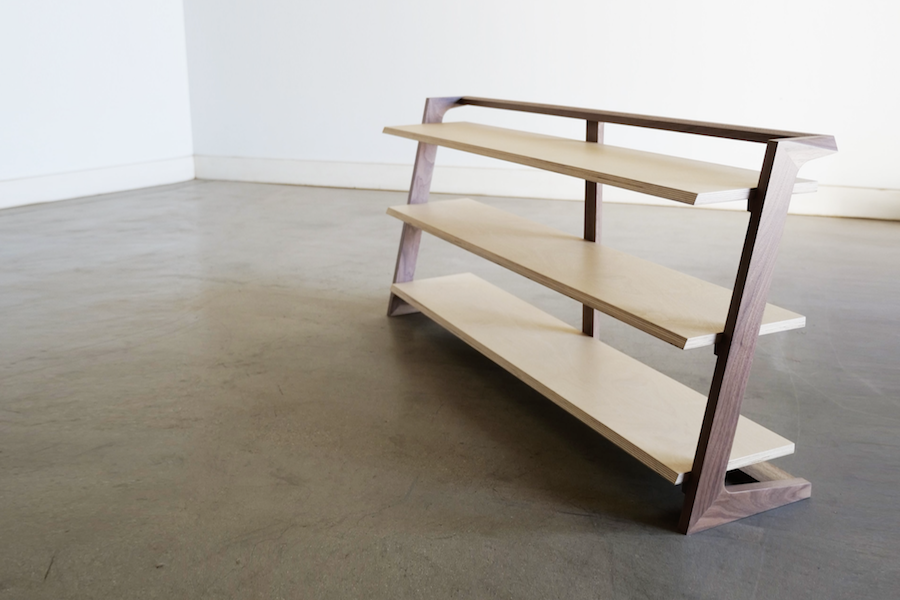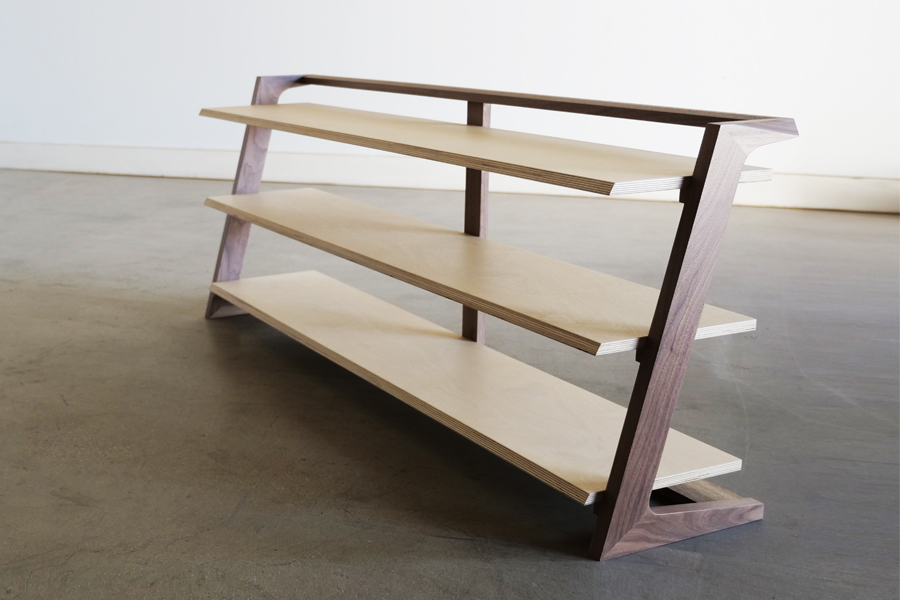
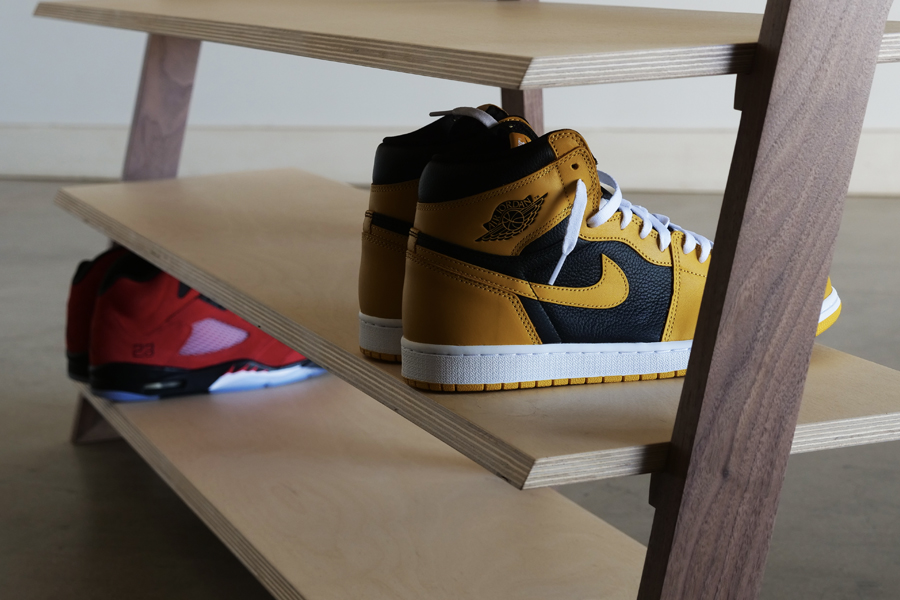
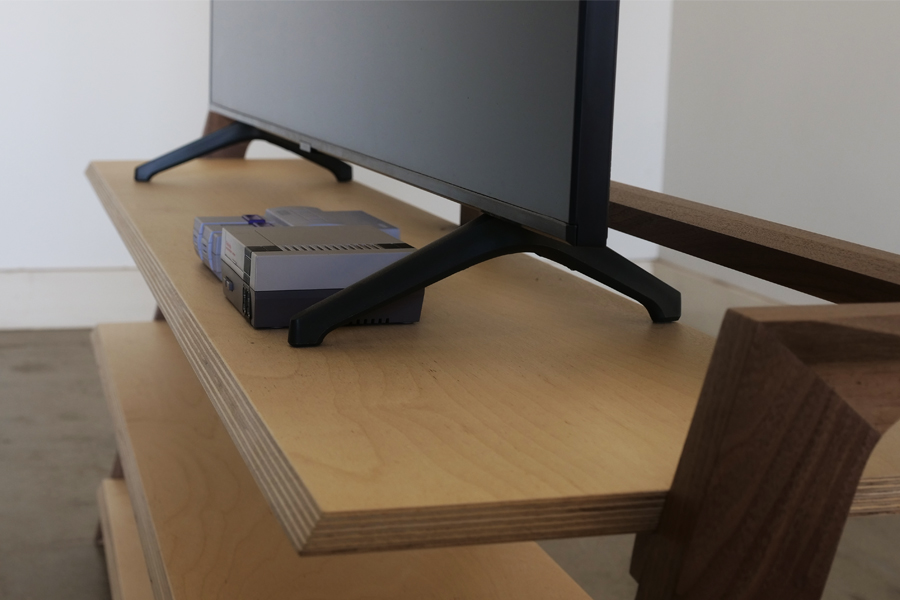


I use this piece near our entryway to keep the family's shoes on. That said, it can easily be used as a bookshelf, or even a media console in a smaller room.
Tools
Kreg Tools


Other Tools
-
Table Saw

-
Miter Saw (optional)
-
Track Saw (Optional)
-
Band Saw (Optional)
Materials
Wood Products
- 1 Any Species of Hardwood , 48" x 6" x 1"
- 1 Any Species of Hardwood , 62" x 8" x 3/4"
- 1 Sheet of Plywood , 3/4"
Hardware & Supplies
- 1 Box of 1 1/4" Pocket Hole Screws (See tools list)
- 1 Box of 1 1/4" Screws
- 1 Box of Dominos or Dowels
Directions
-
Watch The Video
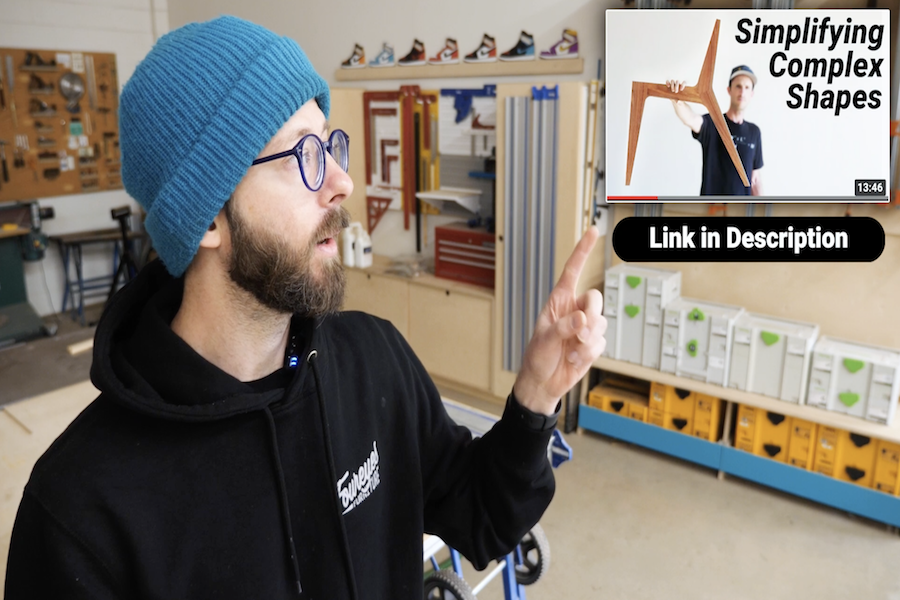
If you want to build this, I highly recommend watching the video. There are many nuanced techniques and "order of operation" approaches that are much easier to explain and understand by watching the video: https://youtu.be/2D66zypz5Ok
-
Prepare Material
You'll want to start with wood milled to the final thickness. Either buying pre-dimensioned or milling yourself is fine but you'll need:
1 Any Species of Hardwood - 48" x 6" x 1"
1 Any SPecies of Hardwood - 62" x 8" x 3/4"
1 Sheet of 3/4" Plywood.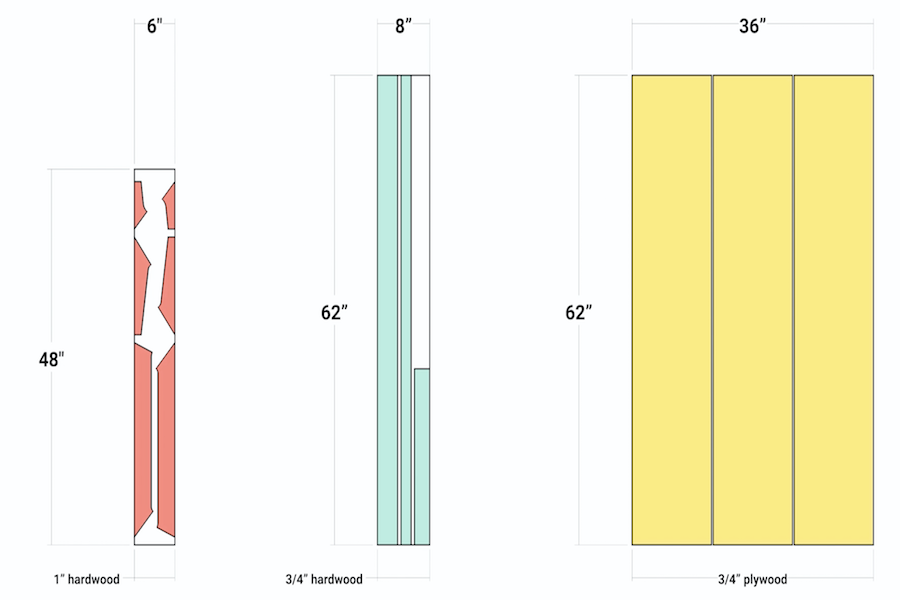
-
Prepare Templates
Prepare Templates
-
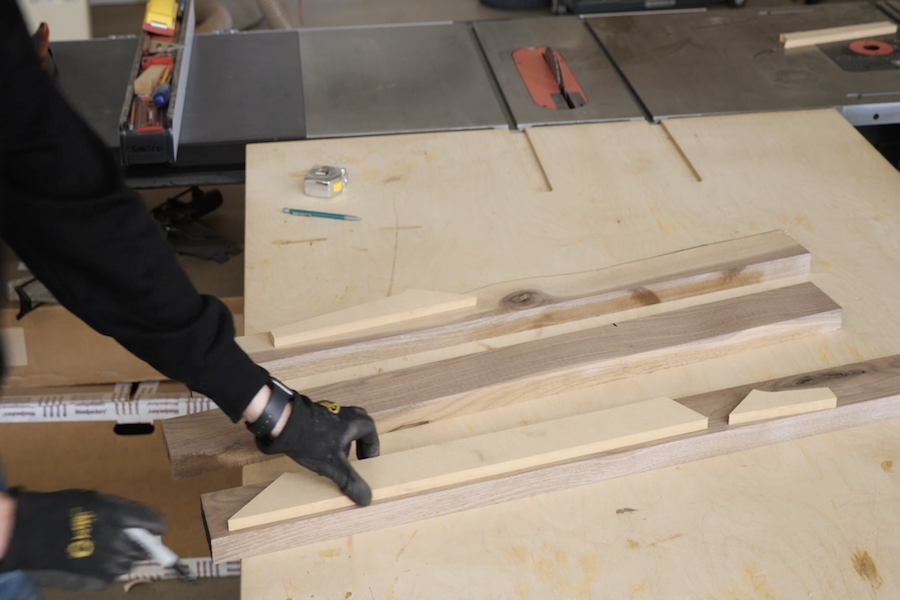
Rough Cut Hardwood
Use your templates to cut out 6 oversized chunks of wood (2 for each template piece).
-
Establish Flat Edges
Use a jointer, track saw, table saw, or any other tool you prefer to make sure that each of your 6 hardwood pieces has at least 1 flat reference edge.
-
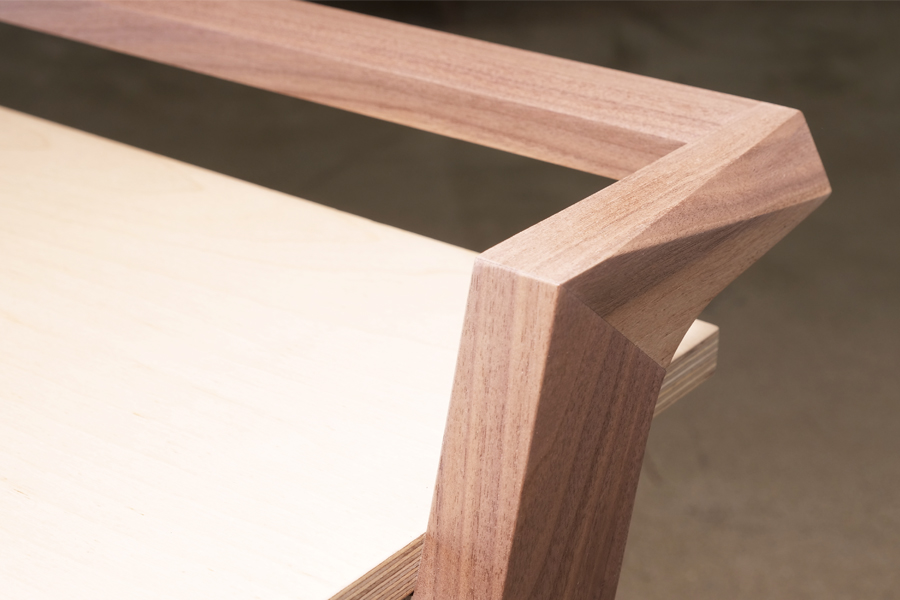
Mark Joint Faces
Position your template so that it is flush with your flat reference edge and mark where you'll be cutting the joint faces on your workpieces.
-
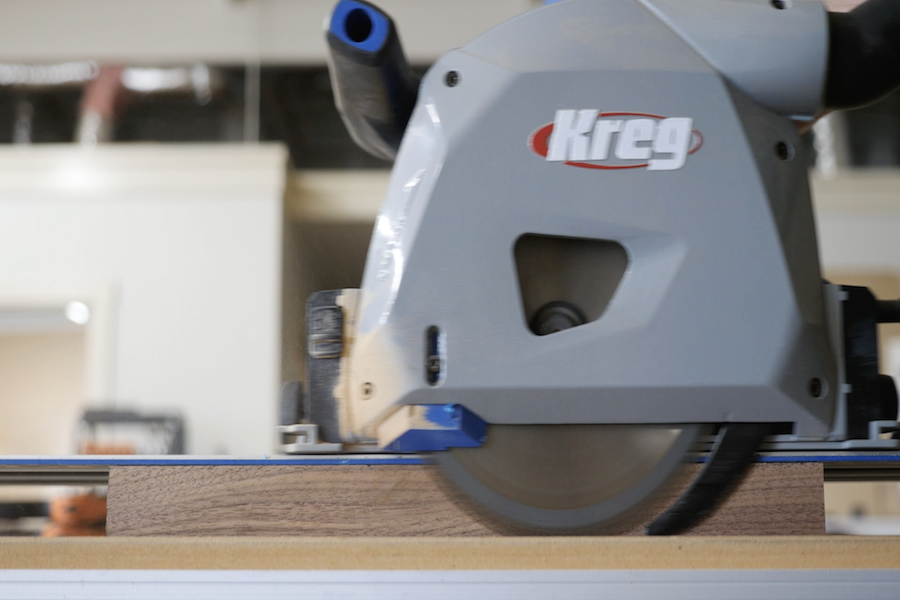
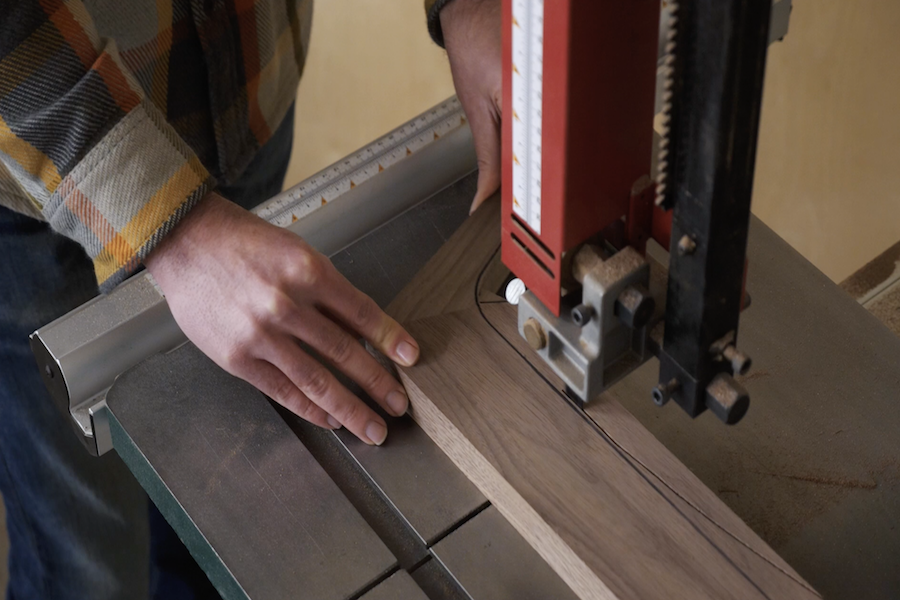
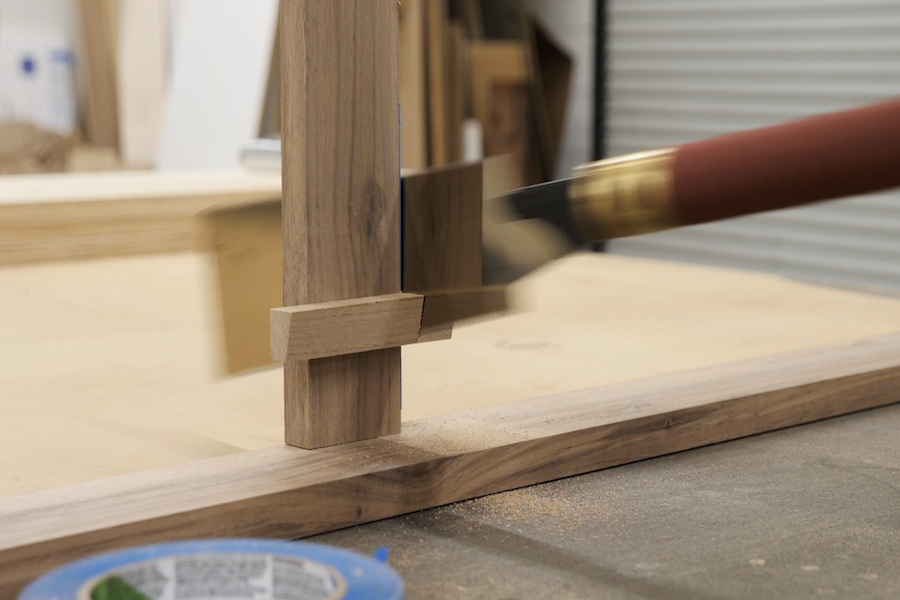
Cut Joint Faces
You can use a Miter Saw, Track Saw or Table Saw to cut your joint faces. I prefer to use a quick sled jig on the table saw. This is described in detail in the video.
-
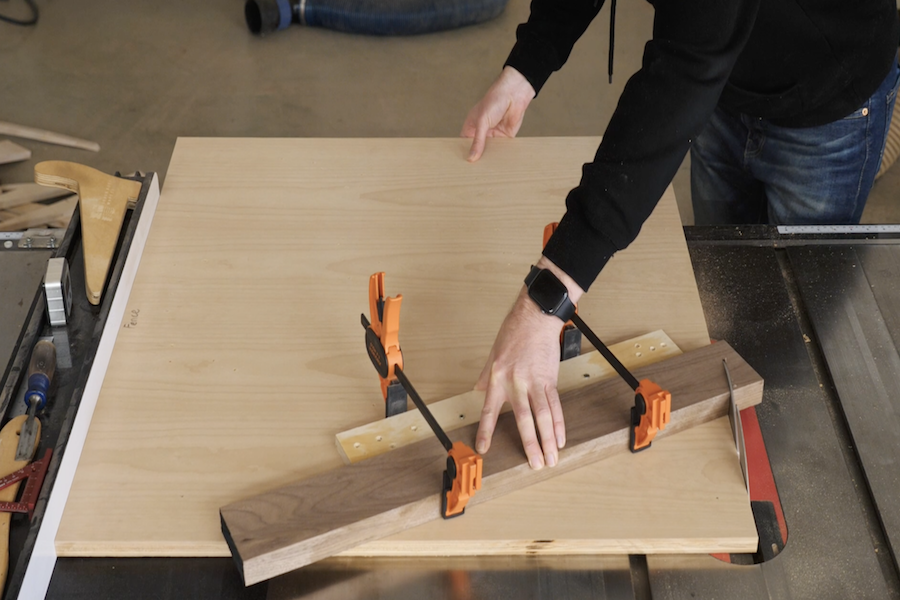
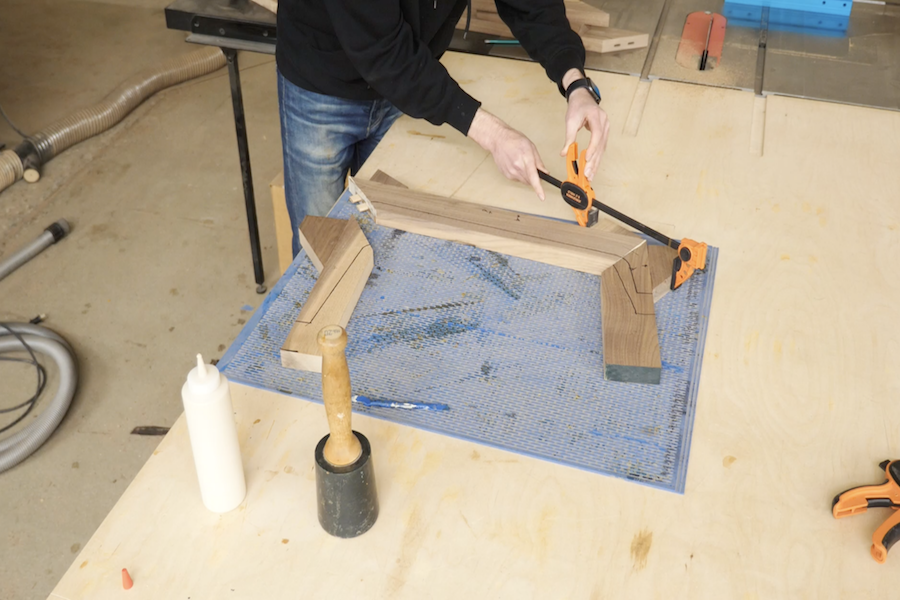
Assemble 6 pieces into subassemblies
With joint faces cut we can put together our subassemblies. You'll need to use something to help get the proper clamping pressure. Again, this is covered in detail in the video.
-
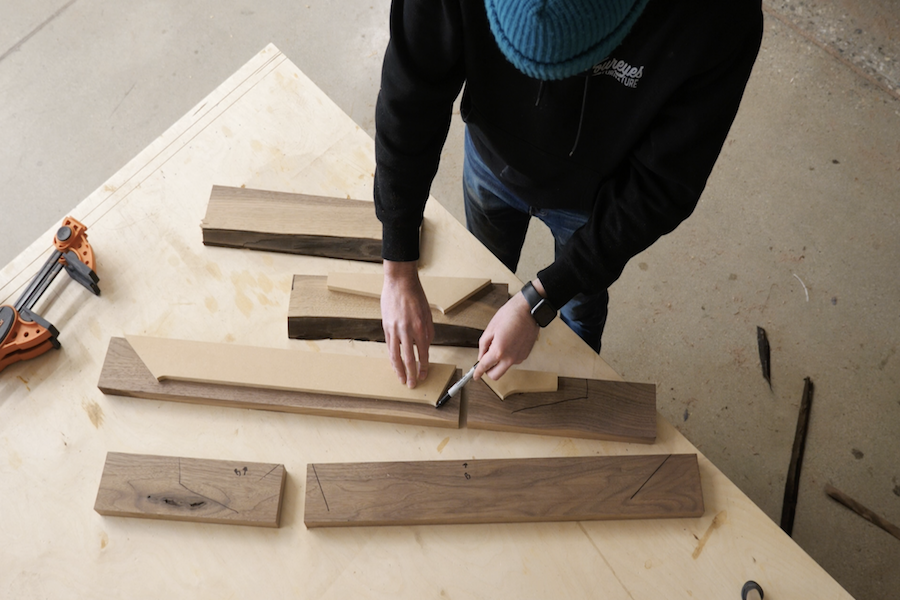
Mark final shape
After your assemblies are dry, clean them up by sanding, then use your templates to mark out the entire shape.

-
Rough cut shape
Use a jigsaw or a bandsaw to rough cut the shape, making sure to stay slightly to the outside of your marker line.
-
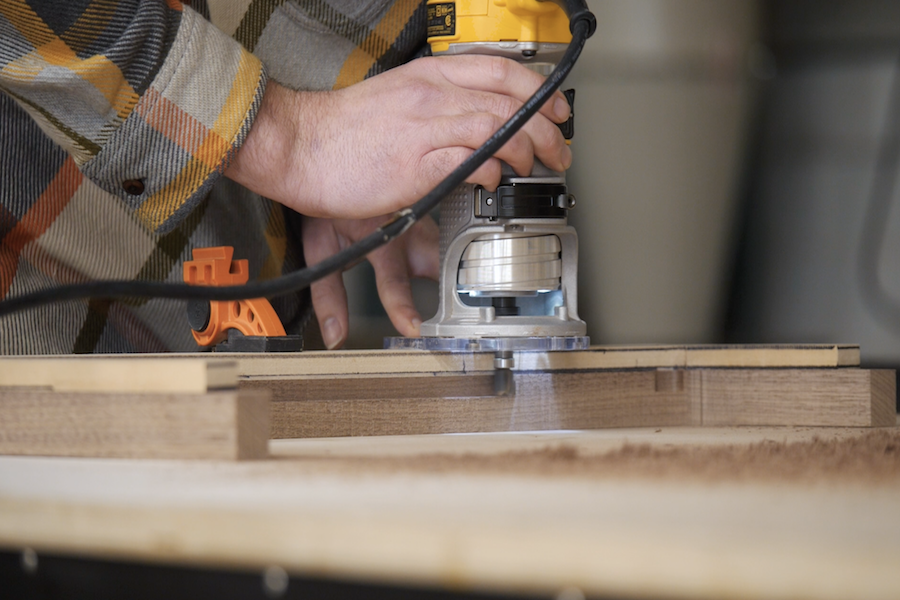
Route Final Shape
Use a router and a templating bit, and a flush trim bit to cut out the final shape. Some tips are given in the video for how to get a cleaner result. You should only be routing the inside curve at this point. The outsides are already flat, and the back of the top and bottom pieces need to be cut using alternative methods since routing end grain will cause tear out.
-
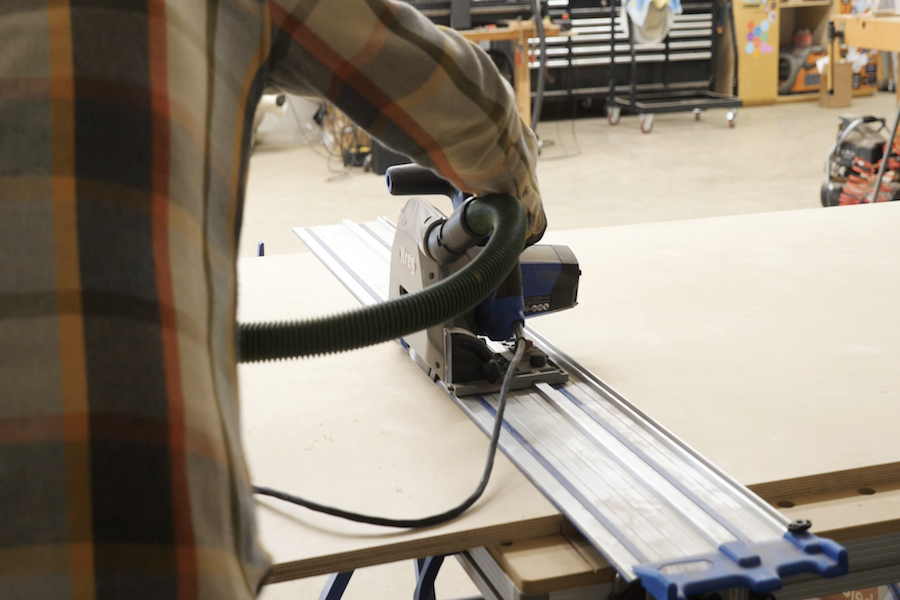
Cut Back of assemblies
Use a track saw, table saw, or miter saw to cut off the backs of the assemblies
-
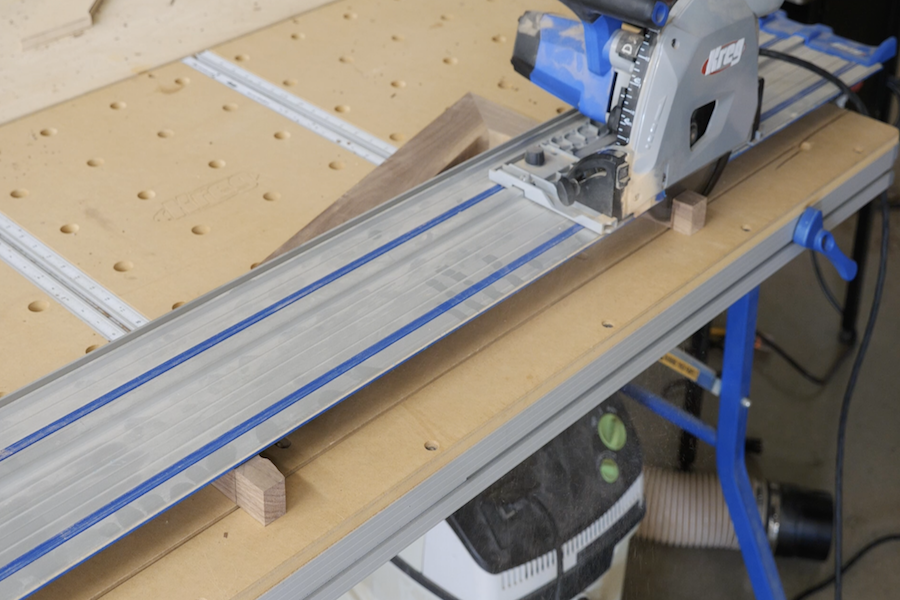
Rip Stretchers to width
From your 3/4" hardwood board rip 3 strips:
one at 62" long x 1 1/2" wide
one at 62" long x 3" wide
one at 24" long x 2 1/4" wide.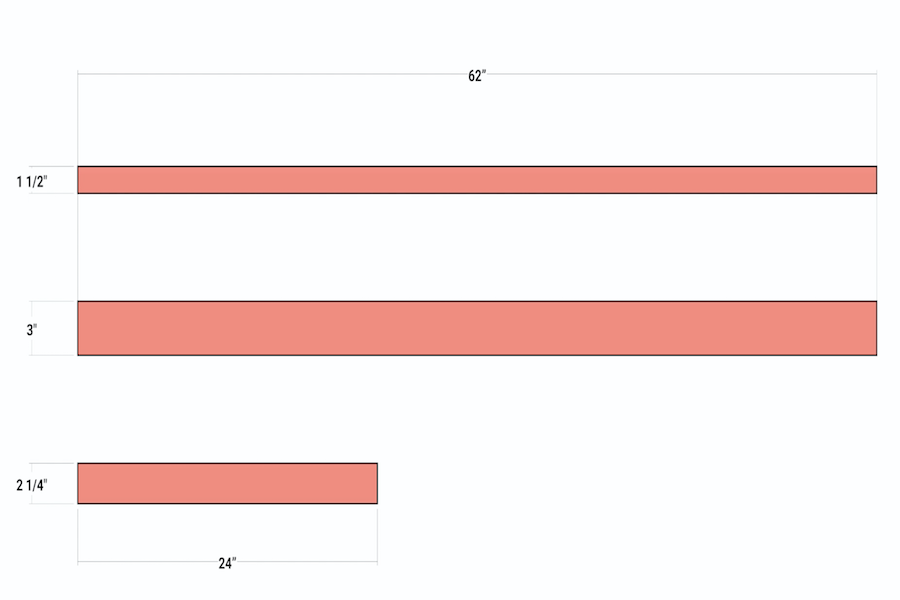
-
Cut Shelves to length
Remove the factory edge from your plywood, then create a stop so that you can cut a large panel of your plywood to 60" long.
-
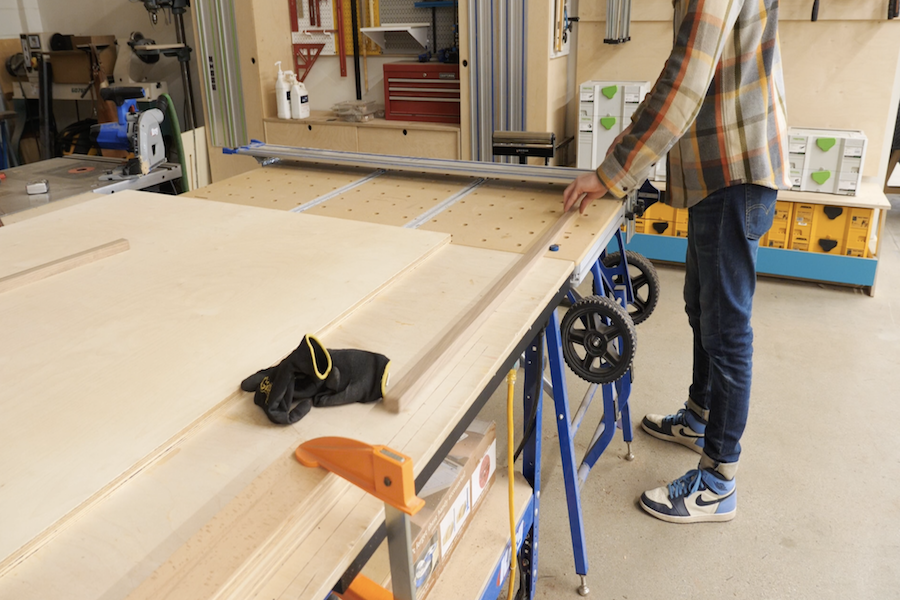
Finalize long stretchers length
Use the same stop from the previous step to cut both of your 62" long stretchers to 60" as well.
Tip:
NOTE: being exactly 60" is not crucial. What is crucial is that the length of these stretchers and the plywood shelves are the same length. Woodworking bonus tip. This is why cut lists often do more harm than good. Actual dimensions rarely matter. What matters in woodworking is repeatability and order of operation. Understanding these concepts is what will take your projects from "okay" to great!
-
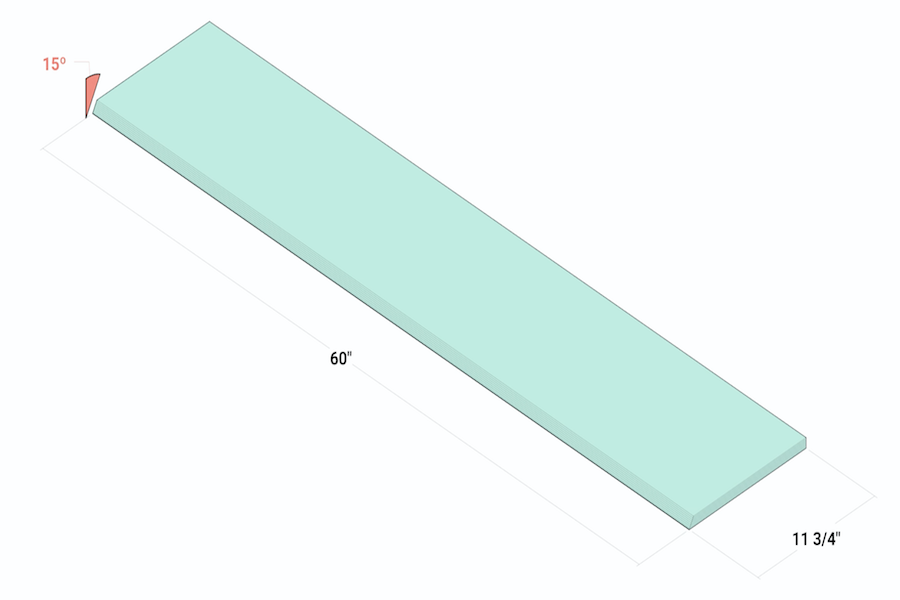
Rip Plywood
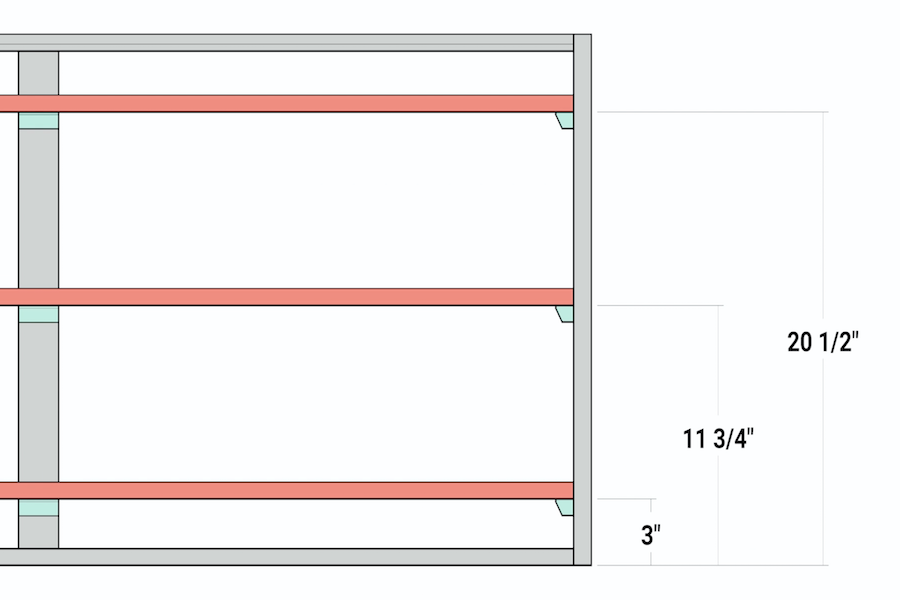
Rip out 3 shelves from your plywood at 11 3/4" wide. Optional. When making your final rip, set your blade to 15º so that the front edge of your shelf has a bevel detail.
-
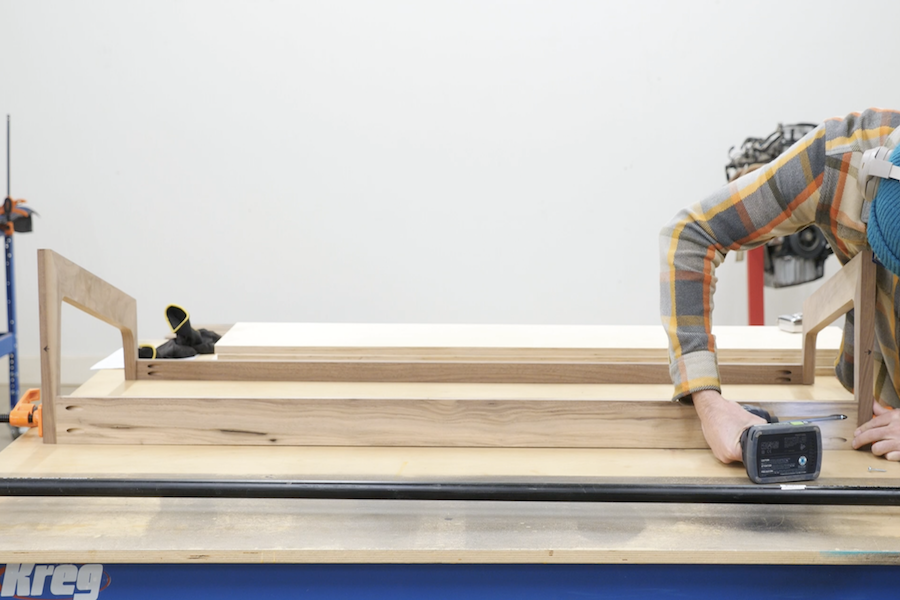
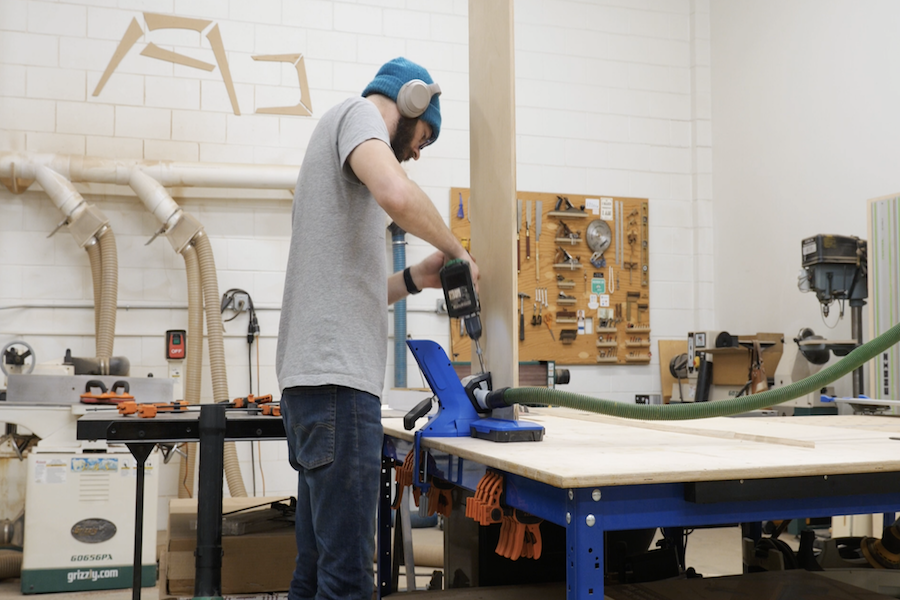
Pocket Holes and Assemble
Drill a pair of Pocket holes into the underside of each end on both of your 60" long hardwood stretchers. Then attach the 1 1/2" wide stretcher so that it is flush with the top back side of your assembly, and attach the 3" wide stretcher so that it is flush with the bottom back side of your assembly.
Tip:
Optional: I cut a 15º bevel onto the front top side of the 1 1/2" wide stretcher prior to attaching. This is purely aesthetic.
-
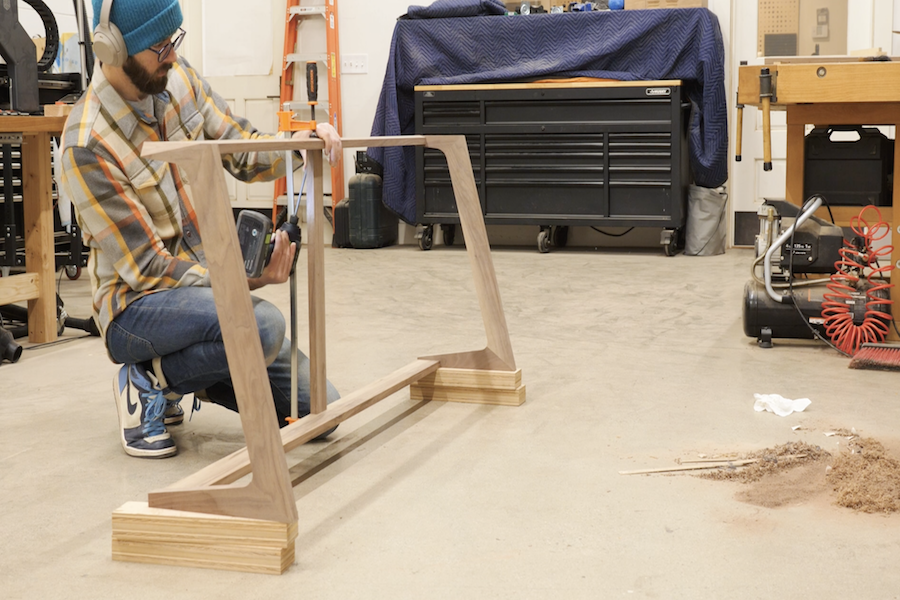
Attach Vertical Support
Position your 2 1/4" wide piece on top of the bottom stretcher, marking a line on the underside of the top stretcher. Use this line to cut your vertical support piece to it's final dimension, drill in a pair of pocket holes, and attach it so that it spans between your two stretchers in the center of the assembly.
-
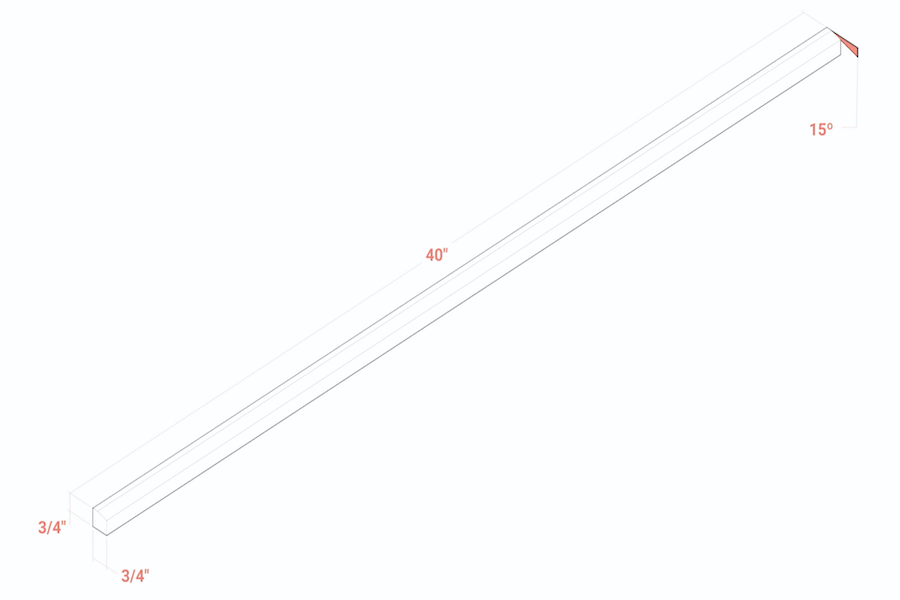
Optional Support Blocks - Create
You could attach your shelves at this point. But to make them more robust, I prefer to make some support blocks. With some extra wood that is laying around I will rip a strip approximately 3/4" x 3/4" x 40" long, which I will then cut into 12 segments roughly 4 inches long.
-
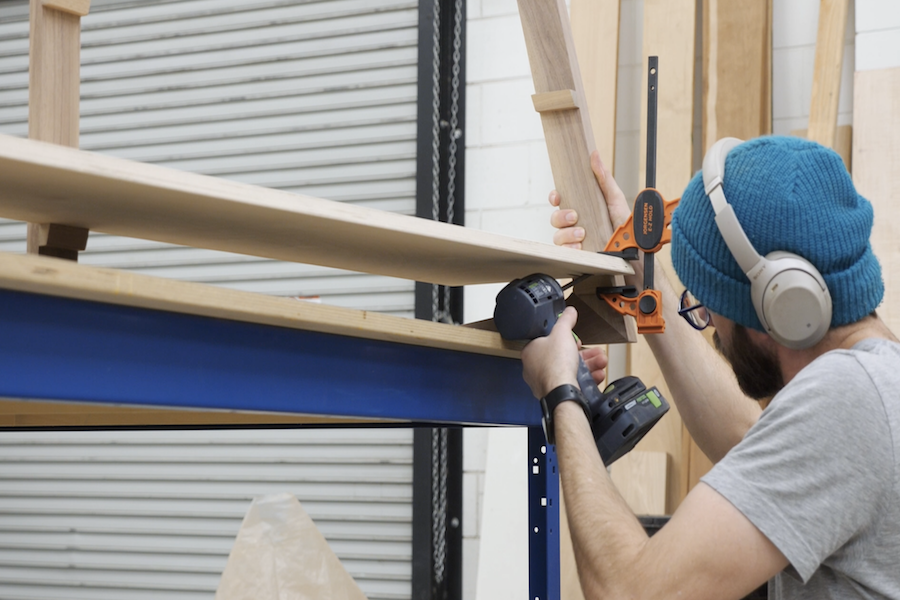
Optional Support Blocks - Attach
Glue and clamp these blocks to the assembly as seen in this image. Note, in the video I describe how I used a scrap piece of plywood to perfectly position the blocks at the proper angles and heights.
-
Trim Support Blocks
Use a pull saw (etc...) to flush trim your support blocks, then go ahead and sand everything now. You can do a bit more clean up sanding after assembly and prior to finishing. But it's much easier to reach everything now, as opposed to after attaching your shelves.
-
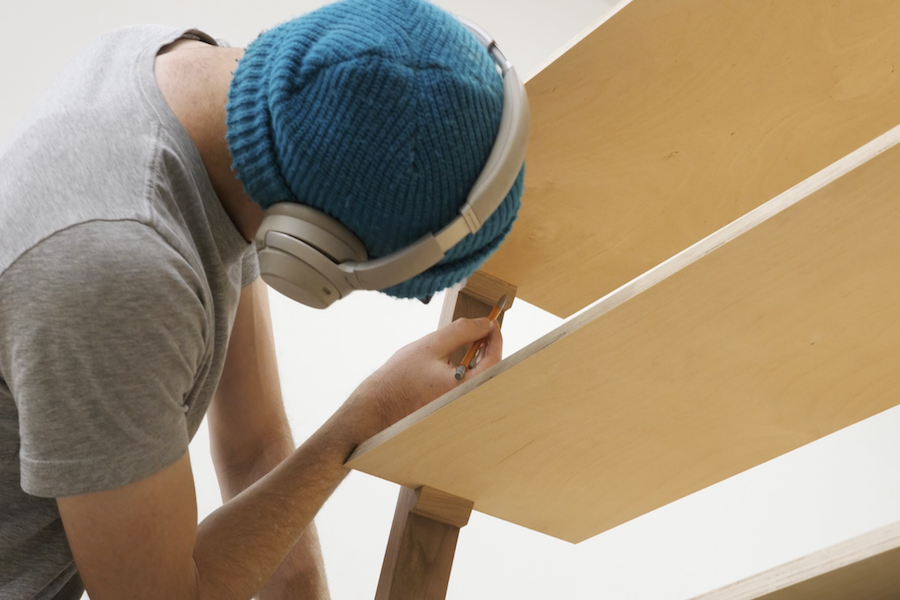
Mark Shelf Attachment Points
Place your shelves on the support blocks and mark on their underside where the shelves intersect with your legs.
-
Pocket hole
Cut a pair of pocket holes into each end of each shelf where they will connect to the legs.
-
Attach
Use pocket hole screws to attach your shelves to your legs.
-
Attach from back
Use another screw, through the vertical support piece and into the backs of the shelves. 1 screw for each shelf should be plenty.
-
Sand and finish
Sand anything else that needs to be cleaned up. I also recommend breaking all sharp corners with a bit of hand sanding to make the piece nicer to the touch and more robust. For finish, use anything that you prefer. There are no wrong answers and it's completely subjective and case based.
-
Done!
This is a fairly challenging build no matter how you view it. That said, the video covers a lot of nuances that isn't possible to capture in a written plan. So if you are going to try building this piece I highly recommend viewing the video and all referenced videos. If you do, and you really want to build it. I know you can do it. In the end, you'll have a great piece...and plenty of confidence to take on bigger and better things. Thanks for reading and thank you for watching.