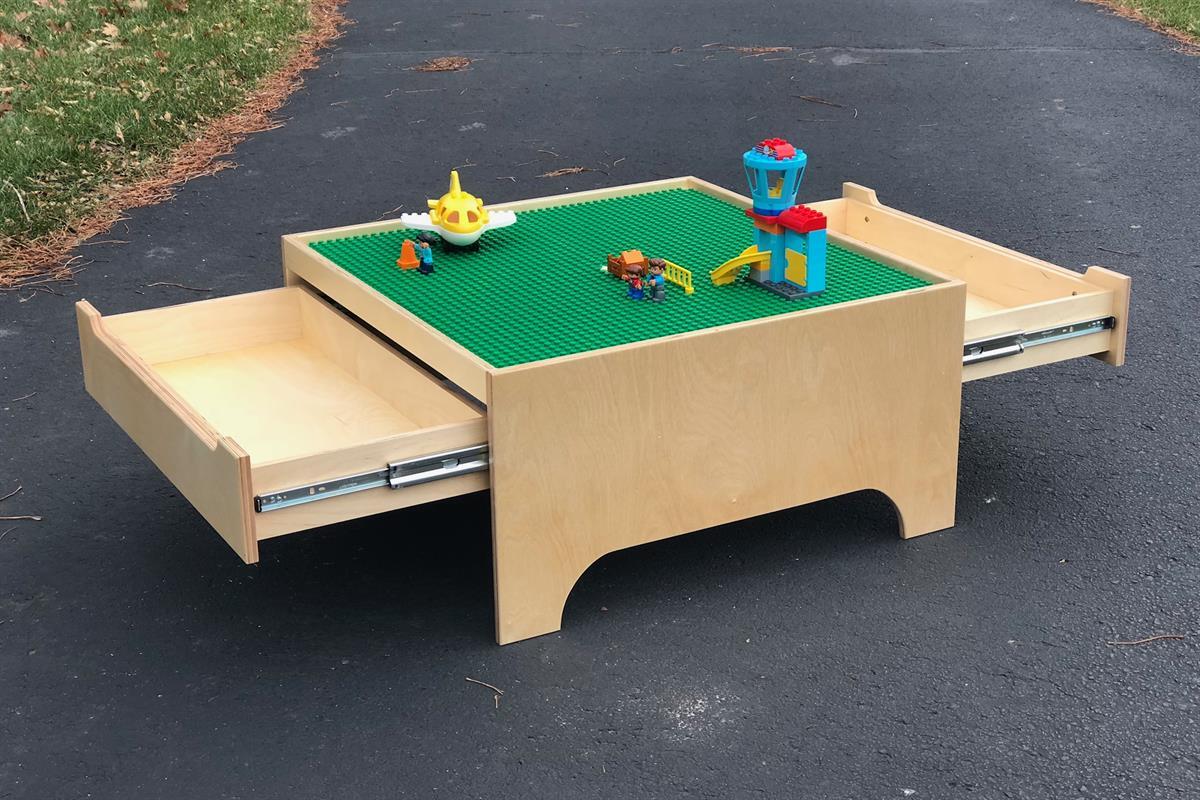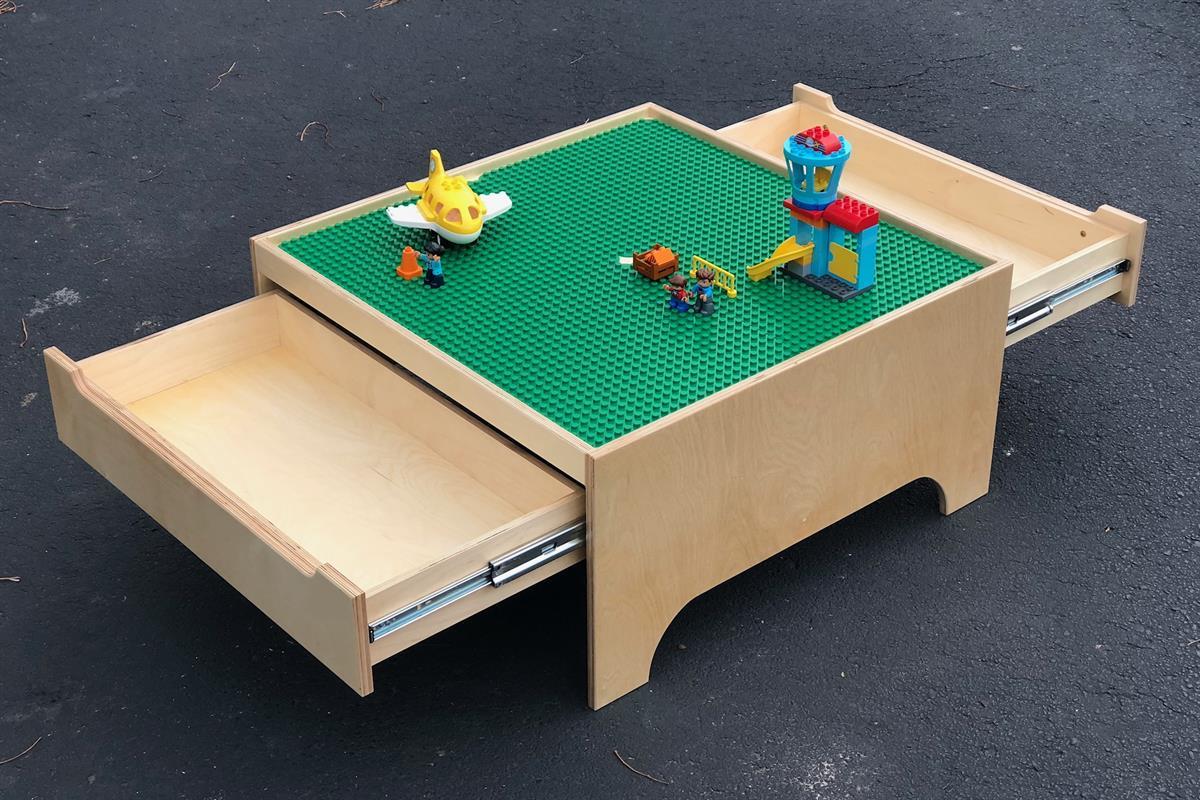
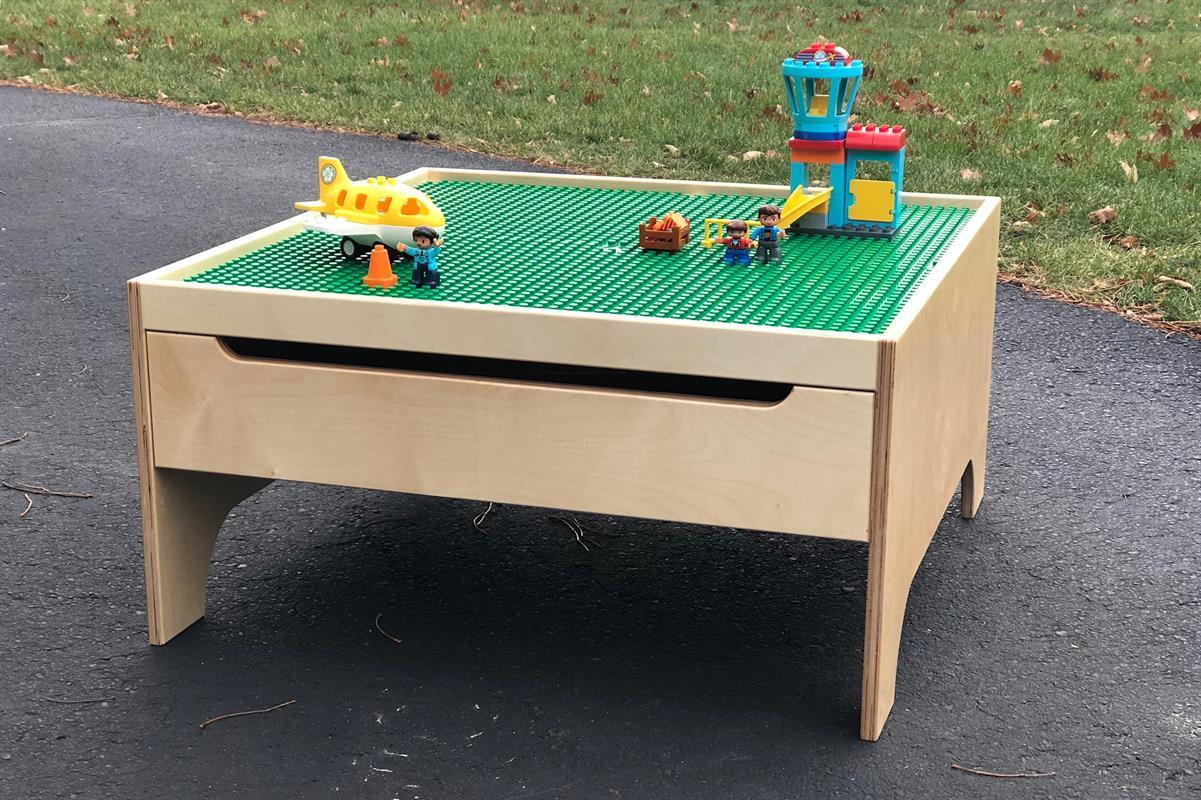
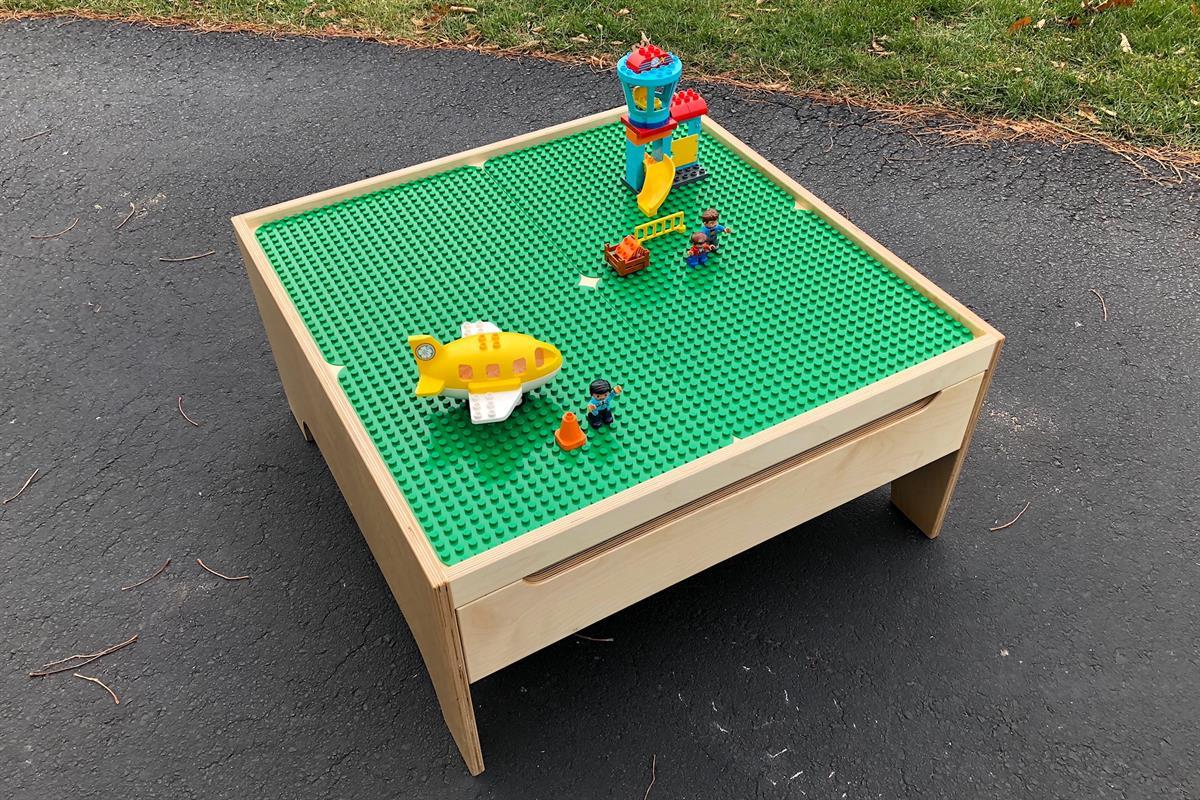
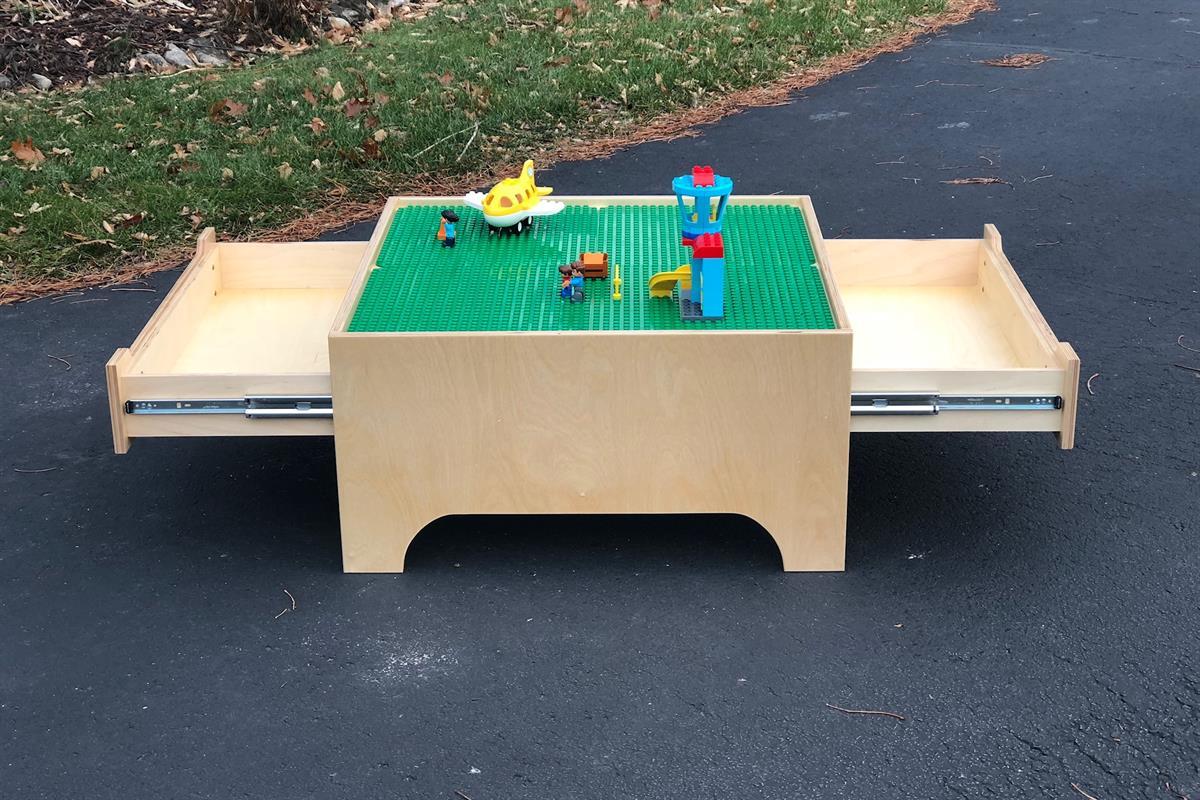
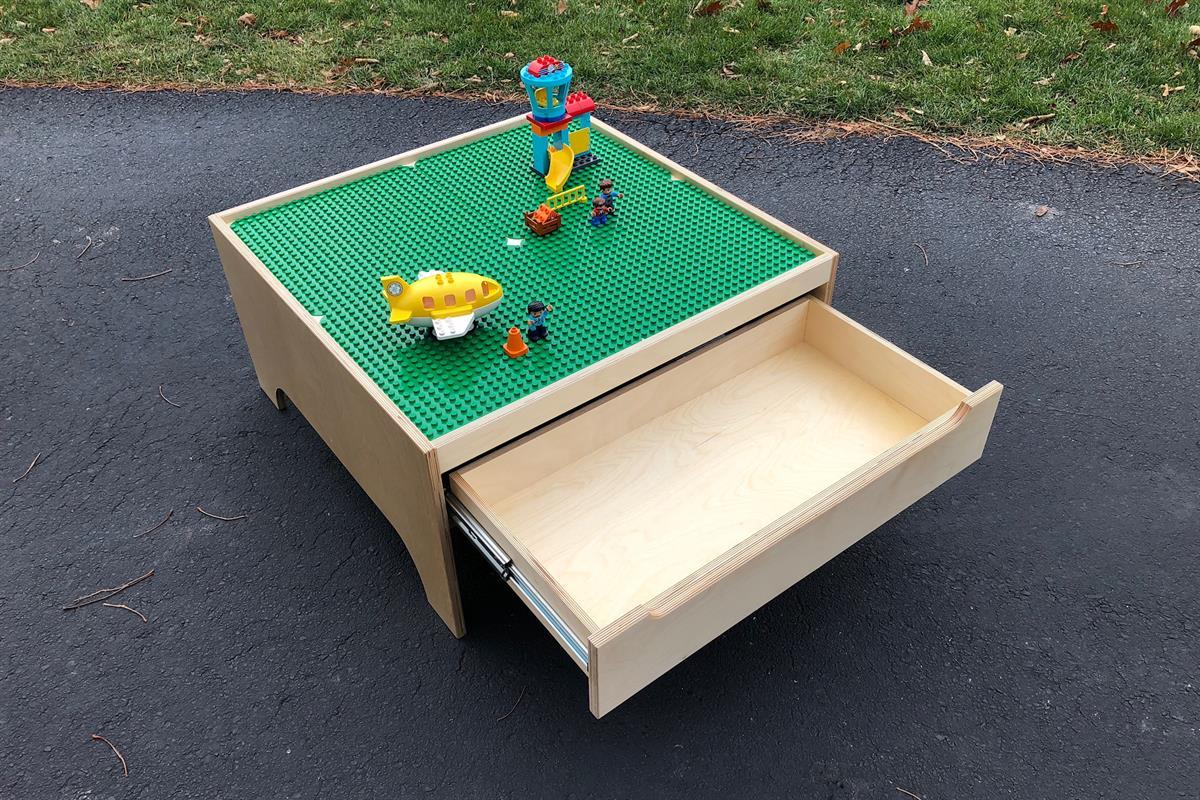


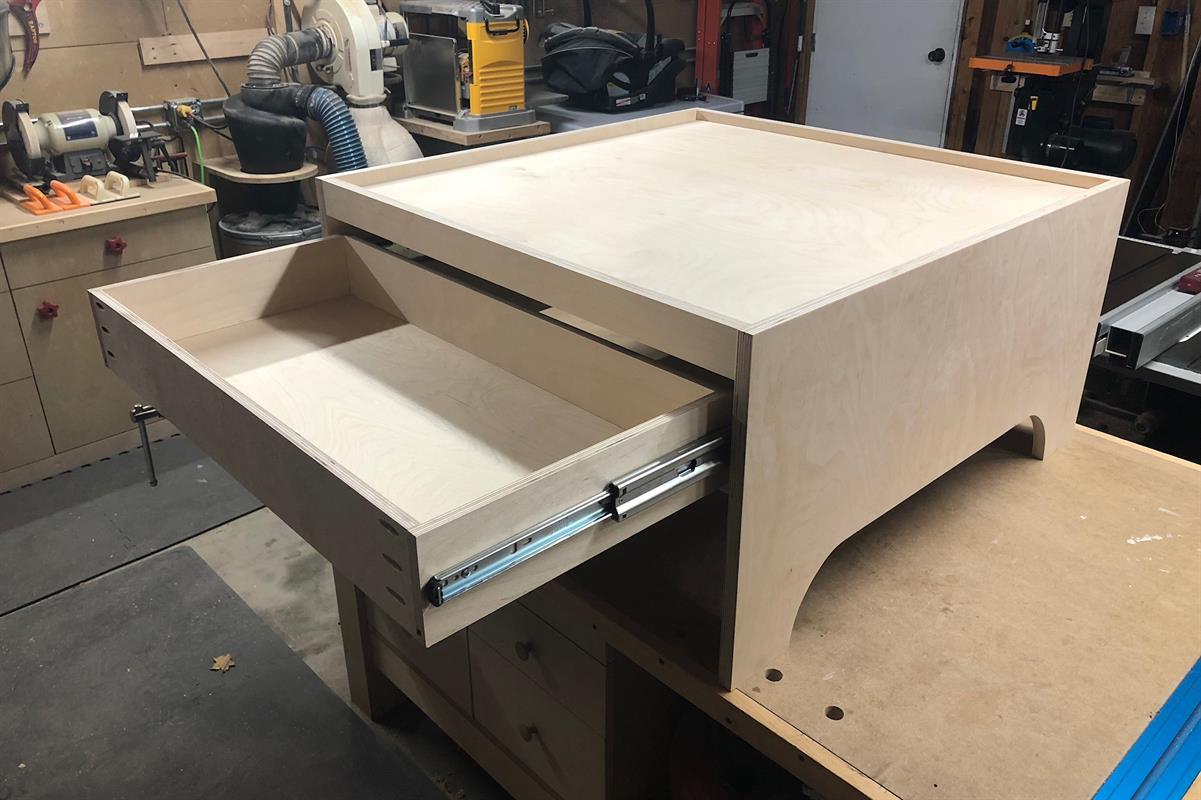
This is version 2.0, a bigger and better take on my original Lego Table design. It is twice the size and has twice the storage, with two drawers on heavy duty easy-close slides. There are a few other tweaks for both form and function as well. This thing is rock solid and a hit with the little ones!
Tools
Kreg Tools


Other Tools
-
Square

-
Table Saw
-
Tape Measure
-
Track Saw
-
Bandsaw
-
Clamps
-
Shop Vacuum
Materials
Wood Products
- 1 Plywood , 3/4" Thick , Full Sheet
- 1 Plywood , 1/2" Thick , Quarter Sheet
- 1 Plywood , 1/4" Thick , Half Sheet
- 1 MDF , 1/4" Thick , Quarter Sheet
Hardware & Supplies
- 1 1-1/4 Pocket Screws - Box
- 2 14" Full Extension Drawer Slides - Pair
- 1 3/4" Pocket Screws for Micro - Box
- 1 Small Bottle of Wood Glue
- 1 Quart of Clearcoat or Finish of your choice
- 4 Duplo Build Plate
- 8 #8 x 1” Washer Head Screws - For Drawer Fronts
- 6 #6 x 1” Screws - For Drawer Bottoms
Directions
-
Cut Base Parts to Size
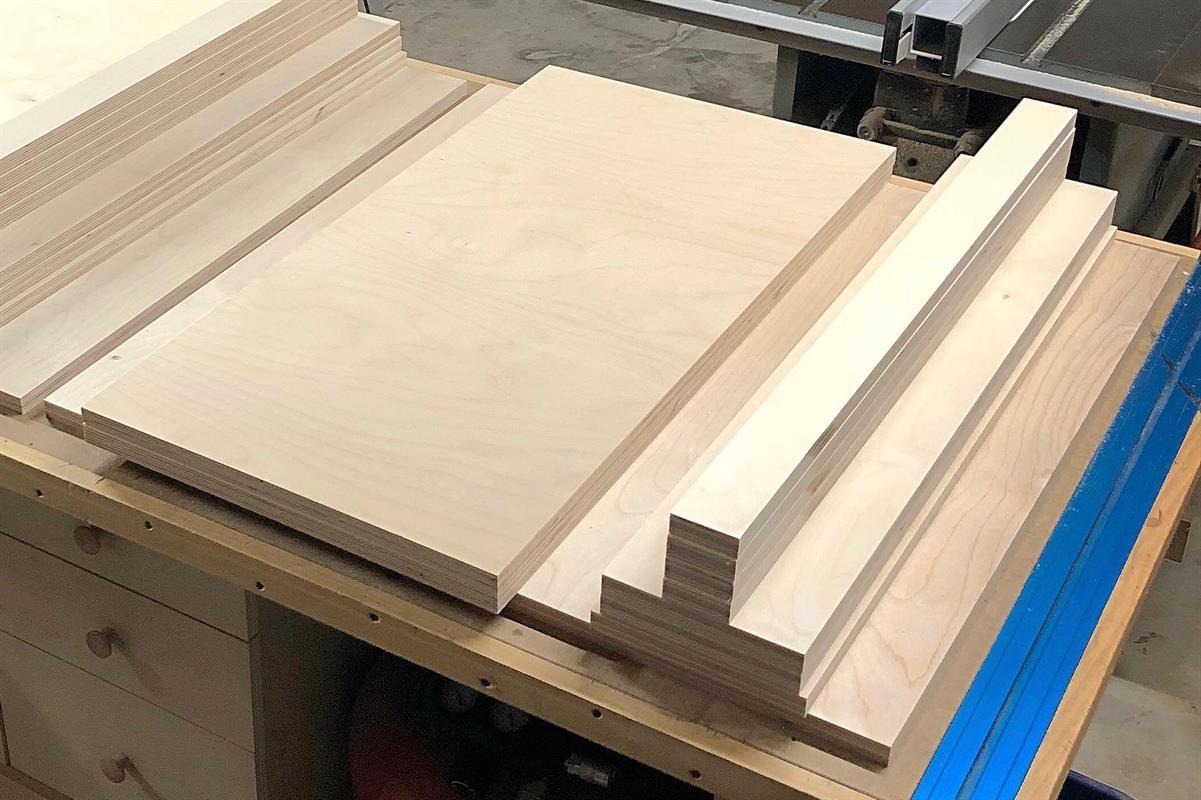
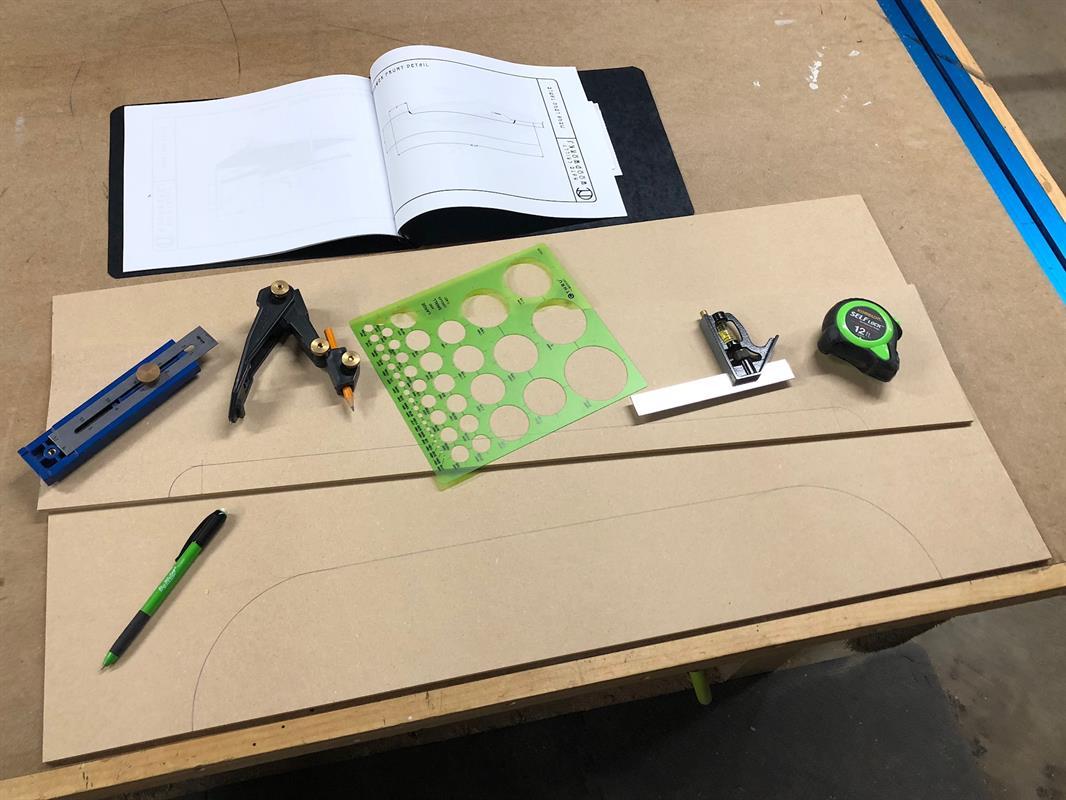
There is a set of measured drawings in PDF form in the Extras section. Print this for reference while building. Based on the cut list and diagram, cut all parts for the base of the table to final size.
-
Layout Templates
You don’t have to make templates, but they will ensure your Leg and False Drawer Front cutouts are consistent. They will also speed up the process should you ever need to make another table, and trust me, when other parents see this thing you definitely will! I use 1/4” mdf for my templates. The relevant dimensions are included in the PDF.
-
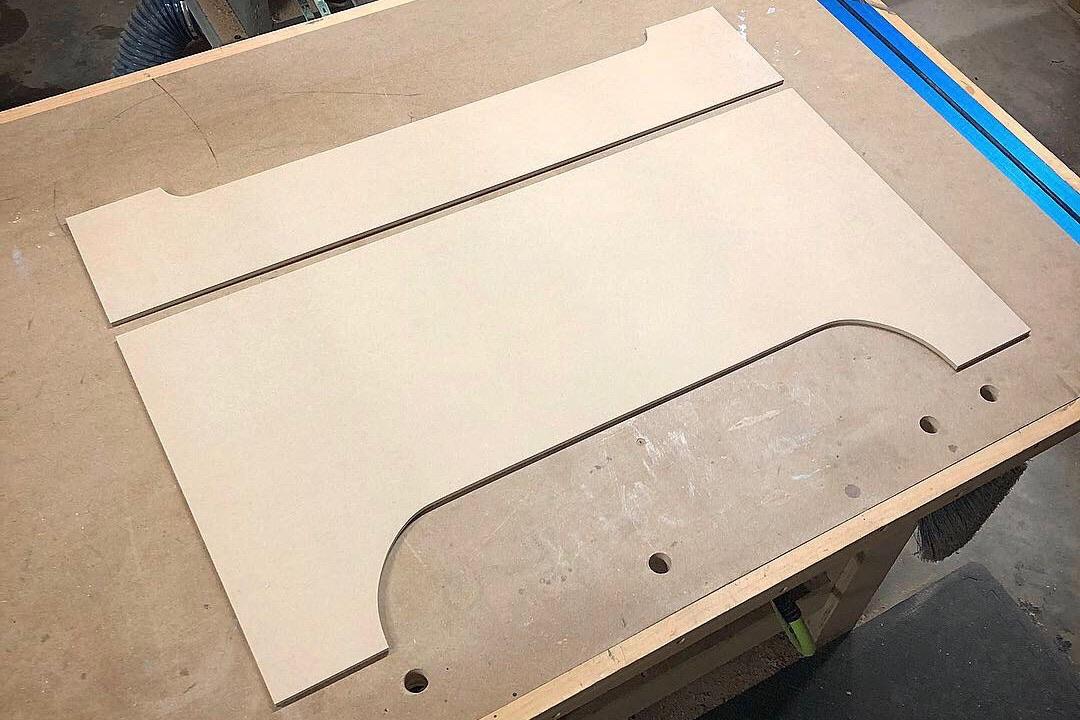
Cut and Refine Templates
Once you’ve marked the templates for the legs and drawer, cut them out with a bandsaw or jigsaw and then refine them with a spindle sander if you have one. You could also use a file, rasp, or hand sanding.
-
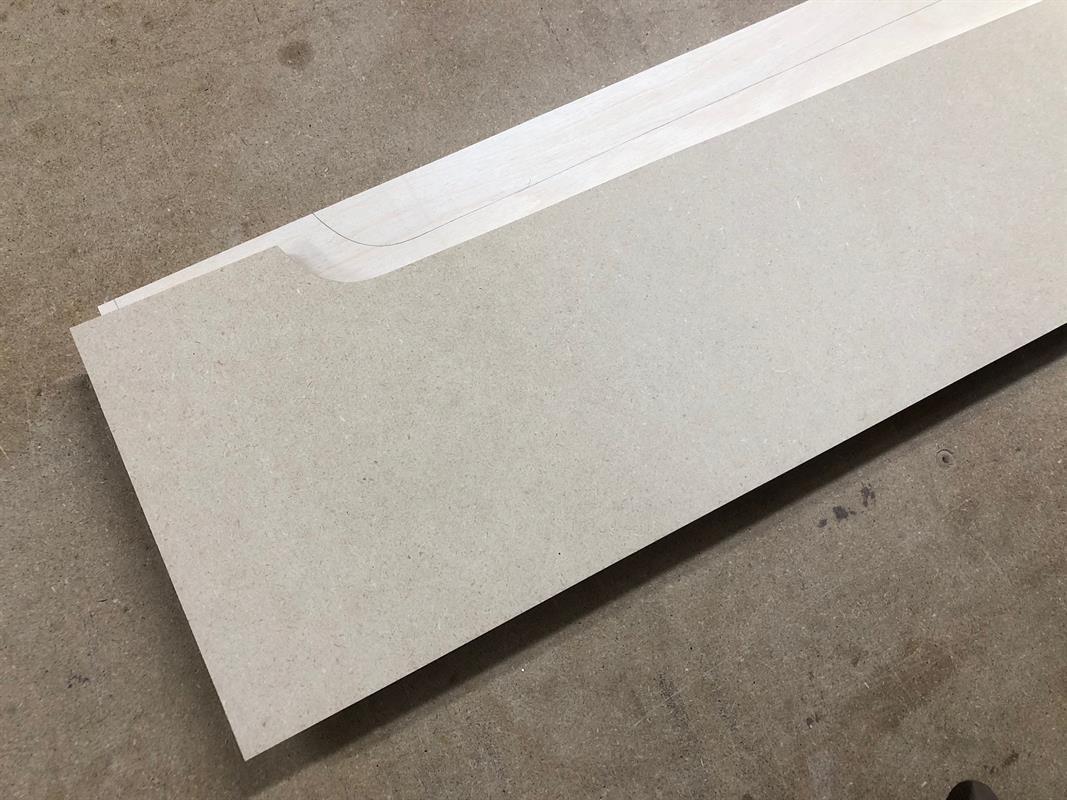
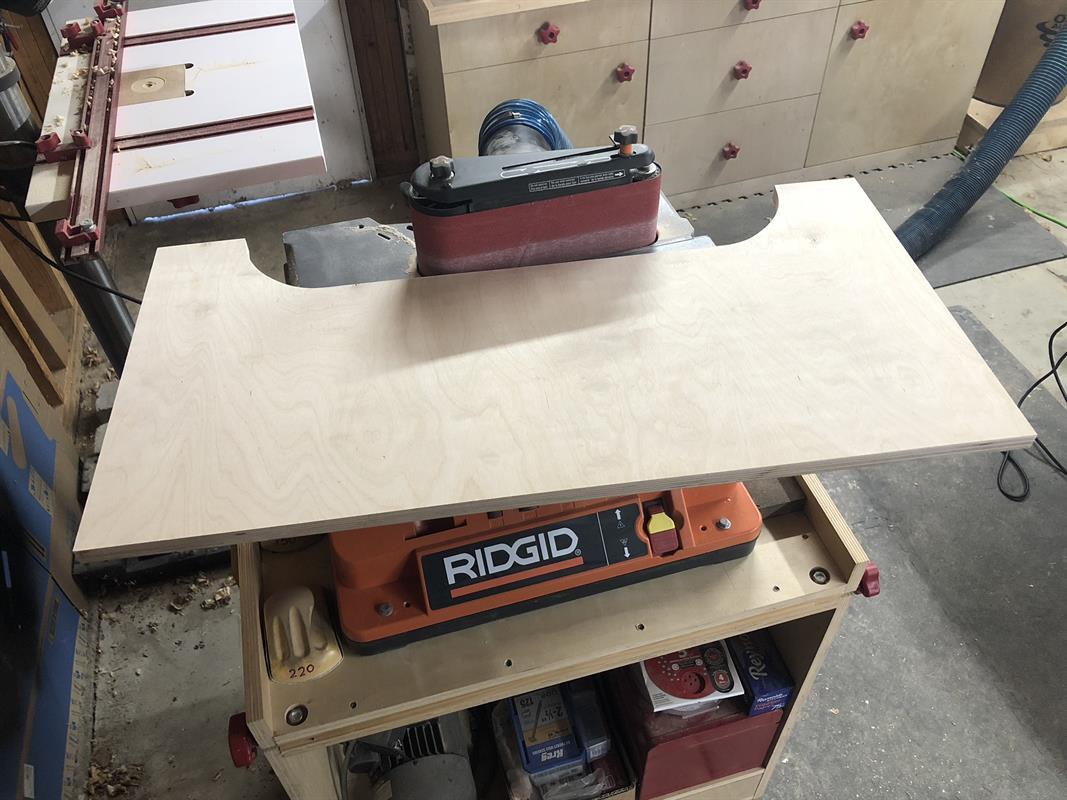
Mark the Legs and Drawer Fronts
Using the templates, mark the pieces for the Legs and Drawer Fronts.
-
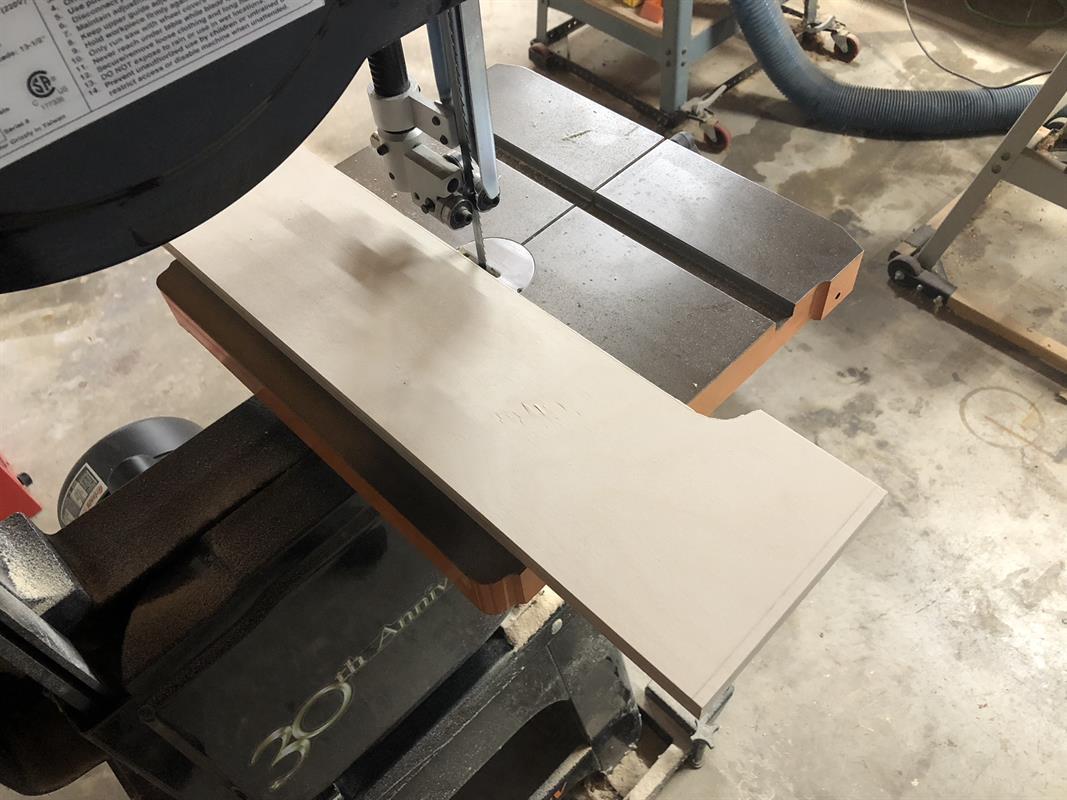
Rough Cut the Parts
Using a bandsaw or jigsaw, cut close to the line, but be sure to stay just outside. They will get cleaned up in the next step.
-
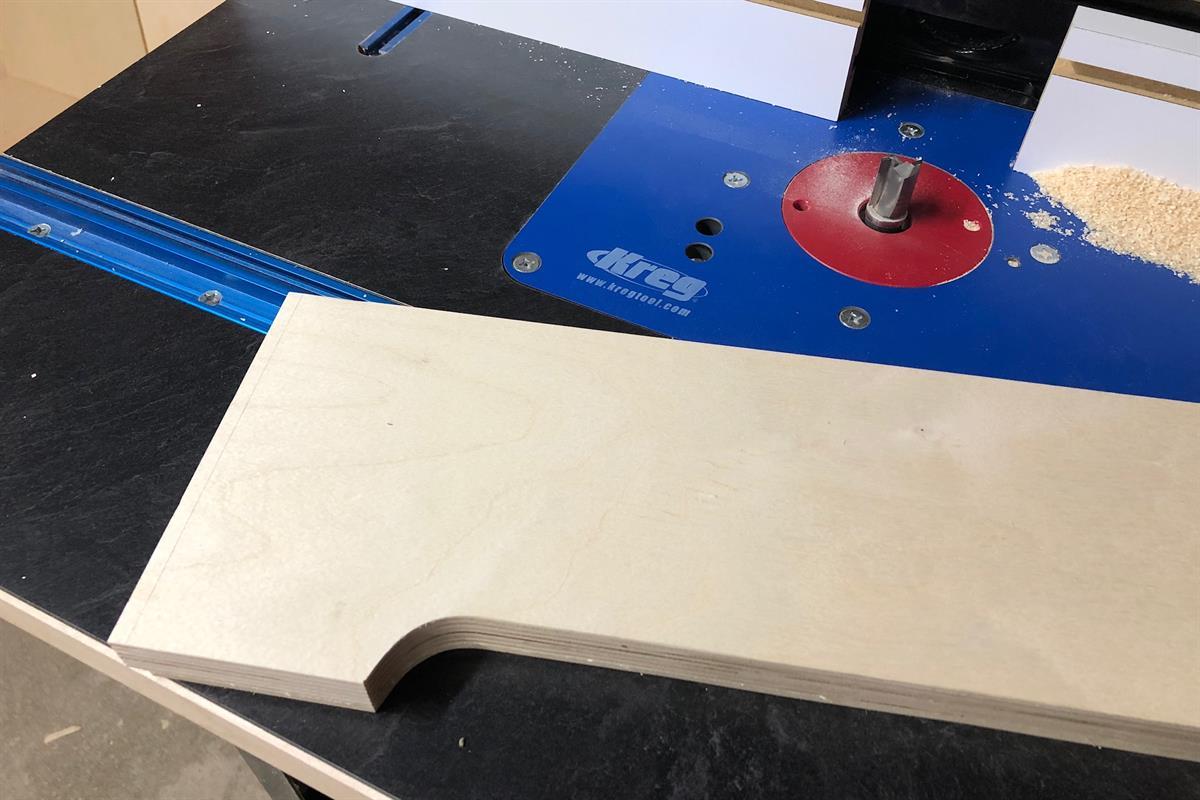
Pattern Route the Parts
Attach the templates to the work pieces using two-sided tape. With a flush trim or pattern bit in the router, trim the work pieces to perfectly match the templates. Remove the template and repeat until both Legs and Drawer Fronts are done. Either a handheld router or router table will work fine.
-
Alternative to Pattern Routing
If you do not have a router, you can use a spindle sander to clean up the cuts to the line you marked previously. A file, rasp, or some hand sanding will work as well. It will be quicker to clamp the two Legs or two Drawer Fronts together and do them at the same time. This will also ensure they are identical.
-
Drill the Pocket Holes - 1
The joinery construction for the base is all pocket holes. You will need to drill pocket holes in the bottom of the Top, the Center Divider, and the Leg Braces. Start by drilling two pocket holes on each end of each Leg Brace.
-
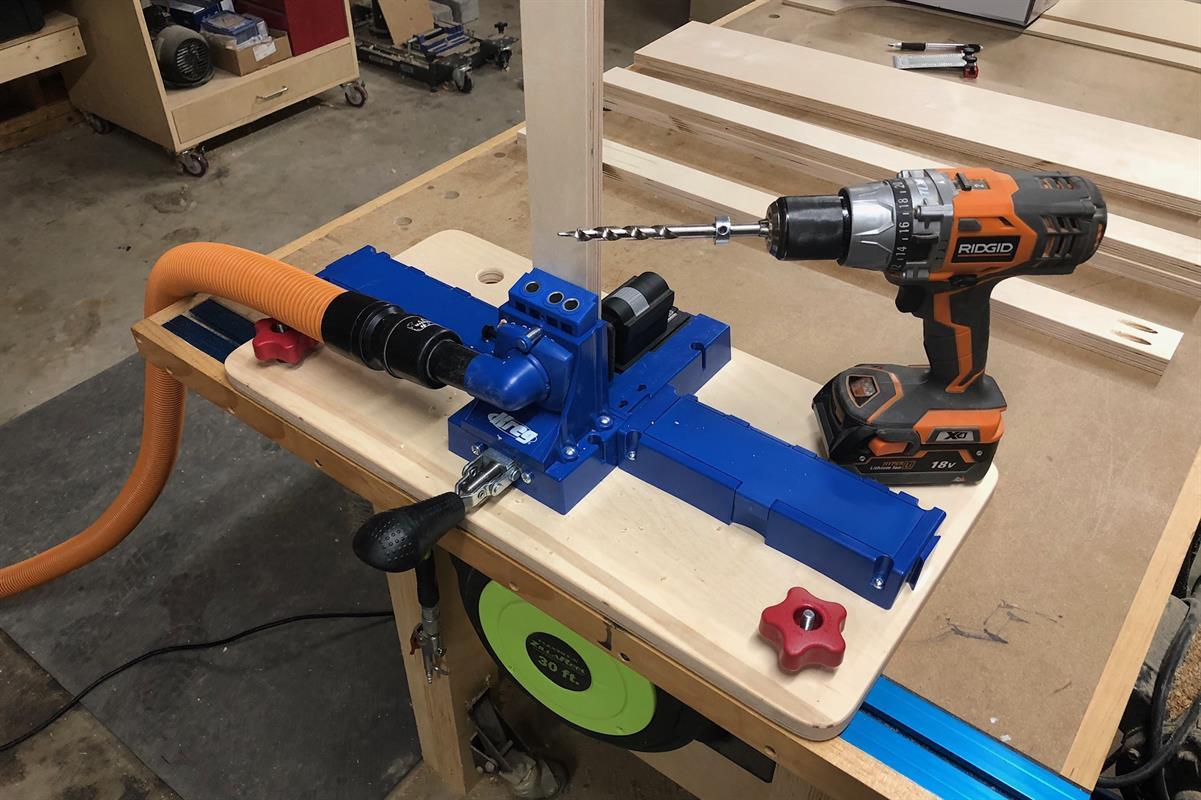
Drill the Pocket Holes - 2
The Top will get pocket holes along all four edges, evenly spaced. I went with 7 per side.
-
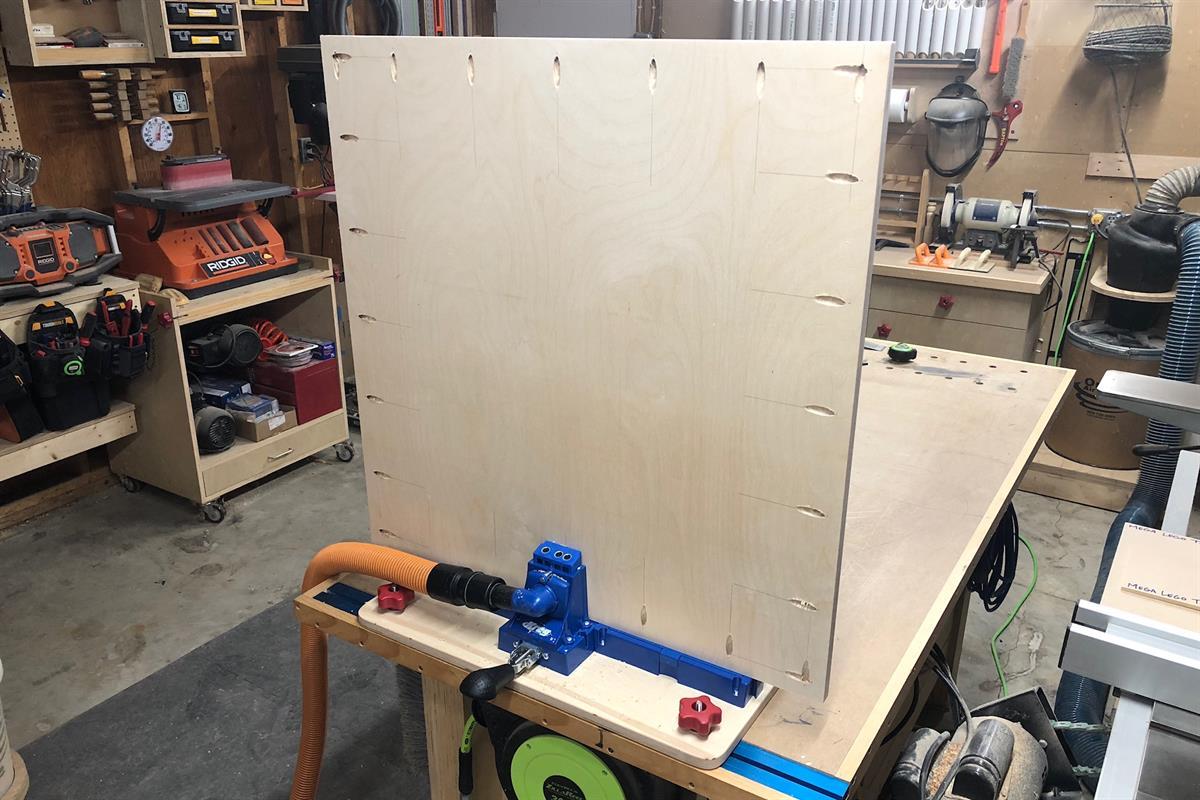
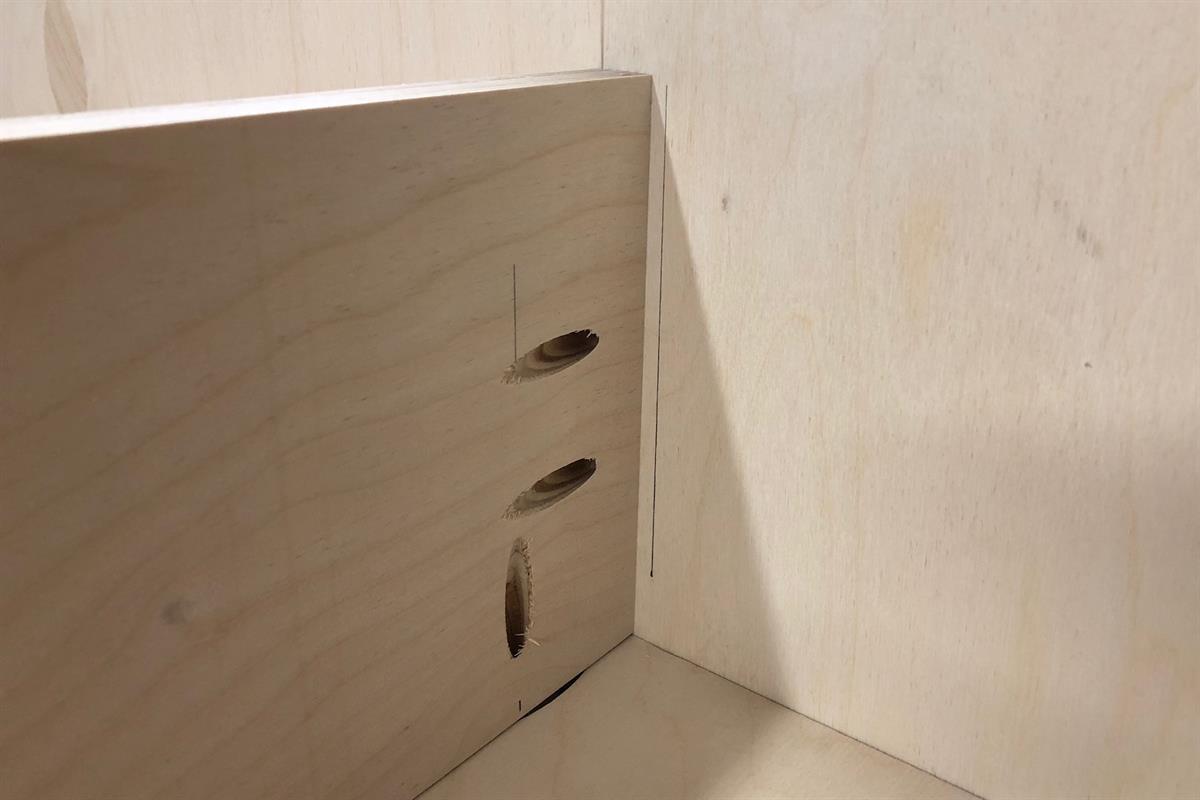
Drill the Pocket Holes - 3
The Center Divider gets pocket holes on each short end and one long edge. They also alternate on either face of the board. This image shows what they look like on one side of the board.
-
Drill the Pocket Holes - 4
Here is a view of the pocket holes on the other side of the divider. Drilling holes on both sides will help to keep everything square and straight as you drive the screws in a later step.
-
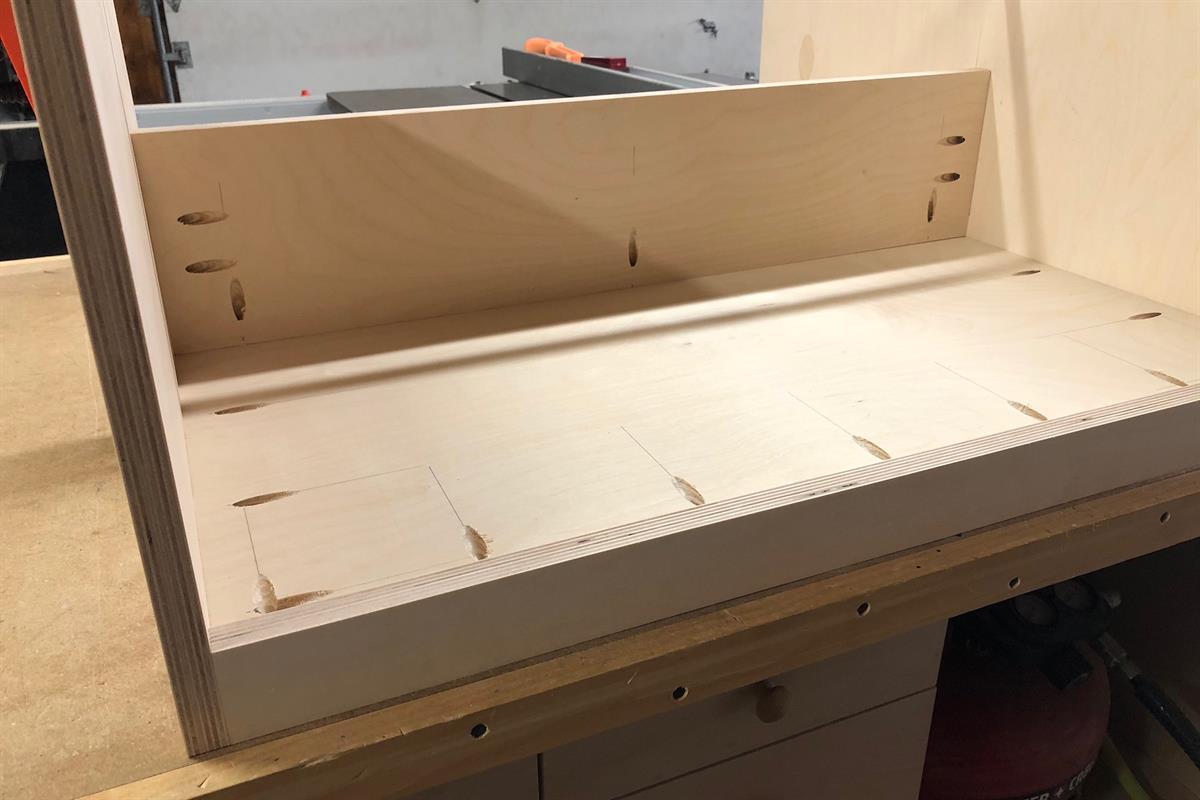
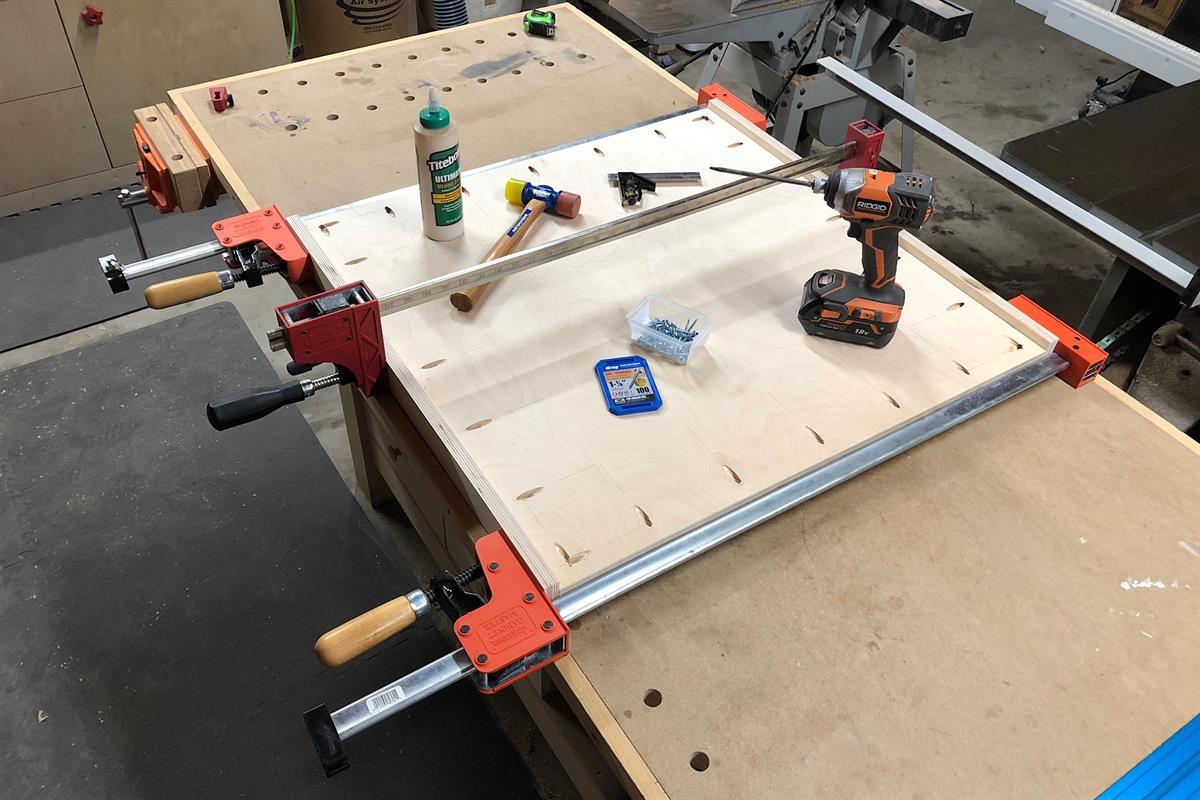
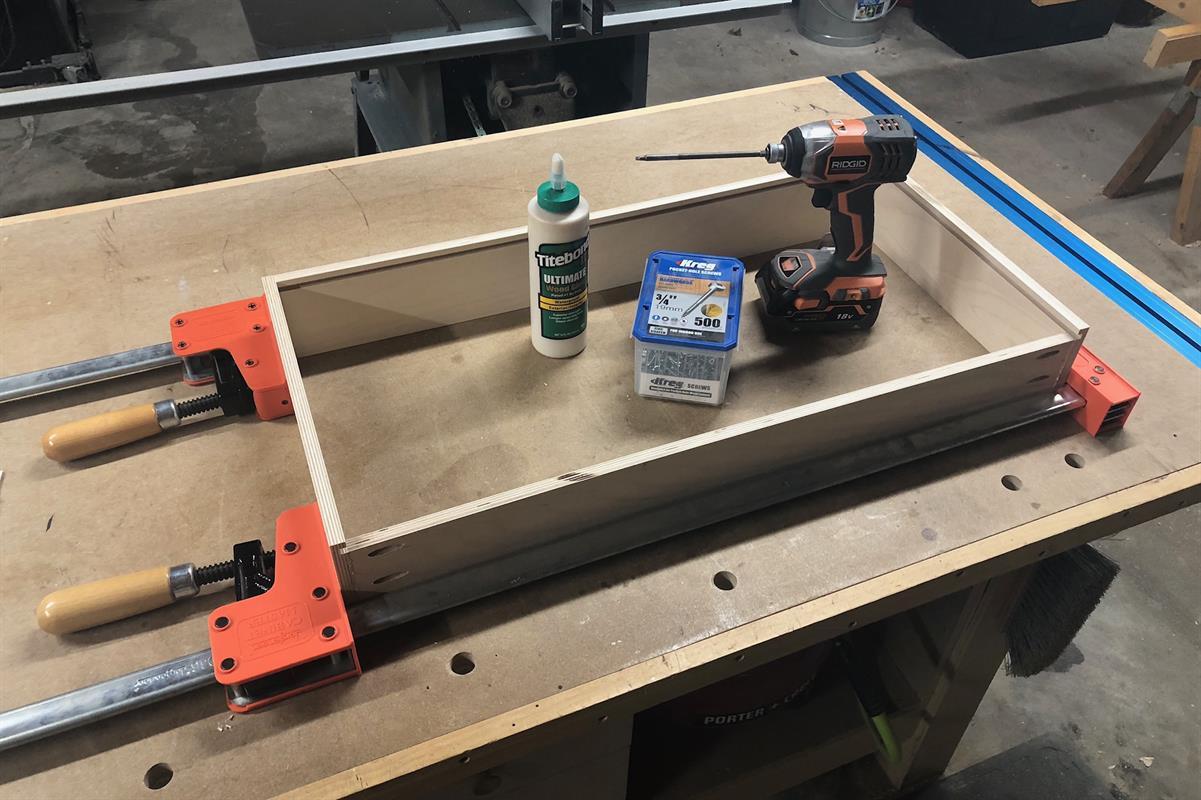
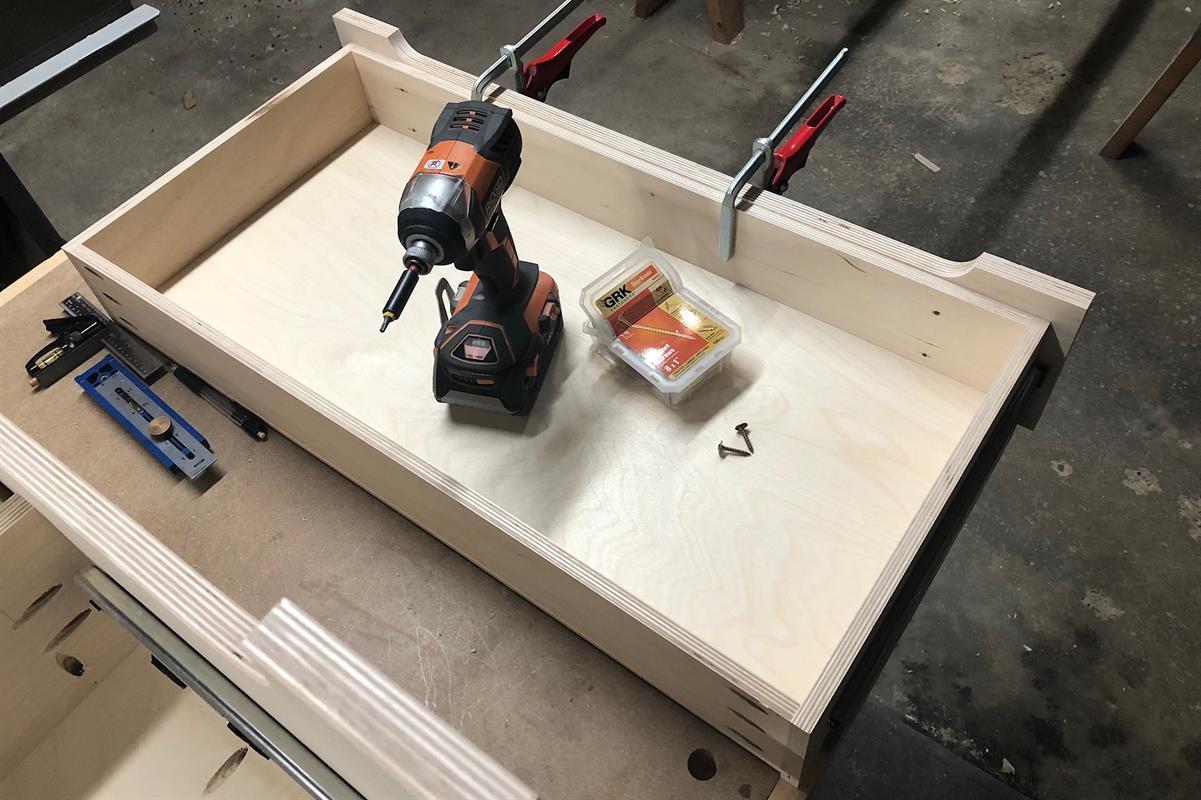
Assemble the Base - 1
Using wood glue and 1-1/4” coarse thread Kreg Screws, begin assembling the base. Start by attaching the Top Trim pieces to the top. Place the Top upside down on some 3/4” plywood spacers (I just used some offcuts). This will create the correct offset. Then clamp the Top Trim pieces in place and drive all the screws.
-
Assemble the Base - 2
Next, add glue to the other edges of the Top and clamp the Legs in place and drive the rest of the screws. A rubber mallet is an invaluable tool for assemblies like this. If you lightly clamp your parts together, you can use the mallet to fine tune the fit and alignment. Then just tighten down the clamps and drive the screws.
-
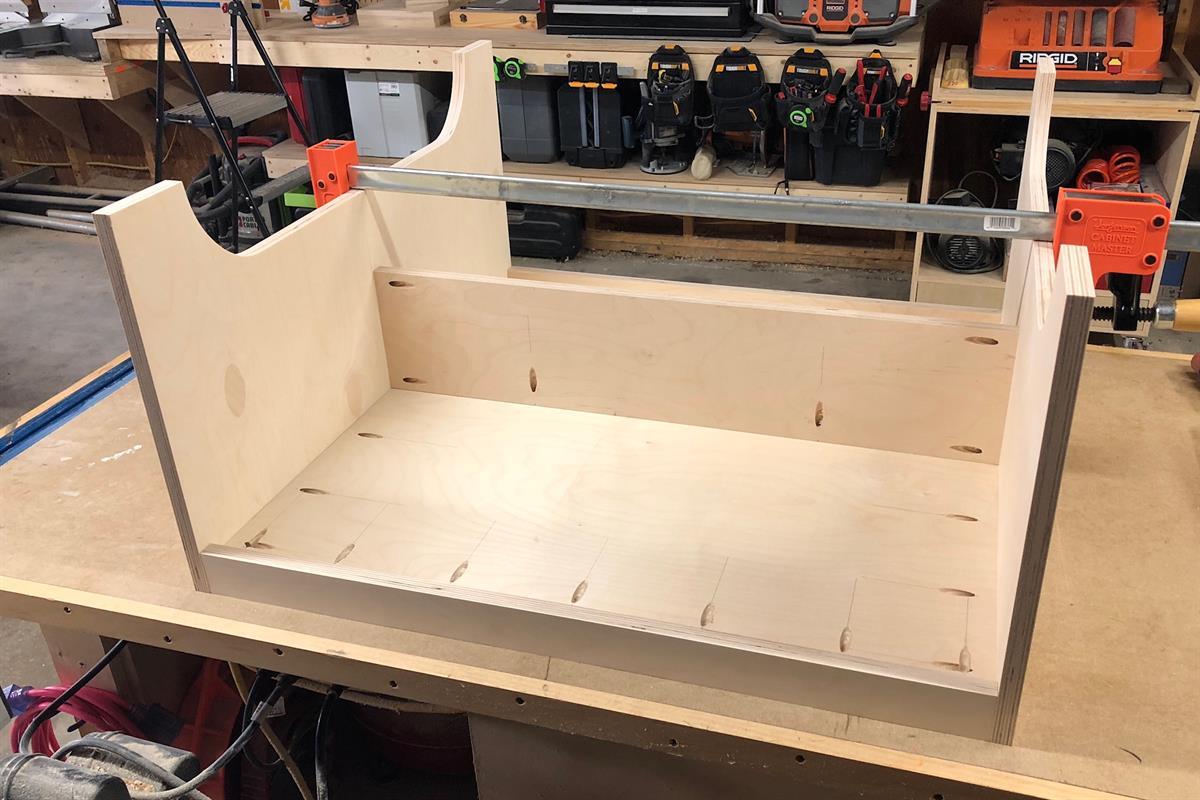
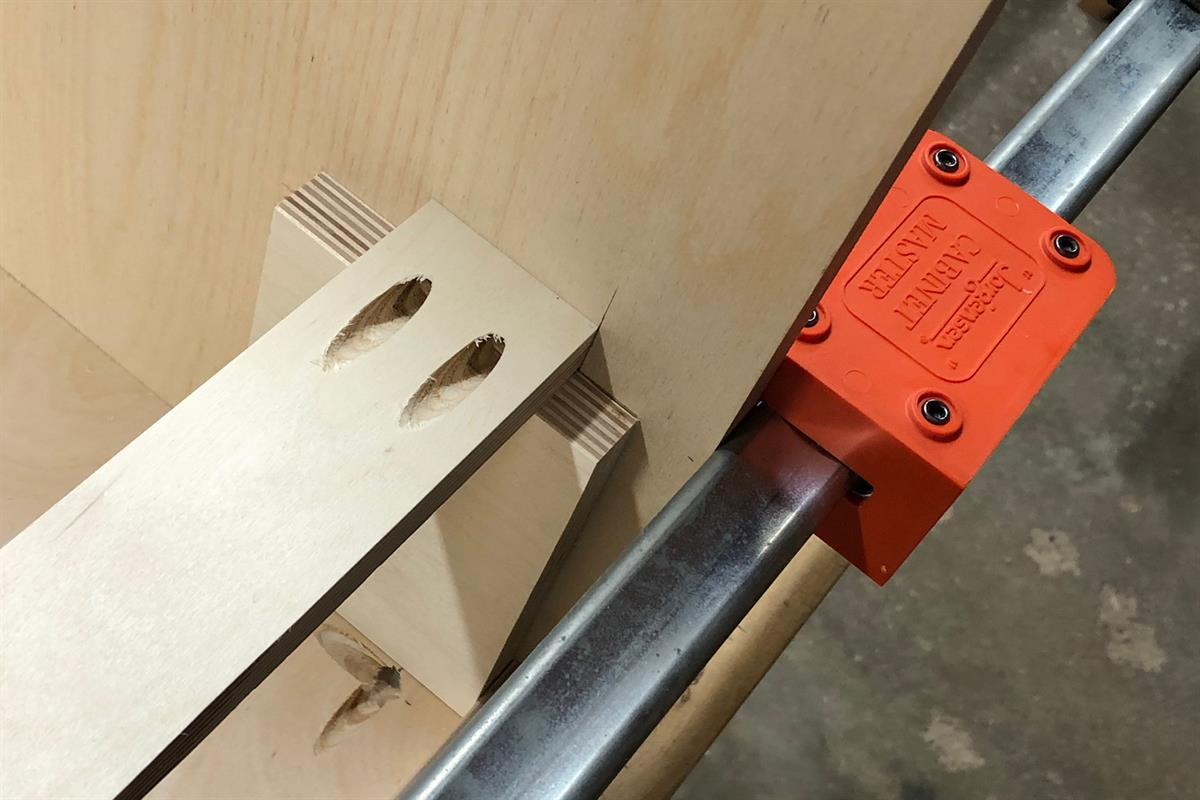
Assemble the Base - 3
The Center Divider gets installed next. The measured drawings show the offset from each side, but it just gets centered between the Legs. Clamp it in place and drive the screws into the Top and Legs, alternating back and forth from each side. This will help keep it from shifting as you drive the screws. Adding a clamp along the length of the divider from leg to leg also helps keep it in place. The image shows the reference line I drew on the inside of each Leg as a guide to keep the divider square and plumb to the Top and Legs.
-
Assemble the Base - 4
Next, add the Leg Braces. Cut two spacers to rest the braces on and ensure the correct location. The spacers should be 5-7/8” long. The Leg Braces get offset from the front of the Legs by 1-1/2”. Add some glue to each end and clamp them in place before driving the screws.
-
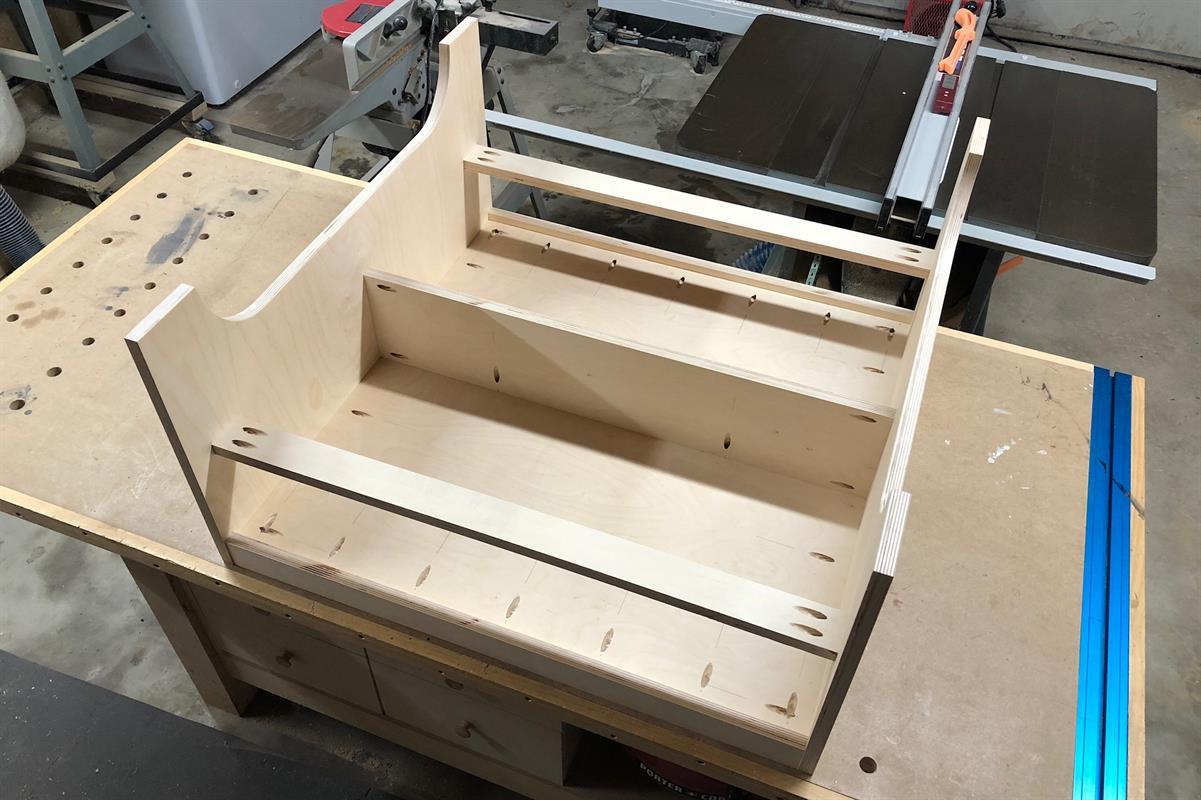
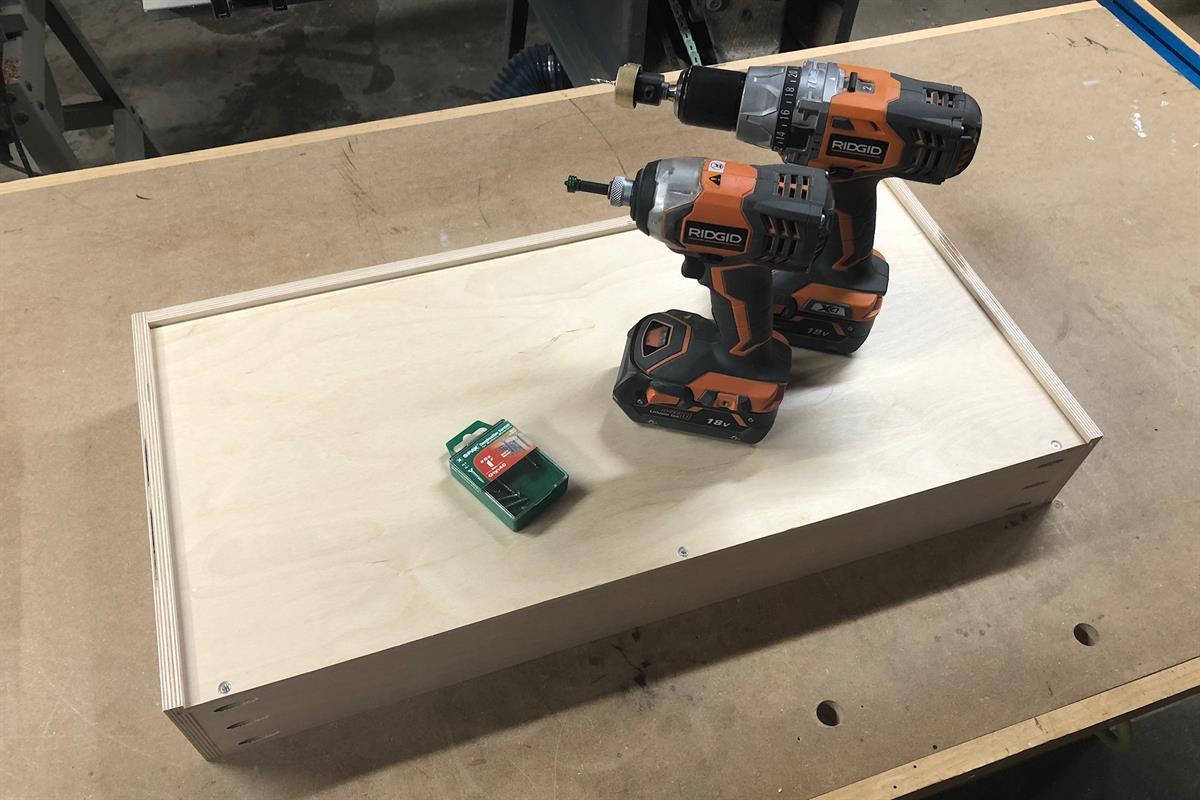
Assemble the Base - 5
The base is now complete! Here is a view from the bottom.
-
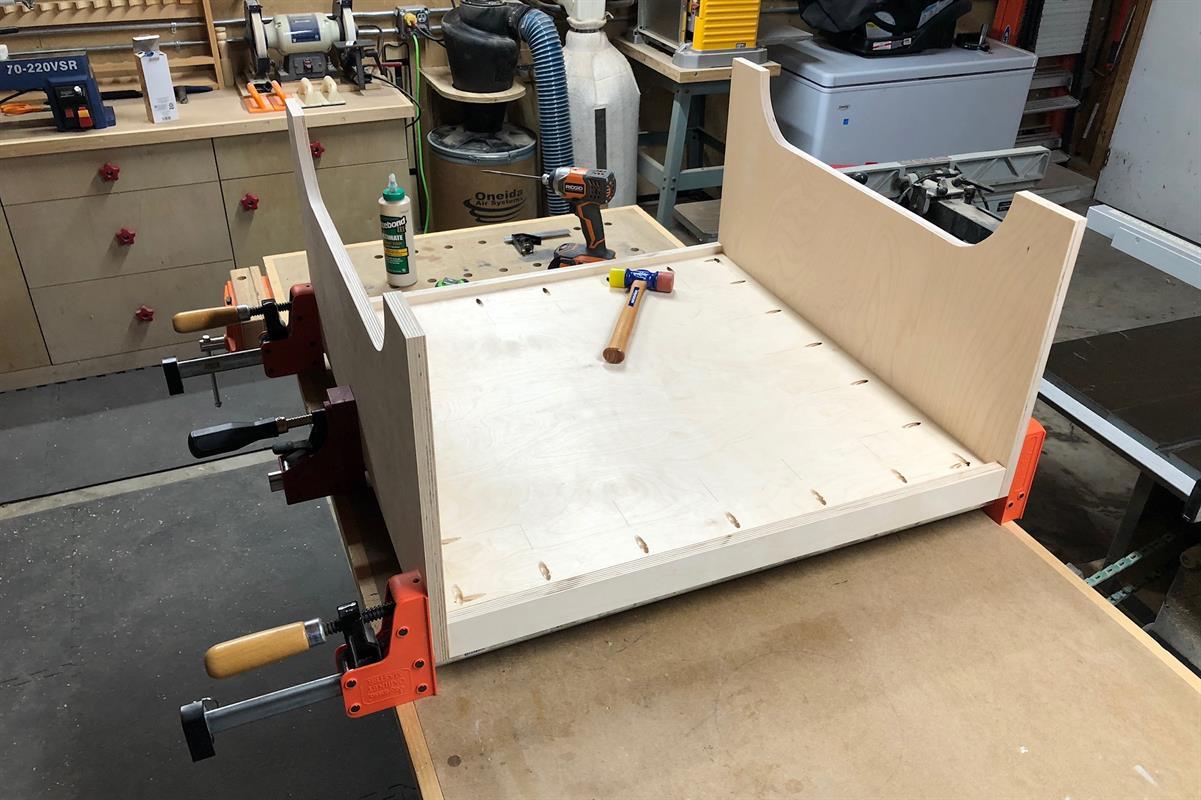
Assemble the Base - 6
And another view of the completed base from above.

-
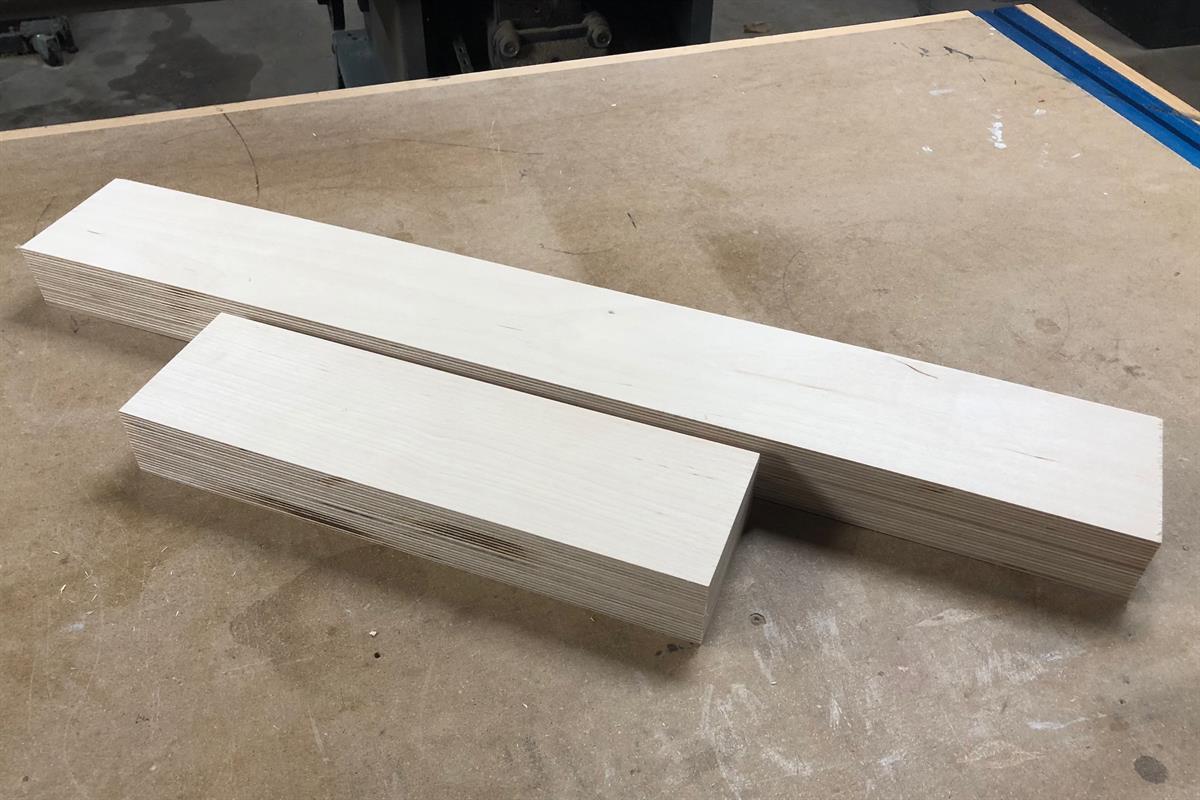
Making the Drawers - 1
Cut the drawer parts per the cut list. Remember, the Drawer Front/Back Pieces should be cut long for now. They will be trimmed to final length later. This is a crucial measurement to ensure proper operation of the drawer slides.
-
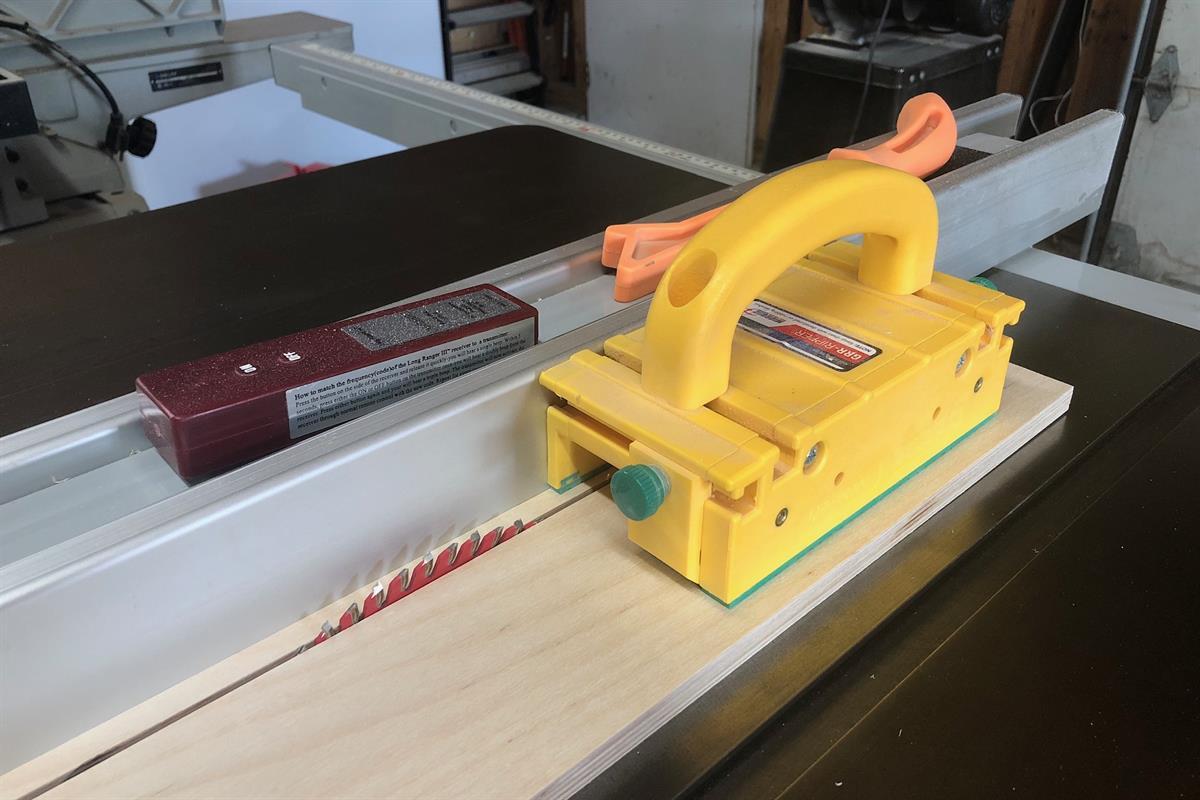
Making the Drawers - 2
Add a groove to the bottom of each drawer part to accept the drawer bottoms. You can use a dado stack if you have one, but it’s pretty quick and easy without. Set the blade height to 1/4” and the fence to 1/4” from the blade. Make the first cut and then incrementally move the fence further from the blade, making subsequent cuts until the drawer bottom stock fits nicely in the groove. I keep a small offcut of the 1/4” ply handy for testing the fit as I go.
-
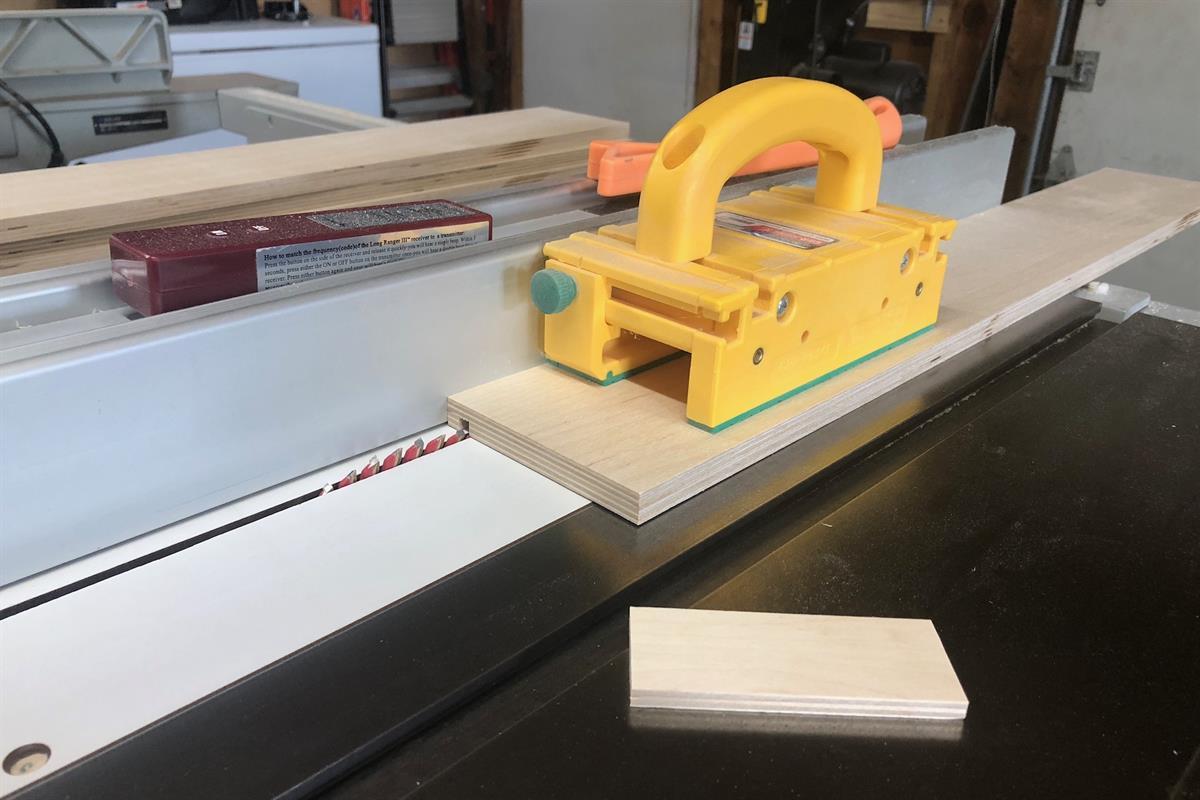
Making the Drawers - 3
Without moving the table saw fence from its final position in the last step, raise the blade and make a through cut on ONLY TWO of the longer drawer parts. These will be the drawer backs, and this will allow us to slide in the drawer bottoms after the drawer boxes are assembled.
-
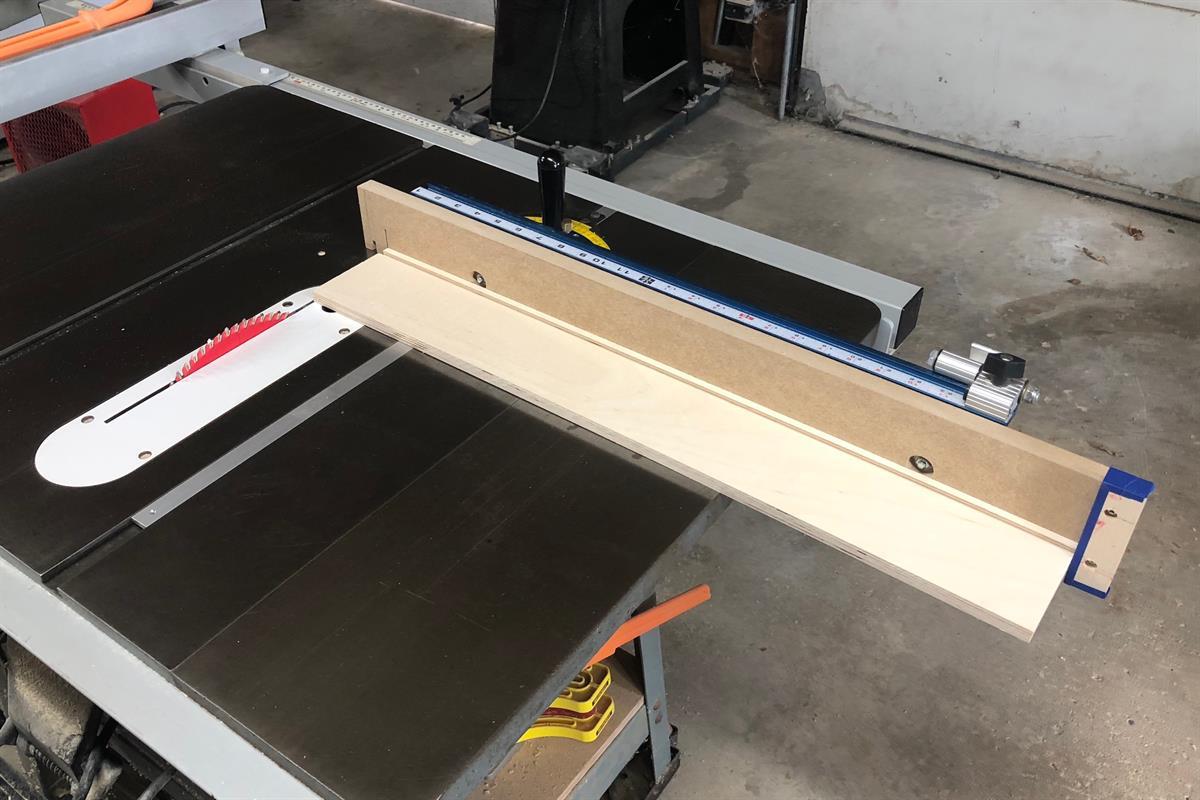
Making the Drawers - 4
Next, cut the Drawer Fronts/Backs to their final lengths. You arrive at this measurement based on the recommended install width of the drawer slides you’ve chosen and the thickness of your plywood, as that can vary. The formula looks like this: Drawer Opening - (Drawer Slide Width x 2) - (Plywood Thickness x 2). You can also line up the two drawer slides and two drawer sides in the drawer opening and measure the remaining space.
-
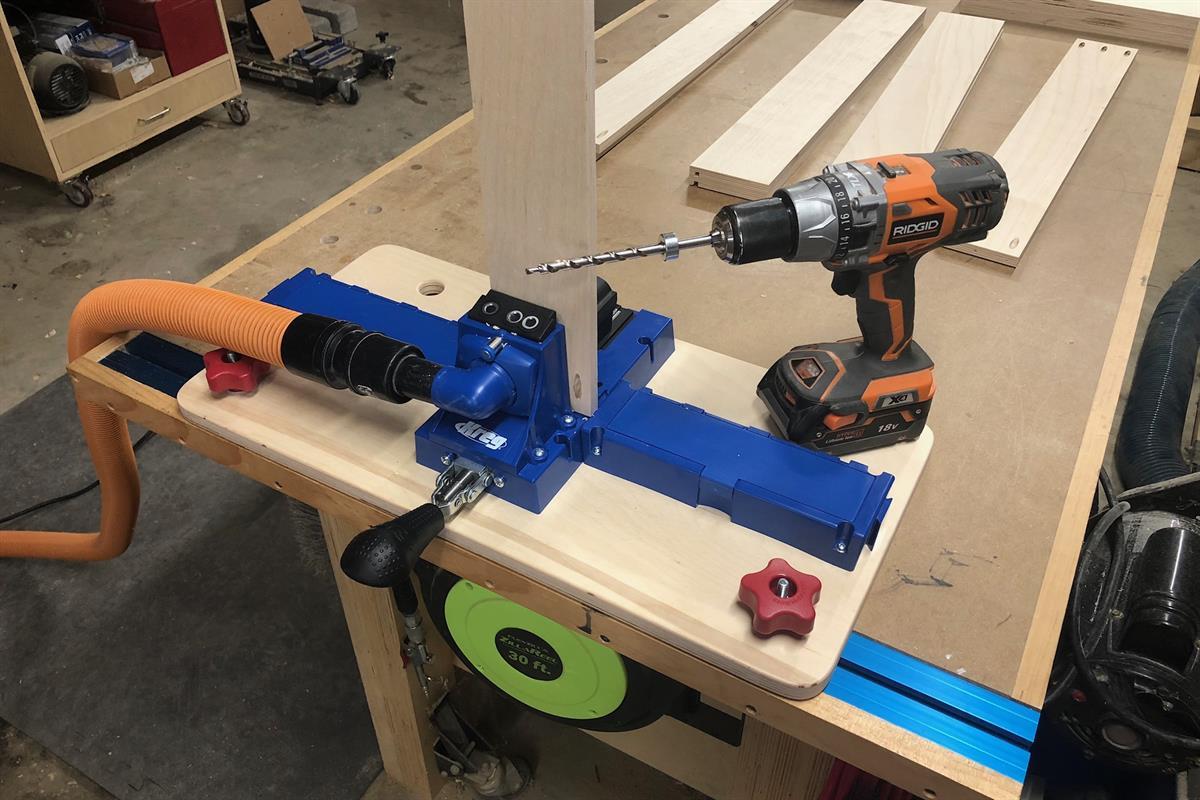
Making the Drawers - 5
Drill pocket holes on either end of each Drawer Front/Back, being sure to stay clear of the grooves we cut earlier. I absolutely prefer the Kreg Micro when working with 1/2” plywood. It works with all of the bench top Kreg jigs or on it’s own.
-
Making the Drawers - 6
Assemble the drawer boxes with wood glue and Kreg Screws. I always use clamps when I can with pocket screws. Be sure that all of the grooves are facing inwards and are on the correct side.
-
Making the Drawers - 7
Cut the Drawer Bottoms to fit. Measure the distance from side to side, including the groove and then from the bottom of the groove in the Drawer Front to the back edge of the Drawer Back. Attach them with a few countersunk screws into the drawer back.
-
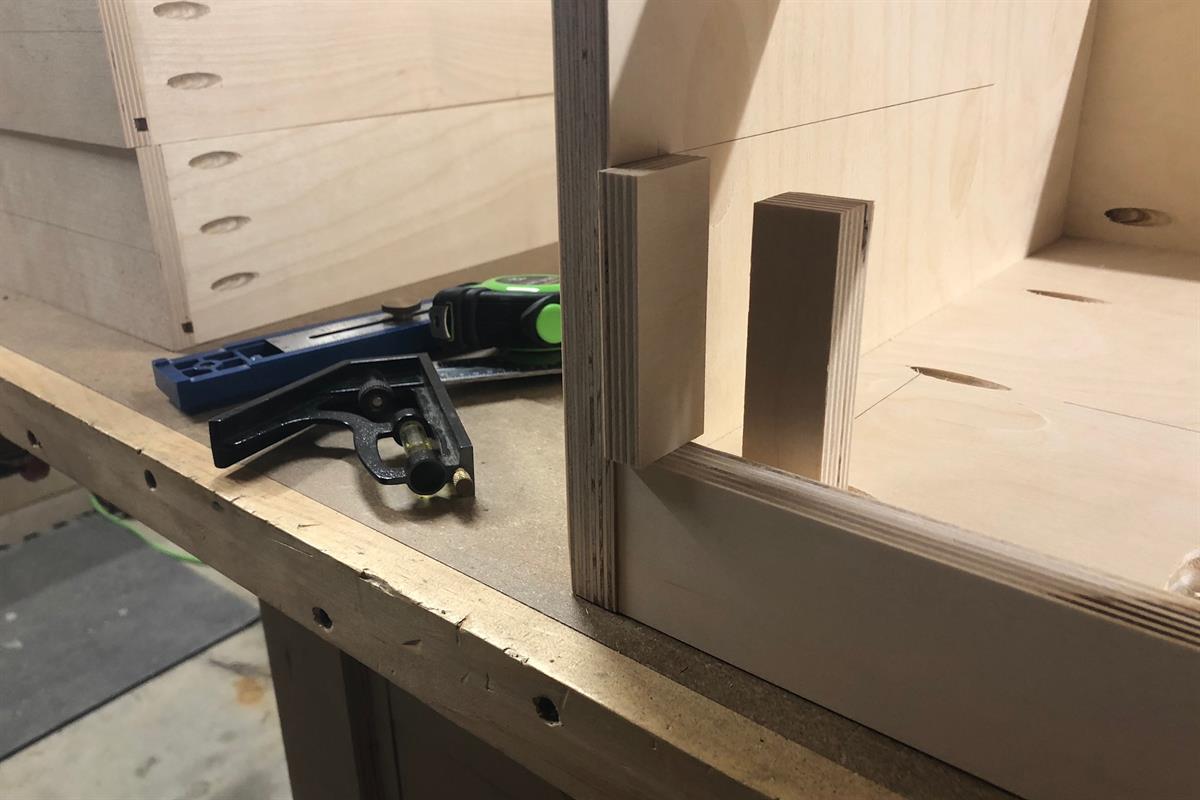
Installing the Drawers - 1
The drawer slides will get mounted on the center of each drawer side, so go ahead and mark a line down the center of each drawer side. Next, make a spacer to easily mark the location of the slides on the inside of each Leg. The spacer should be 3” long. Transfer that mark back along each Leg with a combination square. I use another spacer to mark the offset from the front of the Leg. This offset will be equal to the thickness of the False Drawer Front, so just use a scrap of the 3/4” plywood.
-
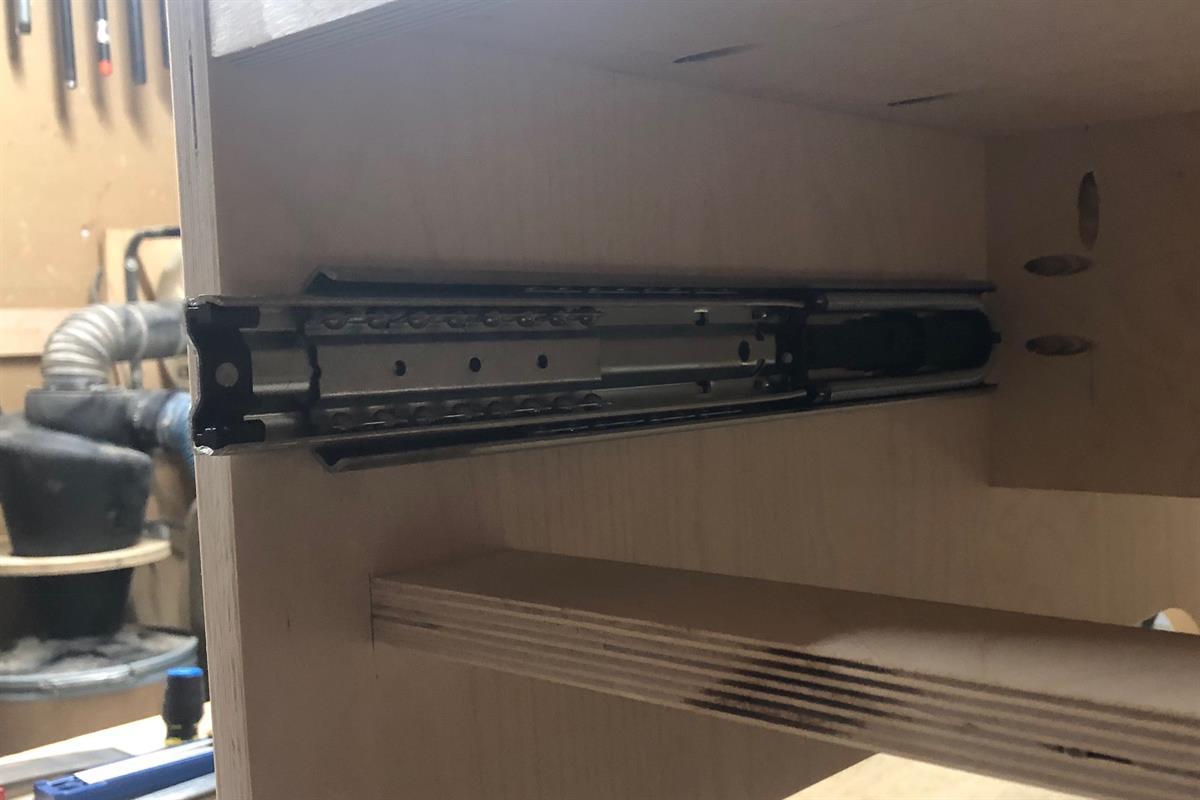
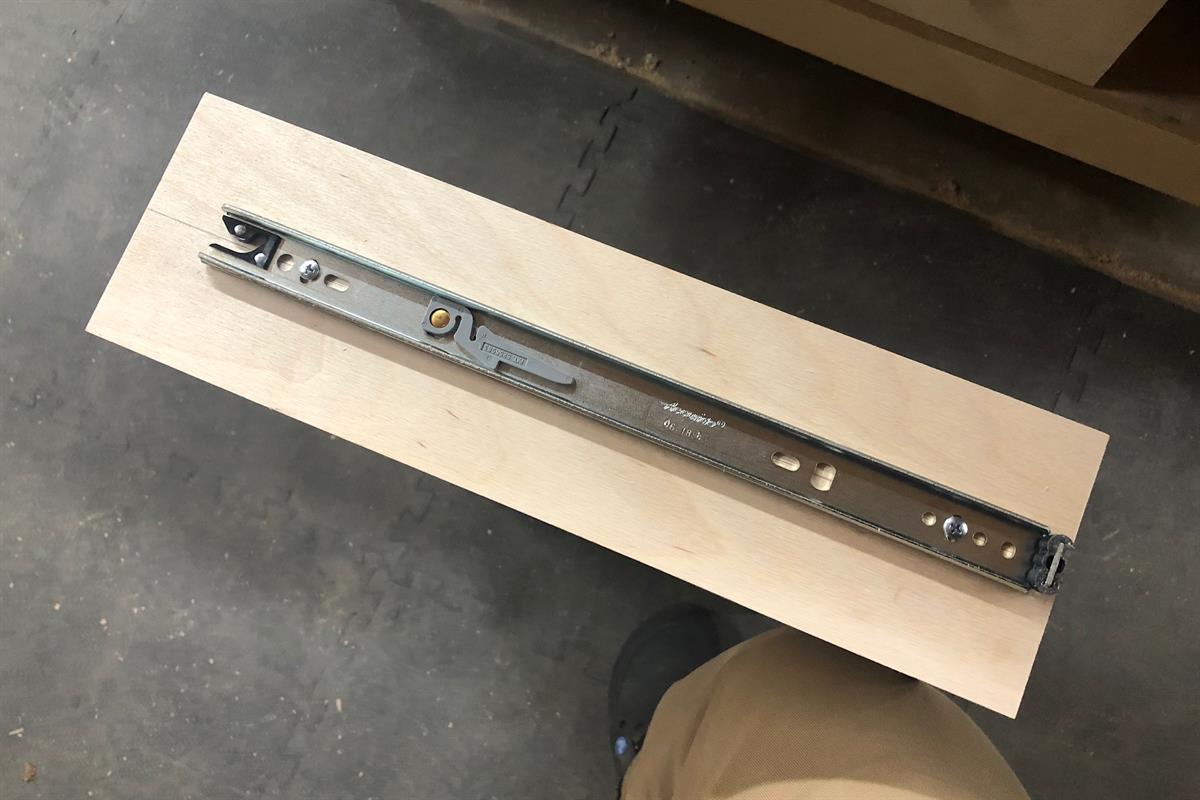
Installing the Drawers - 2
Lay the table on its side and attach the cabinet portion of each slide, centered on the line you drew in the last step, making sure the front of the slide is lined up with the offset mark. Flip the table and attach the other two on the other side.
-
Installing the Drawers - 3
Attach the drawer portion of each slide to the sides of the drawers, again using the lines you drew earlier to center the slides. The front of the slide should be flush with the front of the drawer box, or whatever offset is recommended by the slide manufacturer. My slides called for a 1/8” offset.
-
Installing the Drawers - 4
Cross your fingers, insert the drawers, and hope they fit!
-
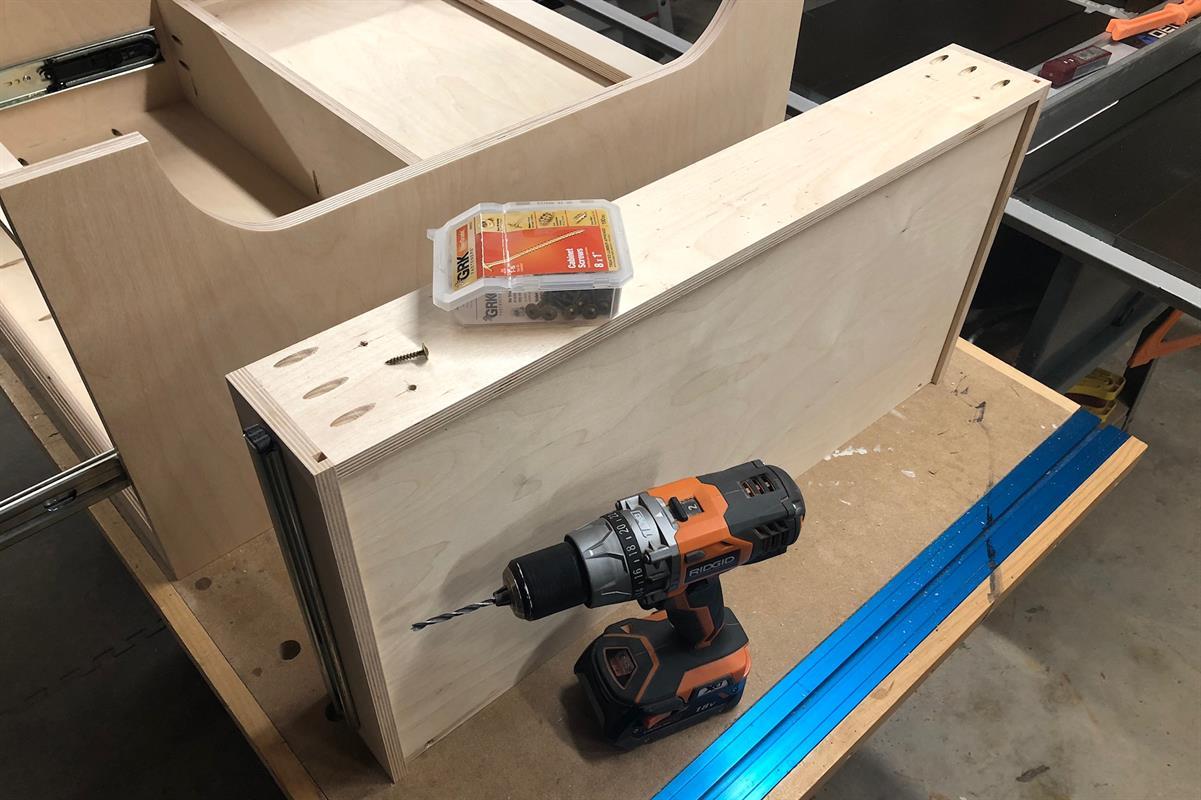
False Drawer Fronts - 1
Remove the drawer boxes from the table and drill 4 holes in the front of each drawer. These will accept the screws that hold the False Fronts in place. They should be slightly oversized for the screws you use. I used #8 x 1” washer head screws.
-
False Drawer Fronts - 2
The False Fronts are still at their original length and will be too big to fit easily in the opening, so trim 1/16” to 1/8” off each end. This will be the reveal between the False front and the Leg.
-
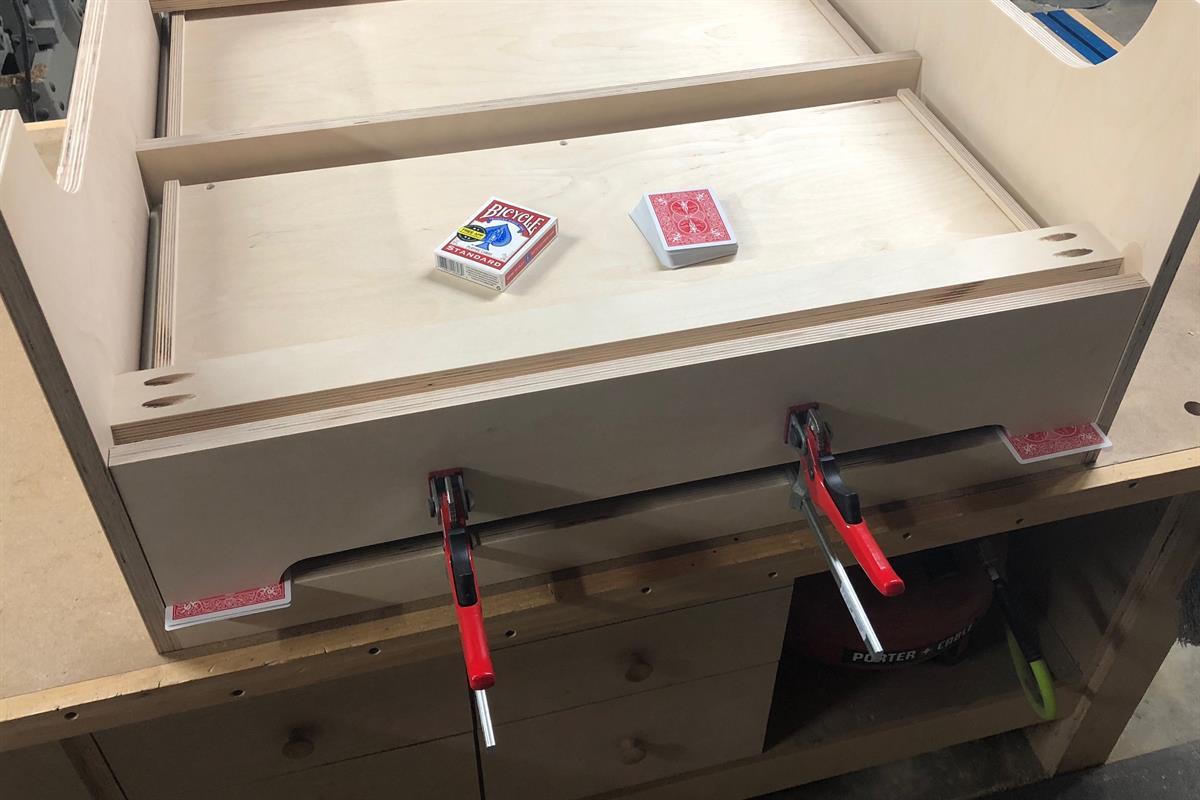
False Drawer Fronts - 3
Reinstall the drawer boxes and flip the table upside down. Use spacers to get a nice even reveal on either side of the False Front and along the top edge of the drawer. I like to use playing cards, adding the same amount on each side to ensure an even reveal. Then clamp the False Fronts in place.
-
False Drawer Fronts - 4
Remove the drawers with the False Fronts clamped in place. Attach them securely with the washer head screws. Reinstall the drawers and make sure everything lines up perfectly. You can make fine adjustments with the drawer slides if needed.
-
Finish It Up!
All that’s left is to add a roundover to all of the edges if you like and do a little sanding for a nice smooth surface. I put a link in the Extras to the roundover bit I prefer. Then take it all apart and add whatever protective finish you like. I sprayed mine with shellac, a nice safe finish. You could also use paint if you like. Get creative! There is also a link to the Duplo build plates in Extras. Amazon had by far the best price I could find. My kids could not wait to get this thing inside and get to playing!!