


Cabinet doors can be pricey. If you have a router table it may not be as hard as you think to make your own! In this tutorial I am going to show you how I made shaker style drawer fronts using a router table and rail and stile router bits.
Tools
Kreg Tools


Other Tools
-
Miter Saw

-
Square
-
Table Saw
-
Tape Measure
-
Clamps
-
Materials
Wood Products
- 1 Board , 1x3 , 96"
- 1 Plywood , 1/4" Thick , Full Sheet
Hardware & Supplies
- 1 Wood Glue
- 1 Rail and Stile Router Bit Set
Directions
-
Overview
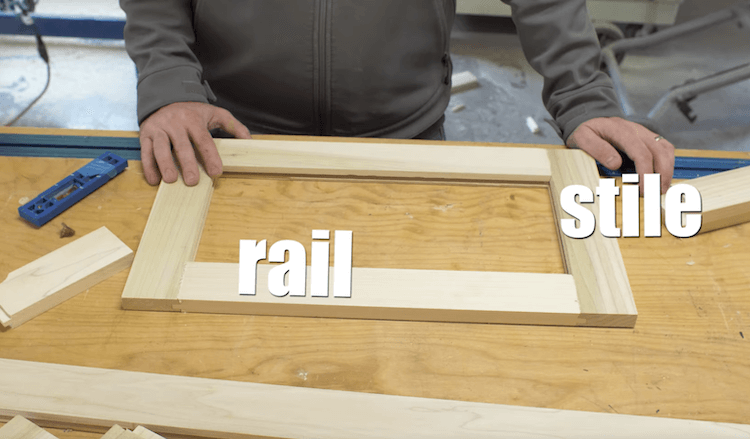
Some terms that get thrown around when describing parts of a cabinet door are “rails” and “stiles”. These parts make up of the outer frame of the door and there are two of each. The “stiles” are the vertical boards and the “rails” are the horizontal boards. These boards are commonly 1x3s or 1x2s, with actual dimensions of 3/4″ x 2-1/2″ or 3/4″ x 1-1/2″ respectively. I prefer to use poplar for painted cabinets because it is pretty stable, paints well, and can be pretty affordable.
The rails and stiles all have a groove cut on the inside of the board to accept a panel. The rails also have a tongue cut on each end that will mate with the groove on the stiles.
-
Setting the Groove Depth
Typically, the groove in a cabinet door is in the middle. So you would have 1/4″ lip on the back, 1/4″ groove for the panel and 1/4″ decorative edge on the front. For a drawer front we will need to fill the void behind the panel, so that, when the drawer pull is installed, it wont cause the panel to get sucked in. We can fix this problem by adding scrap 1/4″ plywood behind it. However, 1/4″ plywood is not truly 1/4″ thick; it is actually 1/32″ less thick, and when you multiply that by two, you get 1/16″ less than the expected 1/2″. Therefore, we are going to slide this groove toward the back of the door by 1/6″ giving us the following: 3/16″ back lip, 1/4″ groove and 5/16″ decorative front.
-
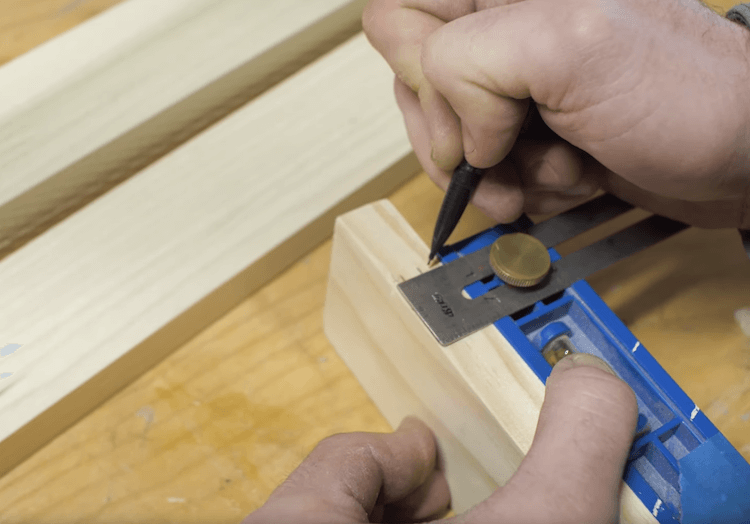
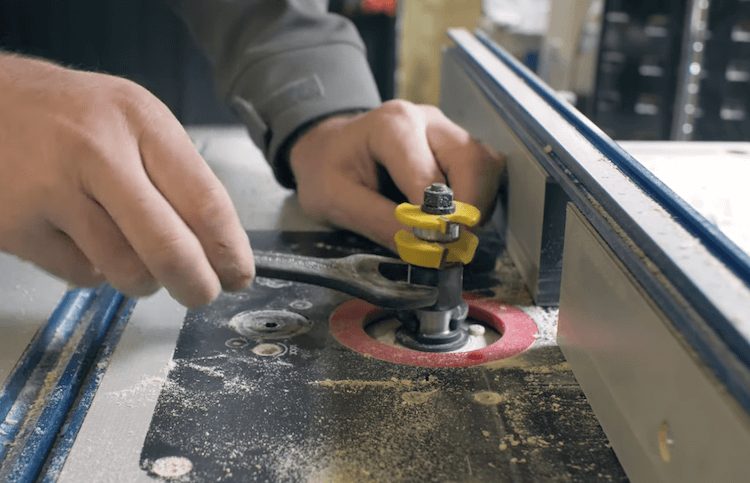
Adjusting the Router Height
Mount the groove profile router bit and raise/lower it to align with your markings. The precision router lift makes this process easy and precise to do from above.
-
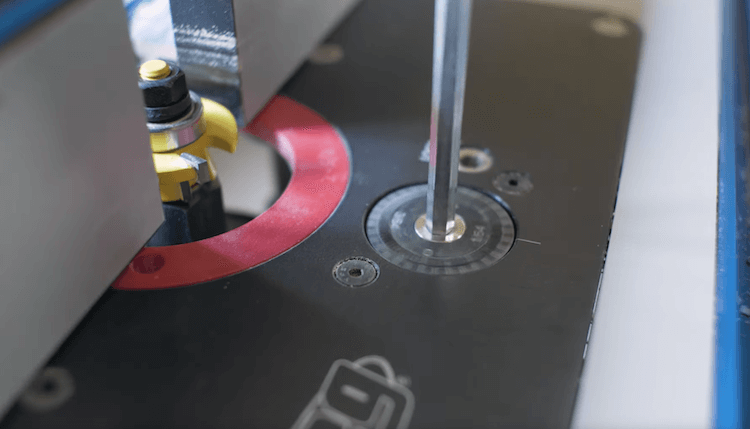
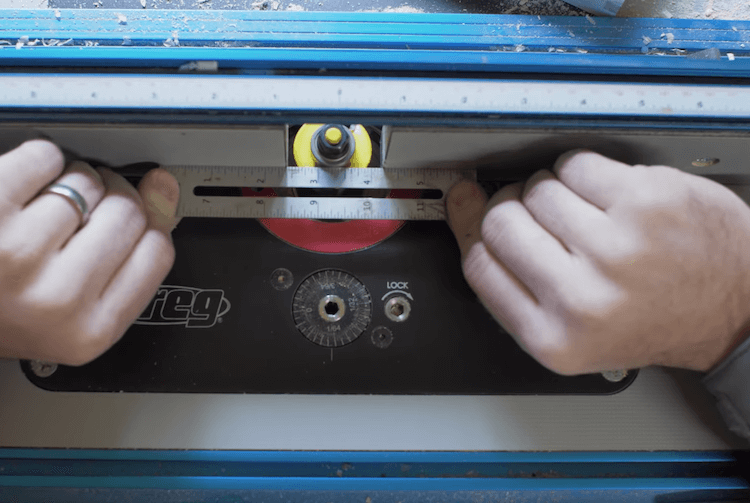
Adjust the Fence
Once the vertical alignment is set up, then align the fence with the steel collar. You can do so with a straight edge, making sure that it is flush with both sides of the fence and the collar barely spins when the straight edge is moved from side to side.
-
Test Cut
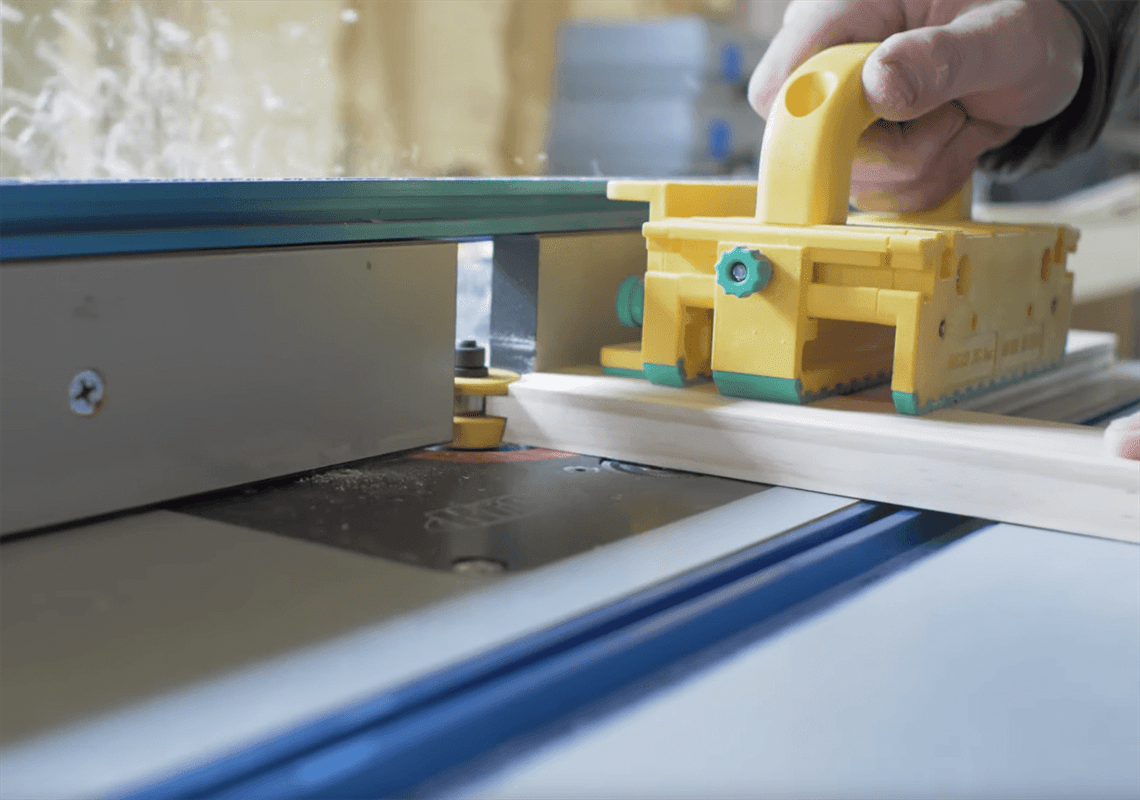
When cutting a profile on the router table you should always go from right to left and apply consistent pressure in the following three directions; against the fence, against the table
and feeding from right to left. 1 and 2 can be done safely with the use of featherboards on both sides of the router while 3 is done with your hands feeding the stock through. Or the same can be done with a Microjig or two.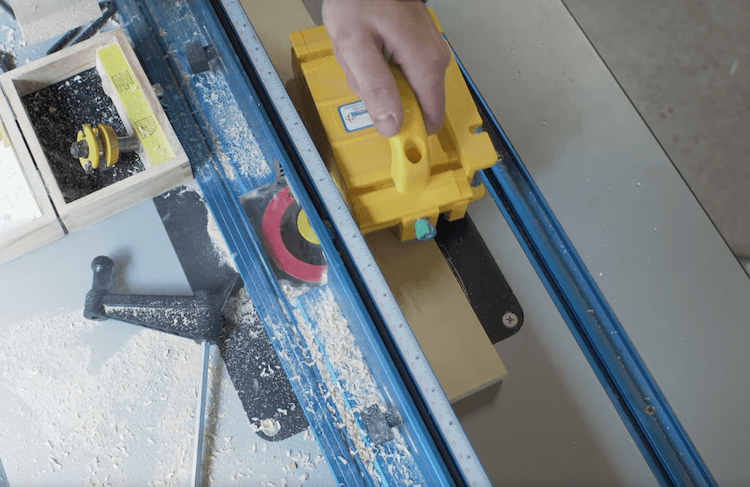
-
Check the Results
After running the test piece through the router, check the profile to make sure it is what you were aiming for.

-
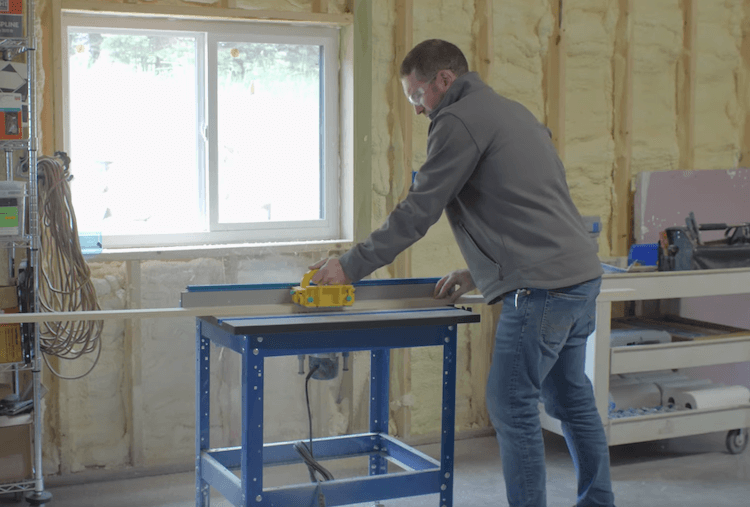
Cutting the Grooves
Once you are happy with the placement, all of the 1×3 stock can be routed with the groove profile.
-
Cutting Stiles to Length
The length of the stiles is equal to the overall height of the drawer front or door. I went with a full overlay drawer front. This means that there will only be 1/8″ gap between the door and any adjacent doors or surfaces. And when there is no adjacent surfaces (end of cabinet), the door drawer front is flush with the end. If you have a lot of the same height fronts, a stop block like I have above will help you make quick and consistent cuts.

-
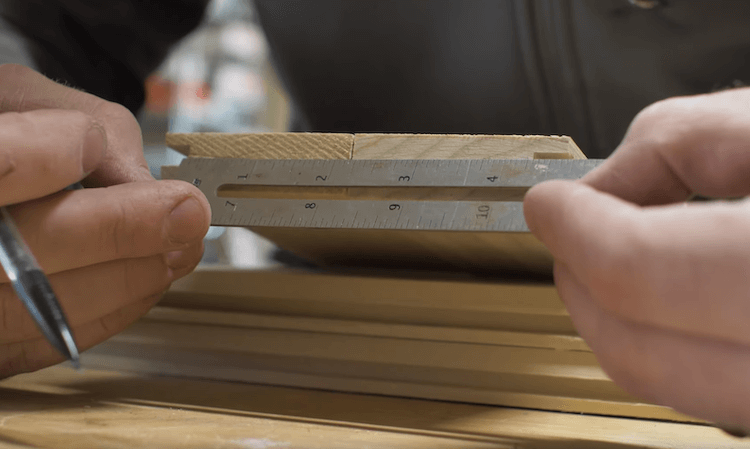
Calculating Length of Rails
The most reliable way to measure for the rail lengths is to start by laying out the drawer face (or door) sides on the cabinet carcass with a pencil. With our 1/8″ gap marked on the center of the drawer dividers we were then able to measure the drawer front width. Now that we know the width of the face we need to subtract the stiles. By taking two stiles and turning the flat sides in, you can then measure from the inside of one groove to the inside of the other (I came up with 4-1/4″). Then subtract this amount from the overall width you measure earlier to get the length of the rails. These widths will vary, so make sure to measure for each drawer front and try to keep your accuracy with a 1/16″. Now you can cut those rails to length.
-
Tongue Profile Bit
Replace the groove profile bit with the tongue profile. Align the bit as best you can with the groove on a piece you have already cut. Then align the collar with the fence as we did in the previous step.
-
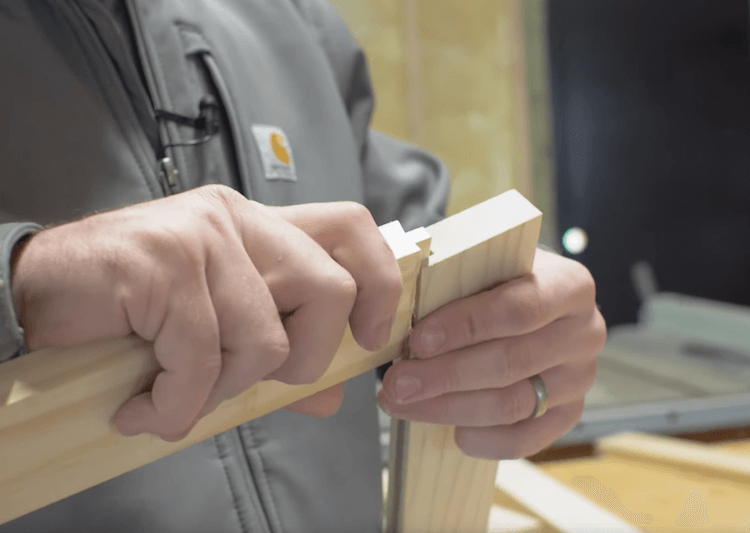
Testing & Cutting the Tongues
Cutting the tongues can be a little bit more dangerous than cutting the grooves since the piece has to be fed through the router perpendicular to the fence. To make sure these are routed safely you can use a rail coping sled or a scrap square of plywood and featherboards or a Microjig to make sure the rail stays perpendicular to the fence as it is fed through the router.
Cut a tongue on a test piece and check the fit to make sure the height of the bit is correct. Once you are happy with the cut, proceed to cut the tongues on all the rails.Tips: Cutting the tongues can create tear-out at the end of a cut. To help minimize this, make slow passes (but not too slow that you burn the wood) and make sure to have solid scrap wood behind it.
-
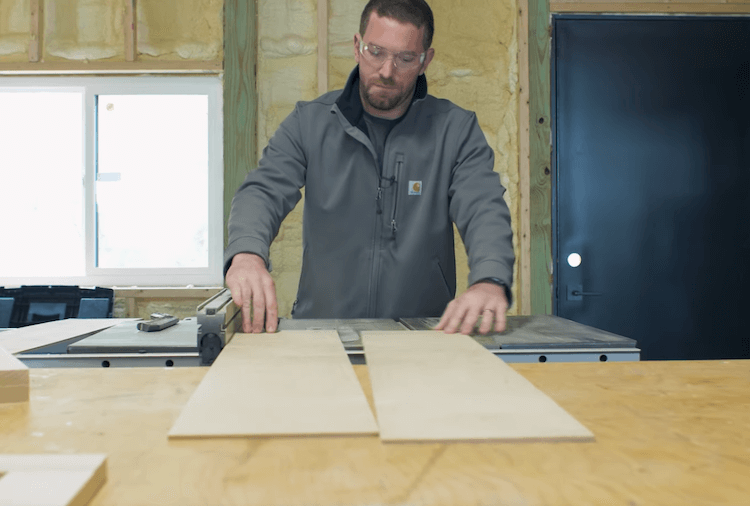
Cutting the Panels
The panels that we are making are flat plywood panels. These are very easy to make and look great. Another option is a solid wood, raised panel but those will not be covered in this tutorial. Determine the dimensions of the panel and make sure to include the depth of the groove. Then subtract about 1/16″ to make sure the fit isn’t too tight. The panels can then be cut down on the table saw and miter saw.
-
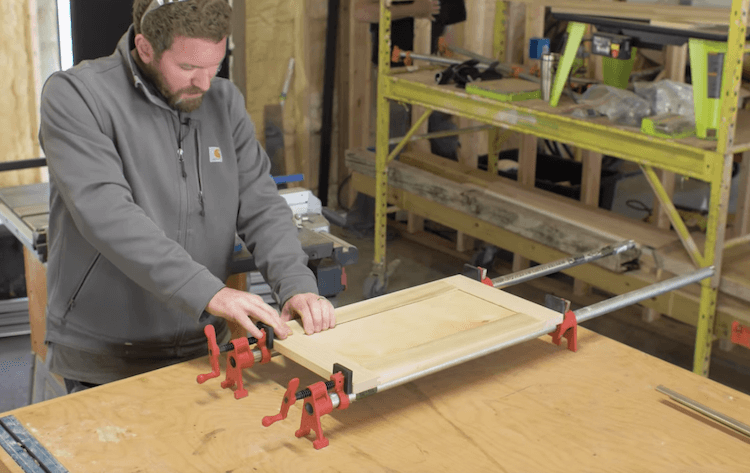
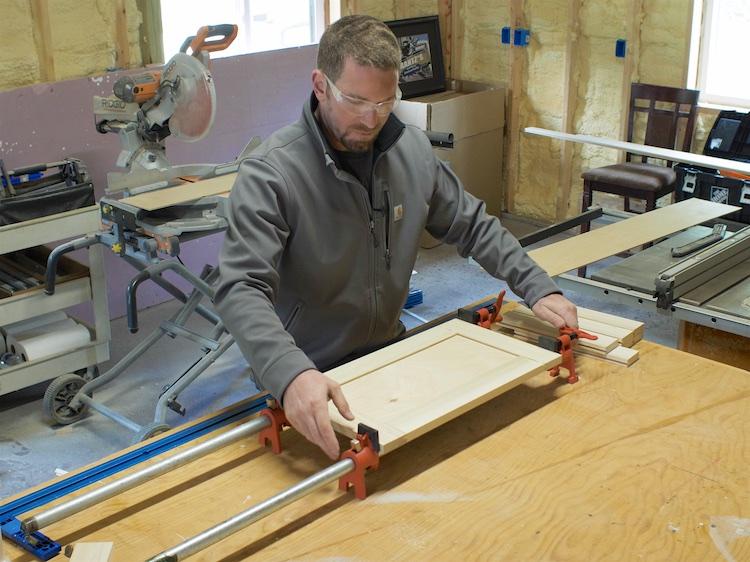
The Glue Up
Apply a thin layer of wood glue to the entire mating surface of the tongues. Then insert the two rails into the groove of one of the stiles. Make sure to align the outside edges when doing so, and slide the panel into place.
Note: If you want to make sure the panel doesn’t rattle you add a little wood glue in the groove. This only works with plywood because it is a stable product, meaning the expansion and contraction is negligible. If this were a solid wood panel you would not glue the panel in place, but rather you would use something like space balls to prevent rattle.
Add that last stile and clamp that panel up, making sure the panel remains flat in the clamps. After the glue sets up over night you can remove the clamps, fill and sand.