

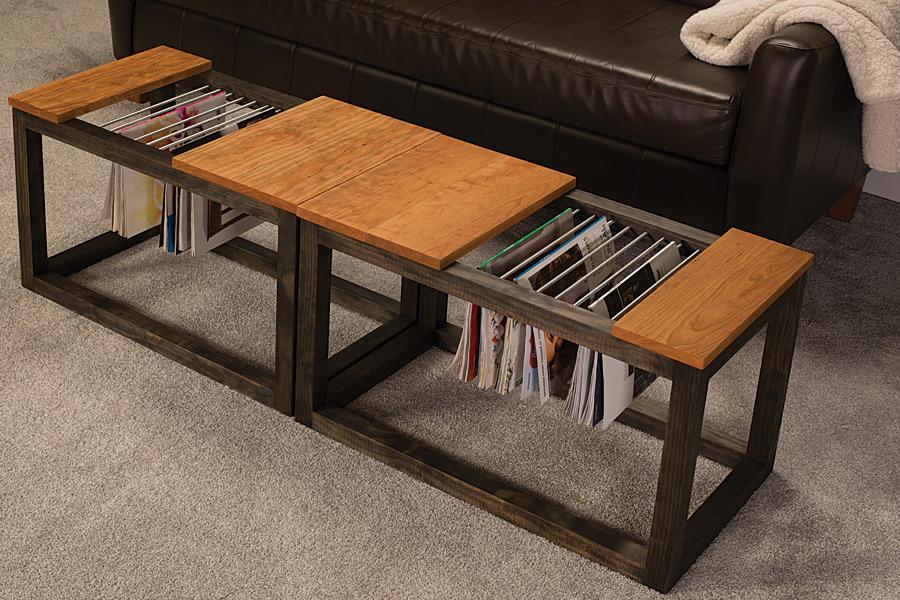
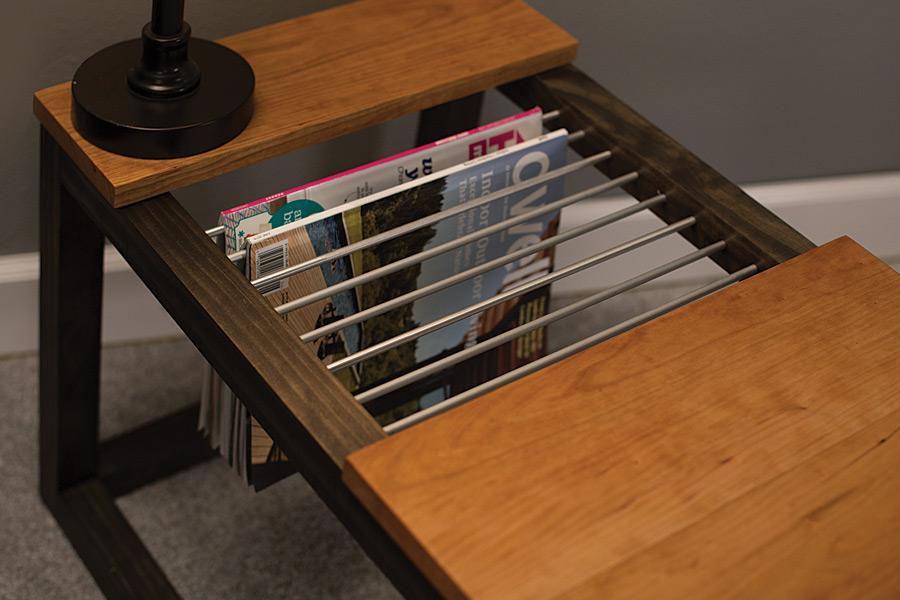
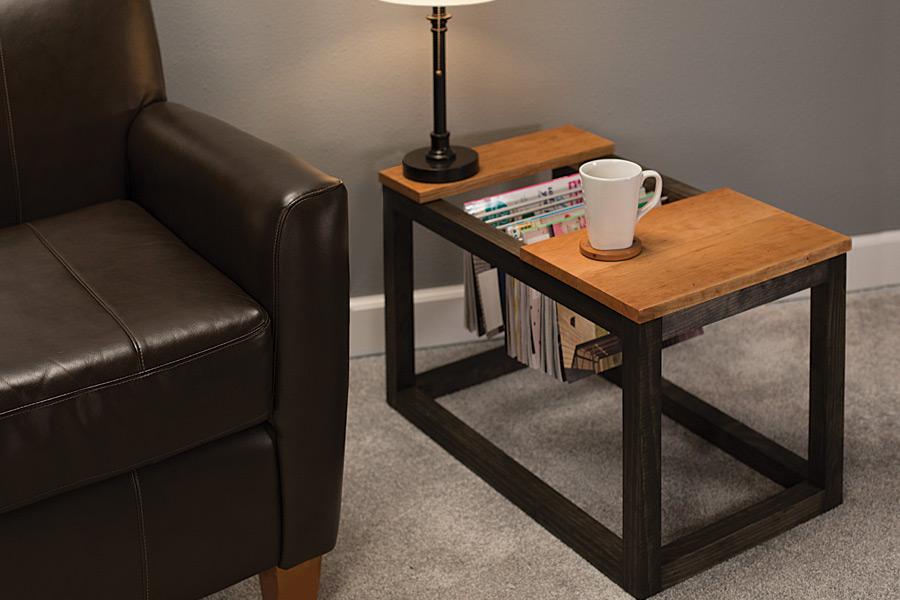
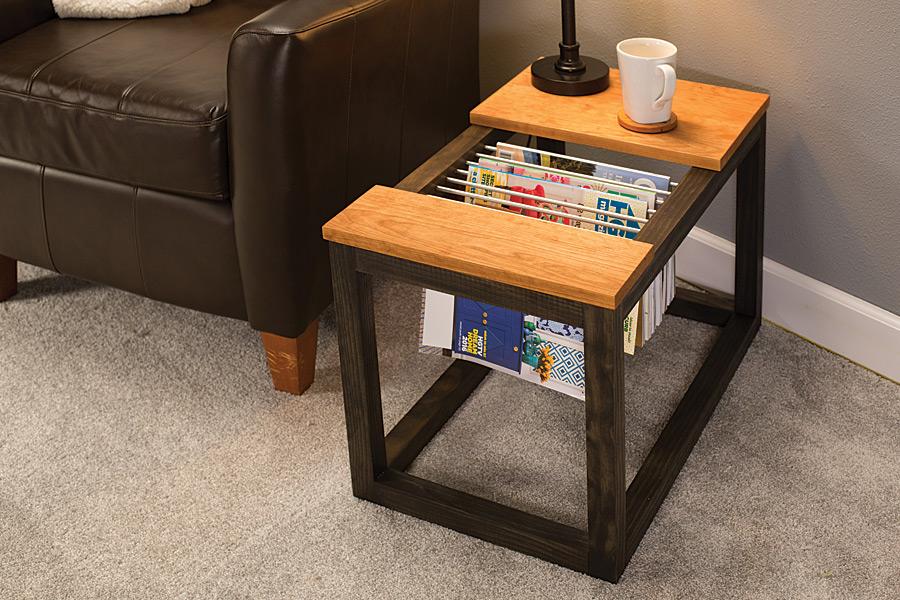
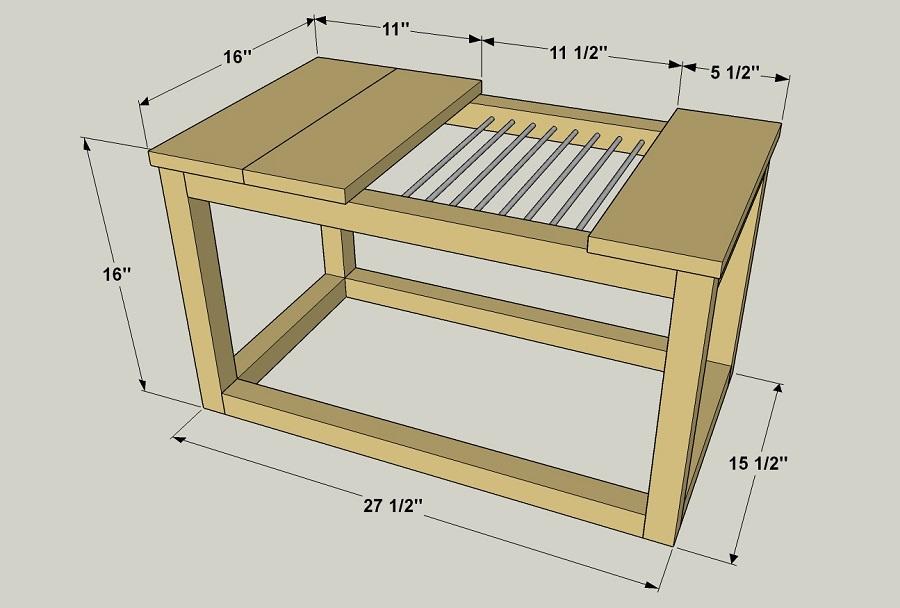


Here’s a convenient, stylish way to store your favorite magazines close at hand but out of the way. This clever table features a cutout area with aluminum rods that allow you to hang magazines instead of stack them. You can build one as an end table, or pair two together to make a coffee table.
Tools
Kreg Tools


Other Tools
-
Miter Saw

-
Square
-
Tape Measure
-
Hacksaw
Materials
Wood Products
- 2 Board , 2x2 , 96"
- 1 Board , 2x2 , 36"
- 1 Board , 1x6 , 72"
Hardware & Supplies
- 32 2 1/2" coarse-thread pocket-hole screws
- 3 1 1/4" fine-thread pocket-hole screws
- 10 2" flat head wood screws
- 4 1/4" x 36" aluminum rod
- 1 Wood glue
- 1 Steel wool
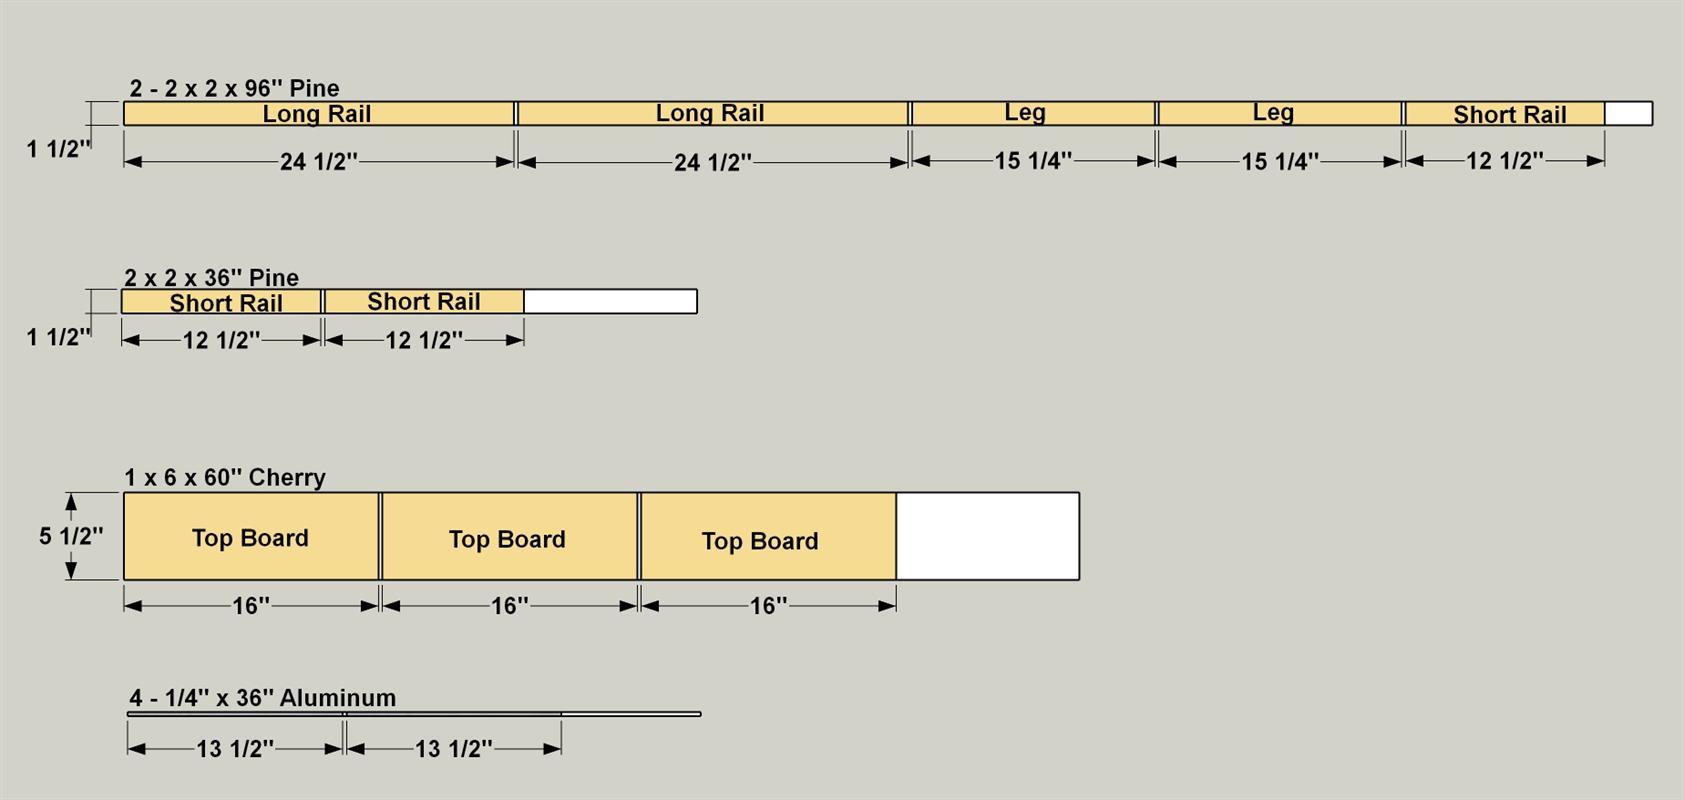
Cut List & Parts
- 4 Long Rail , 1 1/2" x 1 1/2" x 24 1/2" pine
- 4 Short Rail , 1 1/2" x 1 1/2" x 12 1/2" pine
- 4 Leg , 1 1/2" x 1 1/2" x 15 1/4" pine
- 3 Top Board , 3/4" x 5 1/2" x 16" cherry
- 8 Hanging Rod , 1/4" x 13 1/2" aluminum rod
Directions
-
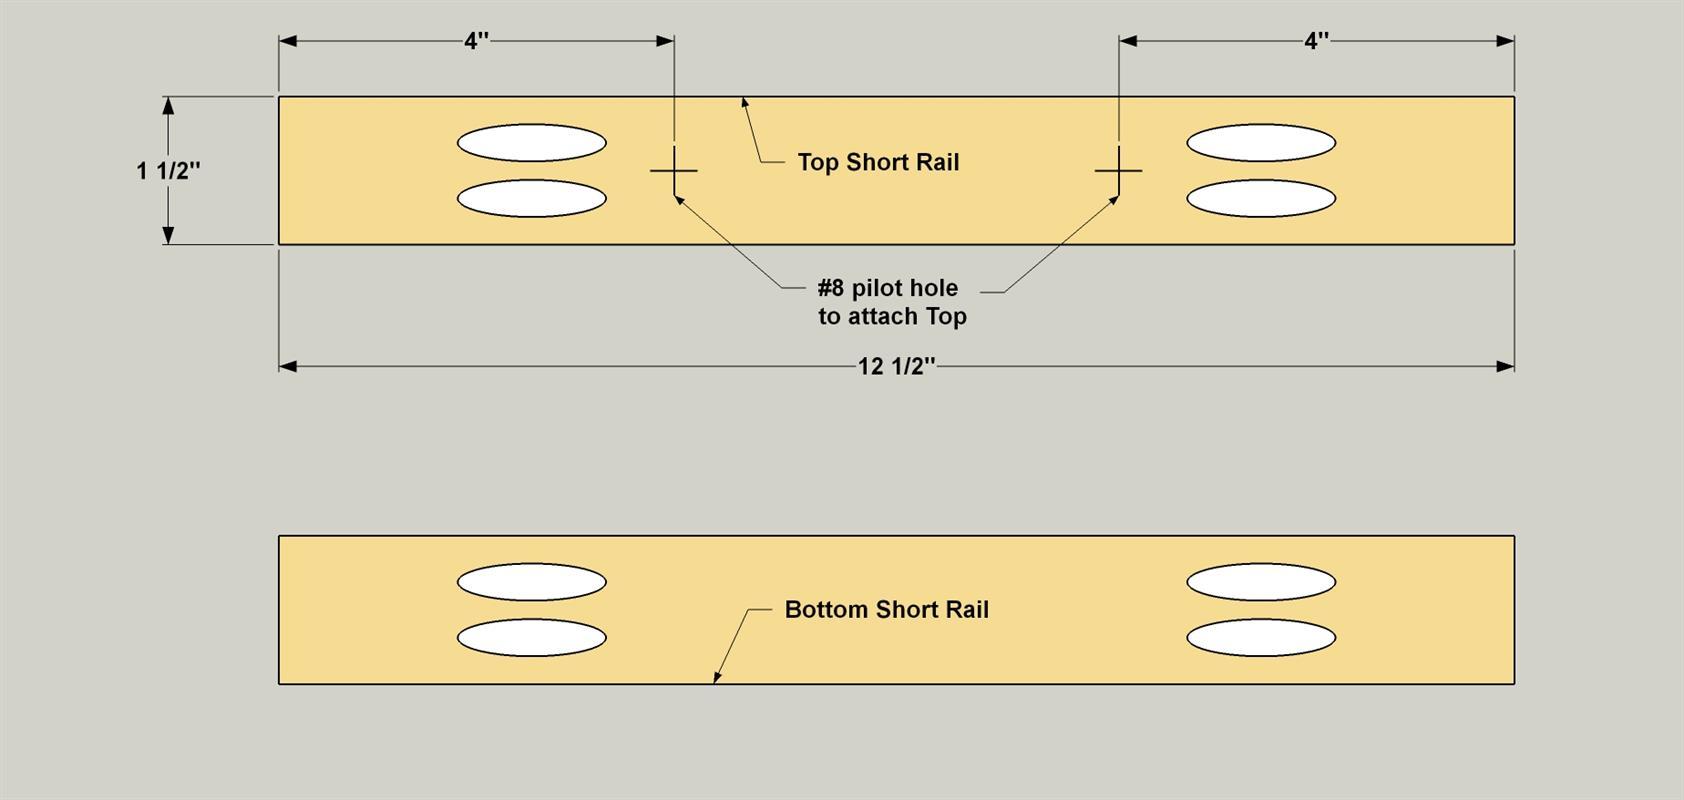
Make the Short Rails
Cut four Short Rails to length from 2x2 pine boards, as shown in the cutting diagram. Set your pocket-hole jig for 1 1/2"-thick material, and then drill pocket holes at the locations shown. On two of the Short Rails, drill 1/8" pilot holes at the locations shown. These will be used for screws that attach the Top boards in a later step.
-
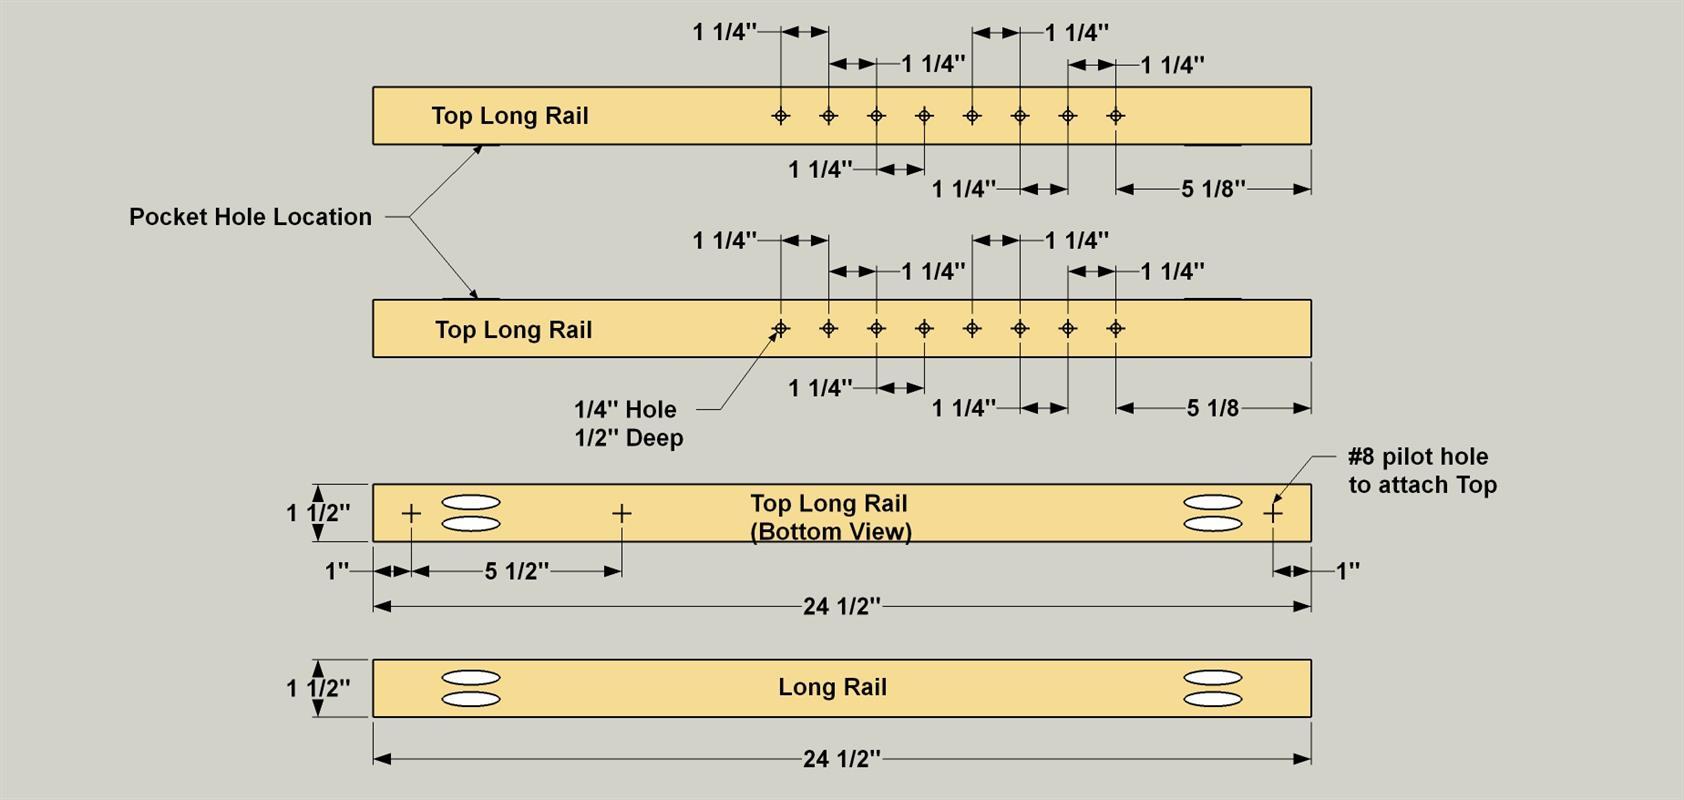
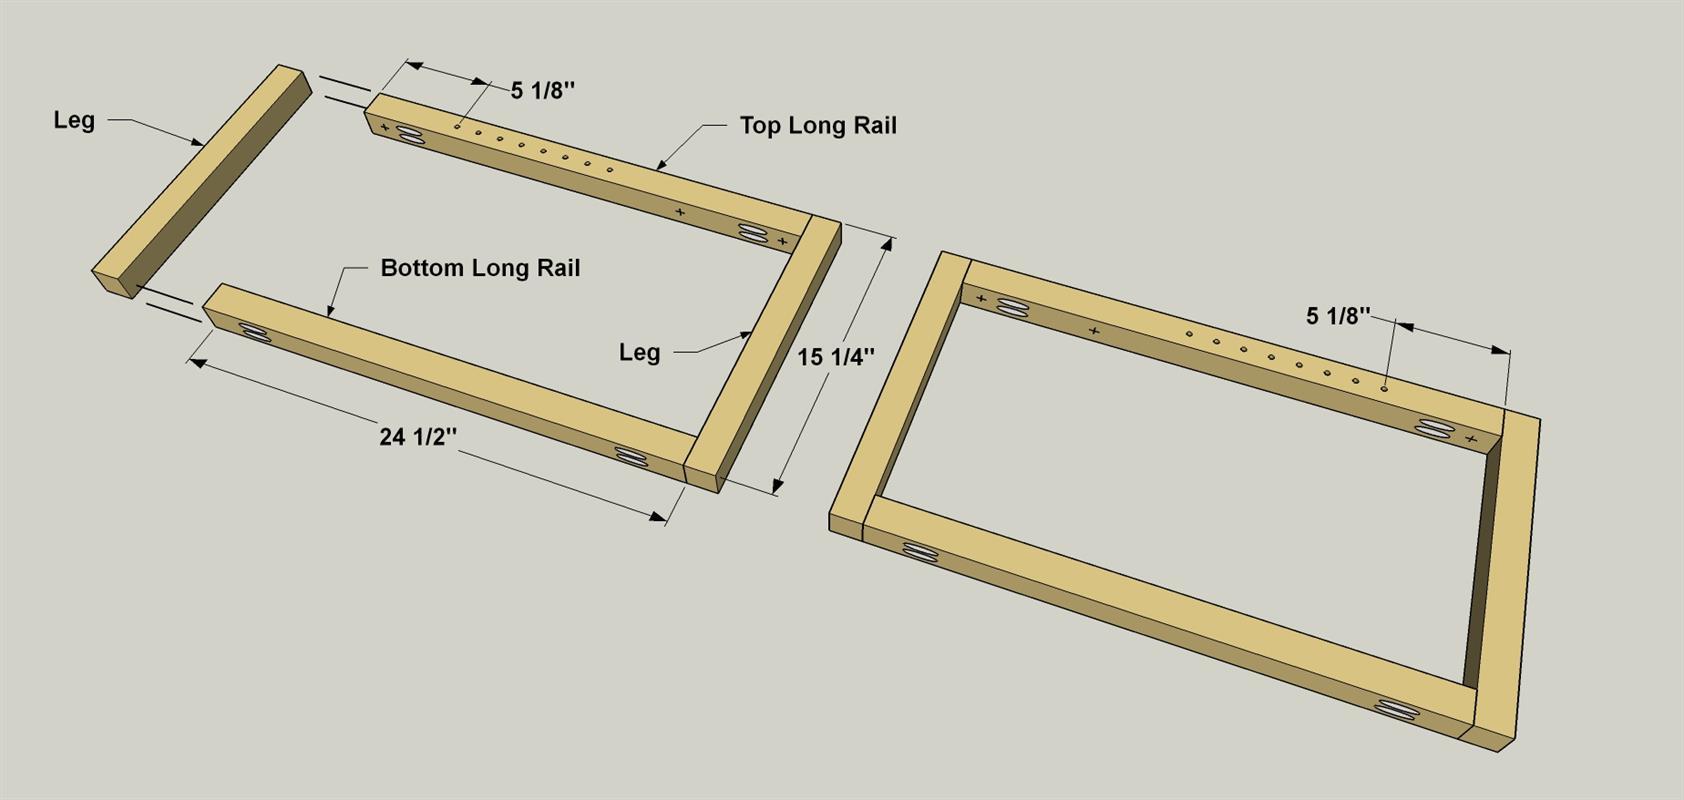
Make the Long Rails
Cut four Long Rails to length from 2x2 pine boards, as shown in the cutting diagram. Drill pocket holes at the locations shown. Lay two of the rails on a flat surface with the pocket holes facing toward one another, and then bring the Long Rails together so the ends are flush. Lay out the eight 1/4" holes on each of the Rails at the locations shown, and then drill the holes 1/2" deep. These holes will accept the aluminum rods that you’ll add later. Next, roll each Rail so the pocket holes are facing up, and the Rod holes are facing out. Lay out and drill 1/8" pilot holes at the locations shown. These holes, just like in the Short Rails, will be for attaching the Top in a later step.
-
Make the Legs
Cut four Legs to length from 2x2 pine boards, as shown in the cutting diagram. These don’t need any holes drilled. Once you have the Legs cut, sand all of the Legs and Rails smooth using 120-grit and then 150-grit sandpaper.
-
Assemble the Sides
Assemble the first side by securing two Legs to one Top Long Rail and One Bottom Long Rail using 2 1/2" coarse-thread pocket-hole screws, as shown. Make sure that the holes are oriented correctly. Then repeat this to assemble the other side, making sure that those holes are oriented correctly, as well. The two assemblies should “mirror” one another, so that the holes for the aluminum rods are aligned and facing each other.
-
Stain and Finish the Base Parts
Before you move any further with assembly of the base, it’s a good time to apply your final stain and/or finish to the base parts. It is much easier to finish these parts without the Rods in place. While the finish dries on your parts, you can work on the Hanging Rods.
-
Make the Hanging Rods
Now you can cut eight Hanging Rods to length from 1/4" aluminum rod. To do this, mark the length, and then cut the rods with a hacksaw to the length shown in the cutting diagram. Sand or file any burs off the end of each Hanging Rod. Then you can give the Hanging Rods a nice sheen using #0000 (super-fine) steel wool. You can do this by hand, but a faster, easier way is secure a Rod into a drill as you would a drill bit. Then, with the drill at a slow speed (to prevent the steel wool from becoming too hot), polish each Rod with the steel wool.
-
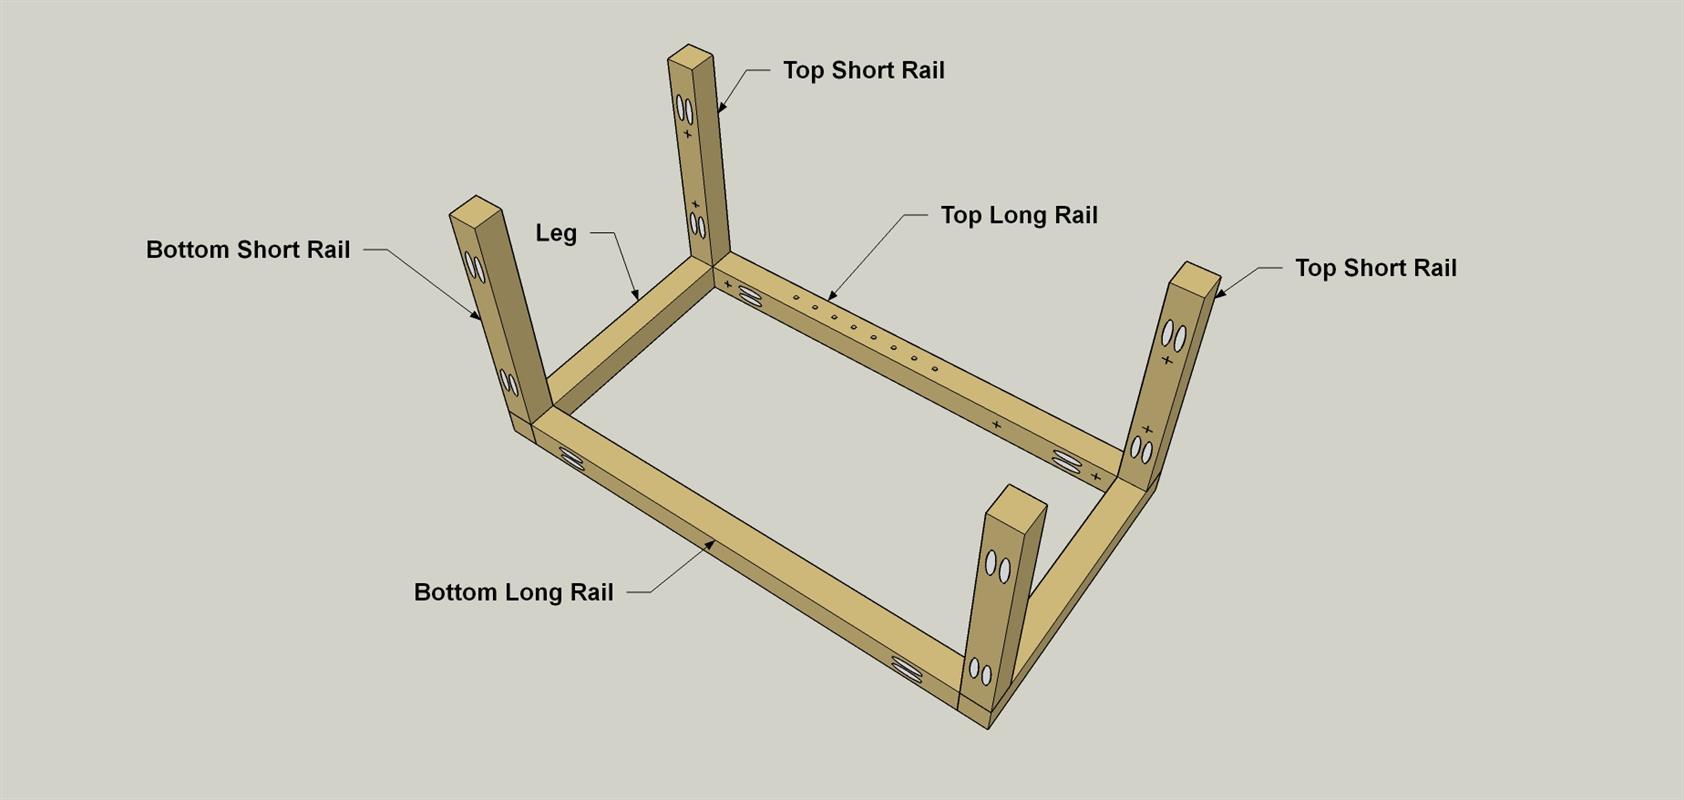
Attach the Short Rails
Now you can attach the four Short Rails to the Legs on just one of the side assemblies. Make sure that the two Short Rails that you drilled pilot holes in back in Step 1 are located at the top of the assembly. Attach the Short Rails using 2 1/2" coarse-thread pocket-hole screws.
-
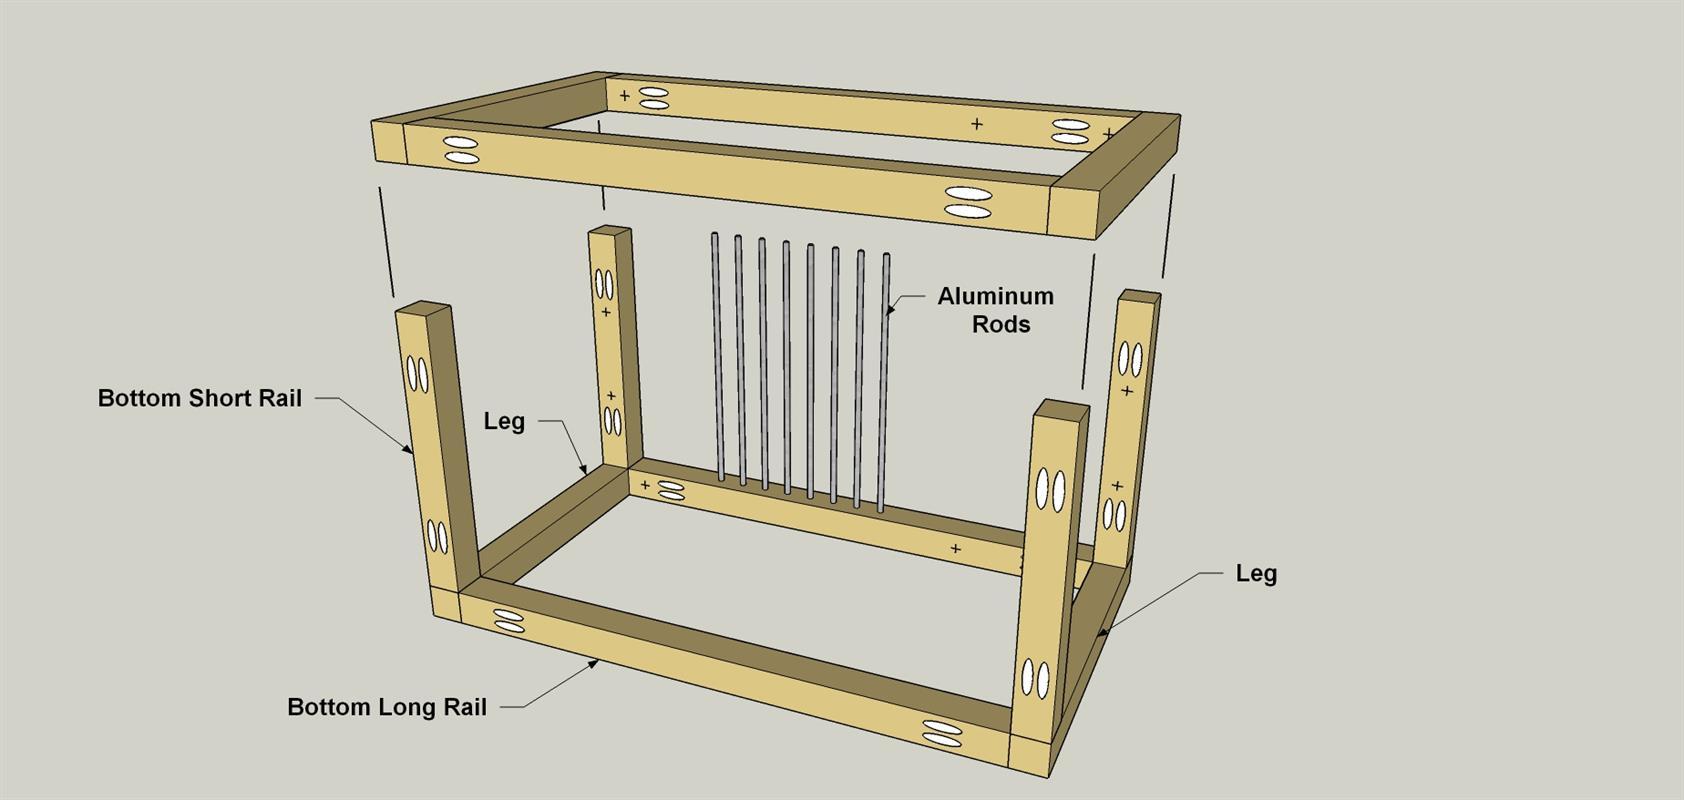
Complete the Base Assembly
Install the Hanging Rods in the holes on the side you added Short Rails to. Then add the second side assembly by inserting the Hanging Rods in the holes and pushing the second side against the Short Rails. Secure that side to the Short Rails using 2 1/2" coarse-thread pocket-hole screws.
-
Make the Top Boards
Cut three Top Boards to length from a 1x6 board, as shown in the cutting diagram. Set your pocket-hole jig for 3/4" thick material and, on just one of the Top Boards, drill pocket holes at the locations as shown.

-
Assemble the Top
Glue two of the Top Boards together and secure them using 1 1/4" fine-thread pocket-hole screws. Sand this panel and the other Top board. Then apply your final finish to the top, and let it dry.

-
Install the Top
With the Top panel and Top board face down on a work surface, lay the table base in place, and then secure the Top boards using 2" flat head wood screws.
