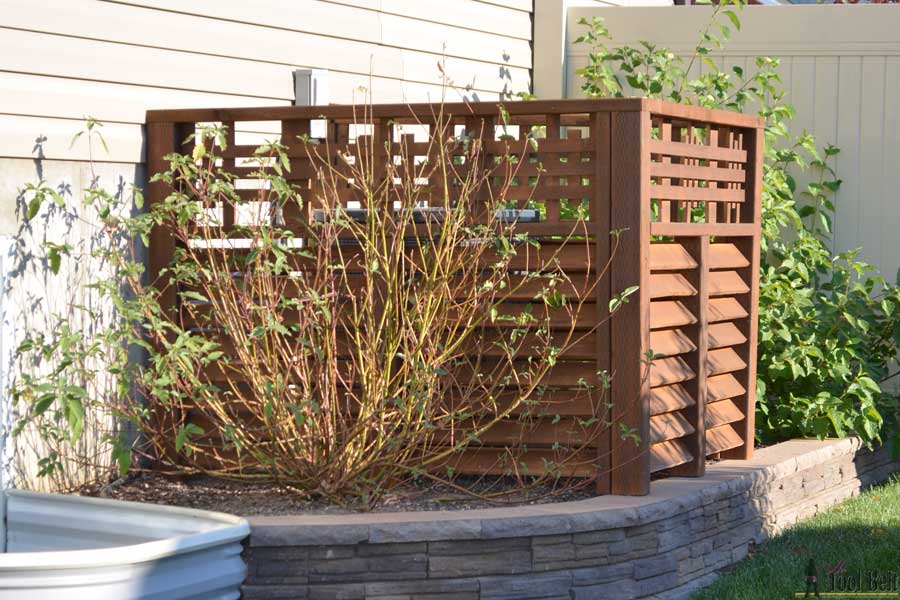
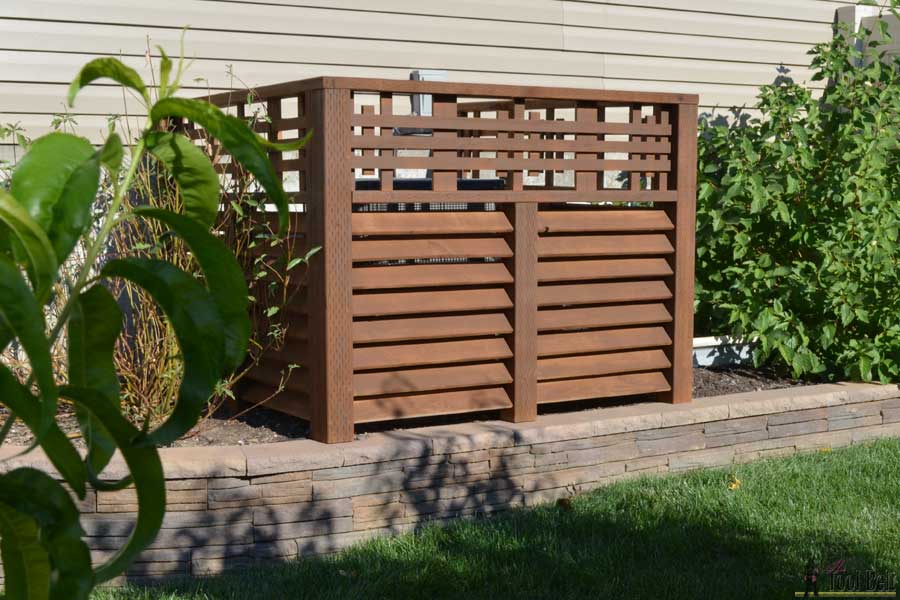
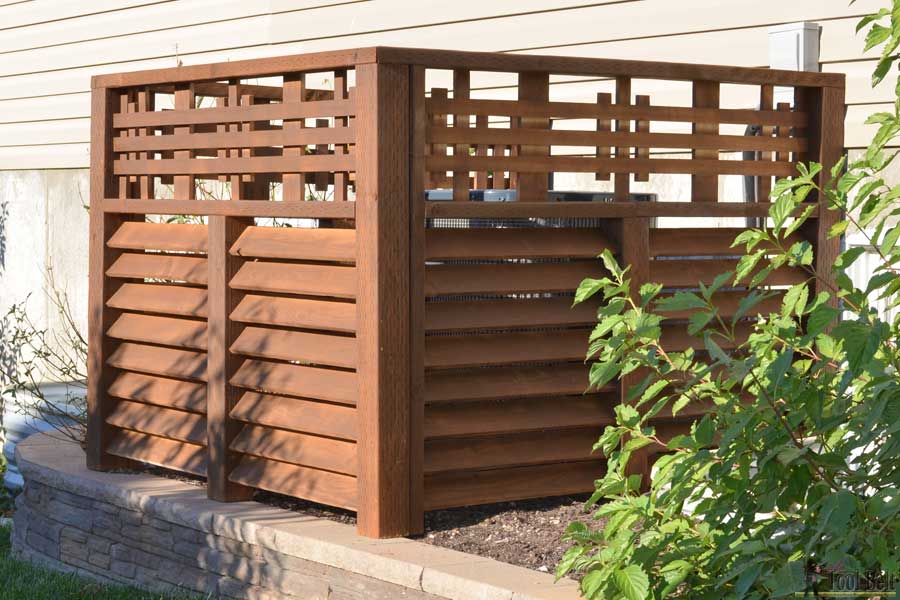
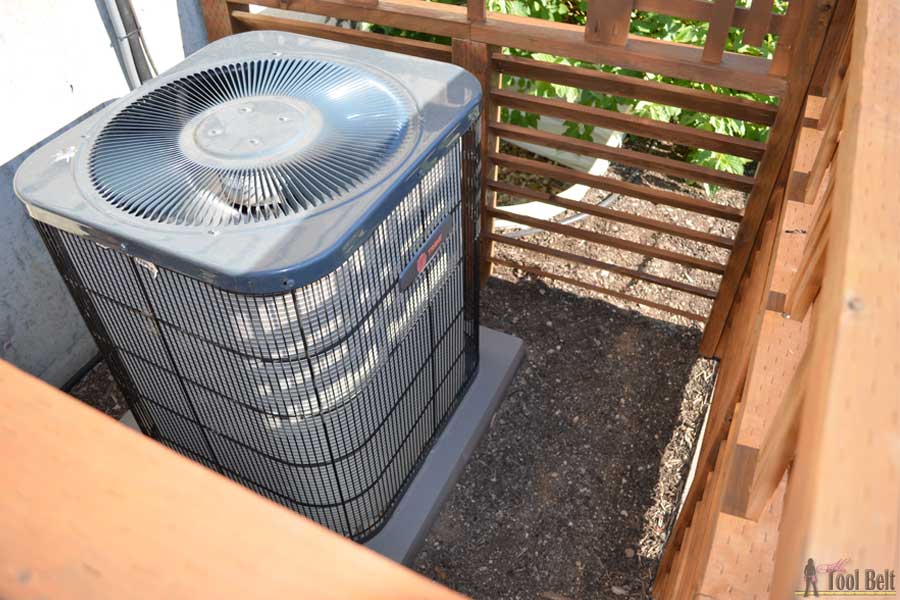


Cover up those unsightly air conditioning units or pool equipment with an outdoor wood louver privacy screen. The slats are angled to give a louvered look and allow for essential air flow to the A/C unit. Adjust the plans for your yard needs. The screen is robust, but movable if work is required on unit.
Tools
Kreg Tools


Other Tools
-
Miter Saw

-
Table Saw
-
Tape Measure
-
Clamps
-
Nail Gun
-
Shop Vacuum
Materials
Wood Products
- 3 Board , 4x4 , 96"
- 5 Board , 2x4 , 96"
- 17 Board , 1/2" x 3 1/2" (cedar pickets) , 72"
- 3 Board , 1/2" x 5 1/2" (cedar pickets) , 72"
Hardware & Supplies
- 40 2 1/2" pocket hole screws
- 192 1" pocket hole screws
- 1 Wood glue
- 1 Sandpaper
- 1 Stain/protective finish
- 100 1" brad nails (18 ga)
Directions
-
Mark for louvers
Cut the boards according to the cut list/diagram.
Mark the inside/mating face of the corner posts and panel ends and both faces of the center posts for the slat/louver angle. Remember to mirror each post/end when making the marks. Make the marks starting from the bottom.
On the front mark: 2 1/4", 5 1/2", 8 3/4", 12", 15 1/4", 18 1/2", 21 3/4", 25".
On the back mark: 4 3/4", 8", 11 1/4", 14 1/2", 17 3/4", 21", 24 1/4", 27 1/2".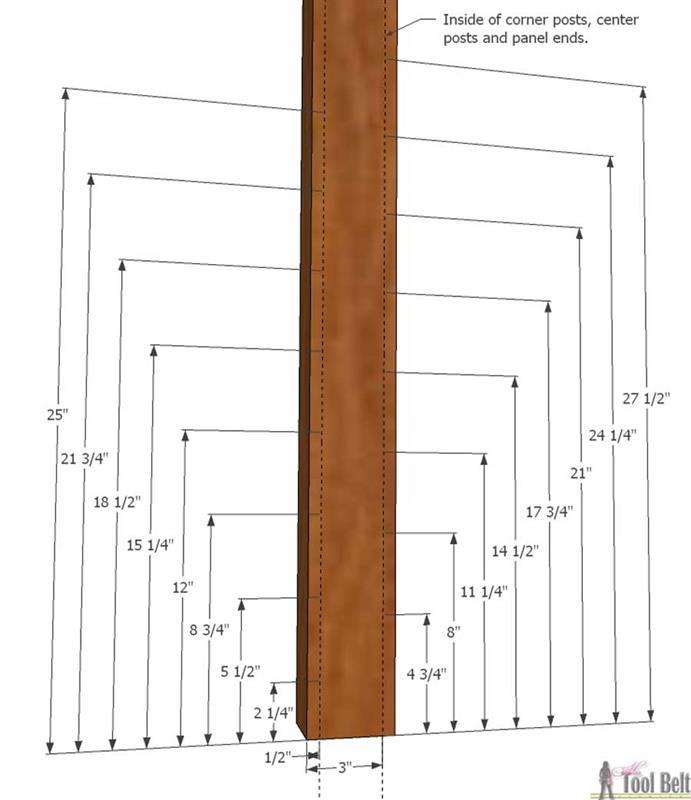
-
Assemble front frame
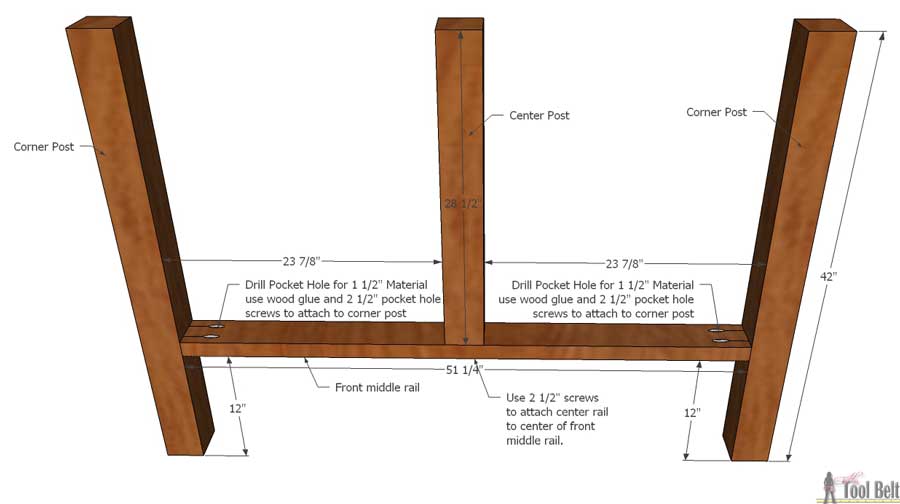
In both ends of the front middle rail, drill pocket holes for 1 1/2" material. Mark 12" from the top of both corner posts and secure the front middle rail to the corner posts with 2 1/2" pocket hole screws.
Mark the center of the front middle rail and secure a center post with 4 - 2 1/2" screws.
(Note: diagram shows frame upside down.)
-
Assemble side frames
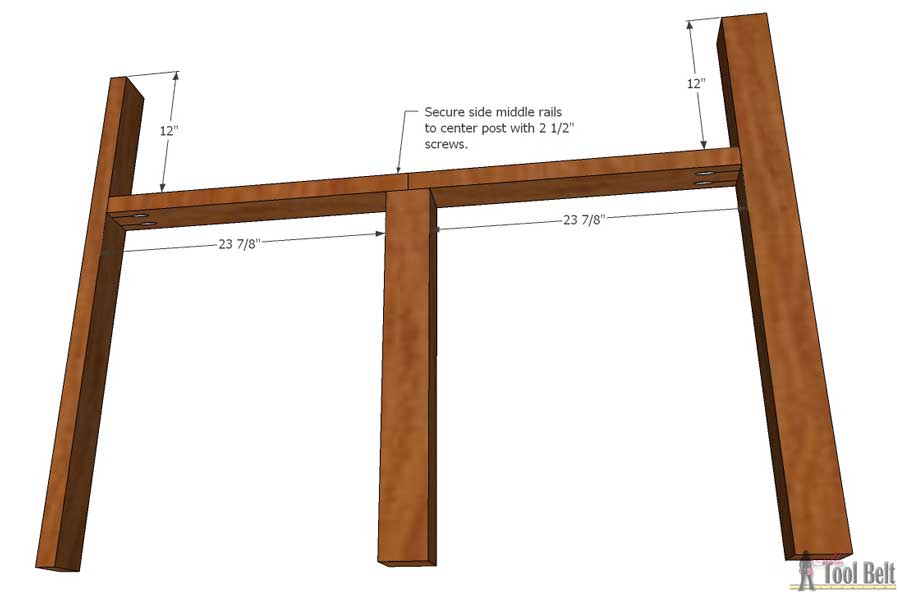
In one end of each side middle rail, drill pocket holes for 1 1/2" material. Mark 12" from the top of the back corner posts and panel end. Secure the side middle rails to the corner post/panel end with 2 1/2" pocket hole screws.
Mark the center of a center post and secure the side middle rails to the center post with 2 - 2 1/2" screws in each side middle rail.
-
Attach louver slats
Drill pocket holes for 1/2" material in both ends of each louver slat. If the louver slats need to be sanded, do it before assembly.
With the frame assembly upside down, secure each louver slat to the corner/center post with 1" pocket hole screws. Start with the 'bottom' and work up. Line up the corners of the louver slat to the marks made earlier.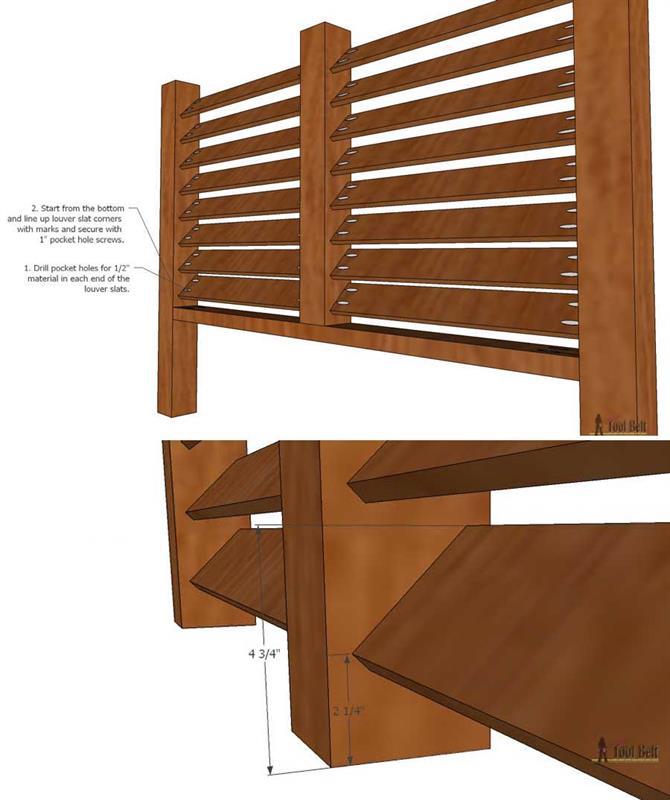
-
Add trellis
Drill pocket holes for 1/2" material in each end of the wide vertical trellis pieces. Drill pocket holes for 1/2" material in the sides of 6 narrow vertical trellis pieces. Inset the trellis pieces about 1" from the back of the rails. Attach a narrow vertical trellis piece with pocket holes on each end and secure with 1" pocket hole screws. Measure and mark 12 3/4" from each end and secure a wide vertical trellis piece. Attach the front/side top rail in place with 2 1/2" screws. On the side top rails make the back flush with the corner. Use a brad nailer and attach the horizontal trellis pieces, centering the middle one and spacing the other two 1". Space the narrow vertical trellis pieces 1" from each other.
(Repeat for each panel)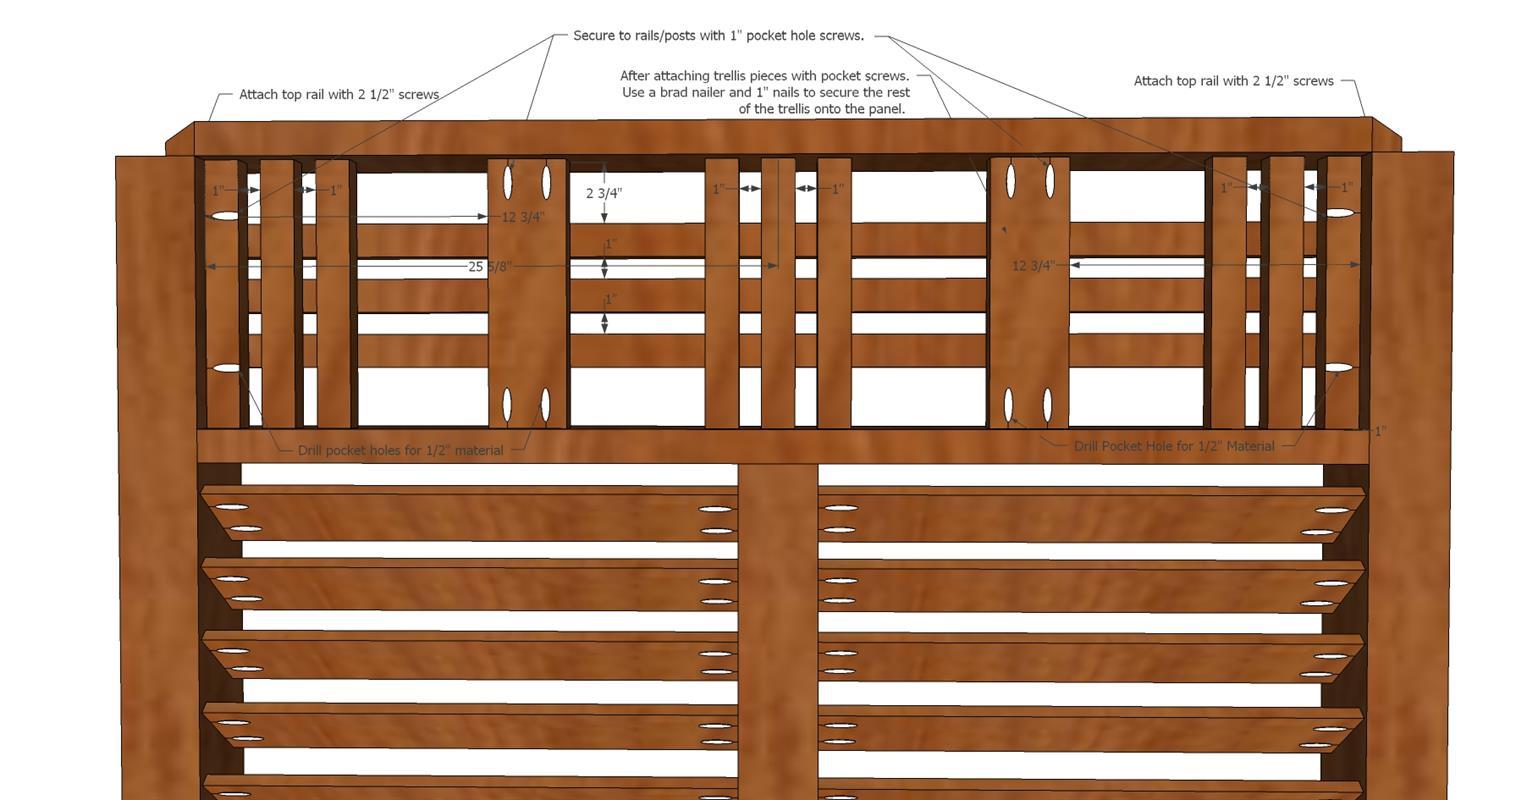
-
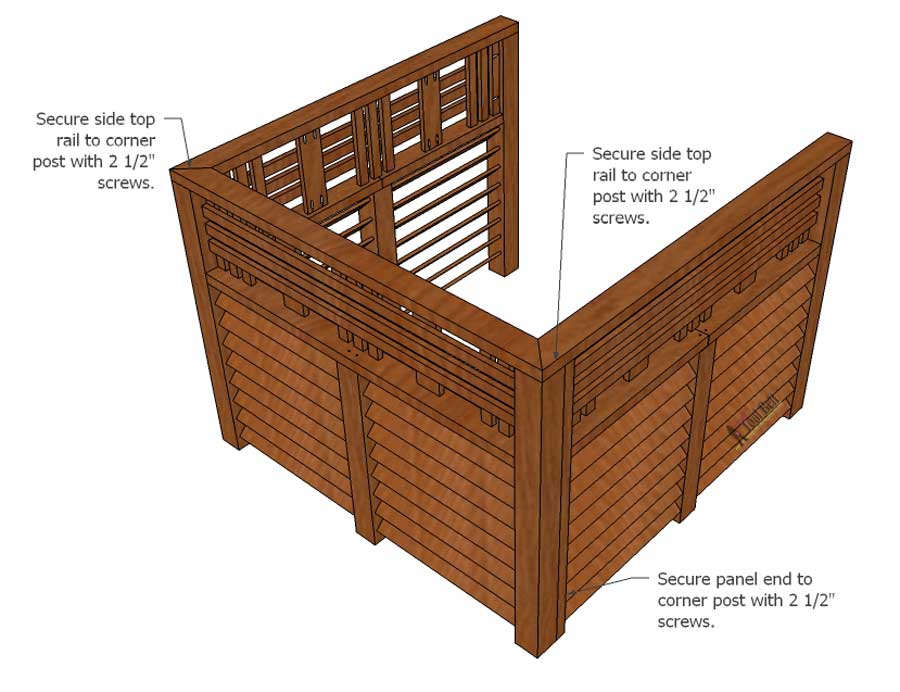
Assemble panels
Use 2 1/2" screws to attach the panel ends to the corner posts of the front panel. Secure the side top rails to the corner posts with 2 1/2" screws.