

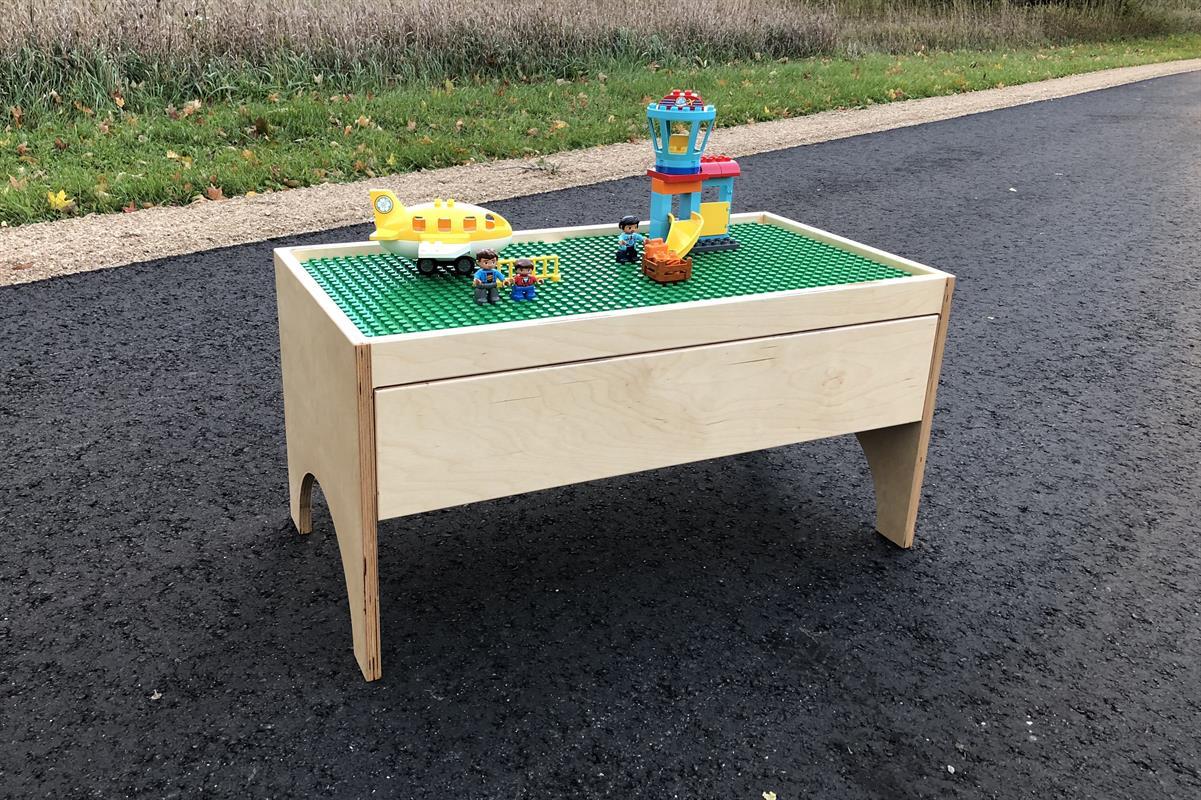
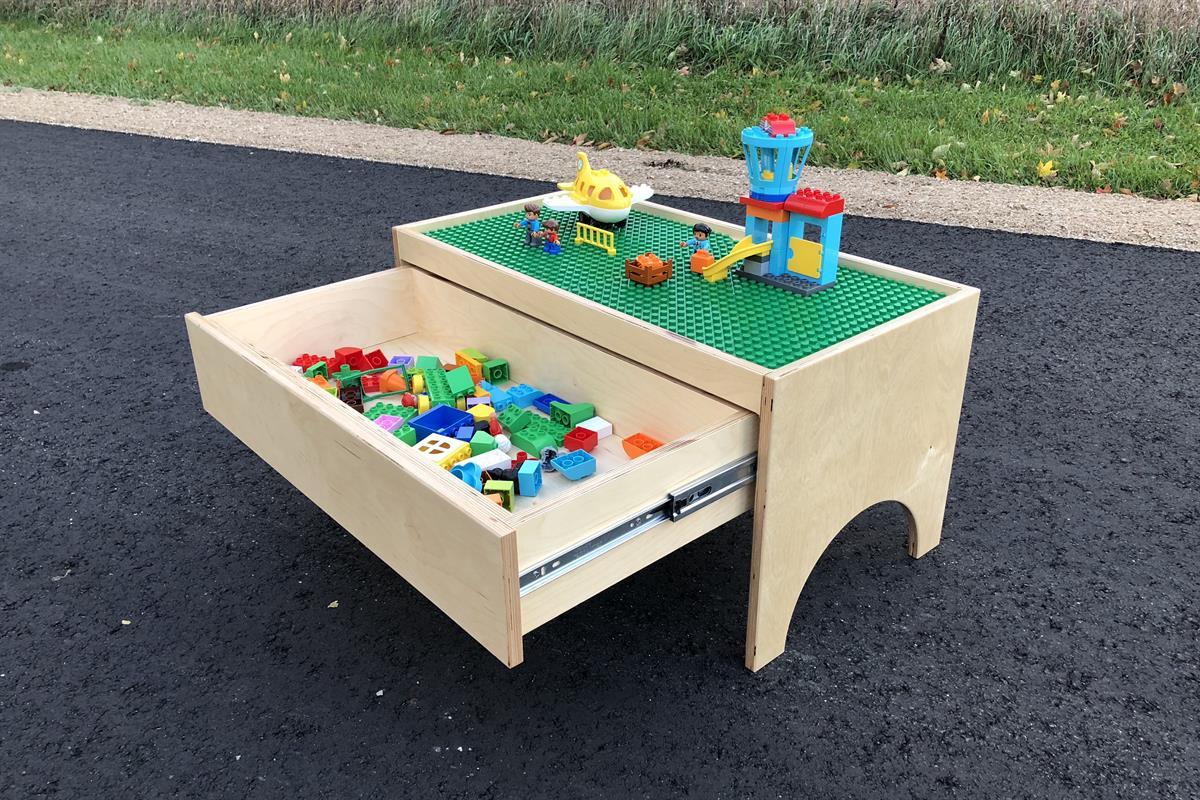
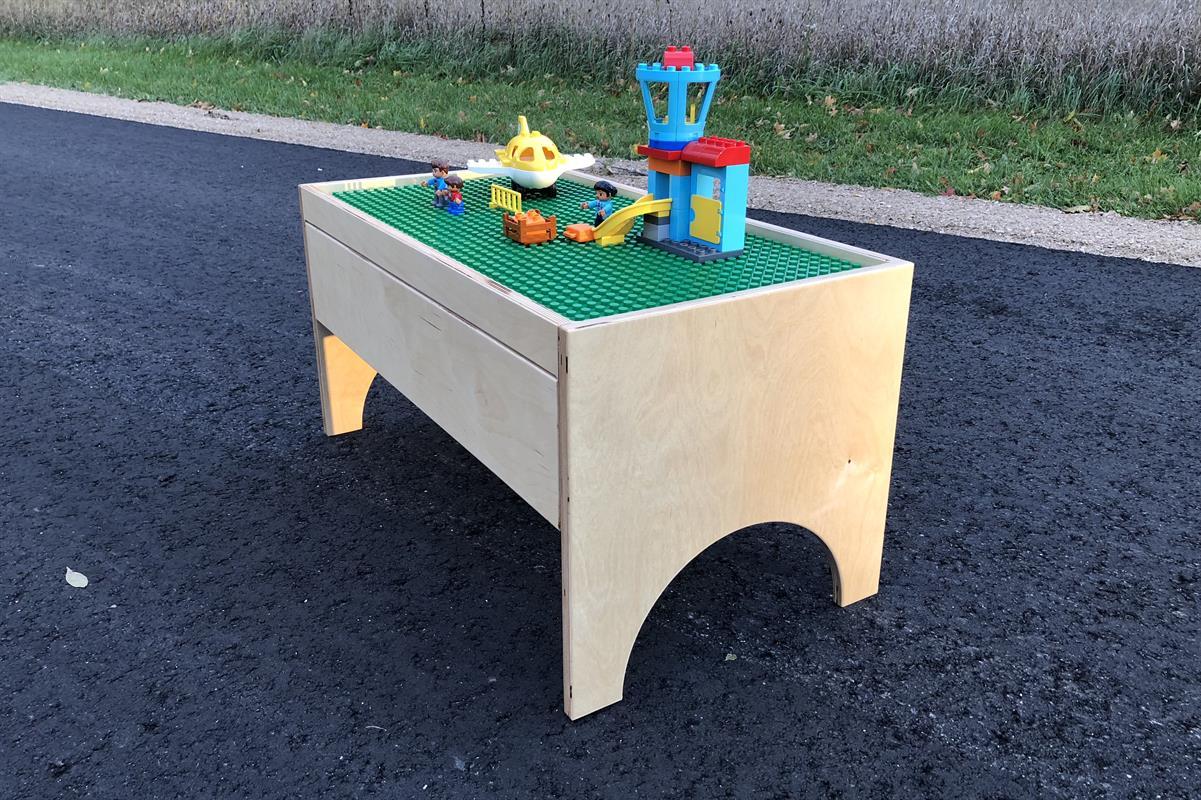


I built this table for my kids (ages 4 and 2). It is designed to fit two of the Duplo build plates. There is a big drawer for storing Lego when not in use. It is a perfect height for small children. It can be built in a weekend and only requires a small amount of materials.
Tools
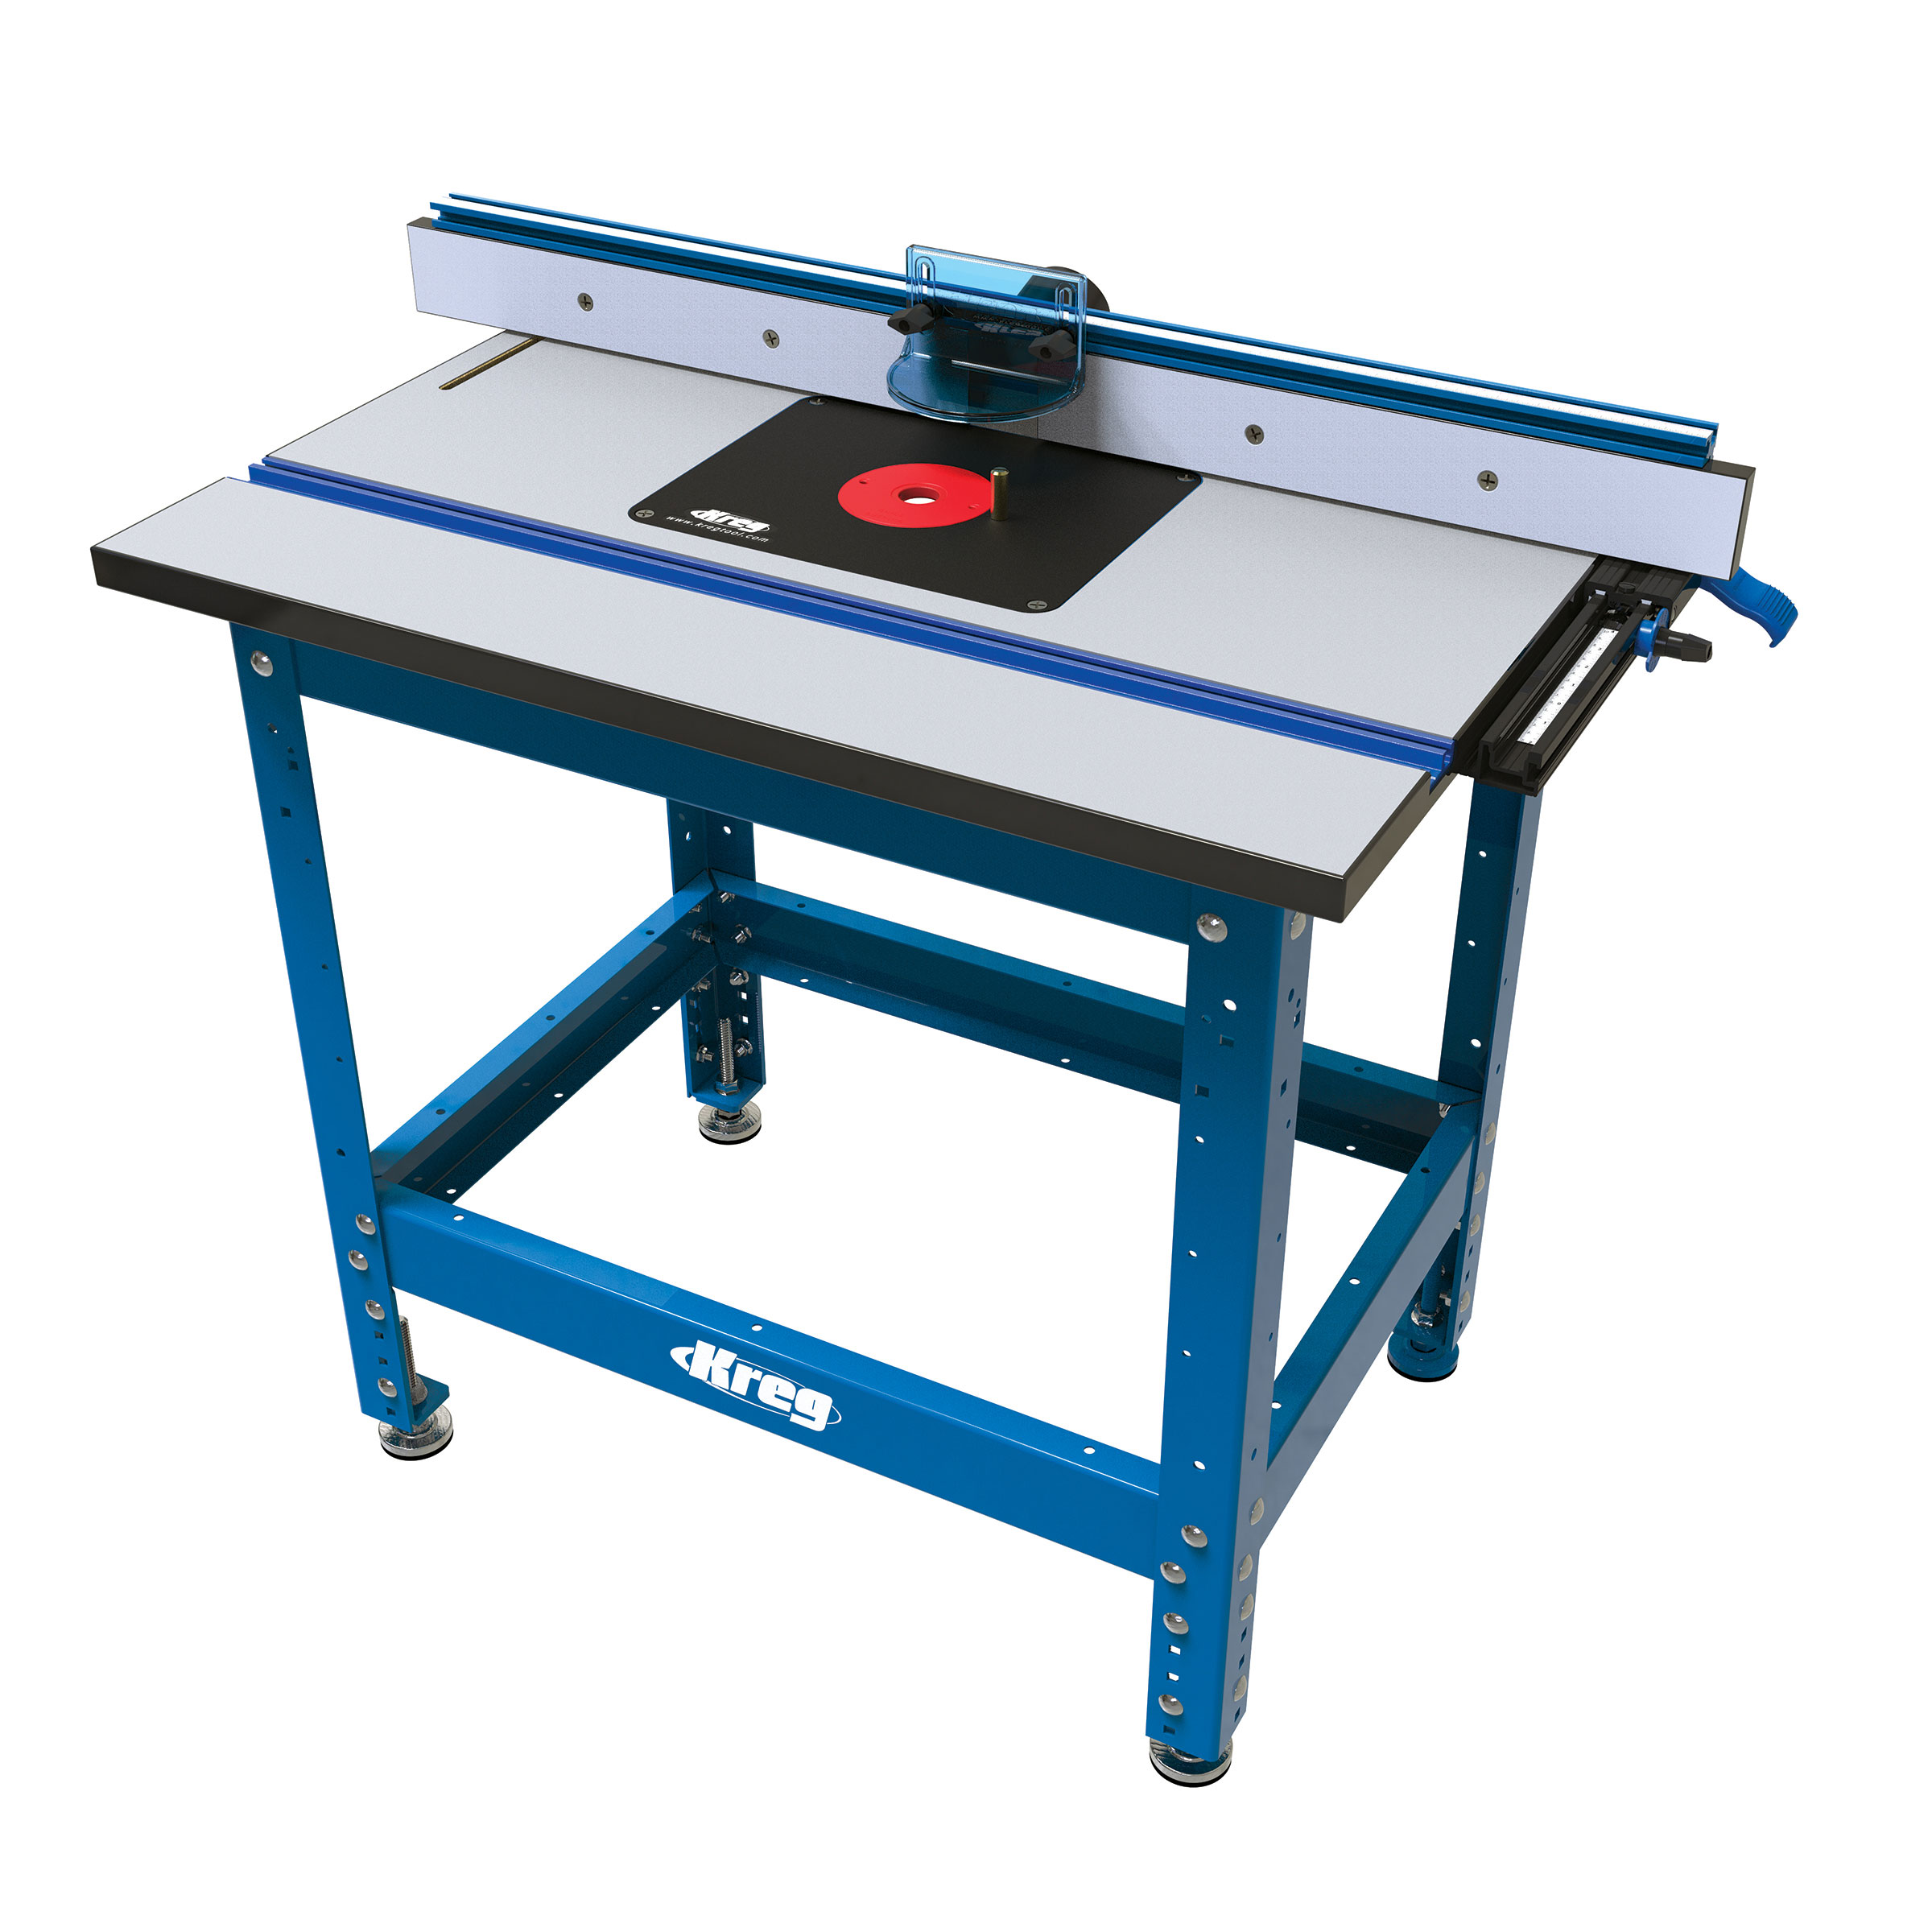
Kreg Tools


Other Tools
-
Miter Saw

-
Square
-
Table Saw
-
Tape Measure
-
Track Saw
-
Circle Template
-
Shop Vacuum
Materials
Wood Products
- 1 Plywood , 3/4" Thick , Half Sheet
- 1 Plywood , 1/4" Thick , Quarter Sheet
Hardware & Supplies
- 1 Box of 1-1/4” Kreg Screws
- 1 Set of 14” full extension drawer slides - Soft Close
- 2 15” Duplo Lego Build Plate
Directions
-
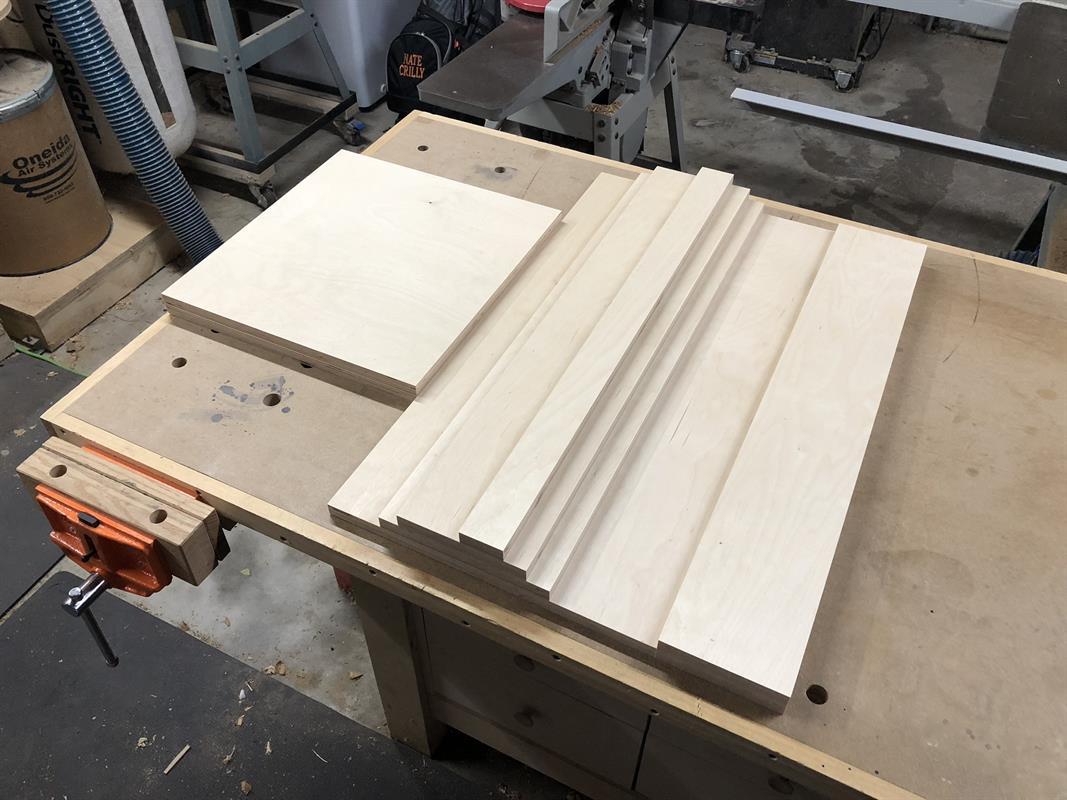
Cut Table Parts to Size
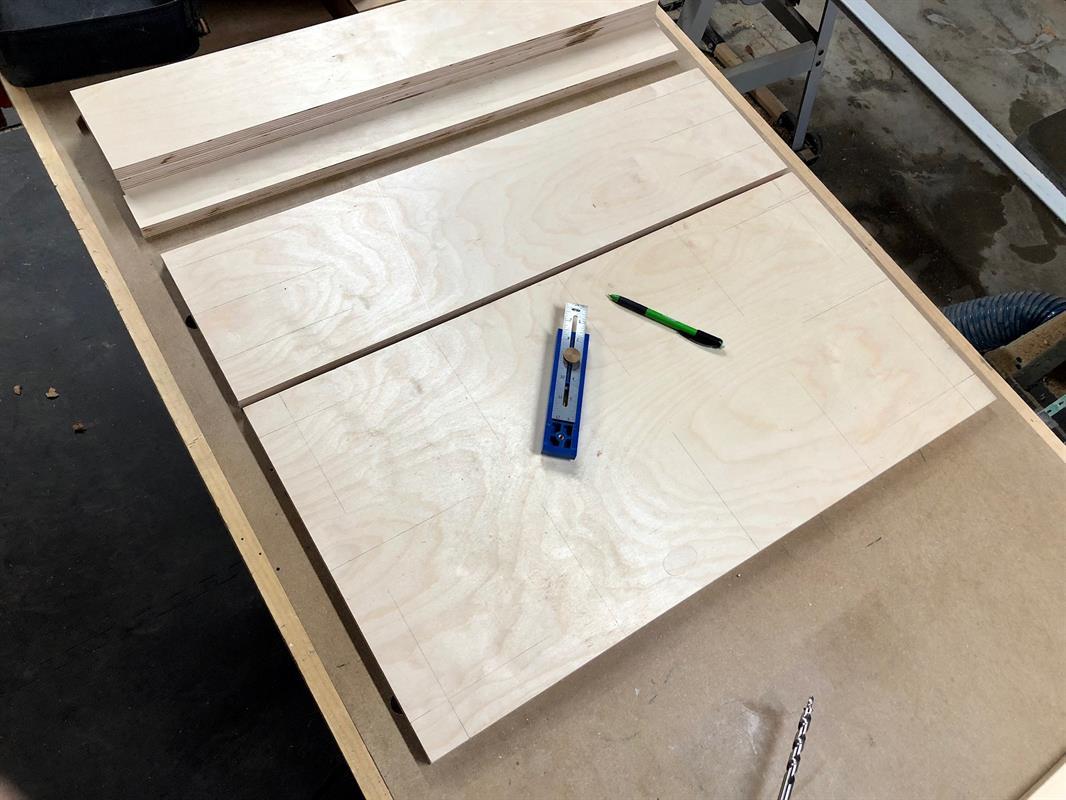
Using the cut list and diagram, cut all of the parts for the table base to size. The drawer front and back should be cut to width but left a little long until later. Also, the drawer bottom will be cut to size later as well. There is a PDF in the extras section with printable plans that includes a materials list, cut list, cutting diagrams, and measured drawings.
-
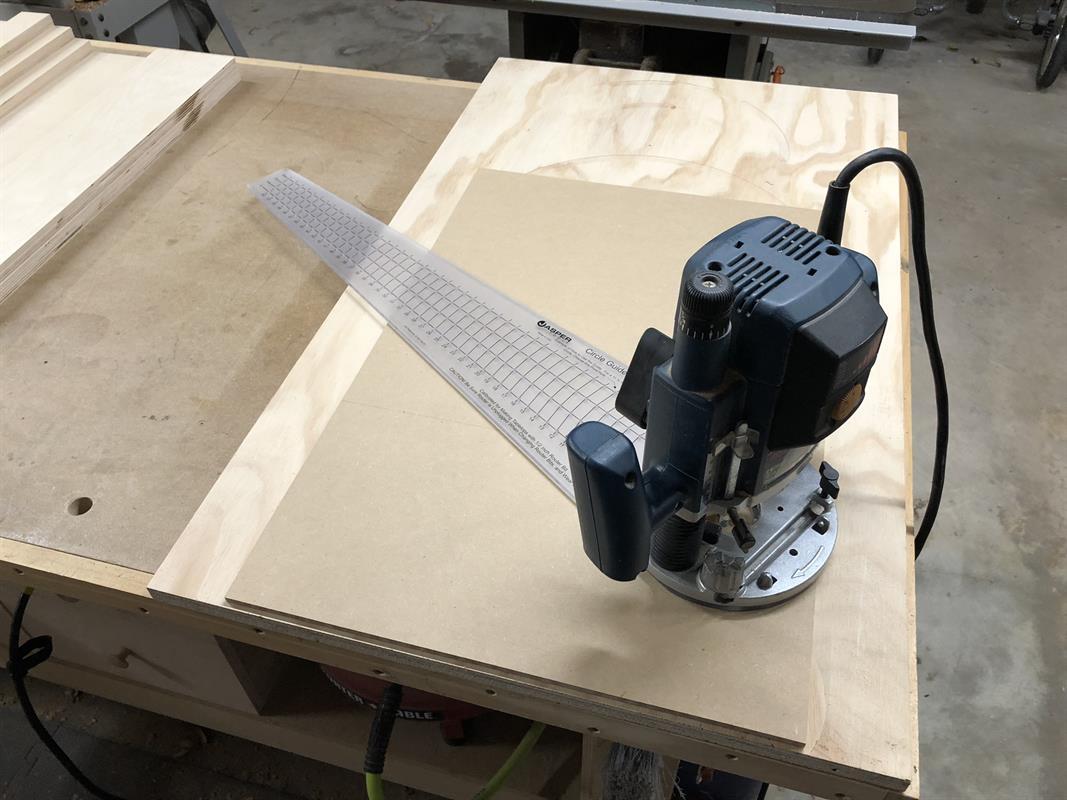
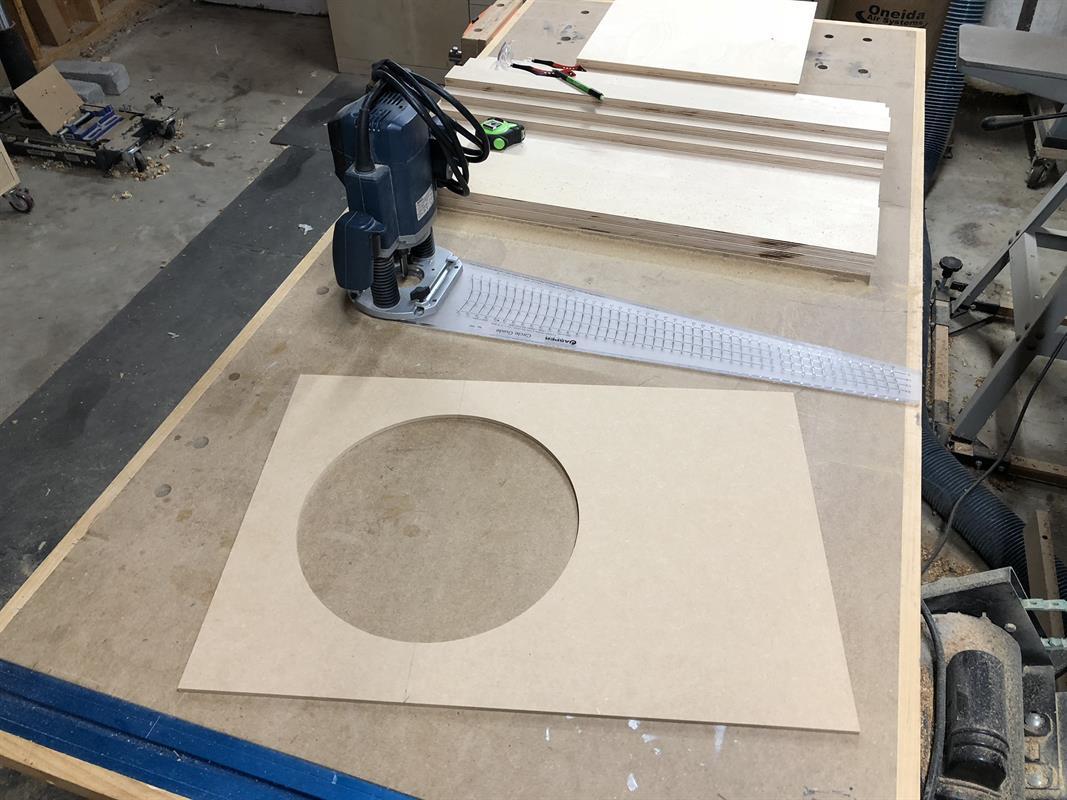
Making the Leg Template - Step 1
I chose to make a decorative half-circle cutout in the ends, but this step is optional. You could do this with a jigsaw and some sanding, but I went with a router template. This will ensure accurate and repeatable results. Save the template because you will definitely be asked to make more once everyone sees what you’ve built! I used 1/4” mdf for the template stock. It is cut to the same width as the end pieces. I start by cutting a 12” diameter circle out of the center using a circle jig and plunge router.
-
Making the Leg Template - Step 2
Here is the template with the circle cut out. Next, crosscut the template through the centerline of the circle, leaving you with a template that is the same dimensions as the end pieces. There will be a half-circle cutout at the bottom. You will see the completed template in the next step.
-
Making the End Pieces - Step 1
Use the template to mark out the circular cutouts at the bottom of each end piece.

-
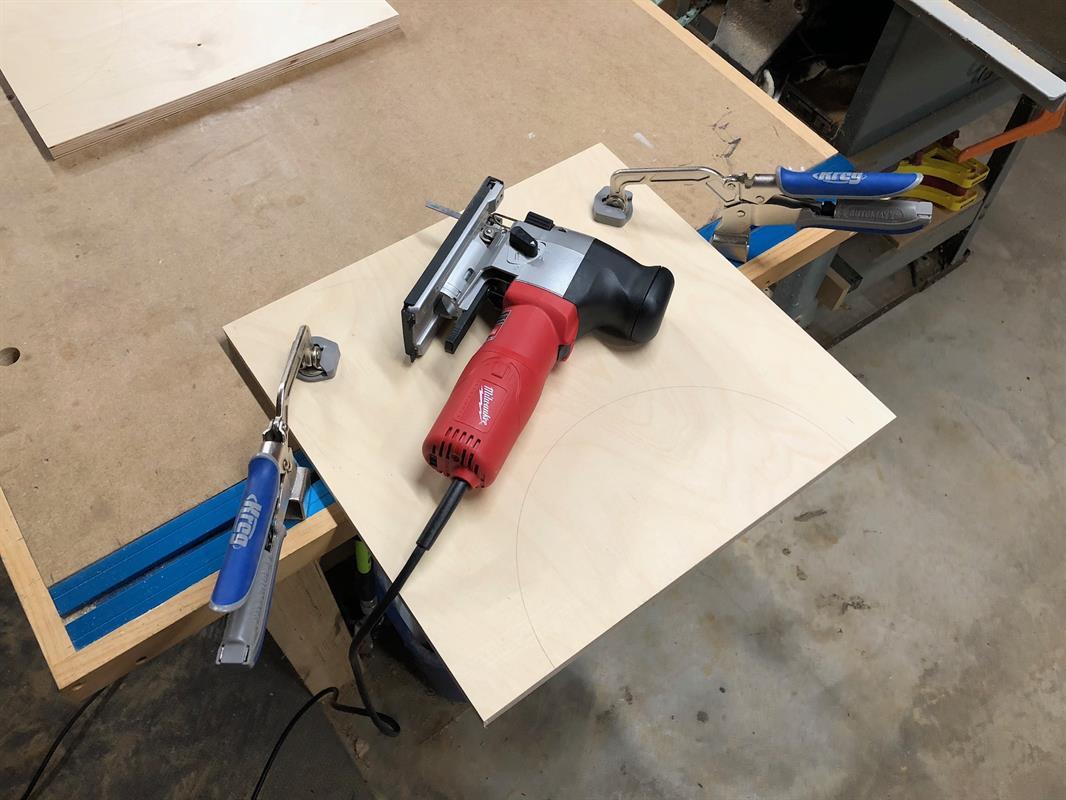
Making the End Pieces - Step 2
Using a jigsaw, cut out the majority of the waste. Be sure to stay slightly inside your line. The rest will be cleaned up in the next step.
-
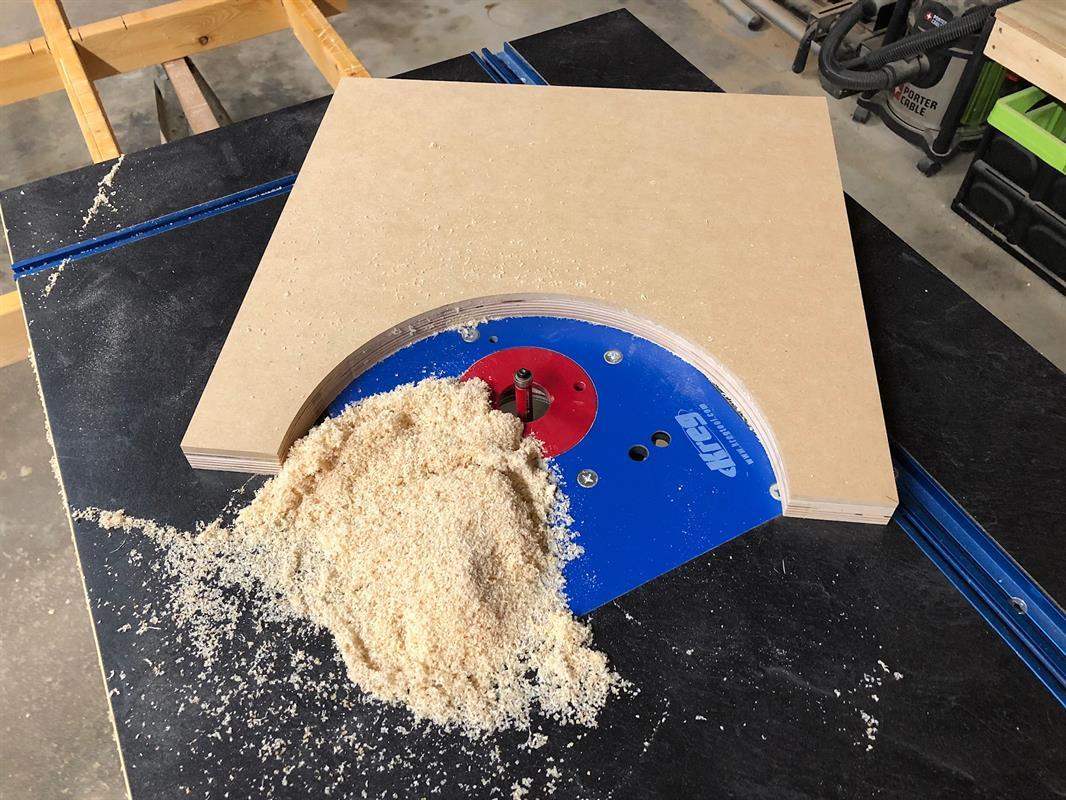
Making the End Pieces - Step 3
Attach the template to the end piece with two-sided tape. I use carpet tape because it is readily available, cheap, and strong enough to hold the template securely. Using a flush trim bit with bearing, route along the bottom of the template to clean up the circular cutout and leave a perfect finish. I prefer a router table for this operation, but a handheld router will work as well. Remove the template with a putty knife and repeat for the second end piece.
-
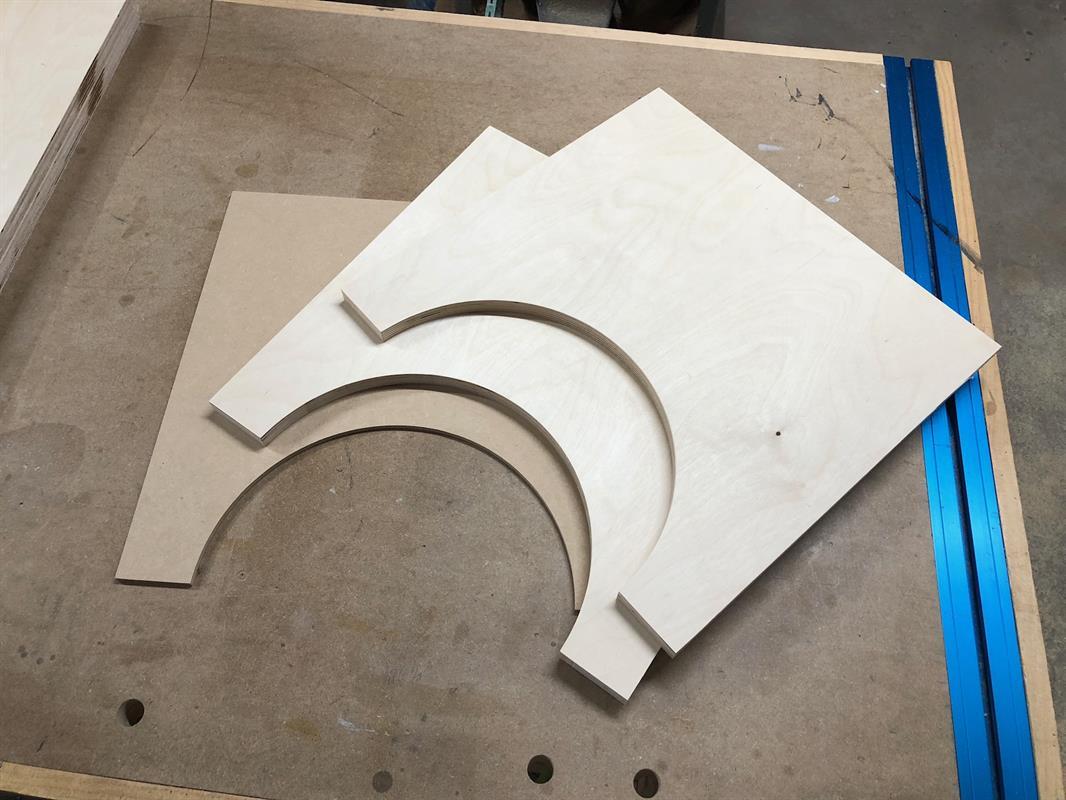
Making the End Pieces - Step 4
You should now have two end pieces with perfect half circles cut from the bottom. I really like the look of the cutout and how it makes the table appear to have four feet. If you don’t like the circle, skip it. This is also a good opportunity to make it your own and design a different profile for the end pieces. I’d love to see what you come up with!
-
Table Base Joinery - Step 1
The beauty of this table is its simplicity and how quickly it goes together. All parts are joined with pocket holes. Start by laying out the location of the pocket holes on the bottom of the Top and the back of the Back Trim. The Top gets 5 pocket holes evenly spaced along each long edge and 3 along each short edge. The Back Trim gets 3 on each short end, but they are offset a little. The first one starts 2” from the top edge and the next is 1” from the bottom edge. The last is halfway in between. A later step will show the boards after the holes are drilled.
-
Table Base Joinery - Step 2
I recently upgraded to the Kreg K5, and I can’t recommend it enough! Tons of great features and so easy to setup and use. However, any Kreg Jig will work. I definitely recommend hooking up a shop vac. It reduces tear out, keeps the jig from clogging, and reduces heat build up on the drill bit. Also, a corded drill is a must when drilling a lot of holes. They are lighter than battery powered drills and have tons of power. They are also pretty cheap.

-
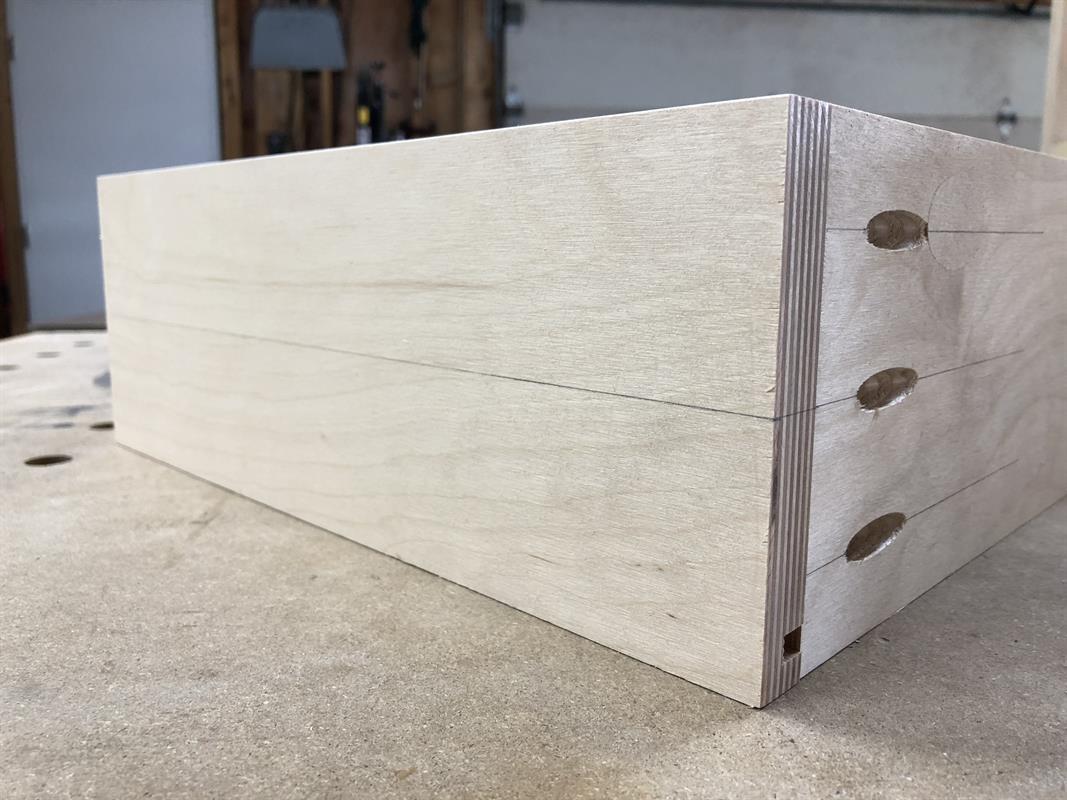
Table Base Joinery - Step 3
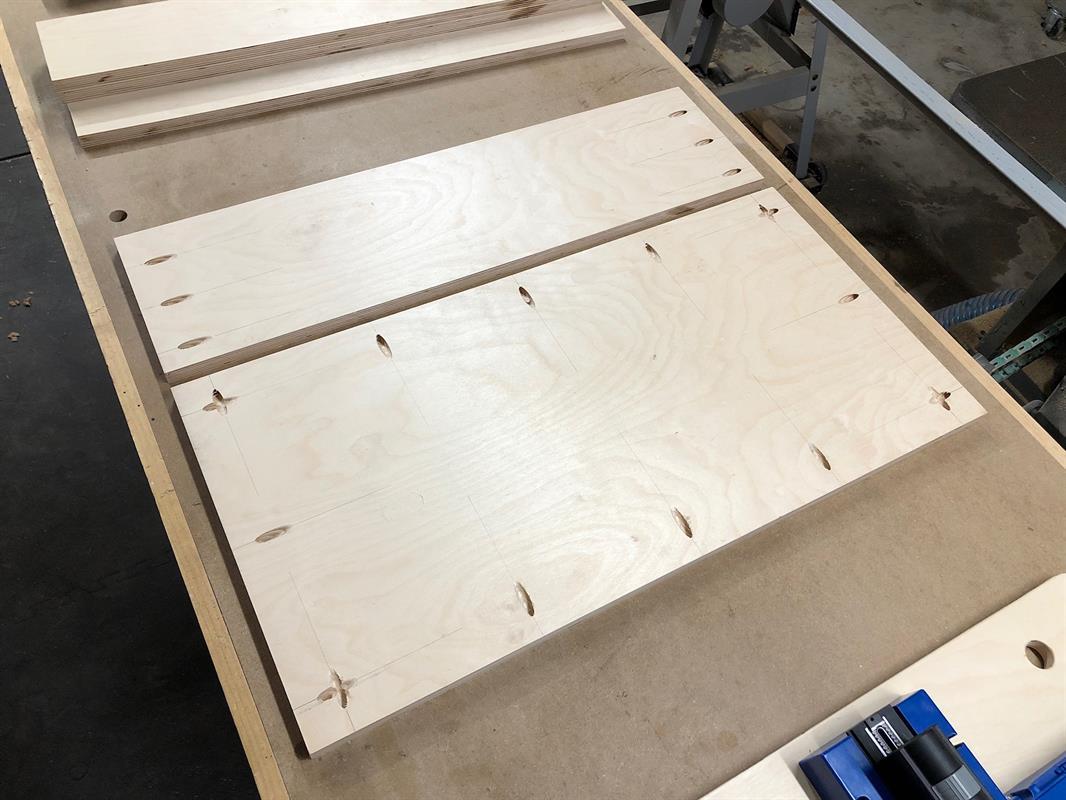
Here is a look at the pocket hole joinery before assembly.
-
Assemble the Base - Step 1
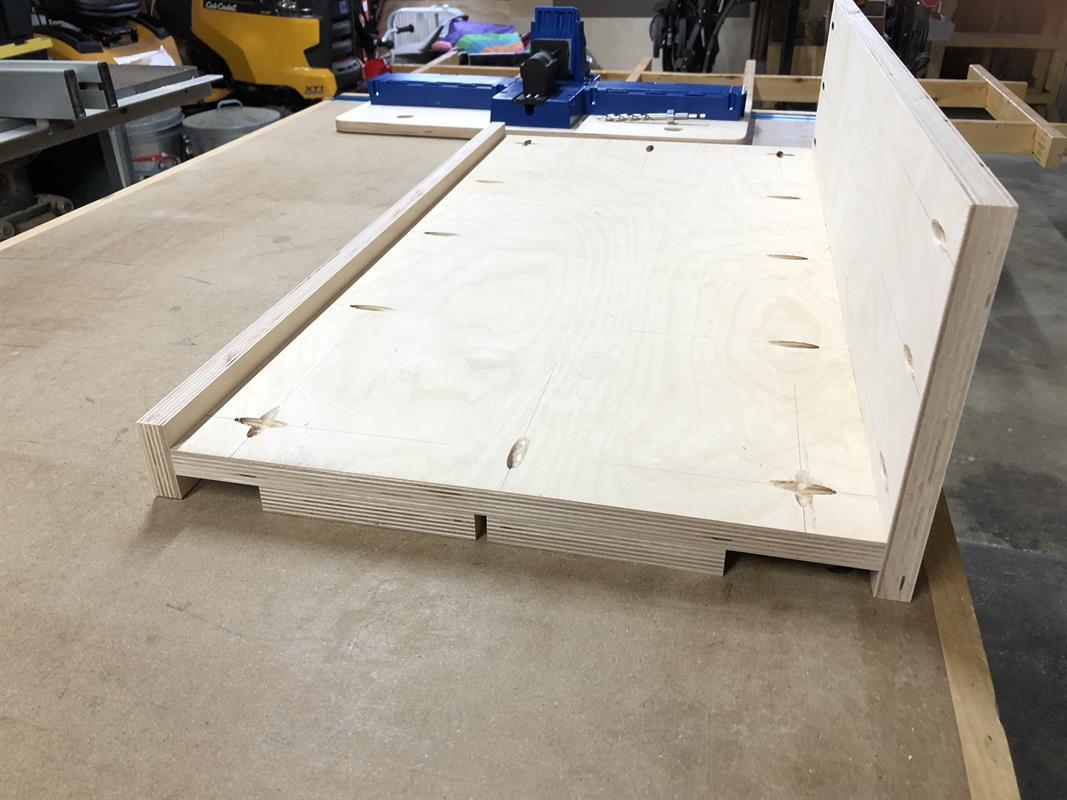
Using scraps as spacers, lay the Top face down on your bench. The Front Trim goes along one long edge and The Back Trim, pocket holes facing in, along the other. You can start to see how the pocket holes will be used to join all the parts of the table base.
-
Assemble the Base - Step 2
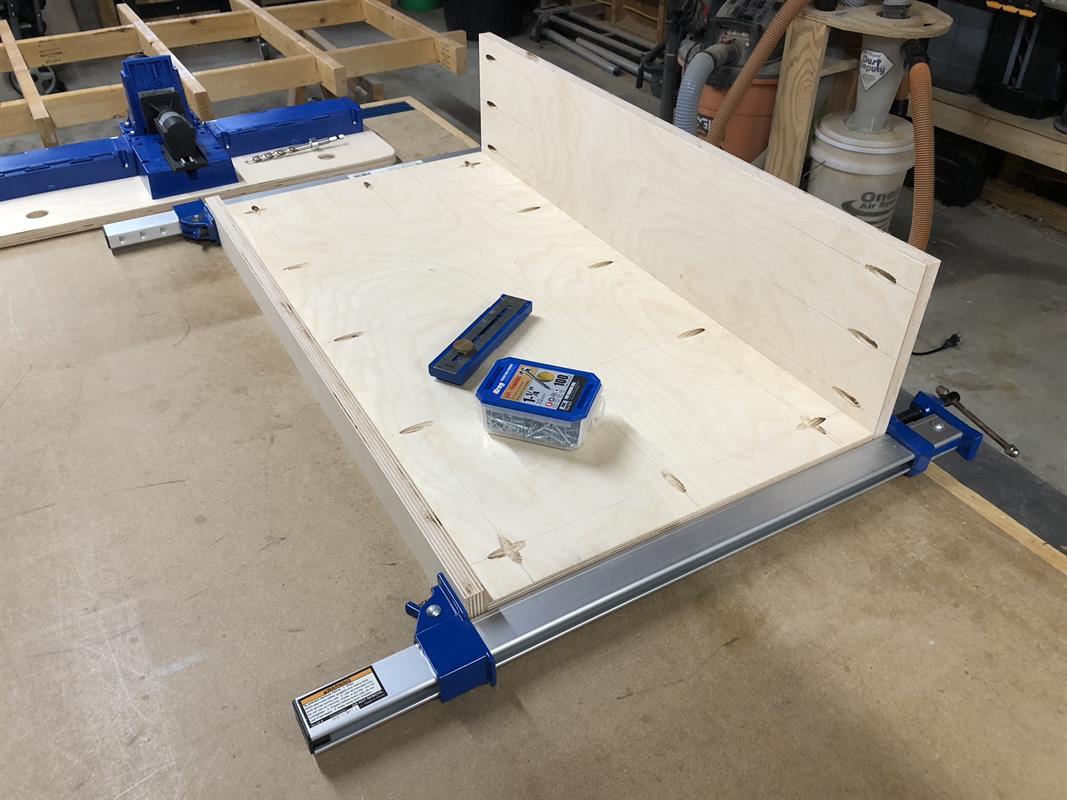
I always use clamps when adding pocket hole screws. They really help to keep everything aligned and prevent slippage when driving the screws. One clamp at each end is enough. Attach the Front and Back to the Top with 5 pocket screws in each.
-
Assemble the Base - Step 3
Clamp an End piece on either end of the assembly created in the last step. Drive pocket screws into the End Pieces through all remaining pocket holes. There should be three in the Top and three in the Back for each End piece.

-
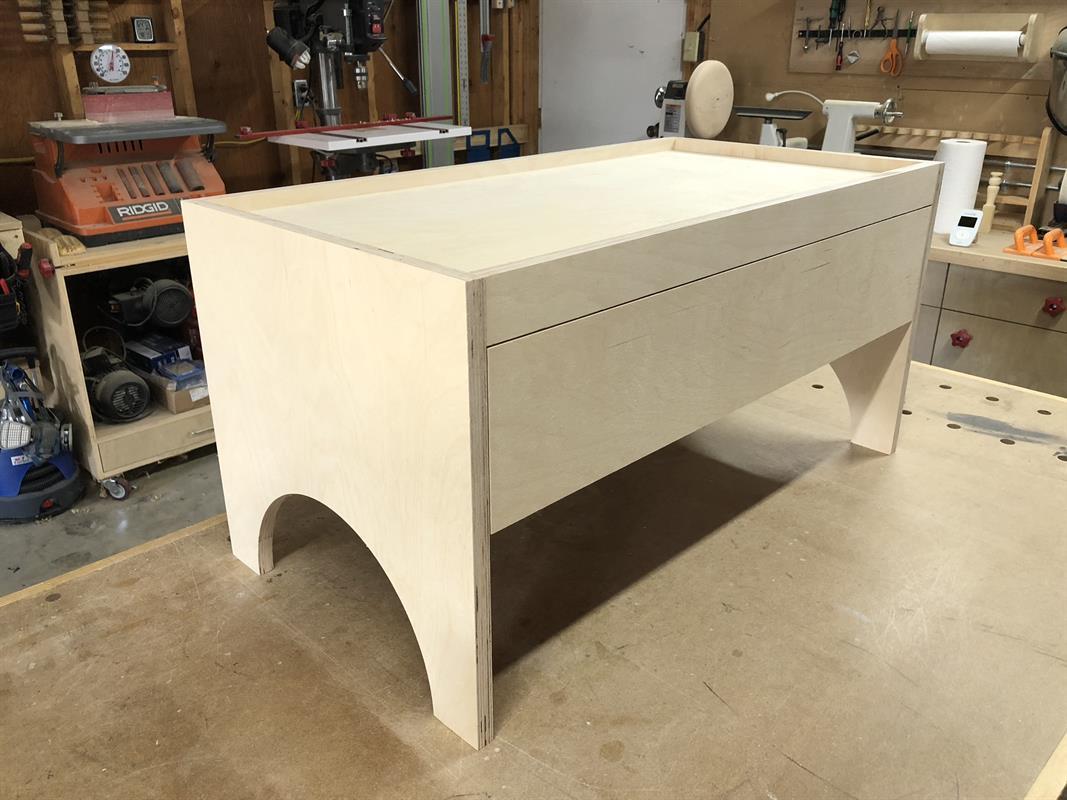
Assemble the Base - Step 4
Remove the clamps and flip it over. The table base is now complete! Next up is the drawer.

-
Build the Drawer - Step 1
The drawer sides should already be cut to 14” long. You should now calculate the final length for the drawer front and back. Start with 30-1/4”, the width of the drawer opening. From that, subtract the thickness of both drawer sides and the thickness of both full extension slides (most call for 1/2” for each slide). My plywood was actually only 11/16” thick, so be sure to measure yours because most plywood is undersized. Here is the equation for mine: 30-1/4” - 11/16” - 11/16” - 1/2” - 1/2” = 27-7/8”. I always subtract an additional 1/16” so the drawer slides easily and is not too tight, so my final measurement for the front and back is 27-13/16”. Cut these parts to final length. Sorry I forgot to take a picture!
-
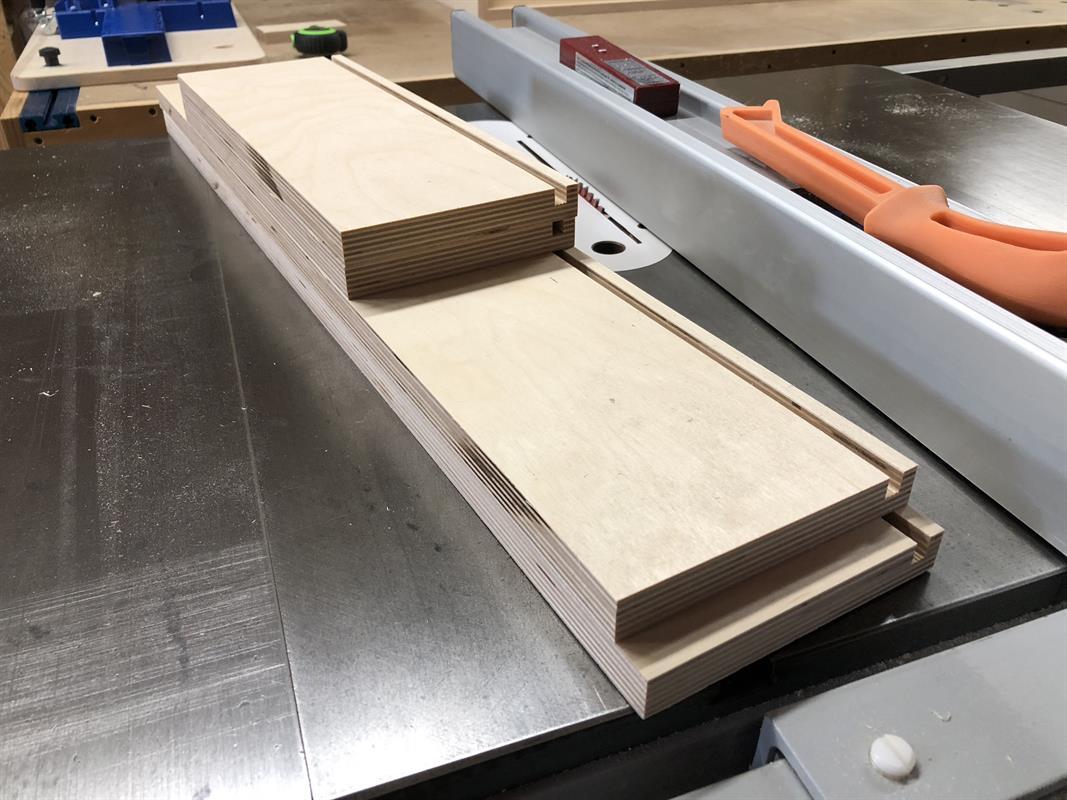
Build the Drawer - Step 2
Next, we need a groove along the bottom inside edge of all four drawer parts to accept the drawer bottom. I did this at the table saw. I set the blade height to 3/8” and set the fence to 1/4”. Run each board over the blade then move the fence slightly further from the blade, making additional passes until you get a nice fit for your bottom panel. Mine was just under 1/4” thick. If you don’t have a table saw, you could also just cut the bottom panel bigger and nail or screw it to the bottom of the drawer after it is assembled.
-
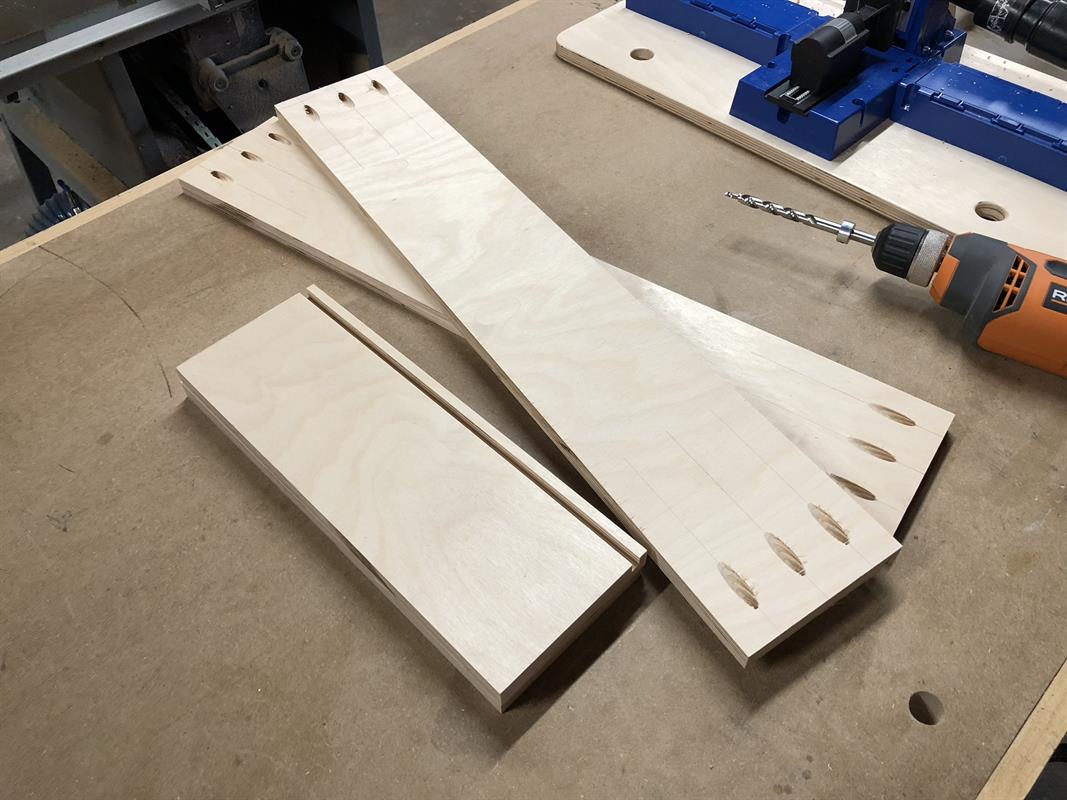
Build the Drawer - Step 3
The drawer front and back get pocket holes on both ends of their outside faces. Be sure to orient them so they do not interfere with the grooves you just cut in the last step. 3 on each end is more than enough.
-
Build the Drawer - Step 4
Next, measure and cut the bottom panel to size. Again, I forgot to take a picture...sorry. The best way to take this measurement is to clamp the drawer parts up and measure each dimension, including the depth of the groove on either side. It can change slightly from the plans dependent on how deep you cut the grooves and how thick your plywood is. Mine was 28-9/16” x 13-3/8”.
-
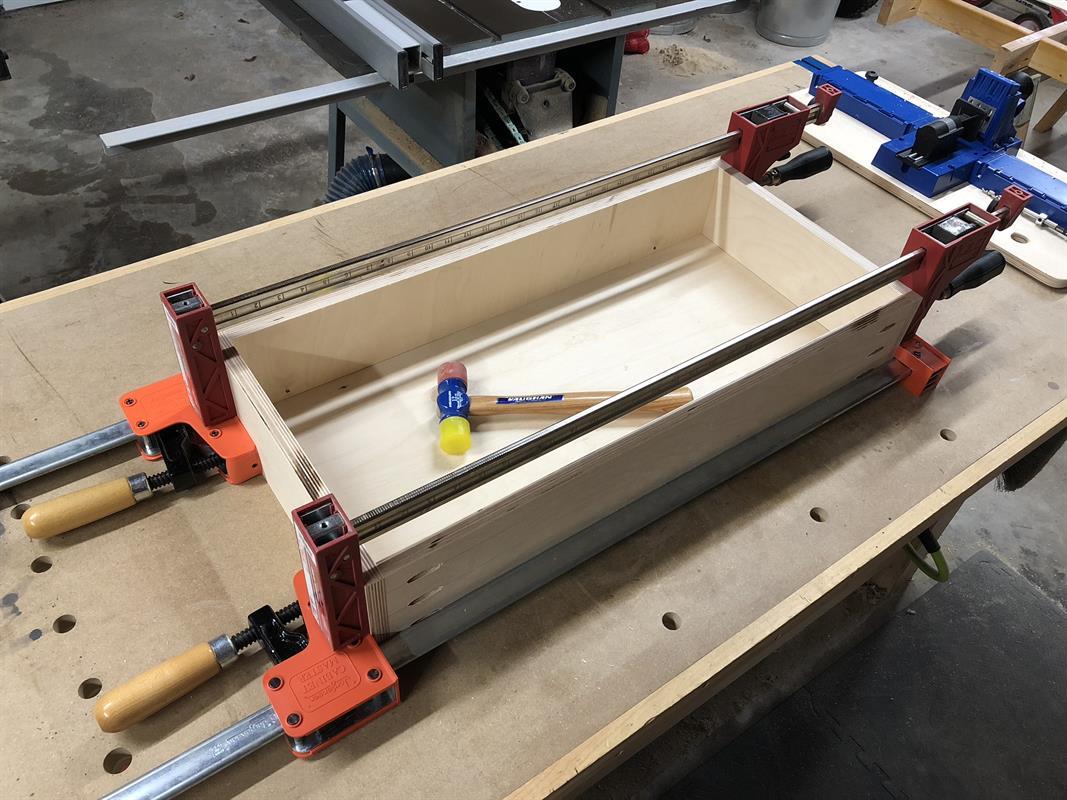
Build the Drawer - Step 5
Now it is time to assemble the drawer and screw it together. Again, clamps are your friend. Get it all clamped up and square before driving the screws. I like to use a rubber mallet for fine adjustments to make sure everything lines up perfectly.
-
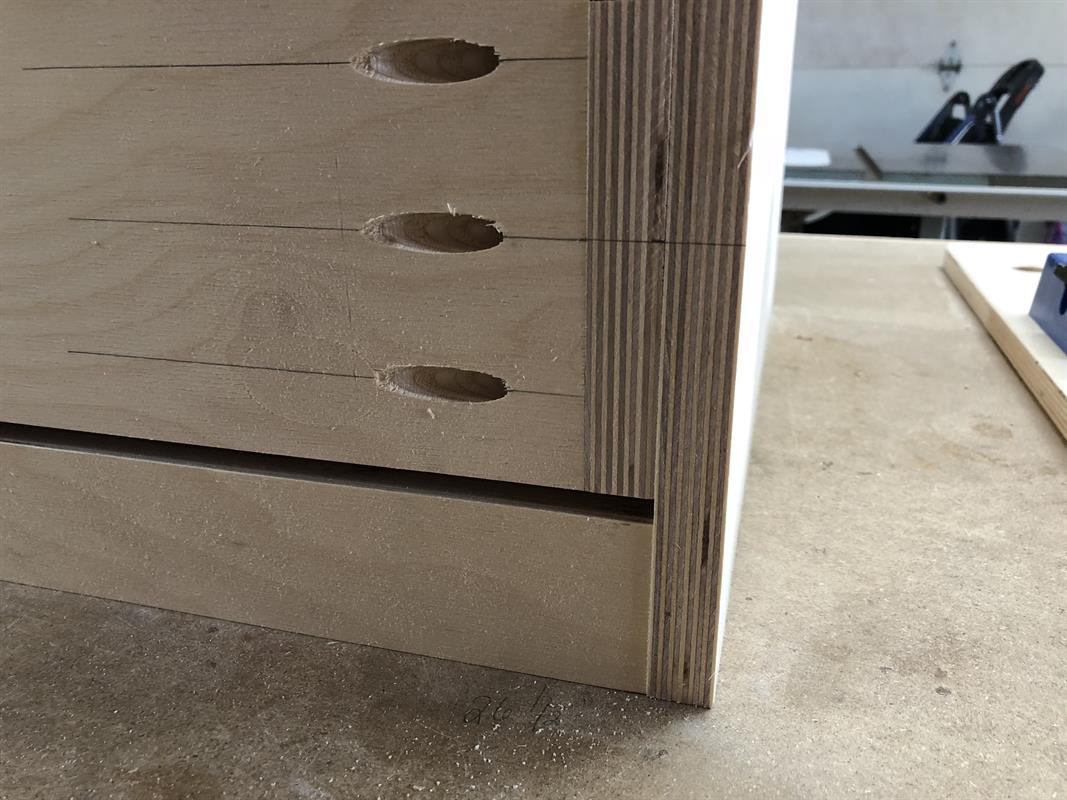
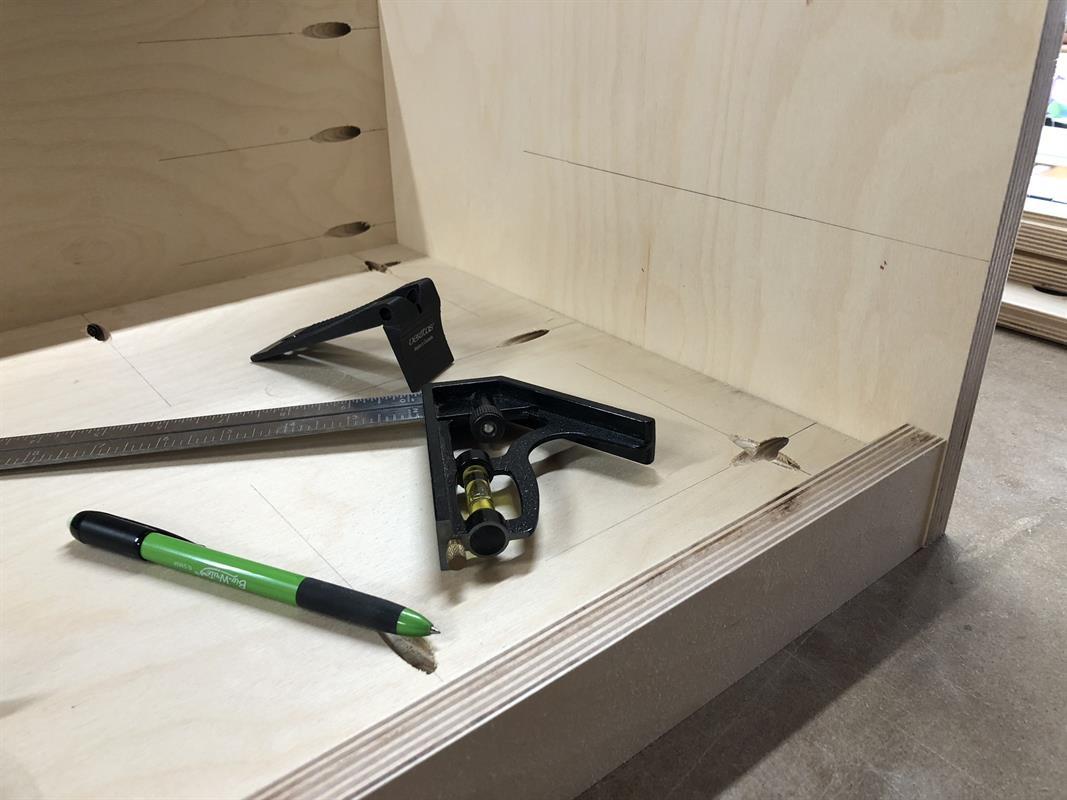
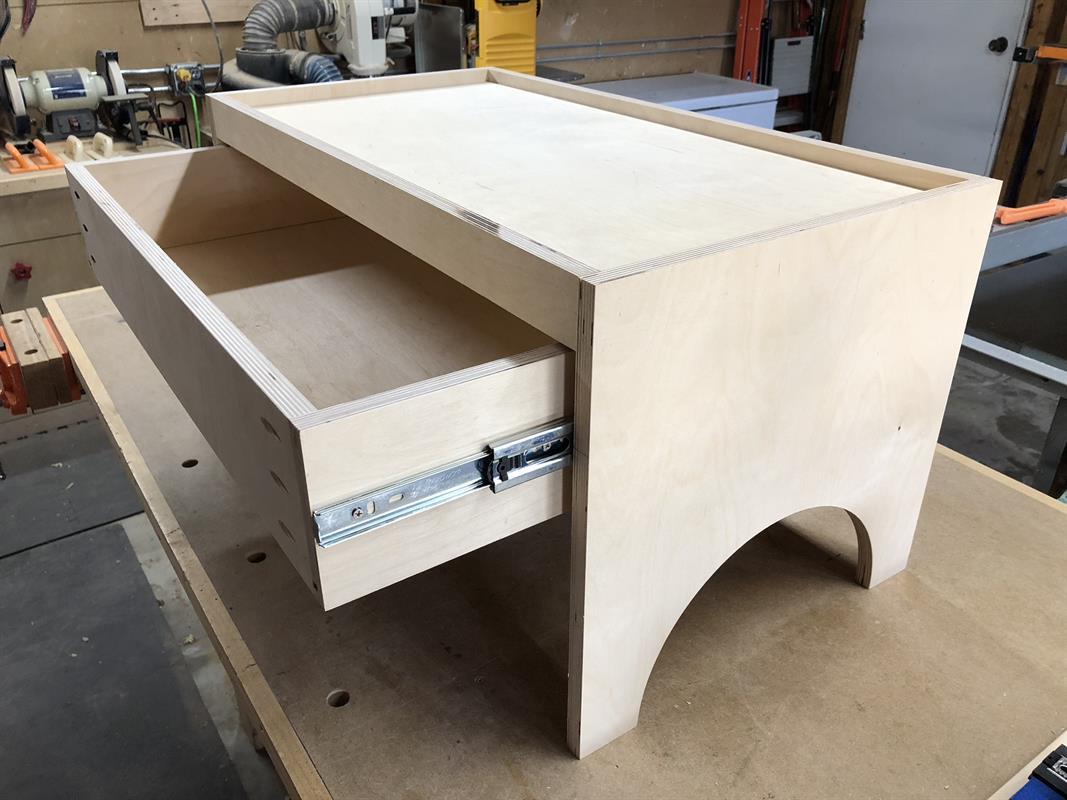
Install the Drawer Box - Step 1
The drawer slides will be installed on the centerline of the drawer sides. Mark the center on the drawer. Flip the table upside down and place some spacers on the underside of the top to raise the drawer box about 1/4” above the front trim. You can see the gap in the picture. Transfer the centerline mark from the drawer to the front of the leg on the table.
-
Install the Drawer Box - Step 2
Using a combination square, transfer the centerline mark along both drawer sides.
-
Install the Drawer Box - Step 3
Next, transfer the marks from the front of the legs to the inside of each end piece. These will be the mounting points for the full extension slides.
-
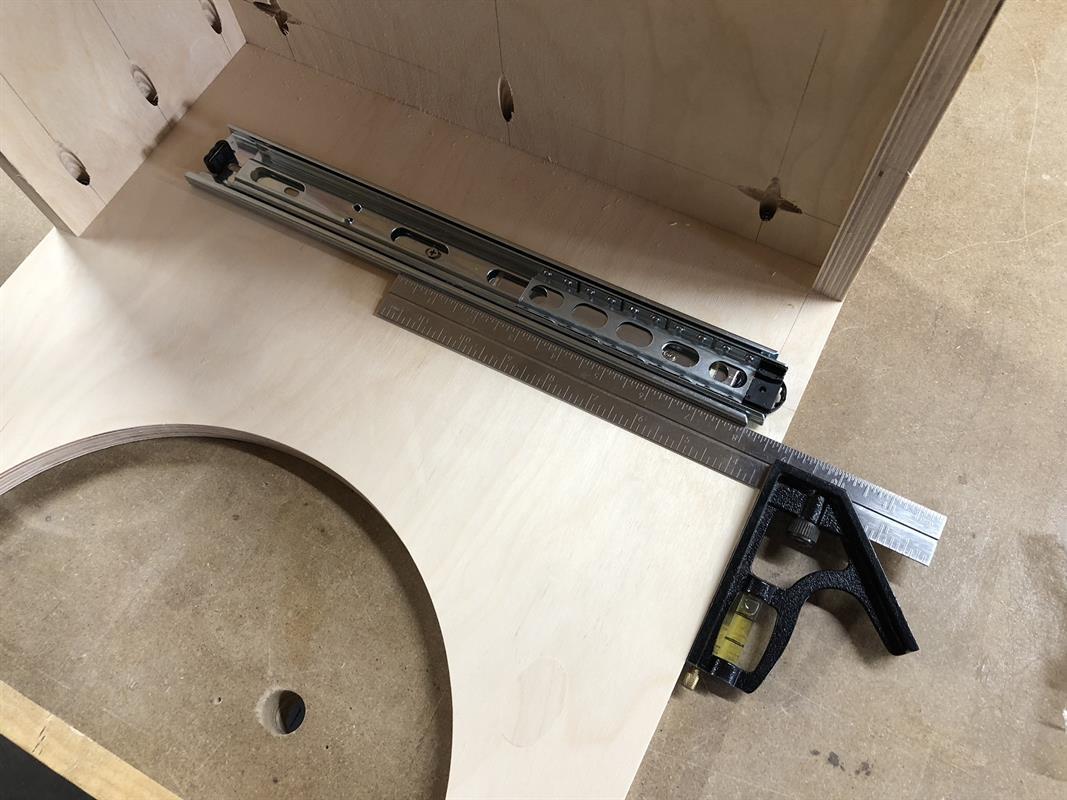
Install the Drawer Box - Step 4
Install the cabinet portion of each slide on the inside of each end piece. Be sure to offset them from the front by the thickness of your plywood to allow room for the false front we will add later. I recommend slides with a soft close function to protect those little fingers. A combination square helps keep the slide square to the table. Add at least 3 screws per slide.
-
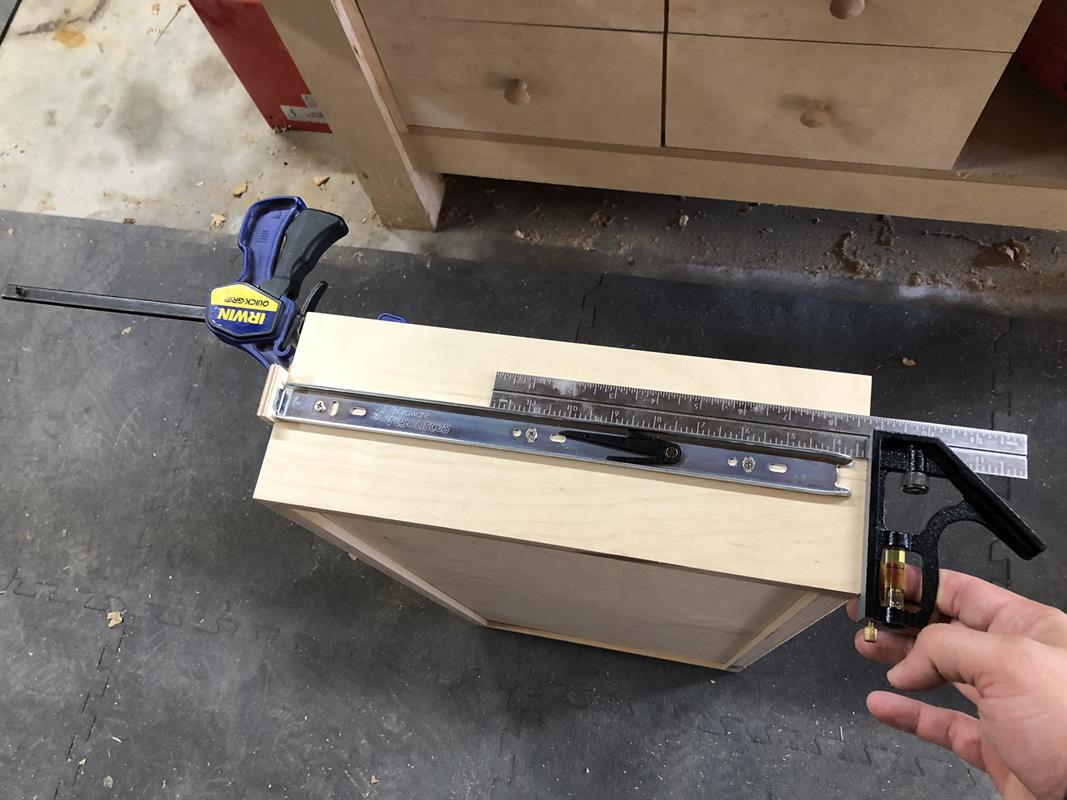
Install the Drawer Box - Step 5
Install the drawer portion of each slide on either end of the drawer box using the same method as the prior step. Be sure the front of the slide is flush with the front of the box. I clamped a small scrap to the drawer front to help.
-
Install the Drawer Box - Step 6
Slide the drawer into place and make sure it opens and closes easily.
-
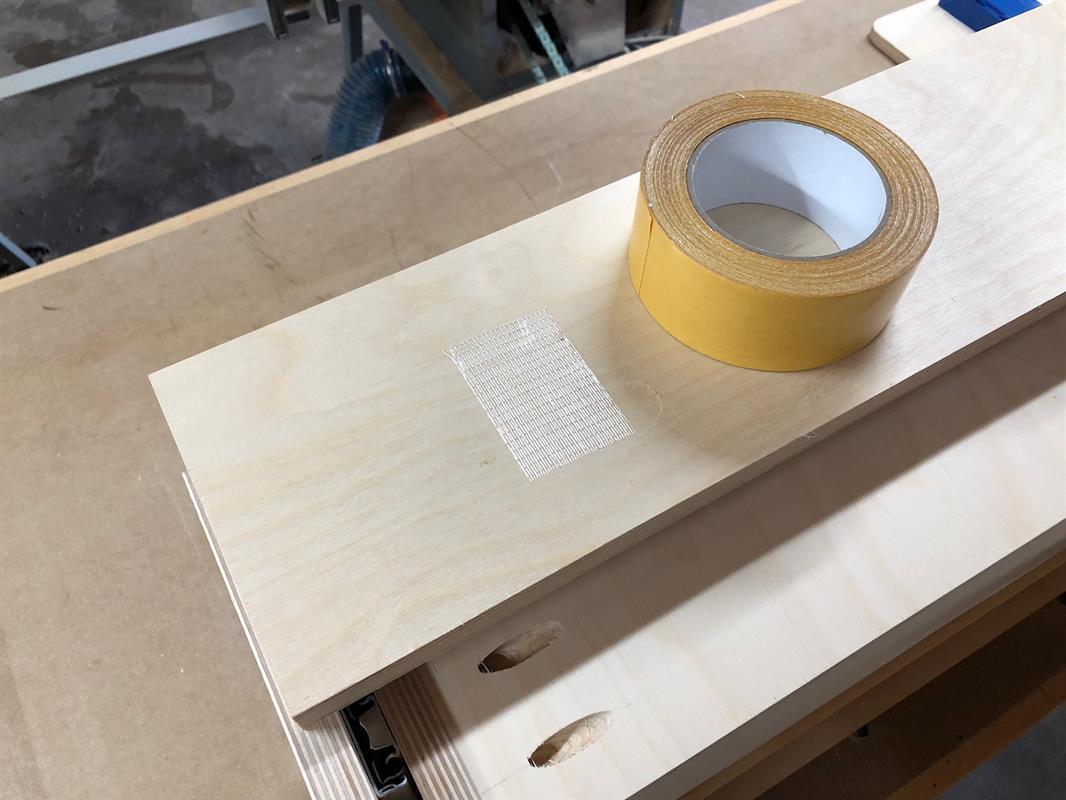
Install the False Front - Step 1
Trim your false drawer front to final length. Leave about 1/16” to 3/32” clearance on each side for a nice reveal. Once it is cut to length, temporarily attach it to the front of the drawer box with several pieces of carpet tape, making sure to maintain an even reveal at either end and along the top.
-
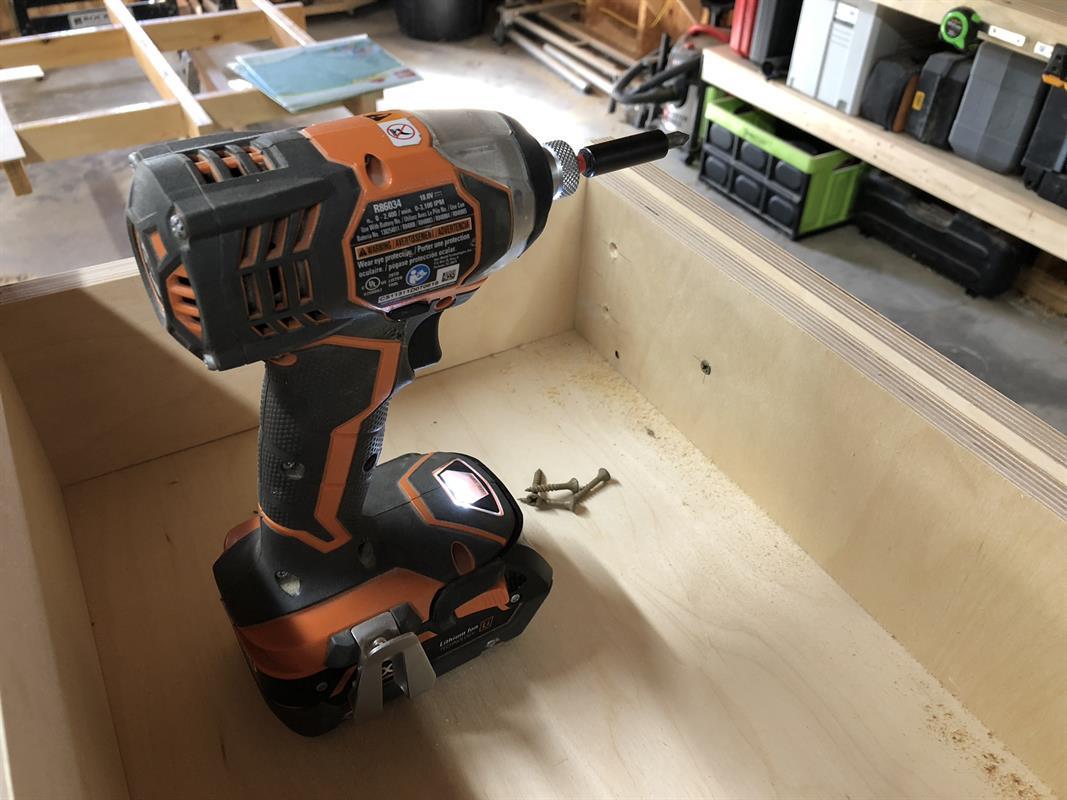
Install the False Front - Step 2
Once the False Front is secured with the tape, pull the drawer open and add several screws from the inside of the drawer to hold the False Front in place permanently.
-
Install the False Front - Step 3
If you need to make any small adjustments, you can use the elongated holes in the drawer slides to get everything aligned perfectly. The construction phase is now complete!
-
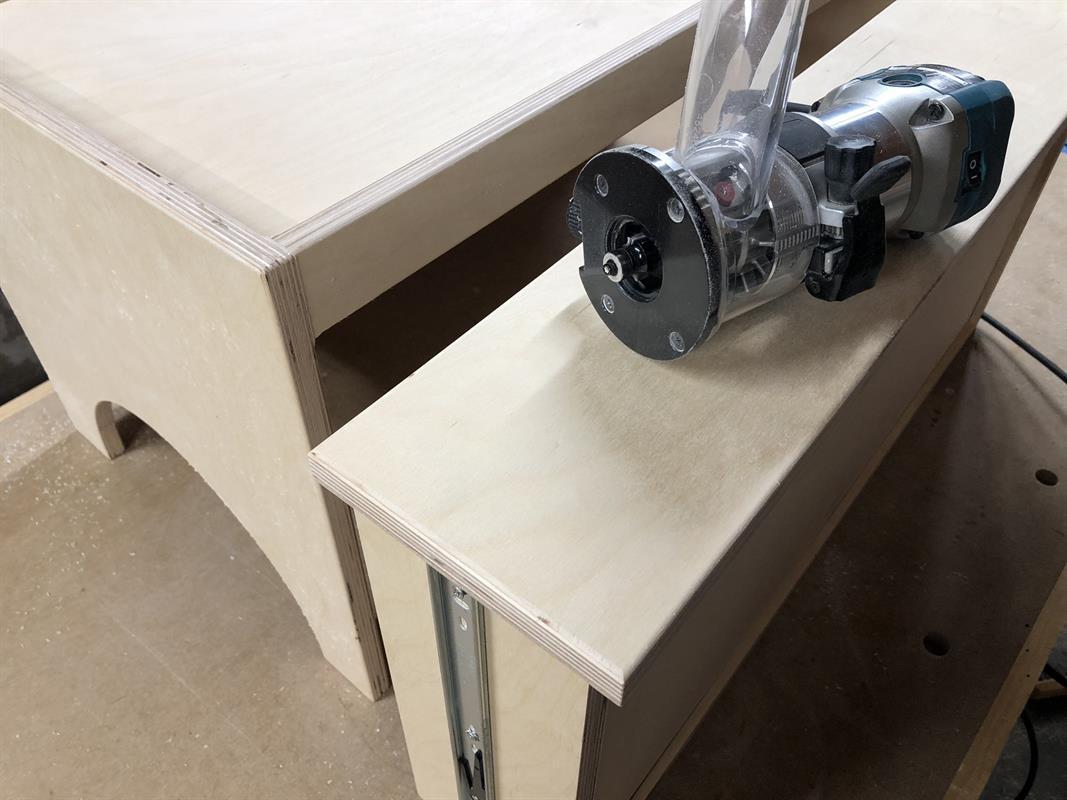
Add the Roundovers
Add a nice small roundover to all edges to prevent splintering and protect the little ones from sharp edges. I used a 1/8” bit. You could also use a chamfer bit or even break the edges by hand with a block plane or sandpaper.
-
Apply a Finish
Take it all back apart and sand everything up to 220 grit, then apply your finish of choice. It’s going to need some protection from those dirty little monsters! I hope your kids enjoy it as much as mine do. Don’t forget to upload some pictures of your build!
