DIY Little Free Library – How To Build a Little Free Library
By Lazy Guy DIY

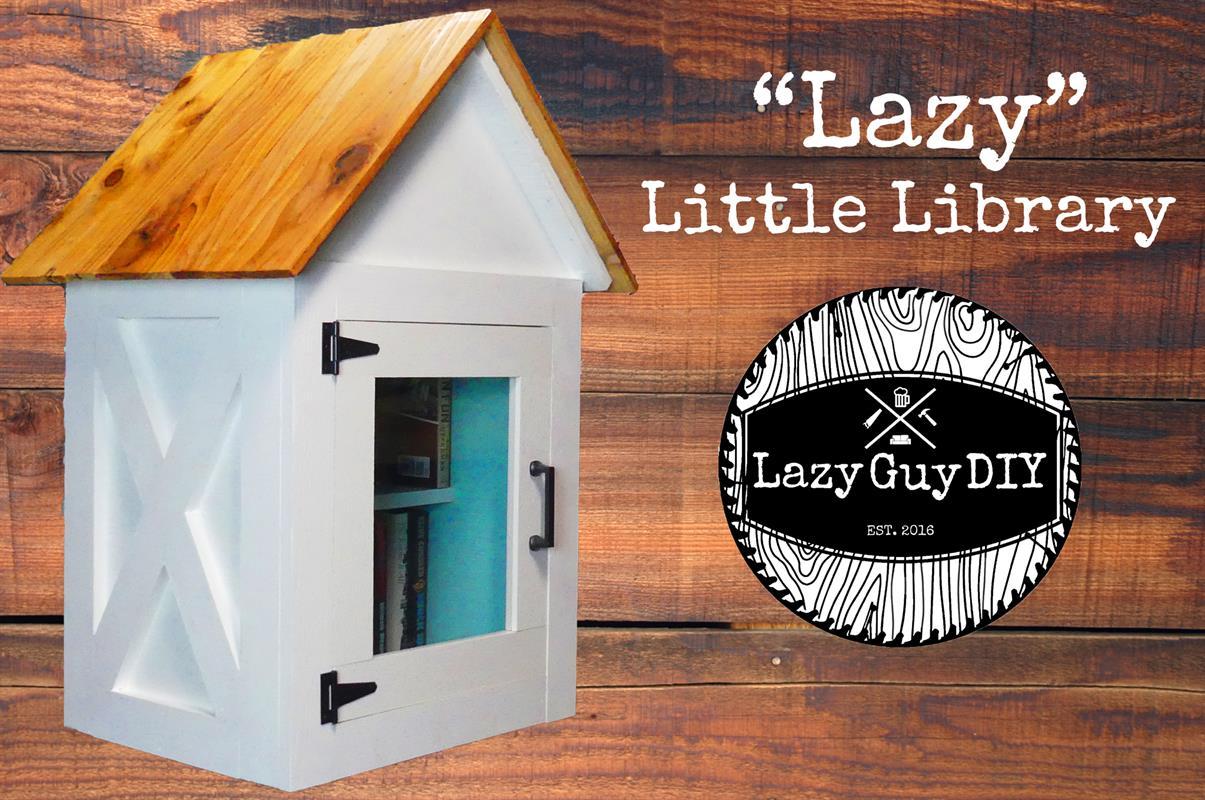


The Lazy Little Library is a great weekend project to really bring the community together! Made of materials to withstand the elements and keep books dry, it's a great place for the neighborhood to share their favorite reads. Be sure to check out the build video on YouTube: http://bit.ly/2wUpoil
Tools
Kreg Tools


Other Tools
-
Miter Saw

-
Square
-
Table Saw
-
Tape Measure
-
Clamps
-
Nail Gun
Materials
Wood Products
- 1 Plywood , 3/4" Thick , Full Sheet
- 4 PVC Trim or Pressure Treated Wood , 1x3 , 96"
- 2 Cedar Picket , 1x6 , 72"
- 1 Board , 4x4 , 48"
Hardware & Supplies
- 1 Pull Handle
- 2 T-Hinges
- 1 Magnetic Catch
- 1 12"x18" Plexiglass
- 1 1-1/4" Blue Kote Exterior Pocket Screws
- 1 TiteBond III Exterior Wood Glue
- 1 Exterior rate caulk
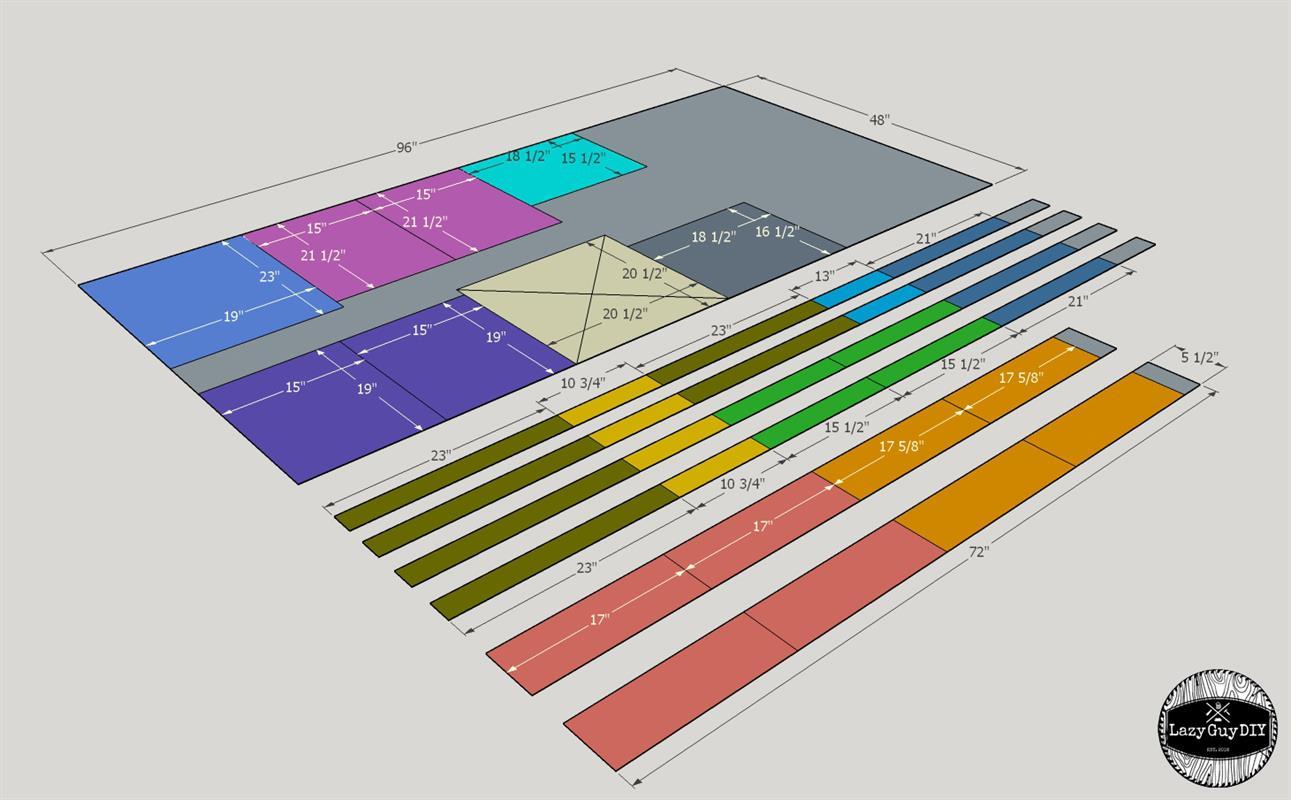
Cut List & Parts
- 1 Back Panel , 3/4" x 23" x 19"
- 2 Top & Bottom Panels , 3/4" x 19" x 15"
- 2 Side Panels , 3/4" x 21.50" x 15"
- 3 Roof Panel (Triangle) , 3/4" x 14.50" x 14.50" x 20.50"
- 4 Vertical Trim , 1"x 3" x 23"
- 4 Horizontal Trim , 1"x 3" x 10.75"
- 1 Roof Panel , 3/4" x 15.50" x 18.50"
- 1 Roof Panel , 3/4" x 16.50" x 18.50"
- 2 Front Vertical Trim , 1" x 3" x 23"
- 2 Front Horizontal Trim , 1"x 3" x 15.50"
- 4 X Trim , 1" x 3" x 21"
- 2 Horizontal Door Piece , 1" x 3" x 15.50"
- 2 Vertical Door Piece , 1"x 3" x 13"
- 3 Cedar Roofing Plank , 1" x 6" x 17"
- 2 Middle Cedar Roofing Plank Insert , 1" x 2" x 17"
- 3 Cedar Roofing Plank , 1" x 6" x 17.625"
- 2 Middle Cedar Roofing Plank Insert , 1" x 2" x 17.625"
- 1 Post , 4" x 4" x 48"
- 2 Base Attachment , 2" x 4" x 10"
Directions
-
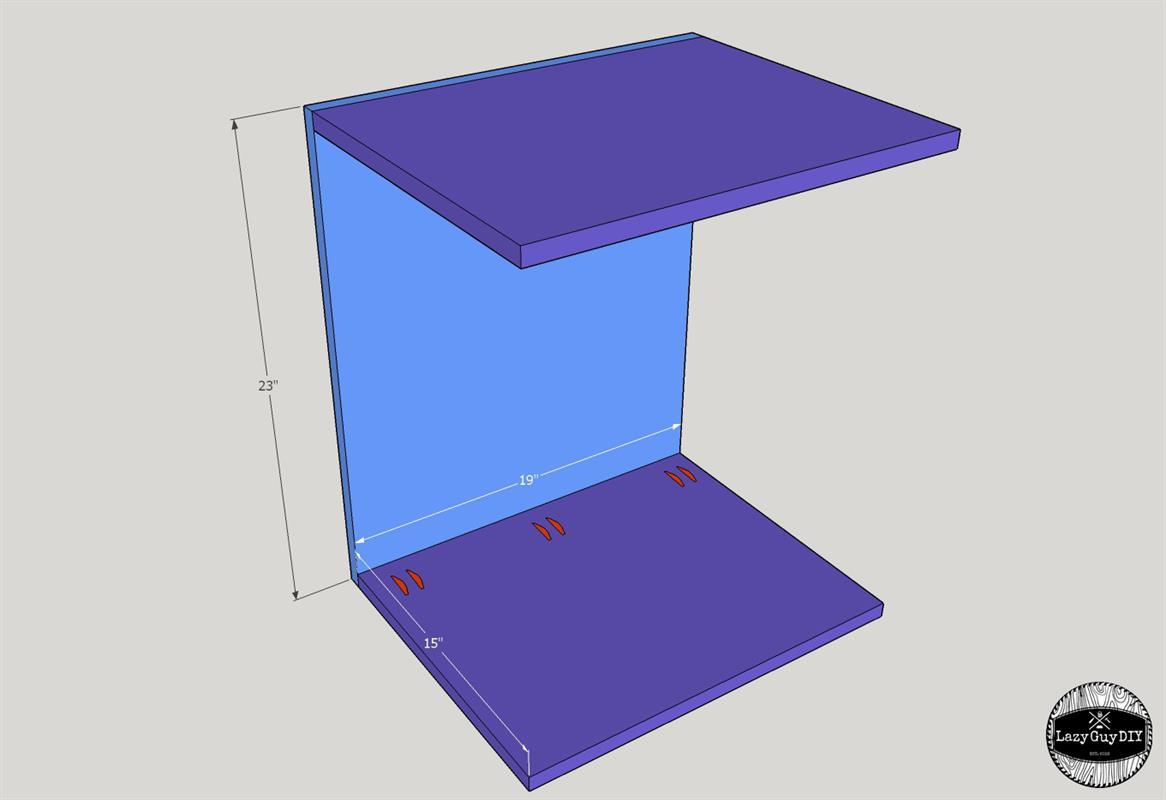
Frame
Pre-drill 3/4" depth pocket holes into both 15" x 19" 3/4" plywood panels and attach to 19" x 23" back panel with wood glue and 1-1/4" exterior Blue Kote Screws.
-
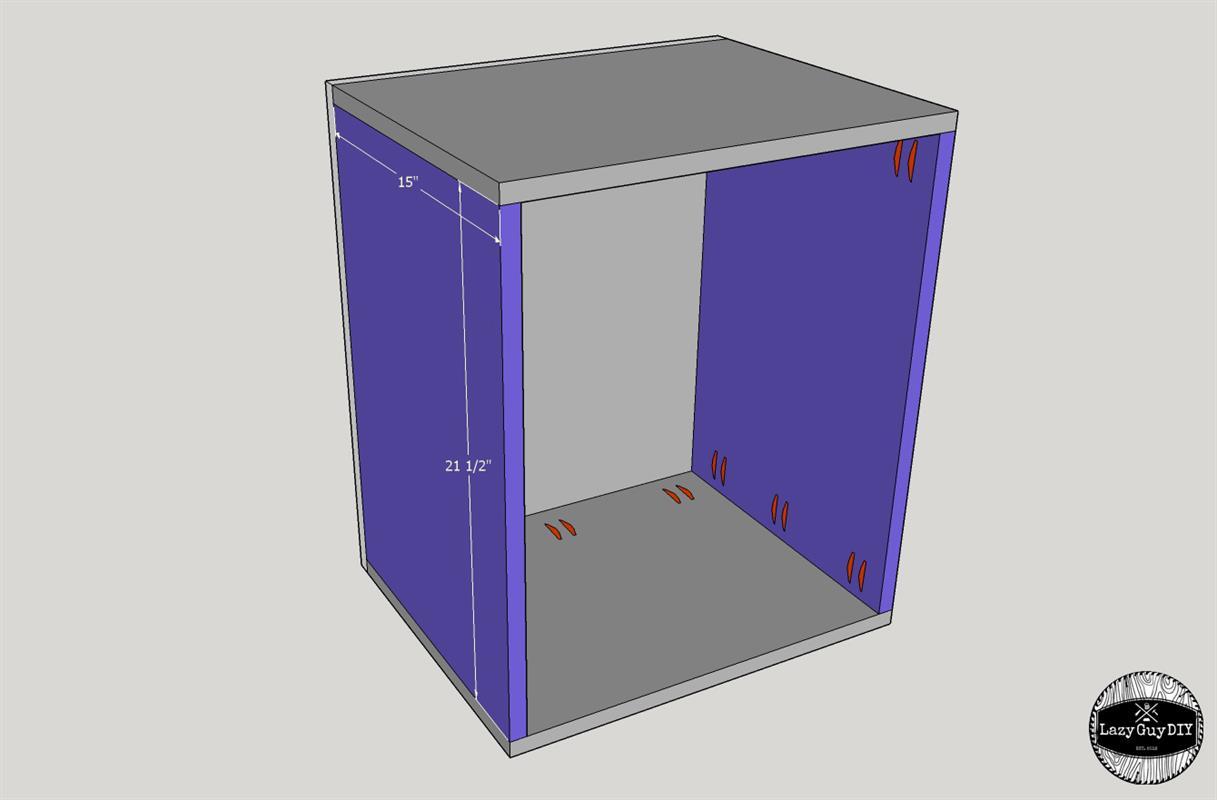
Side Panels
Pre-drill both 15" x 21.50" side panels for 3/4" pocket holes, then attach with wood glue and 1-1/4" exterior pocket screws.
-
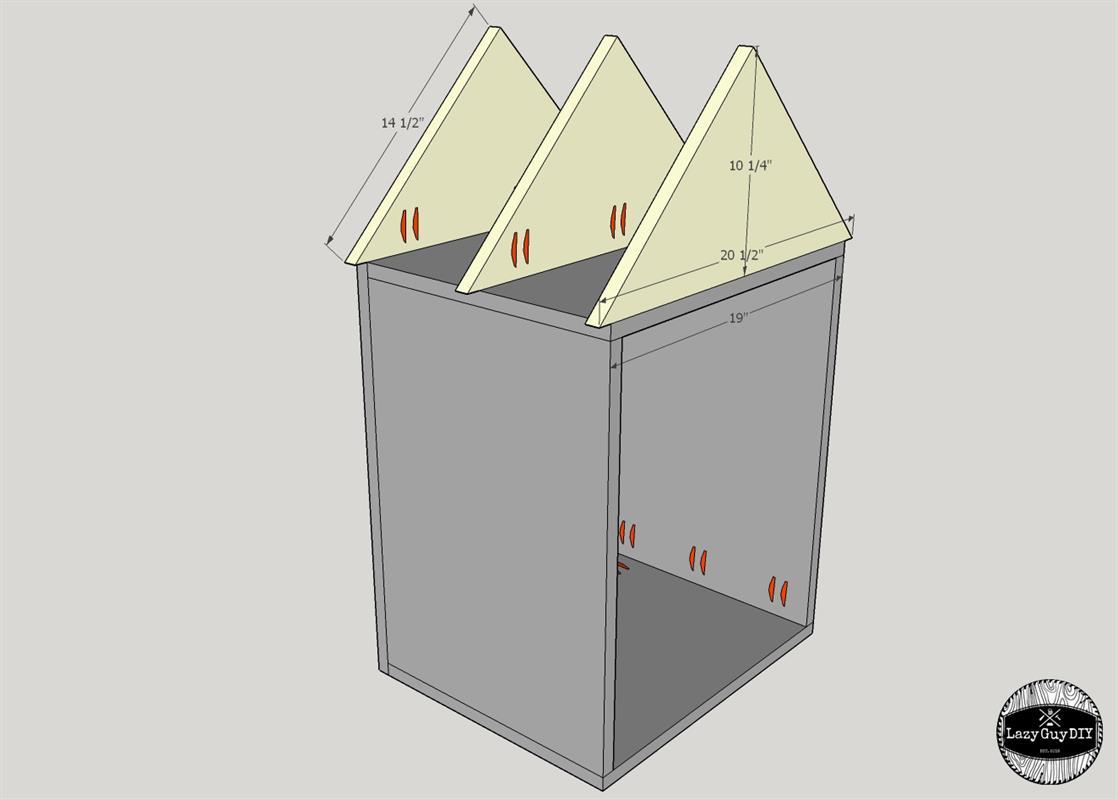
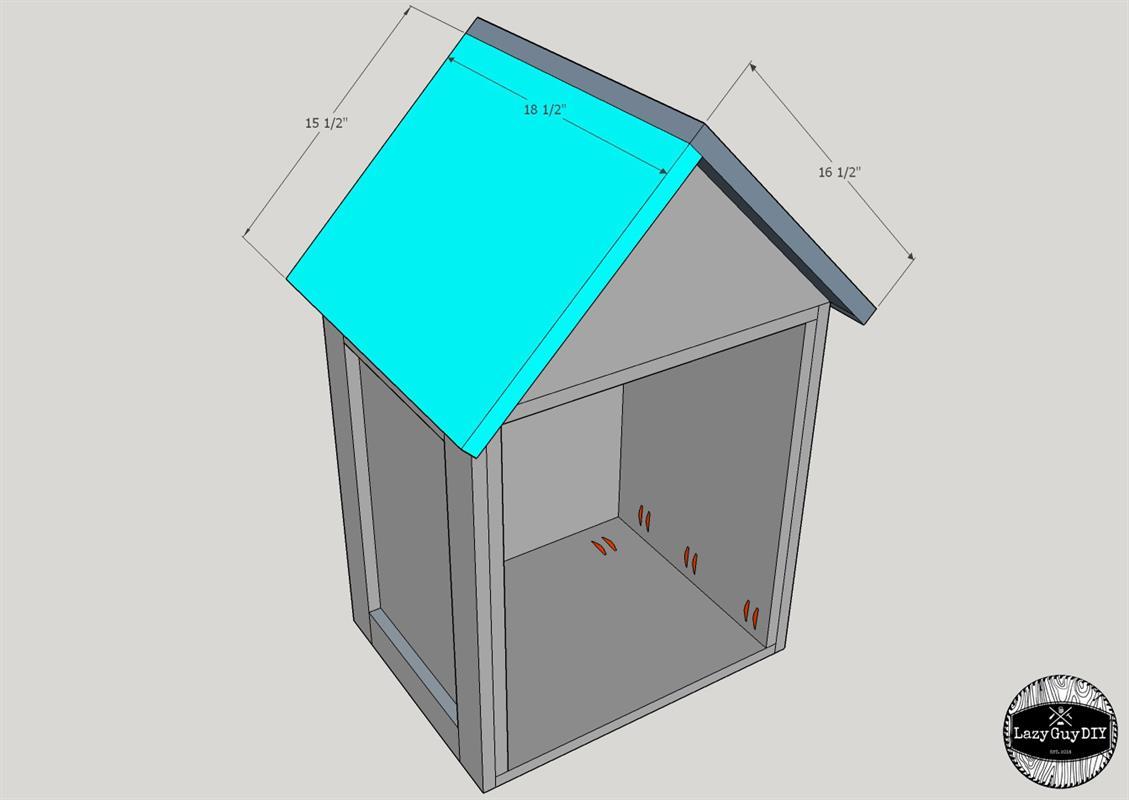
Roof Panels
Pre-drill all three roofing panels with 3/4" pocket holes. Place the pocket holes on the inside of the panel to avoid visible holes for finishing. Attach flush to the front and back with 1-1/4" exterior Blue Kote pocket screws and center the middle panel. There should be a 3/4" overhang on each side.
-
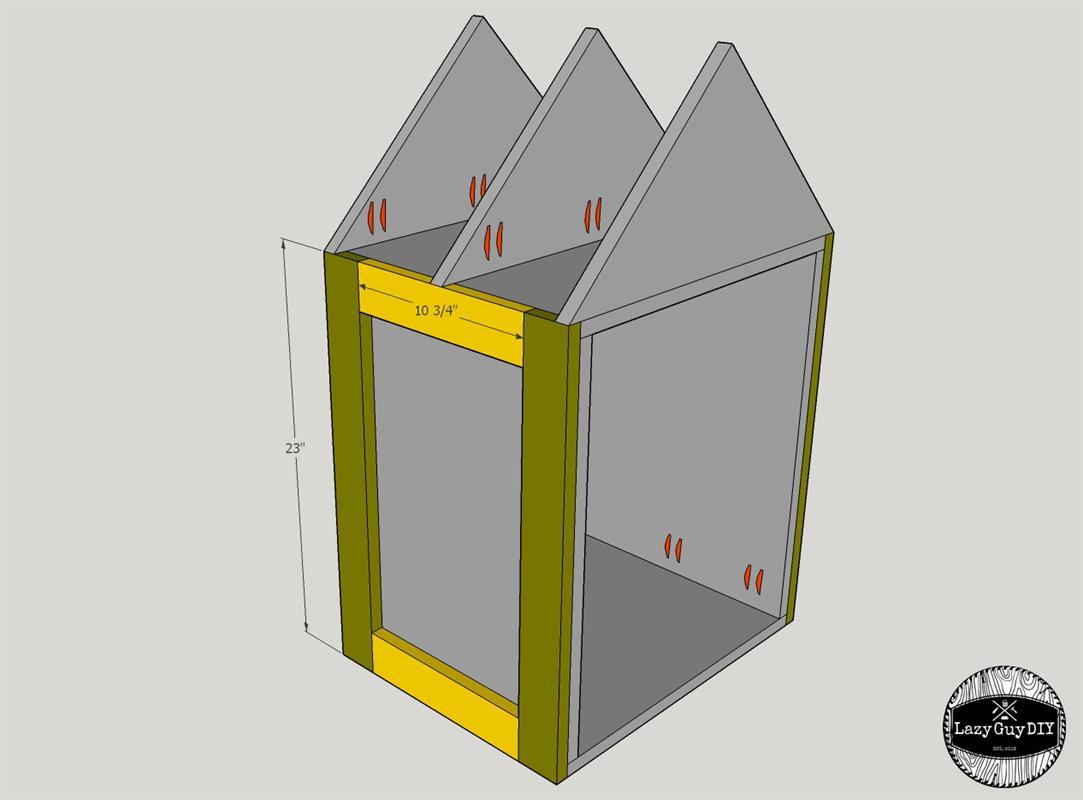
Side Trim
Attach 10.75" & 23" side trim with exterior rated brad nails and wood glue.
*Note: I used PVC 1"x 3" for the trim, but you can also use 1x3 cedar or pressure treated material.
-
Roof
Attach the roofing panels with wood glue and pre-drilled 2" wood screws. Make sure to overlap the top 16.50" panel. Allow for a 1" overhang on each side.
-
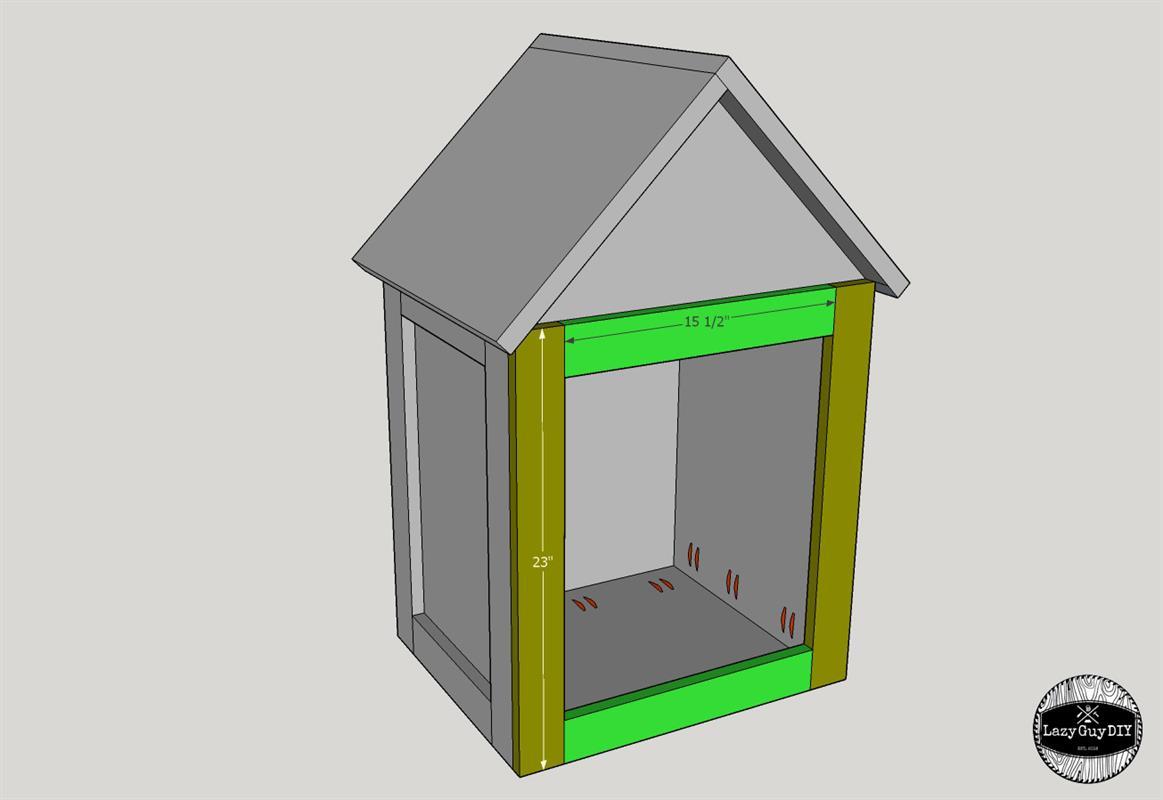
Front Trim
Attach the 15.50" & 23" 1"x 3" trim pieces with wood glue and brad nails. For additional strength, I ran a piece of scrap wood on the inside behind the 15.50" to strengthen the build on both the top and bottom.
-
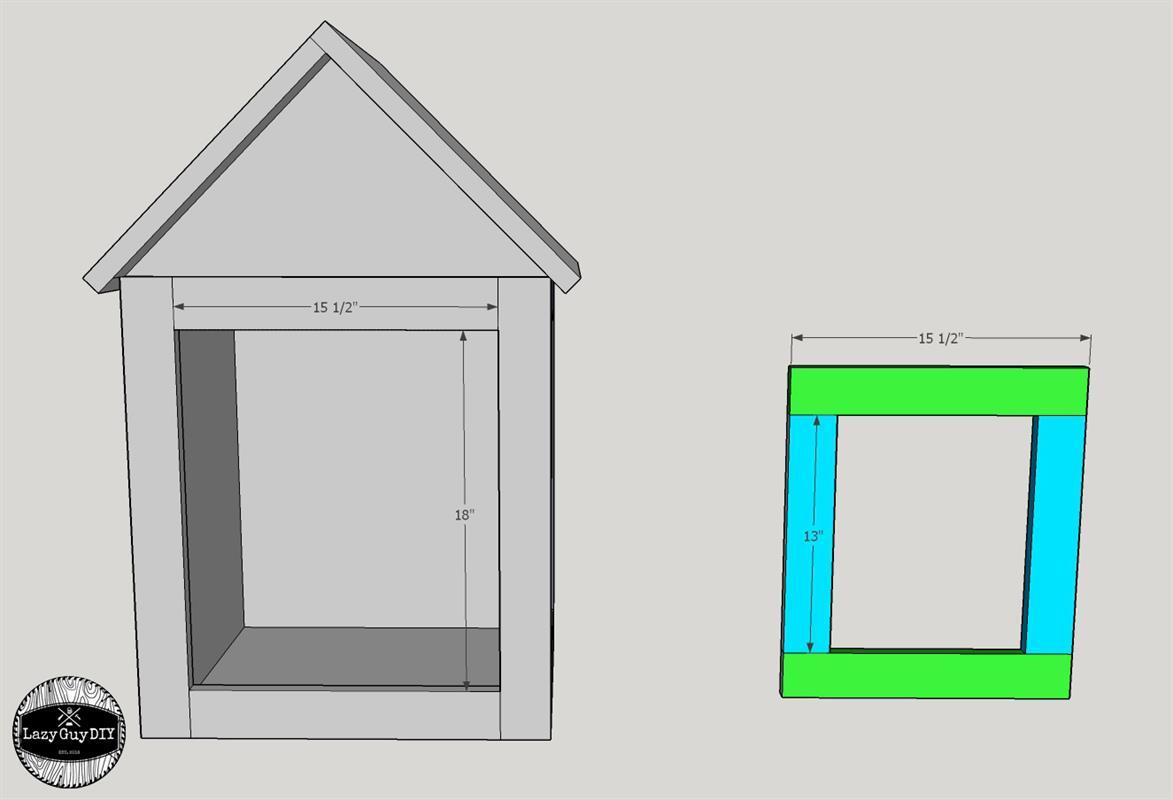
Door Build
Pre-cut the same 1"x 3" material (15.50" & 13") for the door frame. Using the table saw, cut a dado groove on the inside edge of the door frame to slide the plexiglass insert into. I recommend attaching the 2 sides and bottom, slide in the plexiglass window and attach the top. You can also put a touch of silicon sealant in the groove to add to the waterproofing of the door. With the door completed, add hardware (I used rustic t-hinges and a farmhouse handle), plus a magnetic catch on the inside to hold the door shut.
Tip:
Pro tip - use self-closing spring hinges with magnetic catches to ensure the door stays closed!
-
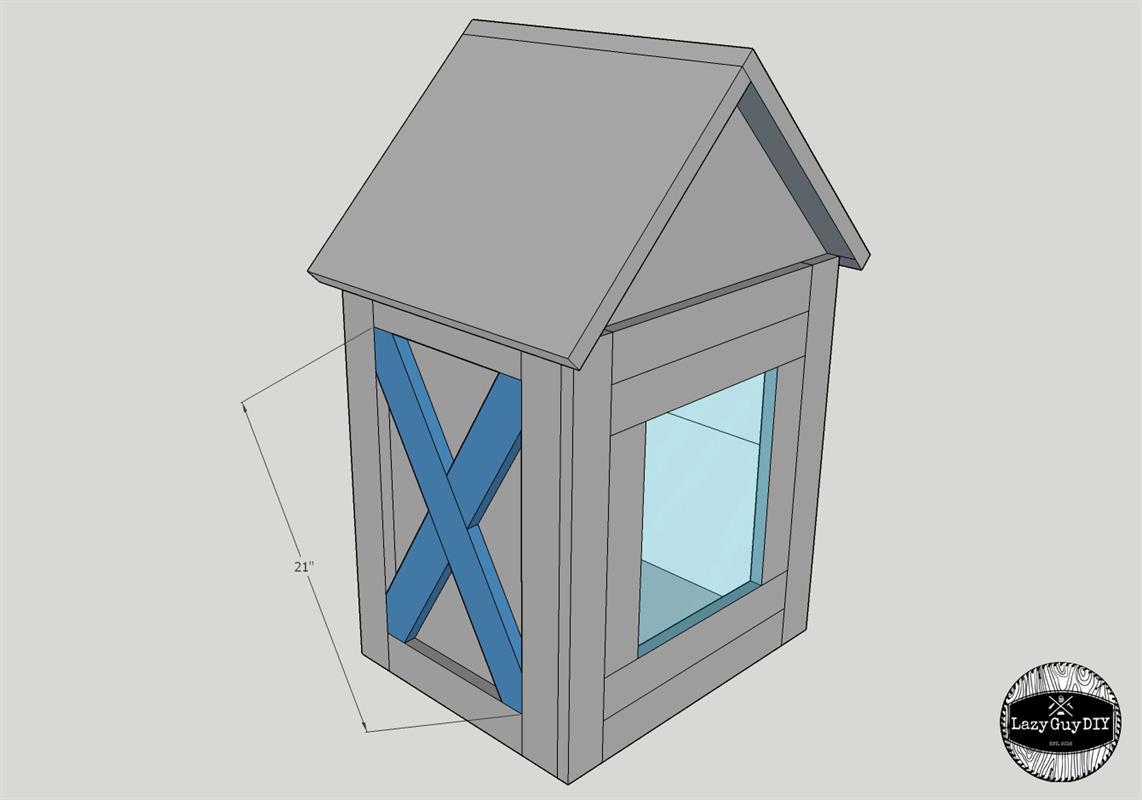
X Trim
Cut and attach the 1"x 3" trim pieces with wood glue and brad nails. Caulk all edges with exterior rated caulk.
-
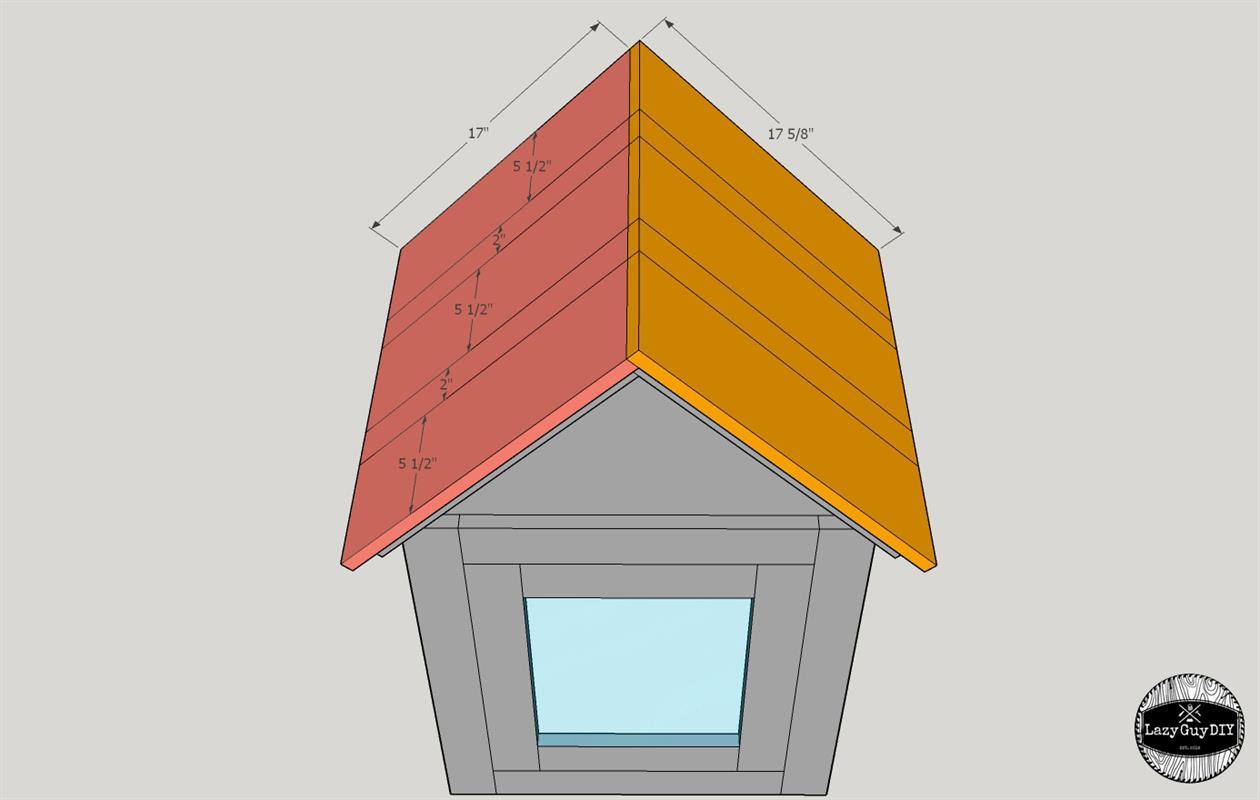
Roofing
Cut four cedar planks to 17" and 17.625" each. Take one of each length and rip down two 2" by length planks (middle inserts to accommodate roof width). Attach planks with an opposite overlap from plywood roofing panels allowing for a 1" overhang on each side. Attach with wood glue and exterior rated brad nails.
-
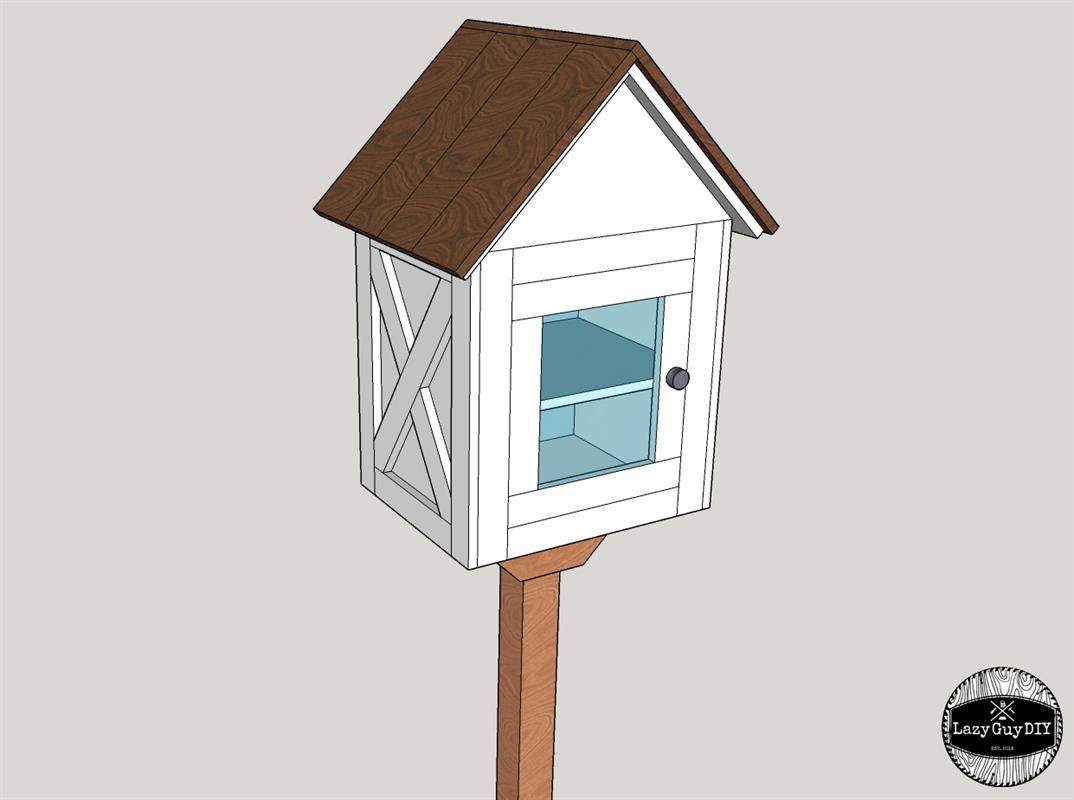
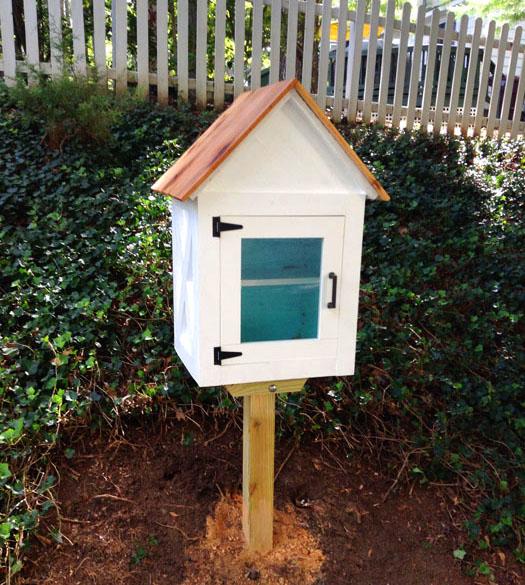
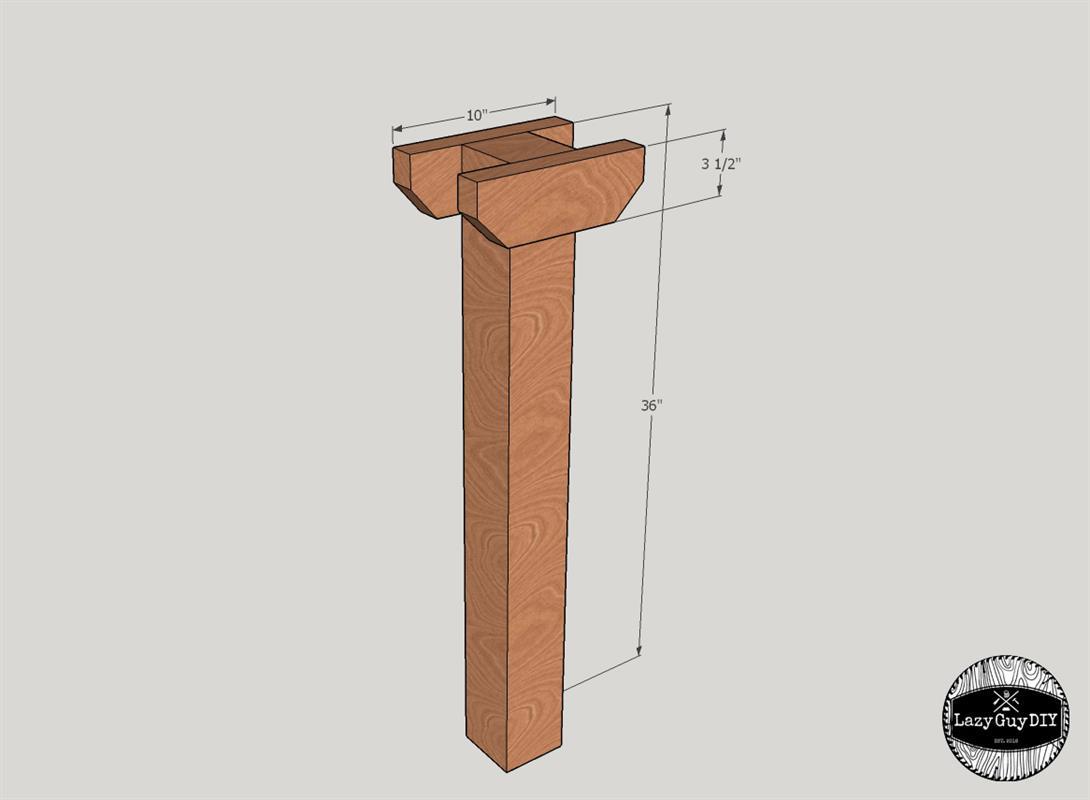
Pole
If attaching to a 4"x 4" base, inset the pole into the ground at least 12". Attach the 2"x 4" x 10" supports to the bottom of the library with a space wide enough for a 4"x 4". Pre-drill and attach to the 4" x 4" with 2 bolts or length wood screws.
-
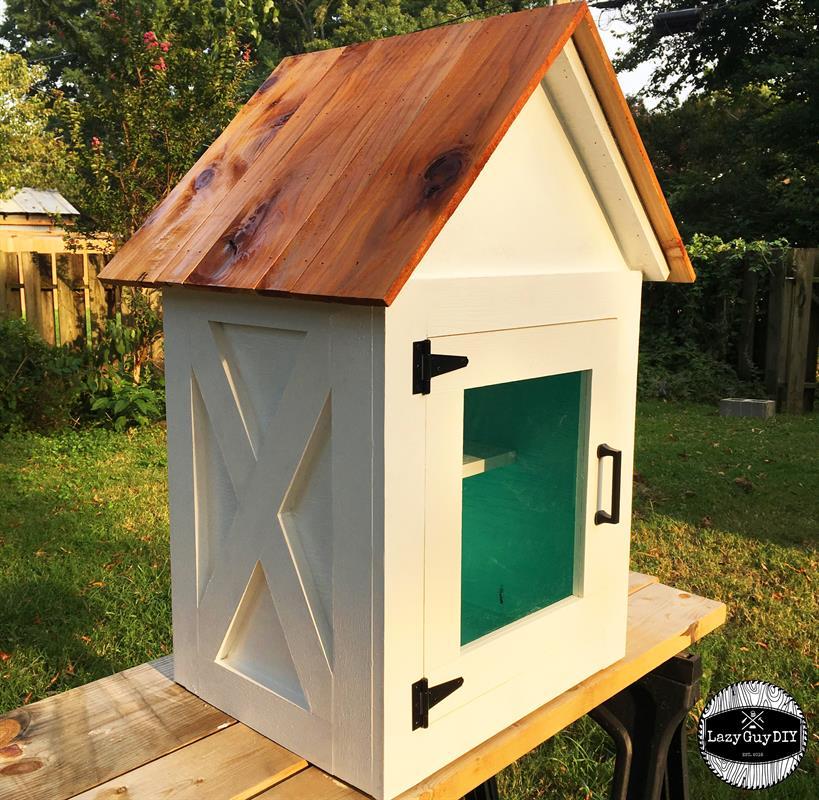
Finishing & Shelf
I used exterior rated paint for all surfaces and an exterior poly for the cedar roofing that should keep this project weather and water proof for years.
Not in the pictures, but I also added a shelf on the inside with pocket screws that is 17.50" wide and 8" deep. Make sure it's tall enough so you can accommodate most book sizes.