

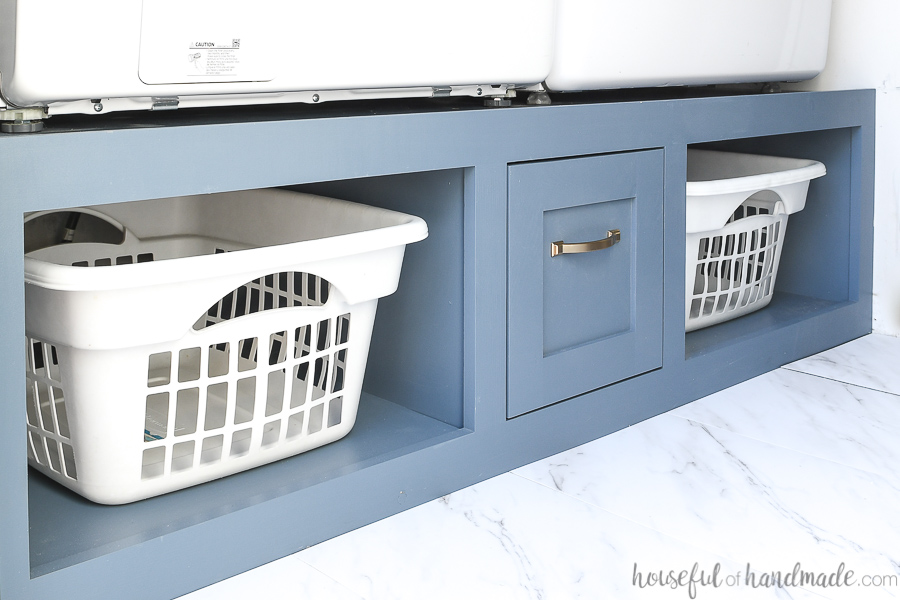
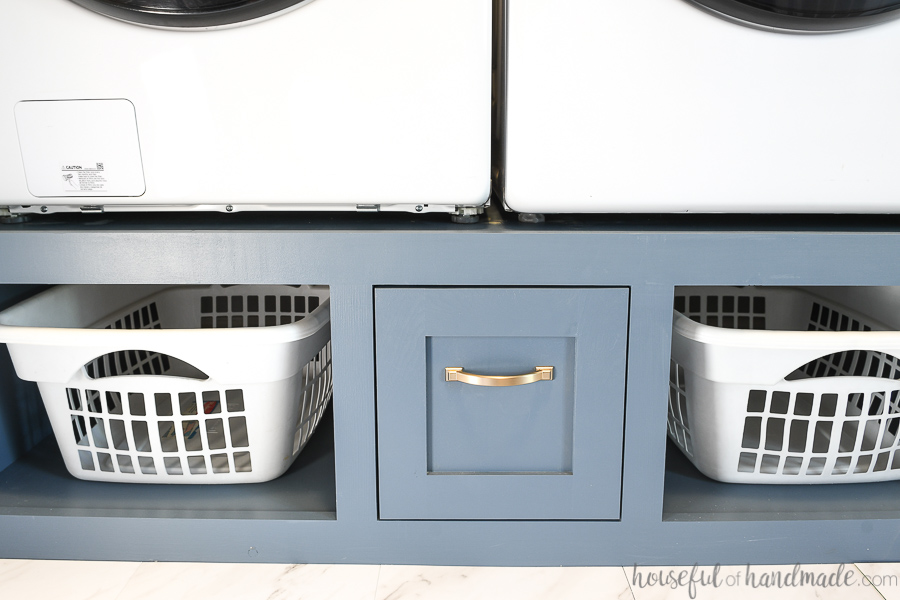
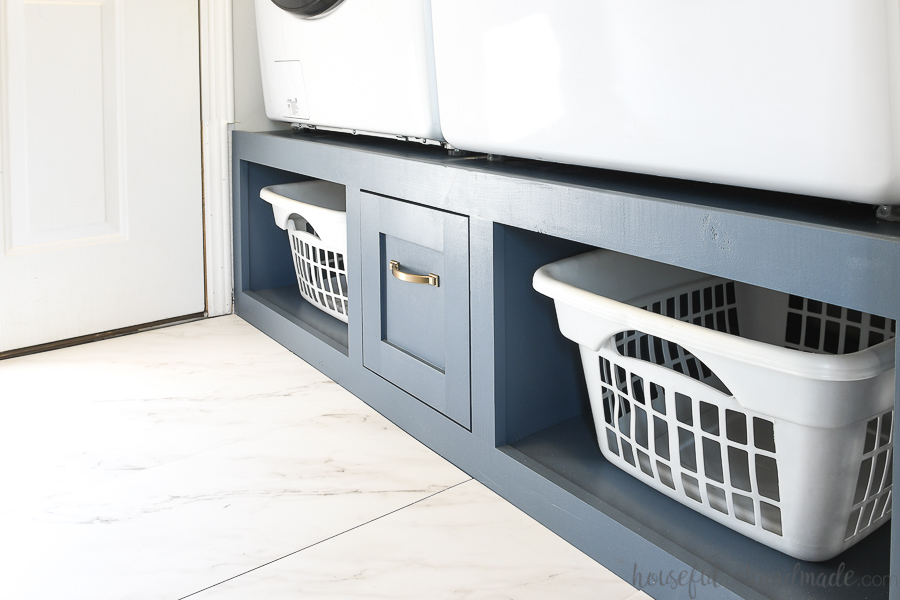


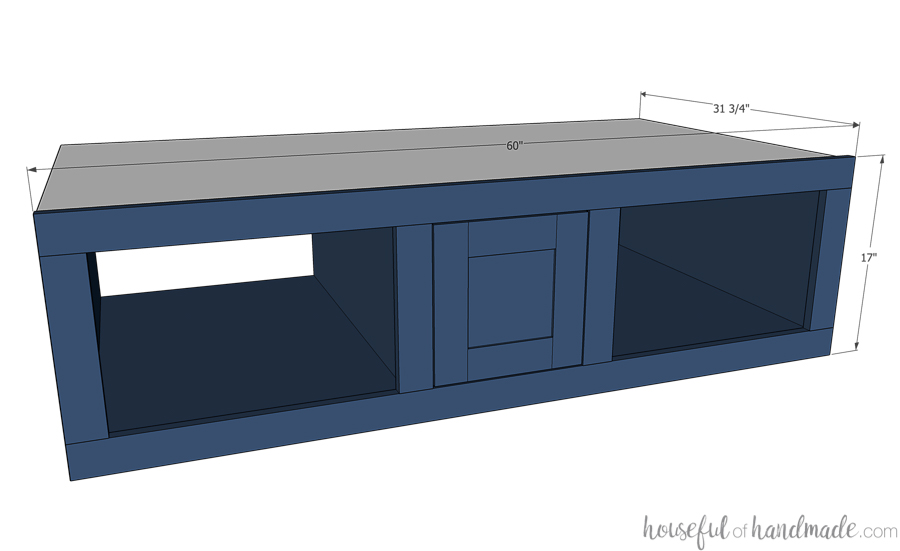
Raise your washer and dryer up off the floor with this easy laundry pedestal. The space below the washer and dryer is turned into storage with a large drawer and 2 shelves for laundry baskets.
Tools
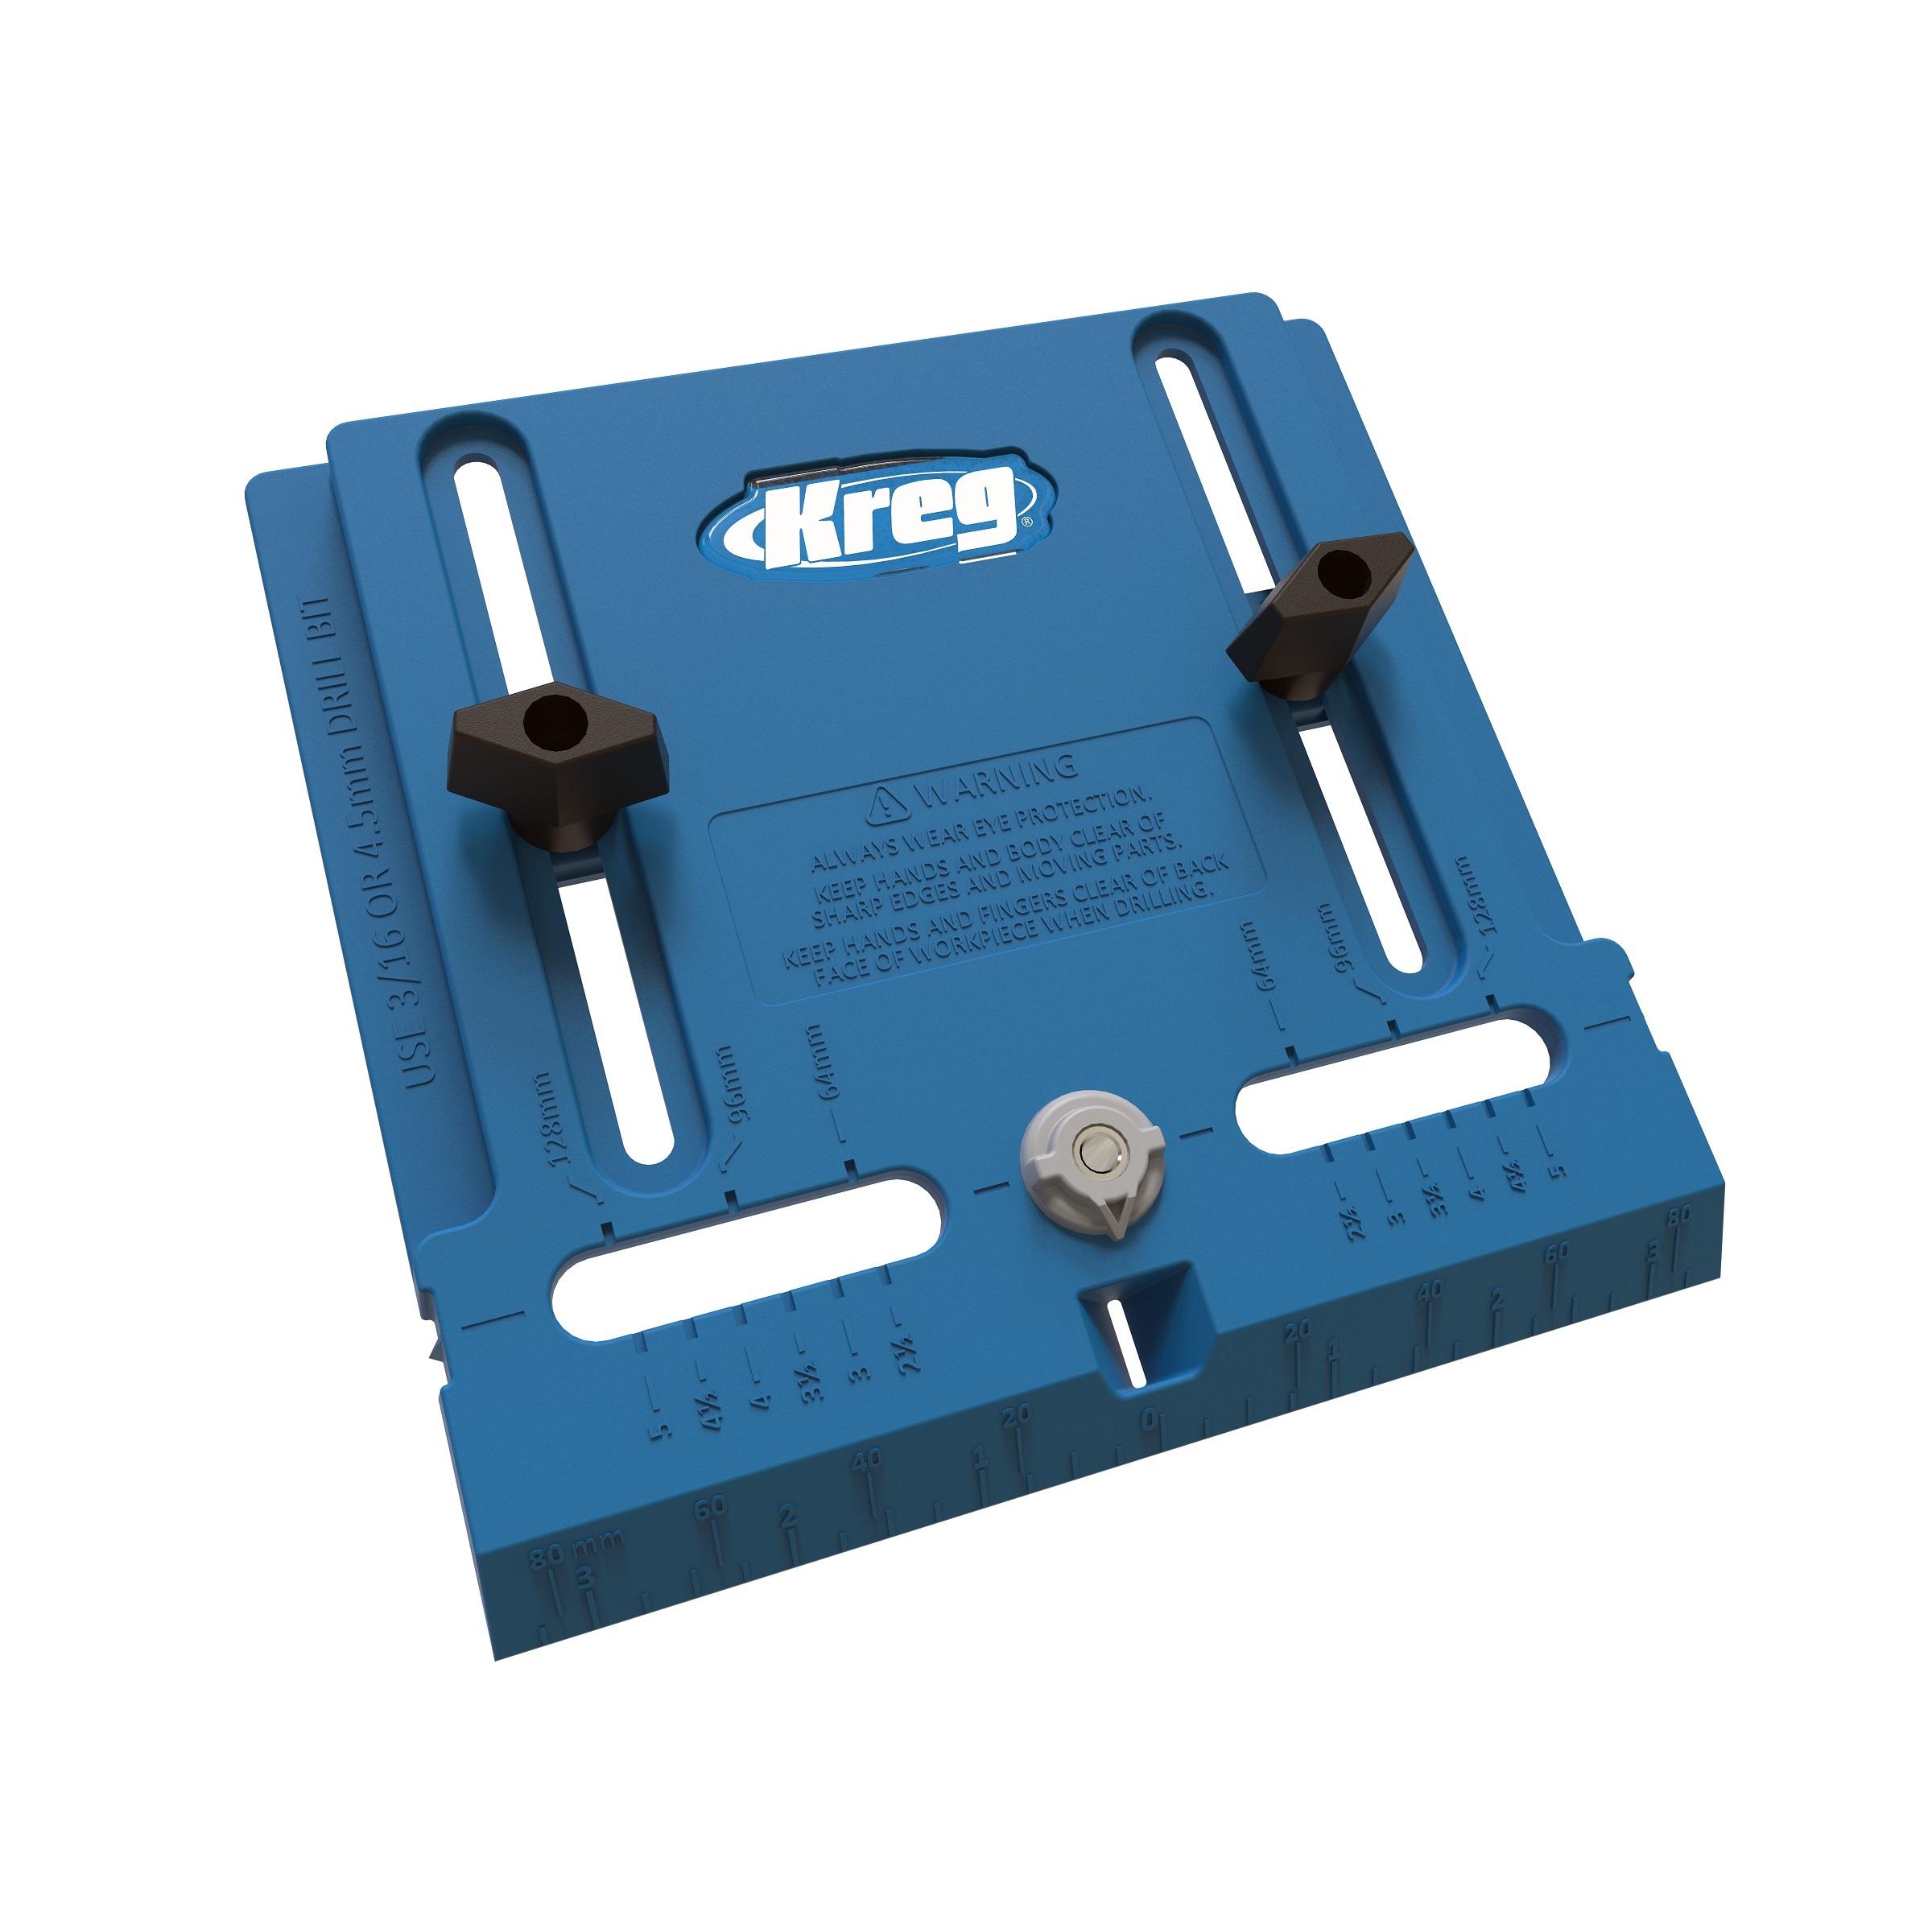
Kreg Tools


Other Tools
-
Miter saw

-
Kreg face clamp
-
Kreg 90 degree clamp
-
Brad nail gun
Materials
Wood Products
- 7 Boards , 8’ x 2x4
- 3 Boards , 8' x 1x3
- 1 Plywood , 4x8 x ¾”
- 1 Plywood or MDF , 4x4 x ¼”
- 1 Plywood , 2x4 x ½”
Hardware & Supplies
- 1 Box of 2 ½” pocket hole screws (See tools list)
- 1 Box of 1 ¼” pocket hole screws (See tools list)
- 1 Box of 1” pocket hole screws (See tools list)
- 1 Box of ⅝” brad nails
- 1 Box of 1 ¼” brad nails
- 1 Wood glue
- 1 Pair 22” ball-bearing drawer slides
Directions
-
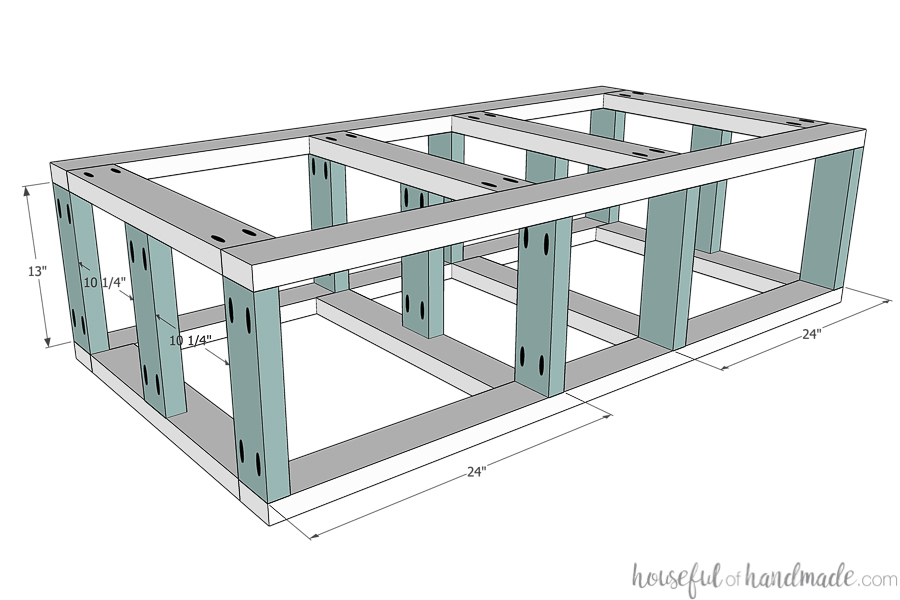
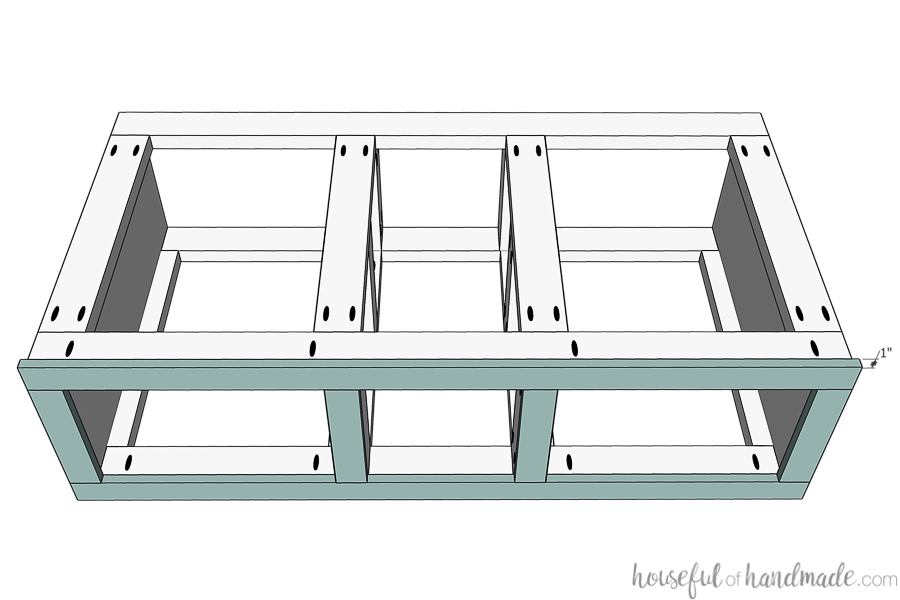
Start assembling the 2x4 base
Set your Kreg pocket hole jig for 1 ½” thick material. Drill 2 pocket holes in each end of the platform joist boards. Attach the joist boards between the platform front/back boards with 2 ½” pocket hole screws so that the outside board is flush with the ends of the boards and the inside boards are 14” in from the edge. Make sure to leave a 12” gap in the center for the drawer section.
Repeat to have 2 identical pieces.

-
Finish the 2x4 base
With the pocket hole jig still set to 1 ½” thick material, drill 2 pocket holes in each end of the leg pieces. Attach 3 of the legs to the far edge of one of the assembled base top/bottom pieces with 2 ½” pocket hole screws. Then attach 3 to the other end and finish with the other 6 along the 2 joists in the center. Make sure to leave a 12” space between them for the drawer box. Then attach the other assembled piece to the top with the screws on the other side of all the leg boards.
-
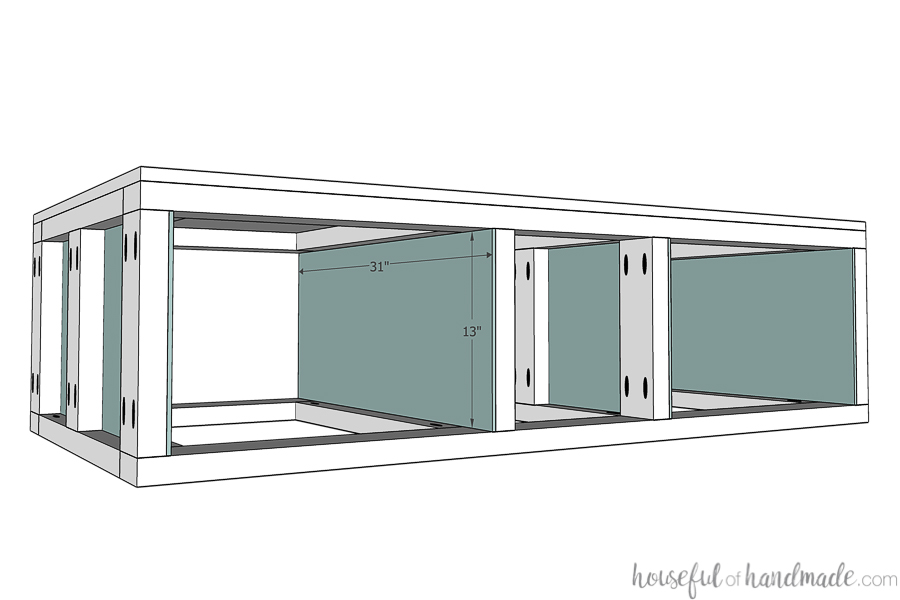
Add the sides inside the shelves
Attach the ¼” material to the inside of the shelf areas. Use ⅝” brad nails and wood glue to attach it to the inside of the 2x4 legs.
-
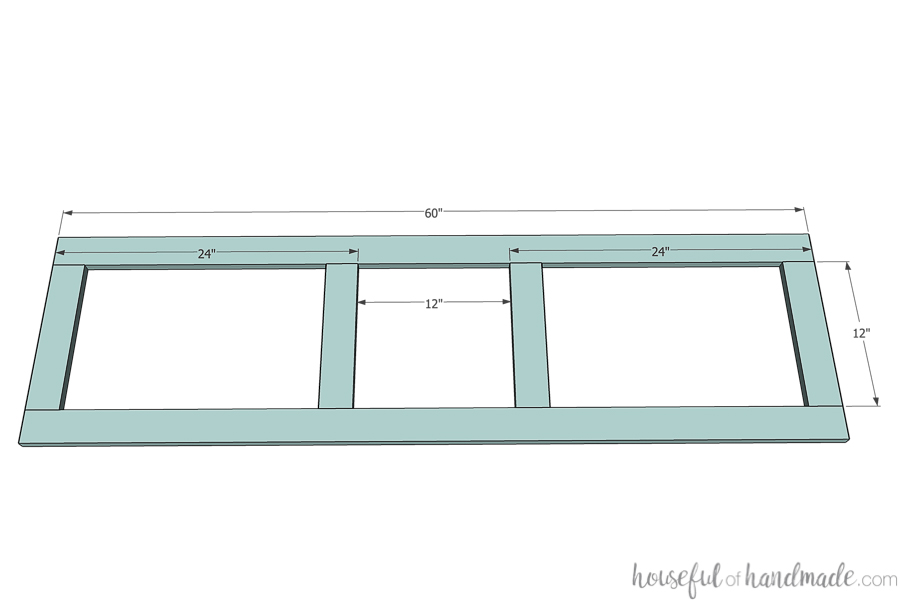
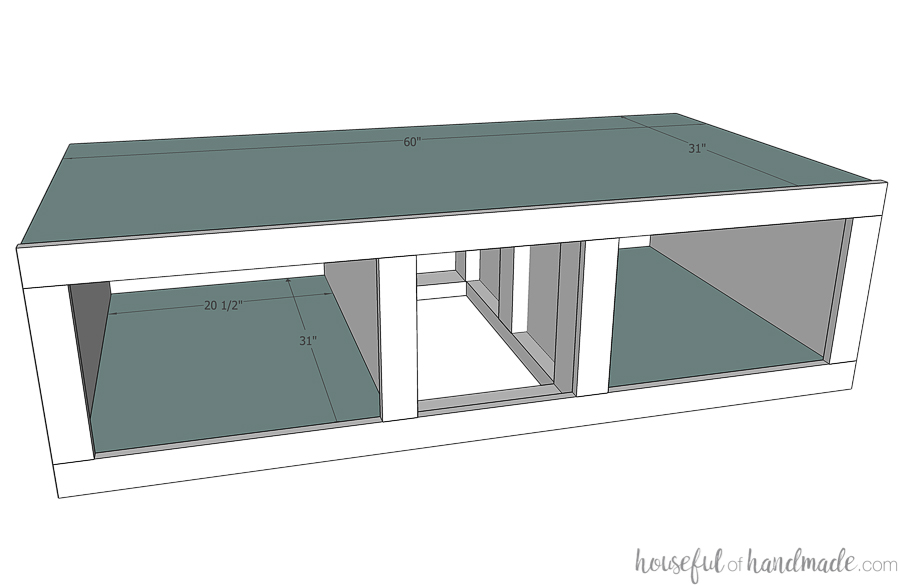
Build the face frame
Set your pocket hole jig for ¾” thick material. Drill 2 pocket holes on each end of the face frame side pieces. Attach them between the face frame top/bottom pieces with 1 ¼” pocket hole screws and wood glue. Attach the sides so they are flush with the edges of the top/bottom board and the 2 center piece leave a 12” gap in the center for the drawer box.
-
Attach the face frame
Drill pocket holes set for ¾” material in the top front of the platform base and the shelf sections (I used the 300 series pocket hole jig for this). Attach the face frame with 1 ¼” pocket hole screws so it is flush with the sides and bottom of the platform. It will stick up 1” from the top.
-
Attach the top and shelf bottoms
Place the shelf bottoms on top of the bottom base in the shelf cubbies. Attach with wood glue and 1 ¼” brad nails. Repeat for the plywood top on the very top of the pedestal.
-
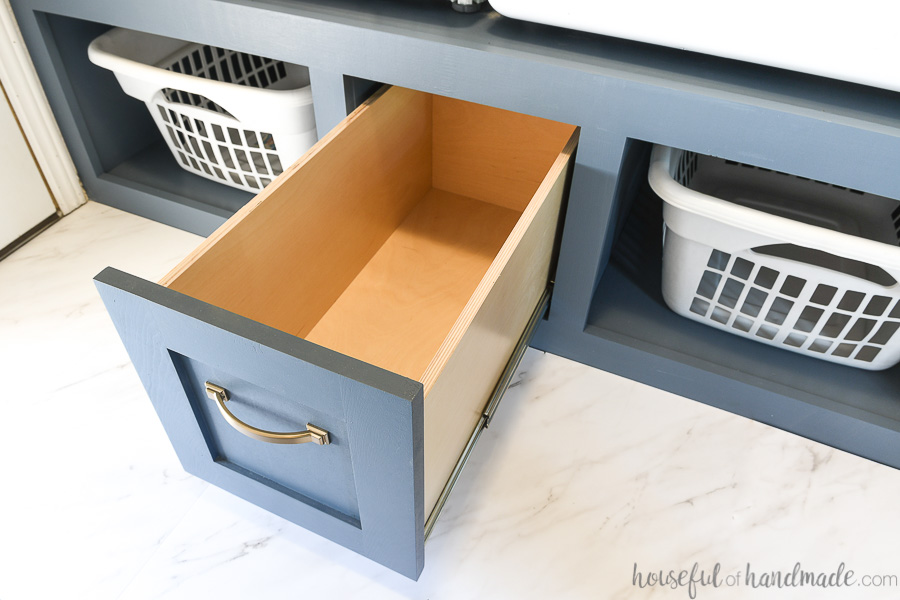
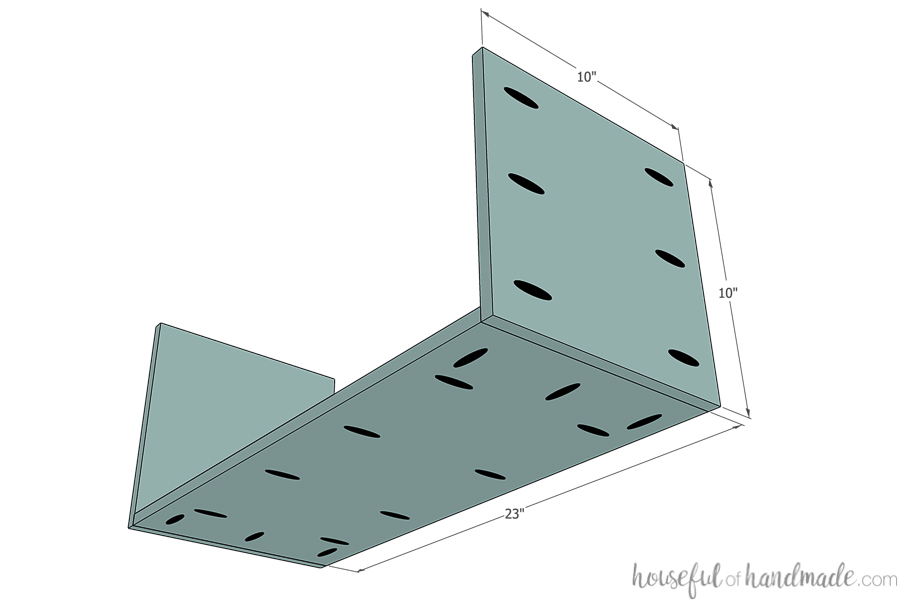
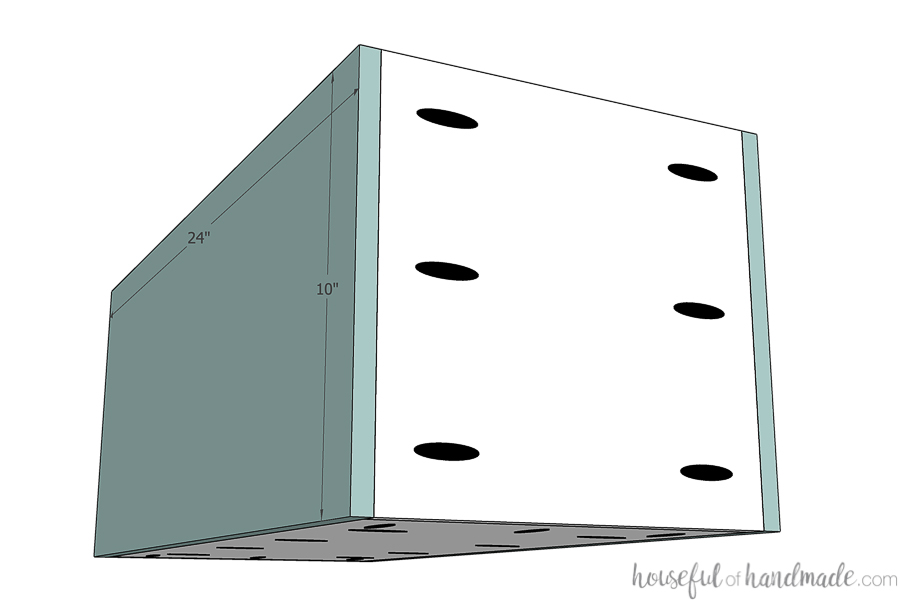
Start assembling the drawer box
This drawer box is a thicker bottom to help hold heavier things (like extra laundry soap). Drill pocket holes set for ½” thick material in the sides of drawer box front/back pieces and all edges of the drawer box bottom piece. Attach the front/back pieces to the bottom pieces with 1” pocket hole screws and wood glue using the pocket holes on the bottom piece.
-
Finish the drawer box
Then attach the drawer box sides to the bottom and front back with wood glue and 1” pocket hole screws.
-
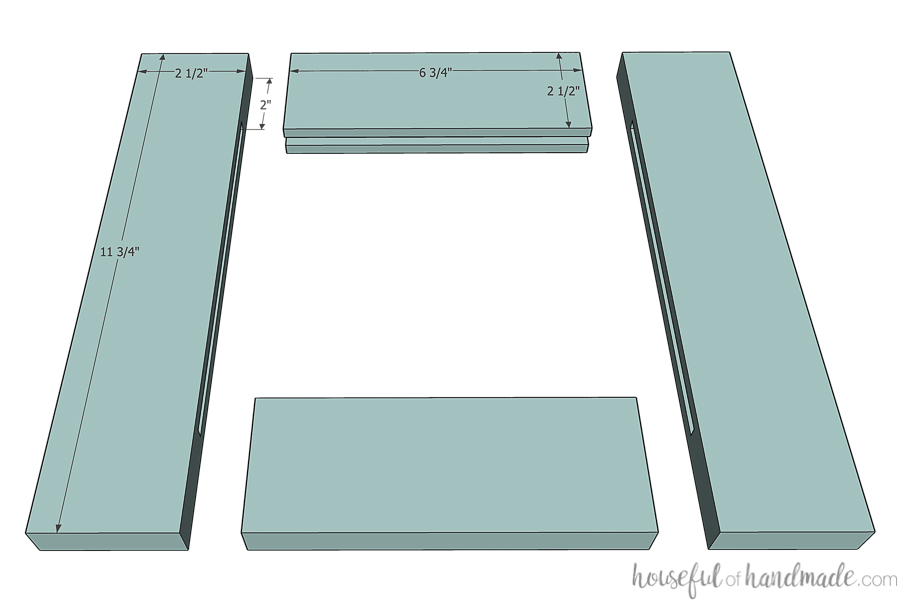
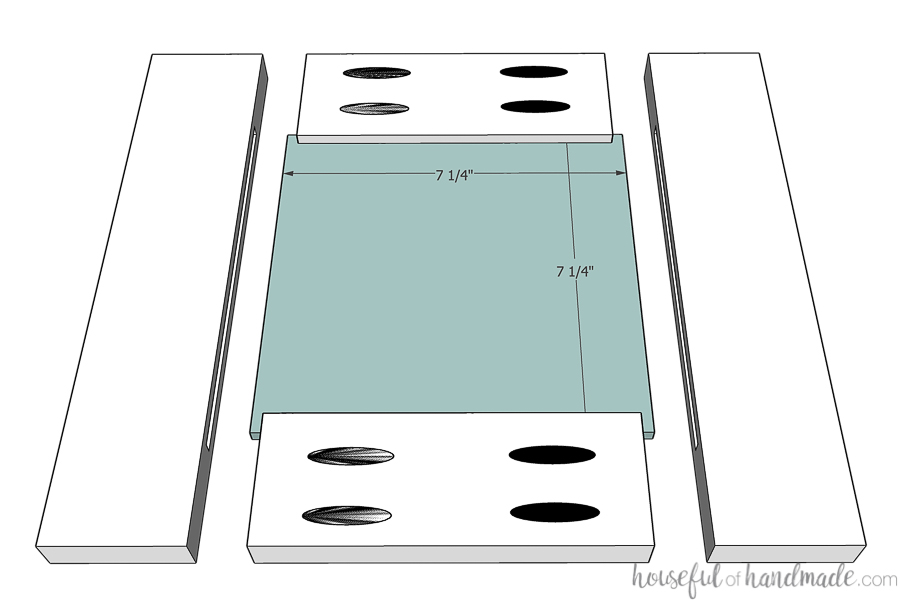
Start assembling the drawer front
On the drawer front rails, router a ¼” deep by ¼” wide groove in the center of one side. On the drawer front stiles, measure 2” from each end and draw a line. Router a ¼” x ¼” groove in one side of the board between these lines.
-
Finish the drawer front
Set your pocket hole jig for ¾” thick material. Drill 2 pocket holes in the back side of the drawer front rail pieces. Place the drawer front panel inside the grooves. And secure the rails to the stiles with 1 ¼” pocket hole screws and wood glue. For more details or for instruction on how to build a drawer front without a router, visit the link in the extras on DIY cabinet doors.
-
Install the drawer
Install the drawer slides so they are set back ¾” from the front of the completed pedestal (flush with the inside of the face frame) and flush with the front of the drawer box. Attach the drawer front to the front. I share a trick for using the Kreg cabinet hardware jig to align your drawer fronts in my built in desk post (link in extras).
-
Enjoy!
Paint/stain your new laundry pedestal. Then place it under your washer & dryer to raise it off the floor. I recommend attaching it to the walls into studs for extra sturdiness. And enjoy doing your laundry without bending over!