


Build a knock-down kids playhouse that can be easily disassembled, transported, and reassembled (no tools required) to a kids fall festival or truck or treat event.
Tools
Kreg Tools


Other Tools
-
Clamps

-
Nail Gun
-
Shop Vacuum
-
Sawhorse
Materials
Wood Products
- 2 Plywood , 1/2" Thick , Full Sheet
- 1 Plywood , 1x2 , Quarter Sheet
- 3 Board , 1x4 , 96"
- 10 Board , 1x2 , 96"
Hardware & Supplies
- 1 Wooden Drawer Knob
- 1 Gate Hinge Pair
- 1 Package of 1" Brad Nails
- 1 Package of 3/4" Pocket Hole Screws
- 1 Gallon of Black Paint (house sides)
- 1 Quart of Orange Paint (trim)
- 1 Quart of Stain (door)
- 1 Quart of Outdoor Sealer
- 1 Wood Glue
Directions
-
Cut materials to size
Cut the plywood down to the sizes listed in the cut list. Cut the trim to size as you construct the playhouse.
-
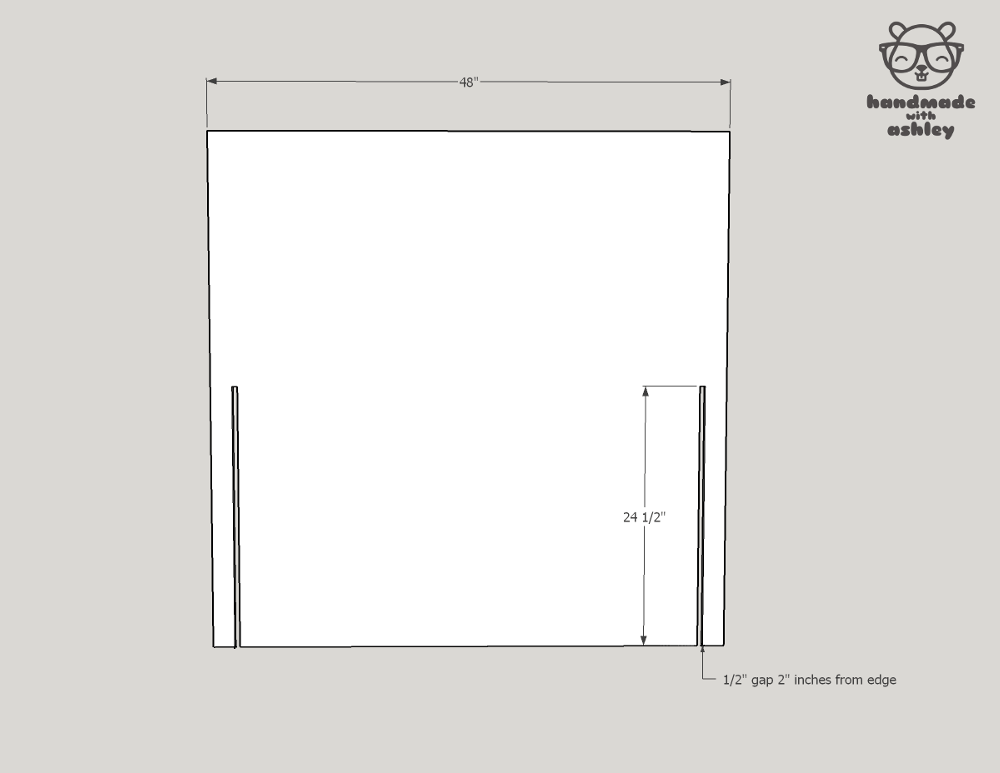
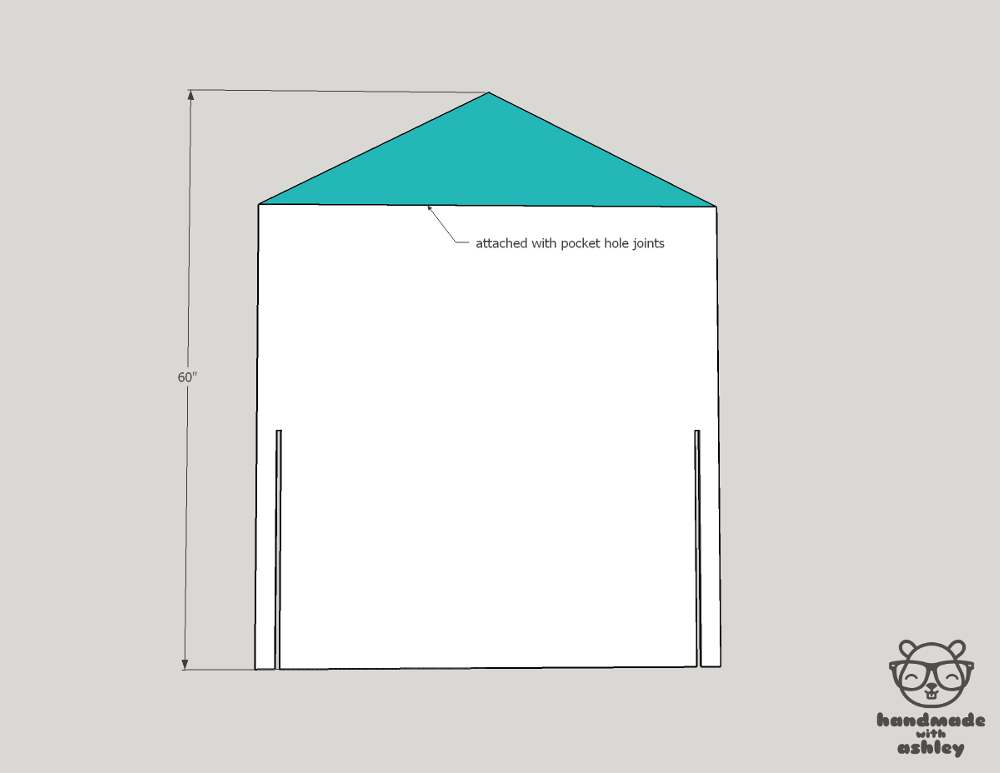
Cut slots for assembly
Cut two slots on each side of the house. The slots will be used to assemble the playhouse.
-
Create faux planks (optional)
This is an optional step that adds a nice touch to the appearance of the playhouse.
To add a faux wood plank look to the playhouse:
Use a circular saw with an edge guide and set the saw depth to 1/8". Run the saw across the width of the panel to create grooves every 6" on panel
of the house.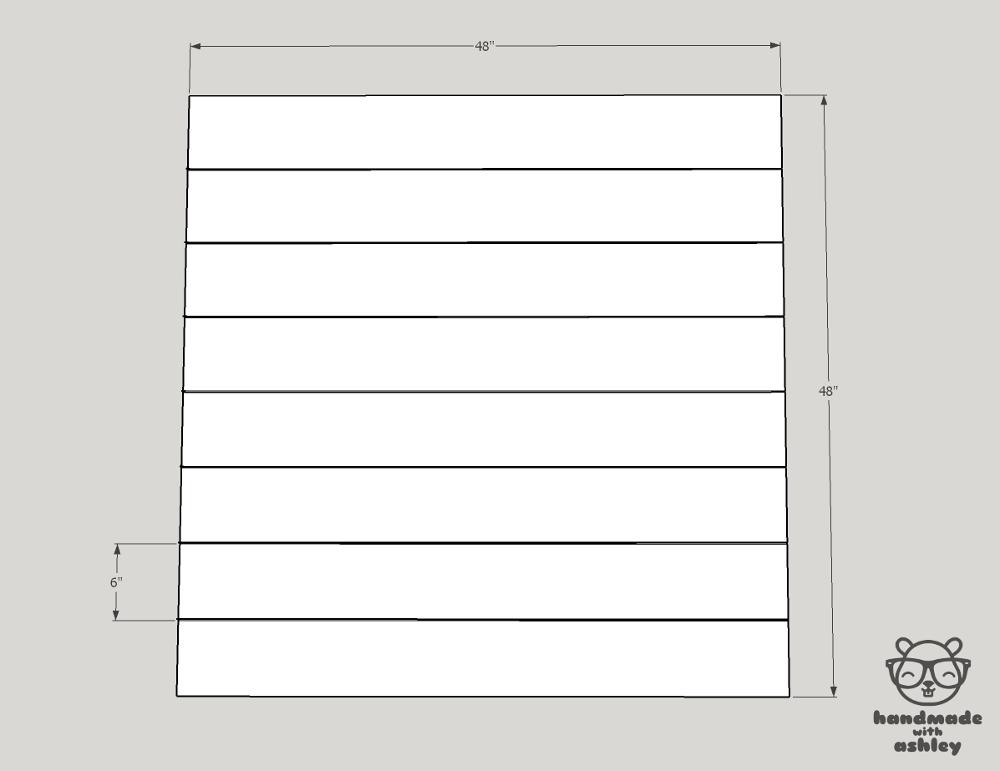
-
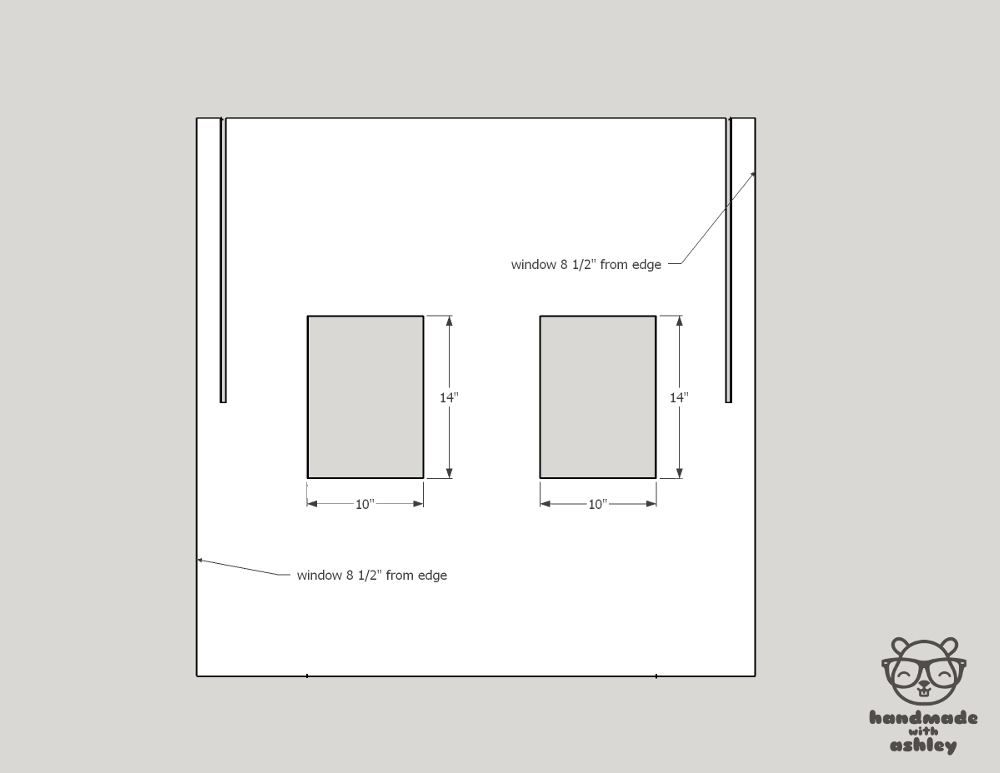
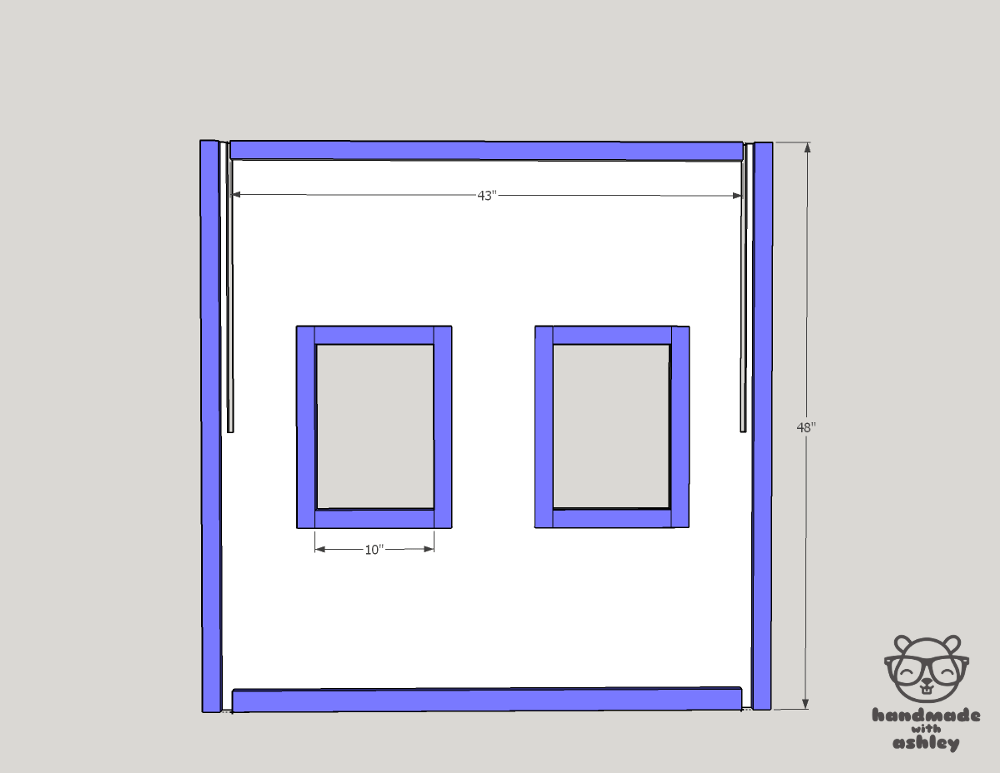
Cut rectangles for the windows
Cut out 2 - 14" x 10" rectangles on 2 panels of the house. The rectangles will be windows for the playhouse.
Drill a pilot hole large enough for a jigsaw blade and cut out the shapes of the windows.
-
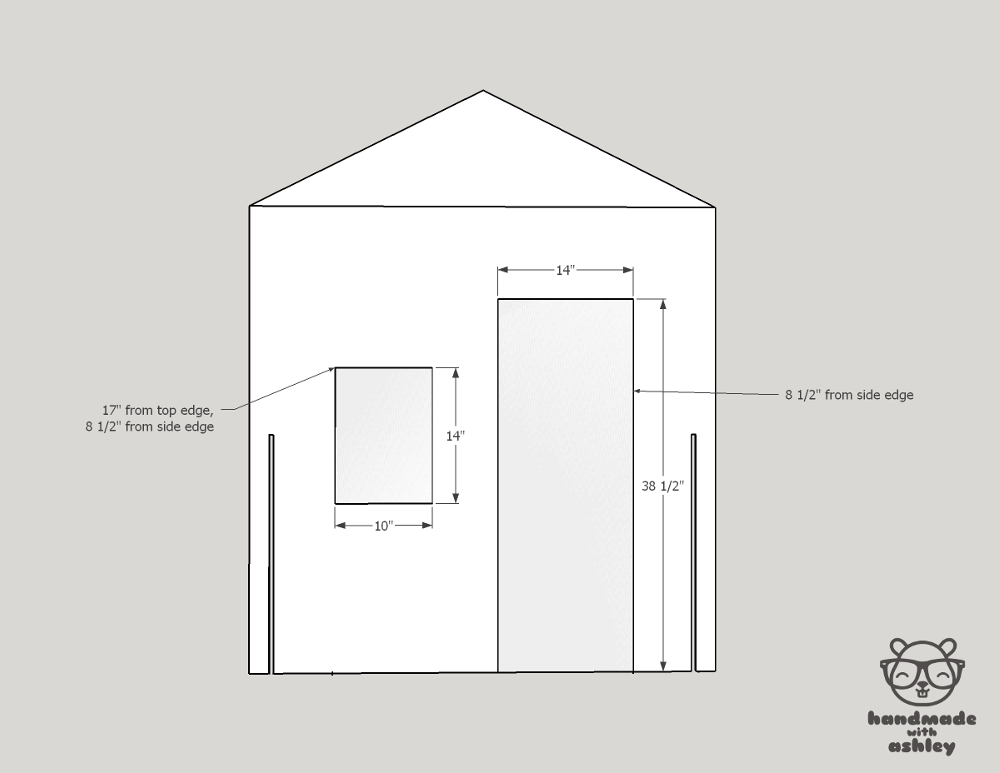
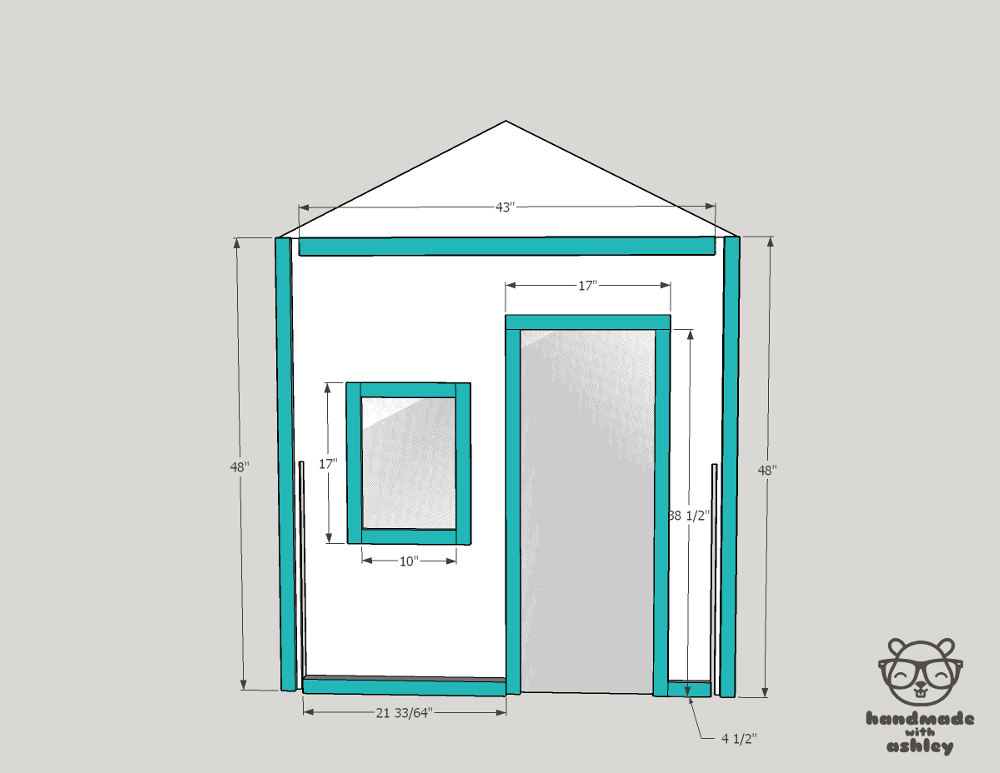
Cut a rectangle for the door
Cut out a rectangle for the door on the front panel. On the same panel, cut another rectangle for a window.
Note: The back panel does not have windows.
-
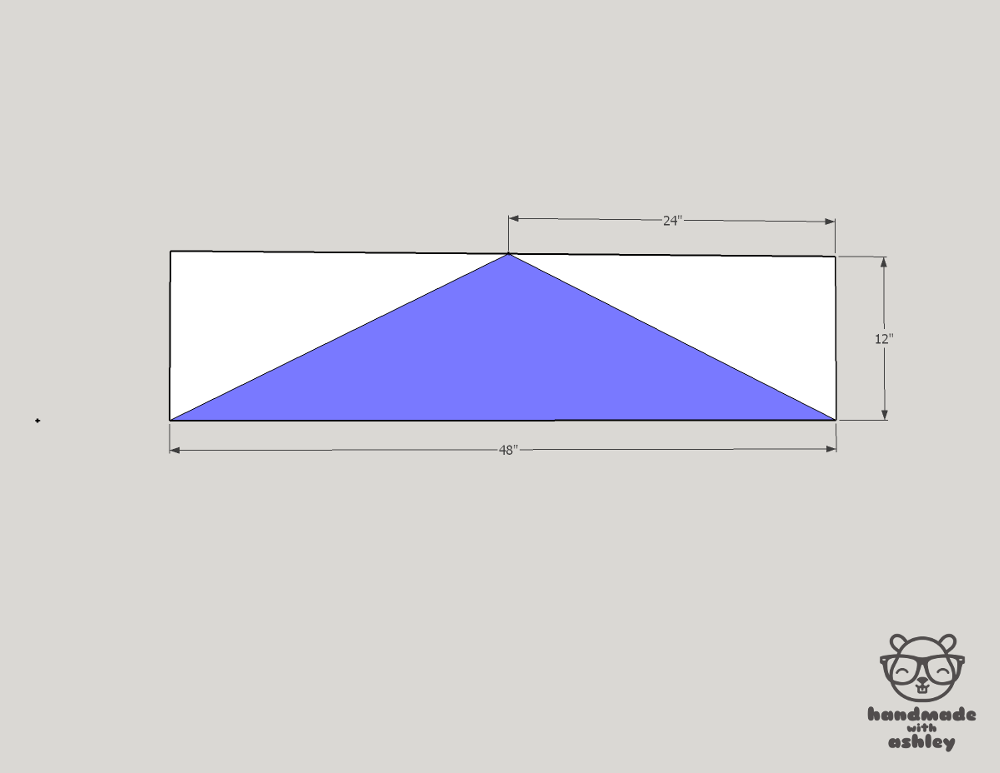
Cut out a triangle for the roof
Cut out a triangle from the 12" x 48" piece of plywood (2). This represents the roof of the playhouse.
-
Attach roof to front / back panels
Use pocket hole joints to attach the roof to the front and back panels.
Important: The front and back panels will have the slots on the bottom.
-
Attach trim to the side/back panels
Use a brad nailer, 1" brad nails and wood glue to attach the trim to the perimeter of the windows and the edges of the panel.
Note: Cut the window trim to size instead of cutting all the boards in advance.
-
Attach trim to front panels
Use a brad nailer, 1" brad nails and wood glue to attach the trim to the perimeter of the windows, the door and the edges of the panel.
-
Attack trim to the roof
Use either a brad nailer or pocket hole joints to attach trim to the roof the playhouse.
Attach the trim to the roof on the front and back panel.

-
Paint, assemble, decorate & enjoy!
Paint the playhouse to your liking.
Assembling the house is a 2-person job (could be a one person job with the use of clamps).
First steady the side panels. Slide the front panel over the slots on the side panels. Repeat for the back panel.
The playhouse should be nice and sturdy despite being very portable.
Decorate the playhouse and enjoy!

-
Visit handmadewithashley.com!
For more woodworking projects and ideas visit handmadewithashley.com!

-
Glue up boards for the door
Cut boards for the door to rough size and glue the boards together.
Once the glue up has dried trim the uneven edges and cut the door to final size.
Once a finish has been applied to the playhouse, install the door with a pair of gate hinges. Use drawer pulls or knobs for handles for the door.
