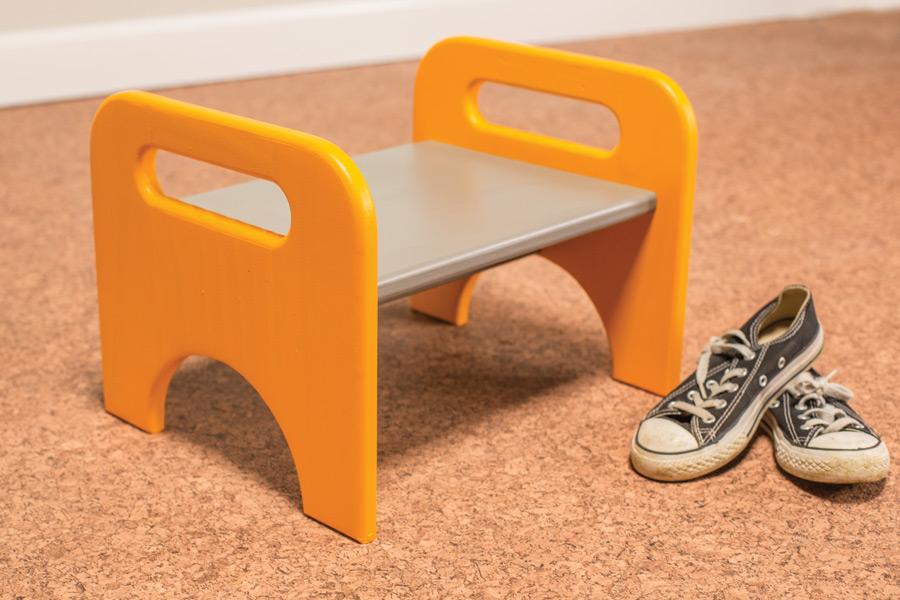
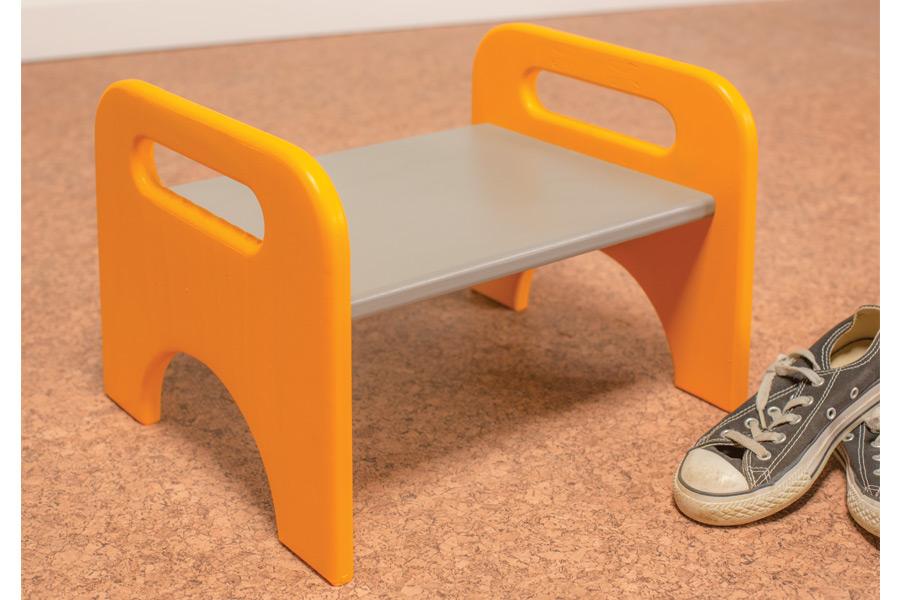
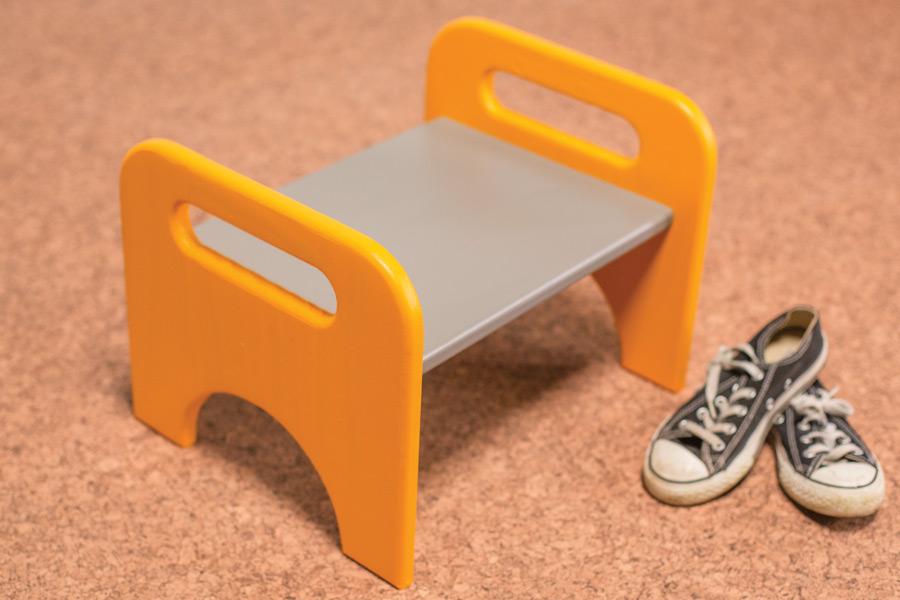
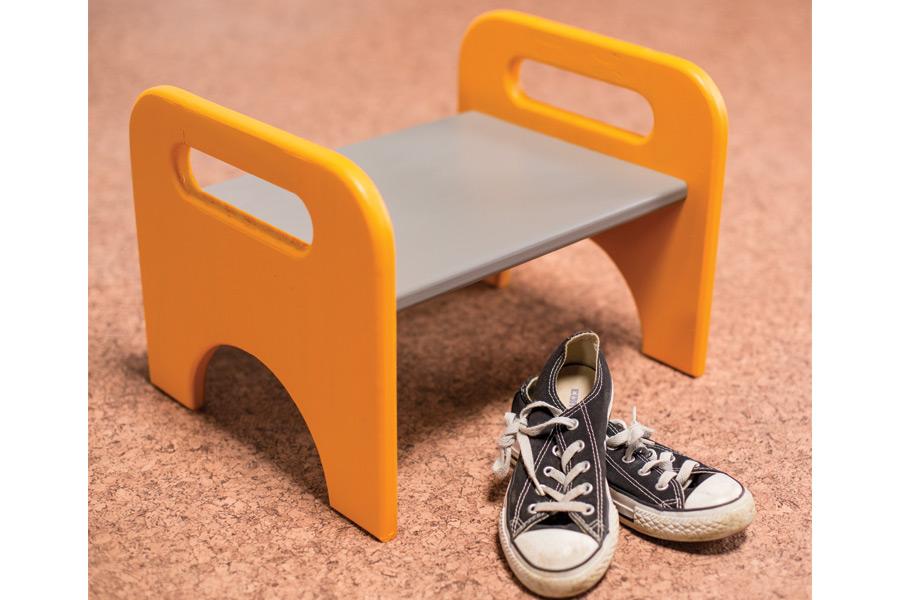


This step stool is a great way to help kids get a little extra height for those times when they want to help out in the kitchen, or when they need to reach a shelf. It’s also a great place to perch while putting on shoes. You’ll have fun building the step stool, and kids will have fun using it.
Tools
Kreg Tools


Other Tools
-
Compass

Materials
Wood Products
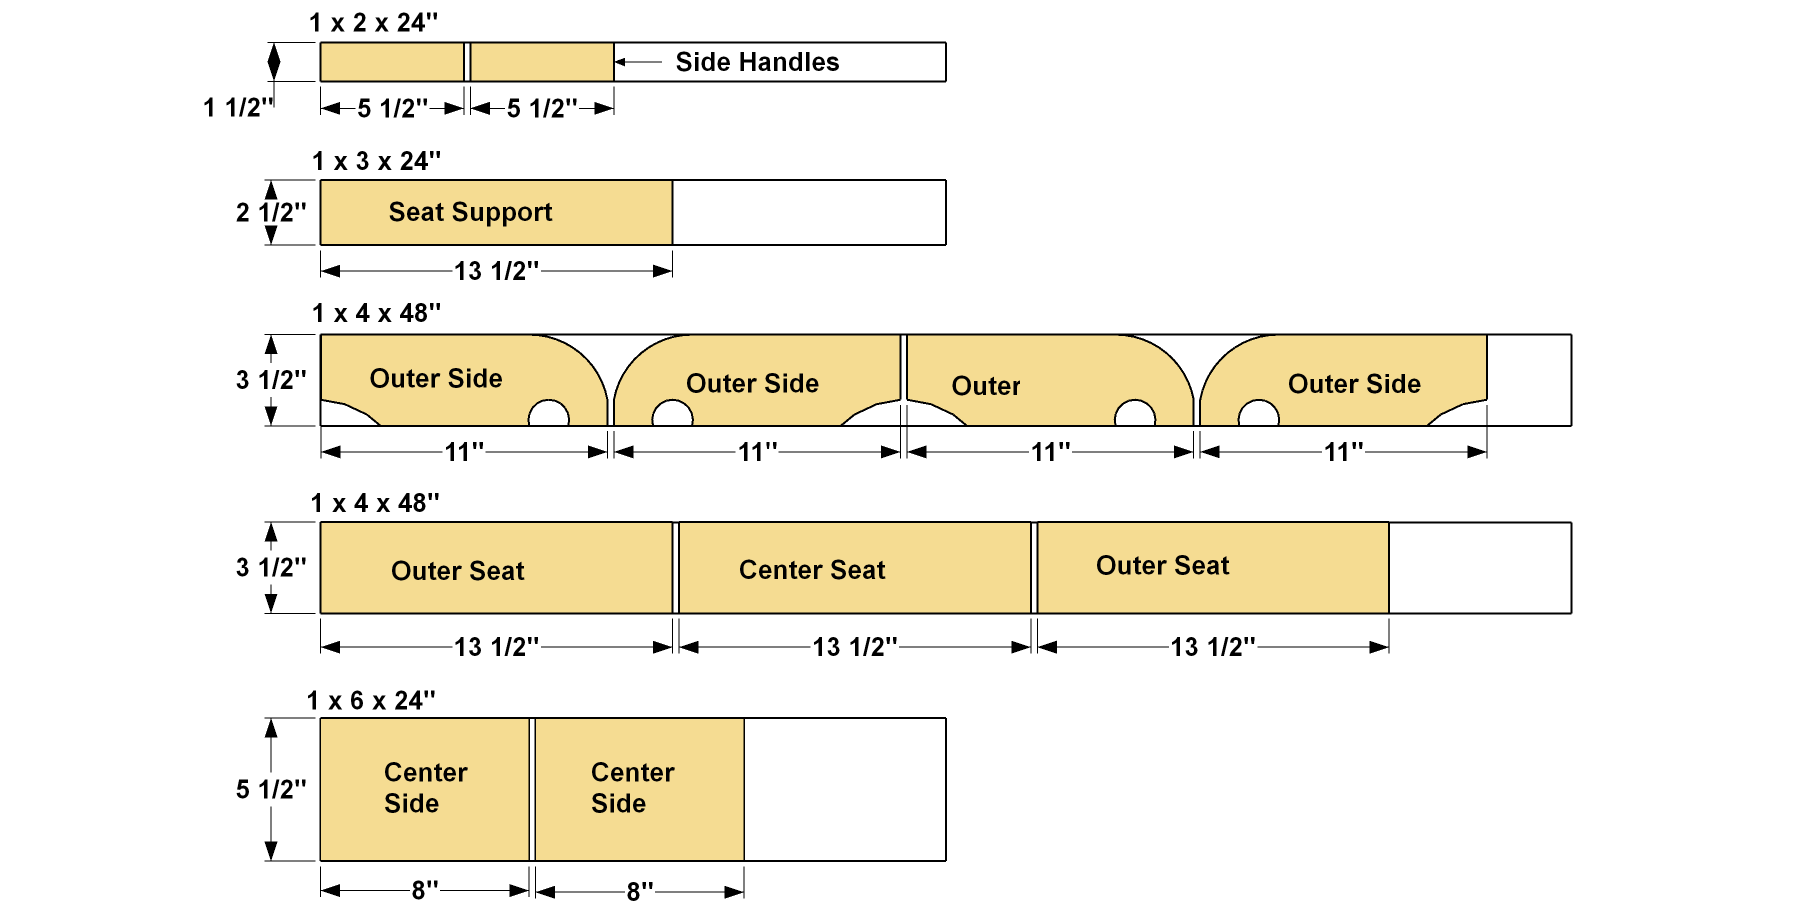
- 1 Board , 1x2 x 24"
- 1 Board , 1x3 x 24"
- 2 Board , 1x4 x 48"
- 1 Board , 1x6 x 24"
Hardware & Supplies
- 32 Coarse-thread Kreg Pocket-Hole Screws
- 16 Paint-grade Kreg Pocket-Hole Plugs
- 1 1 1/2" drill bit
- 1 Wood glue
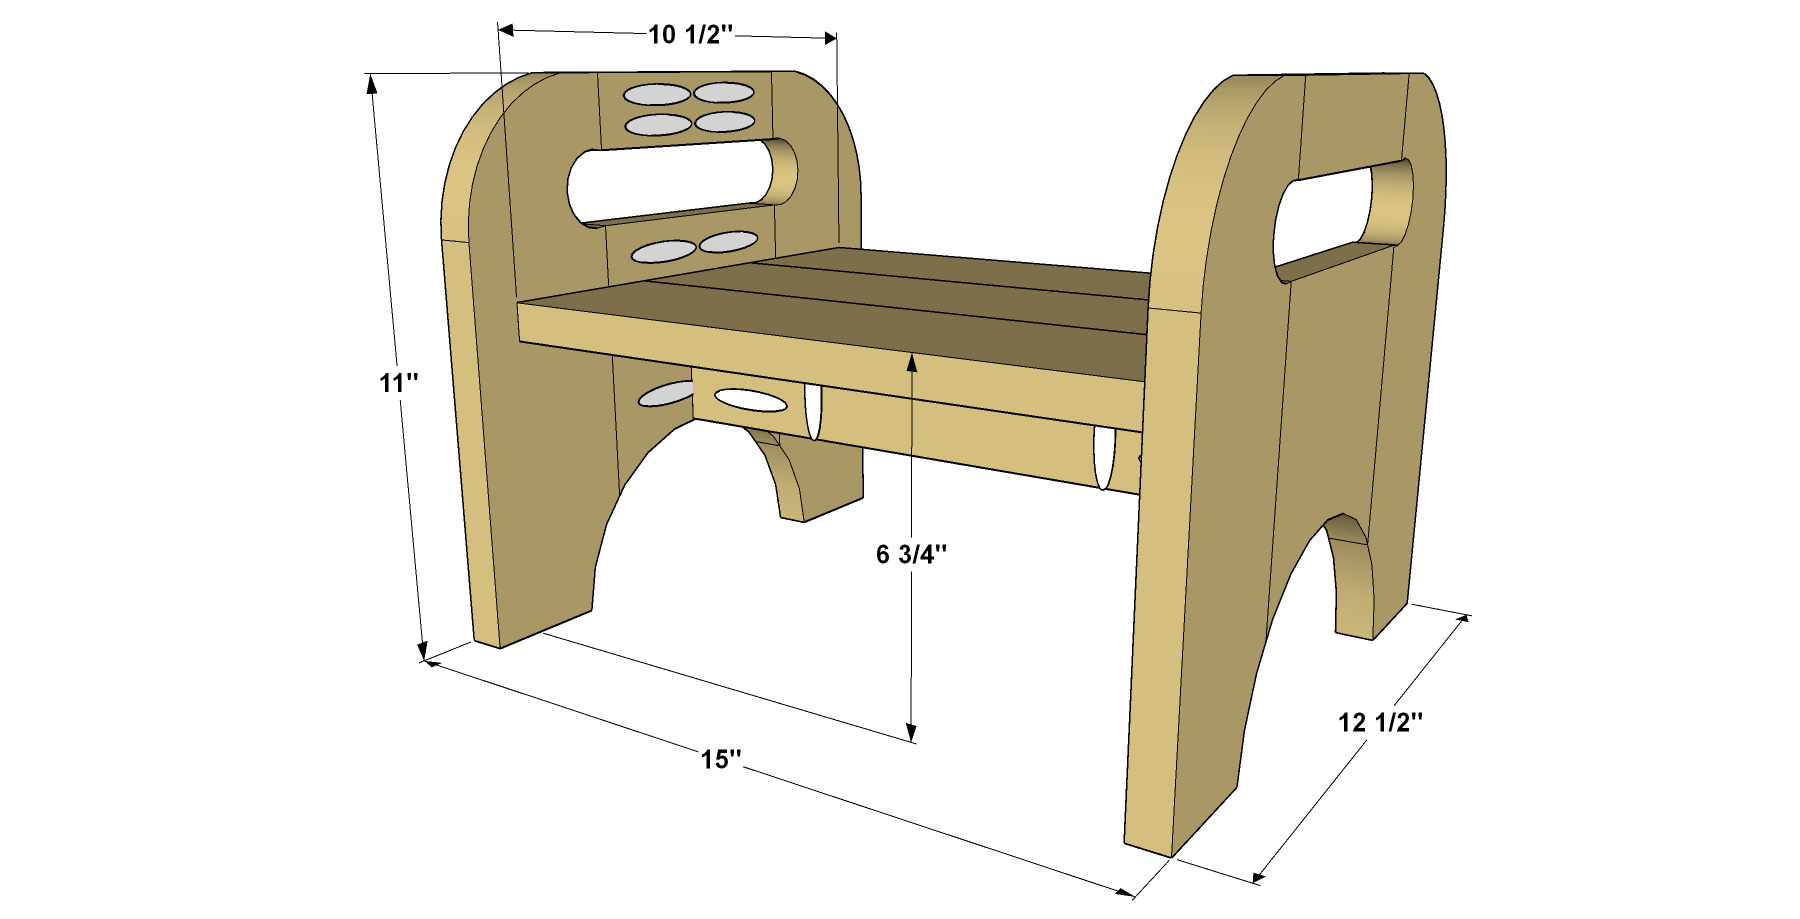
Cut List & Parts
- 4 Outer Side , 3/4" x 3 1/2" x 11"
- 2 Center Side , 3/4" x 5 1/2" x 8"
- 2 Side Handles , 3/4" x 1 1/2" x 5 1/2"
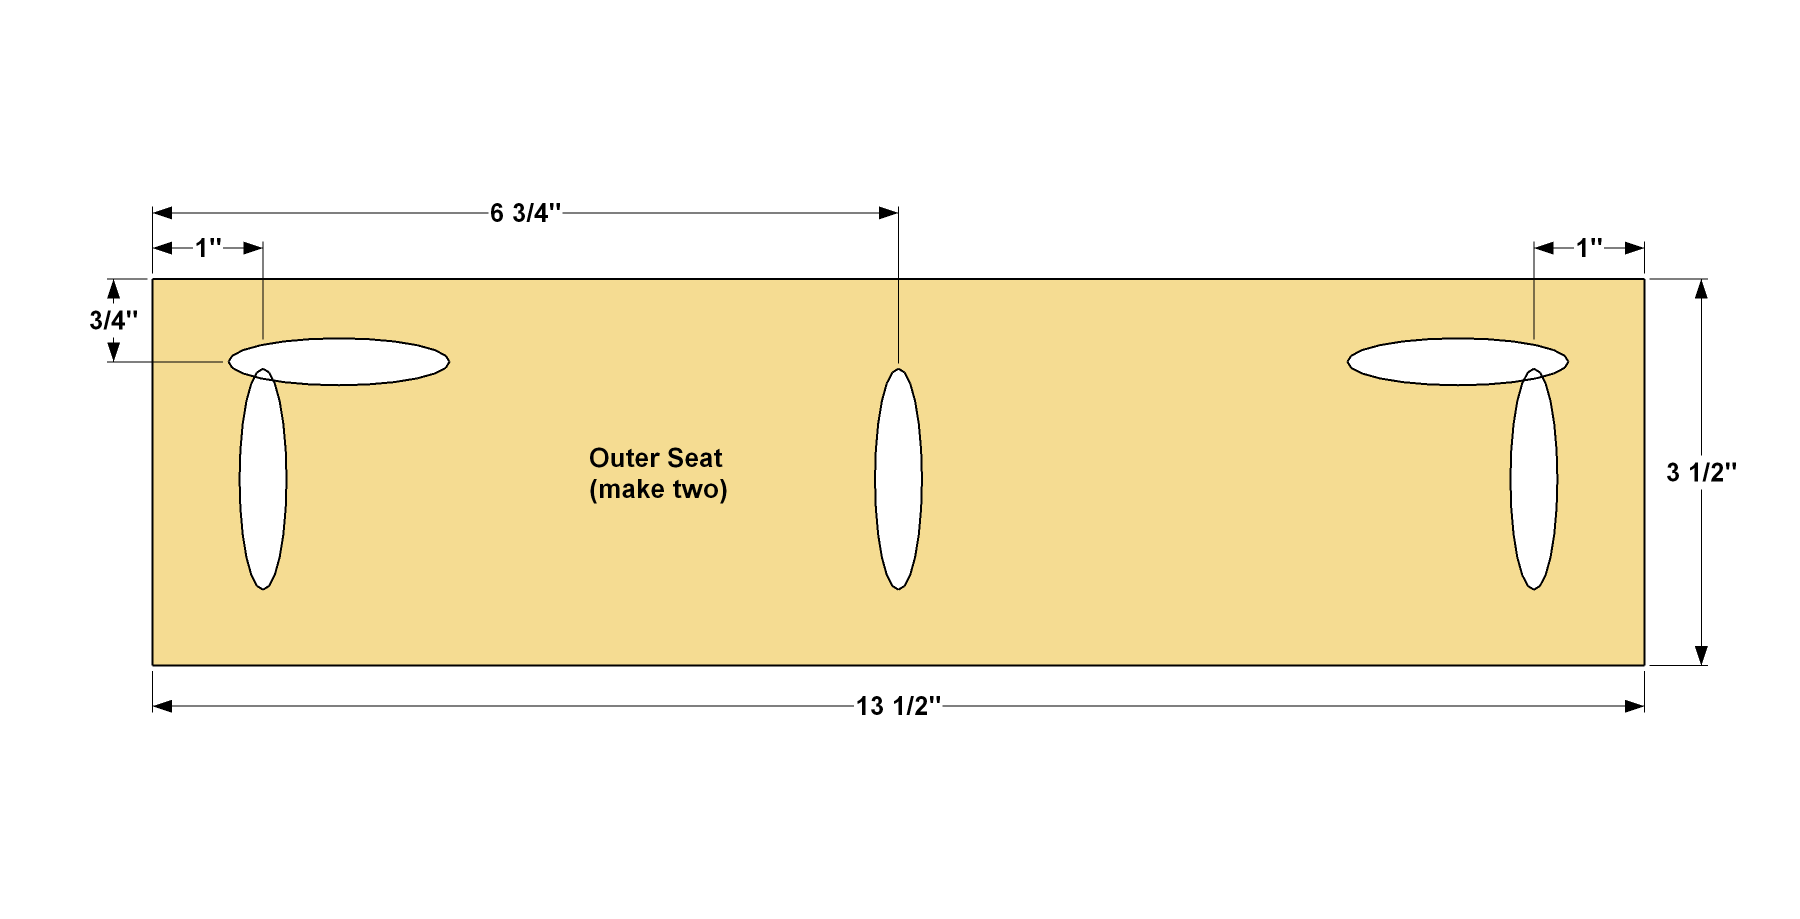
- 2 Outer Seat , 3/4" x 3 1/2" x 13 1/2"
- 1 Center Seat , 3/4" x 3 1/2" x 13 1/2"
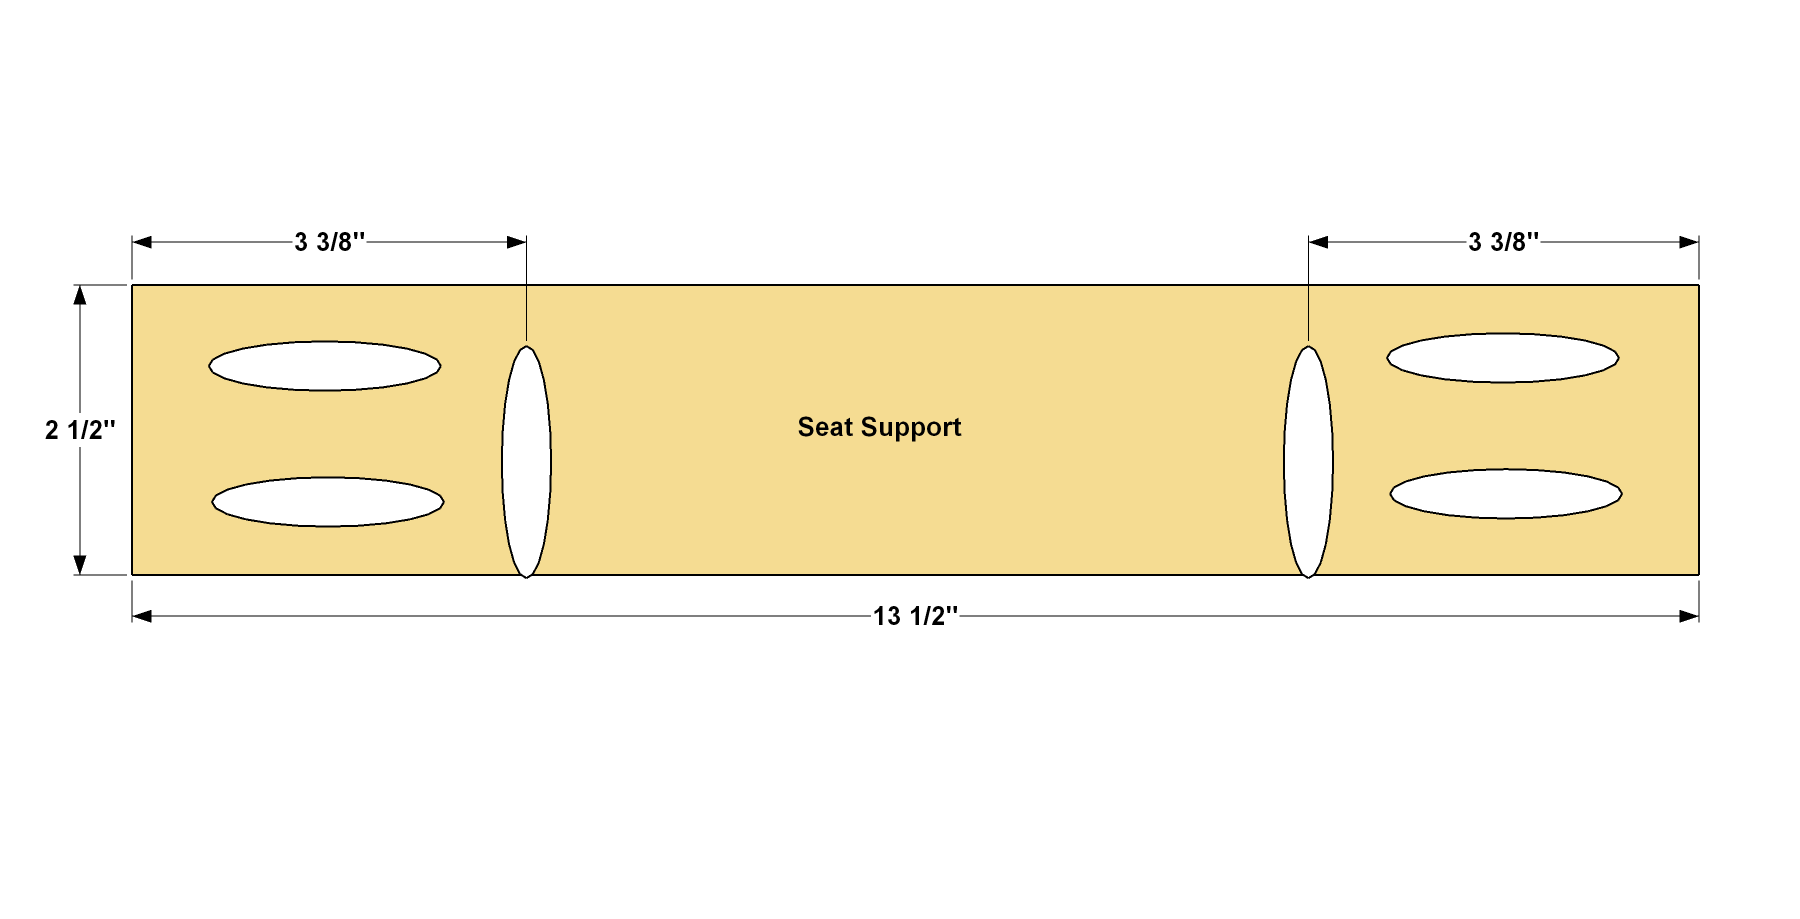
- 1 Seat Support , 3/4" x 2 1/2" x 13 1/2"
Directions
-
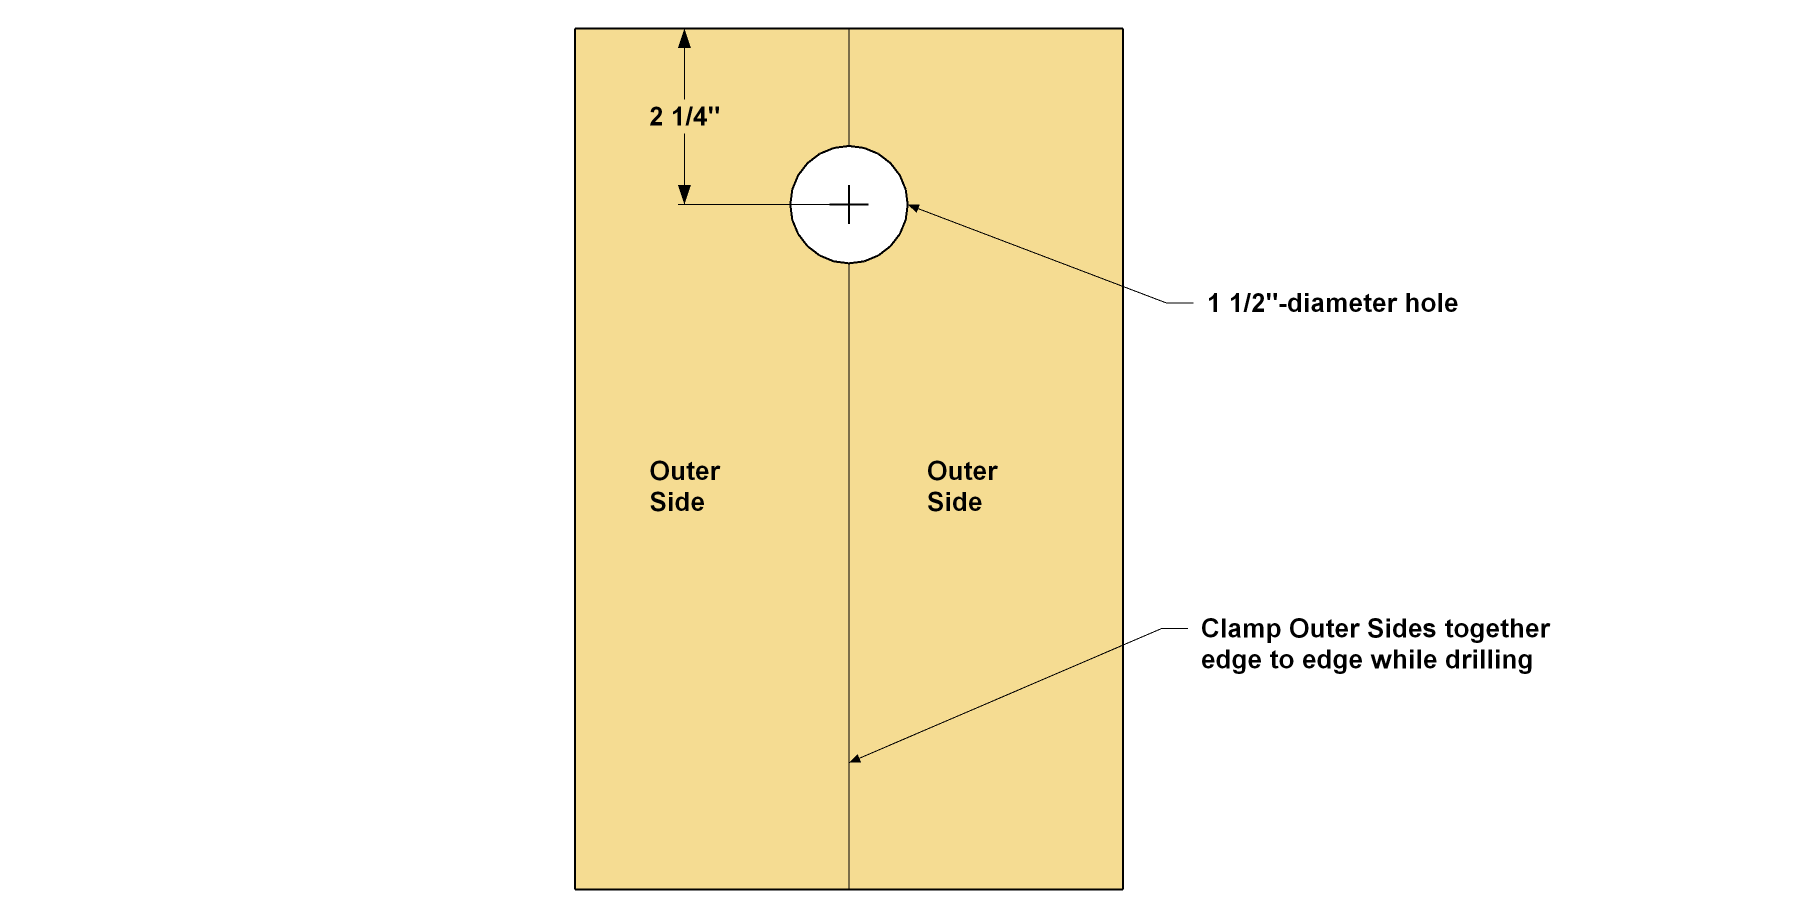
Start with the Outer Sides
Cut four Outer Sides to length from a 1x4 board, as shown in the cutting diagram. Then, clamp two Outer Sides together and drill a 1 1/2" hole where shown. Do the same with the other Outer Sides. When the step stool sides are fully assembled, these holes will become the outer ends of the handle holes.
-
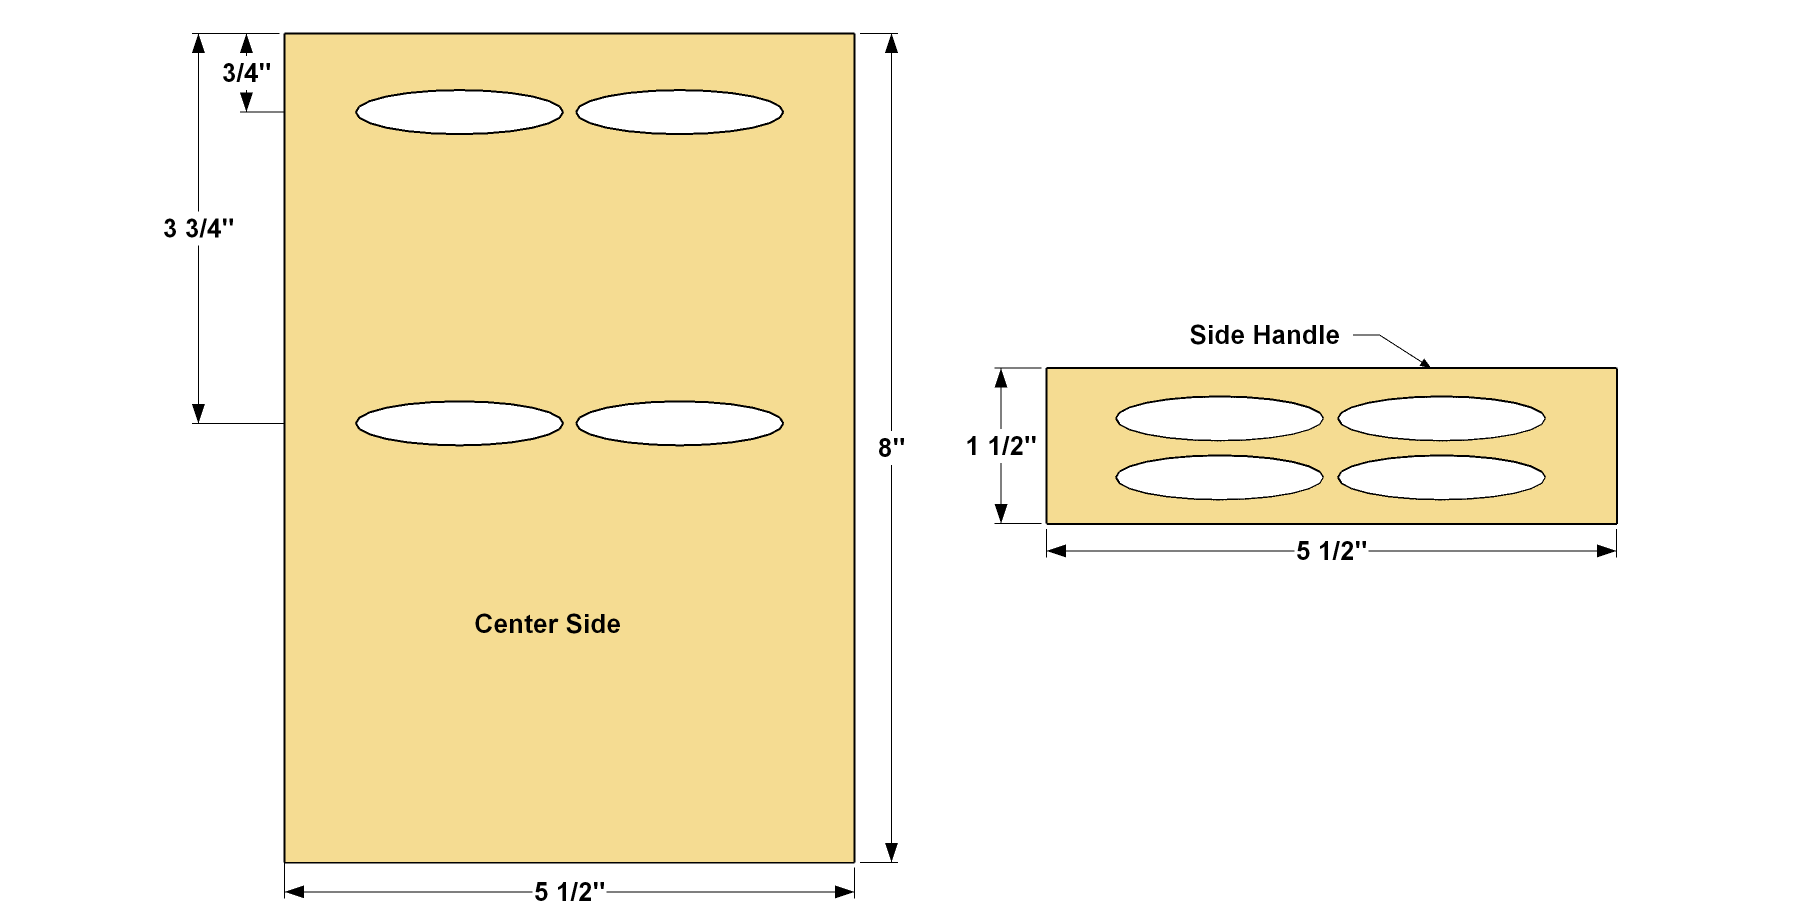
Make the Other Side Parts
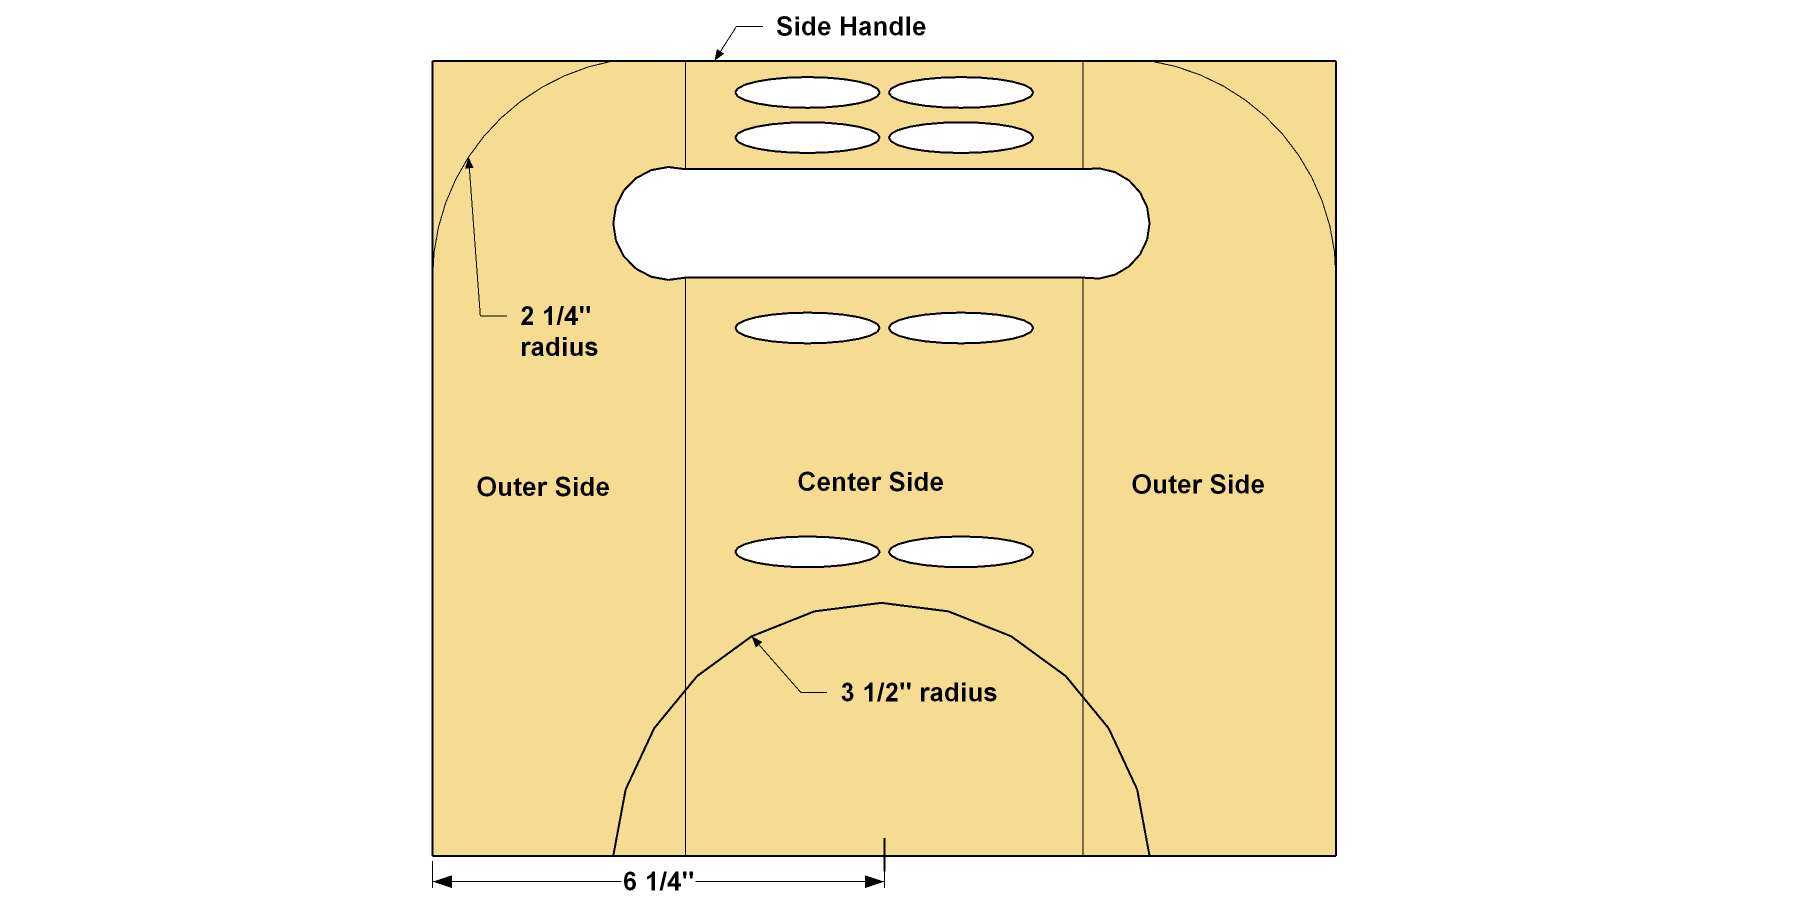
Cut two Side Handles from a 1 x 2 board, then cut and two Center Sides from a 1 x 6 board, as shown in the cutting diagram. With your pocket hole jig set up for 3/4" material, drill pocket holes in the Side Handles and the Center Sides where shown.
-
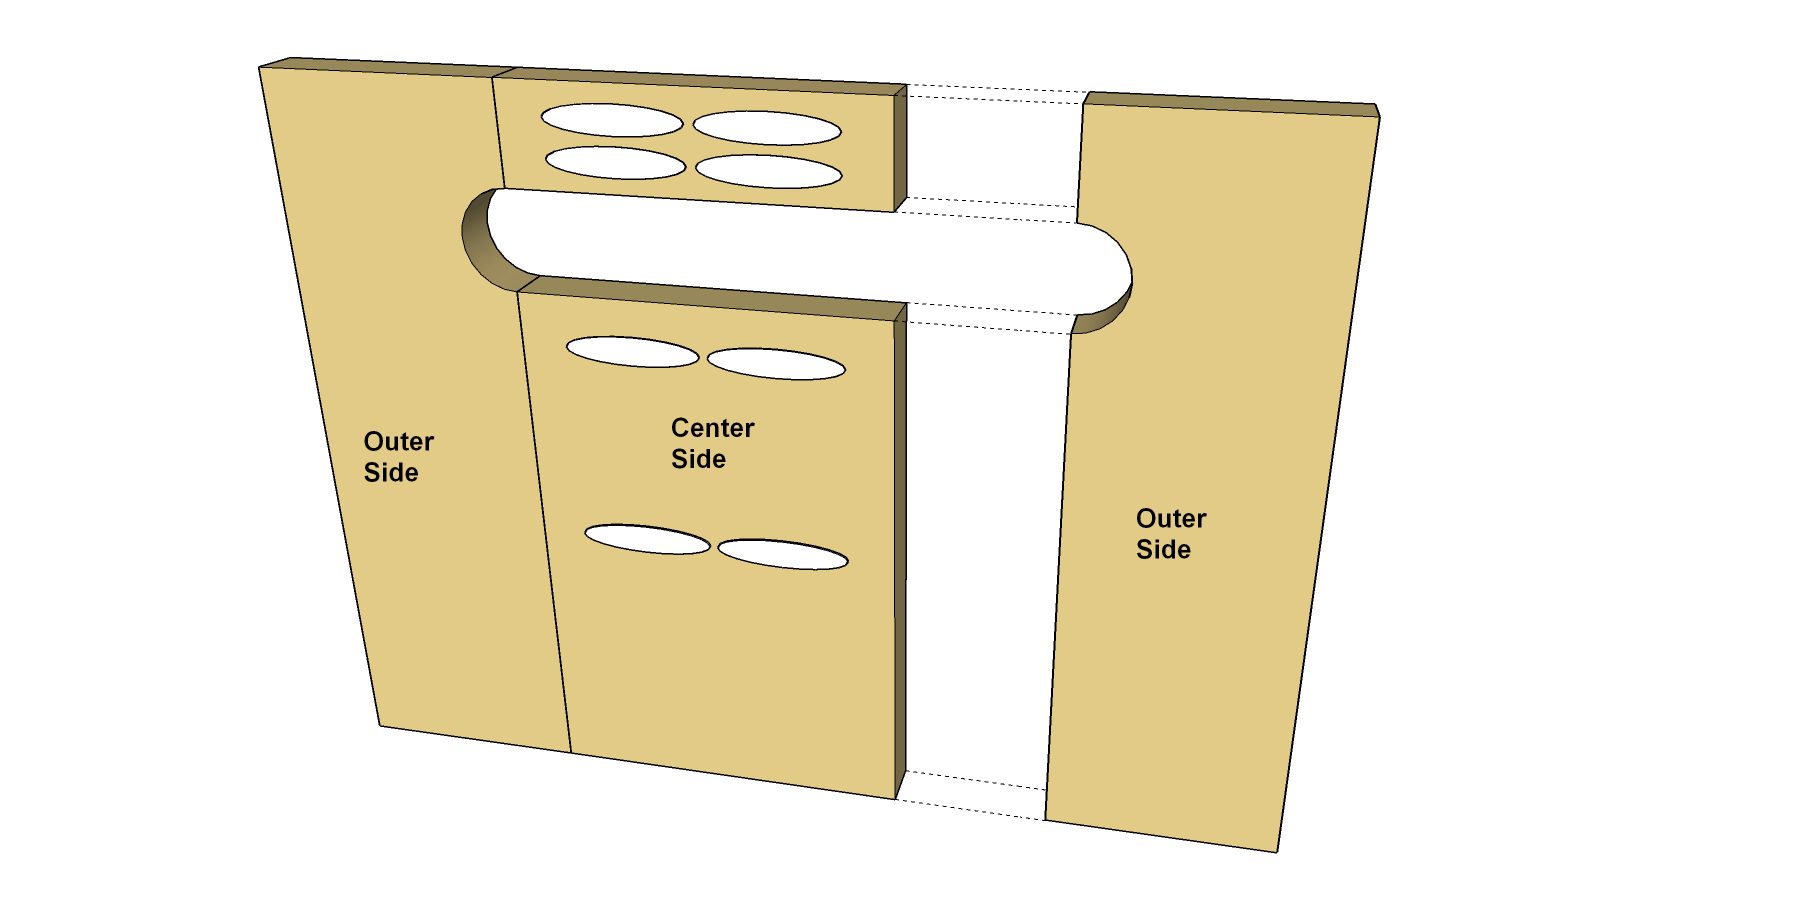
Assemble the Sides
Now you can create the side assemblies. Start by attaching the Outer Sides to the Side Handle and Center Side, as shown. Secure the pieces using 1 1/4" coarse-thread Kreg Pocket-Hole Screws. Glue in Kreg Pocket-Hole Plugs, and then sand them flush.
-
Shape the Sides
Now you can lay out the curves on the side assemblies. Using a compass, mark the upper corners as shown. Then mark the lower arch. Cut these curves with a jigsaw, and then sand the cut edges smooth. This is also a good time to round over all of the sharp edges by sanding them. You’ll want to start with coarse sandpaper, such as 80-grit, to remove material. Then use finer grits (100 or 120) to smooth the surfaces.
-
Make the Seat Parts
Cut two Outer Seats and one Center Seat from a 1 x 4 board, as shown in the cutting diagram. Drill Pocket holes in the Outer Seats where shown.
-
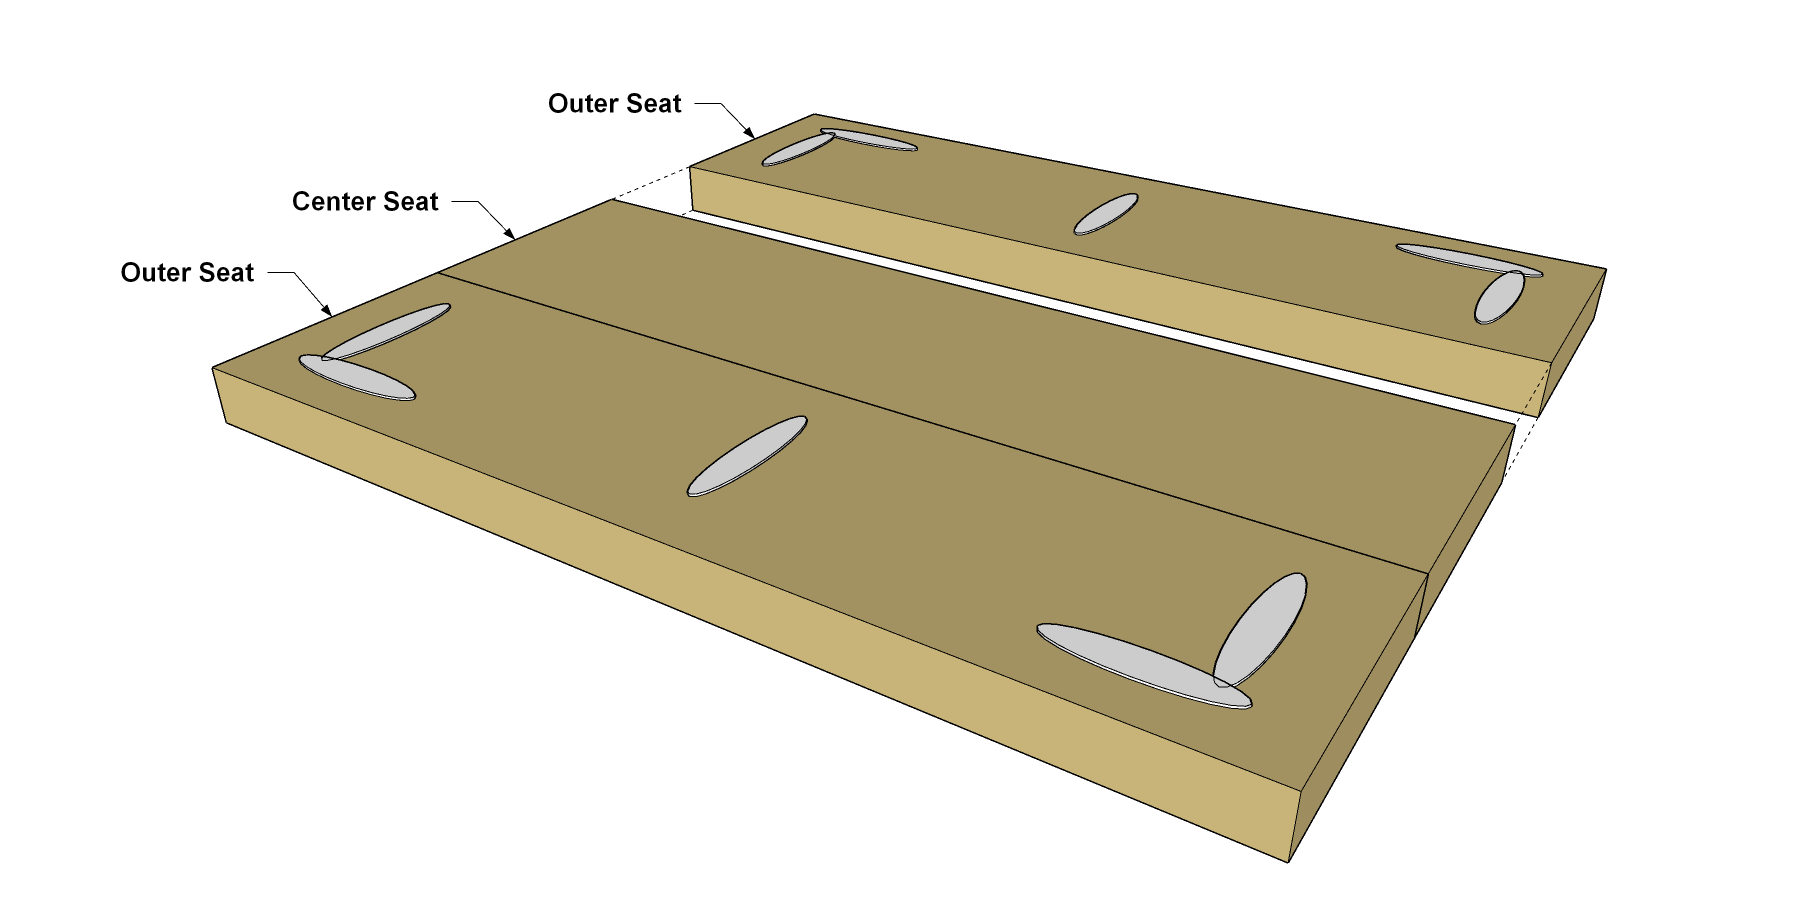
Assemble the Seat
Attach the Outer Seats to the Center Seat using 1 1/4" coarse-thread Kreg Pocket-Hole Screws, as shown. Then round over the edges of the seat assembly—but not the lower ends.
-
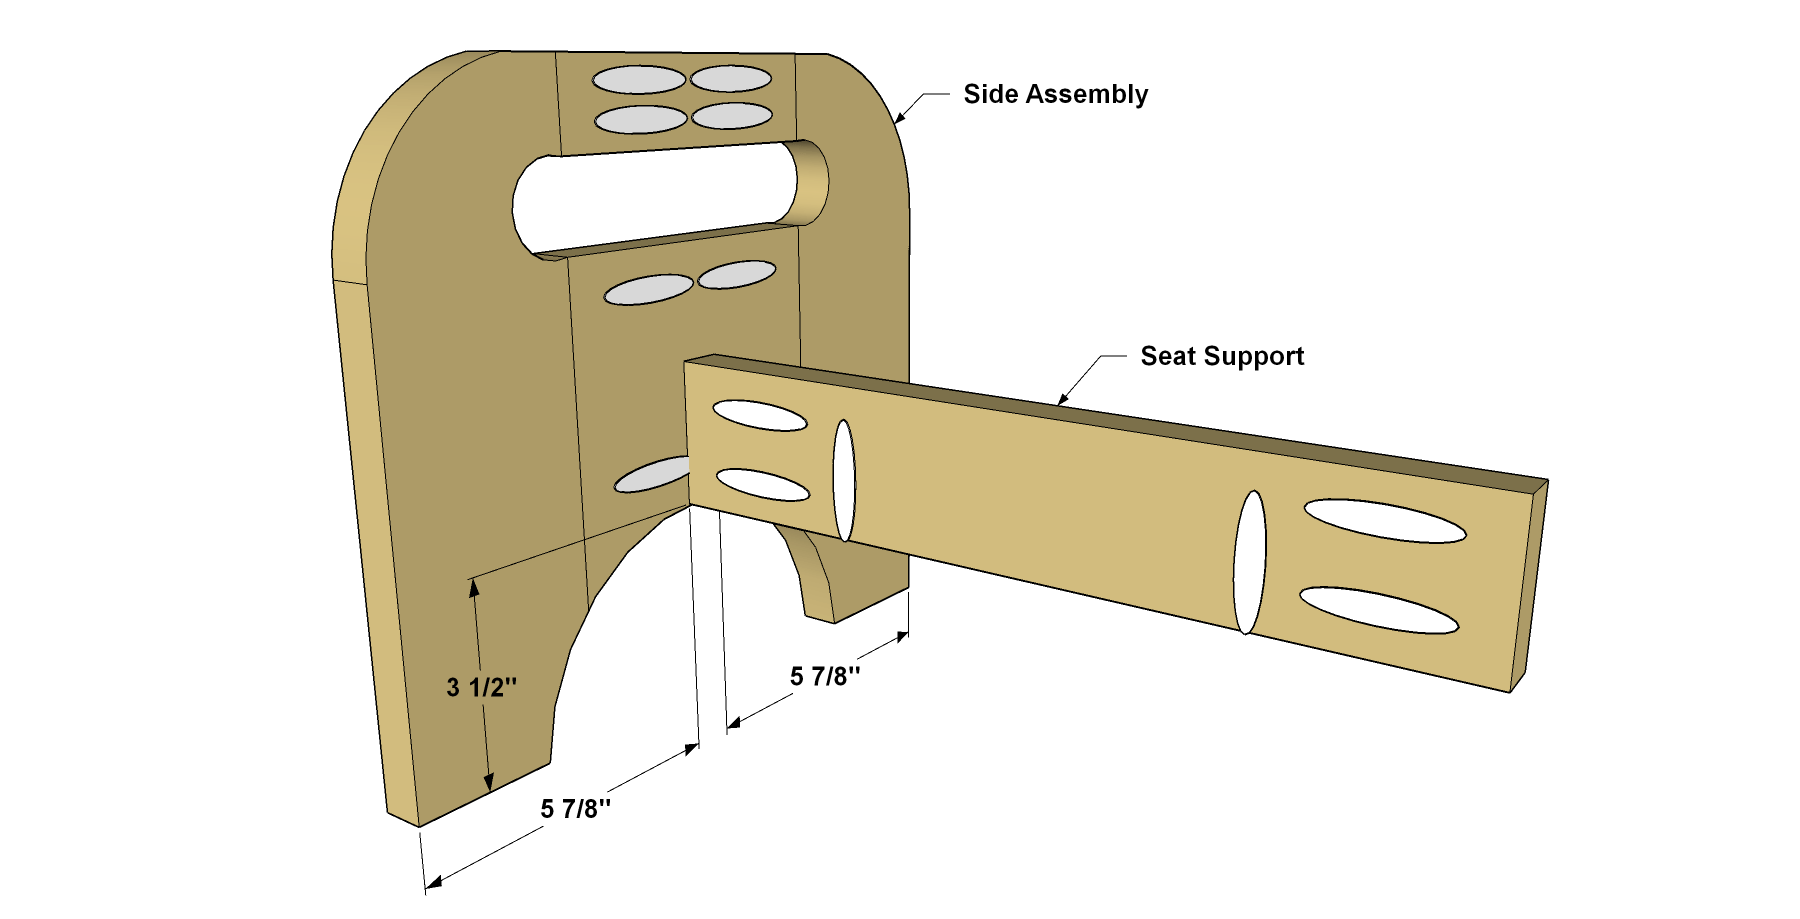
Make a Seat Support
Cut the Seat Support to length, as shown in the cutting diagram. Then drill pocket holes where shown.
-
Assemble the Parts
Secure the Seat Support to one side assembly where shown using 1 1/4" coarse-thread Kreg Pocket-Hole Screws.
-
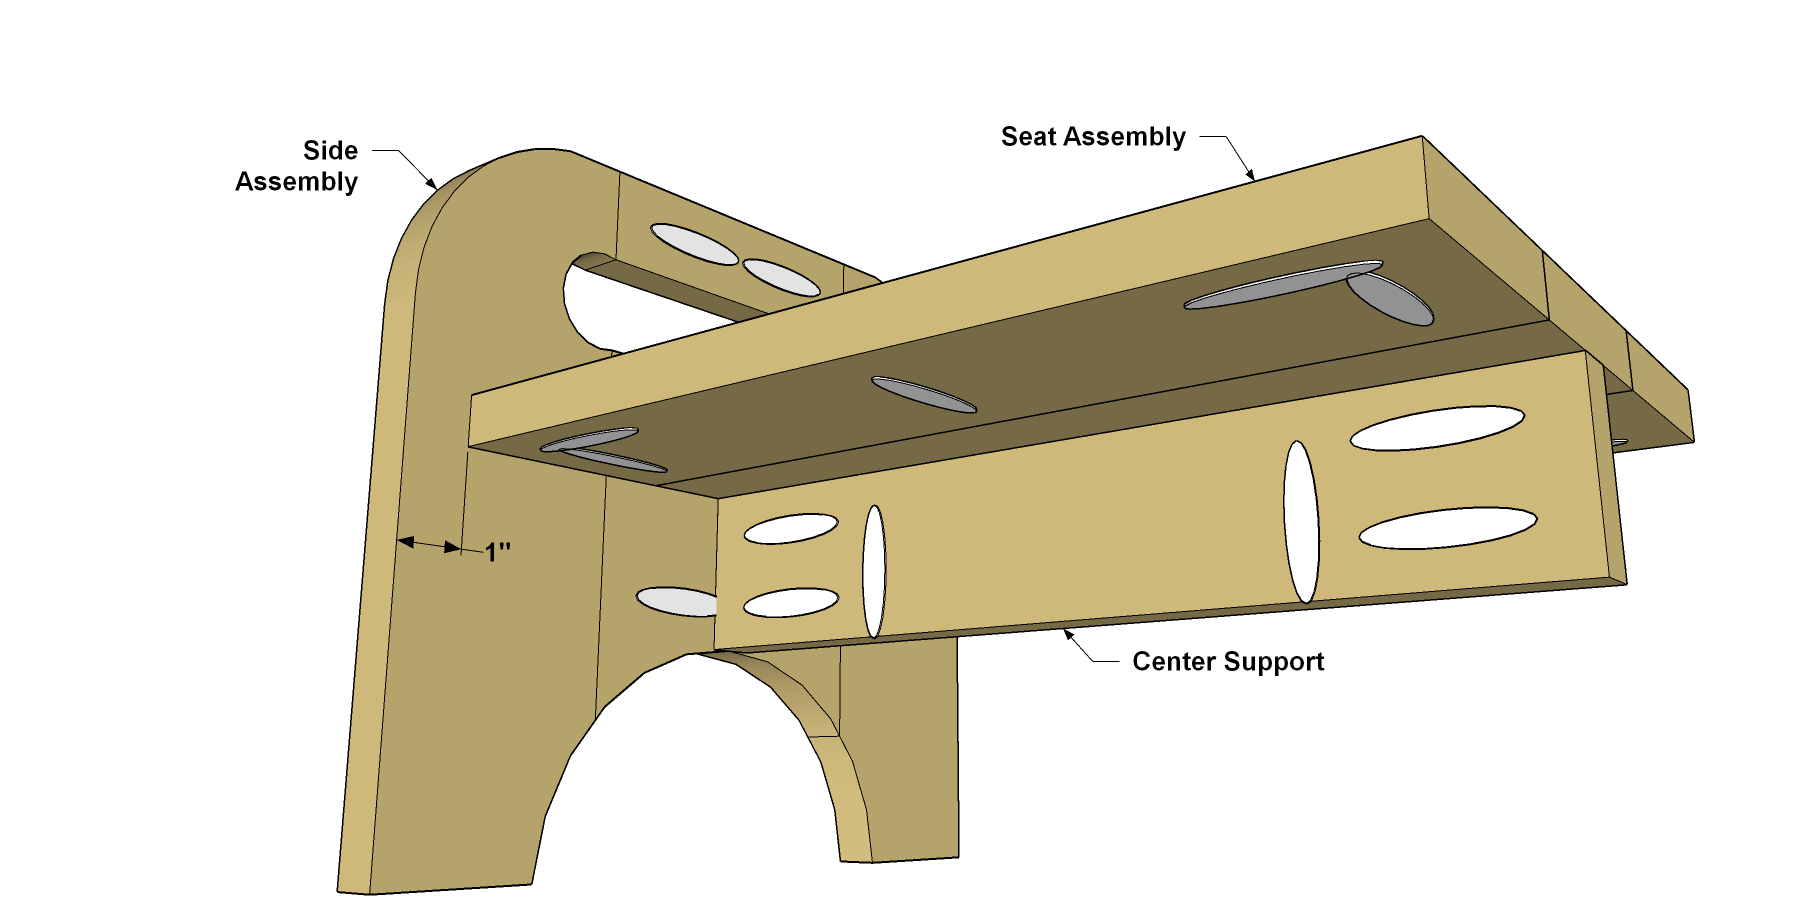
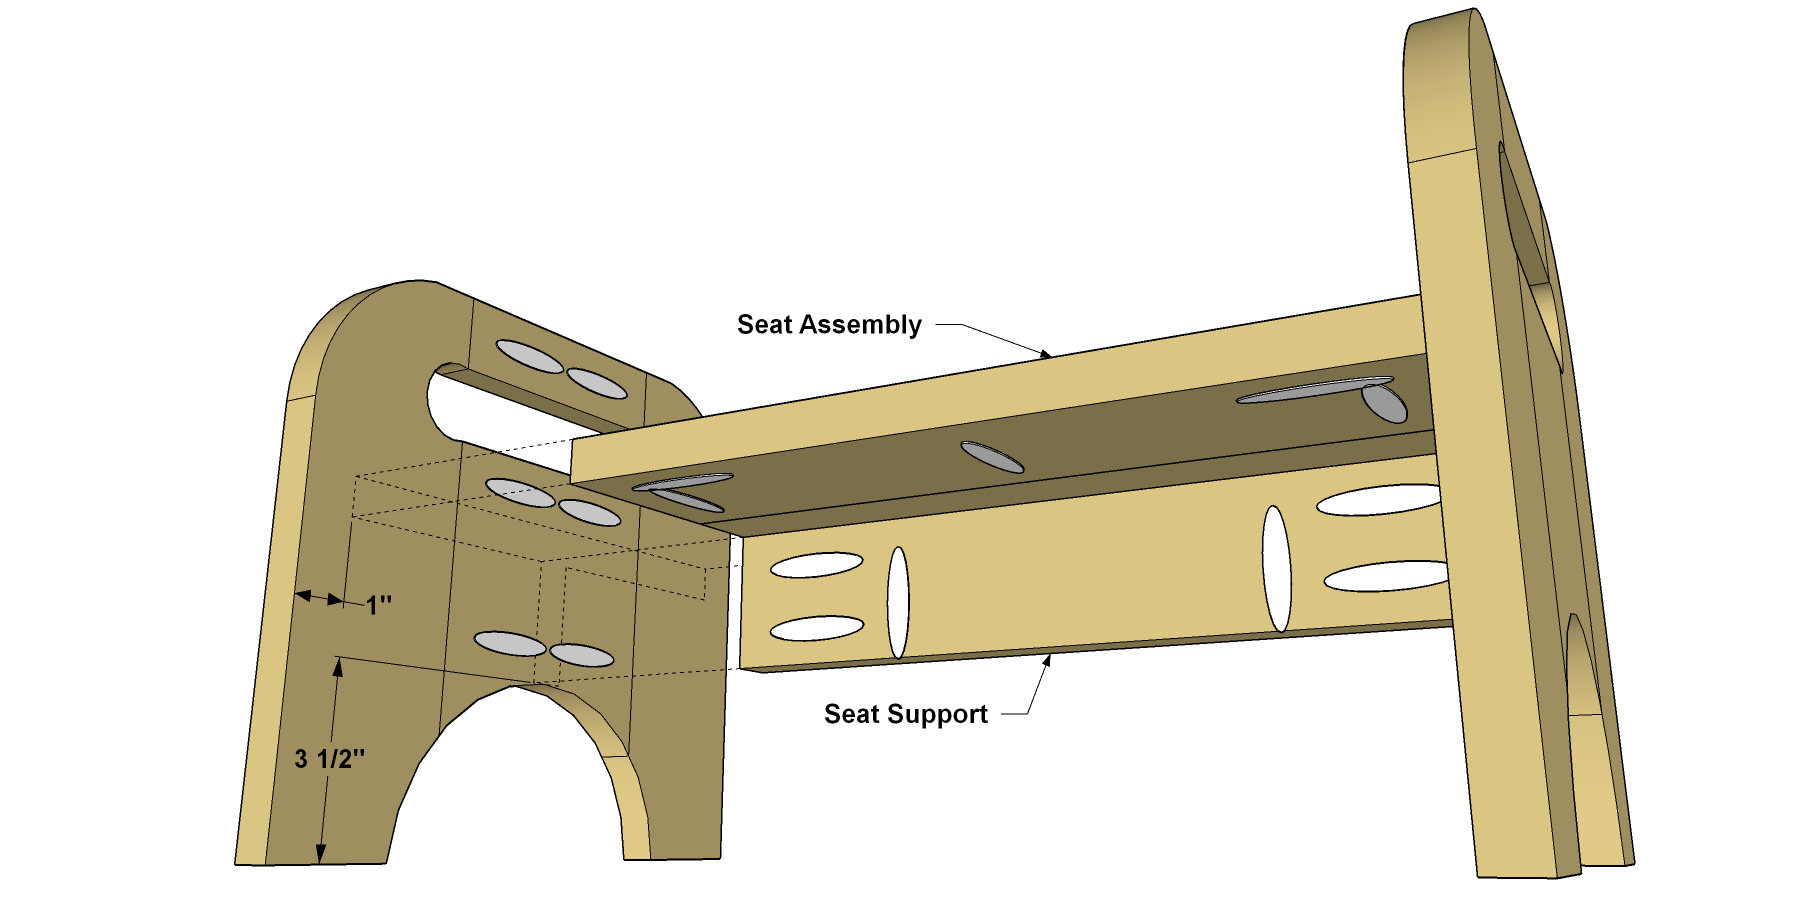
Add the Seat
Attach the seat assembly to the side assembly and to the Seat Support with 1 1/4" coarse-thread Kreg Pocket-Hole Screws.
-
Add the Final Side
Secure the other side assembly with 1 1/4" coarse-thread Kreg Pocket-Hole Screws as shown.
-
Paint or Stain the Step Stool
With assembly complete, you can paint or stain the step stool. Before that, if you want, you could plug the remaining pocket holes. They really don’t show, so this is up to you. If you choose to fill them, you’ll need another 16 plugs.