

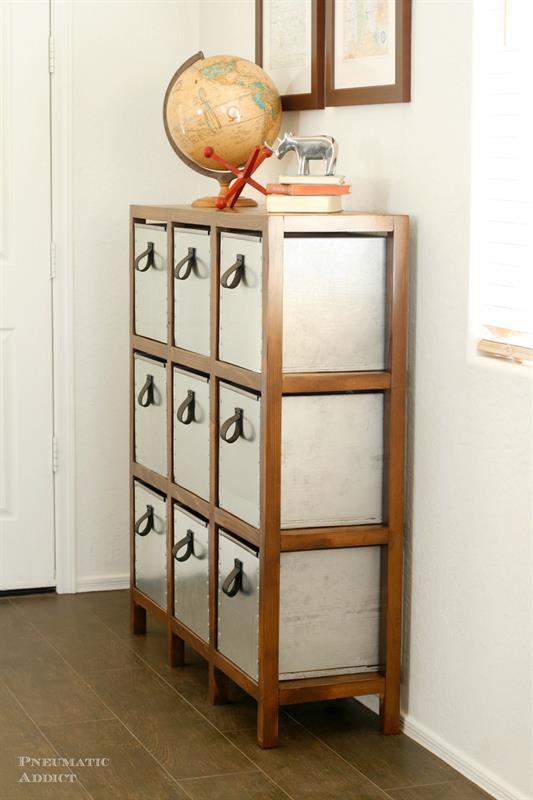
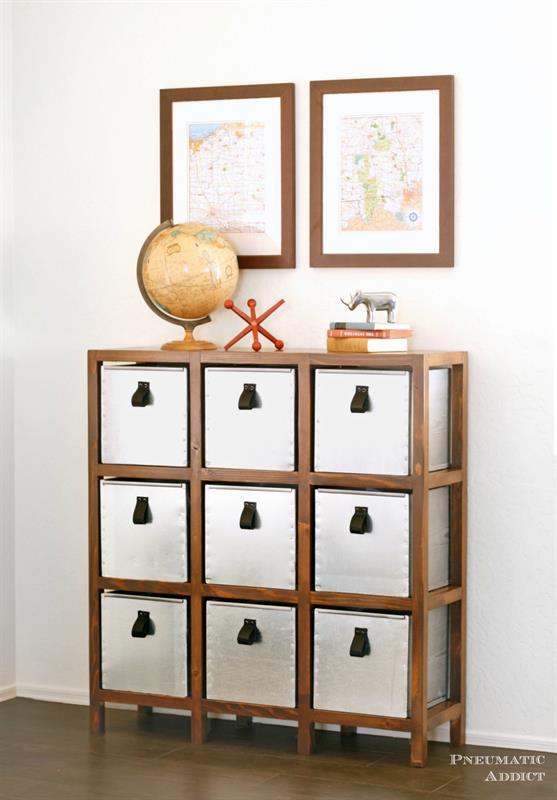
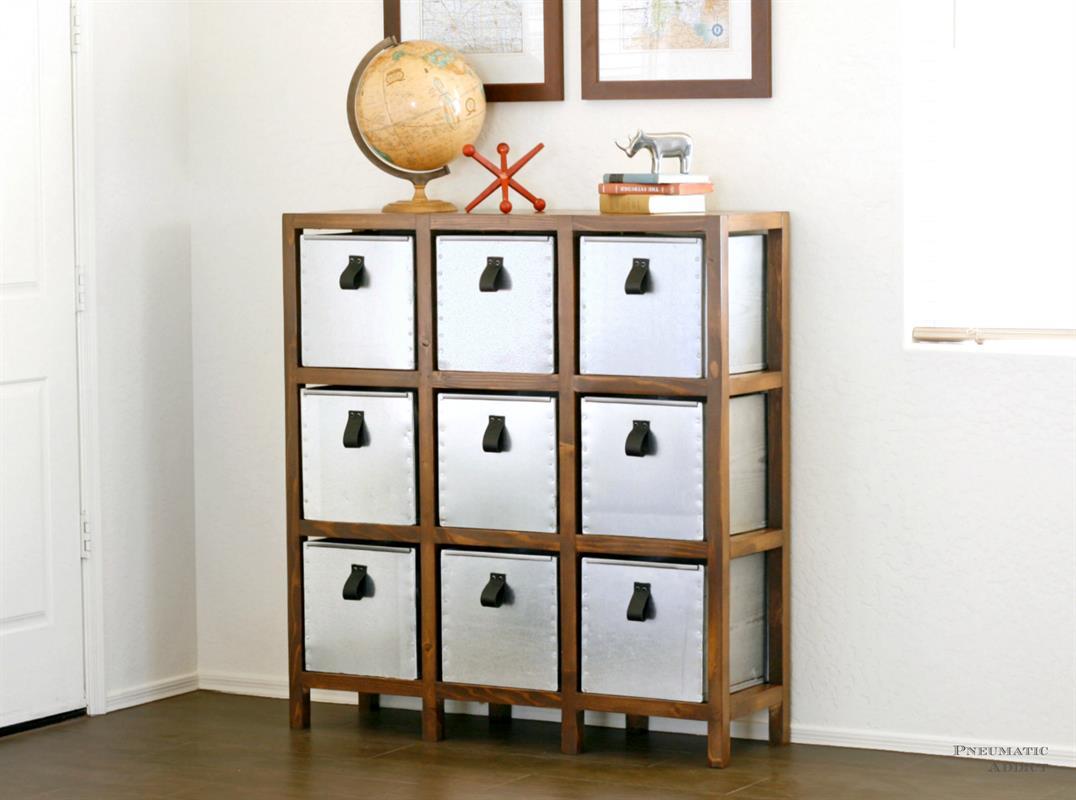


This 9 space cubby organizer can be put together quickly with off the shelf lumber and finished however you'd like. A great storage solution for crafts, toys, shoes, or even office supplies.
Tools
Kreg Tools


Other Tools
-
Miter Saw

-
Square
-
Tape Measure
-
Nail Gun
-
Air Compressor
Materials
Wood Products
- 8 Board , 2x2 , 96"
- 1 Board , 2x3 , 96"
- 1 Board , 2x4 , 96"
- 1 Board , 1x4 , 96"
- 1 Board , 1x4 , 72"
- 1 Moulding , 1/2" x 1/2" square wood trim , 120"
Hardware & Supplies
- 150 2-1/2" pocket hole screws
- 30 1-1/4" pocket hole screws
- 1 Wood glue
- 27 18-gauge finish nails/brads
- 1 Sandpaper
- 1 Stain or paint
- 1 Clear top coat
- 1 Paste wax
Directions
-
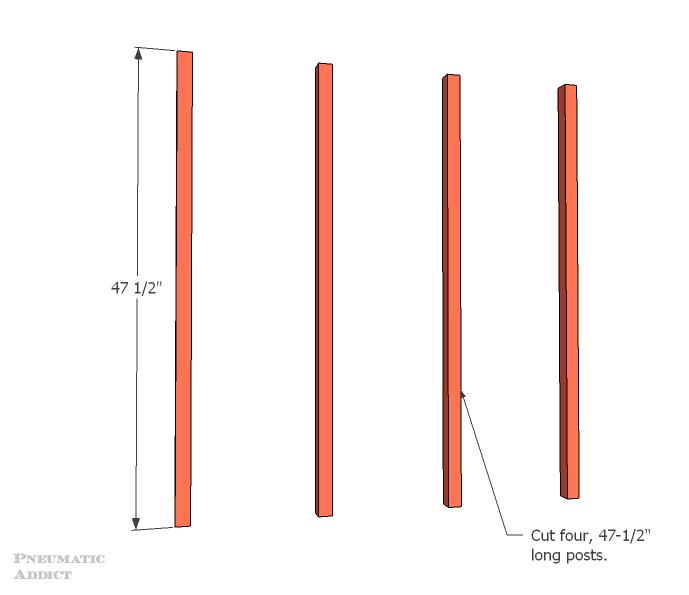
Lay out vertical posts
Cut eight, 2 x 2 x 47-1/2" posts. Lay out four posts on your work surface.
-
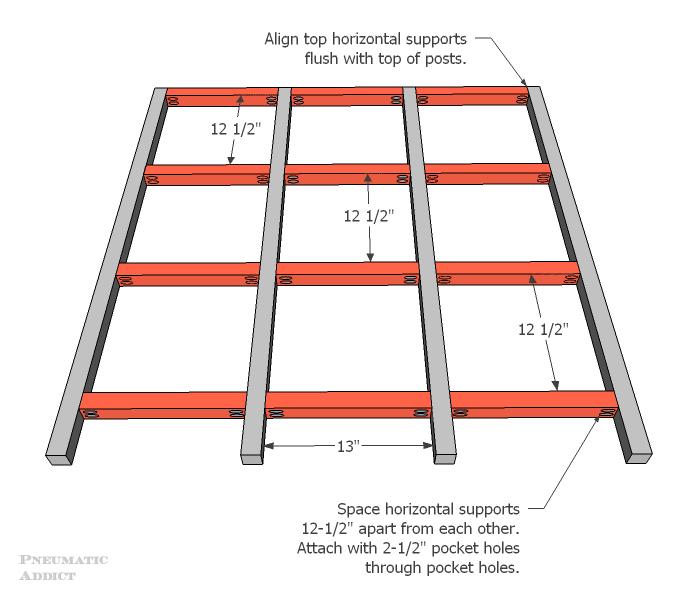
Assemble grids
Cut 24, 2 x 2 x 13" horizontal support pieces. To create each grid:
Align a horizontal support between each post, making sure each sits flush to the top of the posts. Using pocket holes and 2-1/2" screws, connect posts and supports. Measure 12-1/2" from the bottom of the supports and ascribe a line. Align the next row of supports on the line and attach with screws through pocket holes. Attach two more rows of horizontal supports in the same manner, ultimately creating a grid with nine, 13" x 12-1/2" openings.
Repeat the above steps to create a second grid with remaining vertical posts and horizontal supports.
-
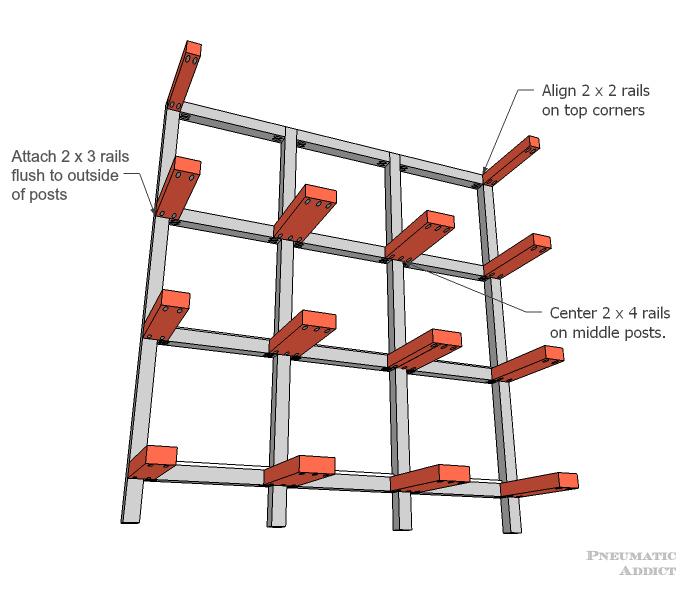
Attach rails
Cut rails from 2 x 2, 2 x 3 and 2 x 4 boards. Drill 2-3 pocket holes, evenly spaced on each end of each rail.
Flip one assembled grid onto your work surface, face-down.
Using pocket holes and 2-1/2" screws, attach the 2 x 2 rails in the top corners.
Attach 2 x 3 rails at the intersecting grid points, along the outer posts, keeping the rails flush to the outside.
Attach 2 x 4 rails, centered on the remaining intersecting grid points.
-
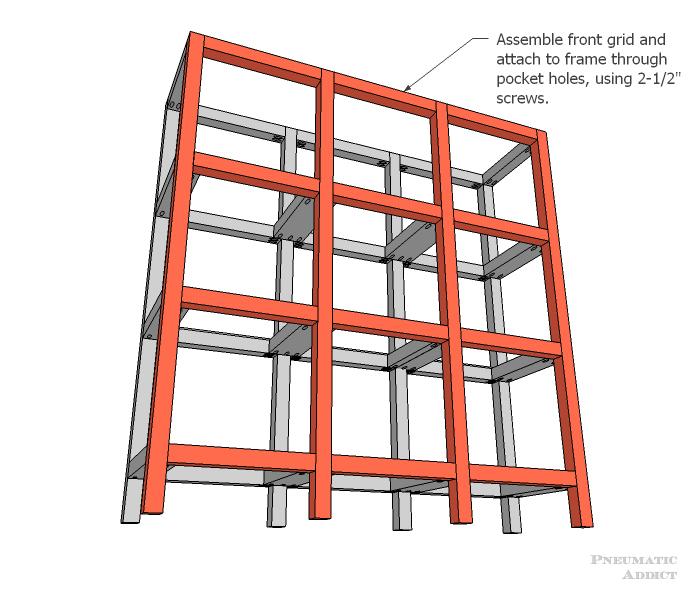
Connect frame
Flip the second grid, face-down onto the work surface. Invert the first grid (with attach rails) onto the second grid. Align the rails and connect with pocket holes and 2-1/2" screws.
-
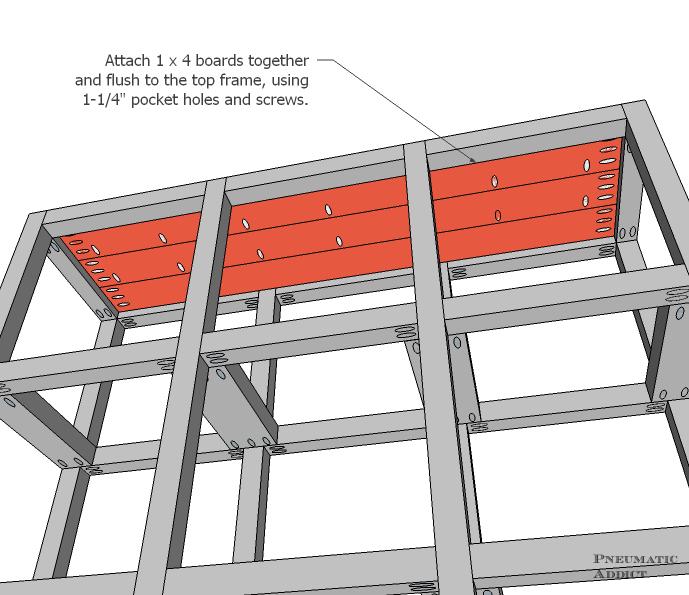
Build and attach top
*First measure the opening on the top side of the assembled frame. If the opening is not 42" x 10-1/2", adjustments to the size of the top may be needed.
Cut three, 1 x 4 x 42" boards. Join boards edge to edge with pocket holes and 1-1/4" screws. Drill additional pocket holes around the perimeter of the joined top.
Insert the top into the opening on the top of the frame. Attach the top to the frame using the perimeter pocket holes and 1-1/4" screws.
-
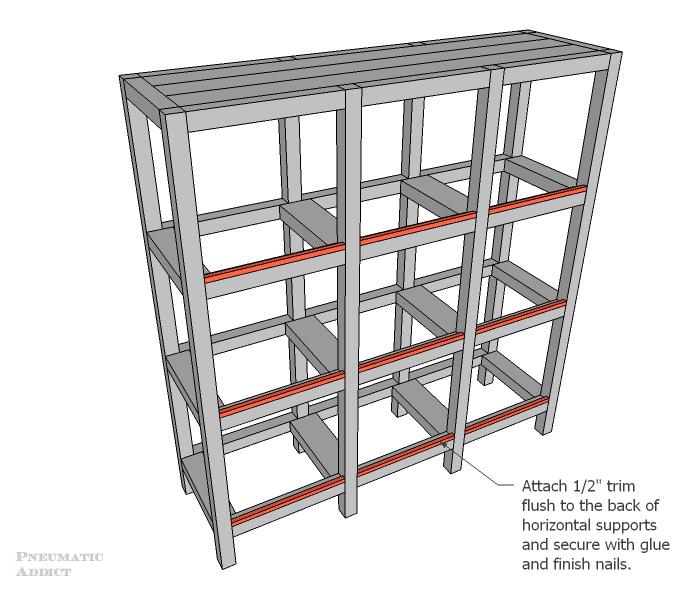
Attach stop blocks
Cut nine, 13" lengths of 1/2" x 1/2" square wood trim.
On the backside of the frame, place a stop block on the top side of each horizontal support, flush to the back. Attach with wood glue and 18 gauge finish nails.
This should provide a 1" wide strip of horizontal support exposed.
-
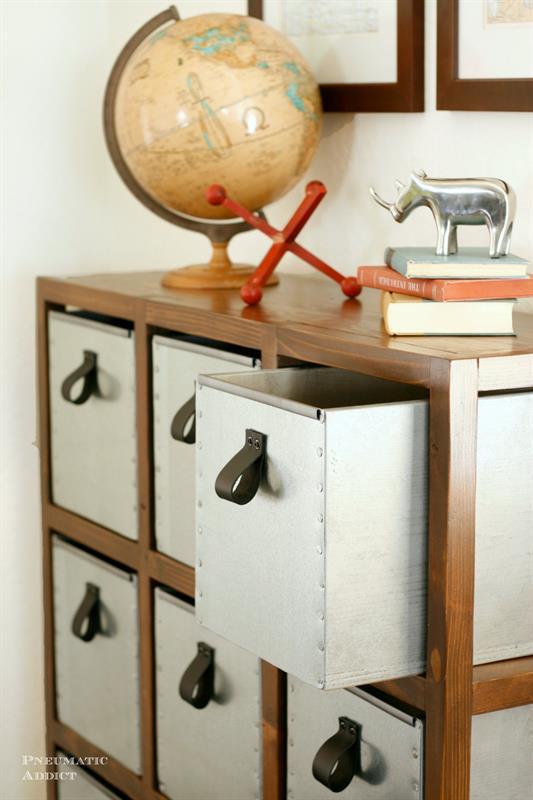
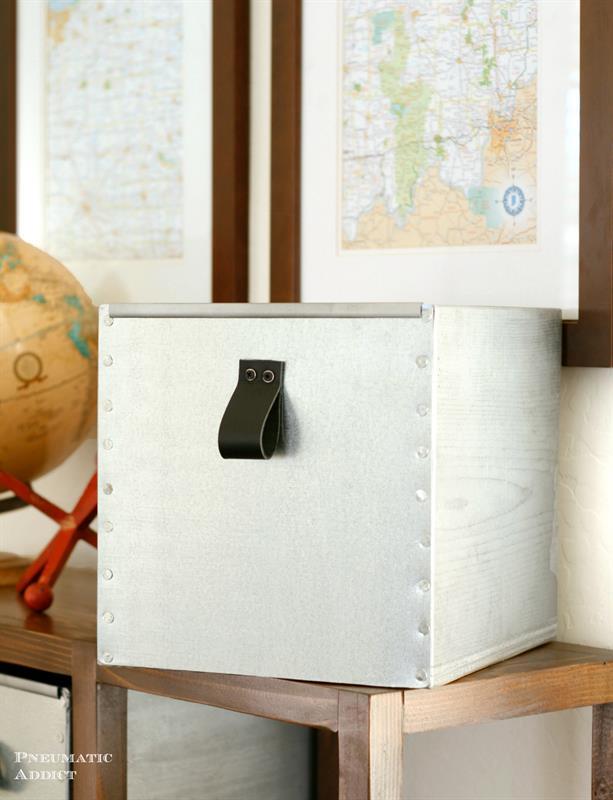
Storage cubbies
The frame will accommodate standard, 12" storage cubbies. To make a set of DIY, Industrial style storage cubbies from wood and off-the-shelf steel panels, check out this tutorial: http://www.pneumaticaddict.com/2016/02/diy-industrial-storage-cubbies.html
-
Sand and finish
Sand the entire frame, making sure to knock down sharp edges. For a painted finish, sand up to a minimum of a 120 grit and for a stained finish, a minimum of a 220 grit.
For smoother movement and extra protection, apply 1-2 coats of paste wax to the rails before adding storage cubbies.