

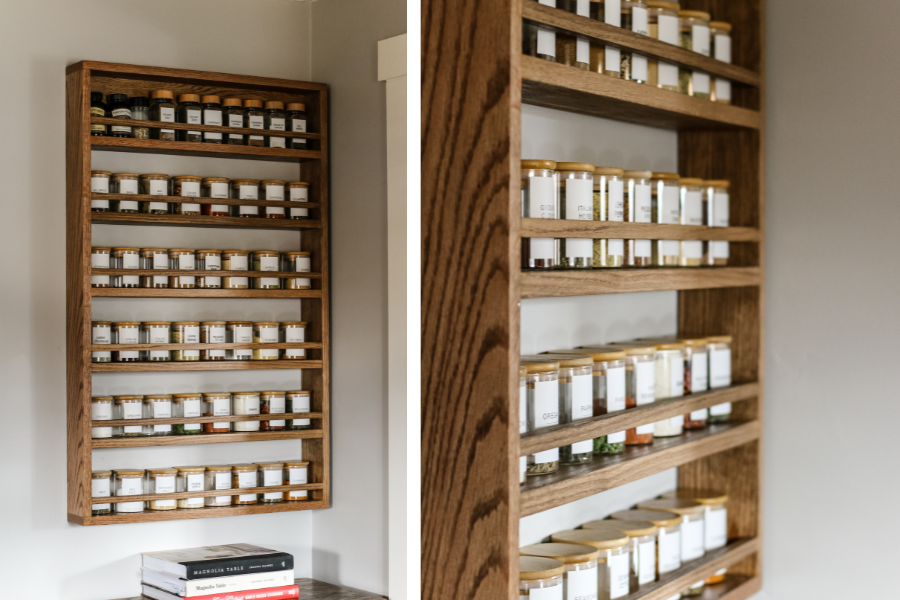


Tired of devoting an entire kitchen cabinet to storing your spices? Looking for a place to store and display them? This hanging spice rack is the perfect solution! Follow along with the beginner-friendly plans to make this for your kitchen!
Tools
Kreg Tools


Other Tools
-
Miter Saw

-
Tape Measure
-
Level
-
Brad Nail Gun
-
Clamps
Materials
Wood Products
- 2 Oak , ¾” x 4” x 10’
- 1 Oak , ¾” x 4” x 4’ Oak
- 1 Oak , ½” x 6” x 3’
- 1 Oak , ¾” x 2” x 2’
Hardware & Supplies
- -- Kreg pocket hole screws (1 ¼”)
- -- 80 & 150 grit sandpaper
- -- 1 ½” Brad nails
- -- Wood glue
- -- Stain
- -- Sealer
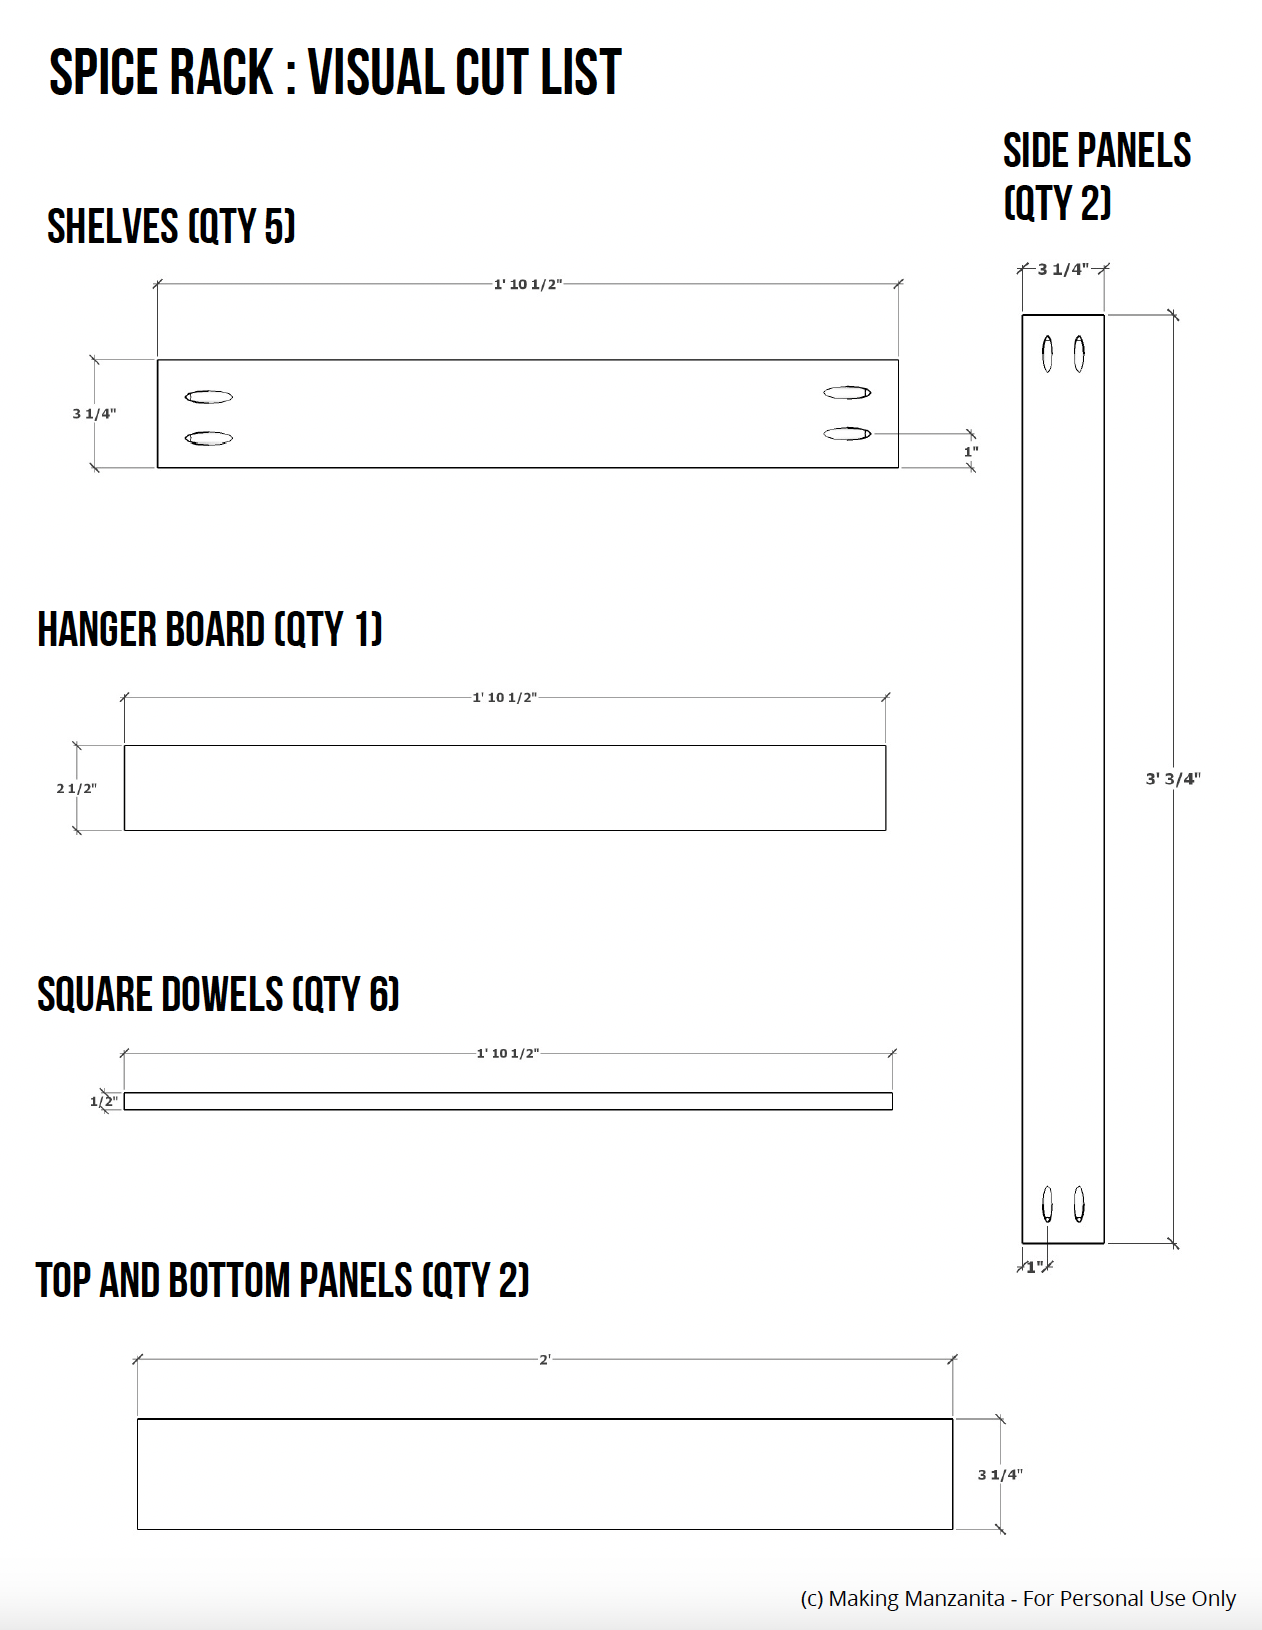
Cut List & Parts
- 2 Side Panels , ¾” x 3 1/4” x 3’ ¾”
- 2 Top and Bottom Panels , ¾” x 3 1/4” x 2’
- 5 Shelves , ¾” x 3 ½” x 1’ 10 ½”
- 6 Square Dowels , ½” x ½” x 1’ 10 ½”
- 1 Hanger Board , ¾” x 2 ½” x 1’ 10 ½”
Directions
-
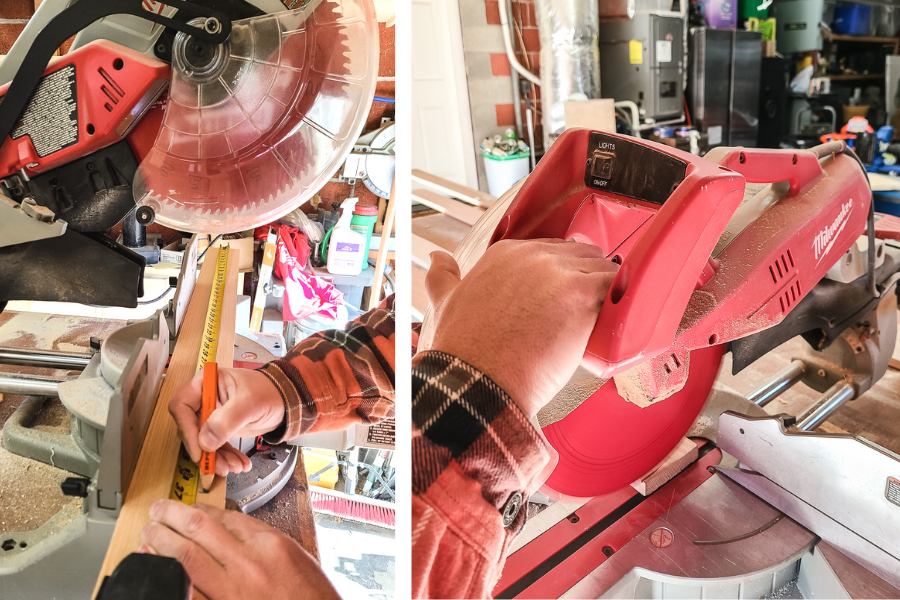
Cut wood
Cut wood according to the visual cut list in the woodworking plans with a miter saw for the lengths. You will also need to use a table saw or circular saw to cut the square dowels if you can’t find them in the store.
-
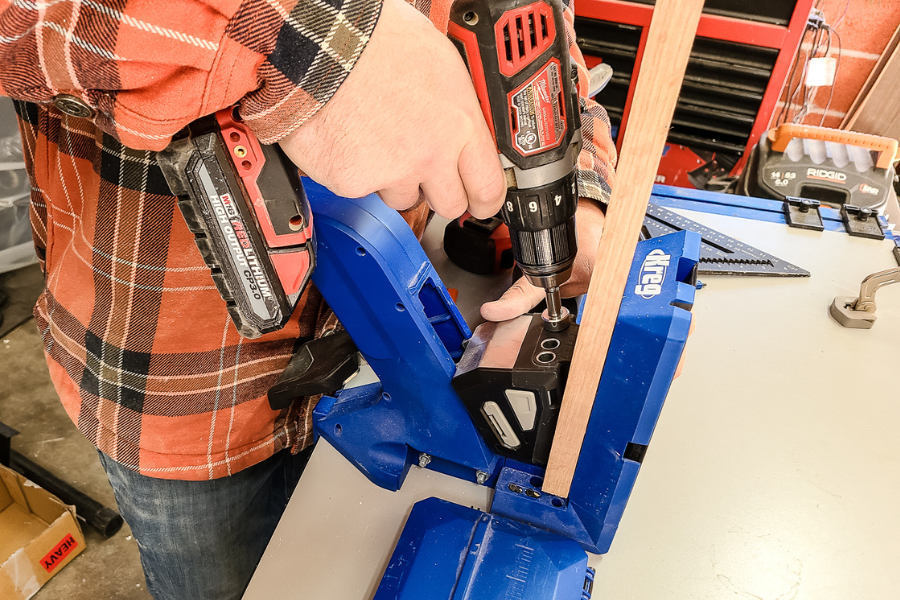
Drill pocket holes
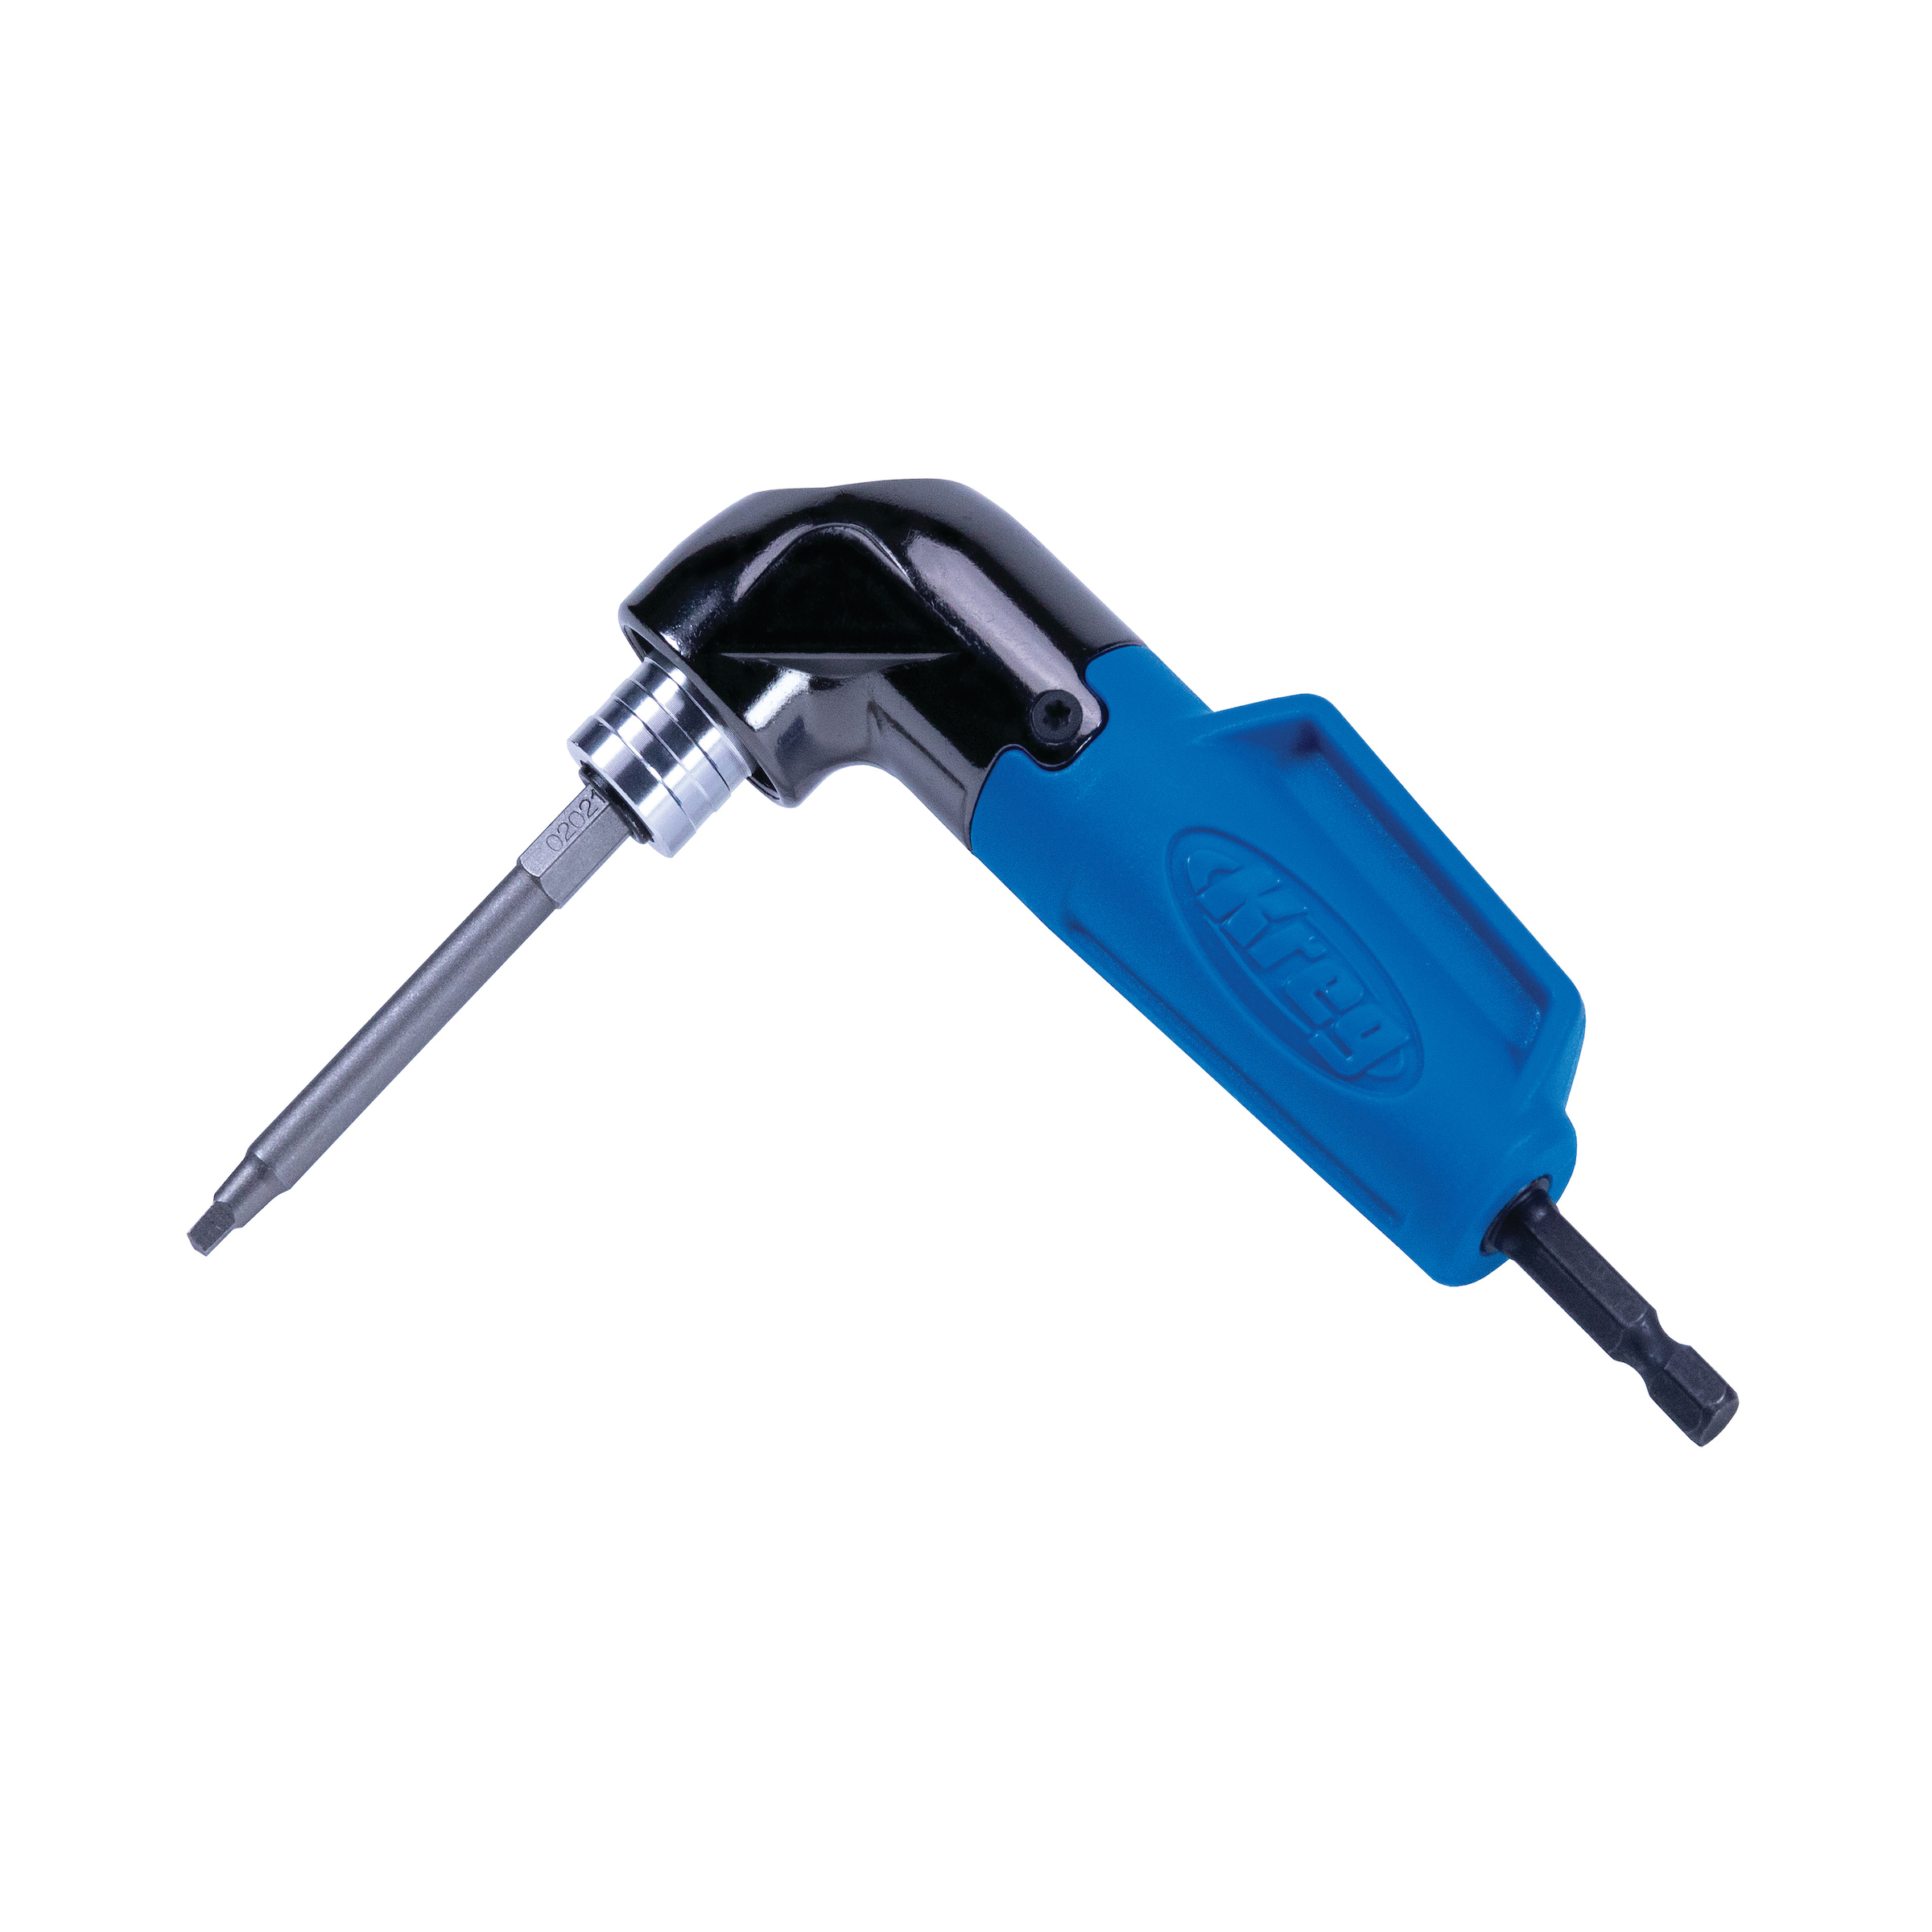
Drill pocket holes as shown in the woodworking plans. We used the Kreg 720 Pro.
Working with oak
Because the wood is oak, we also recommend pre-drilling pilot holes side panels and top and bottom panels for the pocket hole screws. Oak wood is very hard and is prone to splitting.
-
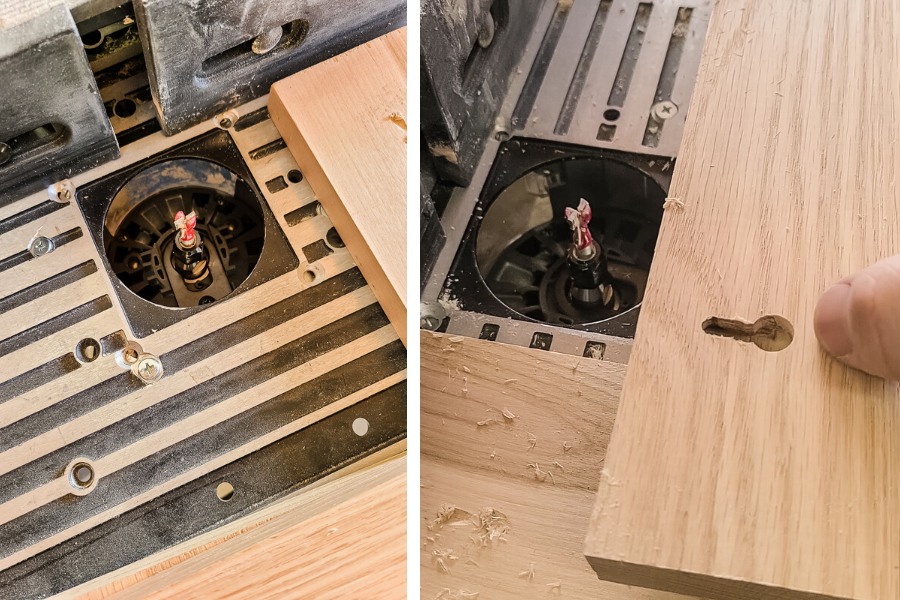
Make the keyholes
If you don’t have access to a router and keyhole bit, you can always use metal french cleat kits to hang this spice rack on the wall. We opted for a flush mount with the wall with the router and keyhole bit. When using the keyhole bit test on a piece of scrap before you do your final piece. Grab a similar-sized piece and mark places for the keyholes. Set up a backstop board on your router table then carefully plunge the scrap board and make the keyhole. Once you are happy with the placement and size, grab the hanger board and repeat.
-
Lightly sand
Lightly sand all pieces with an orbital sander, 80-grit sandpaper, and then 150-grit sandpaper.

-
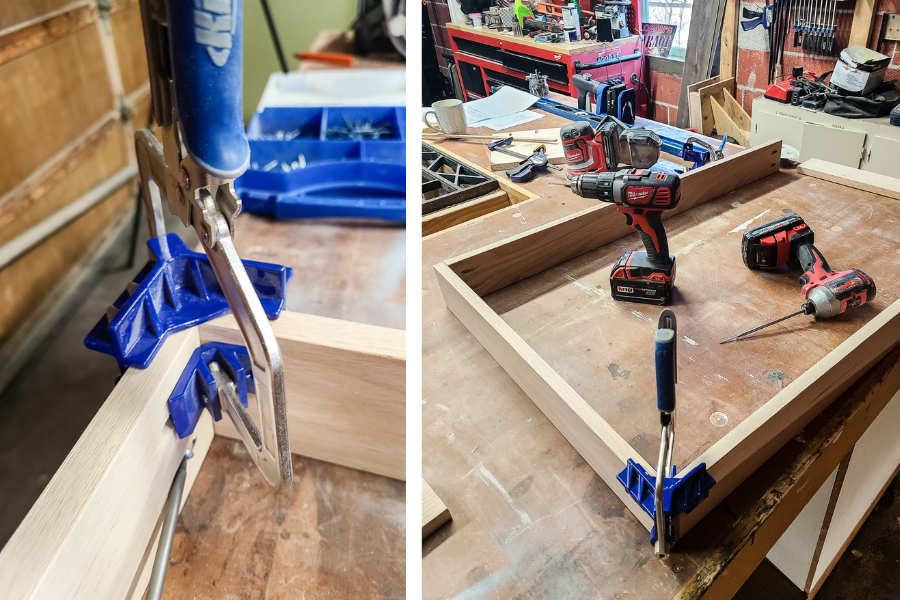
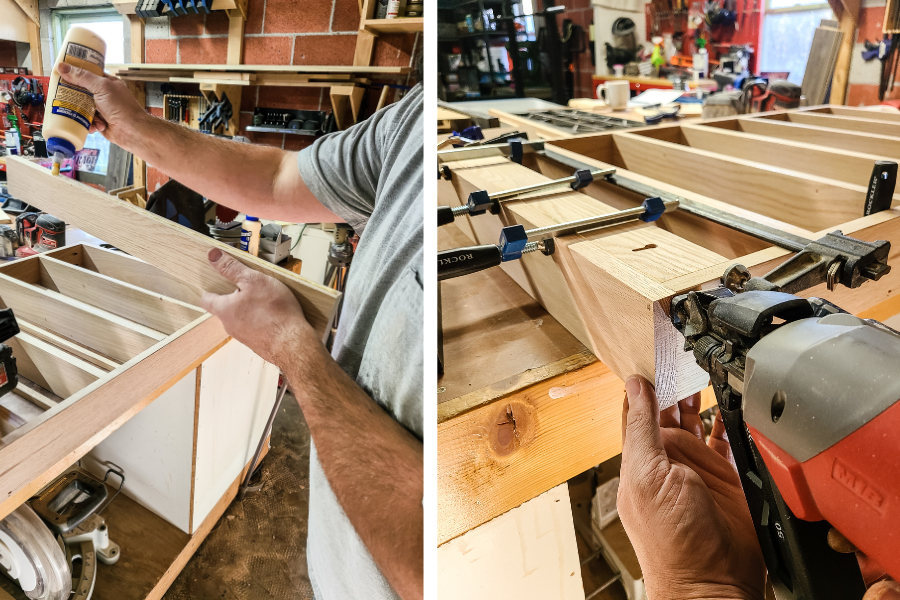
Assemble the box
The box is pretty straightforward. Just attach the top and bottom to the side panels using the pocket holes drilled in each corner The Kreg 90-degree corner clamps come in handy again for this step.
-
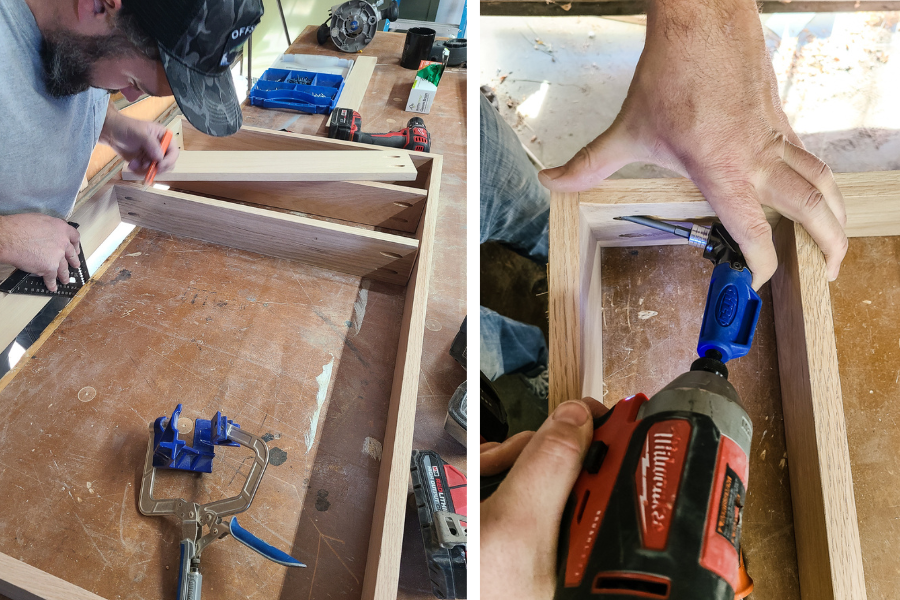
Attach the shelves
Using clamps, start putting the interior shelves together by attaching each shelf to one side panel with the pocket holes and then to the opposite side panel. The Kreg 90-degree corner clamps work great for keeping everything square while you assemble. Be sure to measure where the shelves will be mounted (per the woodworking plans, they are spaced out 5 ½”). The 90-degree pocket hole driver is very handy here for these tight spaces.
-
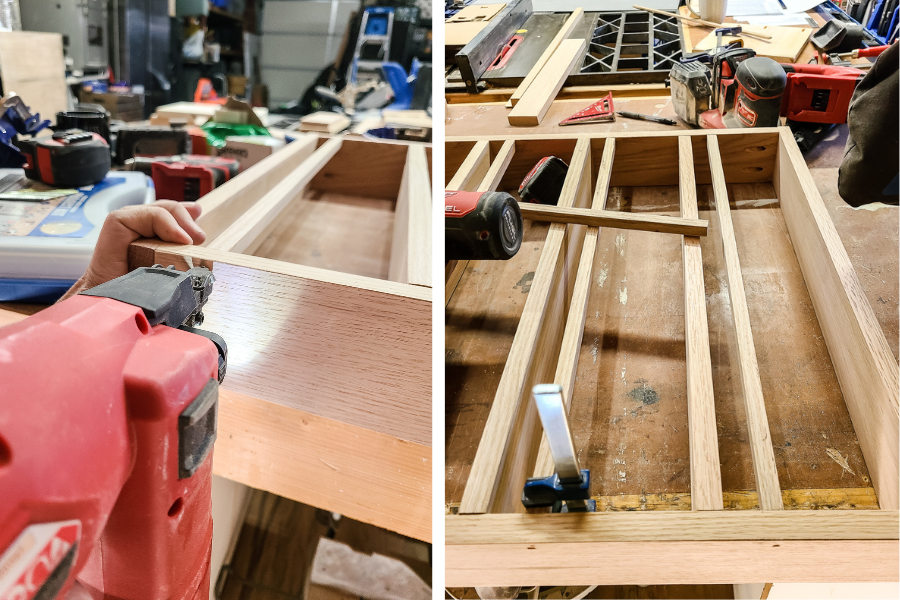
Attach the square dowels
Start by making marks above your shelves at 1” and 1 ½”. This creates a channel for your square dowels to be in when you attach. Grab some wood glue and put it on the end of each dowel. Wipe off any excess glue then attach the dowels in place with your finish nailer with 1” nails. You don’t want a lot of glue here just a little to prevent the dowel from spinning while you nail into place. You can also clamp it into place while you nail.
-
Attach the hanger board
Attach the hanger board with the pre-routed keyholes in the back to the inside top of the spice rack in order to hang the spice rack on the wall later. We added a bit of wood glue and clamped it into place before attaching it with a finish nailer and 1 ½” finish nails.
-
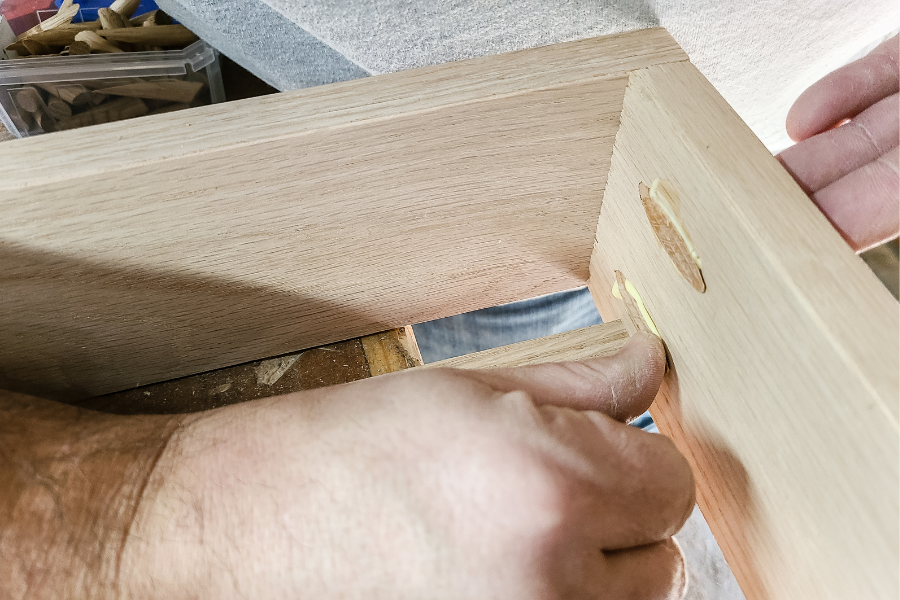
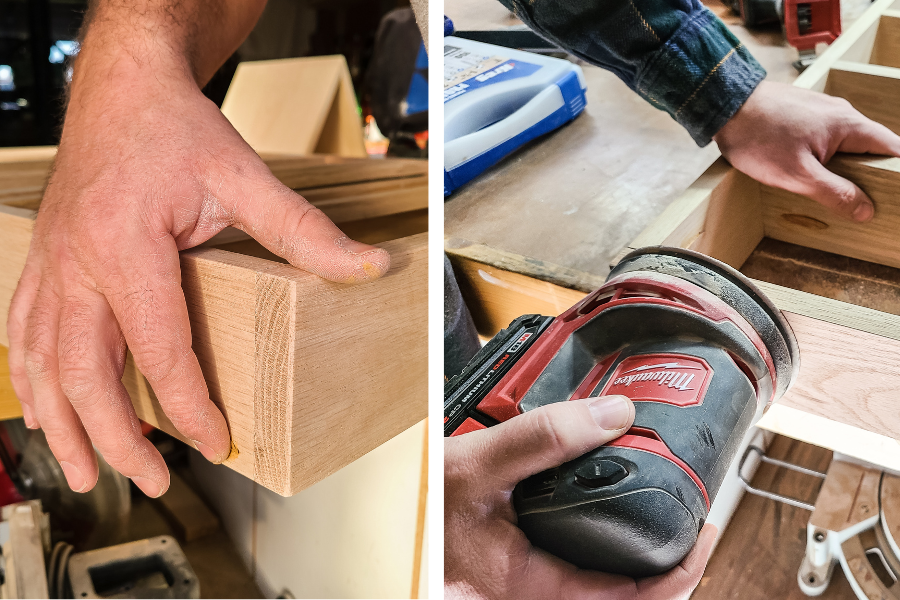
Fill pocket holes
Next, fill all visible pocket holes with stain-grade oak plugs and a bit of wood glue. Once dry, sand smooth. Use the multi-tool sander to get into tight areas because the orbital sander won't fit.
-
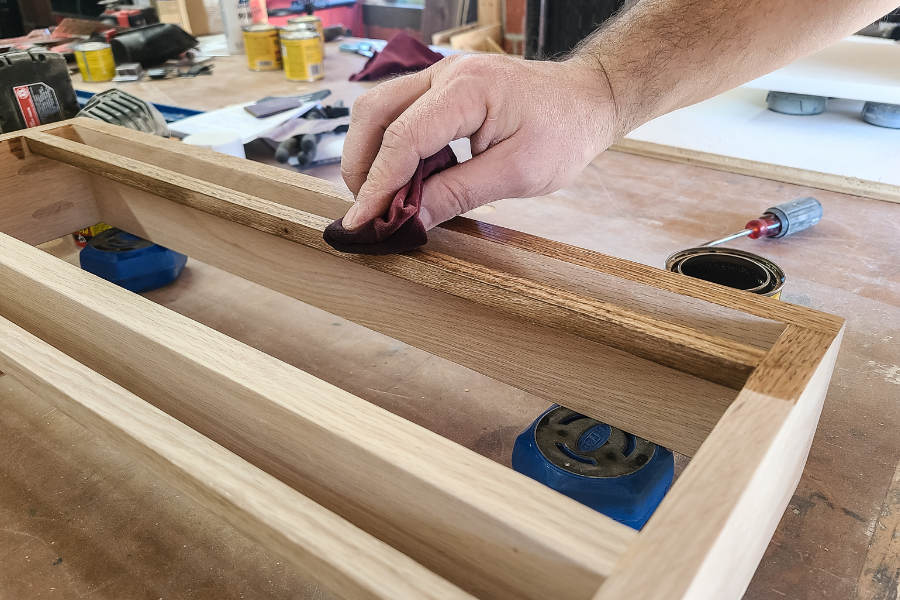
Fill and lightly sand
Lightly sand the entire structure with an orbital sander with 150-grit sandpaper. Fill any blemishes and gaps at joints with wood filler and sand again with 150-grit sandpaper.
-
Stain
Apply the stain color of your choice to your wood. We used Minwax Special Walnut.
-
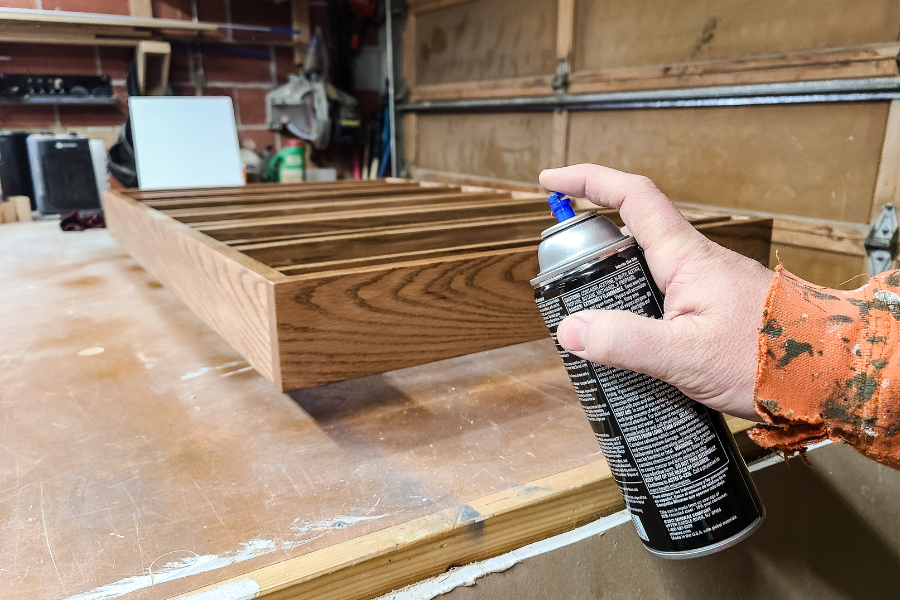
Seal
After the stain is dry, seal it with the finish and sheen you selected. We used an aerosol spray lacquer which is easy to get into all the nooks and crannies here.
-
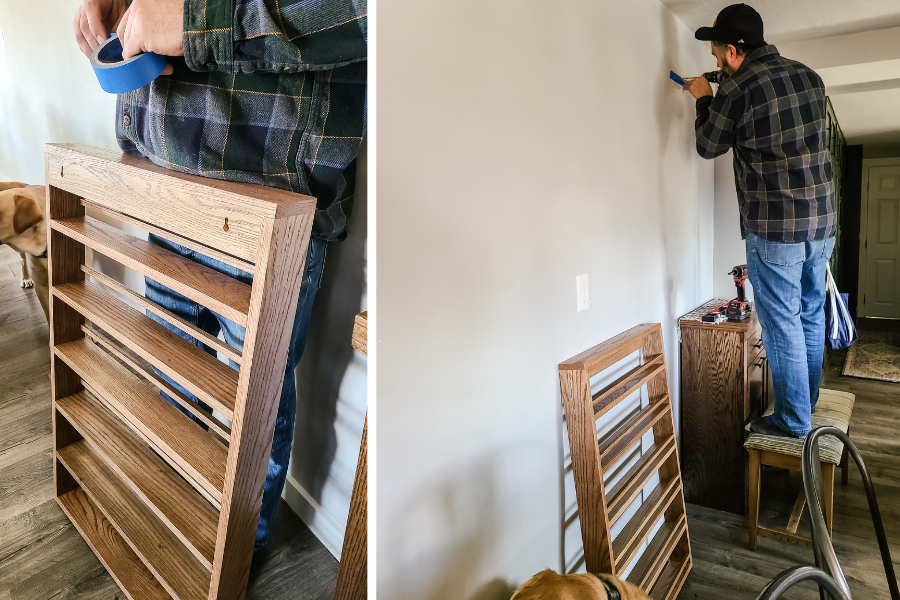
Hang on wall
Finally, mount your spice rack on the wall using the keyholes on the back and drywall screws with anchors.
-
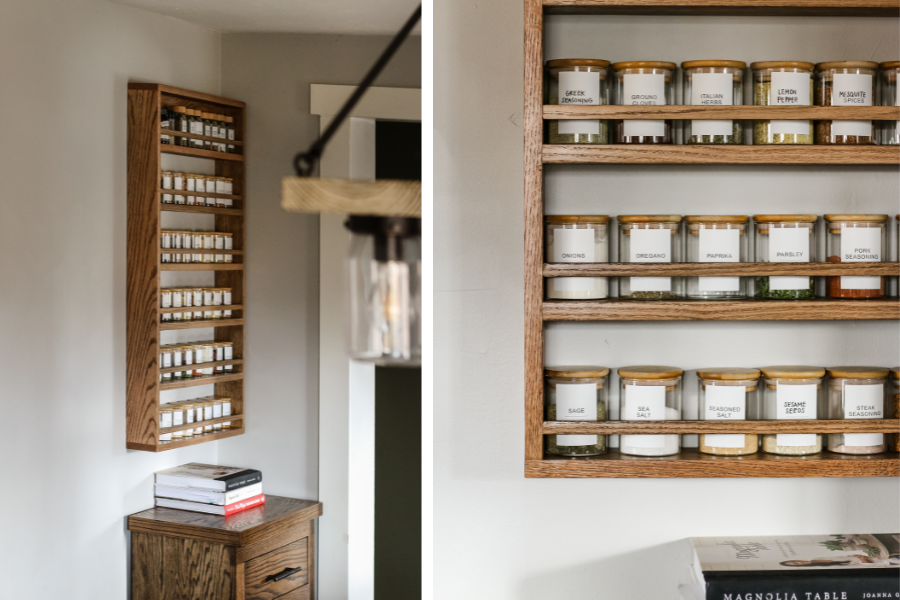
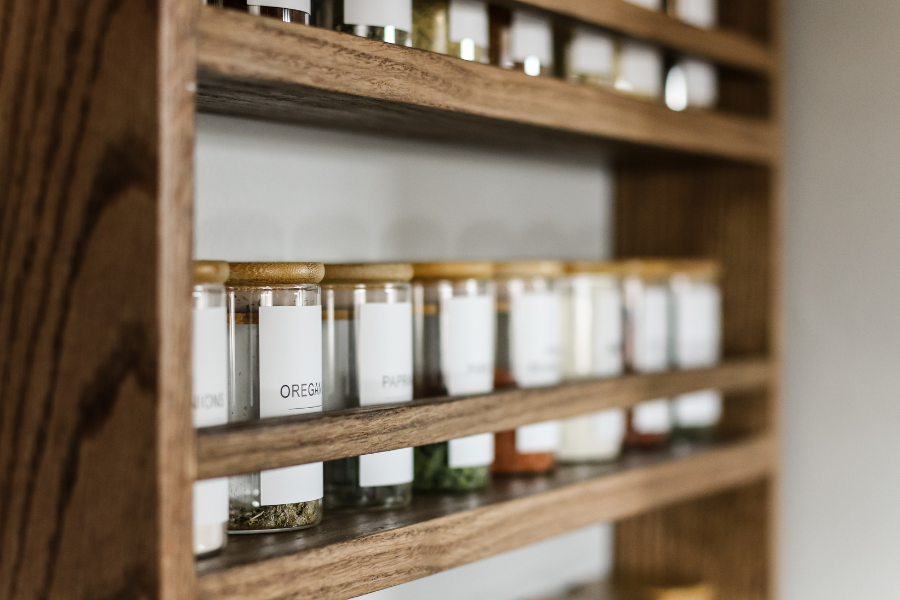
Fill with jars and spices
Next, add the labeled spice jars! Because of the hanger board on the top, the top shelf spice jars may need to be slightly smaller. Check out the extras below for the links to the 2 sizes of jars and labels we used.
Hanging Spice Rack Woodworking Plans – Making Manzanita
Square Glass Spice Jars (for top shelf, need to be smaller to accommodate hanger board)
Watch this Kreg Pocket Hole Jig 720Pro Tutorial
Making Manzanita on Facebook
Making Manzanita on Instagram
Making Manzanita on YouTube
Making Manzanita on TikTok