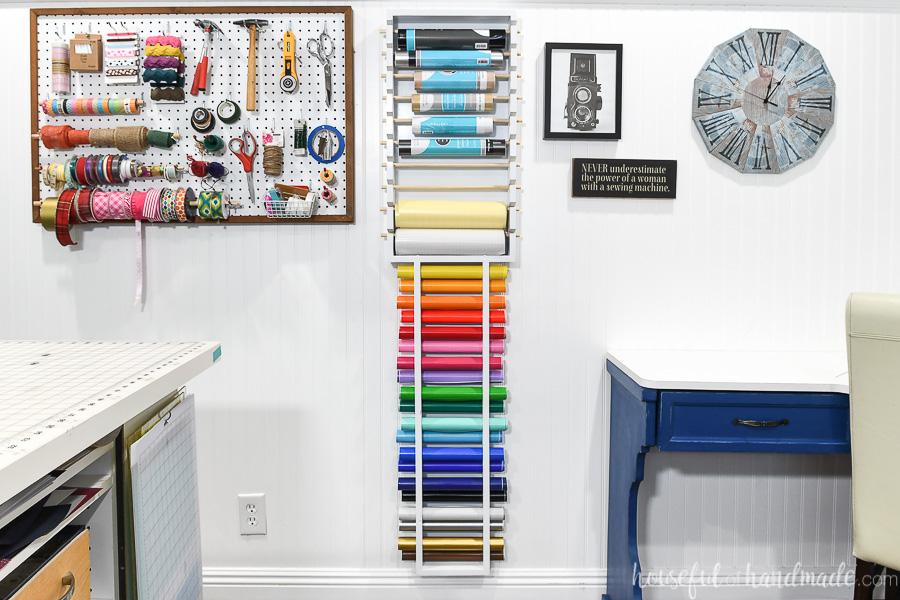
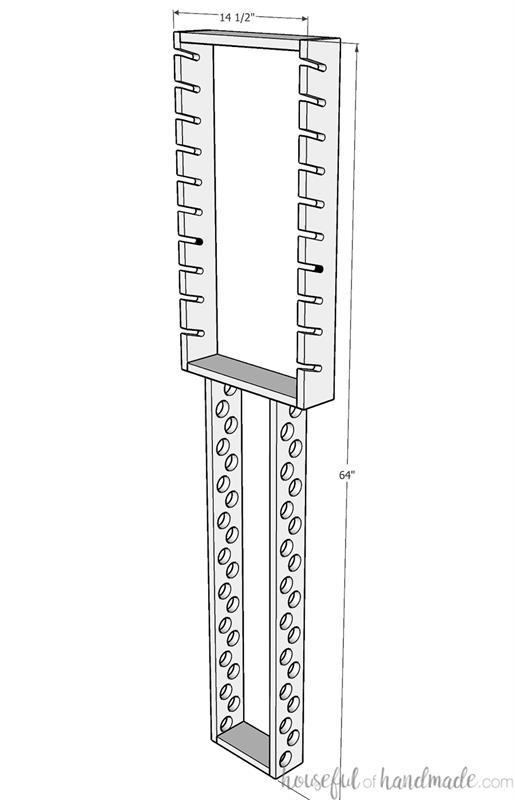


Organize your craft vinyl with this easy storage organizer made from 1x4s. Includes storage area for rolls of vinyl, and storage area for smaller sheets. Hang it on a wall or on/behind a door.
Tools
Kreg Tools


Other Tools
-
Miter Saw

-
Square
-
Table Saw
-
Tape Measure
-
Nail Gun
-
Tape Measure
Materials
Wood Products
- 2 Board , 1x4 , 96"
- 1 Plywood , 1/4" Thick , Quarter Sheet
- 4 Dowel , 7/16" round , 48"
Hardware & Supplies
- 16 1 1/4" Kreg pocket hole screws
- 1 Wood glue
- 2 D-ring picture hangers
- 25 5/8" brad nails
Directions
-
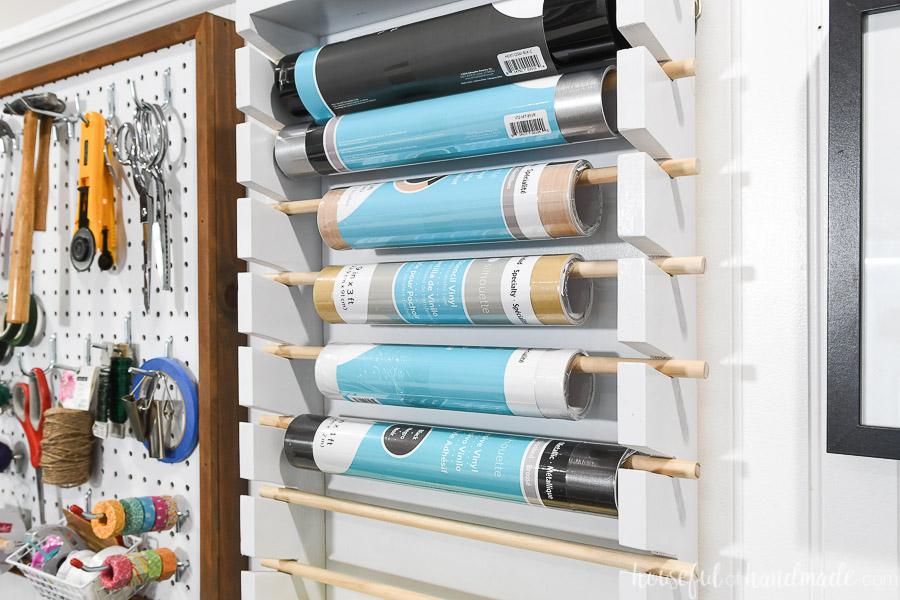
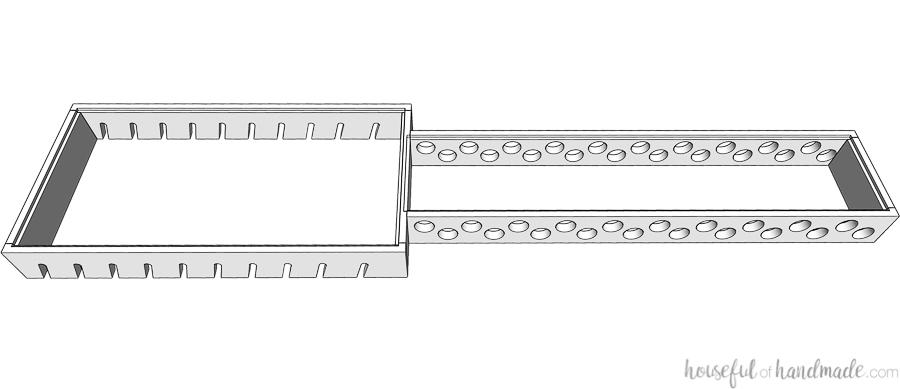
Mark out upper sides
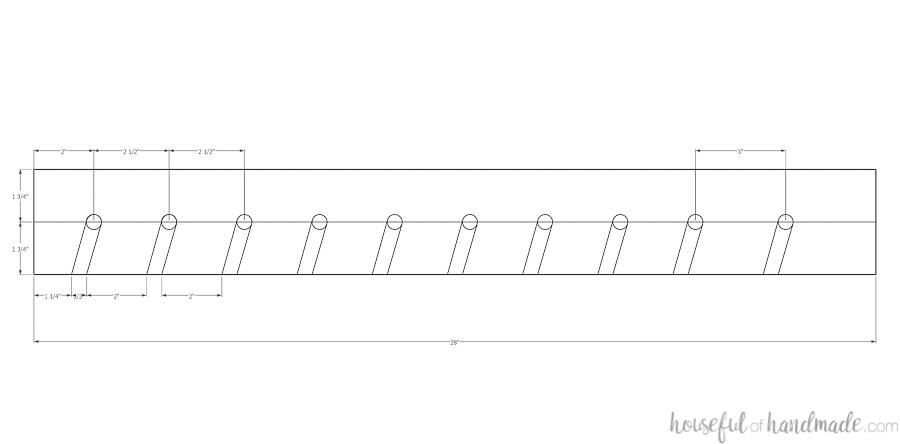
Cut the upper side pieces. Draw a line down the center of the board. Then measure down from the top 2" on the center line and make a mark. Measure 2 1/2" down from there and make another mark. Continue marking every 2 1/2" until you get to the bottom of the board. I made the very last mark 3" away from the previous to allow for an extra large roll of transfer tape. On the front of the board, measure down 1 1/4" and make a mark with a second mark 1/2" away. Measure down from the second mark 2" and make a mark, plus one 1/2" from there. Repeat all the way, until you get to the last one, measure 2 1/2" below the mark for your first mark.
-
Cut the upper sides
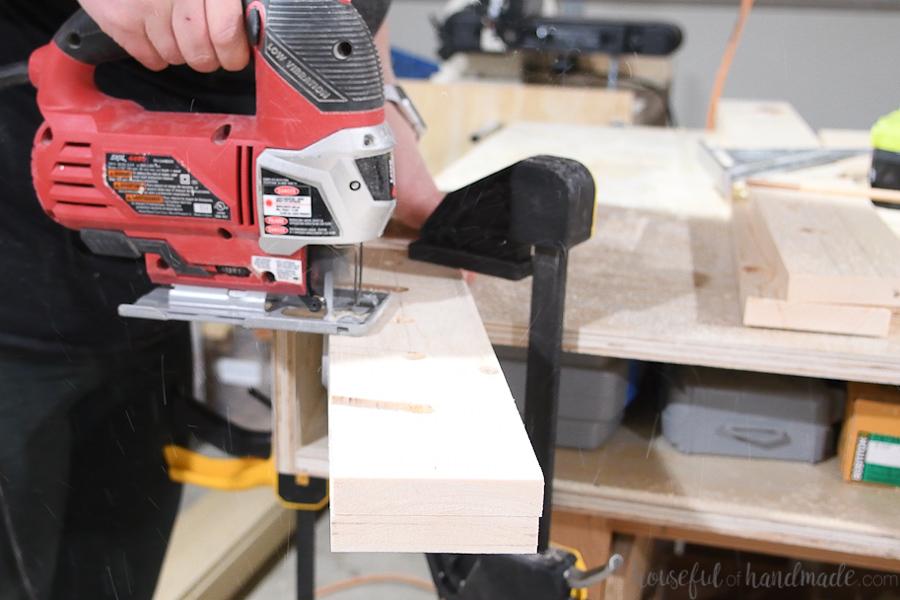
Clamp the two upper side boards together with the marked one on top. Using a drill with a 1/2" drill bit, drill a hole on each of the marks on the center line. Use the mark as the center of the hole. Then draw a line from the top edge of the hole to the top mark on the front of the board. Draw a line from the bottom edge of the hole to the lower mark on the front of the board. Repeat all the way down. Cut along these lines with a jigsaw to create channels for the dowels that angle down in the sides.
-
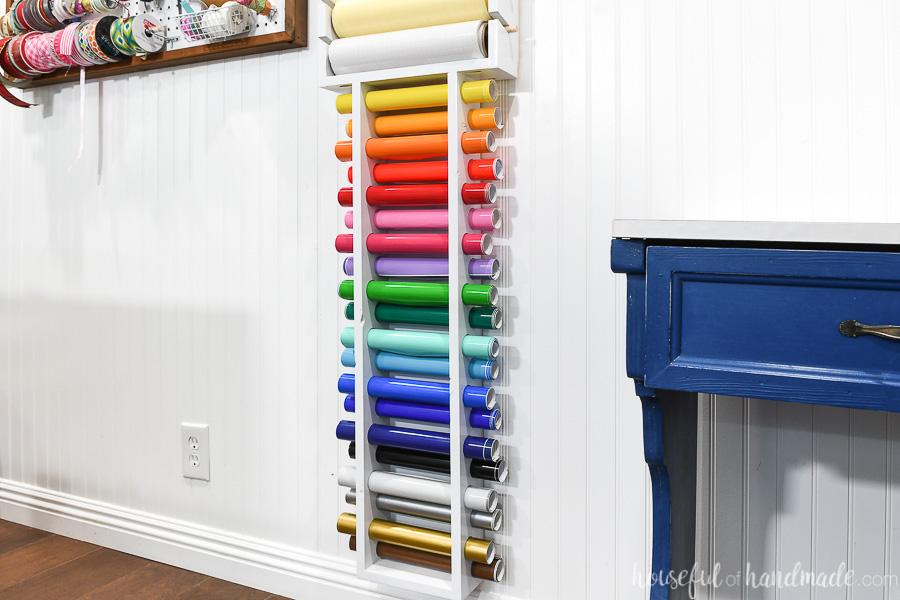
Mark the lower sides
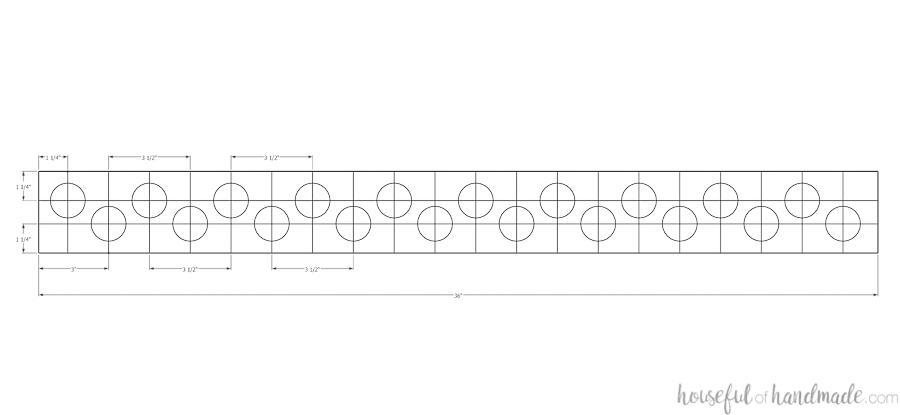
Cut the lower side boards. On one board, measure 1 1/4" in from each side and draw a line all the way down. On one line, 1 1/4" from the top, then again every 3 1/2". On the other line, make a mark 3" from the top, then again every 3 1/2".
-
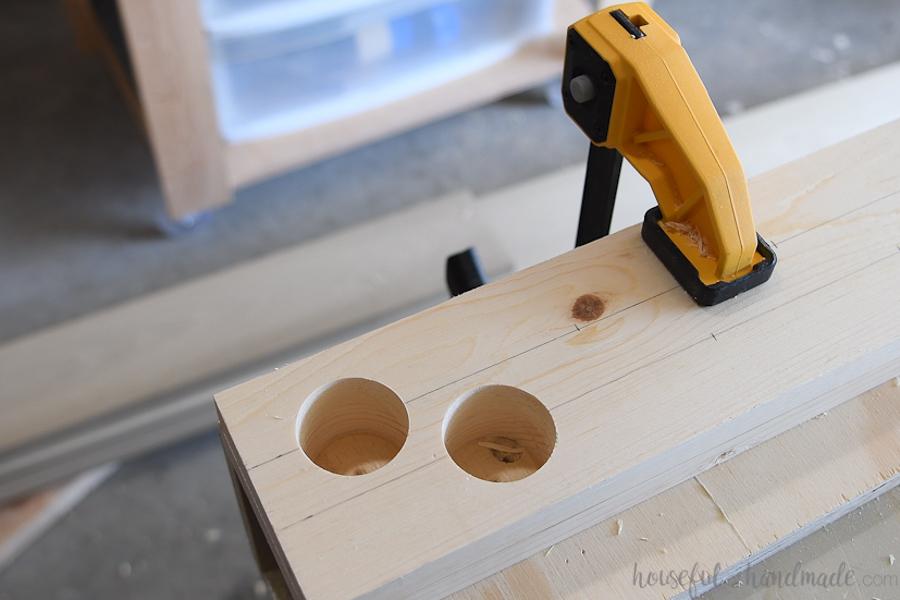
Drill holes in the lower sides
Clamp the two lower side boards together so the one with the markings is on the top. Using a drill with a 1 1/2" drill bit, drill 20 holes with the center of the hole on each mark you made. Place a scrap piece of wood under the boards when drilling to prevent tear out when the drill bit breaks through the bottom of the board.
-
Drill pocket holes
Set the Kreg jig for 3/4" thick material. Drill 2 pocket holes in each end of the upper top/bottom boards and the lower bottom board.
-
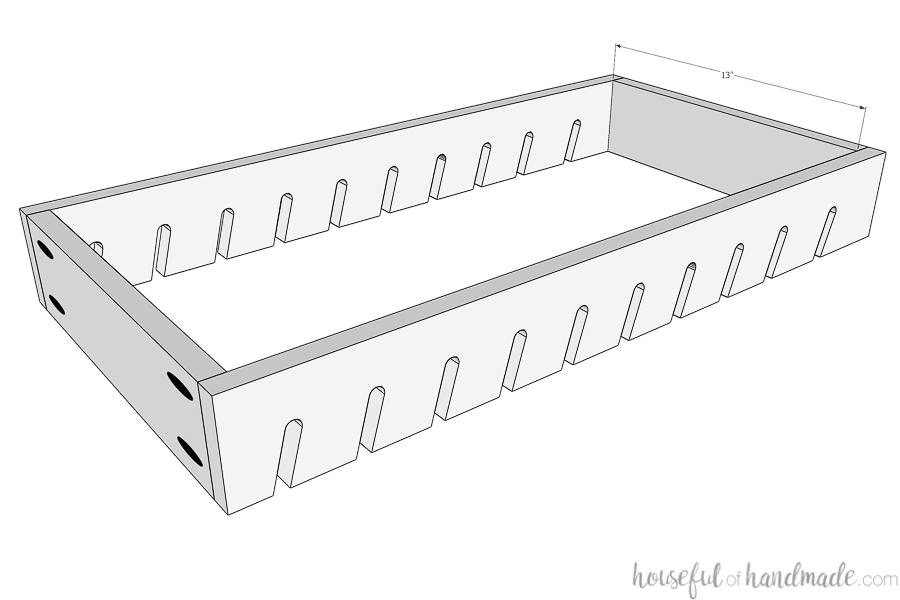
Assemble the upper section
Attach the upper top/bottom boards to each end of one of the upper side boards with the 1 1/4" pocket hole screws and wood glue. Make sure the top and bottom of the boards are flush with the top and bottom of the sides. Then attach the other upper side board to the other side to create a box. Make sure the sides are lined up properly so you can slide a dowel in the channels.
-
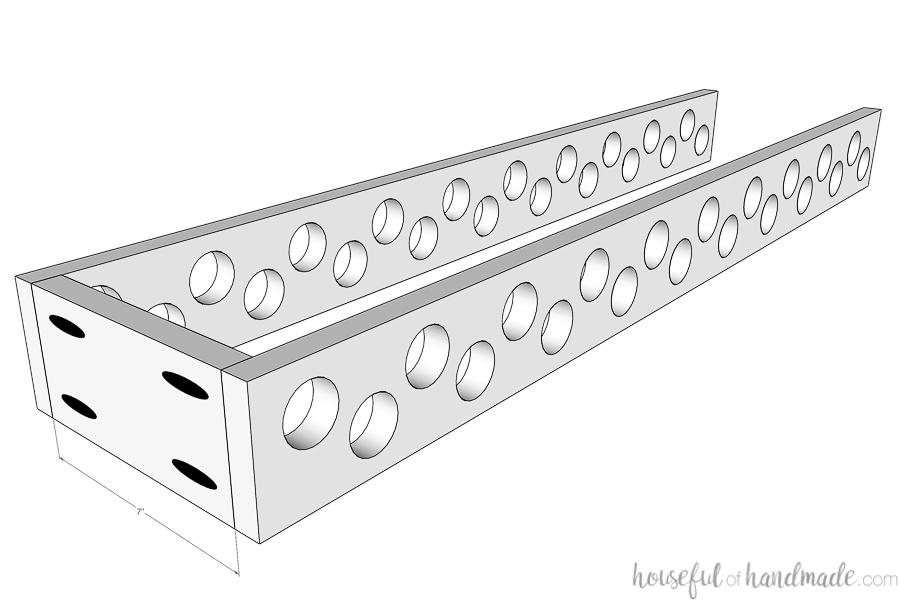
Assemble the lower section
Attach one side of the lower bottom board to the bottom of one of the lower side boards with 1 1/4" pocket hole screws and wood glue. Repeat to attach the other lower side board, ensuring the holes line up properly.
-
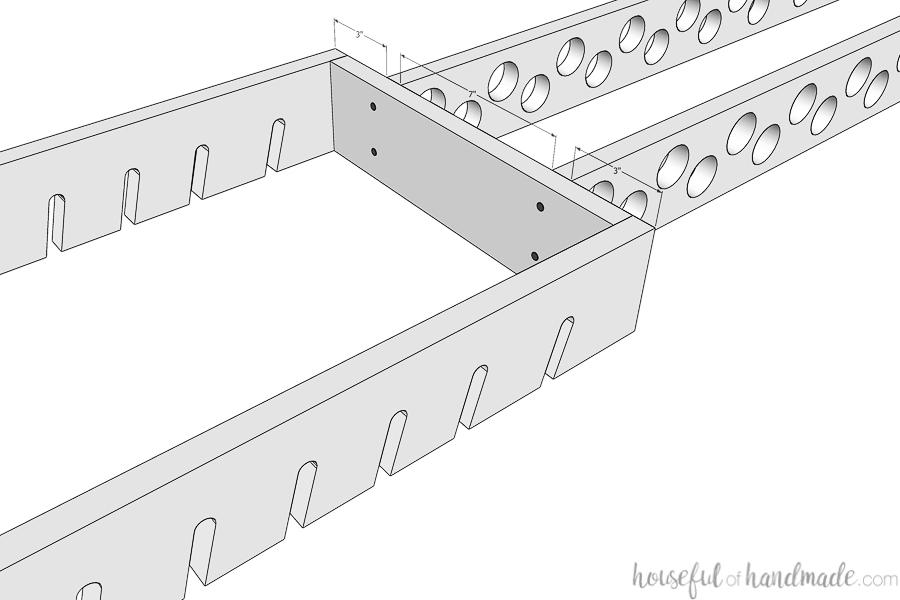
Attach the lower section
Measure in 3" from each side on the bottom of the upper section. Attach the lower section so the outside edge of the side boards is flush at this mark. To attach, secure with a 1 1/4" pocket hole screw in from the top of the upper bottom board into the lower side board, being careful not to attach the screw where it might stick through the drilled hole. Use 2 screws on each side piece to secure.
-
Router the back
Flip the vinyl storage organizer over so the back is facing up. To give the boxes more structure, router a 1/4" groove in the inside edge of the upper and lower sections.
-
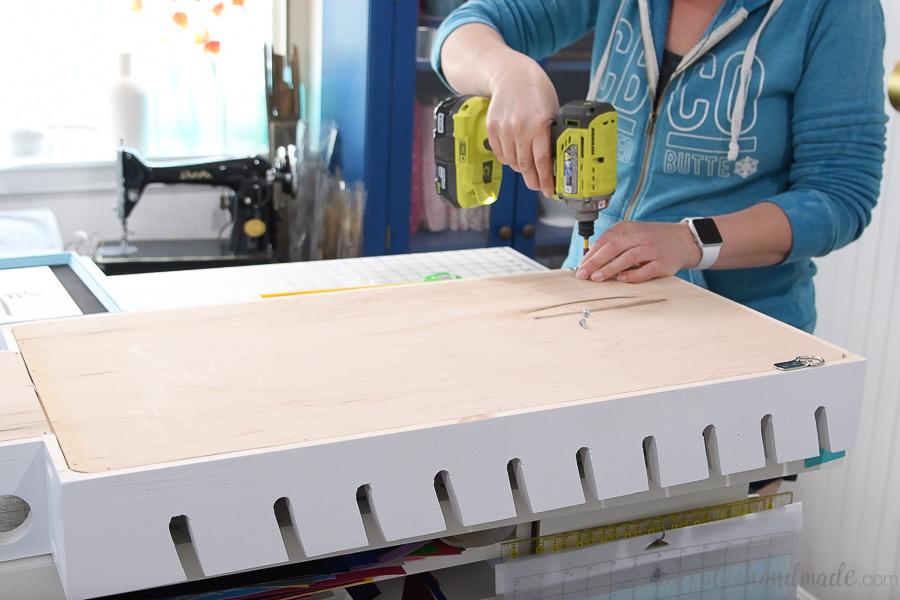
Attach the back panels
Double check the measurement of the opening for the back panel once you have router the groove and cut your 1/4" plywood to match. Cut the corners off to allow it to fit into the curved routed corners, or use a chisel to create straight corners. Attach the back panel with wood glue and 5/8" brad nails.
-
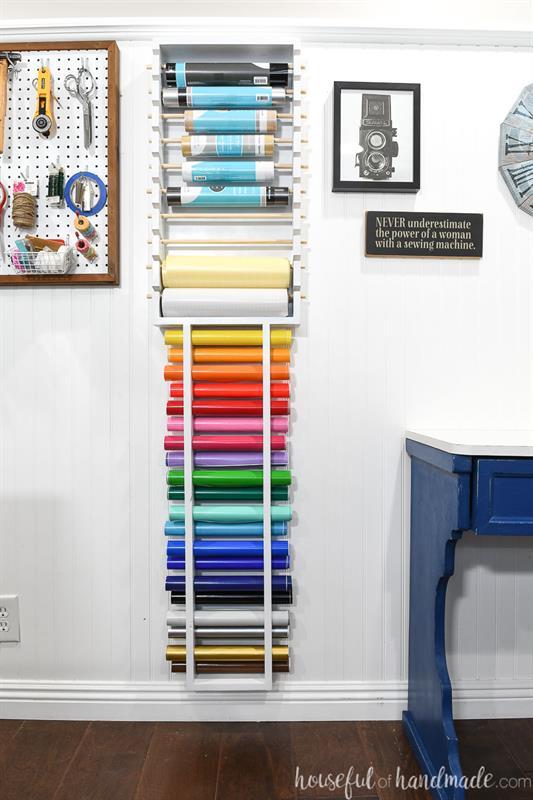
Finish and hang
Sand and finish the vinyl storage. I painted mine with spray paint to make it easier to get in all the holes. Lightly sand with a sanding block between coats of spray paint to get a super smooth finish. To hang, attach a D-ring to the back of each of the upper side pieces. Place picture hangers or screws into the wall for the D-rings to hang on.
-
Load up the vinyl!
Have fun loading up all your vinyl. The upper section was perfect for my special vinyl that comes on tubes. For the lower section, I separated my vinyl sheets by color and had fun making a rainbow. And for more craft room organization and DIY projects, make sure to come visit me at Housefulofhandmade.com.