

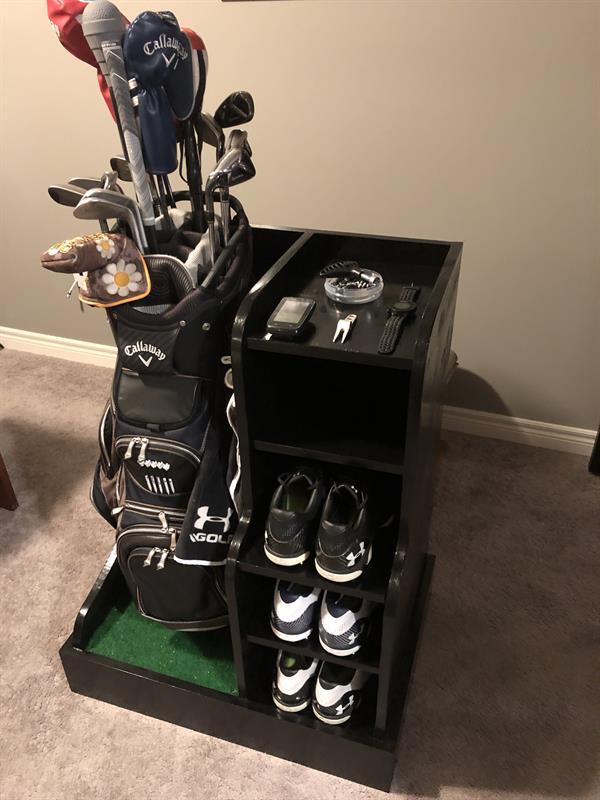


Golf bag and accessories stand.
If you are planning to build this, there are many steps. I've tried to simplify them, but it is difficult sometimes. If for any reason you have any questions about this stand, feel free to email me at rjveteran@gmail.com I will respond quickly.
Happy Building!!
RJ
Tools
Kreg Tools


Other Tools
-
Miter Saw

-
Square
-
Table Saw
-
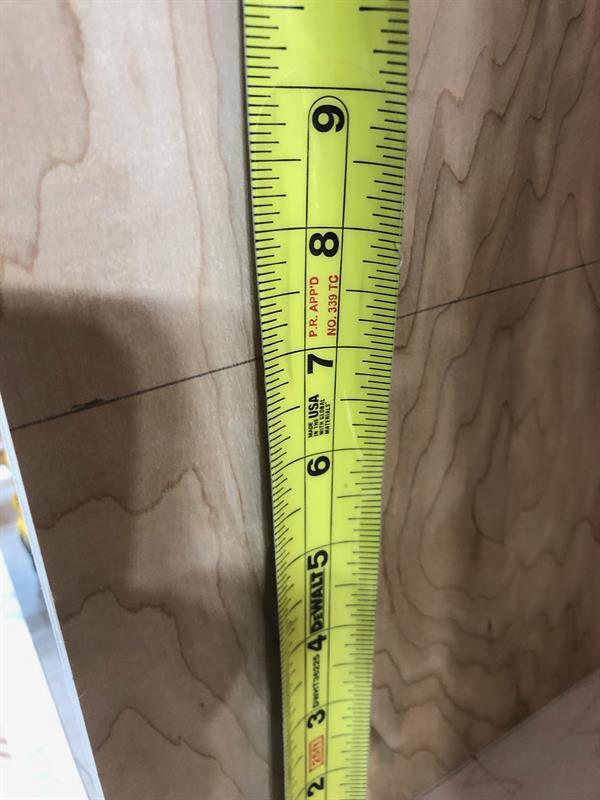
Tape Measure
-
Scissors
-
Clamps
-
Hammer
-
Nail Gun
-
Stapler
-
Shop Vacuum
-
Sawhorse
-
Workbench
-
Rubber Mallet
-
Scissors
-
Edge band roller
Materials
Wood Products
- 1 Plywood , 3/4" Thick , Maple full sheet
- 2 Maple board , 1x6 , 72"
Hardware & Supplies
- 1 Carpenters glue
- 1 Small box 1.5” brad nails
- 50 2X8 construction screws.
- 20 Flathead screw covers (hardwood)
- 25 3/8" x 1 1/2" hardwood dowel pins
- 1 Package of rubber stoppers (4)
- 1 1 yard of green turf
Directions
-
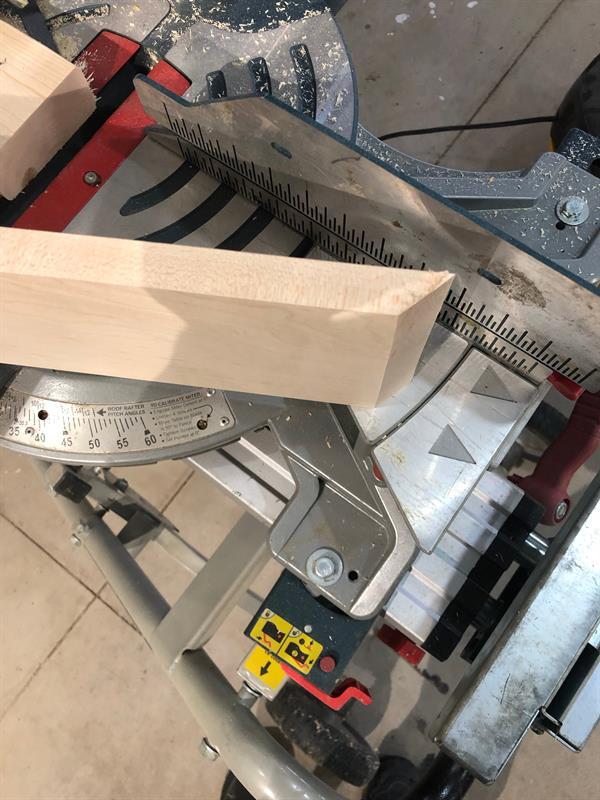
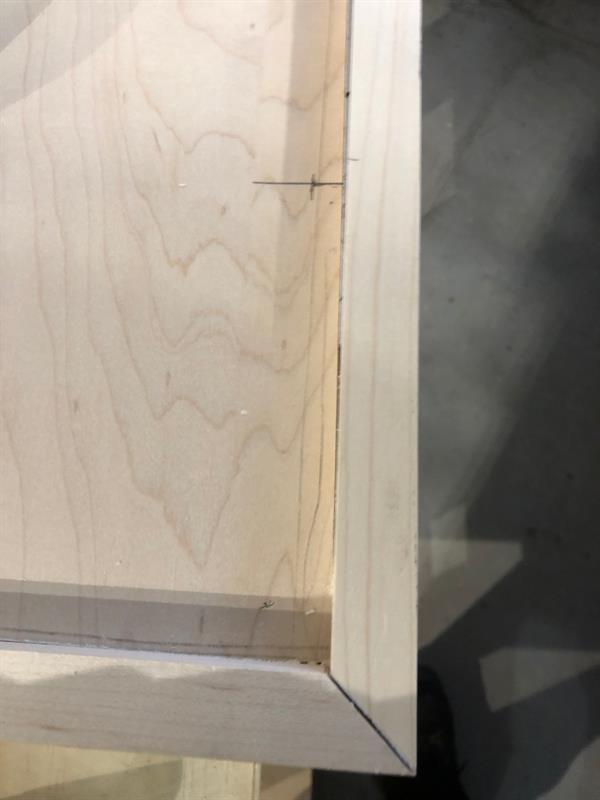
Base border
Cut 1x6x6 maple. Mitre 2 pieces on 45 degree angle @ 20 3/8" from outside corners (sides)and Mitre 2 pieces on 45 degree angle @ 29" form outside corners (front and Back).
*NOTE In all the next steps (approx 115 steps), lightly sand all edges as you are working along this project. especially after each cut. Remember this.
-
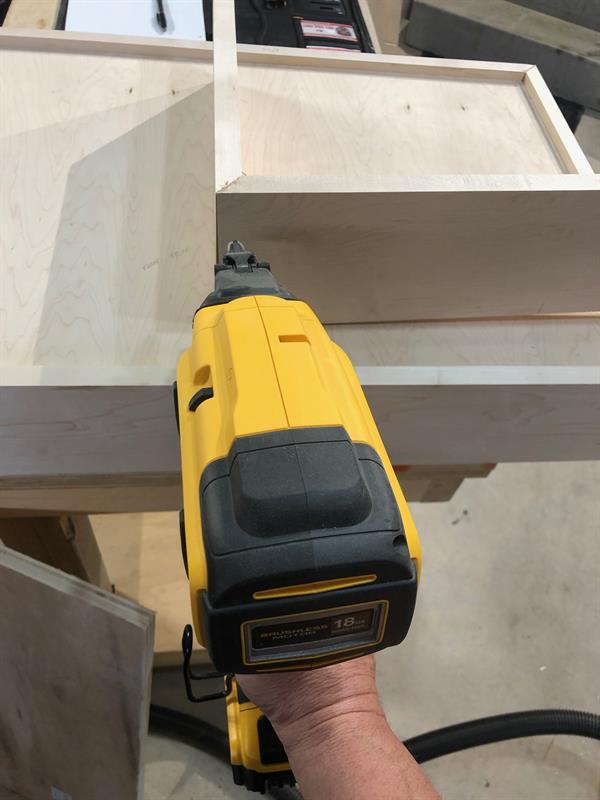
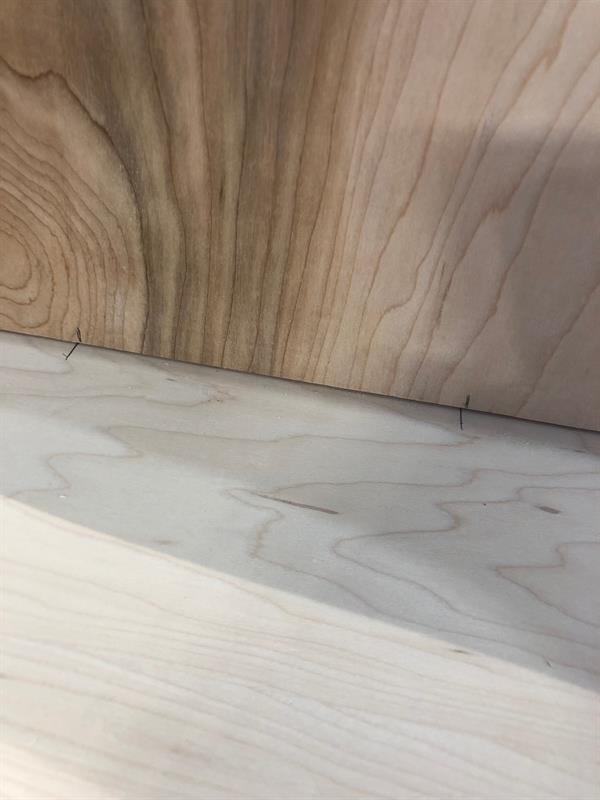
Brad Nail Border
Fire 2 brad nails in each corner (one on each side of corner) to temporarily secure base.
-
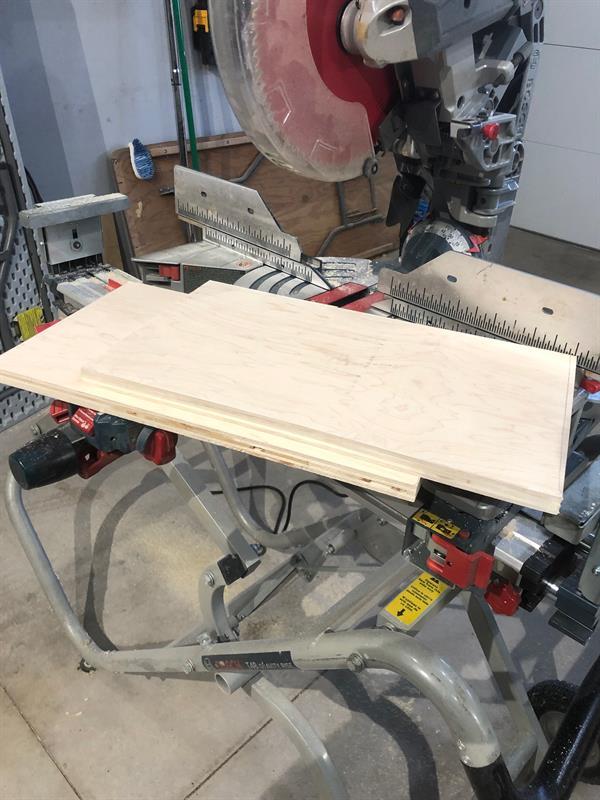
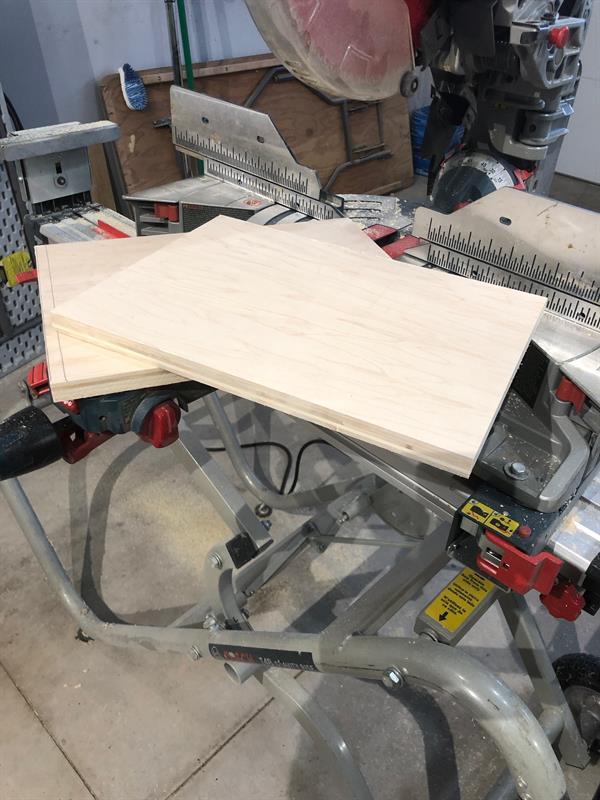
Base floor
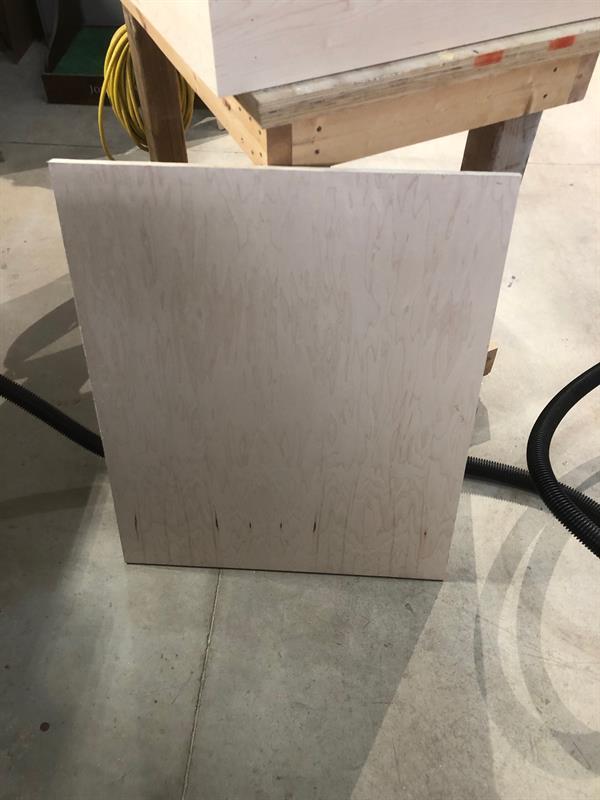
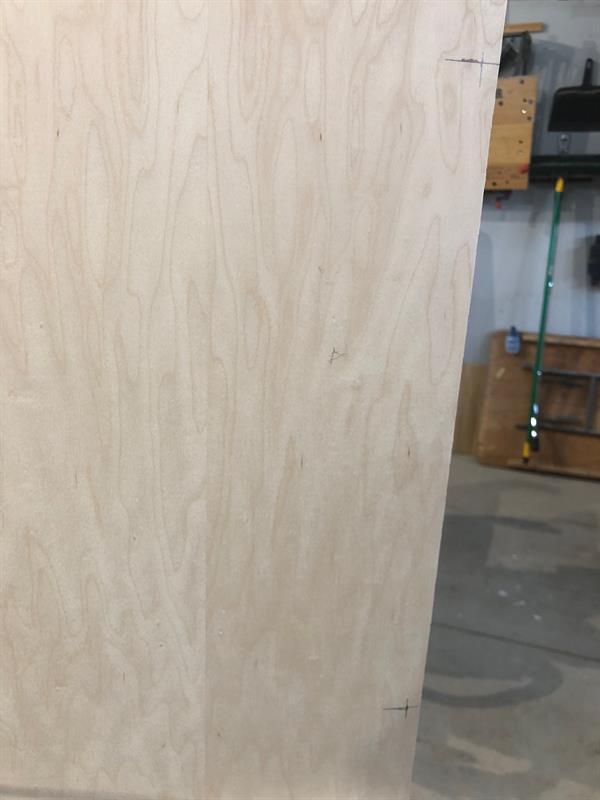
Cut 3/4" Maple plywood piece 18 7/8" X 27 1/2". Ensure good side is facing up for better presentation. Sand sides to fit base order.

-
Floor rest
Cut 4 pieces of 2x4 @ 4 3/8". Brad nail (2 in one side, 1 in the other) one 2x4 in each corner Flush with bottom of the base. This should have a gap at the top of 1 1/4" for base floor to be rested on.
-
Complete base
Flip base right side up. Slide base floor in place, resting on 2x4s. There should be 1/2" gap on top (rail). Looking at base, choose best appearing long part of base as front, For better presentation. Slightly mark in pencil "Front so not to be confused later. Sand Base floor lightly.
-
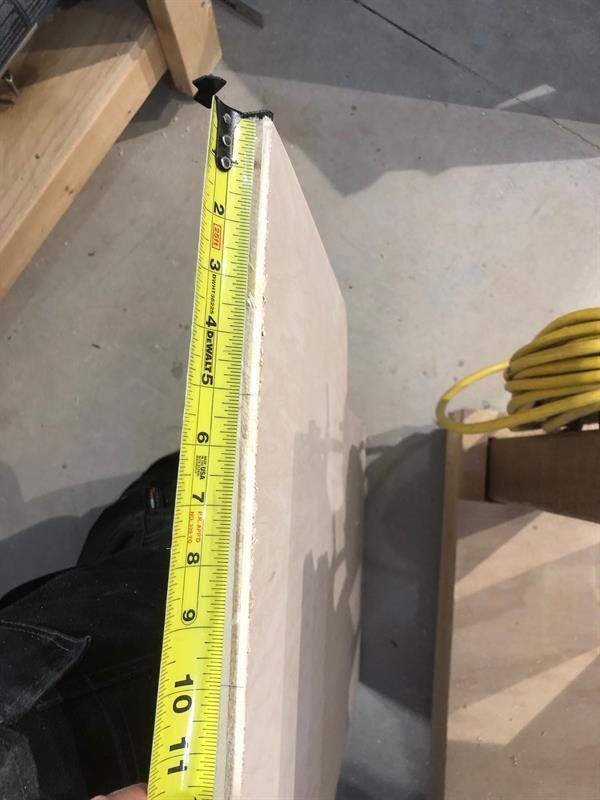
Cut backing
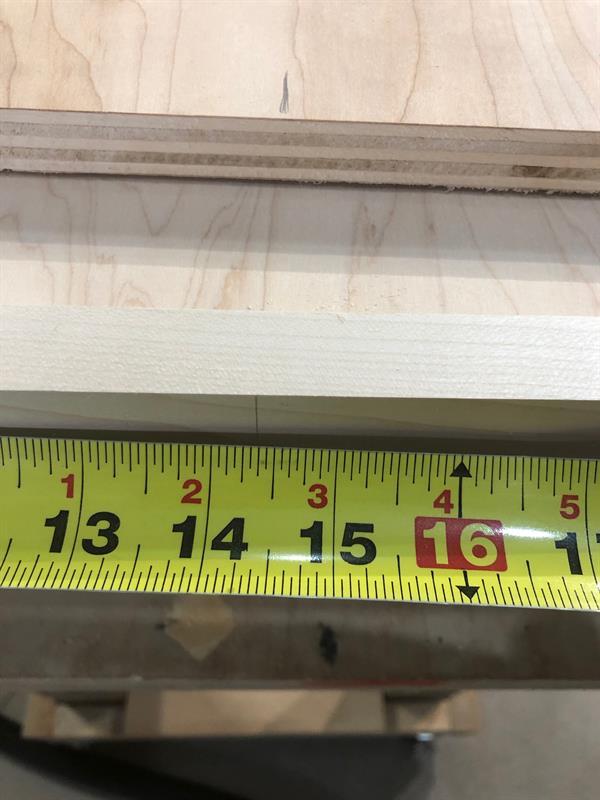
From 3/4" plywood cut a piece 31 5/8" X 25 7/8" This will be back of Stand. Ensure when working that good side faces front.
-
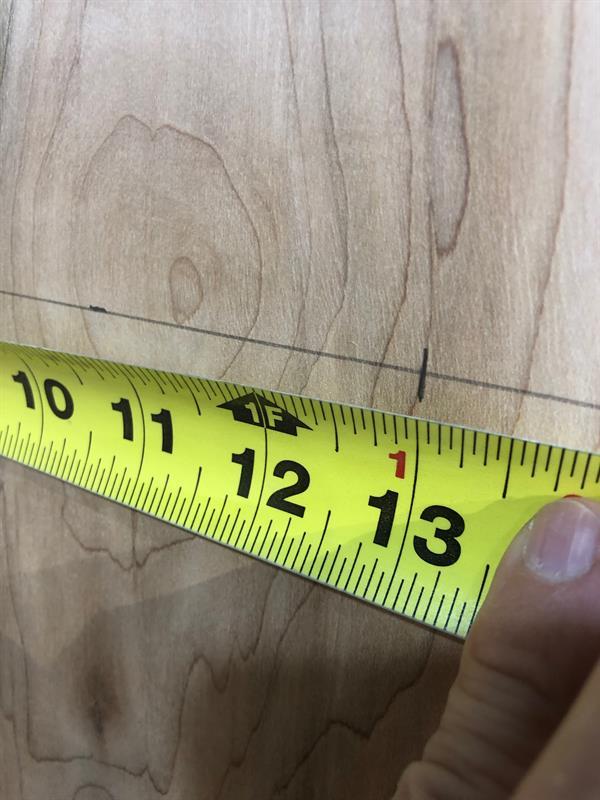
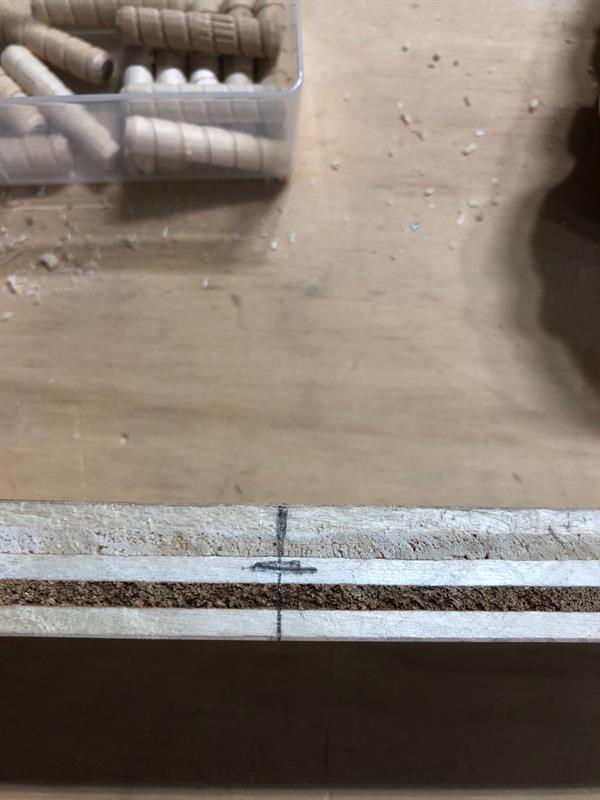
Mark drill line.
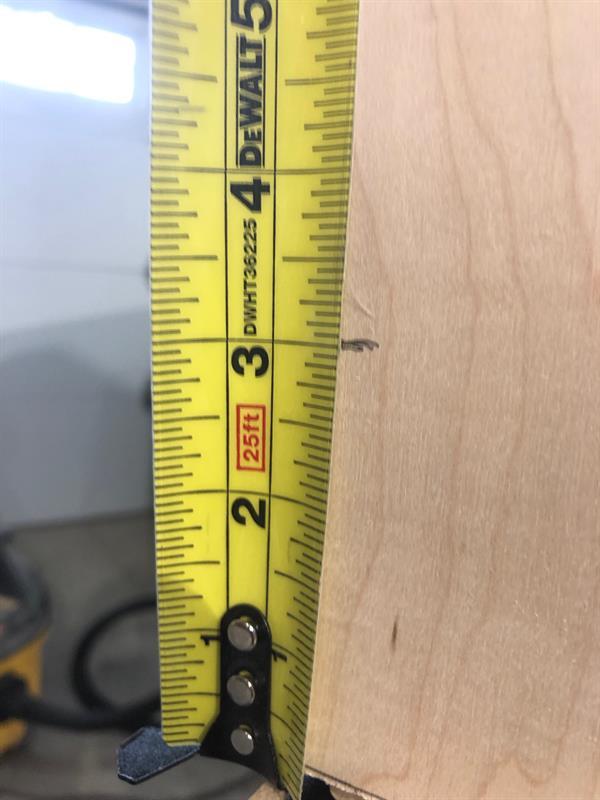
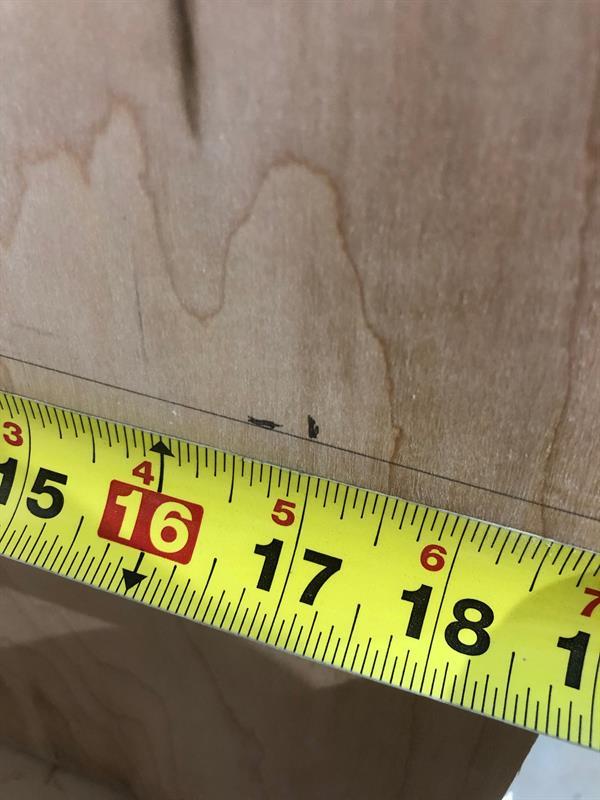
On rough side bottom (25 7/8") of stand Backing, mark @ 13" for drilling.
-
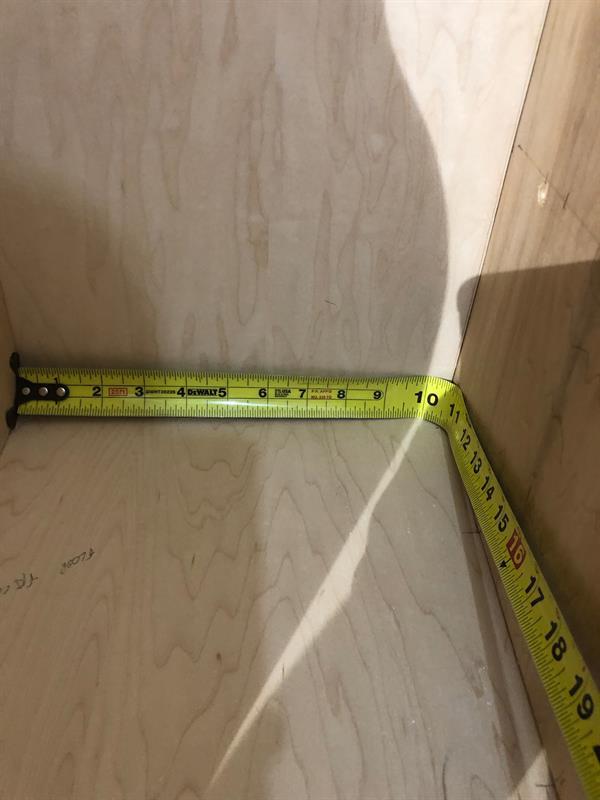
Marking Base back.
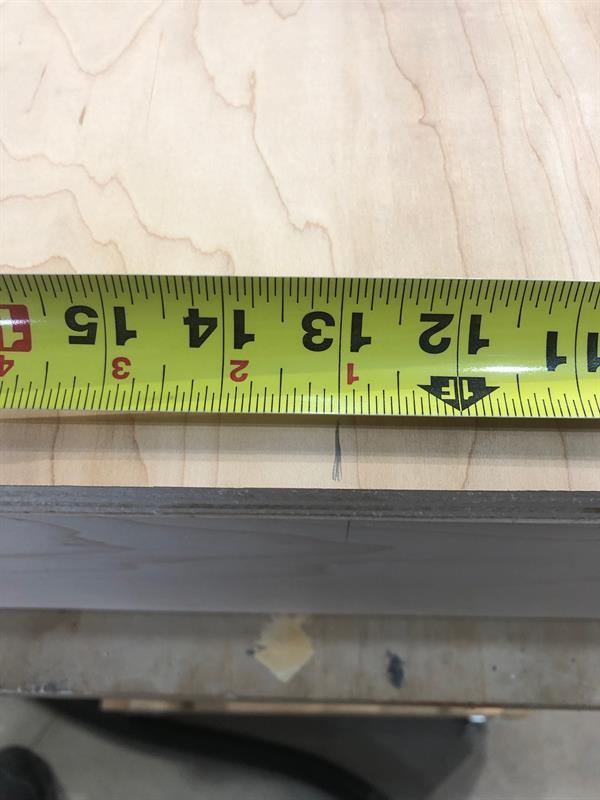
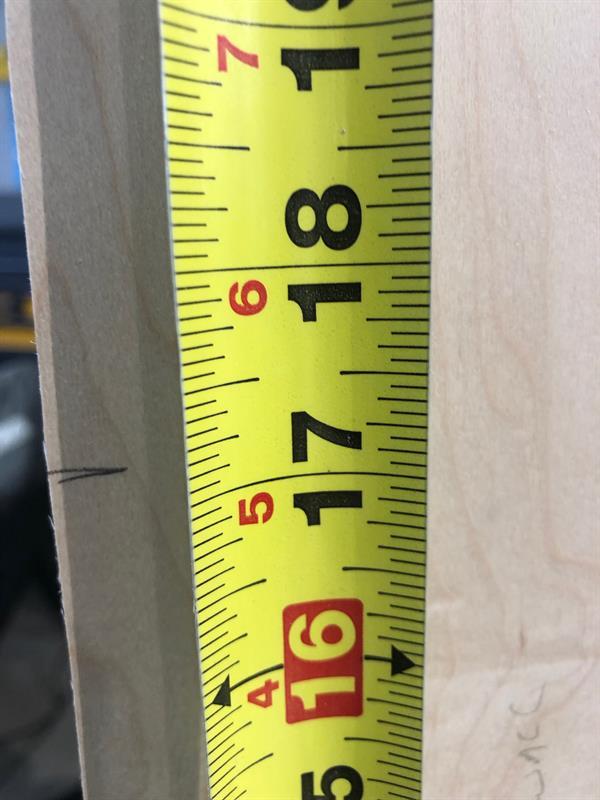
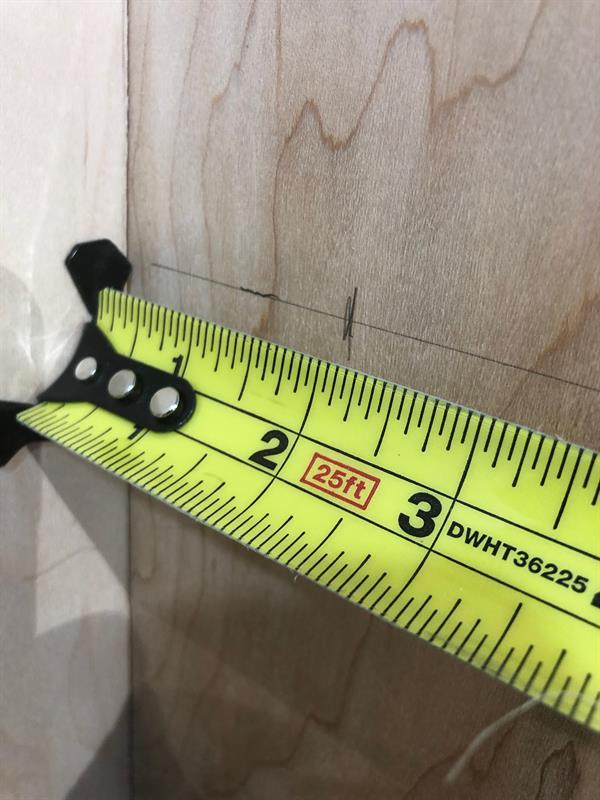
From left hand side of back of base, measure and mark 14 3/8".
-
Lining up base and backing.
Rest backing (Good side facing front) on back of base. When pencil marks line up in back middle, ensure you can fit a 3/4" (use scrap 3/4" piece) piece on floor of base on each side perfectly. This is to allow for walls in future step.
-
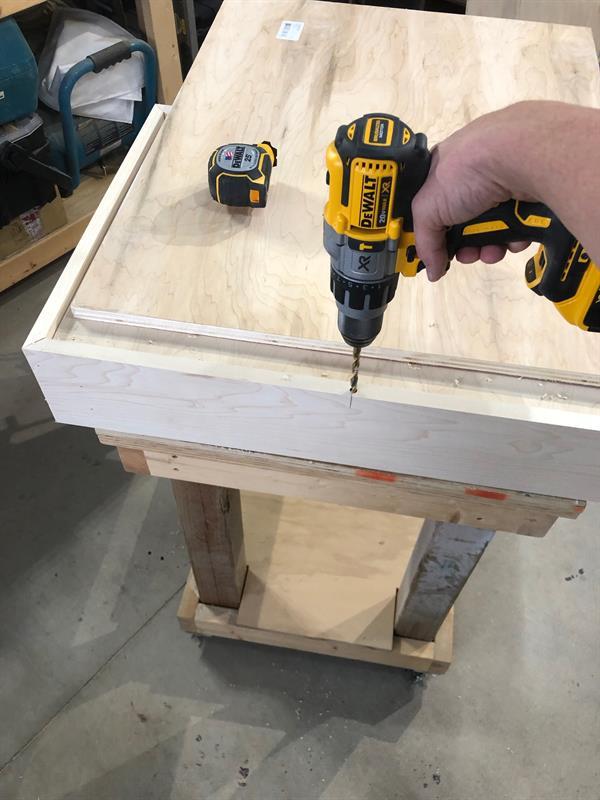
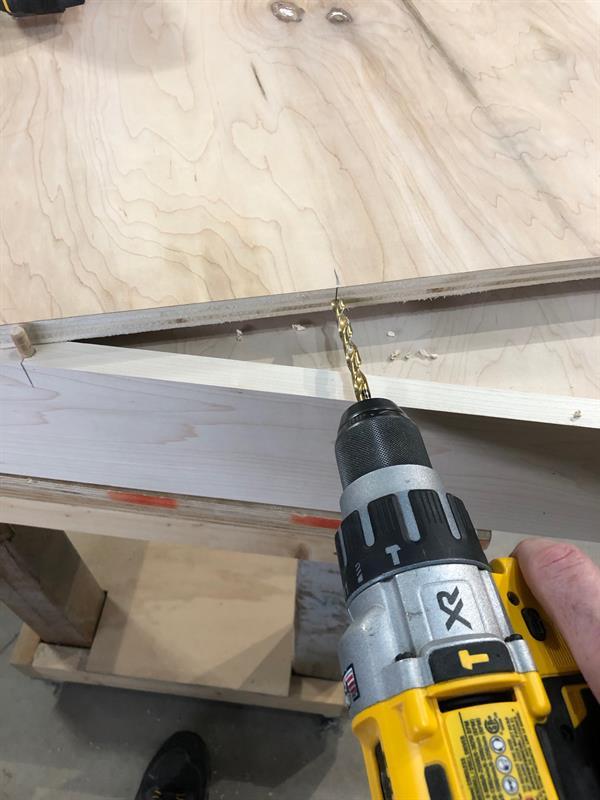
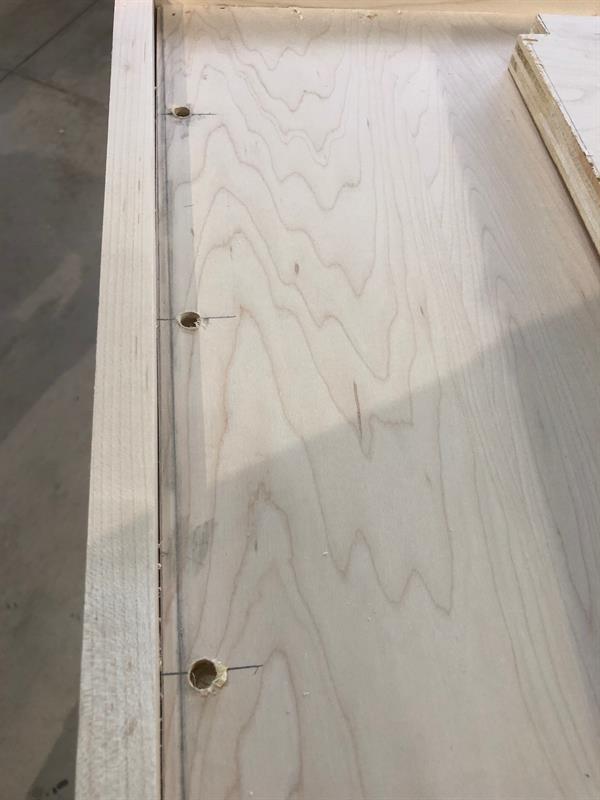
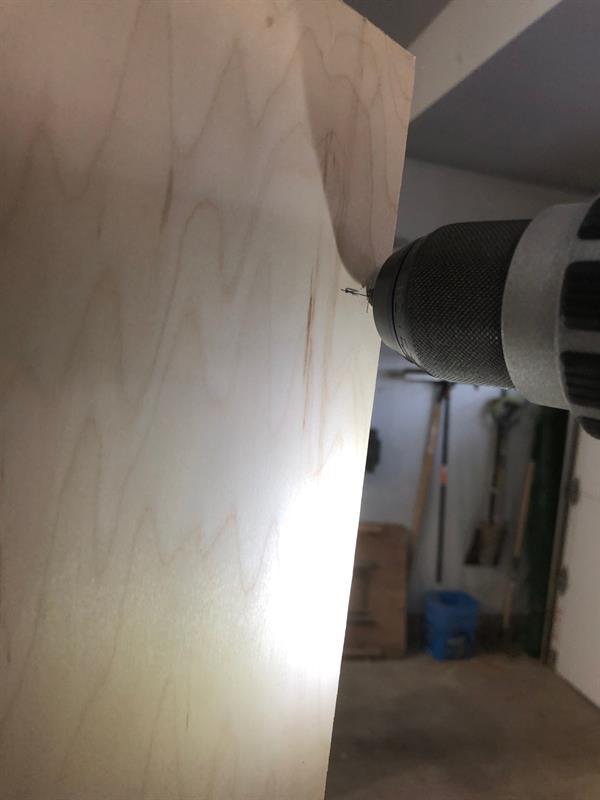
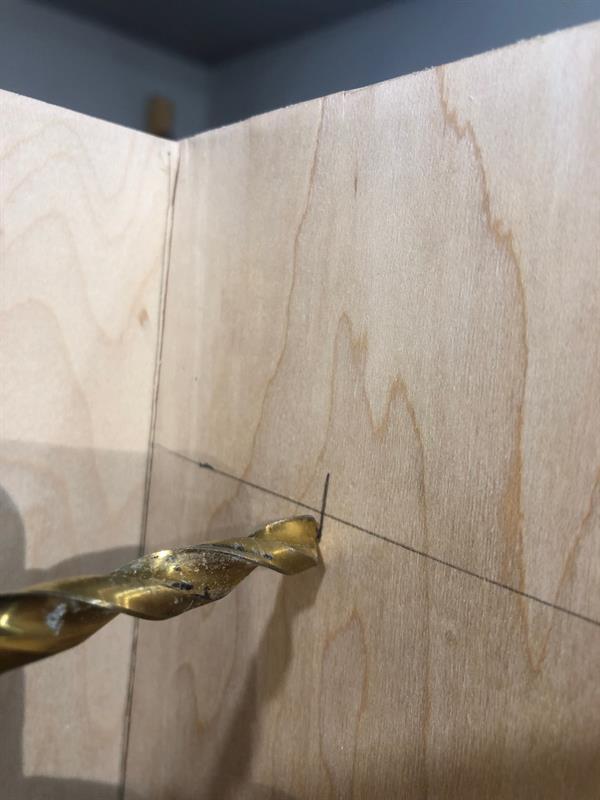
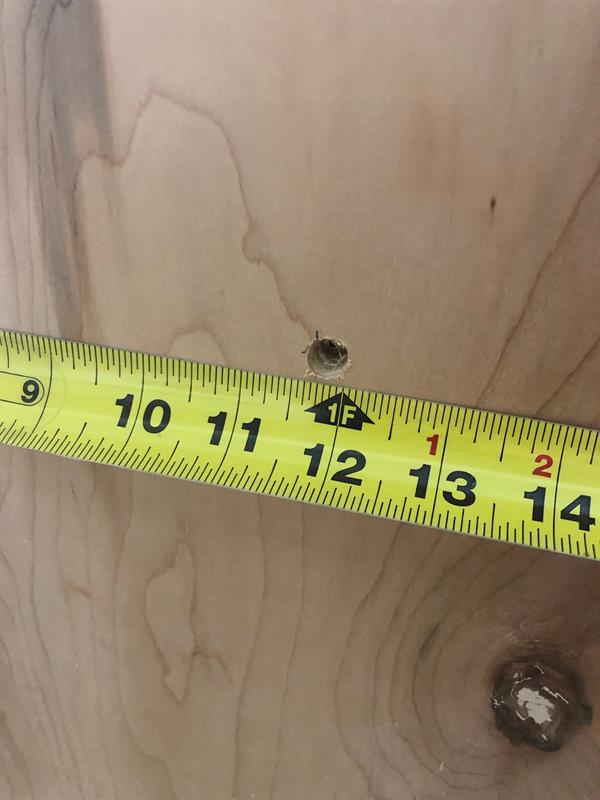
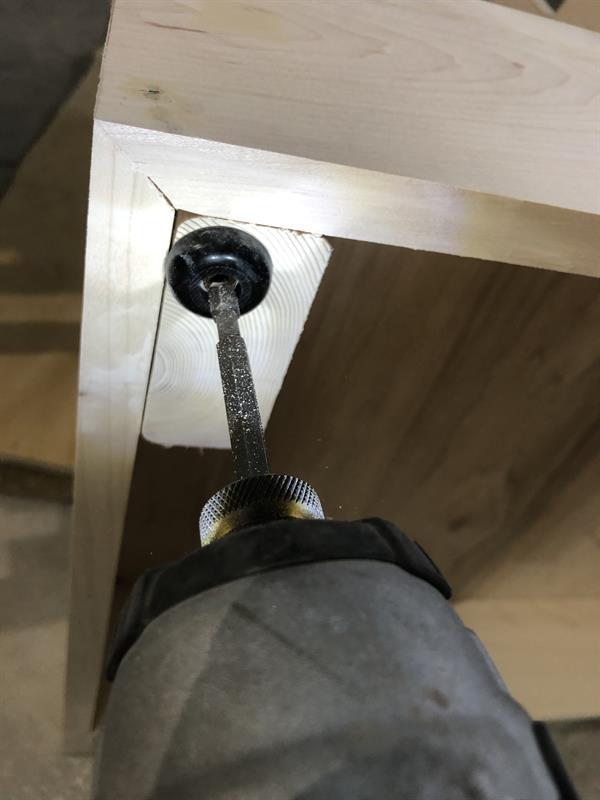
Drill Base and backing
On 14 3/8" mark on back side of base, mark centre of base back. Using 5/16" drill bit, drill 3/4" deep at centre of pencil line on back of base.
-
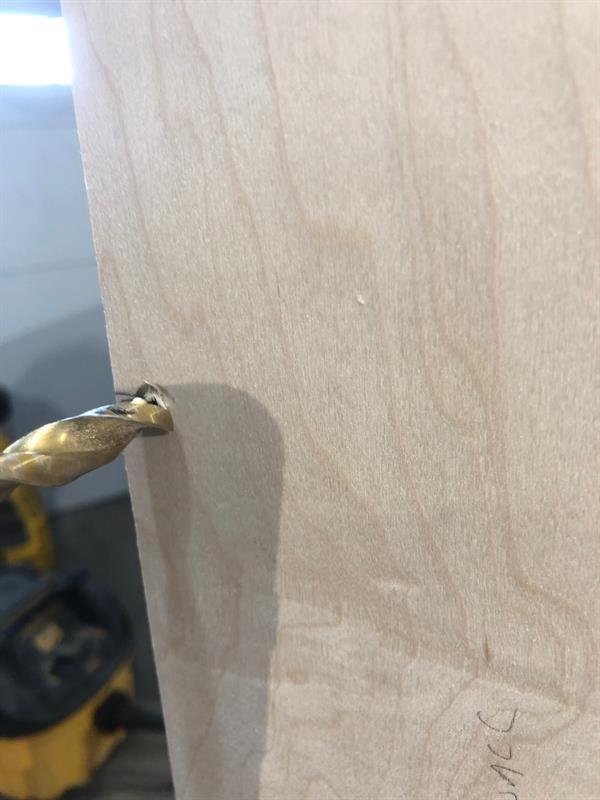
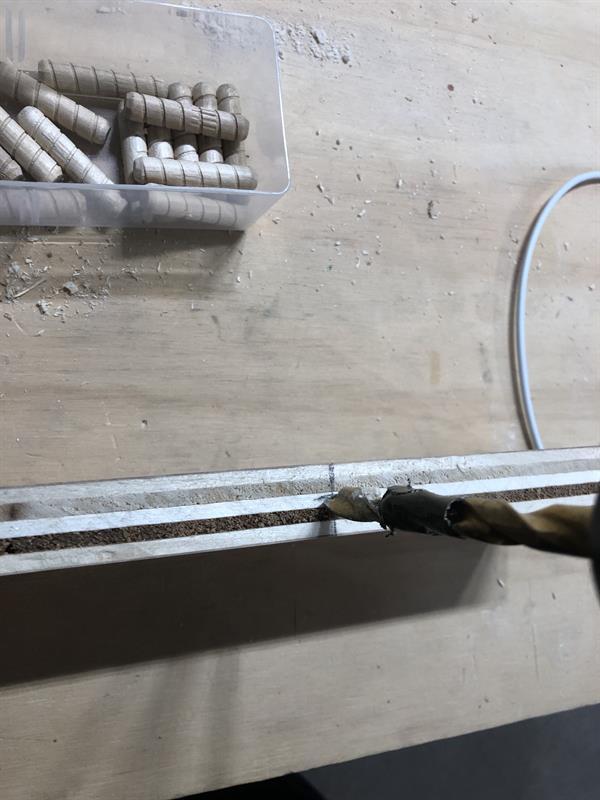
Matching drill hole for backing
On matching line marked @ 13" on bottom of backing, Drill using 5/16" bit in centre of backing bottom at 3/4" deep.
-
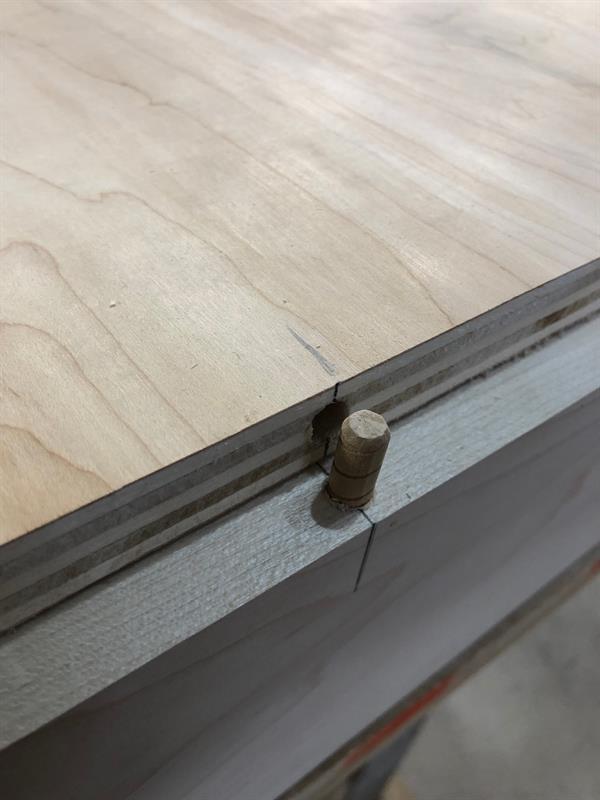
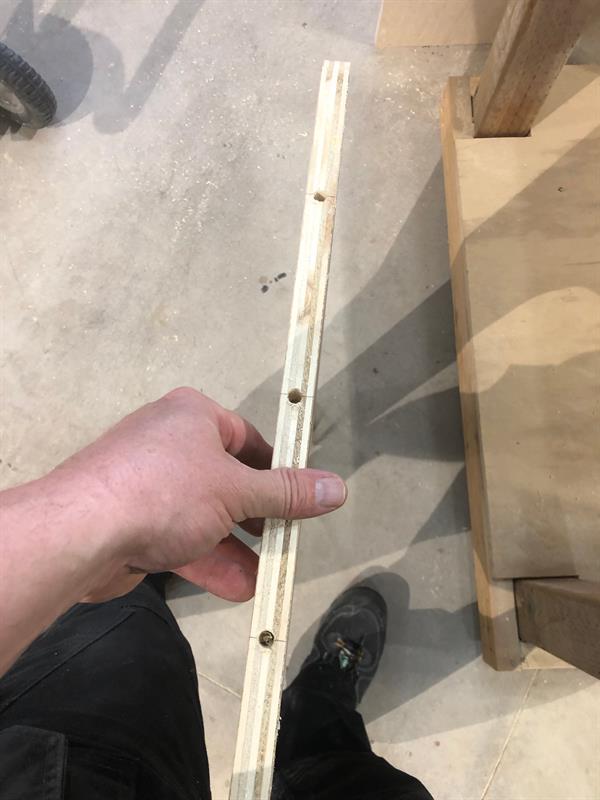
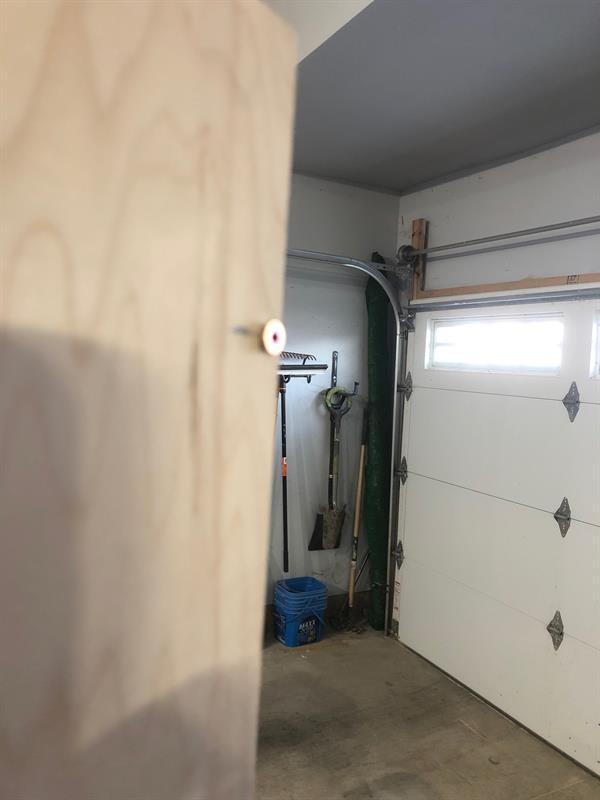
Doweling piece
Put 5/16" dowel piece with dab of glue in base hole. Should stick up 3/4" for backing.
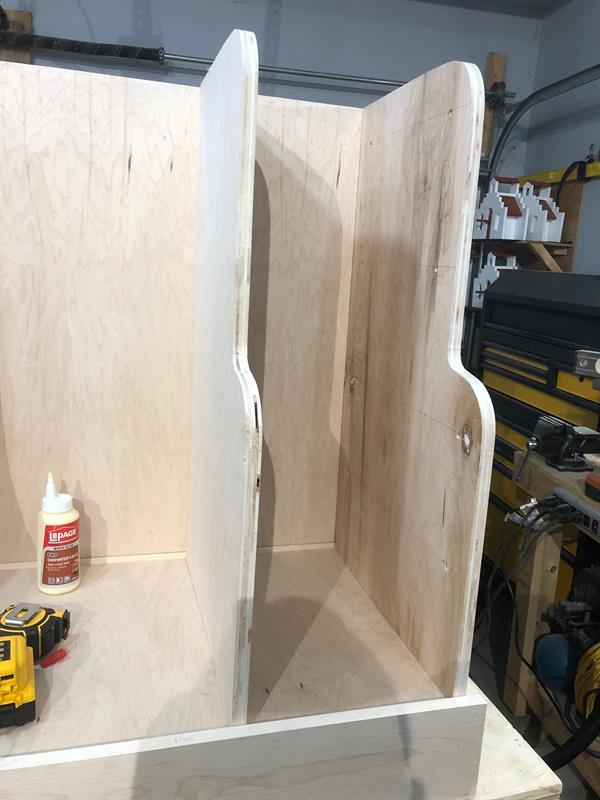
-
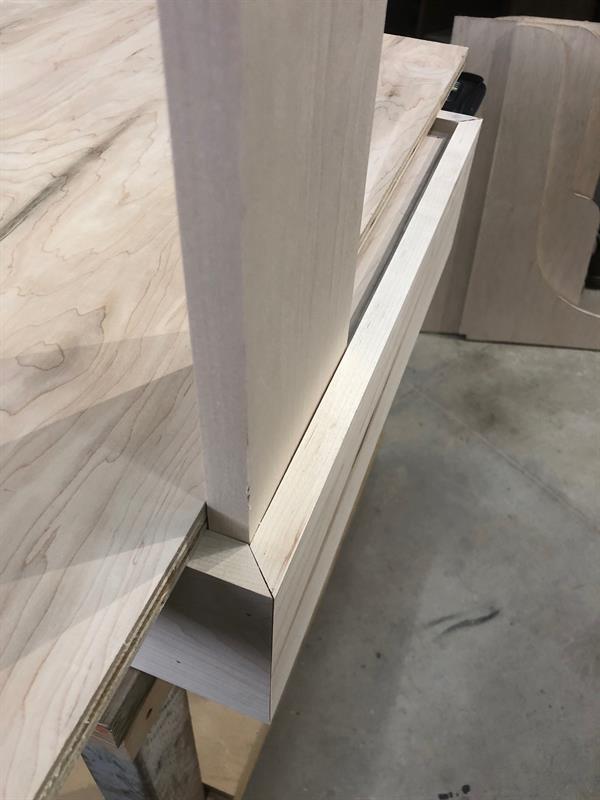
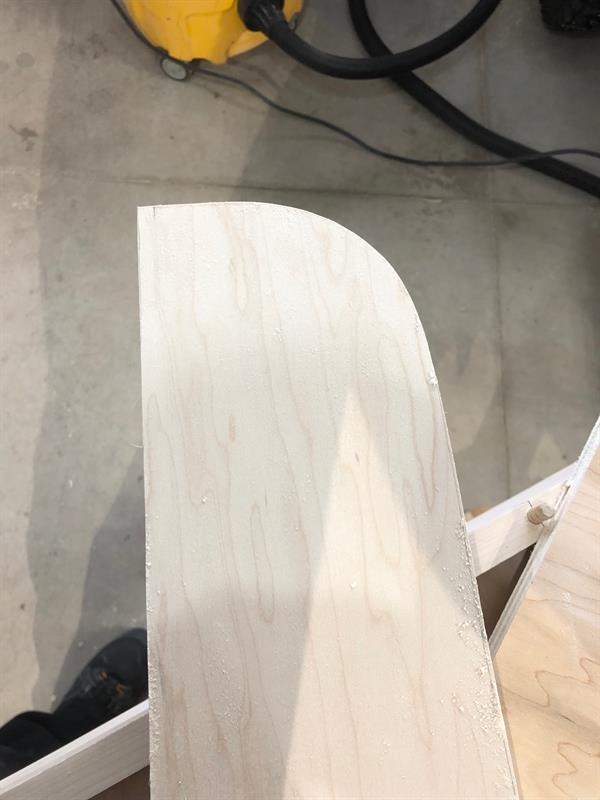
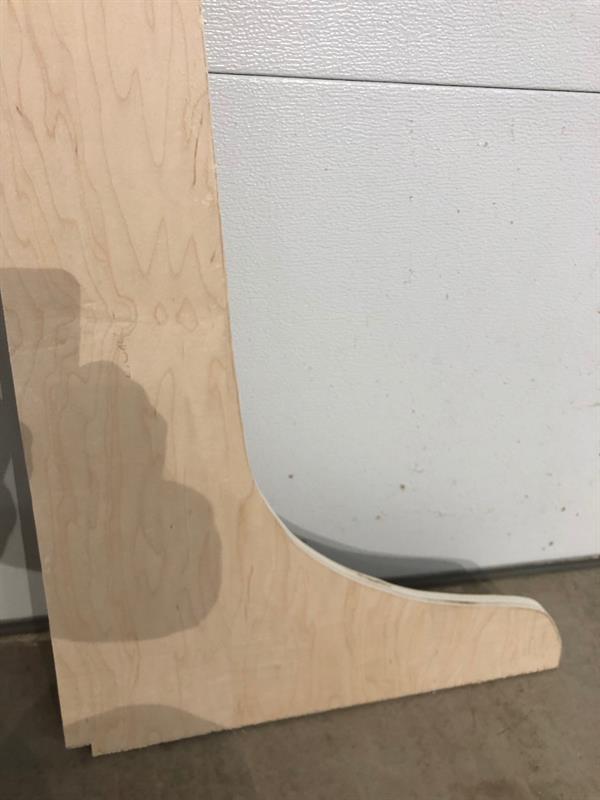
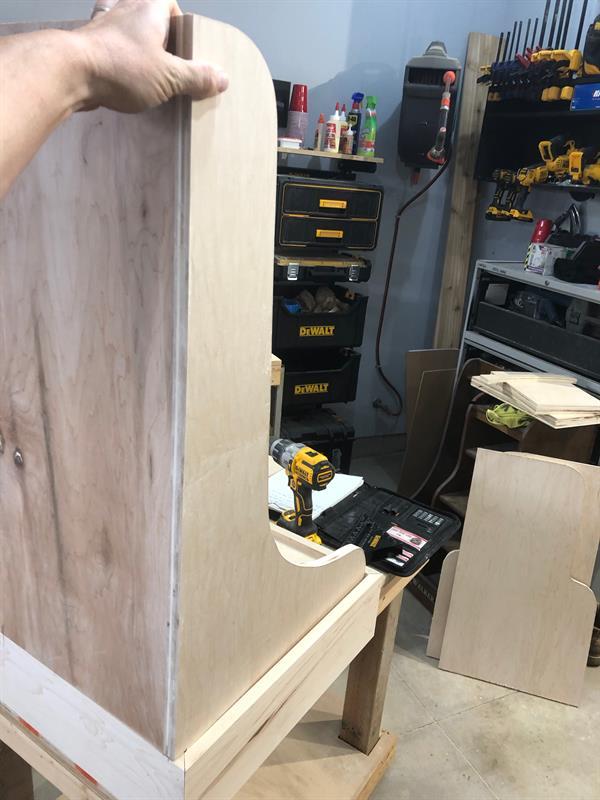
Left hand side wall
Cut piece of 3/4" plywood @ 32 1/8" tall X 19 5/8" wide. Good side faces out. using Jig saw, Jig 2" across from top. Start rounding (Use large coffee can, it's what I used). after jigging rounded top of wall, radually jig down and slightly out.
-
Left hand side wall Con't
Free hand concave curve as best you can so that you are gradually nearing the foot of the wall.
-
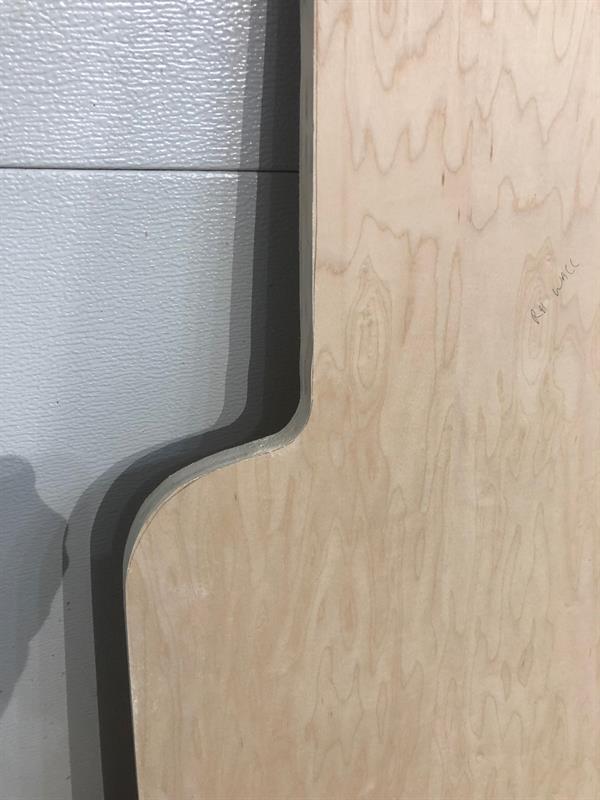
Left hand side wall toe
Using same coffee can, draw and jig rounded toe of left hand side wall. as shown in photo.
-
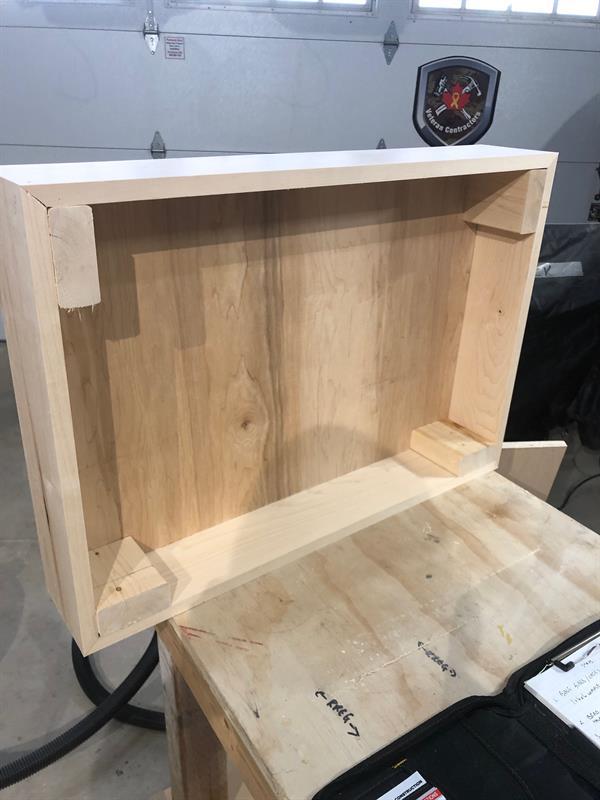
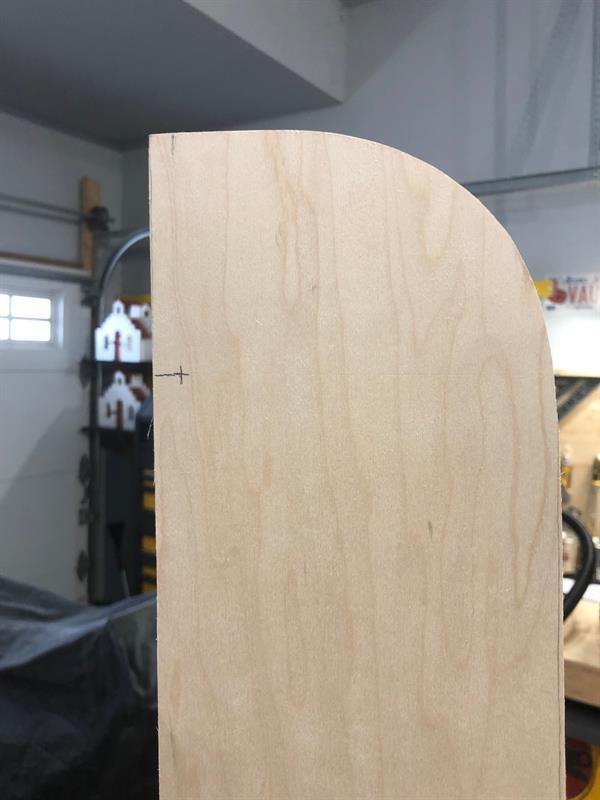
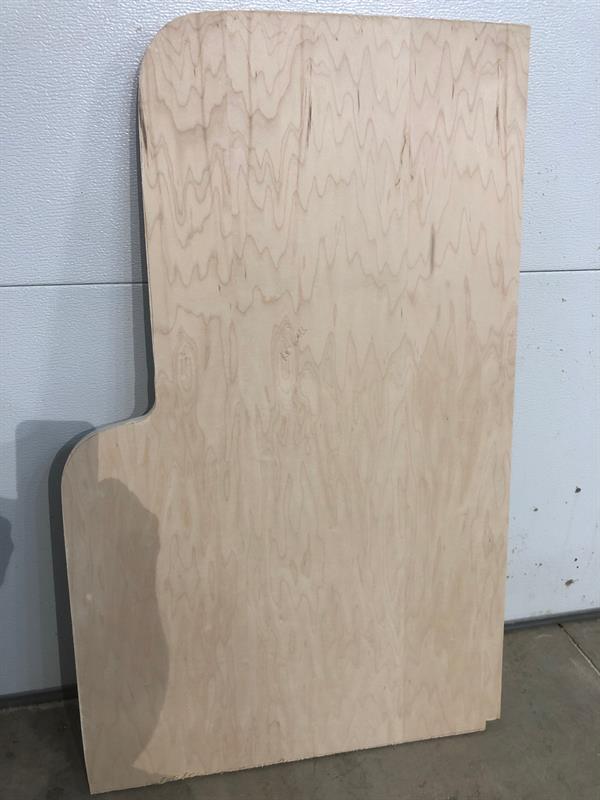
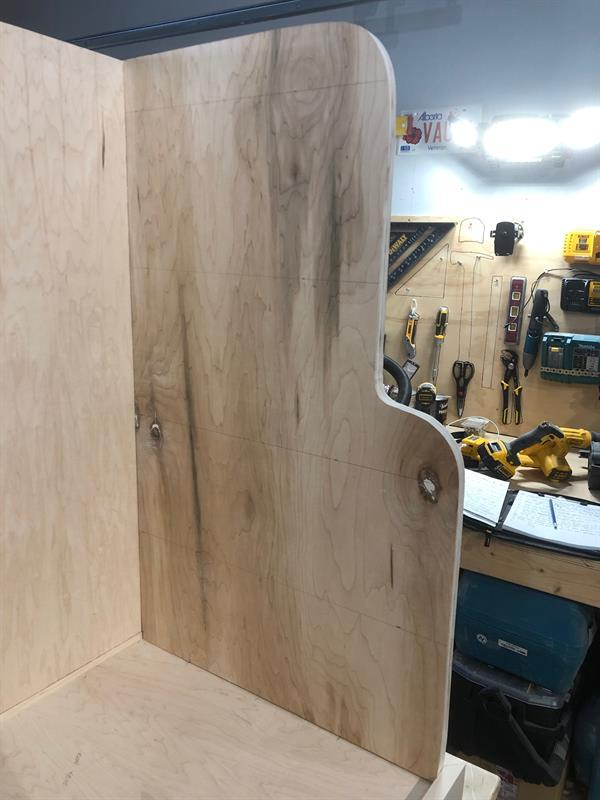
Left hand side wall shape
As per photo, this is what you should have ended up with. It is not vital to have exactly like mine. If it is off a bit, it will still accommodate a golf bag.
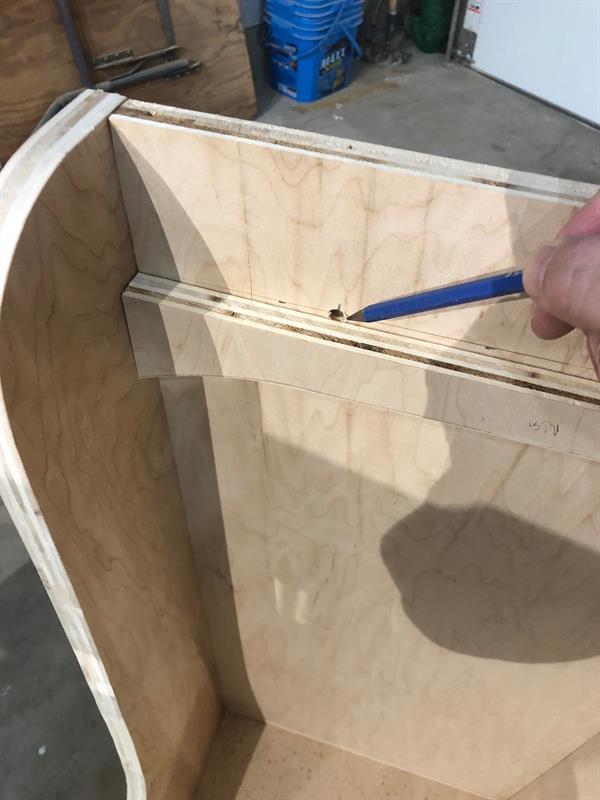
-
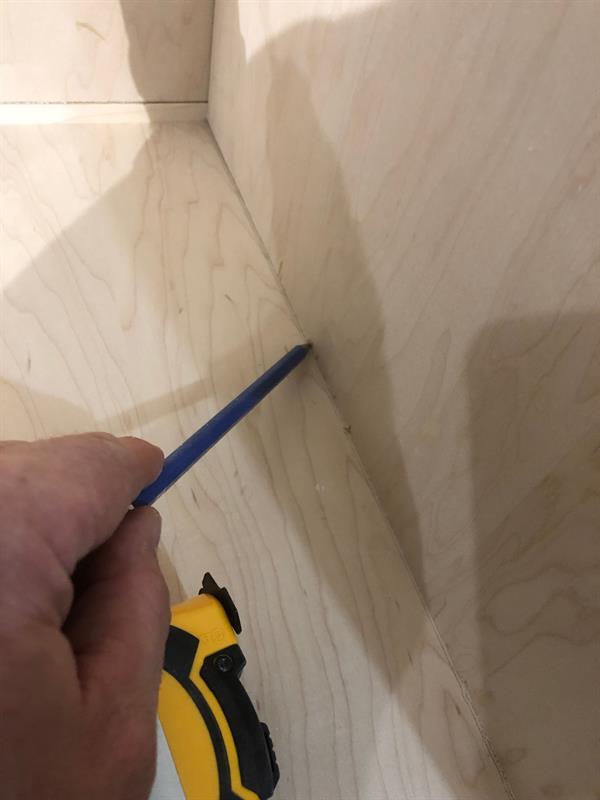
Corner jig
On the heel of the left hand side wall, measure 3/4" in from corner and measure up 1/2". Jig out marking. This is to enable back of base border to fit. Once LHS wall is complete, lightly sand edges with oscillating orbital sander to get smooth finish. Or by hand.
-
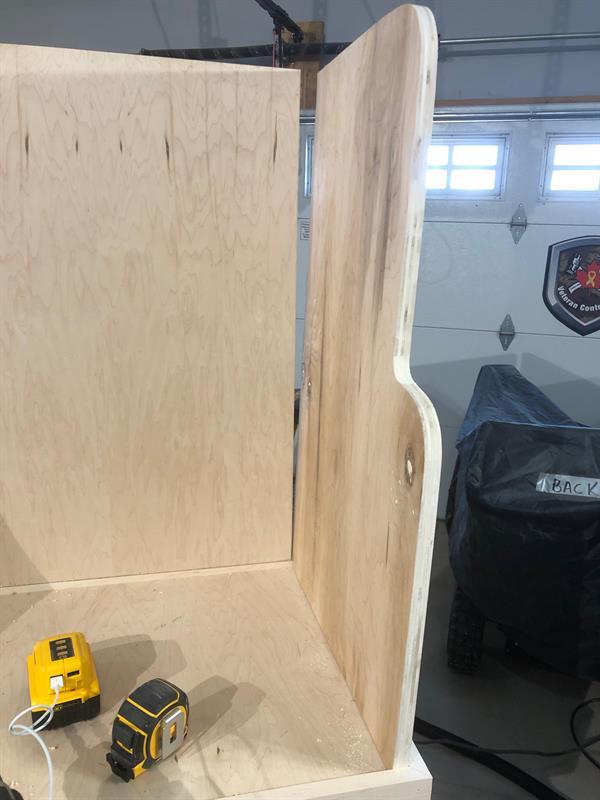
Fitting LHS wall to backing
Put backing piece on previously placed doweling. Put LHS wall in place to ensure it fits nicely.
-
Marking dowel holes.
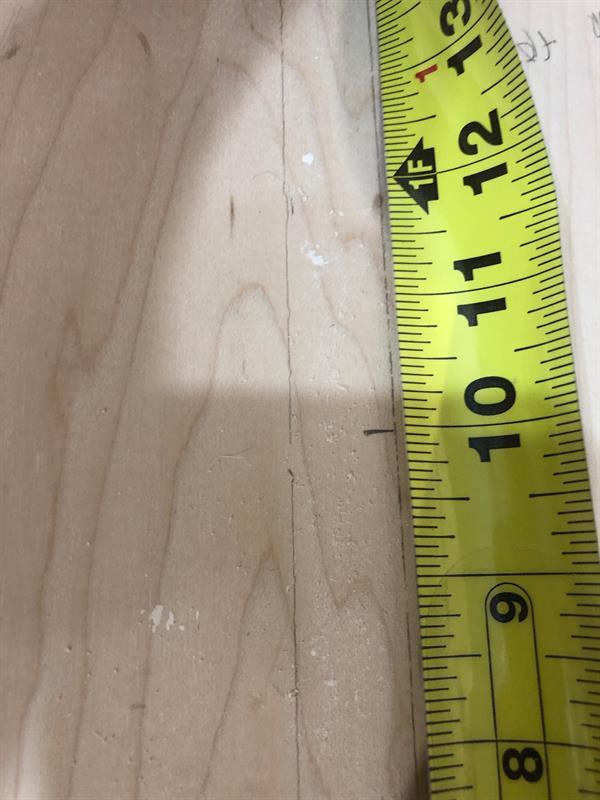
Measure from inside front left hand side base 5", 10" 15" towards back.
-
Marking LHS wall for doweling
Put LHS wall in place. WIth pencil, mark on inside wall matching dowel marks from step 19.
-
Marking centre of dowel lines
Measuring each mark on base from step 19, mark from inside side wall 3/8". This will be for middle of LHS wall dowel.

-
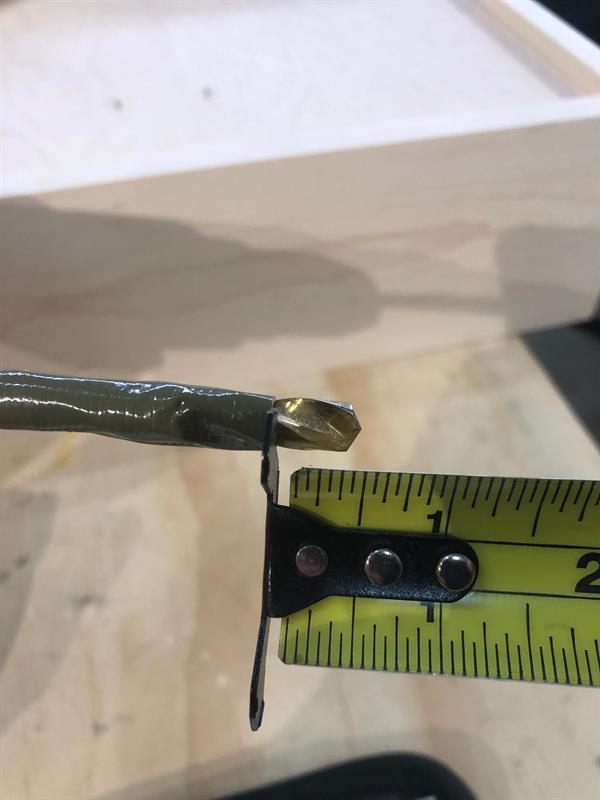
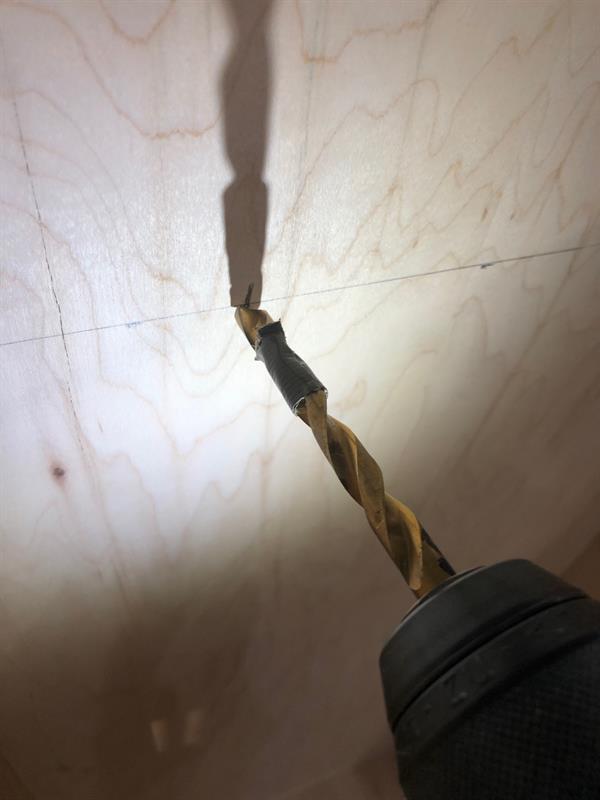
Mark drill bit
Mark 1/2" with tape on drill bit, so you'll know not to go further than 1/2" deep.
-
Drill dowel holes in LHS wall base
At markings on LHS base, drill 1/2" deep with 5/16" bit. This is holes for the 5/16" dowels.
-
Dowel holes in LHS wall
Turn LHS wall upside down so you're looking at dottom where they are marked. Place square on marking, mark with pencil across bottom on the 3 previous marks. Measure and mark (3/8") middle of wall sheet. Drill 1" deep into bottom of LHS wall for matching dowels.
-
Dowels LHS wall
With 5/16" dowels (3) dab glue on 1 end of dowel and place in each hole.
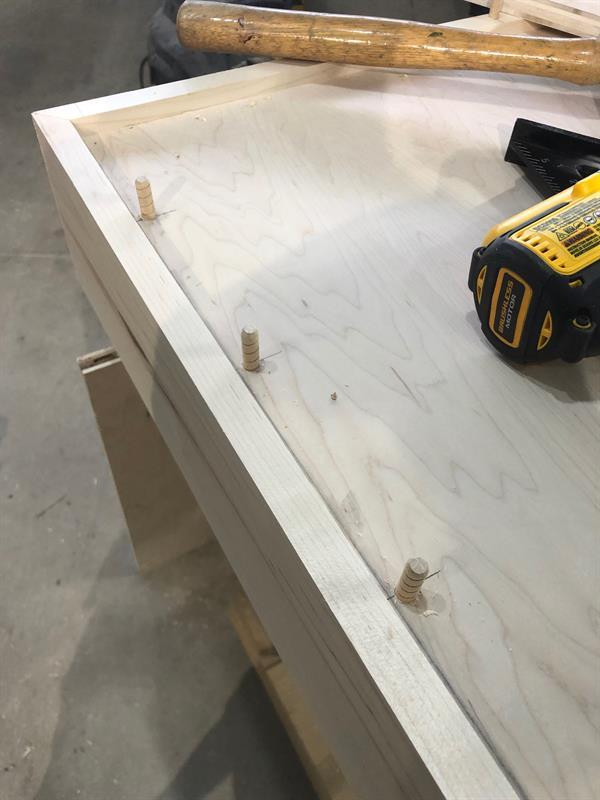
-
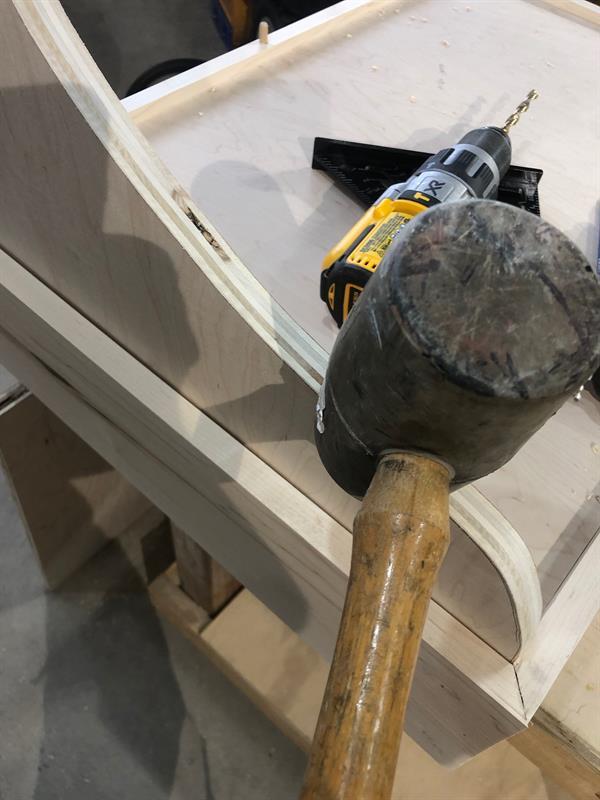
Hammering wall down
Once dowels are in place, dab glue on top of the 3 dowels. Put LHS wall in place matching holes on bottom of wall to dowels. Once fitting in, lightly hit with Rubber mallet to fit tight.
-
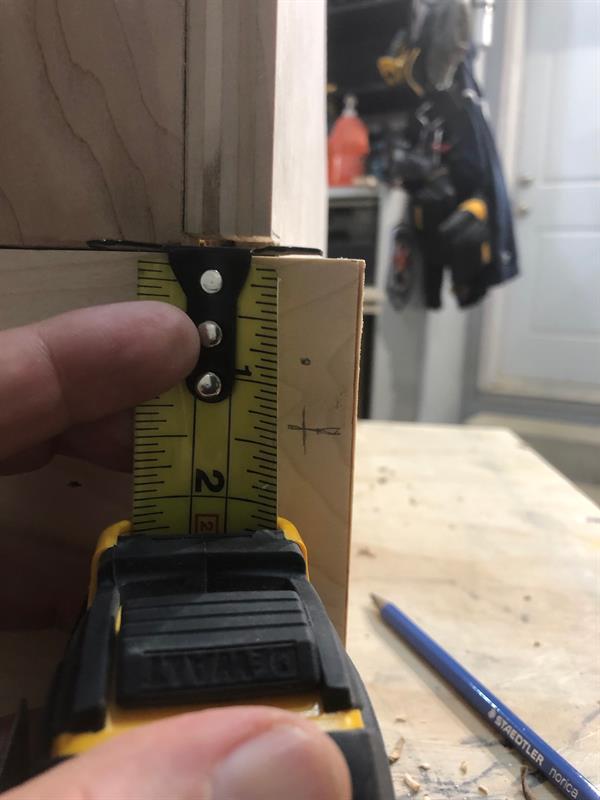
Screw markings
On outside LHS wall mark 3" down from top and 3/8" in from back. This is for assembly screw. Drill pilot hole using 5/32" drill bit on this mark.
-
Screw temporarily
With pilot hole drilled, With impact gun, screw 2" construction screw into top LHS wall, into back wall. Make sure back wall is flush with LHS wall before putting screw in. DO NOT Drill completely in yet.
-
Marking lower screw
Measuring and marking 3" up from bottom of LHS wall, and 3/8" in. this is to accommodate lower screw.
-
Mark LHS wall middle screw
Measure and mark from bottom of LHS wall 17" up and 3/8" in. This is for middle screw.
-
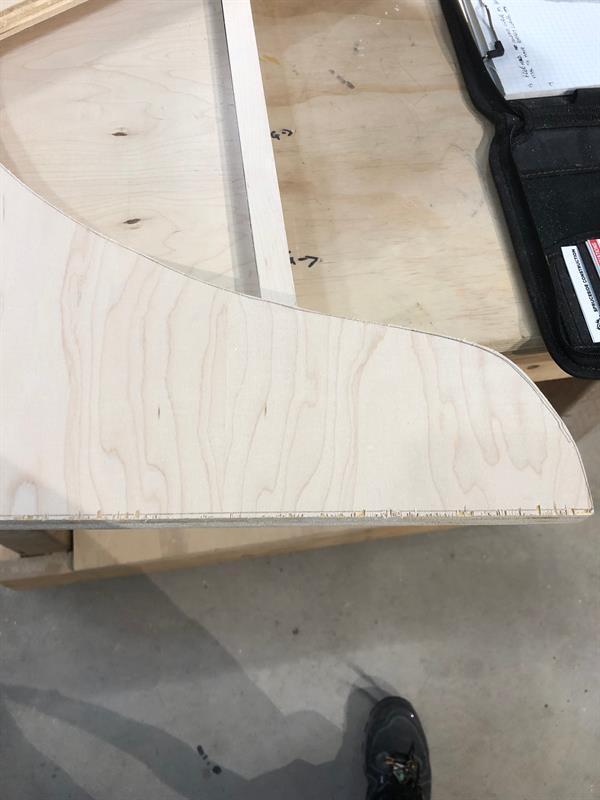
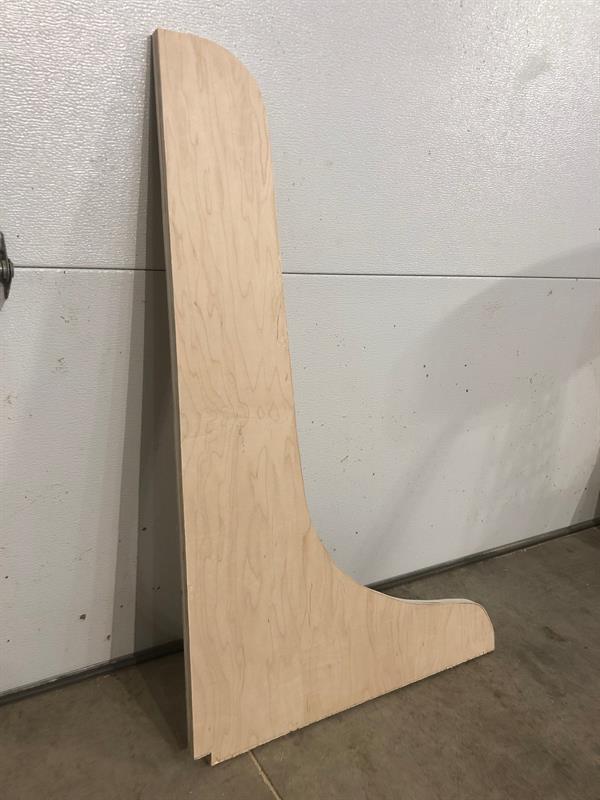
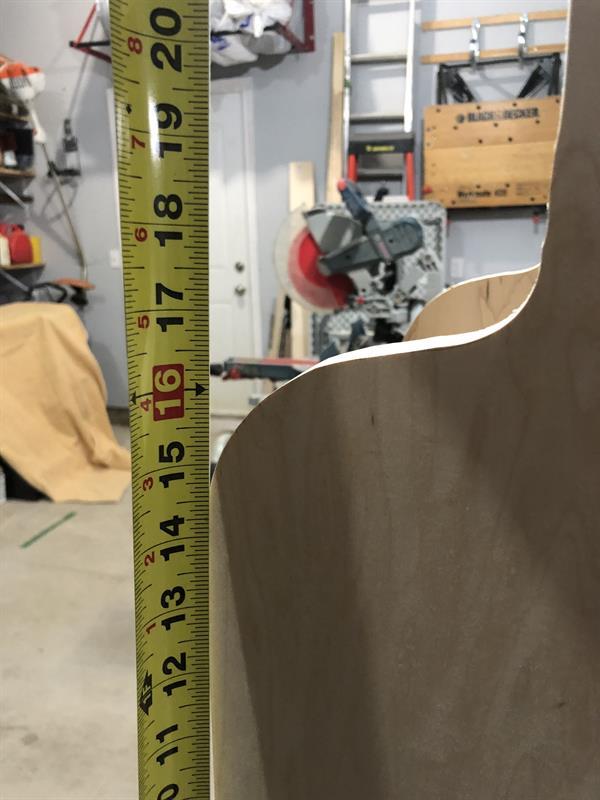
Right hand side wall
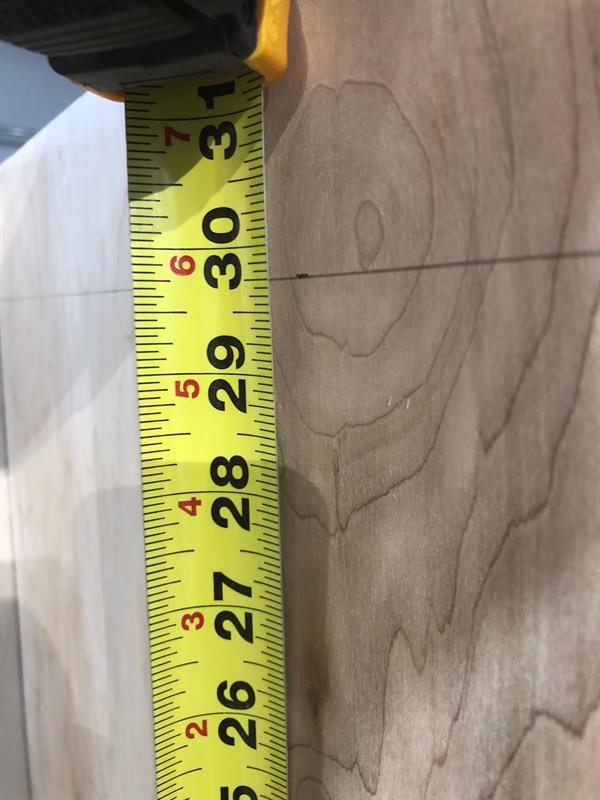
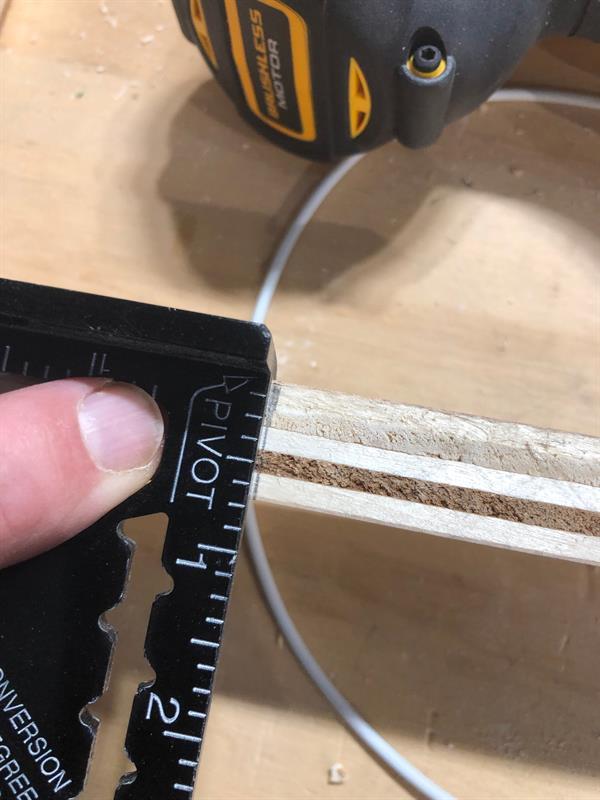
Cut a piece of 3/4" plywood 42 1/4" x 19 3/4". This will be known as right hand side wall or RHS wall. With good side facing up, measure in 12 1/2" from top right corner. Using jig saw and "coffee can" for round marking once you are finished round and are directly marking downward. Measure 14 1/2" down. From back of wall to downwards curve should measure 15 5/8 across upper part of RHS wall (So basically, the upper part of the wall is 15 5/8" wide. Using free hand or soda can draw and cut tight round concave curve.
-
RHS wall final curve
After completing small tight curve, once small circle is parallel to the ground immediately curve downwards using coffee can until you are drawing and cutting straight down. This bottom part of wall should be 19 3/4” wide. Sand edges.
-
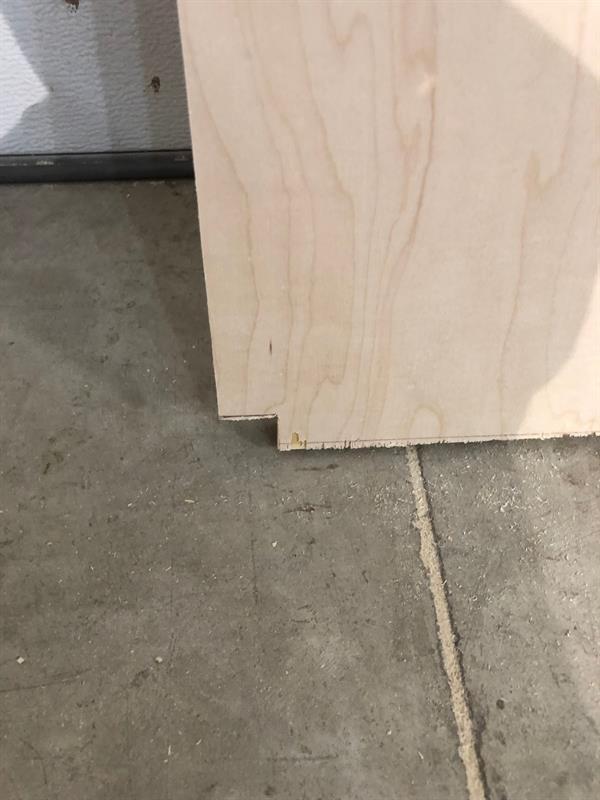
Jig Heel
On RHS wall, bottom heel, mark and jig 3/4" in and 1/2" up to accommodate for base border lip.

-
RHS wall complete
SO once complete, this is what you should have for RHS wall.
-
Marking dowel spots
From front inside right of base, mark 5", 10", 15" for dowel drilling
-
Cross mark
Cross mark those 5,10,15 markings at 3/8" in from inside right wall of base.
-
Drill dowel holes
Drill on markings with 5/16" bit ONLY 1/2" deep. Again, mark bit with tape to ensure you only go 1/2" deep.
-
Marking Under RHS wall
Flip RHS wall upside down. From toe of RHS wall mark lines 5", 10", 15" from toe. After lines are complete, measure and mark in 3/8" on each line so that the line is marked in middle of sheet.
-
Drill dowel holes
With the markings, drill with 5/16" bit 1" deep into bottom of RHS wall.
-
Glue dowels
With a dab of glue on each dowel, place in each of the 3 holes.
-
Trace Middle wall
Take RHS wall (rough side facing up) and place on remaining piece of plywood (good side facing up). Trace out RHS wall. Jig out trace. This will be known as middle wall. WIth table saw or circular saw, evenly cut a 3/8" strip off of the back of the middle wall. This will make the two identical except there will be a underhang of the RHS wall by 3/8".
-
Matching up Middle and RHS walls
Once strip is cut, line them up best you can so that the are as one. Note, there will be the RHS wall 3/8" wider than the middle wall. Using 2 clamps, clamp them together on back side.

-
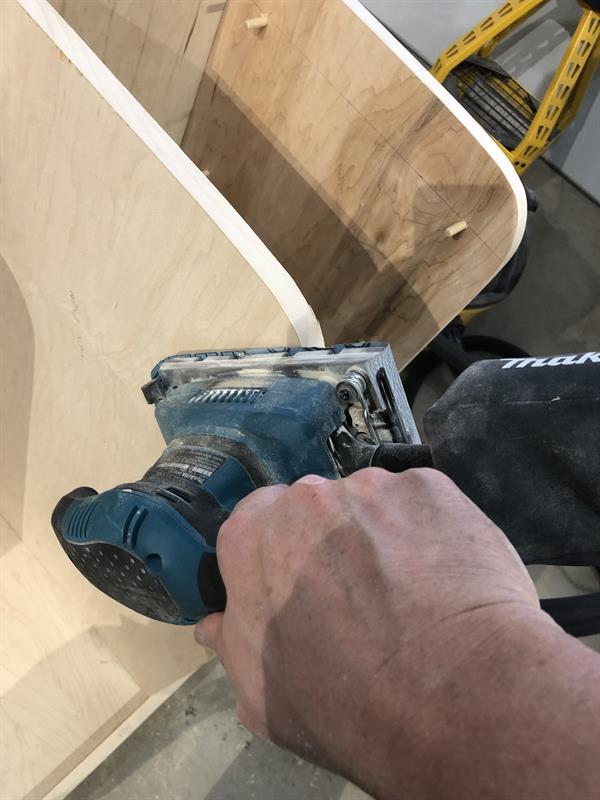
Sanding middle and RHS wall.
While both pieces are claped together at the back of the walls, Take the front part of the walls and lightly sand them with the oscillating orbital sander. Sand them so they match each other.
-
RHS wall installation
After sanding middle and RHS walls, seperate. Take RHS wall to Stand base where dowels are placed. Dab glue on each dowel and fit RHS wall on dowels. Use rubber mallet to home in snug.
-
Marking drill marks for RHS wall.
From top right hand corner of RHS wall, measure and mark down 3" and in 3/8" for screw. Then mark from bottom right hand corner up 3" and in 3/8". Then mark from bottom right hand side up 17" and 3/8" in.
-
Pilot drilling RHS wall holes
Using 5/32" drill bit, drill on markings from step 43. Line up back wall flush so you drill through RHS wall into back wall.
-
Temporarily Screw
In top right hand corner of RHS wall, where you just pilot drilled, put 2x8 construction screw in but NOT ALL THE WAY. This is just temporary.
-
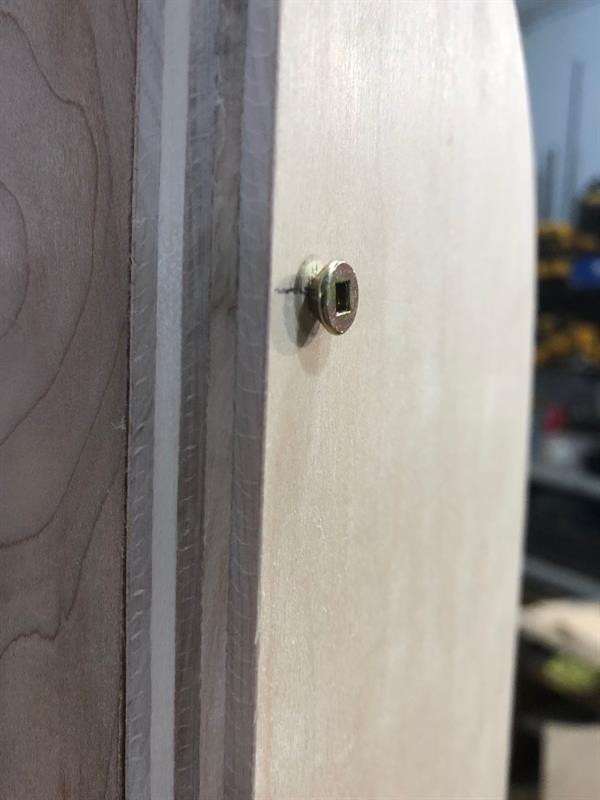
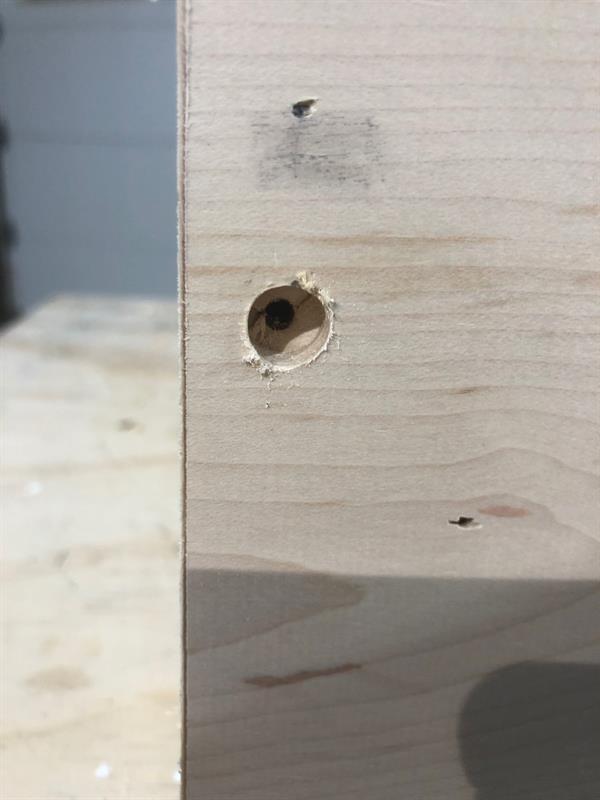
Counter screw
All the holes you pilot drilled now need to be counter drilled to so when you put screws in deep, you are able to put 3/8" wooden head plugs in to hide screw. So drill using a 3/8" drill bit 3/16" deep on each hole on either side of the RHS wall and LHS wall. Do the bottom 2 on each side first as you still have temp screw in place. Should be 6 counter screws in total.
-
Screw in walls
Once bottom 2 screws are secure in counter sink on both LHS and RHS walls, undo top screws on LHS and RHS walls. counter drill these two as well same as the other 4. Counter sink 2 top screws on respective sides to have all 3 counter sunk screws on LHS and RHS walls.

-
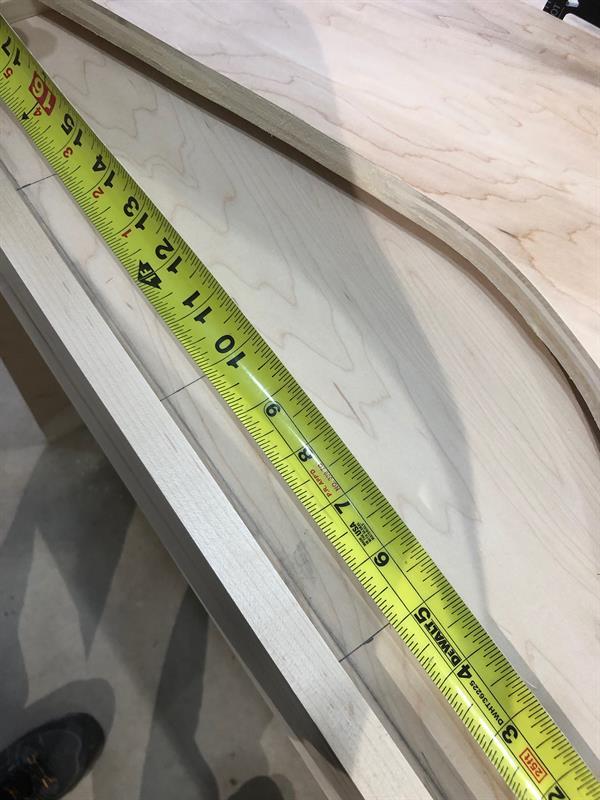
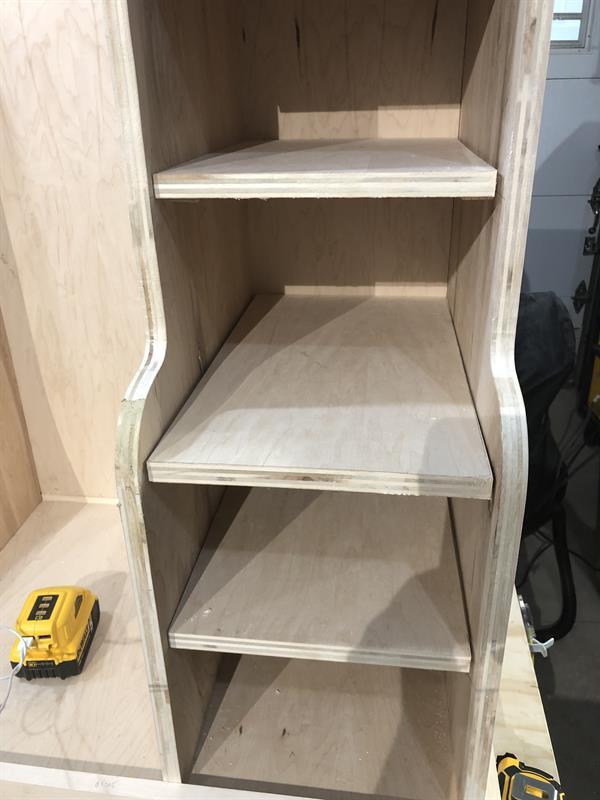
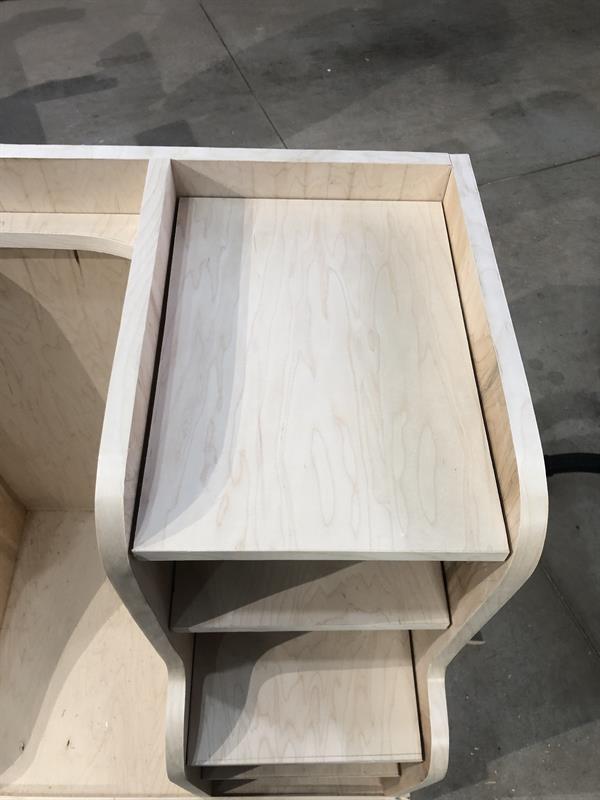
Long shelves
Cut shelves from 3/4" plywood. 2 shelves @ 18 1/4" x 10 7/16". Lightly sand 4the 4 edges of each.
-
Short shelves
Cut two 3/4" plywood pieces at 14 1/2" x 10 7/16" for short shelves. Lightly sand the 4 edges on each shelf.
-
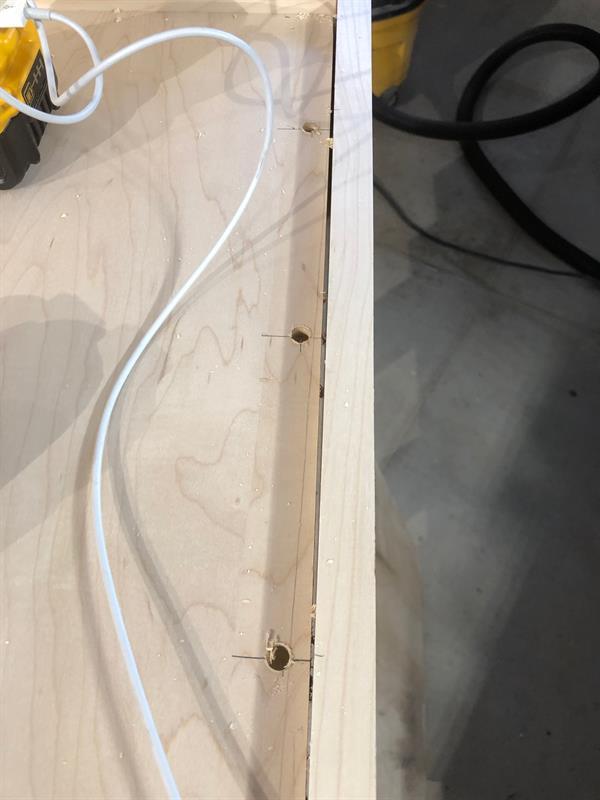
1st Shelf peg marks
On inside of RHS wall you will be marking shelf pegs. Mark 7" from bottom of inside RHS wall. once in the back area and once in front portion. Once you have 2 marks, draw a straight parallel line from front to back inside wall.
-
2nd Shelf marks
Mark from bottom back of inside wall 14" high. Also mark 14" high from bottom at front location of inside wall. Once both marks are up, draw a parallel line across inside of RHS wall.
-
3rd Shelf marks
Mark from bottom back of inside wall 22" high. Also mark 22" high from bottom at front location of inside wall. Once both marks are up, draw a parallel line across inside of RHS wall.

-
Top shelf marks
Mark from bottom back of inside wall 29 3/4" high. Also mark 29 3/4" high from bottom at front location of inside wall. Once both marks are up, draw a parallel line across inside of RHS wall.
-
RHS wall markings
So now you have 4 parallel lines marked for shelves complete on secured RHS wall.
-
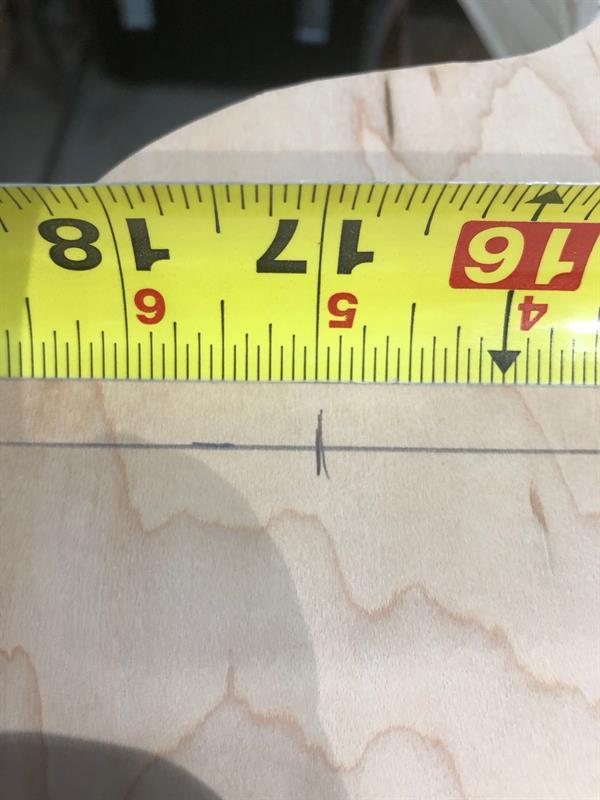
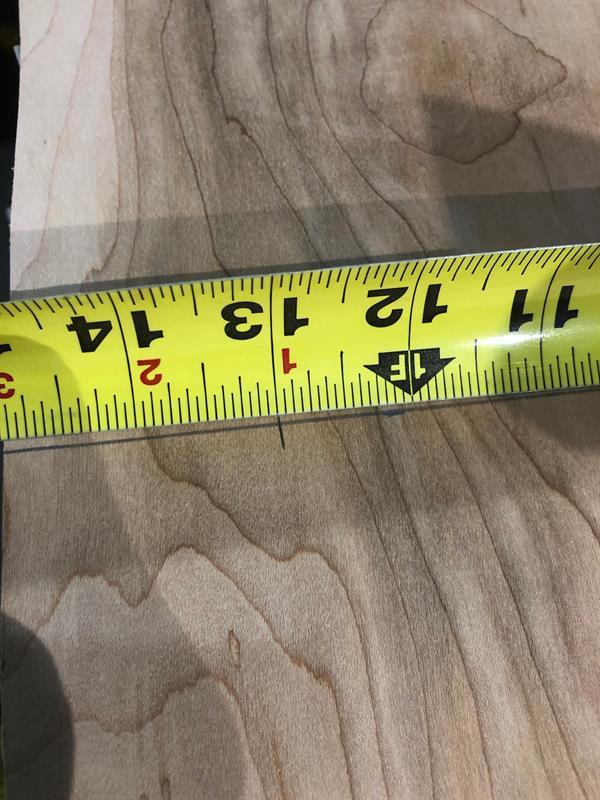
Marking back pegs
For all shelf markings in back of RHS wall, measure and mark 2" from Back wall. Mark 2" on 7", 14" 22" and 29 3/4" lines.
-
Marking 2 lower front pegs
For marking of front lower 2 pegs, measure and mark 17" from back on 7" and 14" lines. This mark should be approximately 2" from front of RHS wall.
-
Marking 2 upper front pegs
For top 2 shelves, measure and mark from back wall 13" on both 22" and 29 3/4" lines.
-
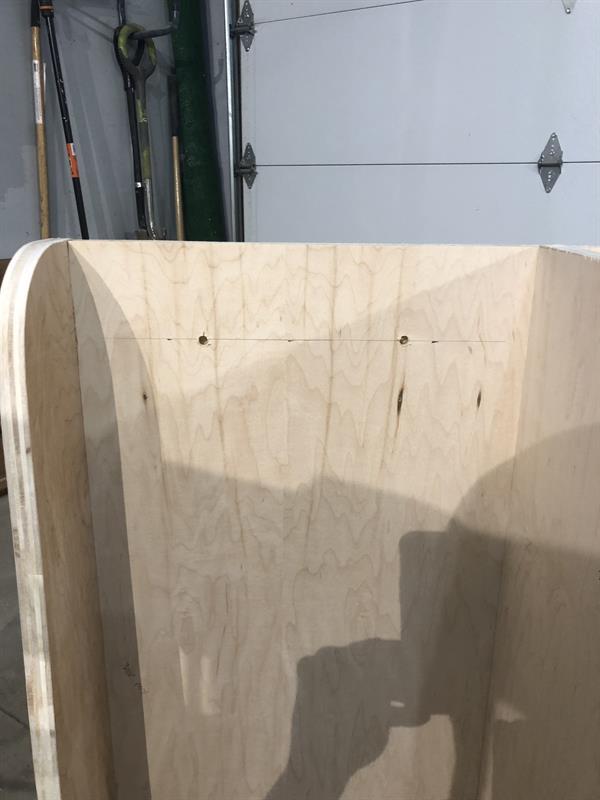
Drilling peg holes
Using 3/8" drill bit, drill ONLY 1/2" (mark with tape). When drilling on these marks, ensure the top of the bit is at the bottom part of each line. SO in theory, the bottom of the shelf will be on these lines.
-
Location of peg holes
So each hole will be located just under line marking. Complete all 8 holes @ 1/2" ONLY deep.

-
Middle wall
Measure and mark from bottom inside RHS wall Against back wall, 10 1/2".
-
Middle wall con't
Measure and mark along the inside front base 10 1/2" from bottom of RHS wall.
-
Homing Middle wall
Place Middle wall on base matching right side of wall with 10 1/2" line. Mark left side line so you know exactly where it is to be positioned.
-
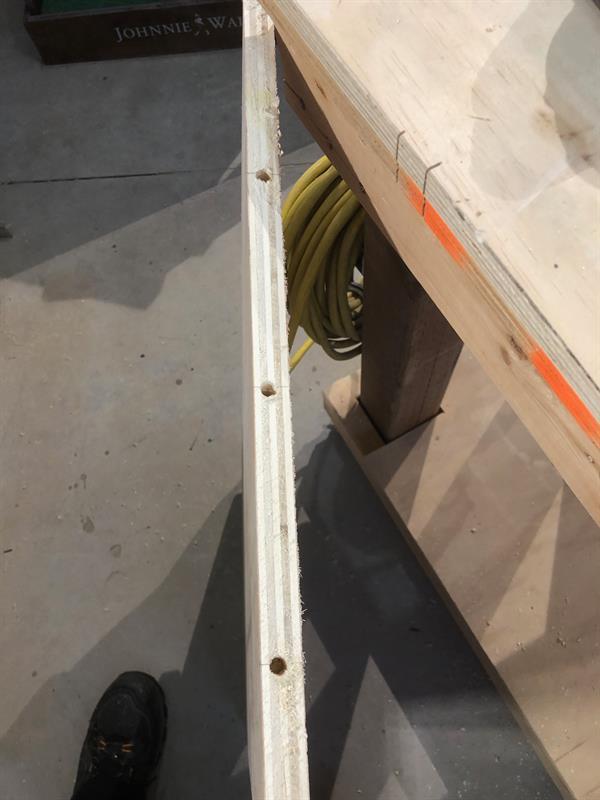
Dowel hole marks
Measure and mark from front inside base 5", 10" and 15" for dowel holes.
-
Centre of Wall
On 5,10 and 15" marks where wall will go. Mark 3/8" in so dowel will be in centre of middle wall. Drill using 3/8" bit ONLY 1/2" down into base.
-
Middle wall dowels in place
Place 3 3/8" dowels in the holes with dab of glue
-
Dowel holes in wall
Flip middle wall upside down. Measure and mark from front 5", 10" and 15". Once marked in length, mark middle of Wall (3/8") in to be in centre of sheet. Drill all 3 holes 1" deep.
-
Temp middle wall place
Temporarily place middle wall home on dowels. Hammer in place if necessary with rubber mallet.

-
Middle wall lower pegs
Measure and mark 7" up from bottom in rear portion of wall. Measure 7" up from bottom at front portion of wall. Mark parallel line to marry them up.
-
14" pegs middle wall
Measure and mark 14" up from bottom in rear portion of wall. Measure 14" up from bottom at front portion of wall. Mark parallel line to marry them up.
-
22" pegs middle wall
Measure and mark 22" up from bottom in rear portion of wall. Measure 22" up from bottom at front portion of wall. Mark parallel line to marry them up.
-
29 3/4" pegs middle wall
Measure and mark 29 1/4" up from bottom in rear portion of wall. Measure 29 1/4" up from bottom at front portion of wall. Mark parallel line to marry them up.

-
Marking rear pegs middle wall
You may take off middle wall and set on work bench. On all 4 lines you marked from steps 72-75, mark 2" from back on these lines. (from what would be back wall).
-
Marking 2 front bottom pegs middle
For front 2 bottom pegs measure and mark along both 2 bottom lines @ 17"
-
Marking 2 upper pegs middle
Mark upper 2 pegs at 13" from back wall.
-
Drill pegs middle wall
With 3/8" drill bit, drill 1/2" deep holes. (Mark with tape)
This is the same as RHS wall. The top part of the bit is to be at the bottom portion of the line. Drill all 8 holes.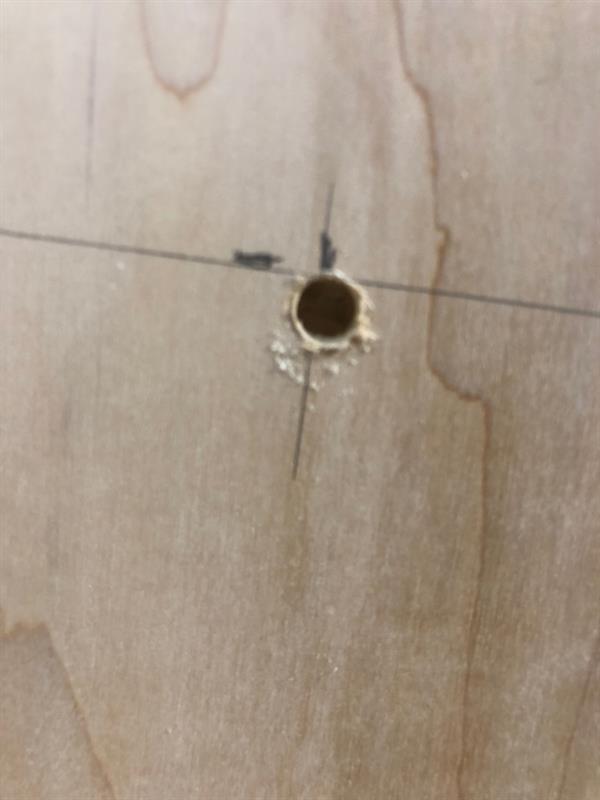
-
Homing middle wall
Put dabs of glue on dowels on base where middle wall goes. Secure middle wall down on dowels. Use rubber mallet to fit tight.
-
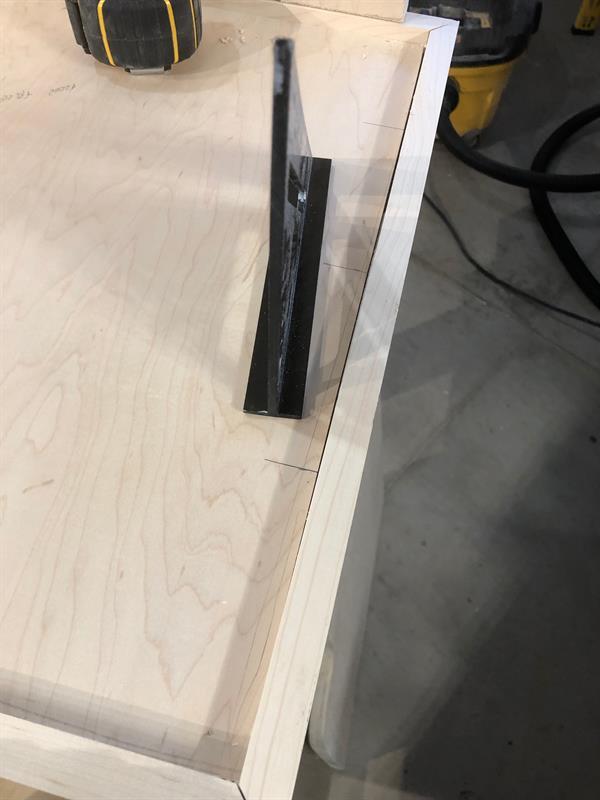
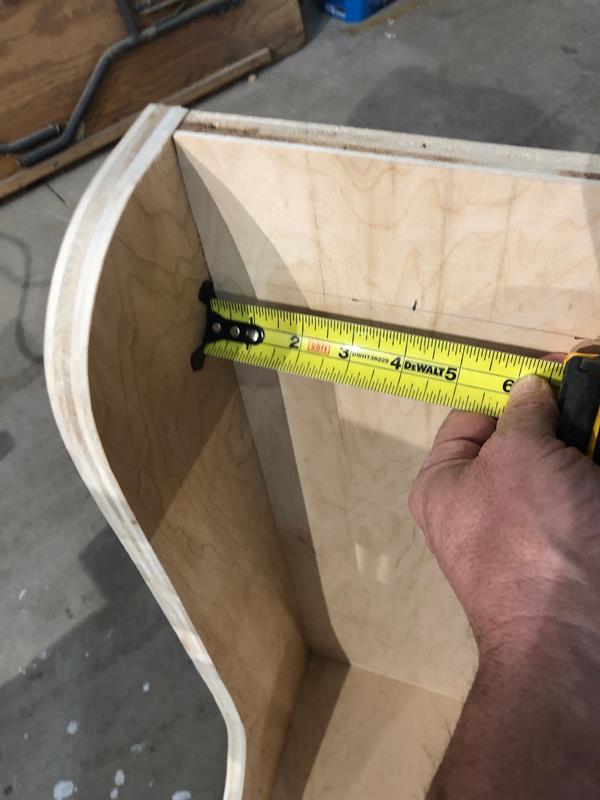
Secure Back to middle wall
Move to facing the back of the stand. Measure and mark from left side of stand 11 3/4"across and 3" down from top. Then 11 3/4" across at 15" down from top. Then from bottom of back baseboard measure and mark 3" up and 11 3/4" across. On these spots, pilot drill using 5/32" drill bit. These 3 holes should go through backing and directly into middle wall. Once this is complete, use 3/8" bit to counter sink holes 3/16" deep, (mark with tape). Secure screws tight into counter sunk holes.
-
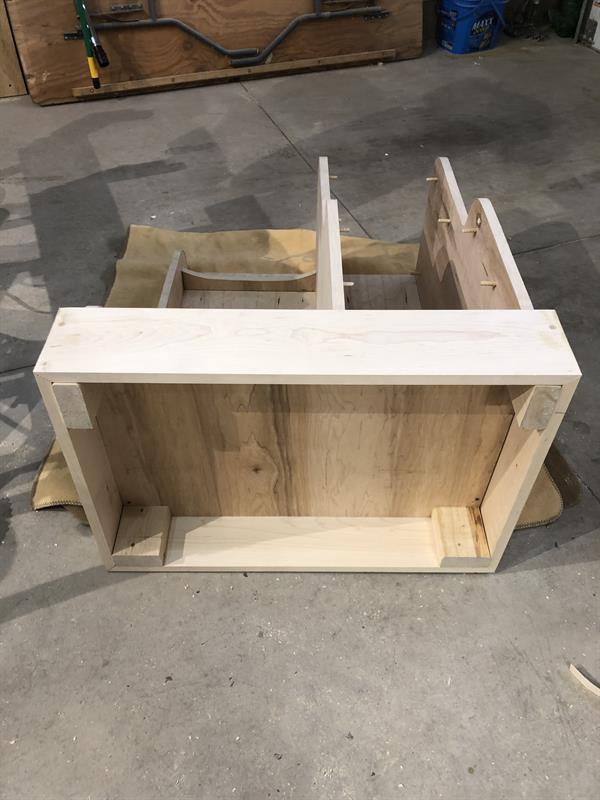
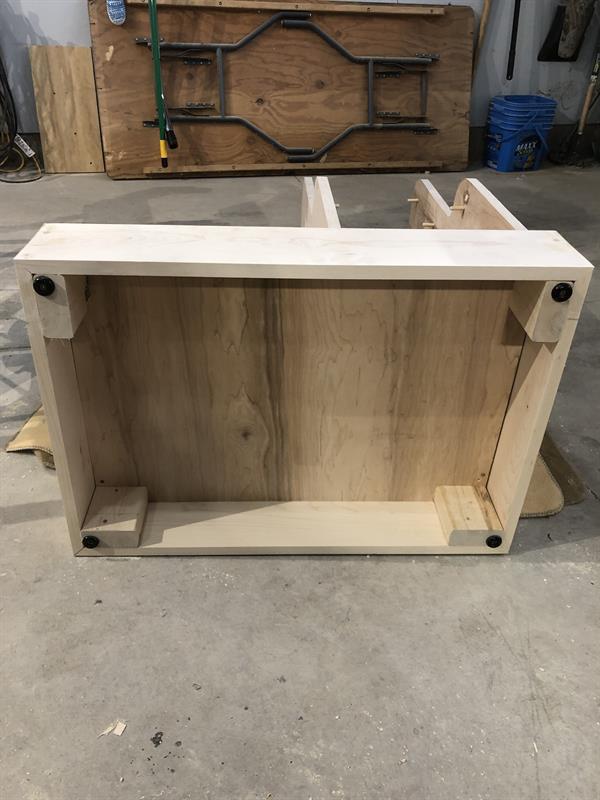
Securing base plates
The base boards are only now held together temporarily with brad nails. Now we will secure them with screws. On each corner of front and back sides, measure and mark 1 1/2" down and 1/2" in from corner for pilot hole. You should have 4 marks 2 in front of stand, 2 in back of stand.
-
Pilot drilling front and back base
Drill these marks with 5/32" bit on left and right side both front and back of stand. (all 4 marks from step 81). Follow this step with counter drilling with 3/8" drill bit 1/4" deep on top of previously drilled holes. Secure with 2x8 construction screws with impact gun.
-
Side base secure
On both left hand and right hand sides, marking shall be the same. Measure and mark 1 1/2" up from bottom and 1/2" in from corner.
-
Counter drill
Counter drill these holes with 3/8" bit 1/4" deep.

-
Screw base plates
Now put in screws with impact gun. 4 in total.
-
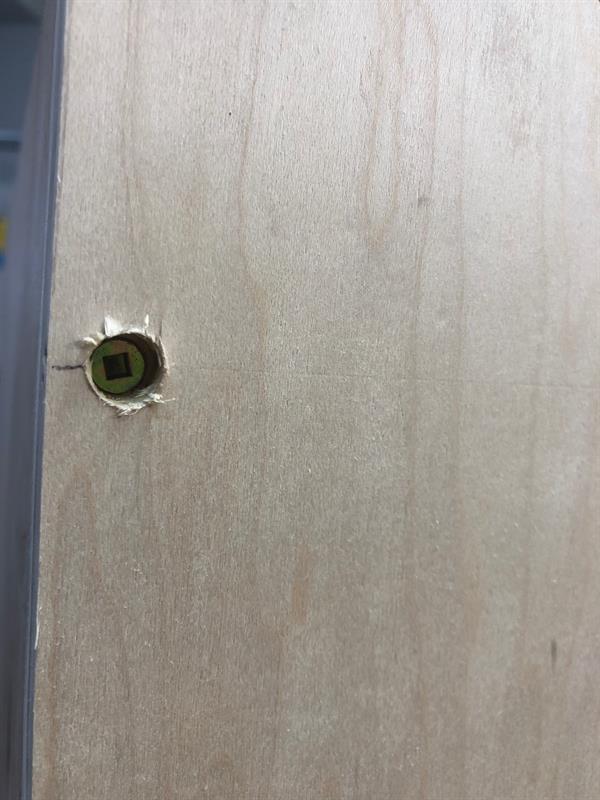
Flat head plugs
Get 8 flat head plugs. 3/8" in size. Dab a bit of glue on one end of flat head. Place in 3/8" holes. Repeat 7 more times for remaining base holes.

-
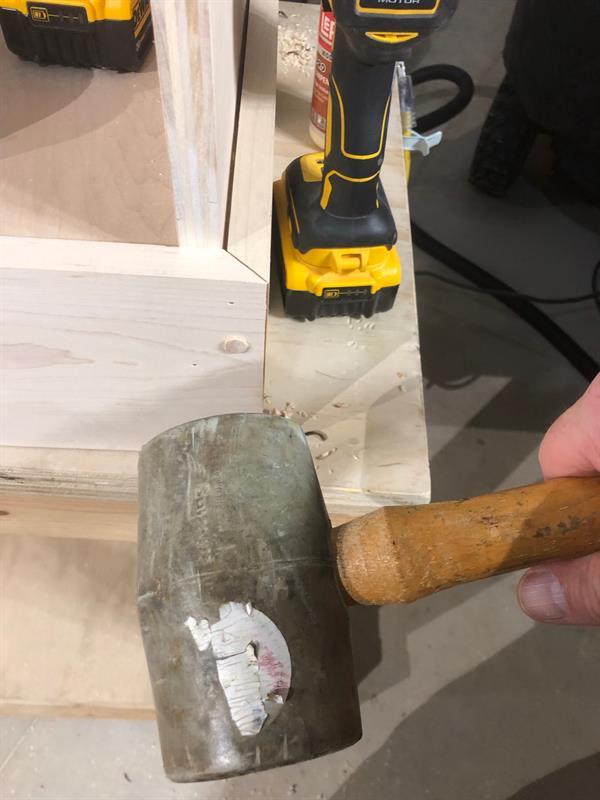
Hammer flat heads
Using rubber mallet, lightly hammer in flat head pieces.
-
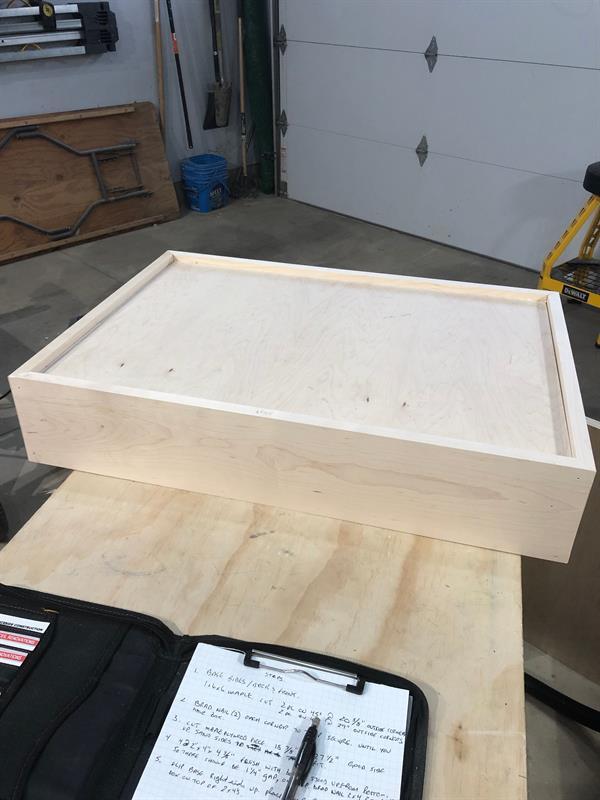
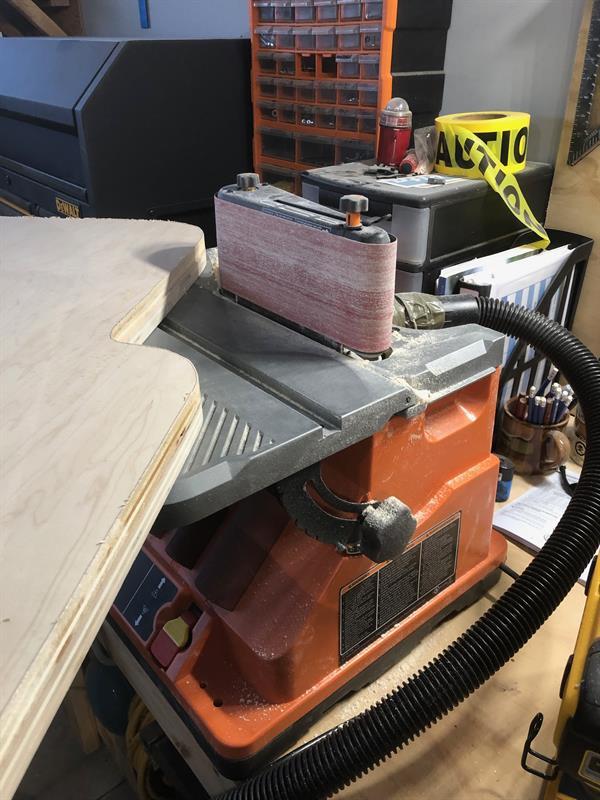
Sanding base and flat heads.
Now sand base corners. Sand the flat heads so they are flush with the base boards.
-
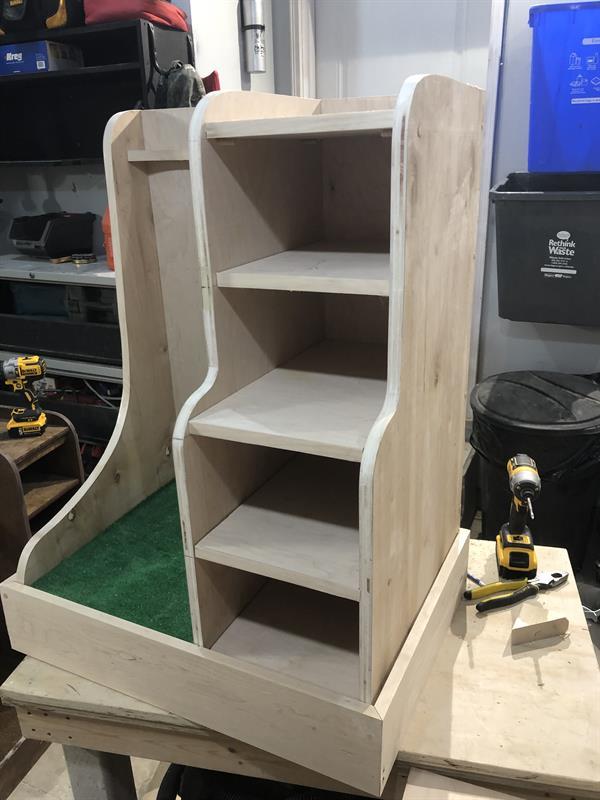
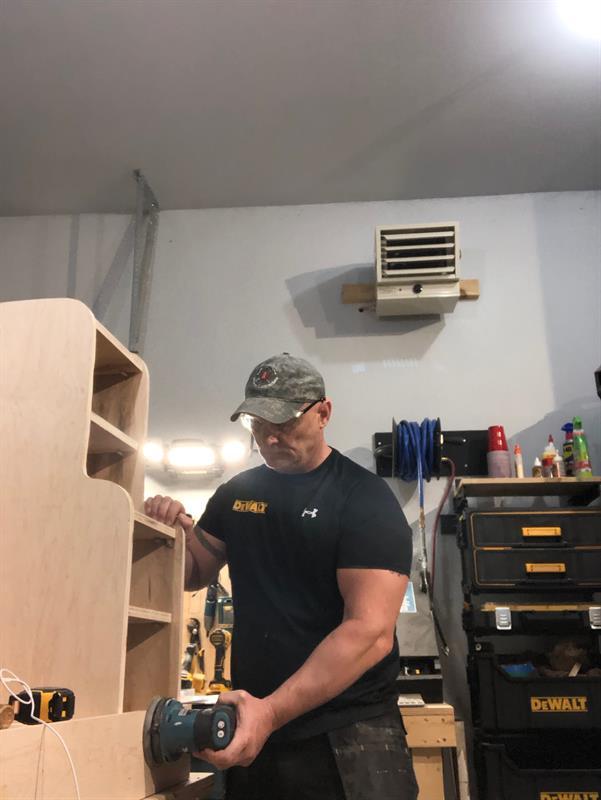
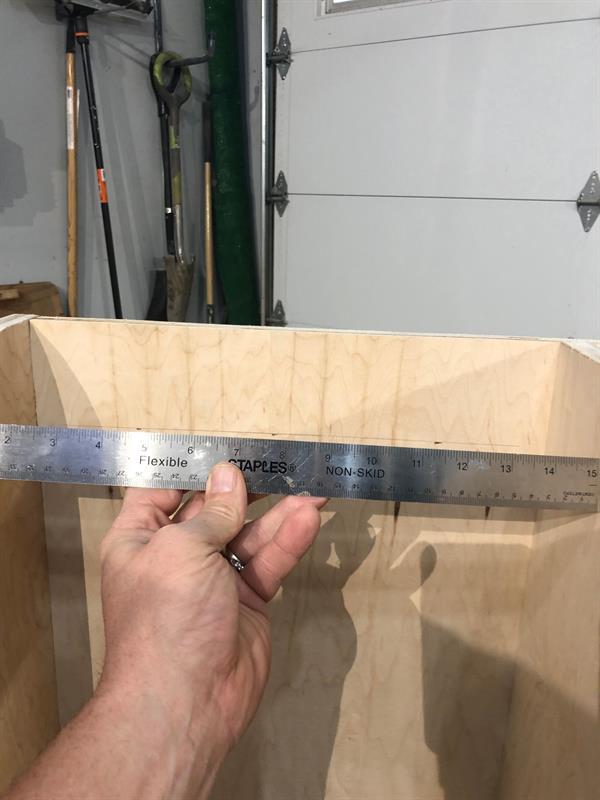
Assembling shelves
Put shelves in place to ensure fit. If they are too tight, use oscillating orbital sander (or belt sander) to evenly sand to fit.
-
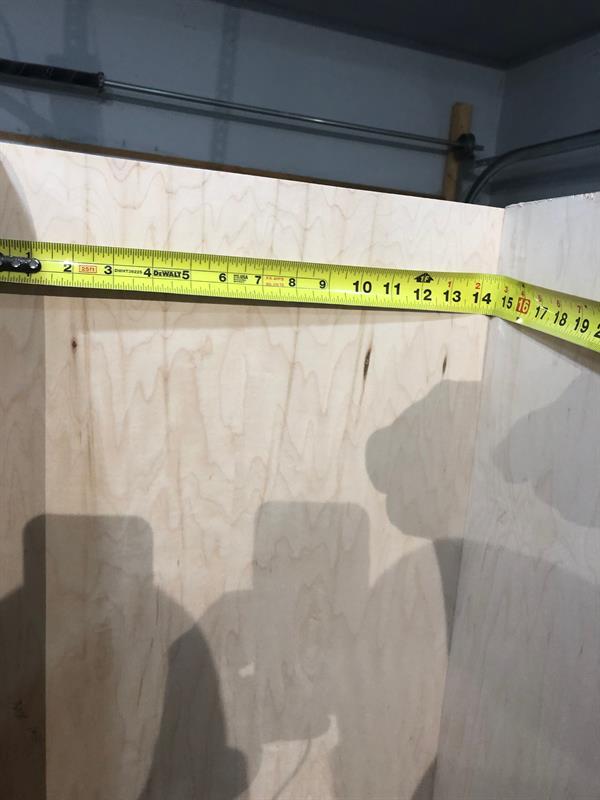
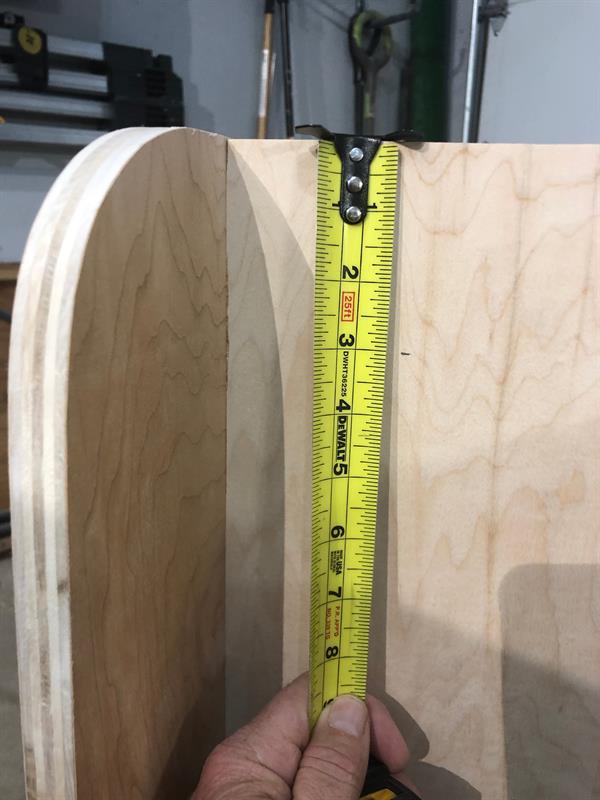
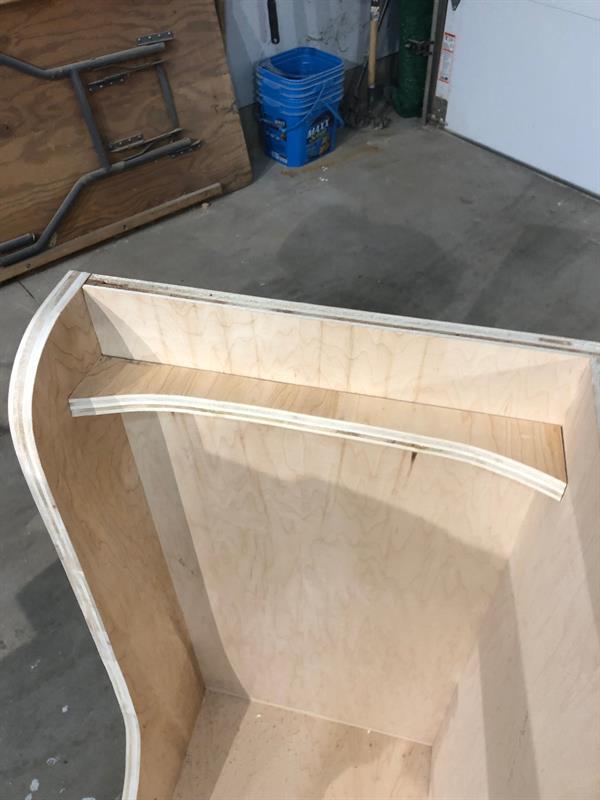
Measure Bag side Back wall
Measure bag side space along back wall (In between the middle wall and LHS wall). It should be approx 14 1/2".
-
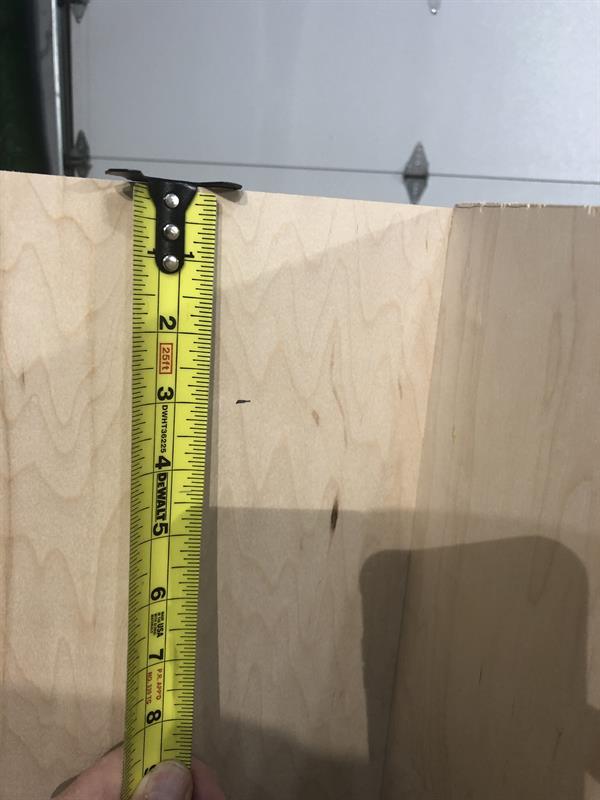
Cut bag rest piece
Cut small piece of plywood 14 5/8" x 3"

-
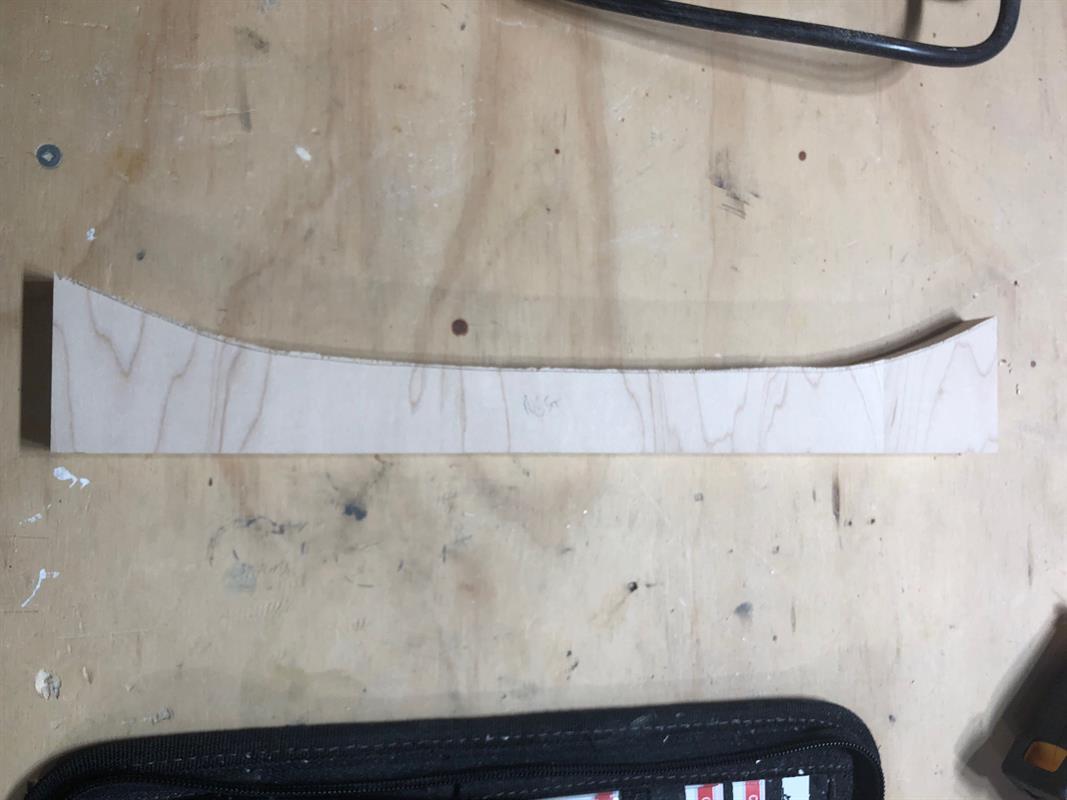
Cut curves
Here is what you will be attempting to replicate. Steps to follow.
-
Concave curve cut
From left side of small plywood piece just cut, mark a concave curve that runs about 4" in. I used a lid off of a garbage can. Then mark straight across. Mark curve from right side as well also bearing about 4". Once curves run a parallel line, draw that straight line to match them. So you will have item from step 92 marked. Jig this curve out using jig saw.
-
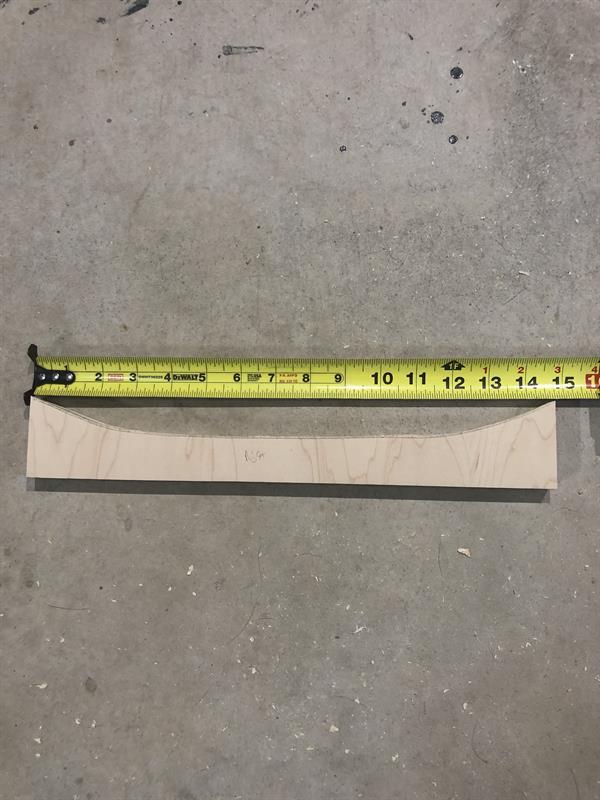
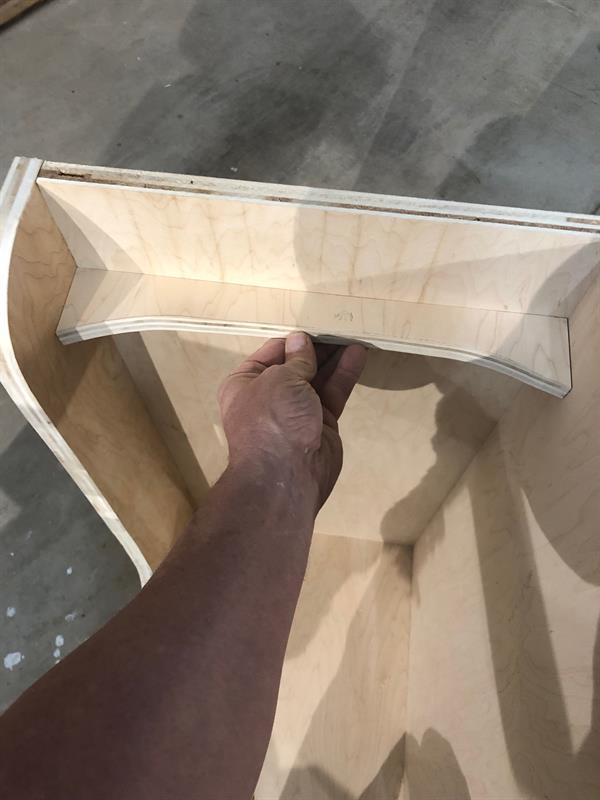
Measuring Bag rest
So your bag rest piece should be 14 5/8" long and have an even curve on inside part. Take this to the oscillating orbital sander and lightly sand out the edges and curved par to even it out if necessary.
-
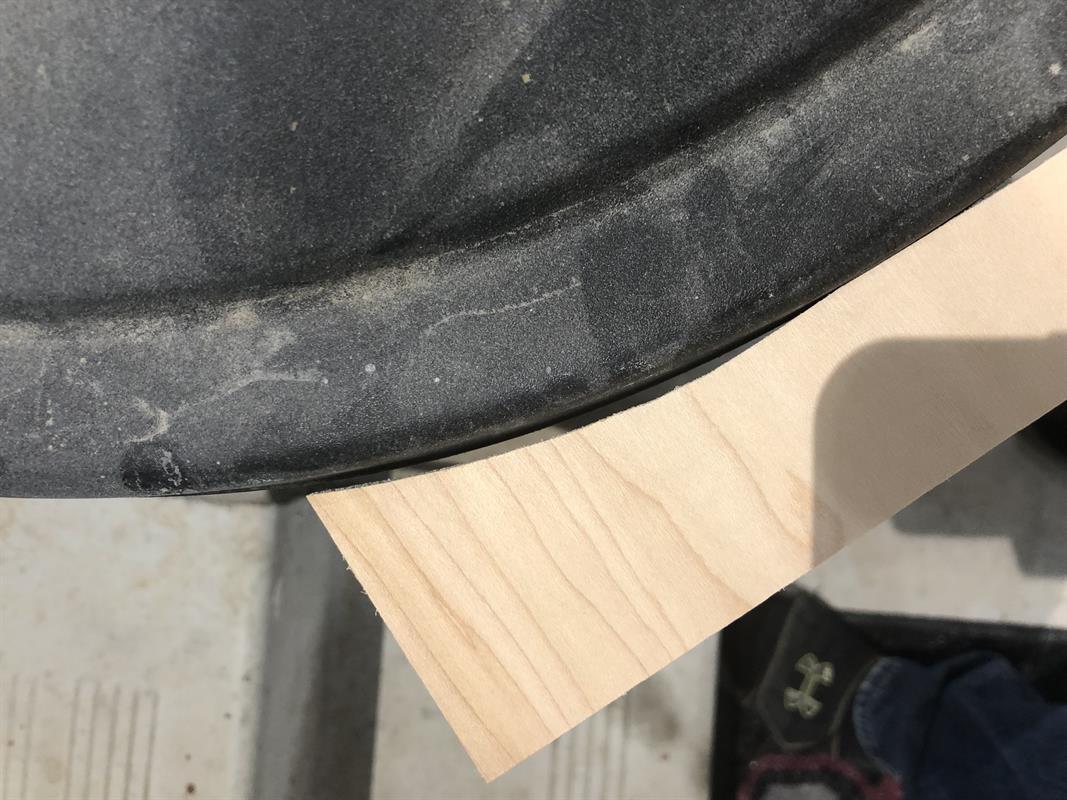
Fitting bag rest
Place bag rest against back wall in between LHS wall and middle wall to ensure fit. If it is too tight, sand down each side lightly until the fit is perfect.
-
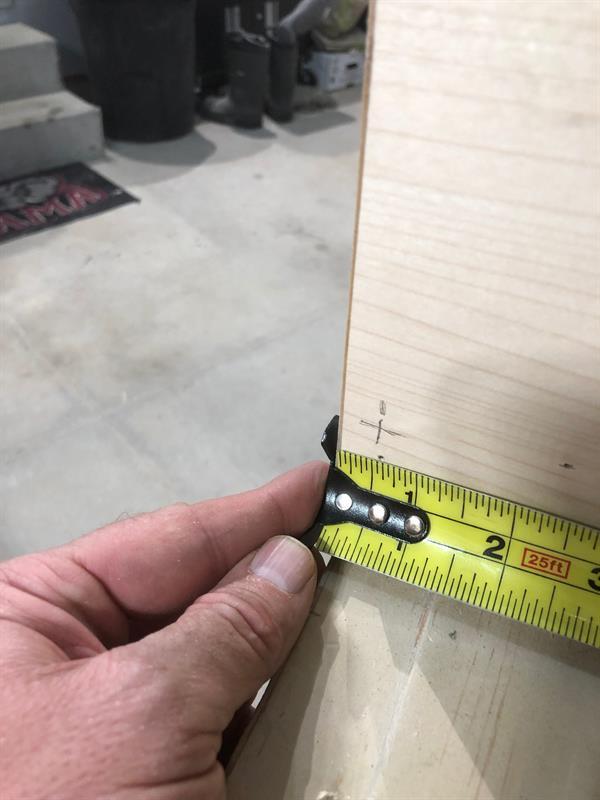
Mark left
Measure and mark on left side close to LHS wall 3" down from top of back wall.
-
Mark right
Measure and mark 3" down from top back wall, close to middle wall
-
Draw line
With pencil (guided by a ruler or small torpedo level) draw a straight line connecting the 2 lines marked 3" down.
-
Mark in
Measure and mark 4" in from LHS wall. Do same 4" from middle wall on line.
-
Drill Dowel holes
On these 2 crosses, drill ONLY 1/2" deep with 3/8" bit. (Use tape on bit to ensure only 1/2" depth)
-
Dowel holes
Now you should have 2 leve; dowel holes on back wall.
-
Mark bag rest
Placing bag rest facing down just below holes. Match holes and pencil mark where holes will go on bag rest.
-
Marking holes
On bag rest where you just marked for dowels, using speed square, mark line across back of bag rest.
-
Centre mark
Mark 3/8" in from either side to reach middle of back bag rest.
-
Drill Dowel
Using 3/8" bit, drill dowel holes on markings 1" deep.
-
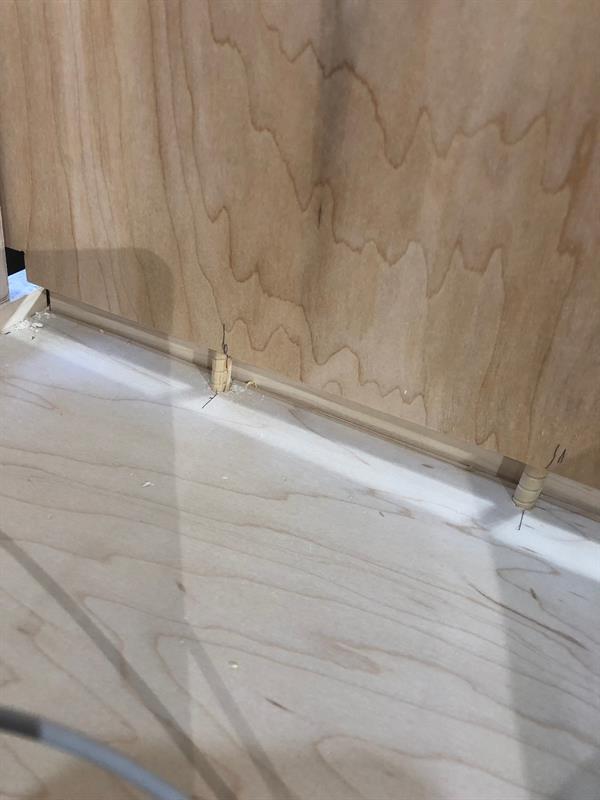
Insert dowels
Once both holes are drilled, put small dab of glue in each dowel holes. With rubber mallet, tap in both 3/8" dowels. They should be sticking out 1/2" each.
Run a light line of carpenters glue along back with dowels to ensure strong hold.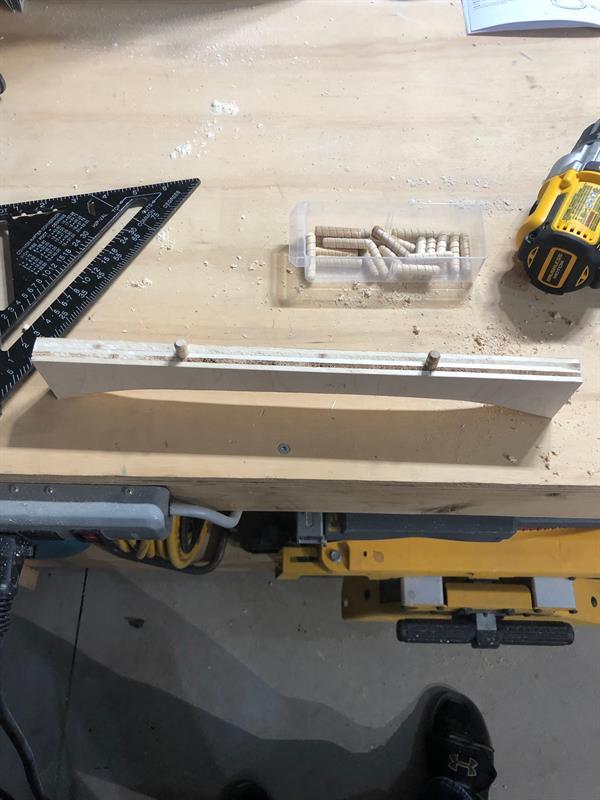
-
Place bag rest
Carefully fit bag rest in place. Once in, give each side a couple of taps with rubber mallet to ensure connection.
-
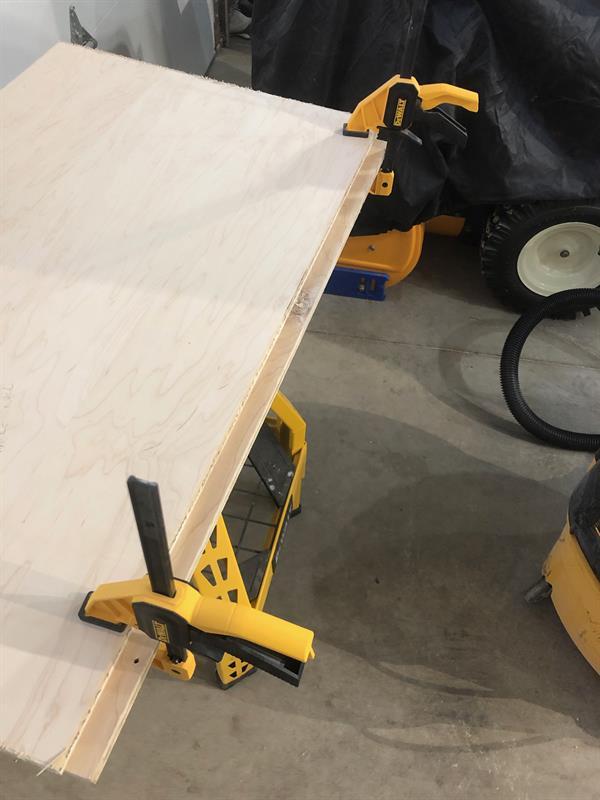
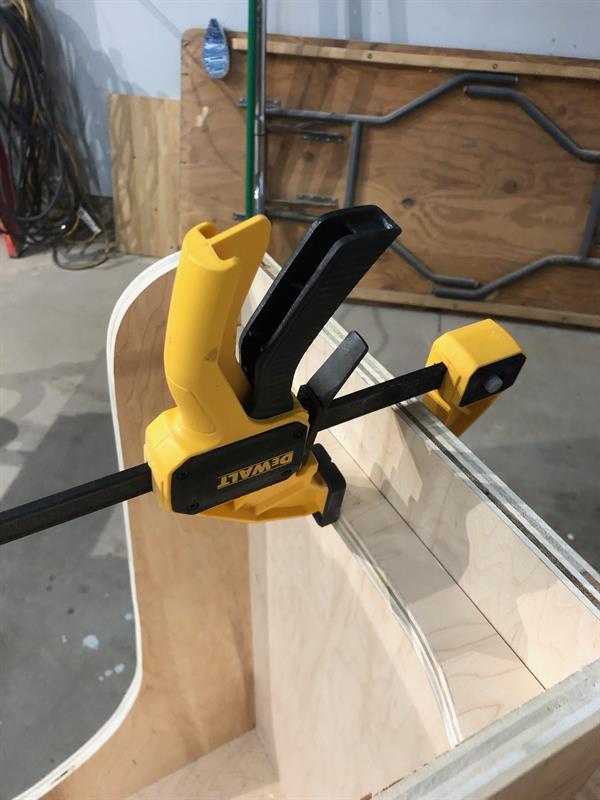
Clamp bag rest
Tightly apply pressure with clamp to bag rest and let sit for a couple of hours until glue is firm.
-
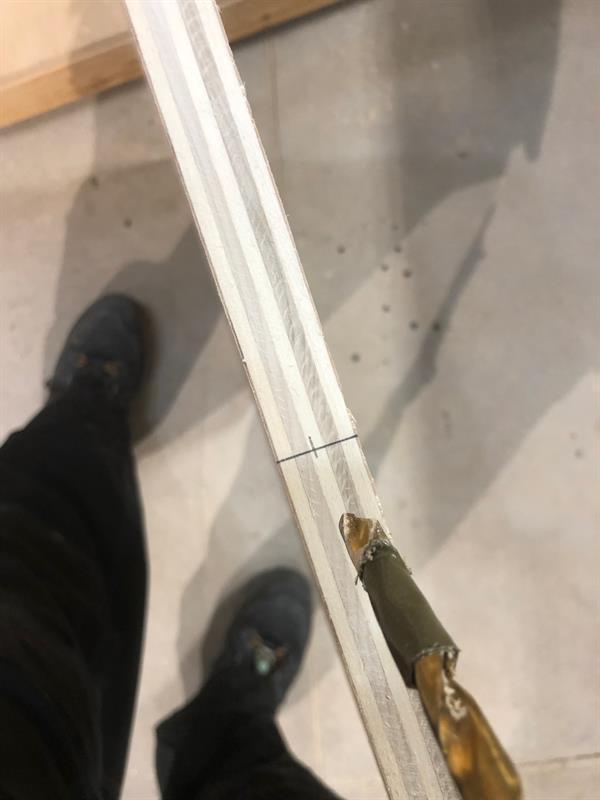
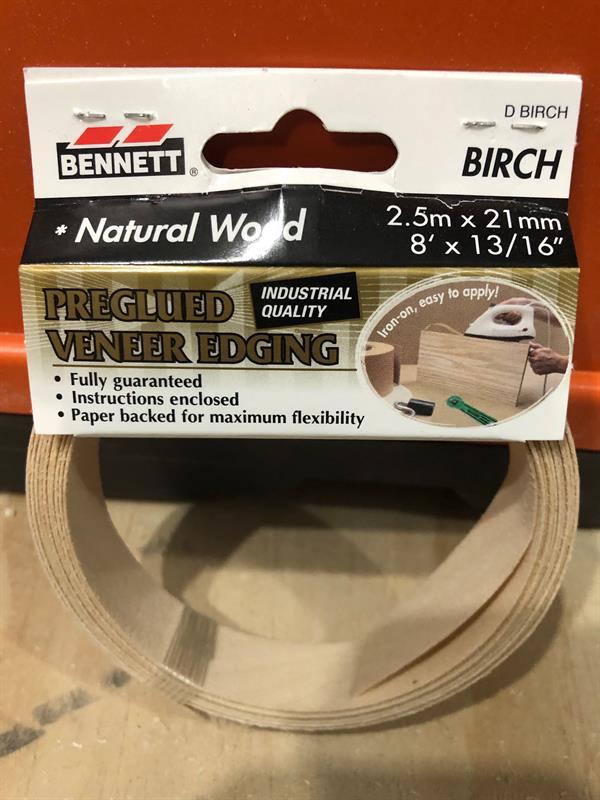
Edge banding material
For edge banding, I'm using Bennet "Birch" natural wood 8' x 13/16" from Home depot.
-
Edge banding
So you are going to edge band all edges except the rear of the back wall, This is to be placed up against the wall and therefore will be hidden.
Heat a regular household iron to 400 degrees. Place edge banding evenly on edge and run iron over it several times until adhesive sticks.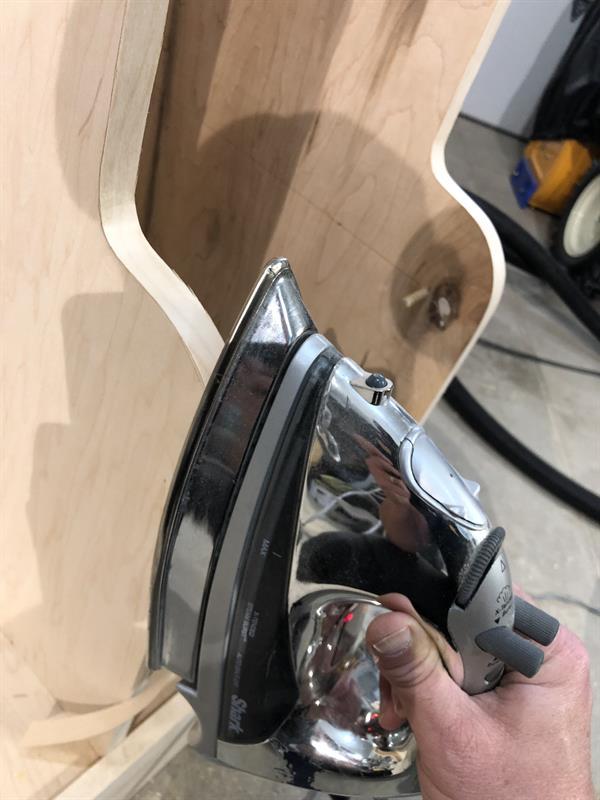
-
Flatening out edge banding
Once the edge band is freshly stuck and still warm, run block of wood or edge band roller over the edge banding.
-
Appearance
This is what you'll have
-
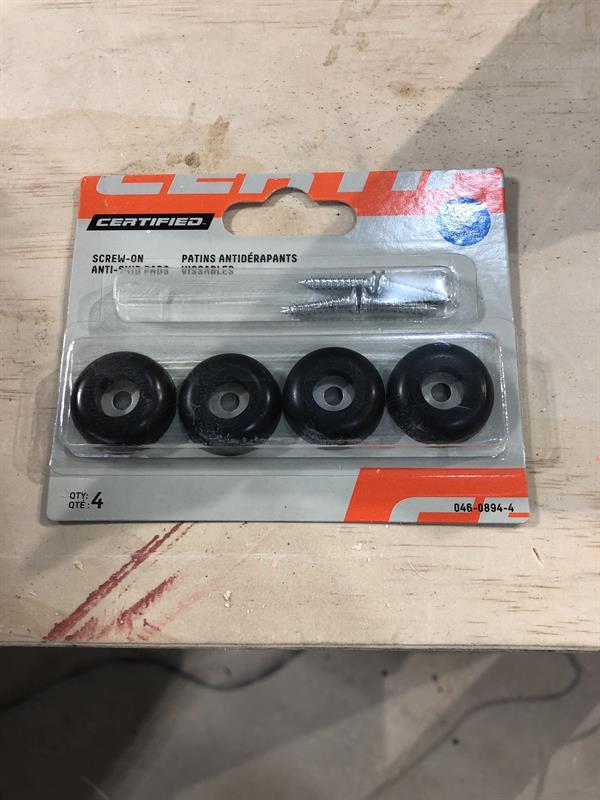
Rubber pads 1"
Now the rubber pads installation.
-
Flip stand carefully on back
Remove the 4 shelves. Carefully lay the stand on it's back.
-
Apply rubber pads
With 2x8 construction screw, place rubber pad on closest corner to the actual corner and fire in screw. Continue with all 4 corners.
-
Rubber pads complete
So you now have all 4 corners complete
-
Sanding
Now sand all edges where edge banding was ironed on.
-
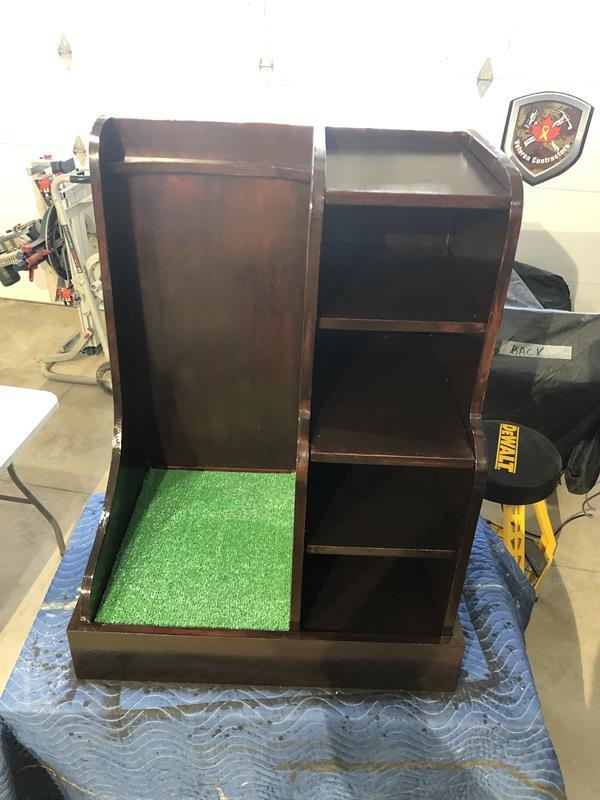
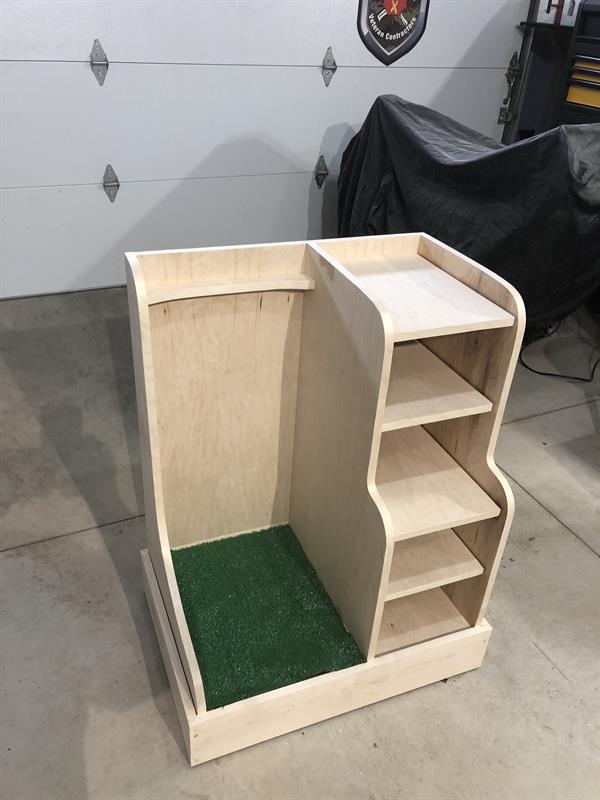
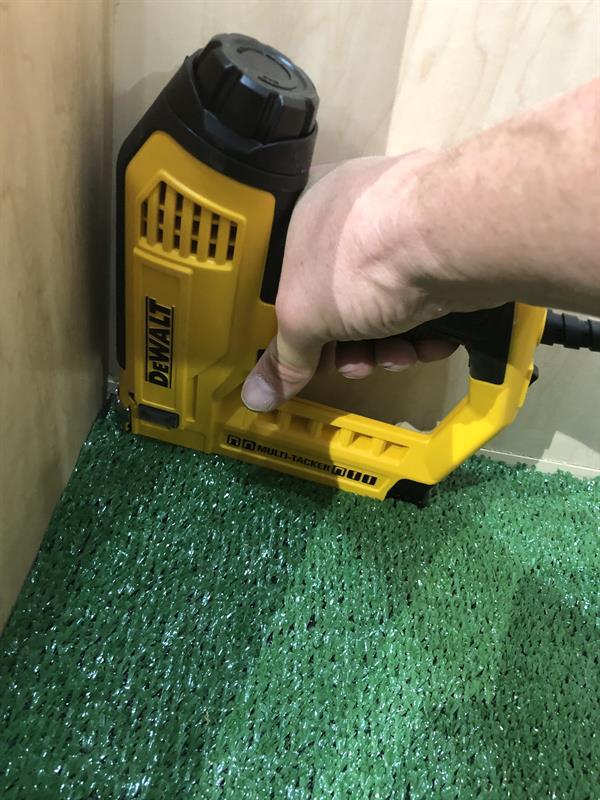
Installing turf
Measure both width and length inside where golf bag stands. (Between LHS wall & middle wall). Turn turf upside down as though the rubber side is facing up. Mark out on the underside of the turf measurements of the inside of bag stand. Cut turf along lines. Place in bag location, trim if necessary. Staple each corner of the turf into the floor of bag stand.
-
Complete!!!!
Now the golf bag stand is ready for staining. I used 3 coats of glossy varathane stain. I was very happy with results.
I hope the instructions weren't too confusing!!!
Thanks and enjoy.
RJ