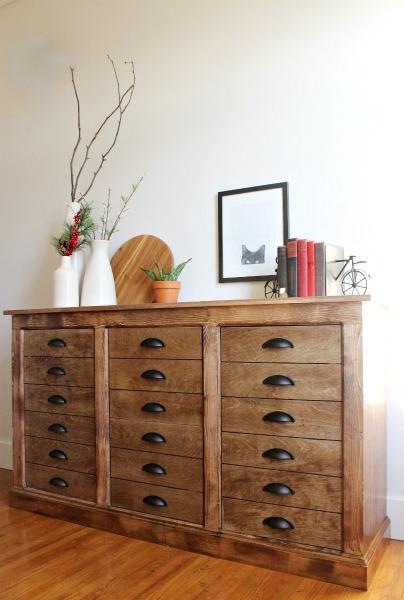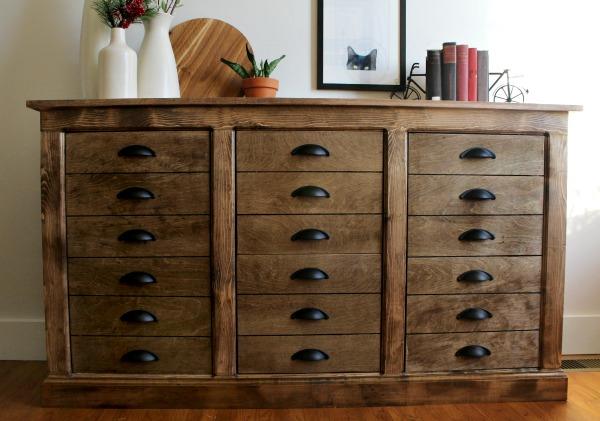

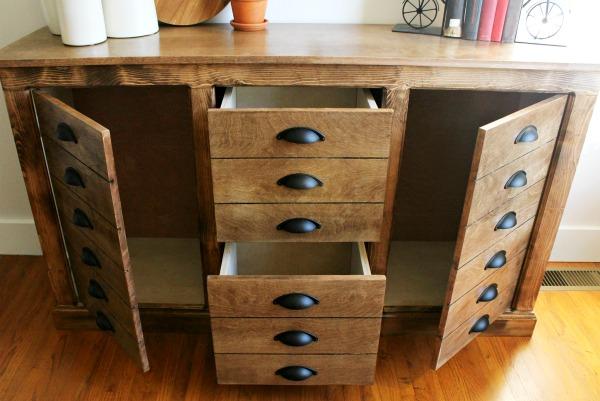


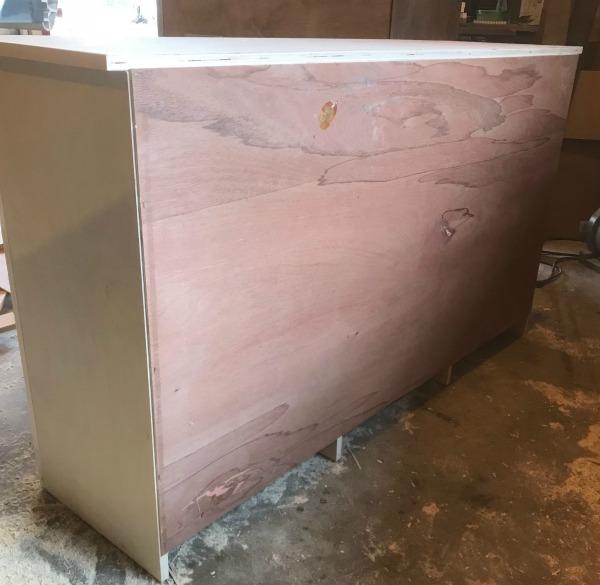
This modern farmhouse dresser has a secret. What may look like 18 little drawers are actually two cabinet doors and two large drawers! This faux drawer dresser provides plenty of storage for an entryway, bedroom, dining or living room! The faux drawers make it an easy build that looks high end!
Tools
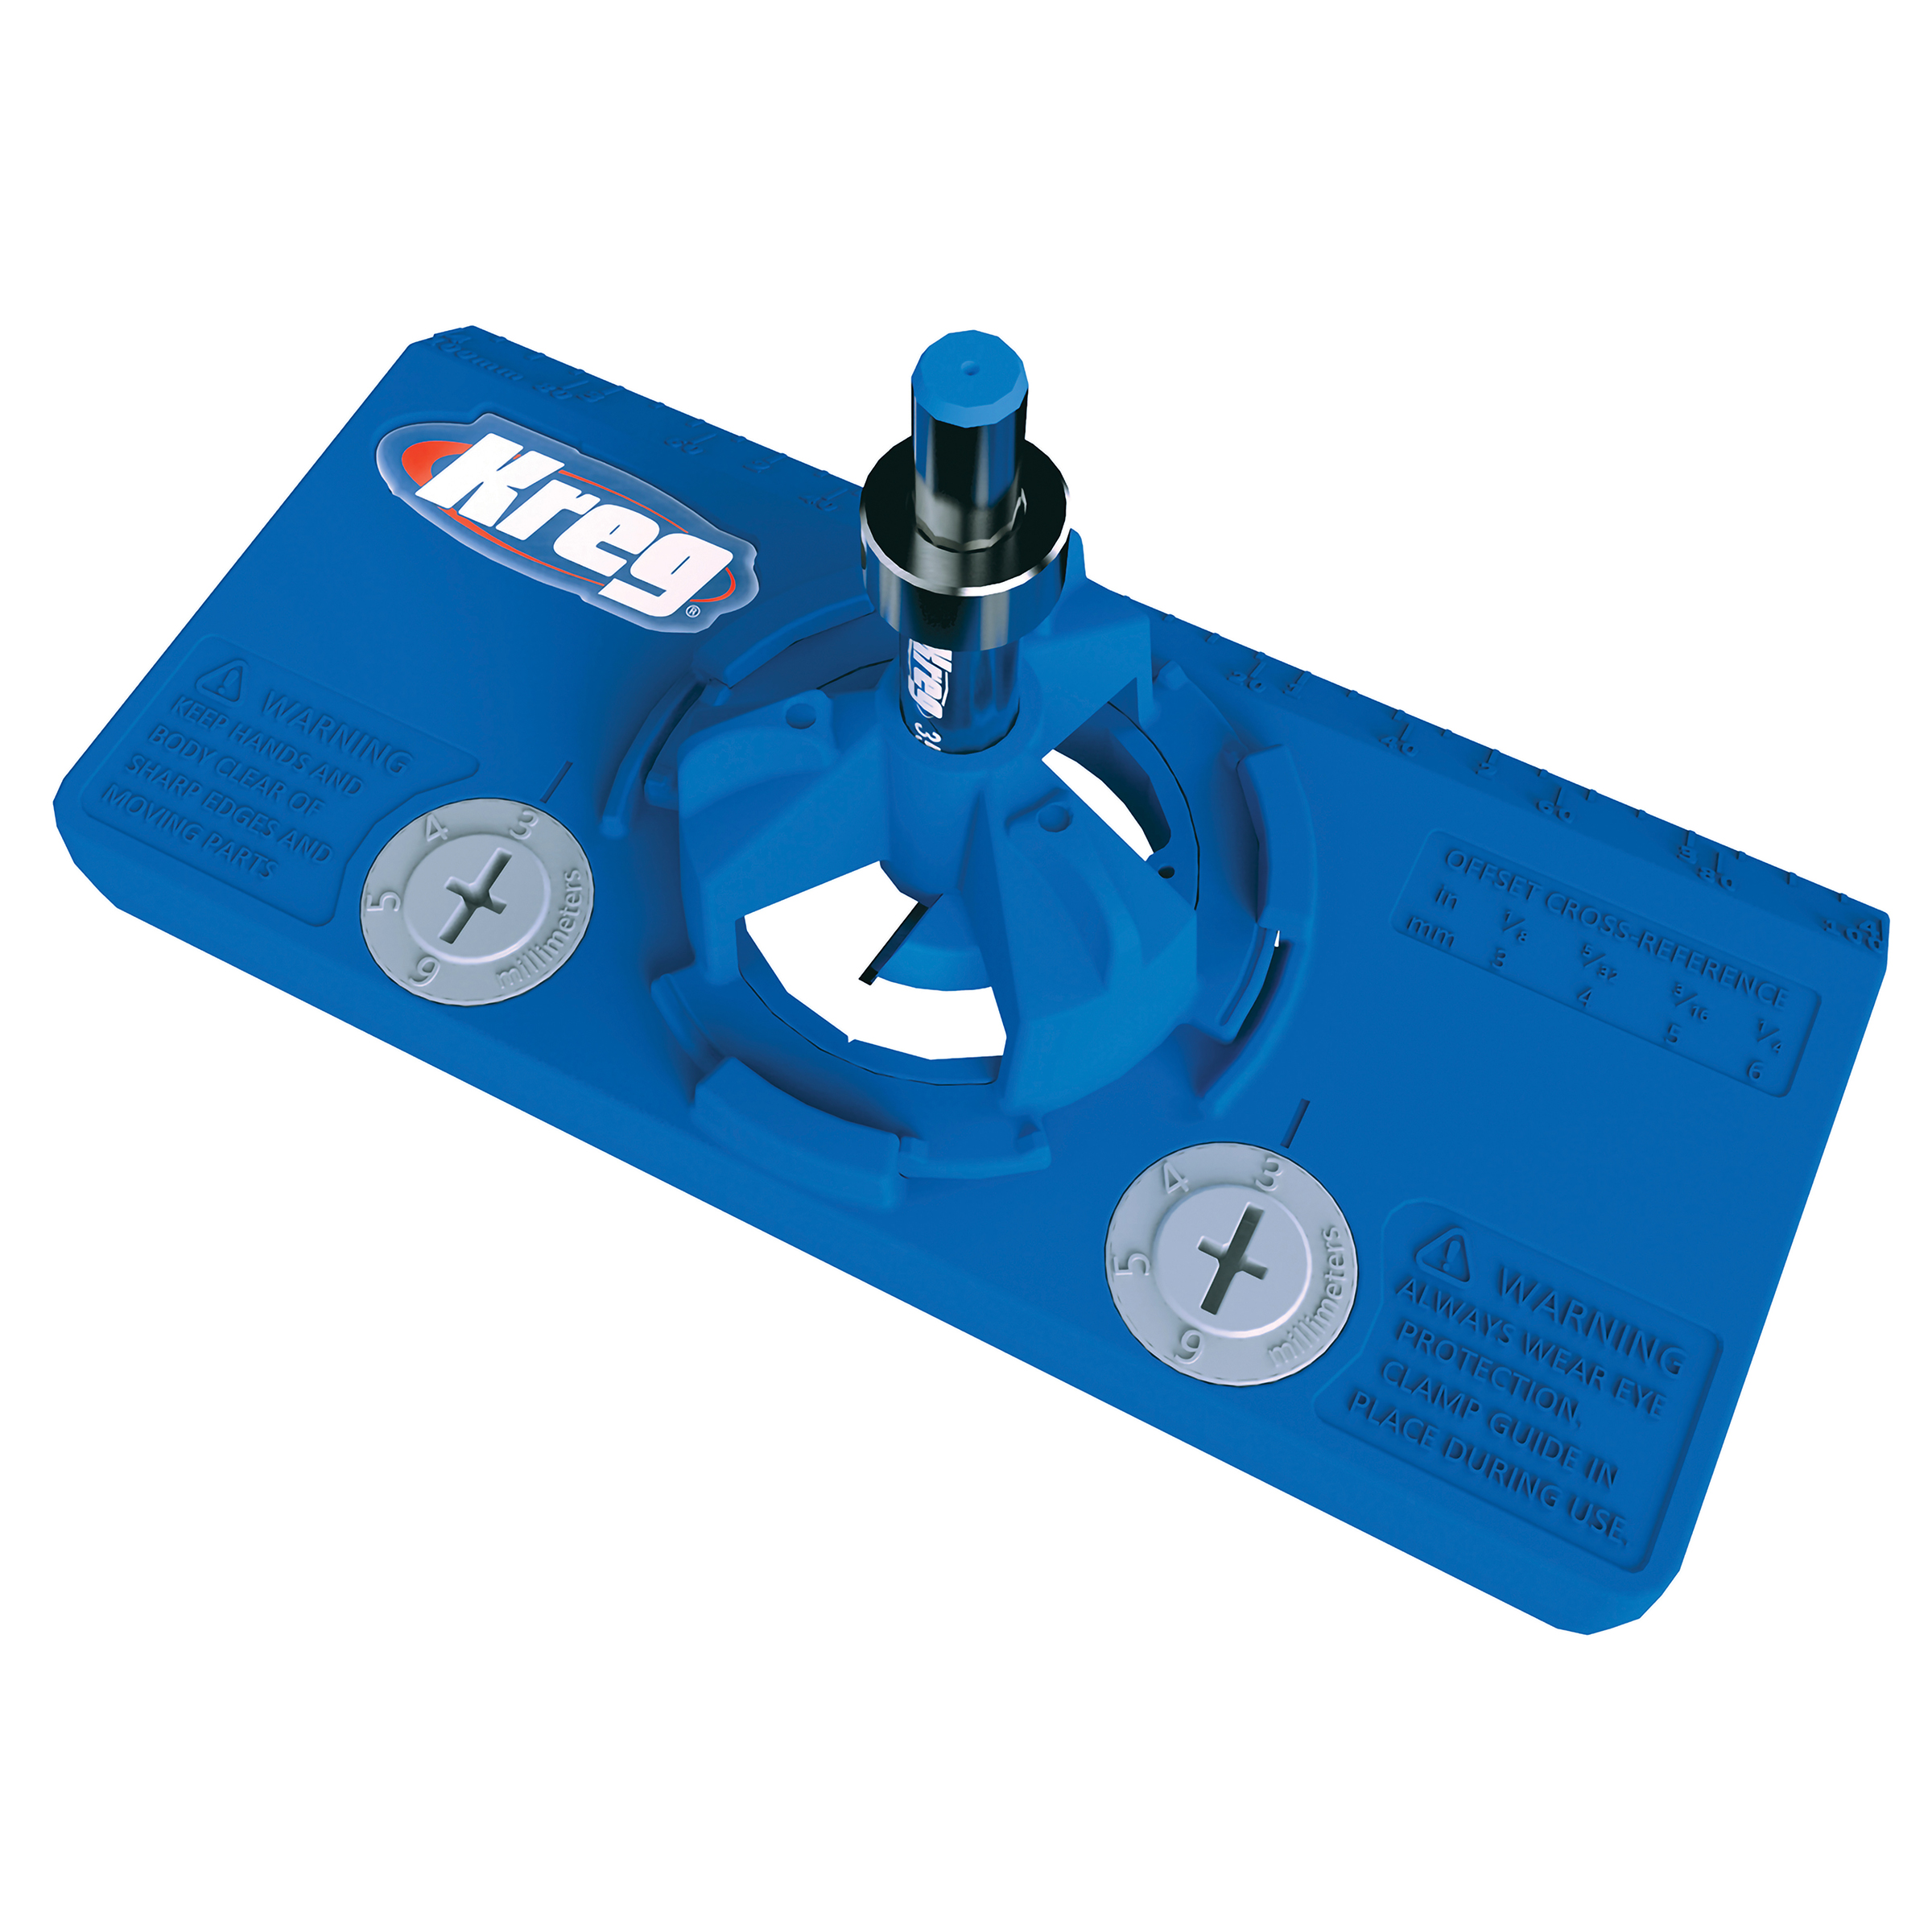
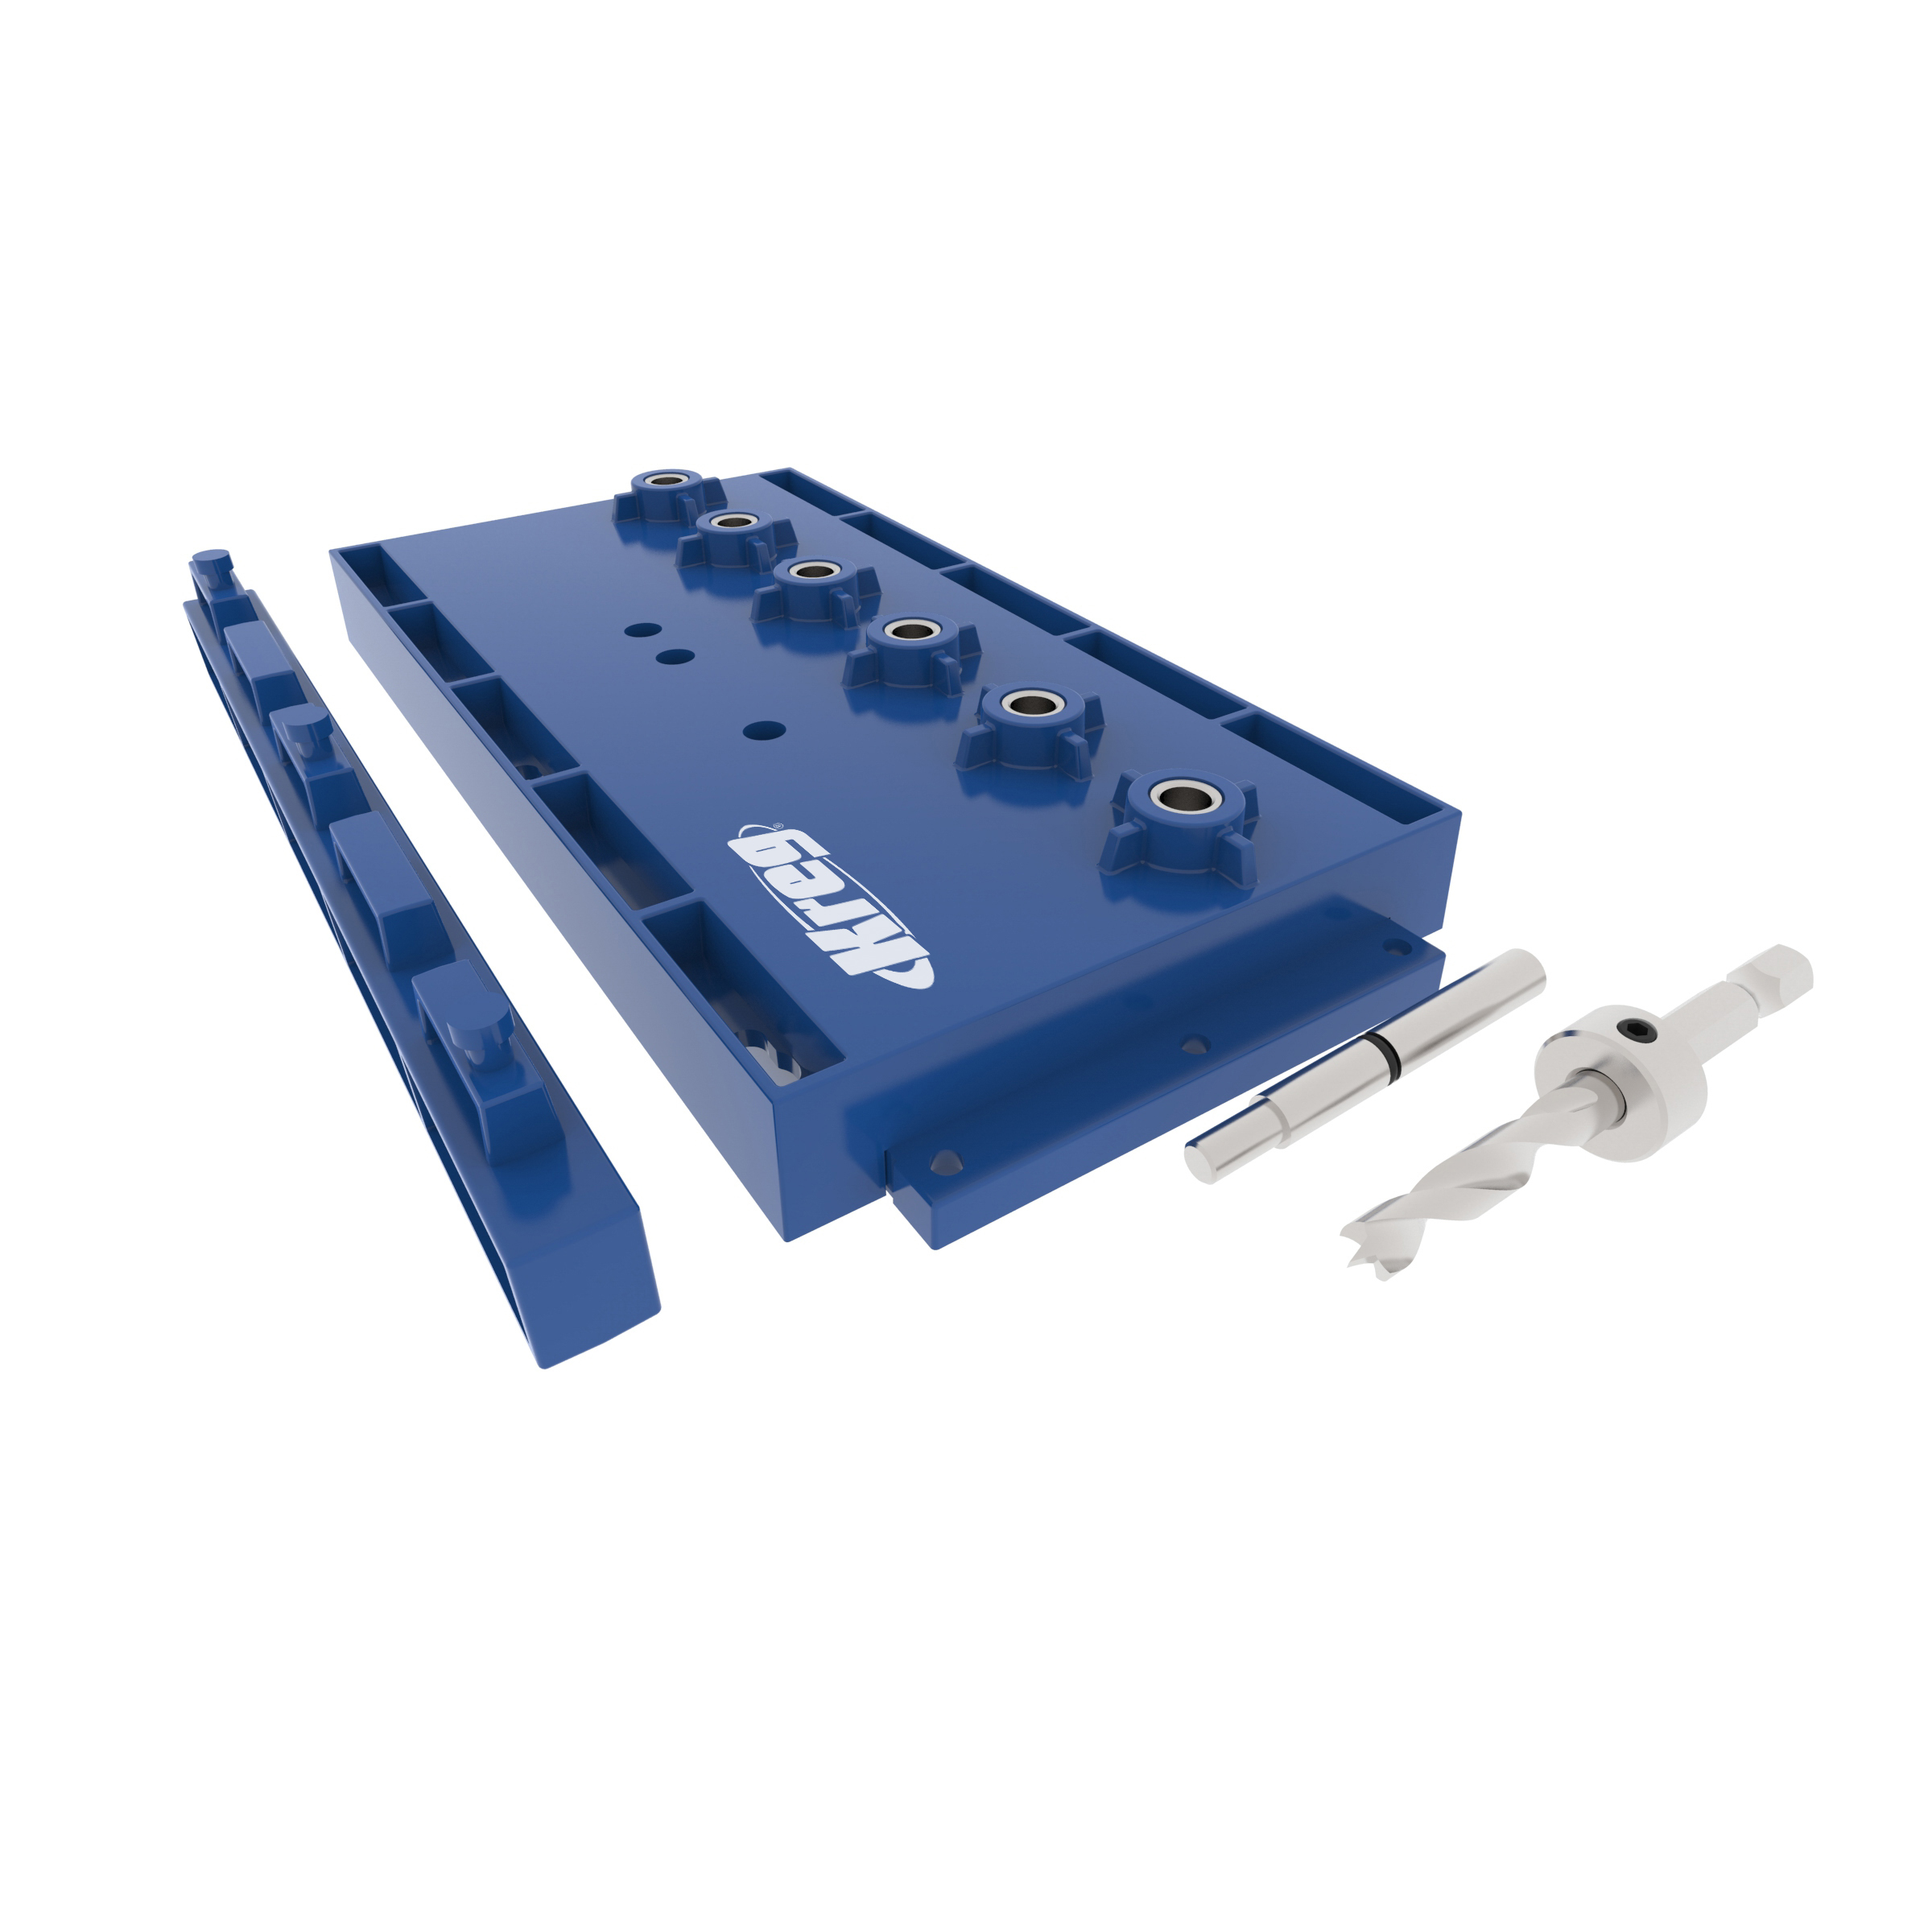
Kreg Tools


Other Tools
-
Miter Saw

-
Square
-
Tape Measure
-
Clamps
-
Nail Gun
-
Stapler
Materials
Wood Products
- 2 Plywood , 3/4" Thick , Full Sheet
- 1 Board , 1x4 , 96"
- 2 Board , 1x3 , 96"
- 2 Board , 2x2 , 96"
- 1 Plywood , 1/4" Thick , Full Sheet
- 1 Baseboard , 3 1/4" , 96"
Hardware & Supplies
- 70 3/4" pocket hole screws
- 4 Concealed hinges (2 pair)
- 18 Drawer Pulls
- 2 Pair 14" ball bearing drawer slides
- 20 2" wood screws (for attaching spacer blocks)
- 50 1 1/4" brad nails (for nail gun)
- 25 5/8" staples for attaching back panel
Directions
-
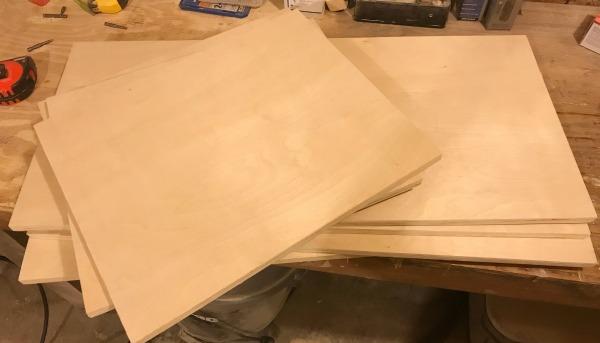
Cut Sides and Bottom Pieces
Using a Kreg Rip Cut and circular saw (or table saw), rip 2 pieces off one sheet of plywood 14 ¼” wide and 8' long. Then, cut four pieces 32” long and 3 pieces 18” long from these strips. This will be your cabinet carcass.
-
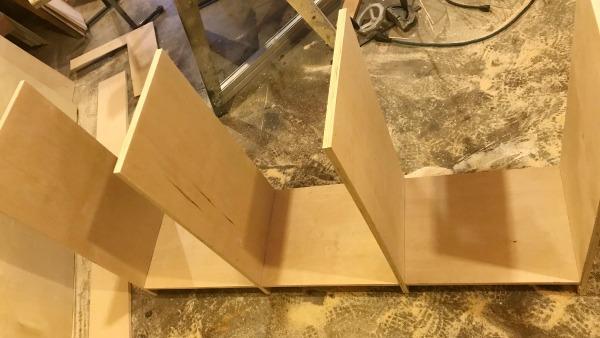
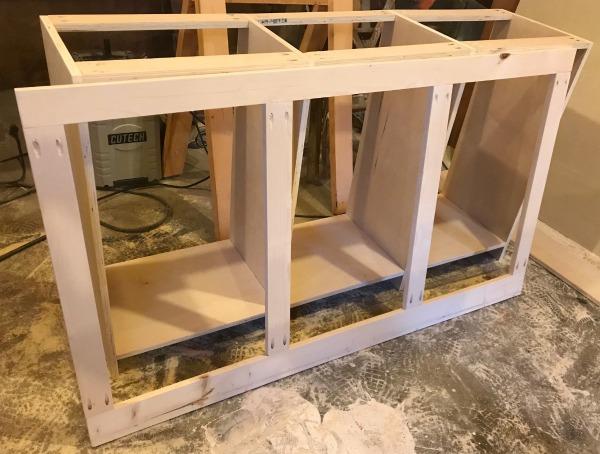
Assemble Cabinet Carcass
Drill ¾” pocket holes (using a Kreg Pocket Hole Jig) into each end of your 18” long pieces and use 1 ¼” pocket hole screws to attach these boards to the 32” long boards like shown. Make sure the top of these shelf pieces are 3 ½” from the ground (or the bottom of the 32” pieces).
-
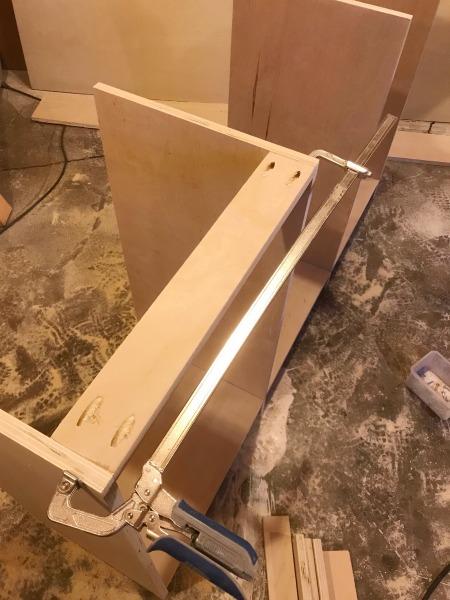
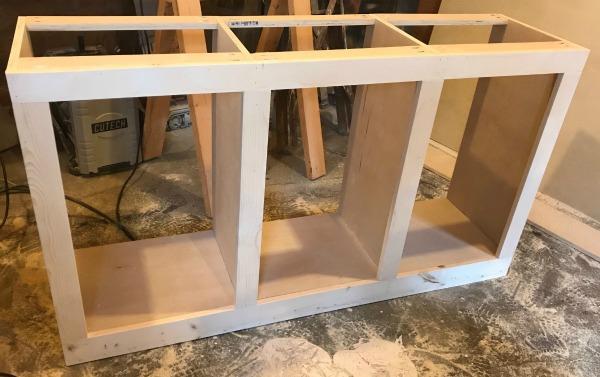
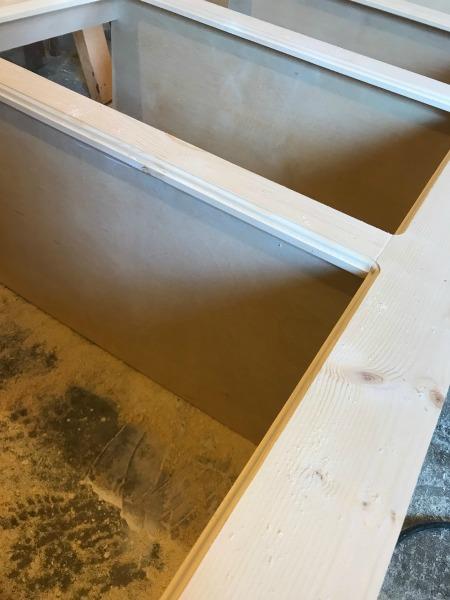
Add Top Supports
Use some 3/4" plywood or 1x material scraps (if you have them) or you can rip a couple pieces of 1 ½” -2” wide 3/4" thick plywood and trim down 6 pieces 18” long. Drill ¾” pocket holes in each end of each piece and attach at the top like shown using 1 ¼” pocket hole screws. This is for extra support and also to attach the top later.
-
Assemble Face Frame
Follow the cut list and cut all the face frame pieces. There should be one 1x4 cut to 57”, one 1x3 cut to 57” and four 1x3s cut to 26” long. Drill ¾” pocket holes into each end of the 26” pieces. Assemble the face frame like shown using 1 ¼” pocket hole screws. The 1x4 should be on the bottom and there should be ABOUT 15 5/8” between each vertical piece.
-
Attach Face Frame
Glue and nail (using a nail gun) the face frame in place like shown.
-
Route Face Frame (Optional)
This step is totally optional, but I thought it added some nice detail. I used a Roman Ogee bit to go around the openings of the face frame like shown. Feel free to not route, or to use a different decorative bit if desired.
-
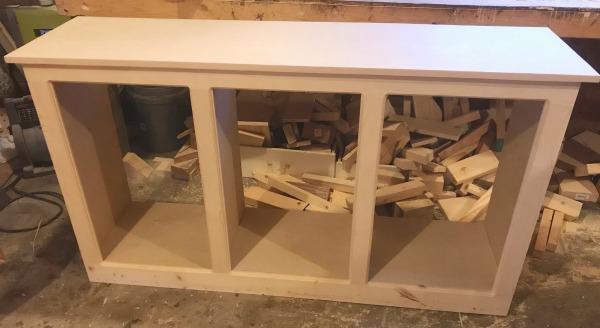
Add Top
Follow the cut list to cut the top piece. Add edge banding (the iron on kind is easy to apply and looks really nice), then place the top on the cabinet. Make sure the back side is flush and it is centered side to side, then use 1 ¼” wood screws or pocket hole screws to screw the top on through the supports you added in step 3.
-
Add Backing
Cut a piece of ¼” plywood the size of the cabinet (32x57) and nail or staple in place on the back. Make sure it is square before attaching.
-
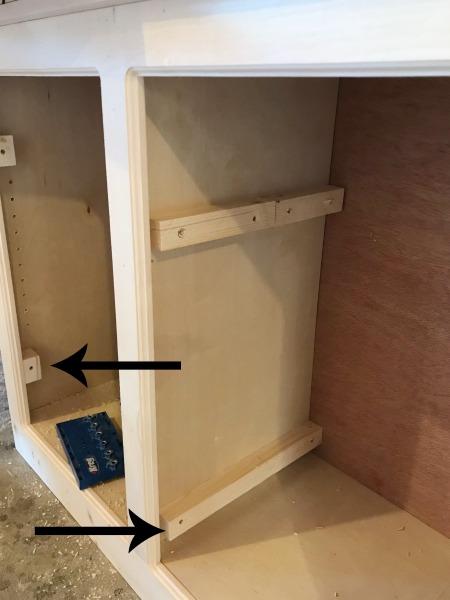
Add Spacer Blocks
Using some scraps or a 2x2 board, cut some “drawer runners” and blocks to act as spacers so the drawers can slide and the doors will be properly inset later. Feel free to trim pieces down to exact dimensions you need, but if you don’t have a table saw, the full width of a 2x2 should be plenty.
Screw the blocks and “drawer runners” in place like shown. These are so that you can attach your drawer slides and door hinges flush with the face frame.
-
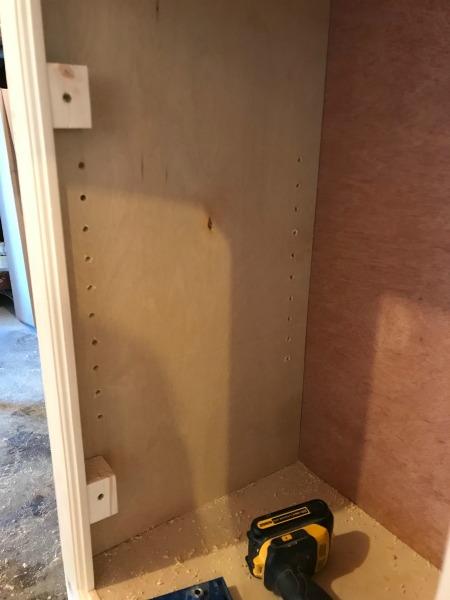
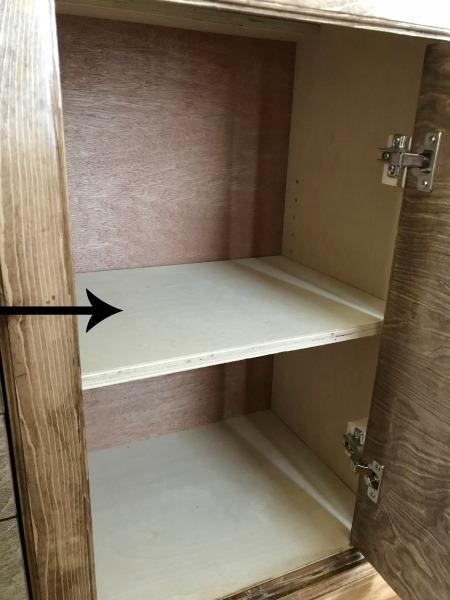
Add Shelf Pin Holes
Using a Kreg Shelf Pin Jig, drill shelf pin holes for adjustable shelves on both sides of the two outside cabinet openings.
-
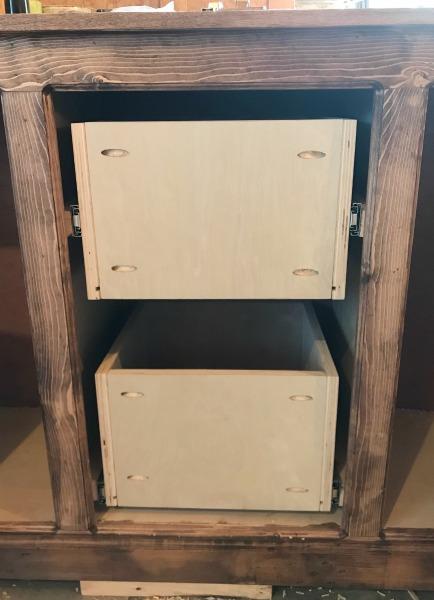
Add Drawer Slides and Drawers
Attach both sets of 14” drawer slides in place on the spacers from step 9 (one set of slides on top and one on bottom of the center section of cabinet). Then, cut the drawer pieces from the cut list. Assemble the drawers using ¾” pocket holes and 1 ¼” pocket hole screws so that each drawer is 14” square. You will drill the pocket holes into both ends of the 12 1/2" pieces. Attach so that the pocket holes face the outside of the drawer. This way you can hide them later. You can either staple, nail, or use a dado cut to attach the drawer bottoms. Then, install the drawers into the slides like shown. NOTE: It may be easier to go ahead and finish (stain or paint) the cabinet prior to installing the drawers and doors as you see done here.
-
Add Baseboard
Cut to fit a piece of 3 1/4" tall baseboard trim around the bottom of the cabinet. Be sure to miter the corners. This is optional, but adds a nice detail. Use a nail gun to attach.
-
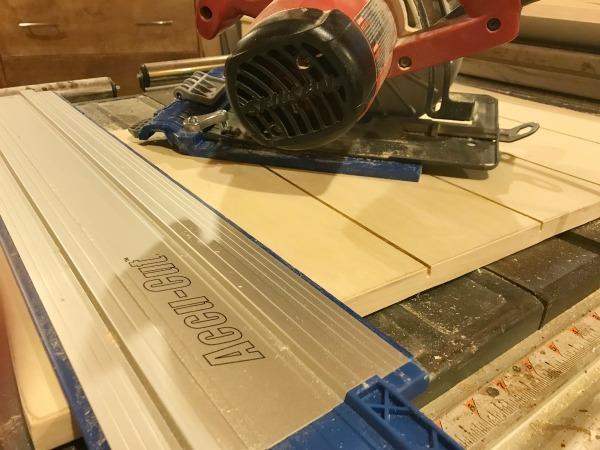
Add Faux Drawer Detail
Cut the 2 doors and drawer fronts according to the cut list. Add edge banding for a more finished look. Then, to make the faux drawer grooves, grab your circular saw and AccuCut. Set the blade depth of your saw to only go into the wood ¼”. Remember to account for the thickness of the AccuCut slide it will ride on.
Make a mark down each door and drawer front ABOUT 4 ¼”. Line up the AccuCut (MAKE SURE IT IS SQUARE BEFORE CUTTING) with these lines one at a time and cut your grooves like shown.
-
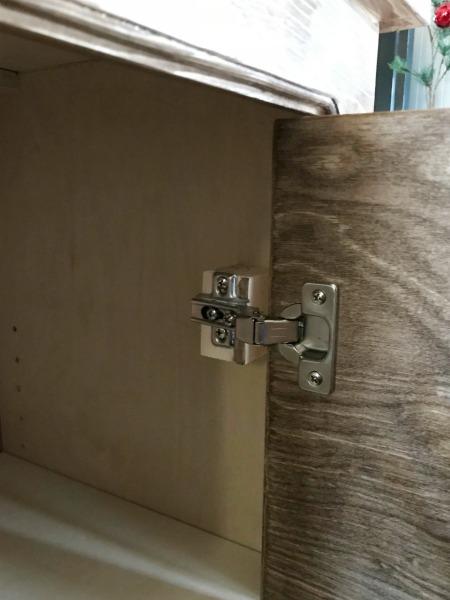
Add Drawer Fronts and Doors
Screw the drawer fronts into the drawers using 1 ¼” wood screws from the inside of the drawer (so you don’t see the screws), then use a Kreg Concealed Hinge Jig to drill holes into the door to accommodate concealed hinges. Make sure to line up your holes with the locations of the spacer blocks you added in step 9. Attach the hinges to these blocks once you have them attached to the door. This will allow you to attach the doors inset. NOTE: It may be easier to go ahead and finish (stain or paint) the doors and drawer fronts prior to this step.
-
Add Shelves
Cut two shelves from the cut list to place into the cabinets. Use shelf pins to place them.
-
Finish and Add Hardware
Putty all nail holes, sand, then wipe clean. Stain and/or paint the cabinet as desired. Here, I used Minwax Special Walnut stain and Minwax Polycrylic to seal it. Once this is dry, add drawer and door hardware. For details on the hardware, click the link in the extras tab on this plan. As stated in earlier steps, it may be easier to finish the cabinet before installing the doors and drawers, and it may be easier to finish the doors and drawers before installing as well. You can finish in whatever order you wish and whatever you think will be easiest.