Farmhouse Coffee Table with Storage
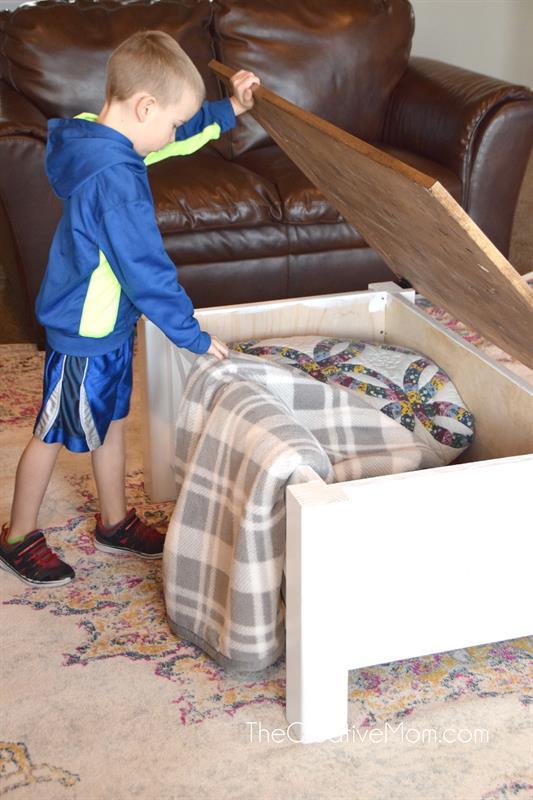
By The Creative MomPlans to build a darling farmhouse style coffee table with built in storage- perfect for storing games, pillows, or blankets. The coffee table is sturdy and strong as well as gorgeous! This is a simple build, but does require a little skill.
Directions
-
Cut Corner Posts
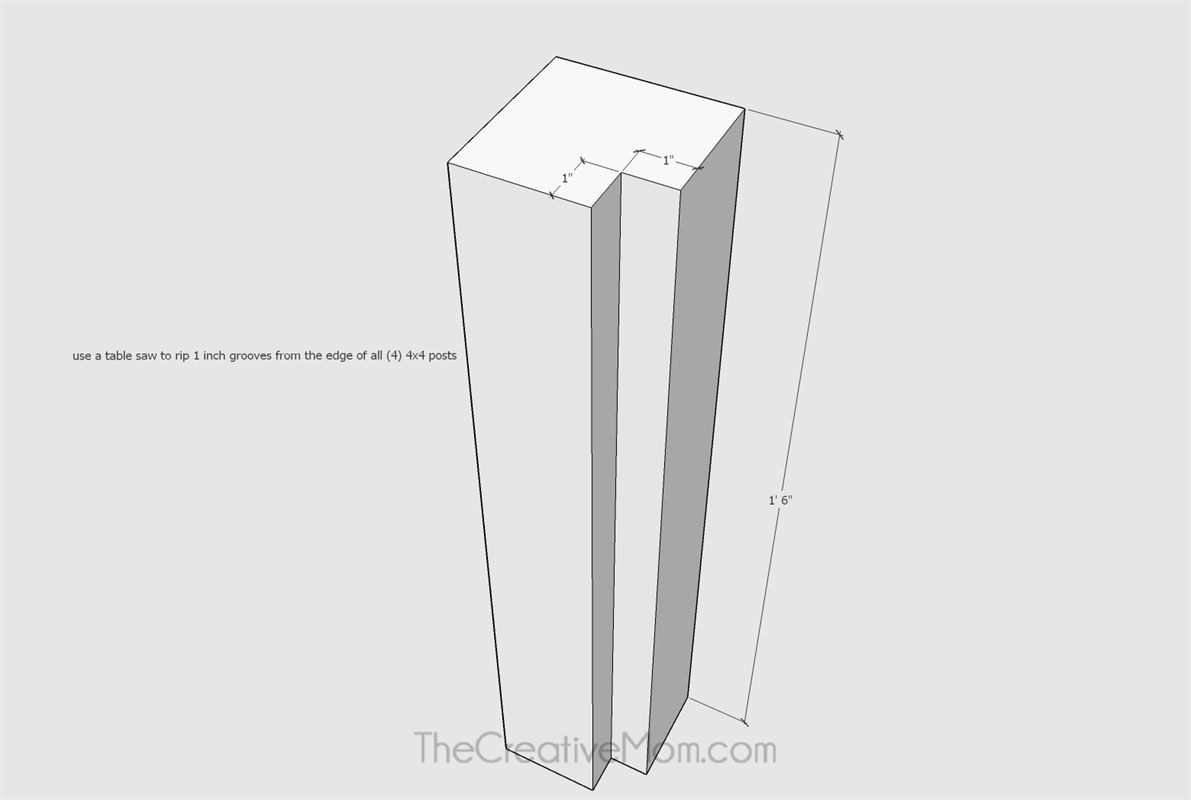
Cut 4- 18" 4x4 posts.
Use a table saw to rip 1 inch grooves in corner posts. -
Build Frame Pieces (for ends)
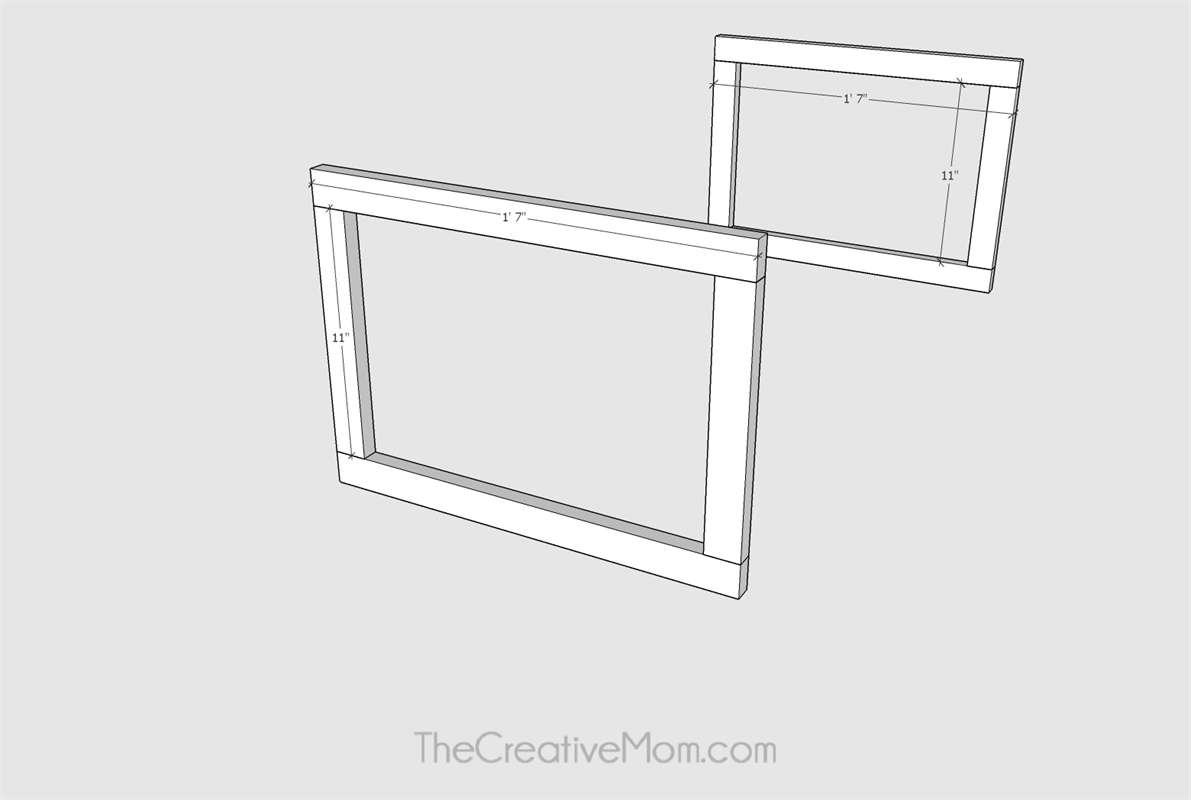
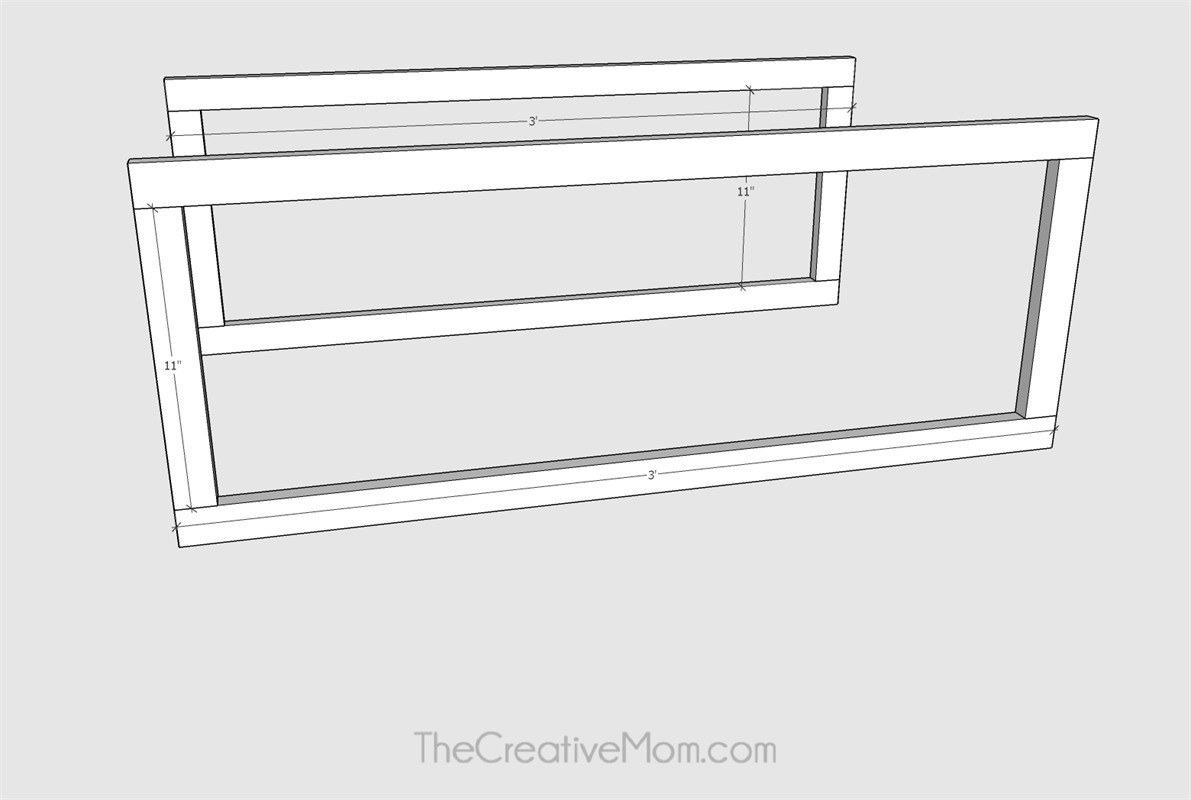
Cut 4- 19" 1x2's and 4- 11" 1x2's.
Drill pocket holes in the ends of all the 1x2's. Then, using 1 1/4" pocket hole screws and wood glue, attach the 11" pieces to the 19" pieces to form 2 rectangles. -
Attach Frame to Post
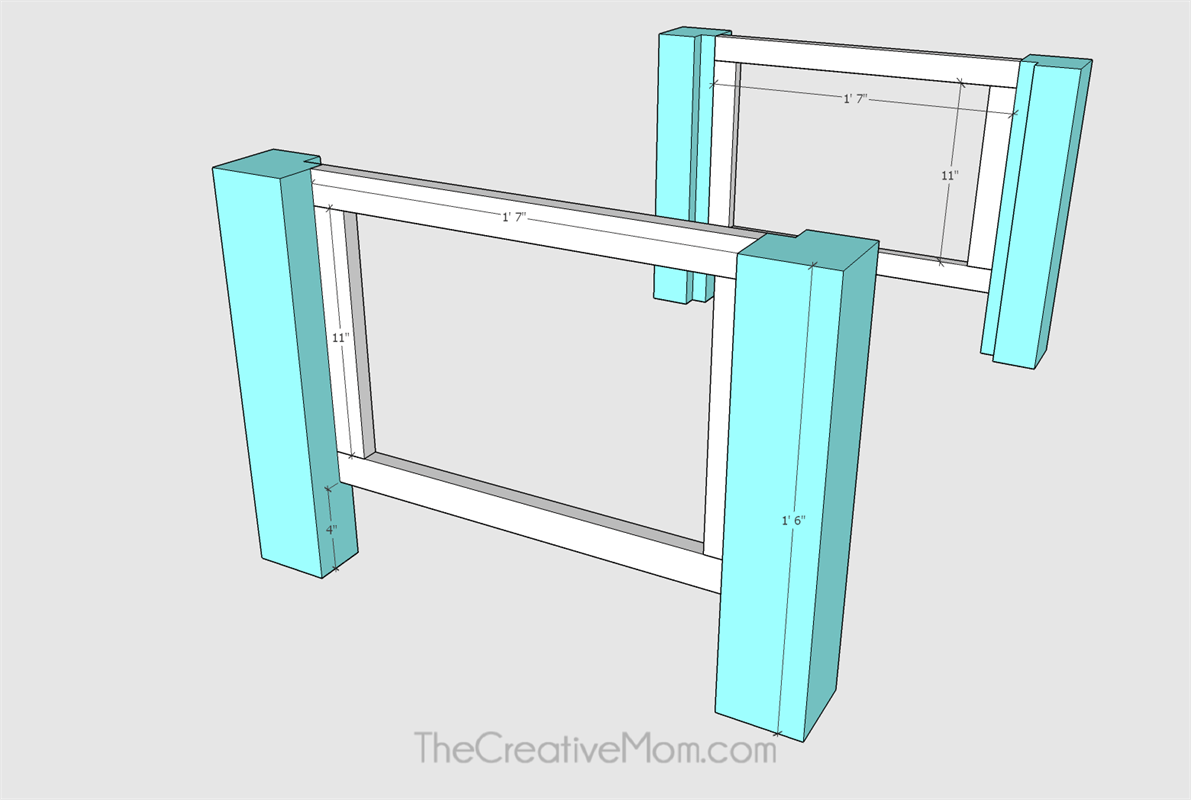
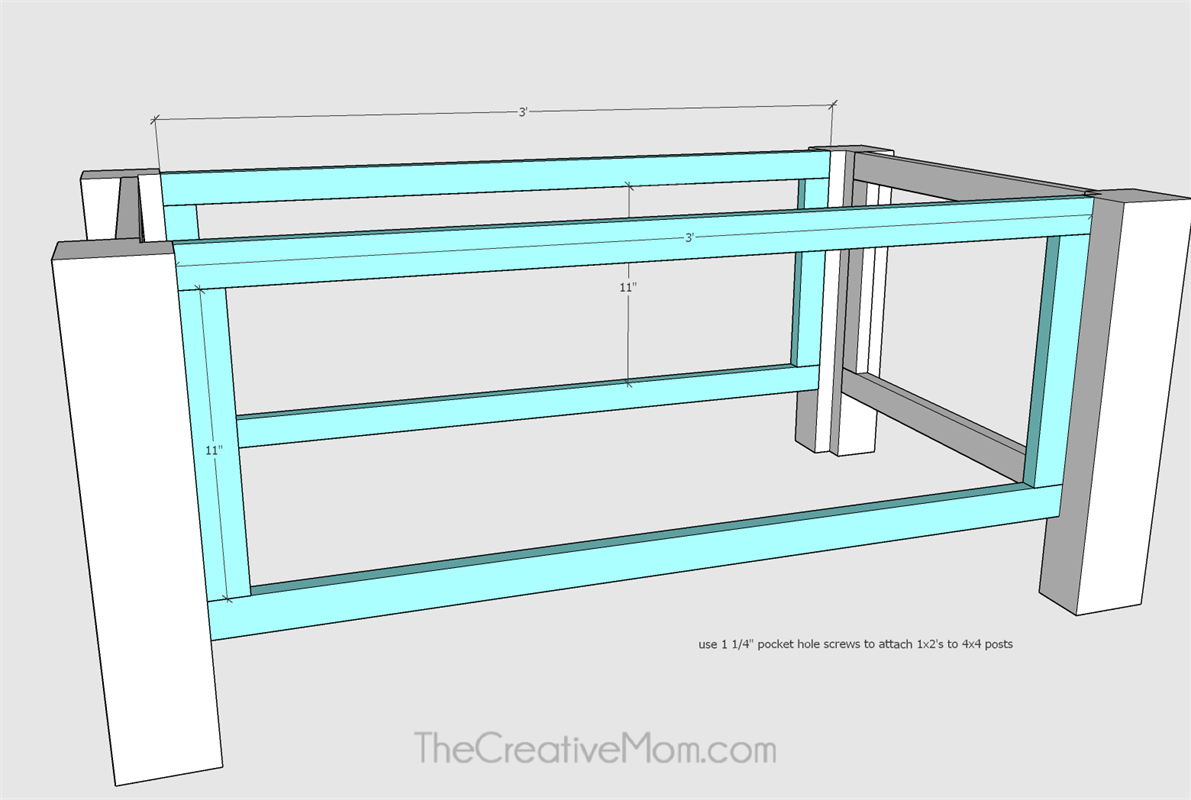
Using wood glue and 1 1/4" pocket hole screws, attach the frame you just built (19" x 11") to the 4x4 frame posts. You will use the pocket holes you drilled in the 19" boards.
The frame will sit on the edge of the grooves, not inside. See plans for details.
The frame should sit flush with the tops of your 4x4's. This will make the bottom 4" off the ground. -
Build Frame Pieces (for sides)
Cut 4- 36" 1x2's and 4- 11" 1x2's.
Drill pocket holes in the ends of all the 1x2's. Then, using wood glue and 1 1/4" pocket hole screws, attach the 11" pieces to the 36" pieces to form 2 rectangles. -
Attach Frame to Post
Using wood glue and 1 1/4" pocket hole screws, attach the frame you just built (36" x 11") to the 4x4 frame posts. You will use the pocket holes you drilled in the 36" boards.
The frame will sit on the edge of the grooves, not inside. See plans for details.
The frame should sit flush with the tops of your 4x4's. This will make the bottom 4" off the ground. -
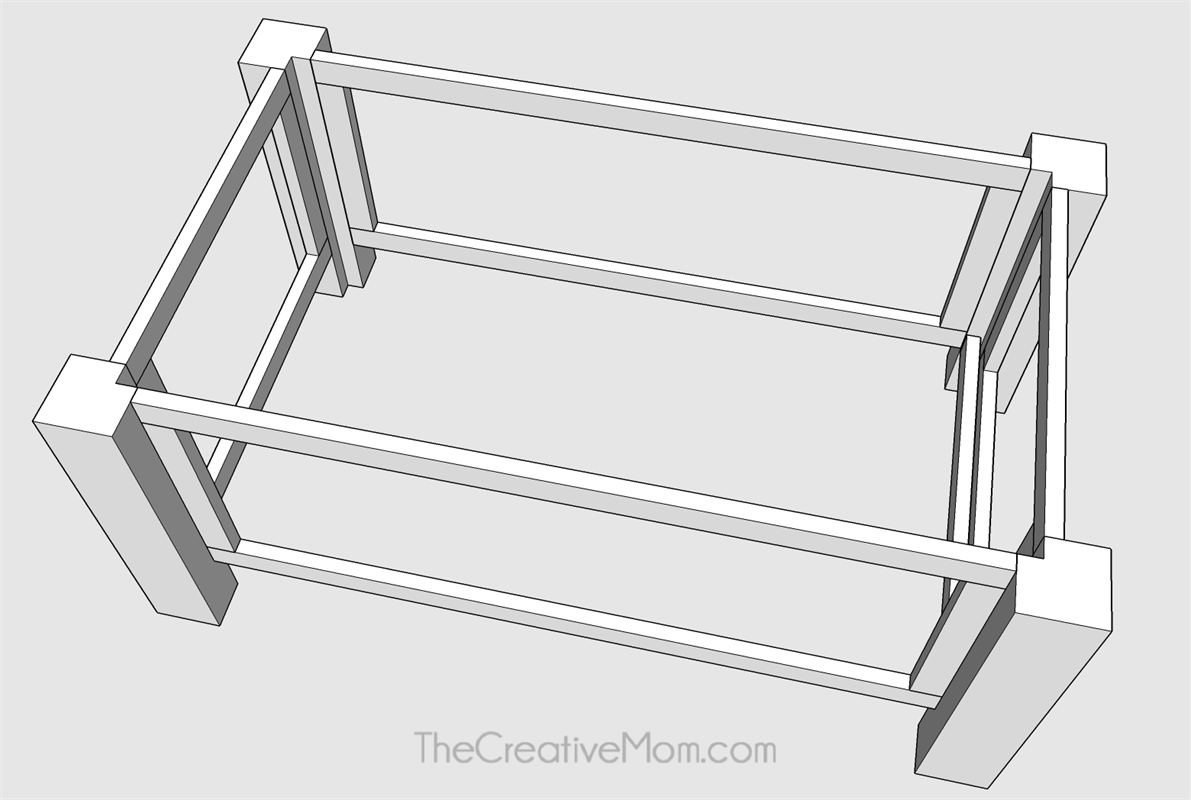
Frame is built
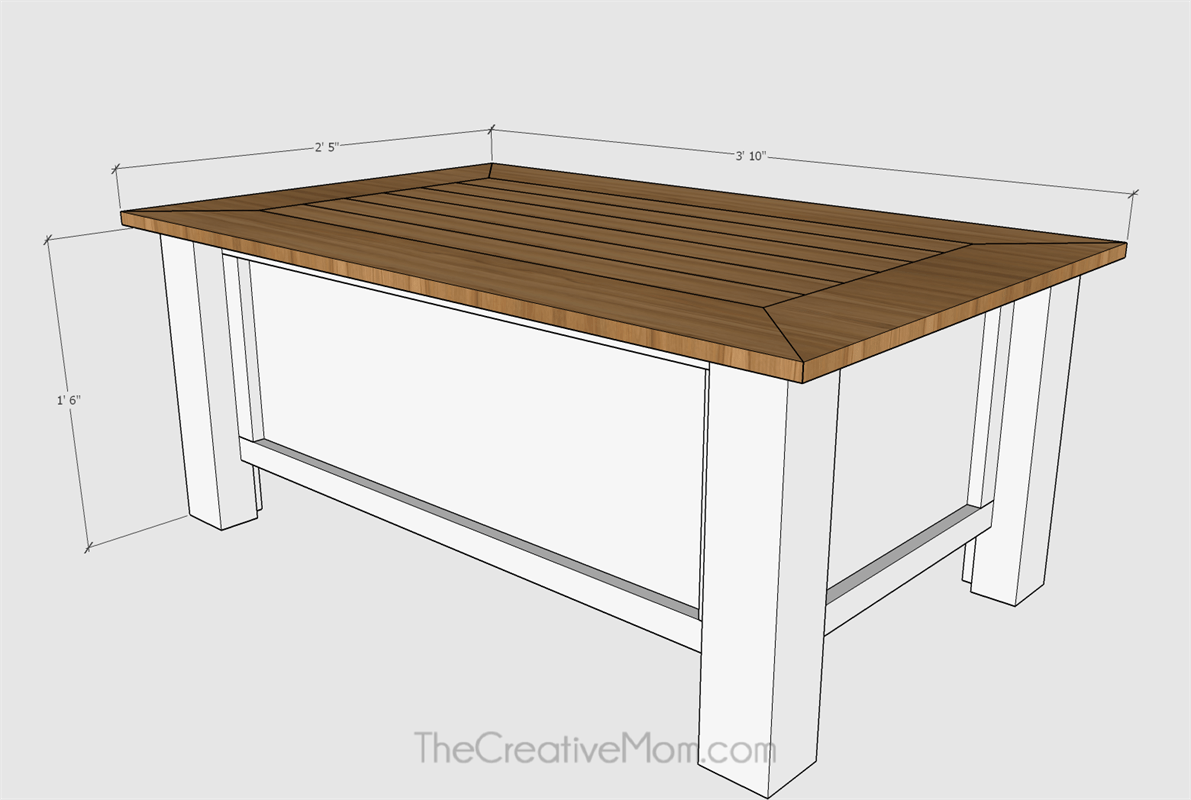
Your frame should be all built now. See plans.
-
Add side panels
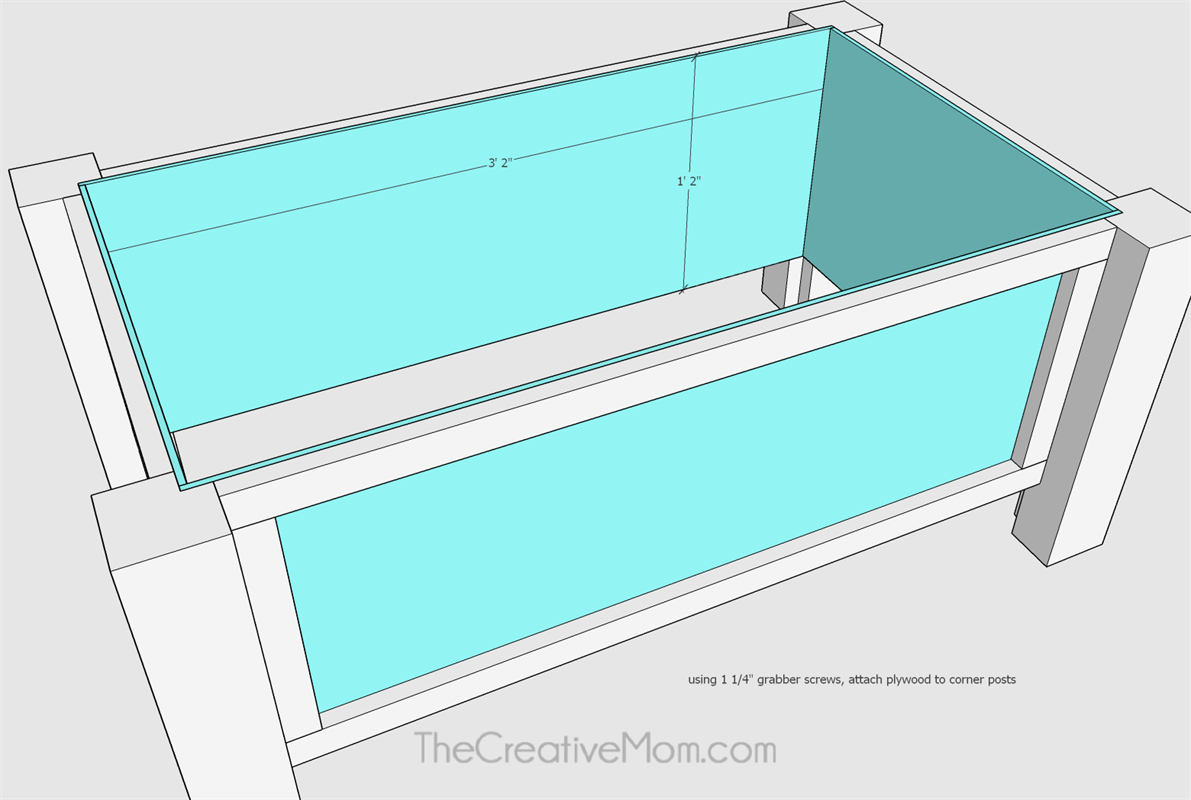
Cut two side panels from 1/2" plywood (38" x 14" each).
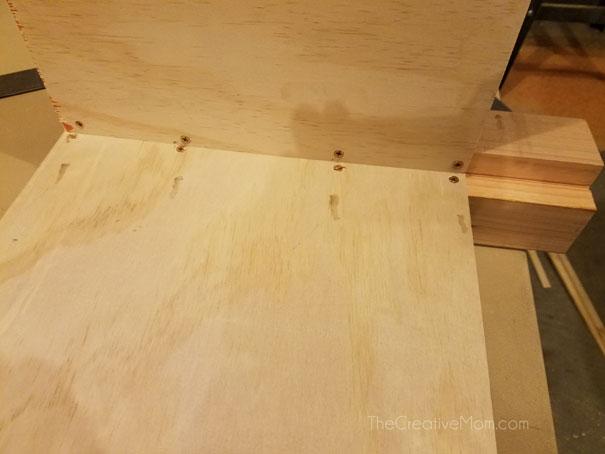
Use wood glue and 1 1/4" grabber screws to attach the plywood side panels to the 4x4 corner posts. The plywood will sit in the groove we ripped out of these posts. Make sure to check for square as you do this. Once the side panels are in, the whole thing will be much more sturdy. -
Side Panels
This photo shows how the side panels should be attached.
-
Add end panels
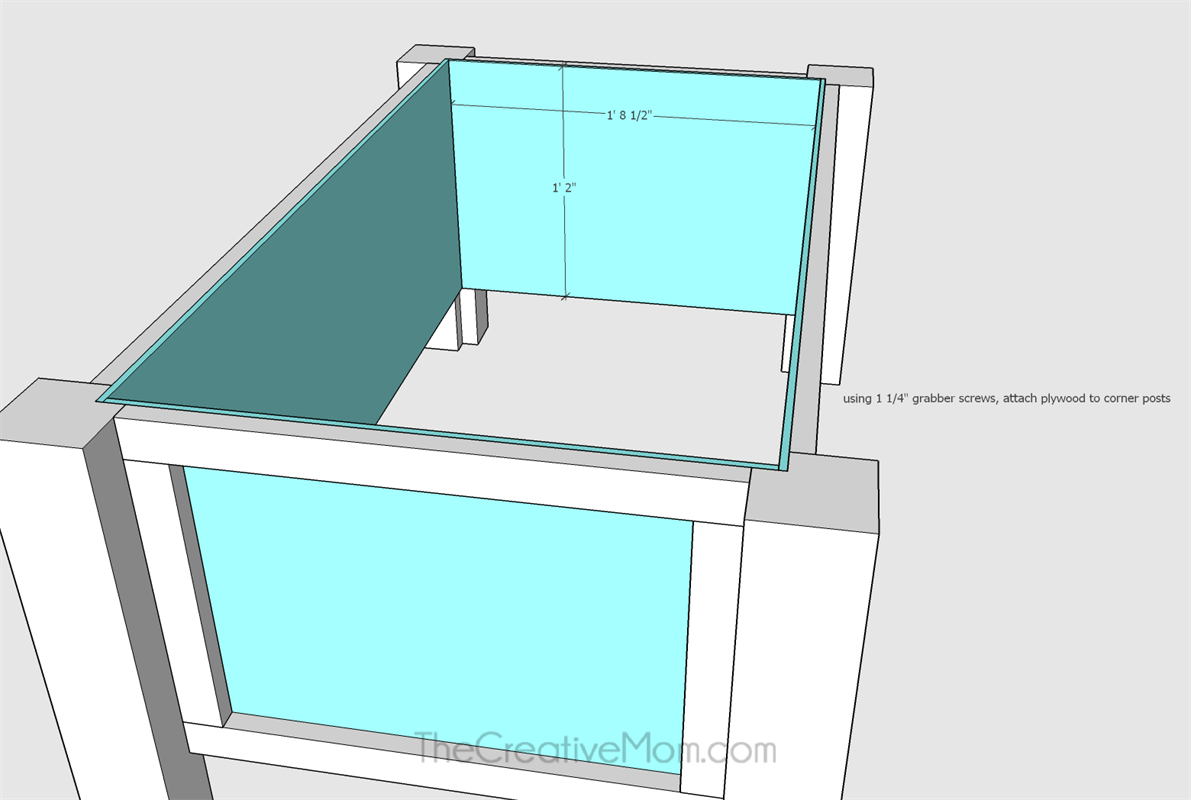
Cut two end panels from 1/2" plywood (20.5" x 14" each).
Use wood glue and 1 1/4" grabber screws to attach the plywood end panels to the 4x4 corner posts. The plywood will sit in the groove we ripped out of these posts. Make sure to check for square as you do this. Once the end panels are in, the whole thing will be much more sturdy. -
Add bottom supports
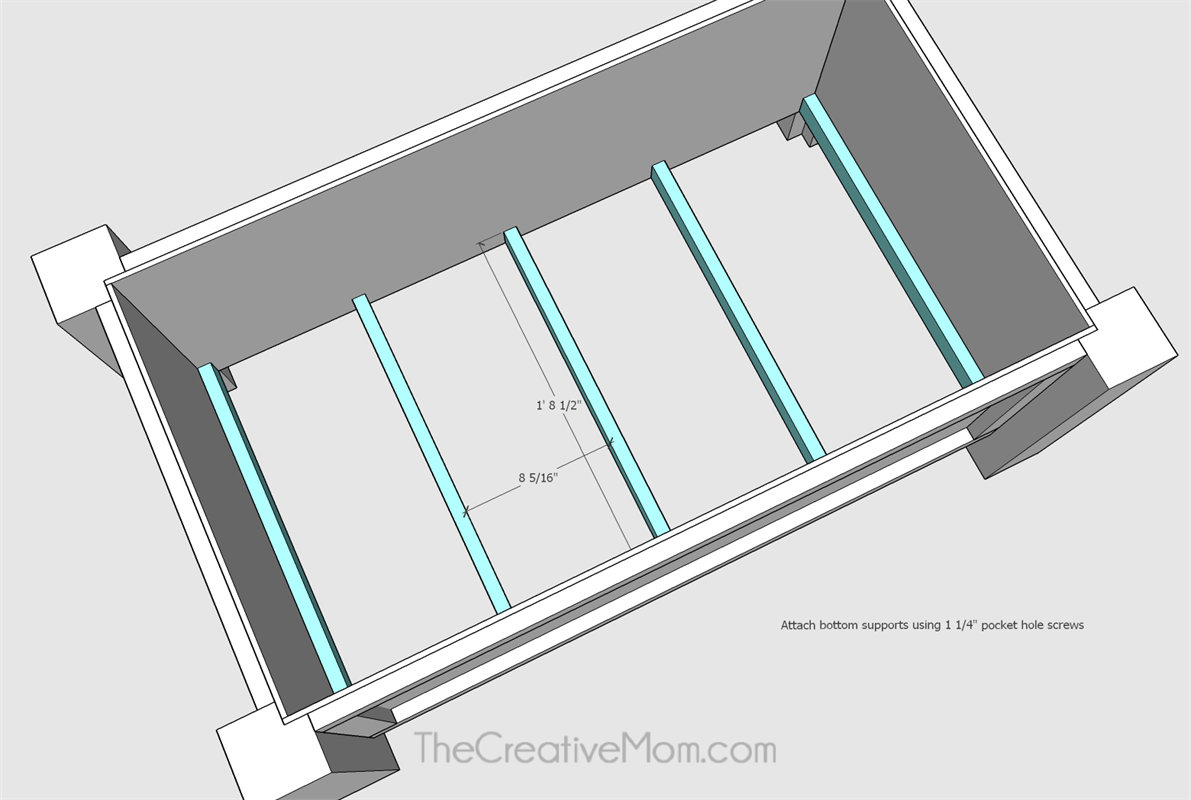
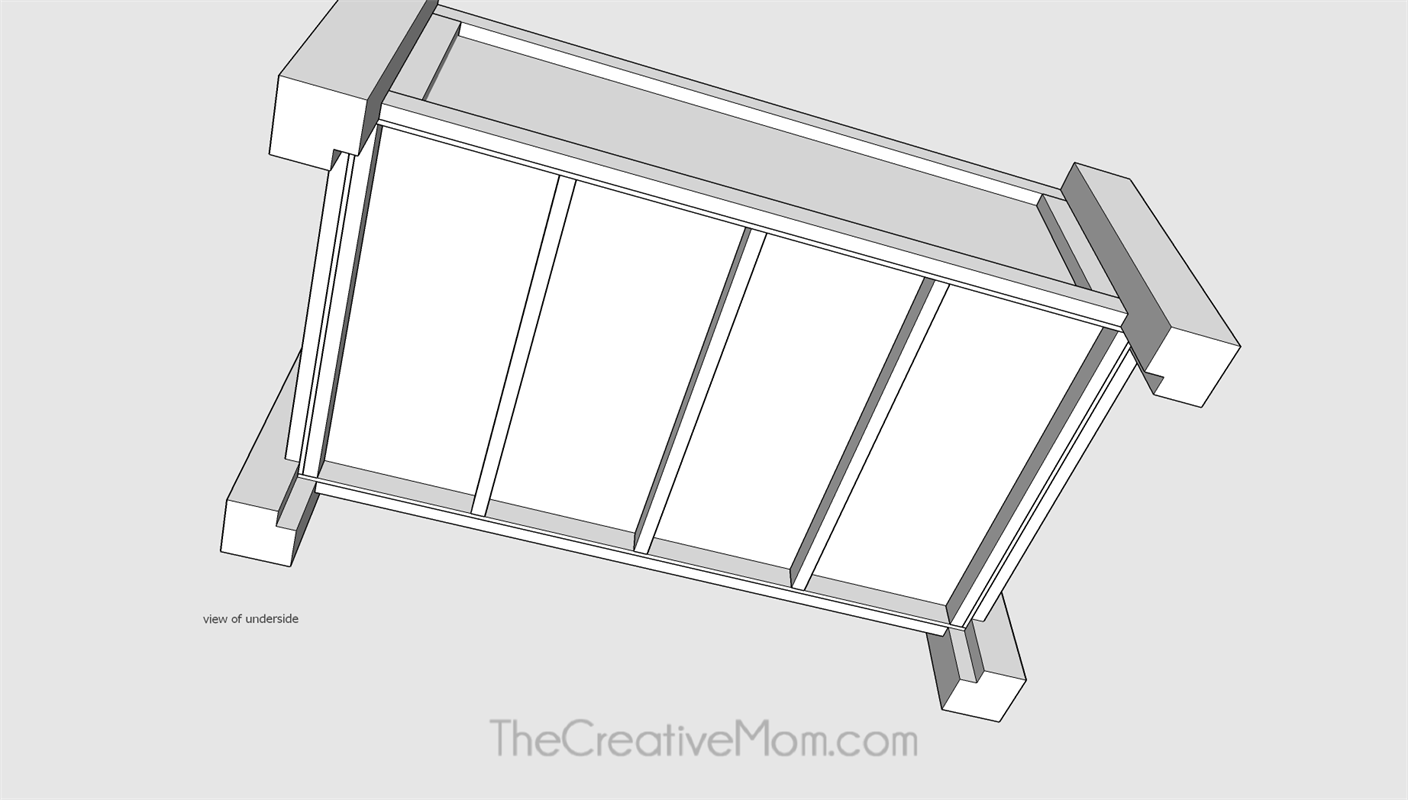
Cut 5- 20.5" 1x2's. Drill pocket holes in both ends of each board.
Using wood glue and 1 1/4" pocket hole screws, attach the boards to the side panels. They should be evenly spaced- about 8 5/16" apart. -
Add bottom
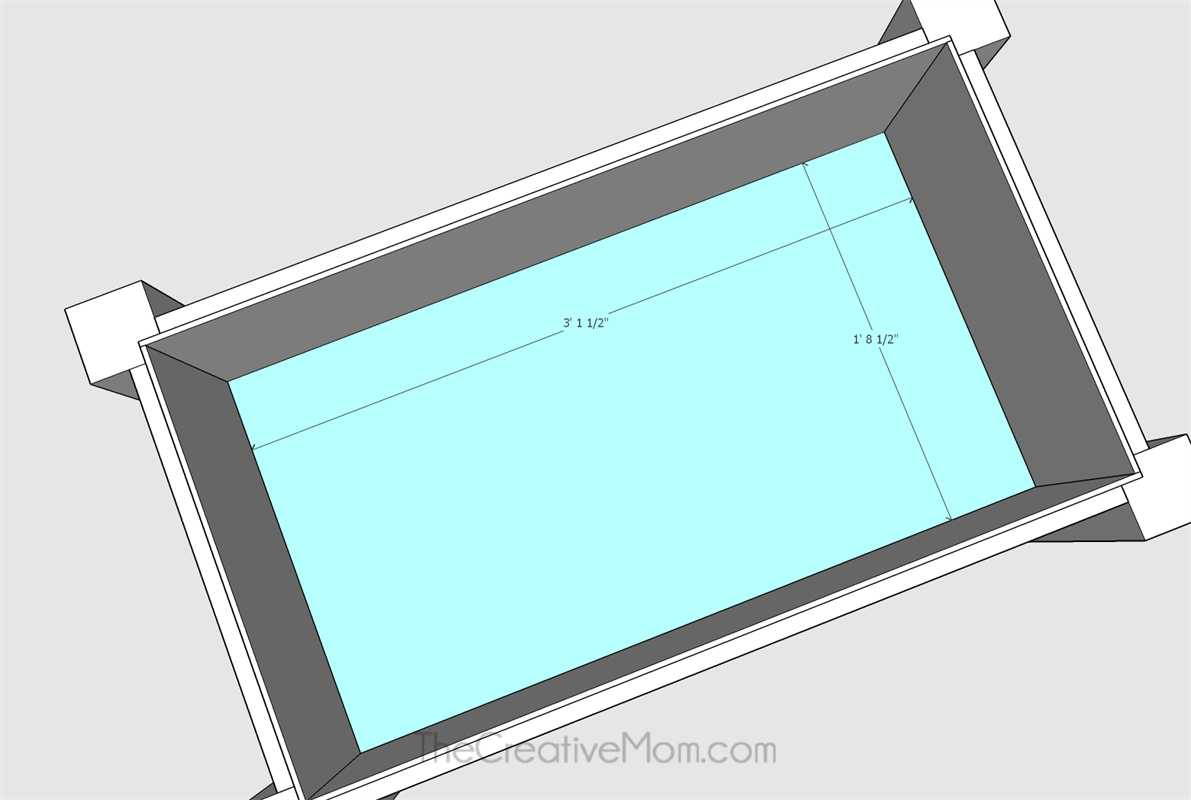
From 1/2" plywood, cut your bottom support- 17.5" x 20.5" (it would be wise to measure your space first).
Simply slide the bottom into place on top of your supports. You can secure it in place with brad nails or screws if desired. -
Build Table Top
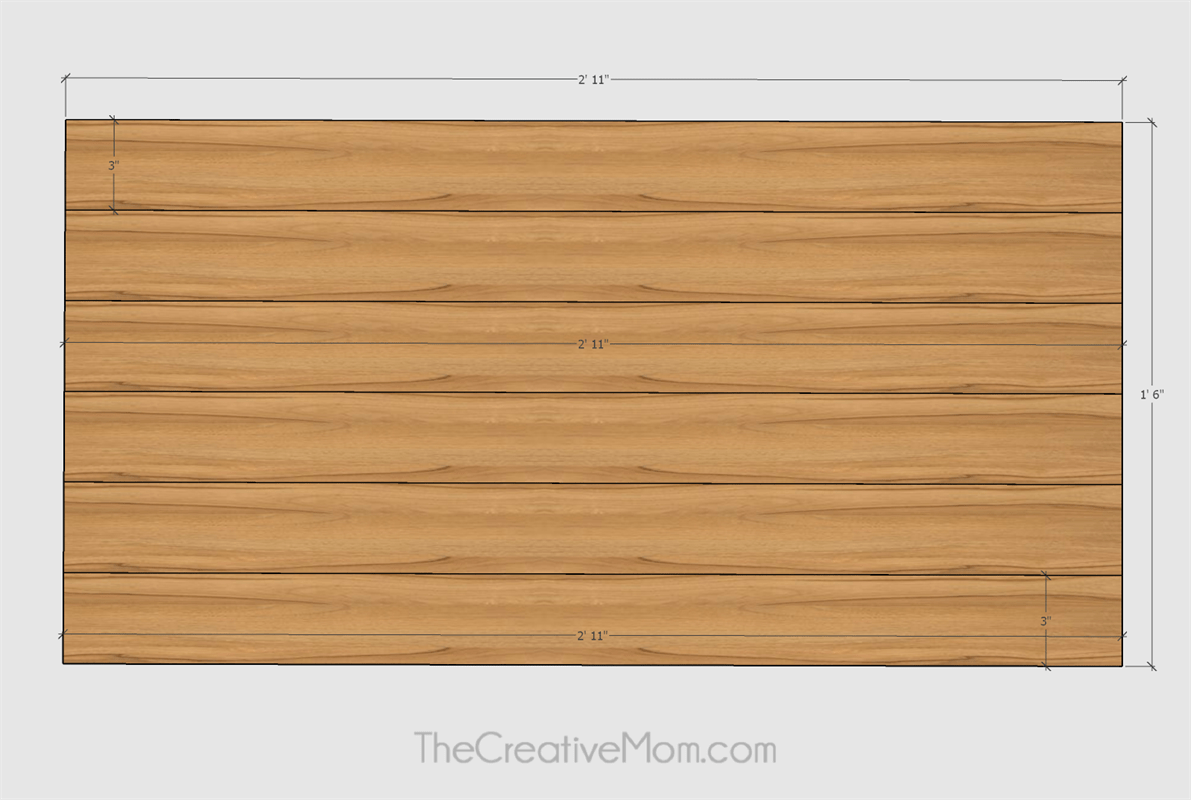
Rip your 1x4's so they are 3" wide. This should make them nice and square, so they fit together without any gaps or rounded edges.
Drill pocket holes in both ends of each board. Drill several pocket holes (3 or 4) on the edges of each board.
Spread wood glue on the edges of each board, and sandwich them together, using bar clamps to keep them tight.
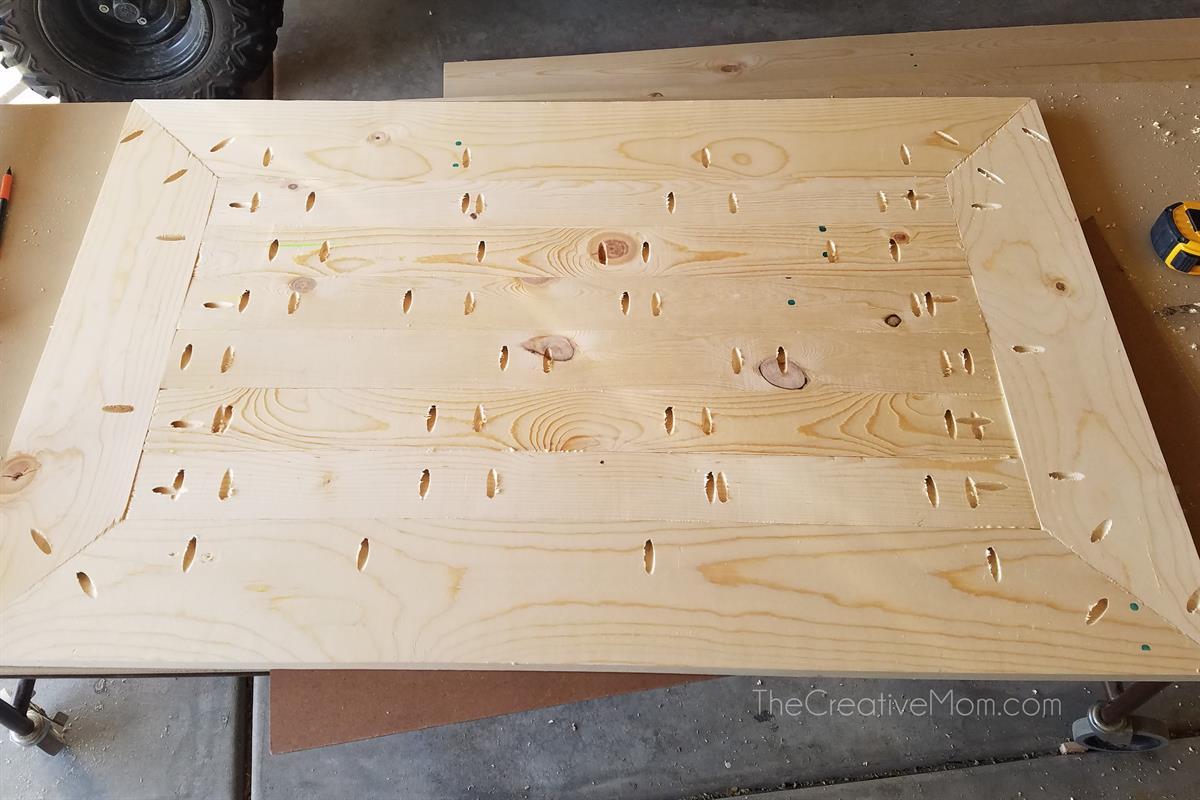
Using 1 1/4" pocket hole screws, attach the 1x4's together. (see photo on next step) -
Table Top Jig photo
You should have plenty of wood glue at each joint. secure with 1 1/4" pocket hole screws.
-
Frame Table Top
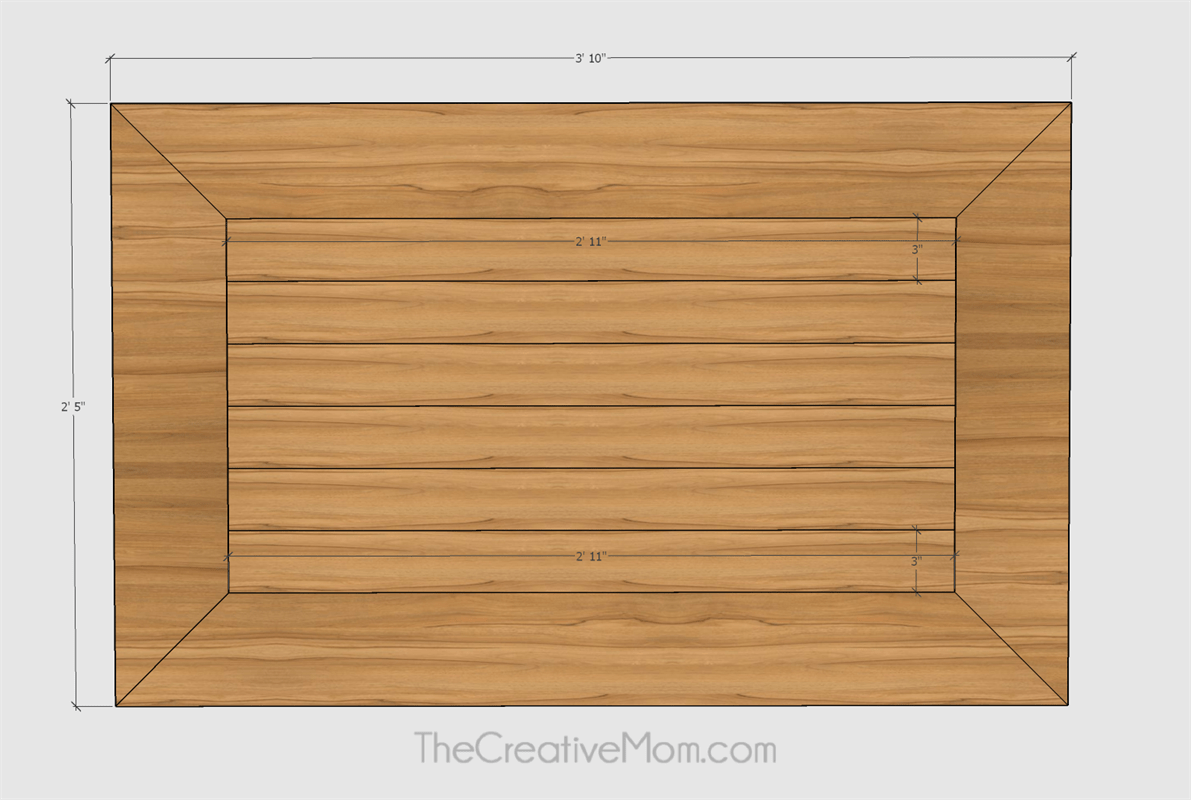
Cut 2- 1x6 46" boards, mitered at 45 degrees on each end (measurement is taken on long side).
Cut 2- 1x6 17" boards, mitered at 45 degrees on each end (measurement is taken on long side).
Drill pocket holes in both ends of each board. Drill several pocket holes (3 or 4) on the INSIDE edges of each board.
Spread wood glue on the edges of each board, and sandwich them together, using bar clamps to keep them tight.
Using 1 1/4" pocket hole screws, attach the 1x4's together. (see photo on previous step) -
Finish Coffee Table top
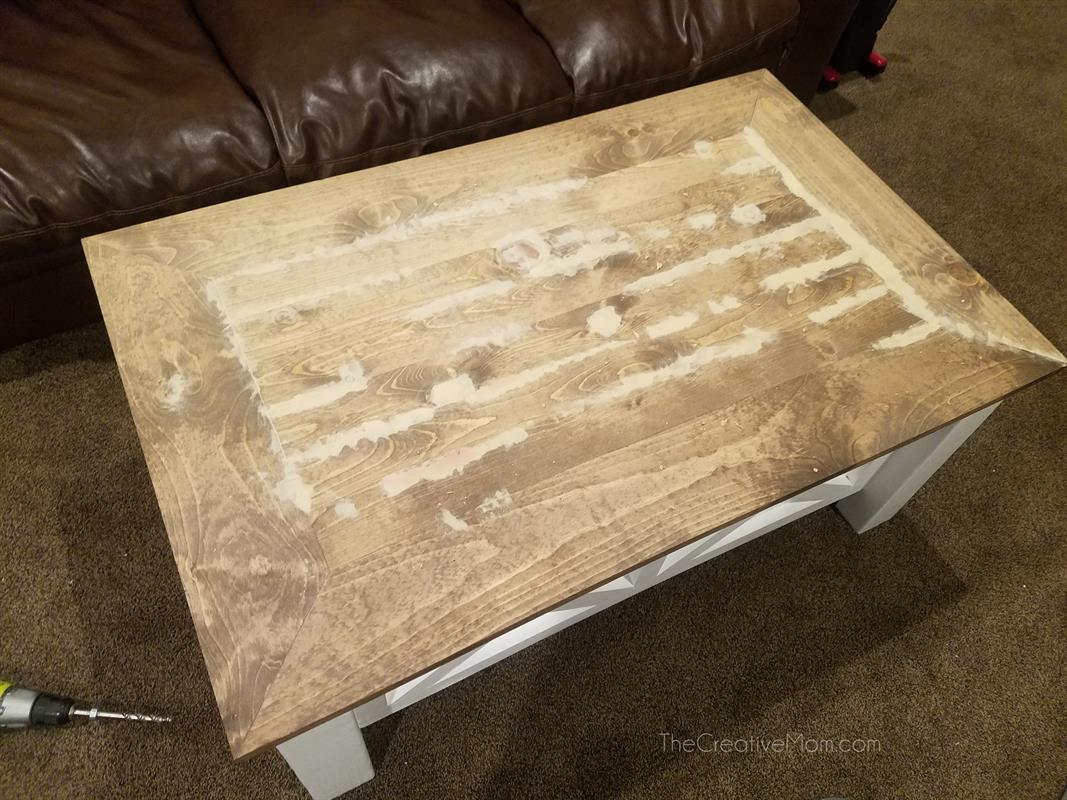
Fill any gaps or holes in the table top with wood filler. If you are planning to paint or stain, make sure you get the paintable or stainable kind.
Once your wood filler is dry, sand with 120 grit sandpaper until the table top is smooth. Then stain or paint and finish with a polyurethane. -
Add decorative pieces
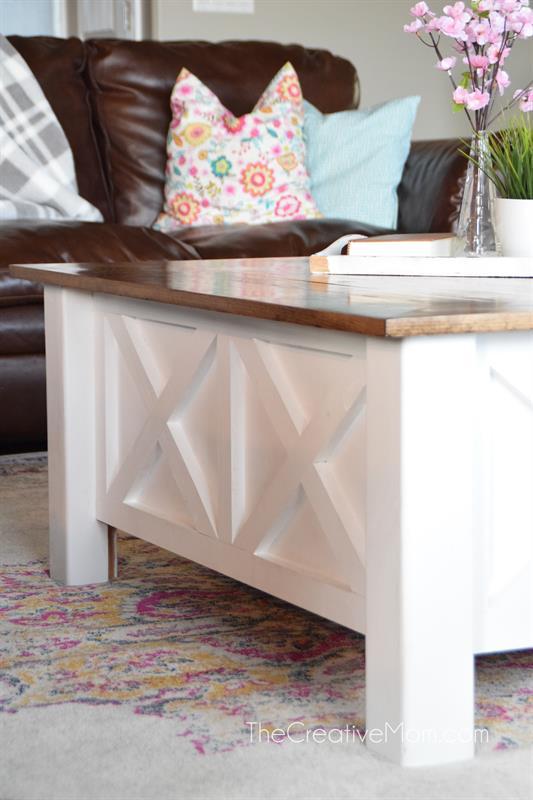
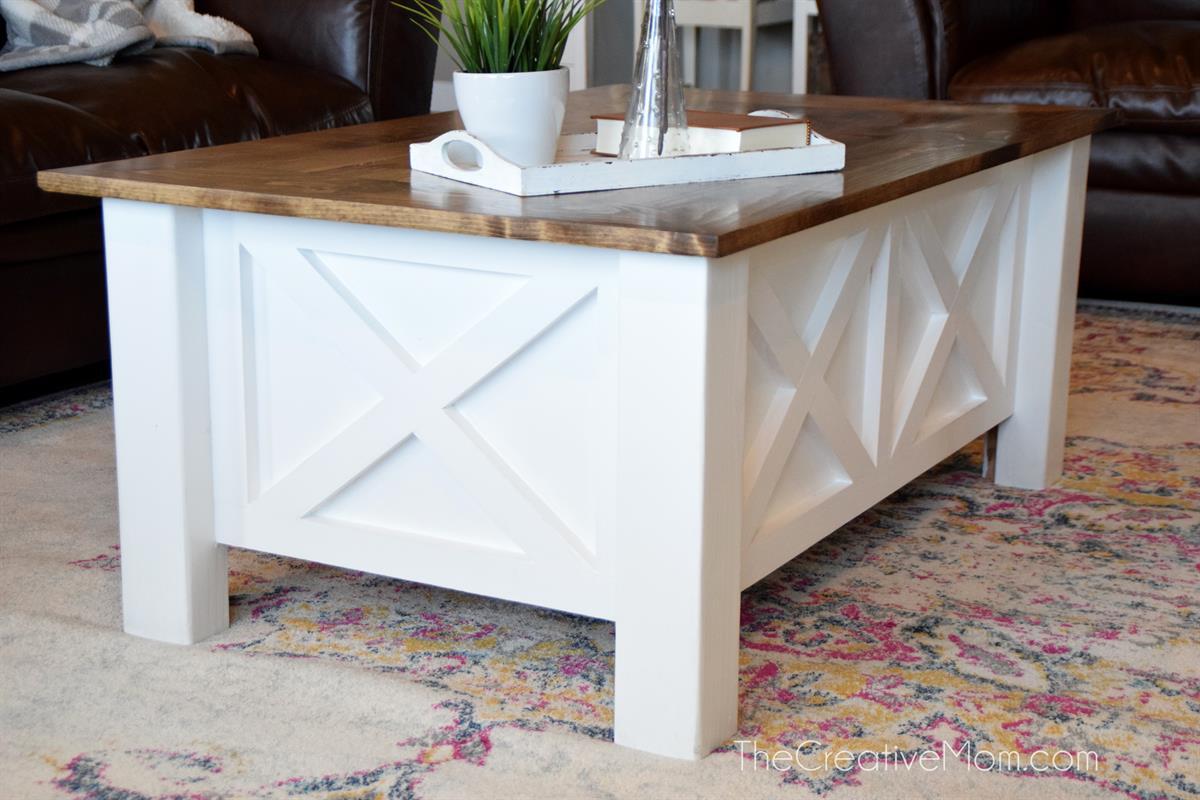
If desired, add decorative trim pieces to your coffee table. We used an x pattern, but you can leave it as-is if desired.
Simply dry fit your pattern into the side panels of your coffee table. Then attach using wood glue and brad nails.
After your pieces have been added, fill any holes. Once your wood filler is dry, sand with 120 grit sandpaper. Then stain or paint and finish with a polyurethane. -
Add hinges
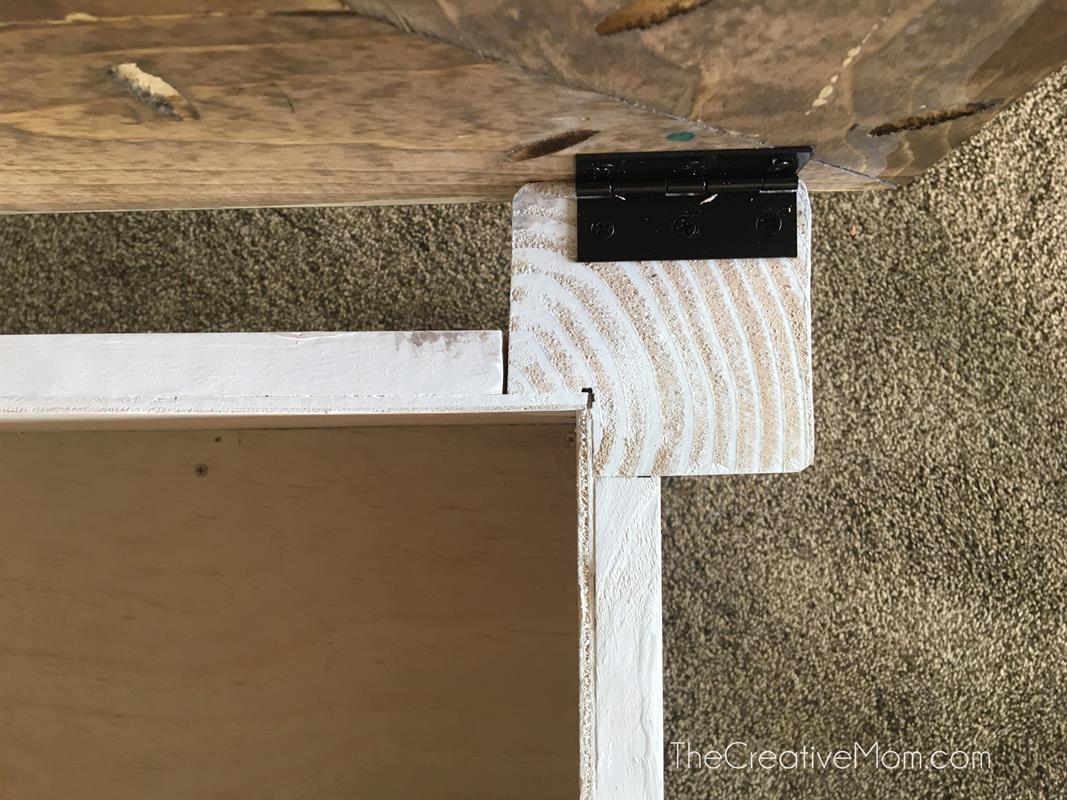
Once your coffee table base and table top are finished and dry, attach them together using hinges. You want your hinges to be on the edge of your 4x4's and about an inch in from each corner of your table top. Be sure to measure the final product and adjust accordingly.
-
Finished product
The underside
-
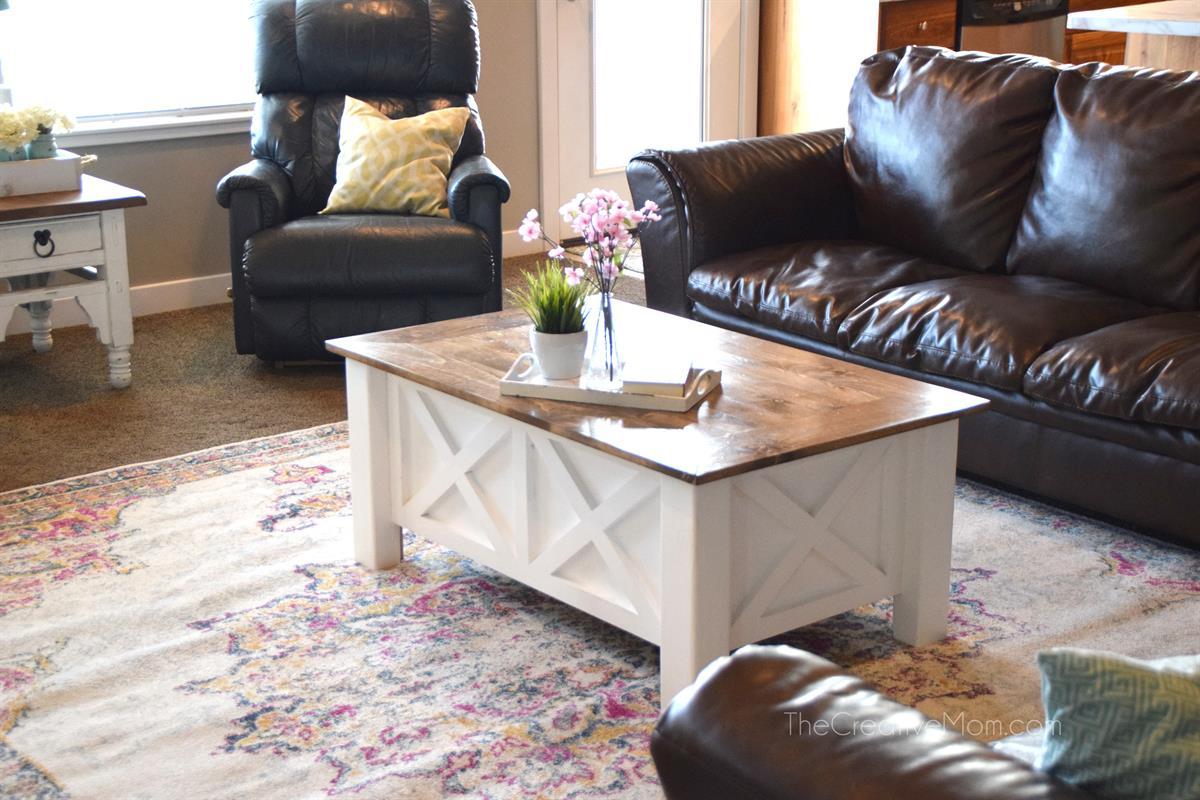
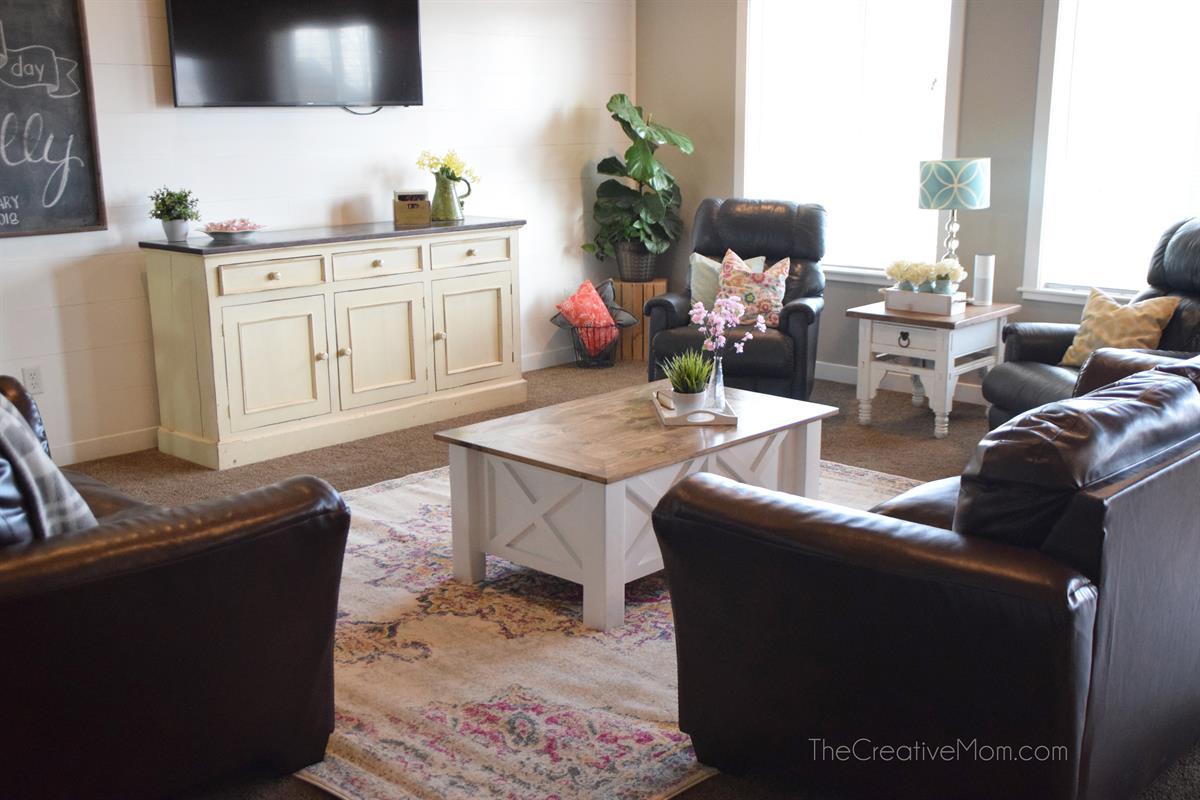
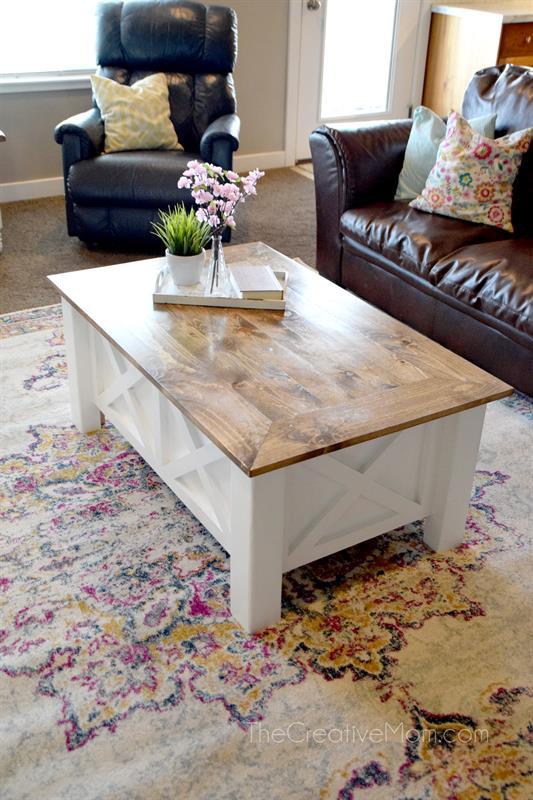
Finished Coffee Table
Your finished coffee table should be similar to this.
Check out our top project plans for DIY coffee tables:


