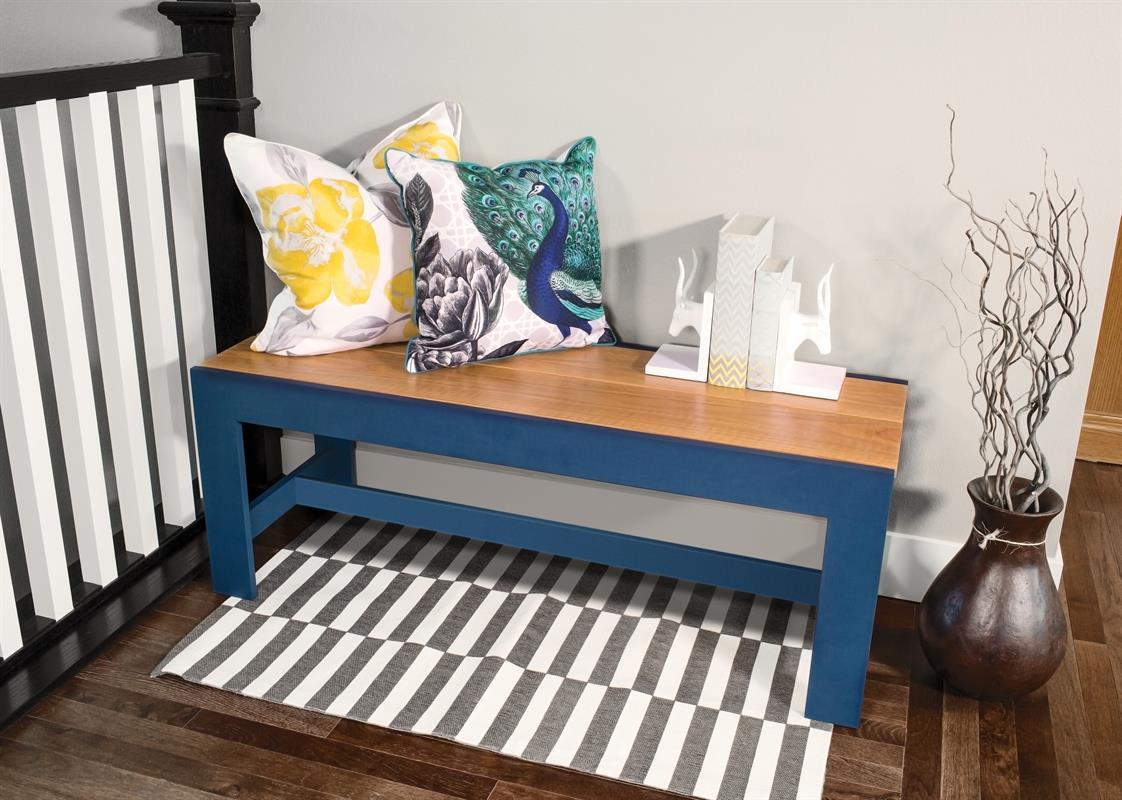


Simple lines, bold colors, and easy construction make this bench a perfect project. Whether you use it in an entryway, in a hallway, or even put it to work for another purpose, it will add style and function that you'll enjoy for years.
Tools
Kreg Tools


Other Tools
-
Miter Saw

-
Tape Measure
Materials
Wood Products
- 2 Board , 19mm x 63mm , 2400mm
- 2 Board , 19mm x 89mm , 2400mm
- 1 Board , 19mm x 184mm , 2400mm
Hardware & Supplies
- 52 32mm fine-thread Kreg pocket-hole screws
- 12 Paint-grade Kreg pocket-hole plugs (optional)
Cut List & Parts
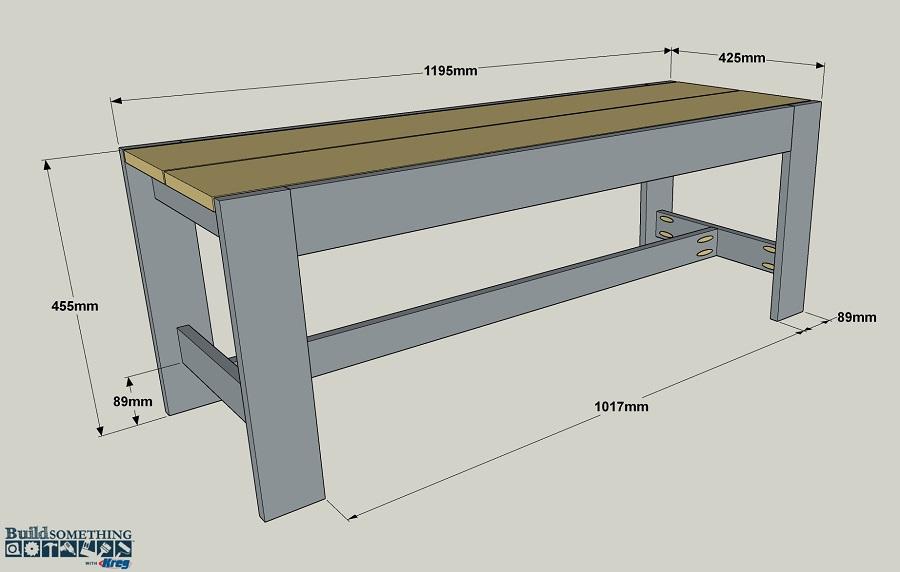
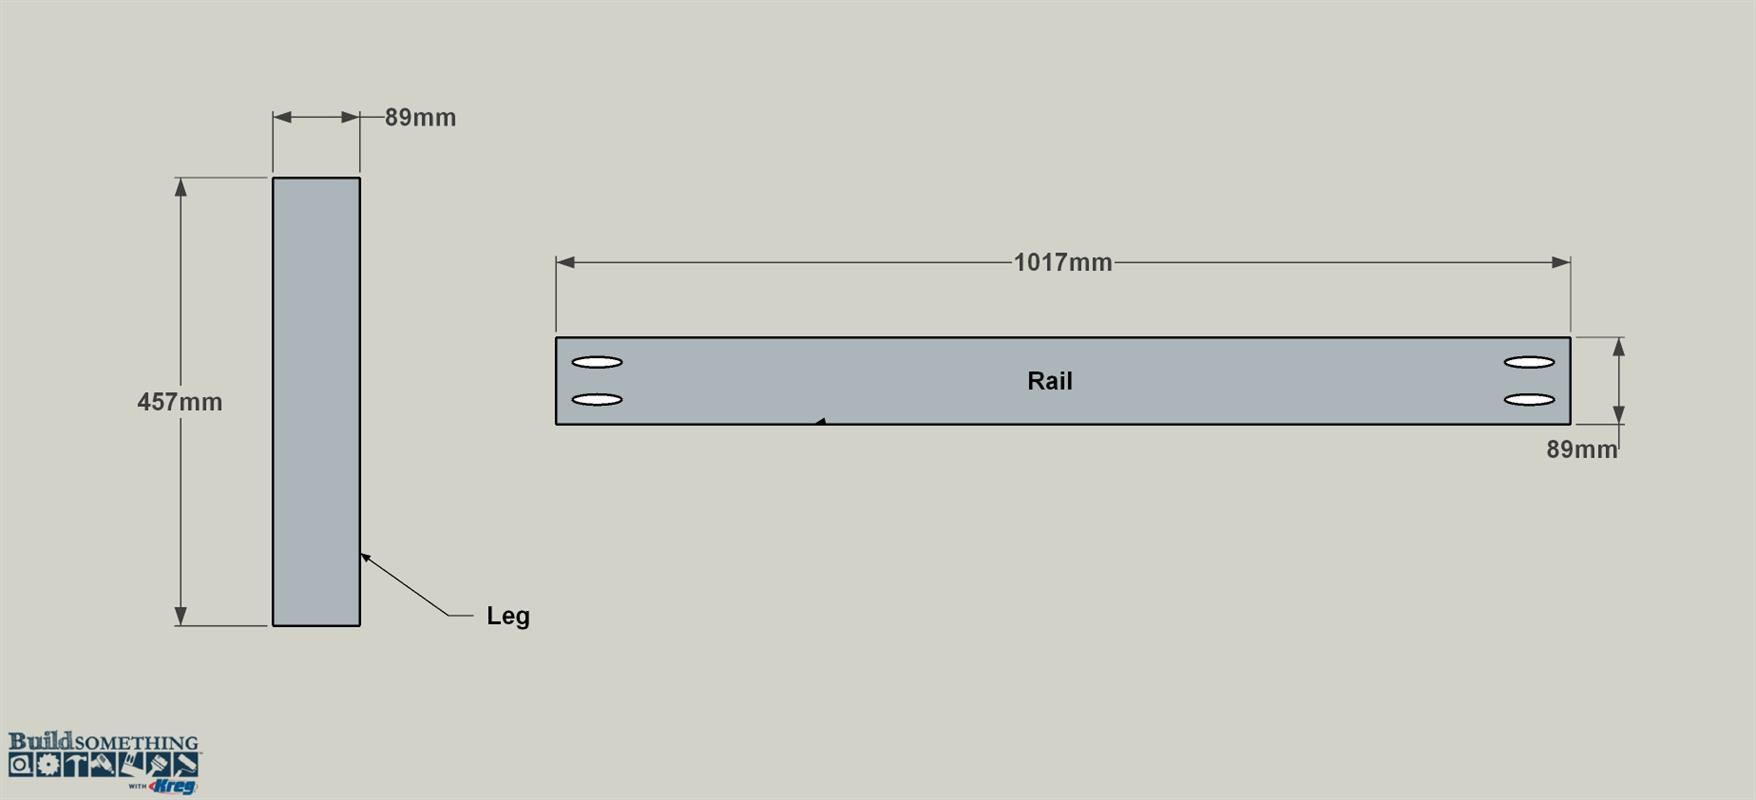
- 4 Leg , 19 x 89 x 457mm poplar
- 2 Side Rail , 19 x 89 x 1017mm poplar
- 2 Bottom Rail , 19 x 63 x 387mm poplar
- 4 Seat Rail , 19 x 63 x 387mm poplar
- 1 Stretcher , 19 x 63 x 1087mm poplar
- 2 Seat Slat , 19 x 184 x 1195mm oak

Directions
-
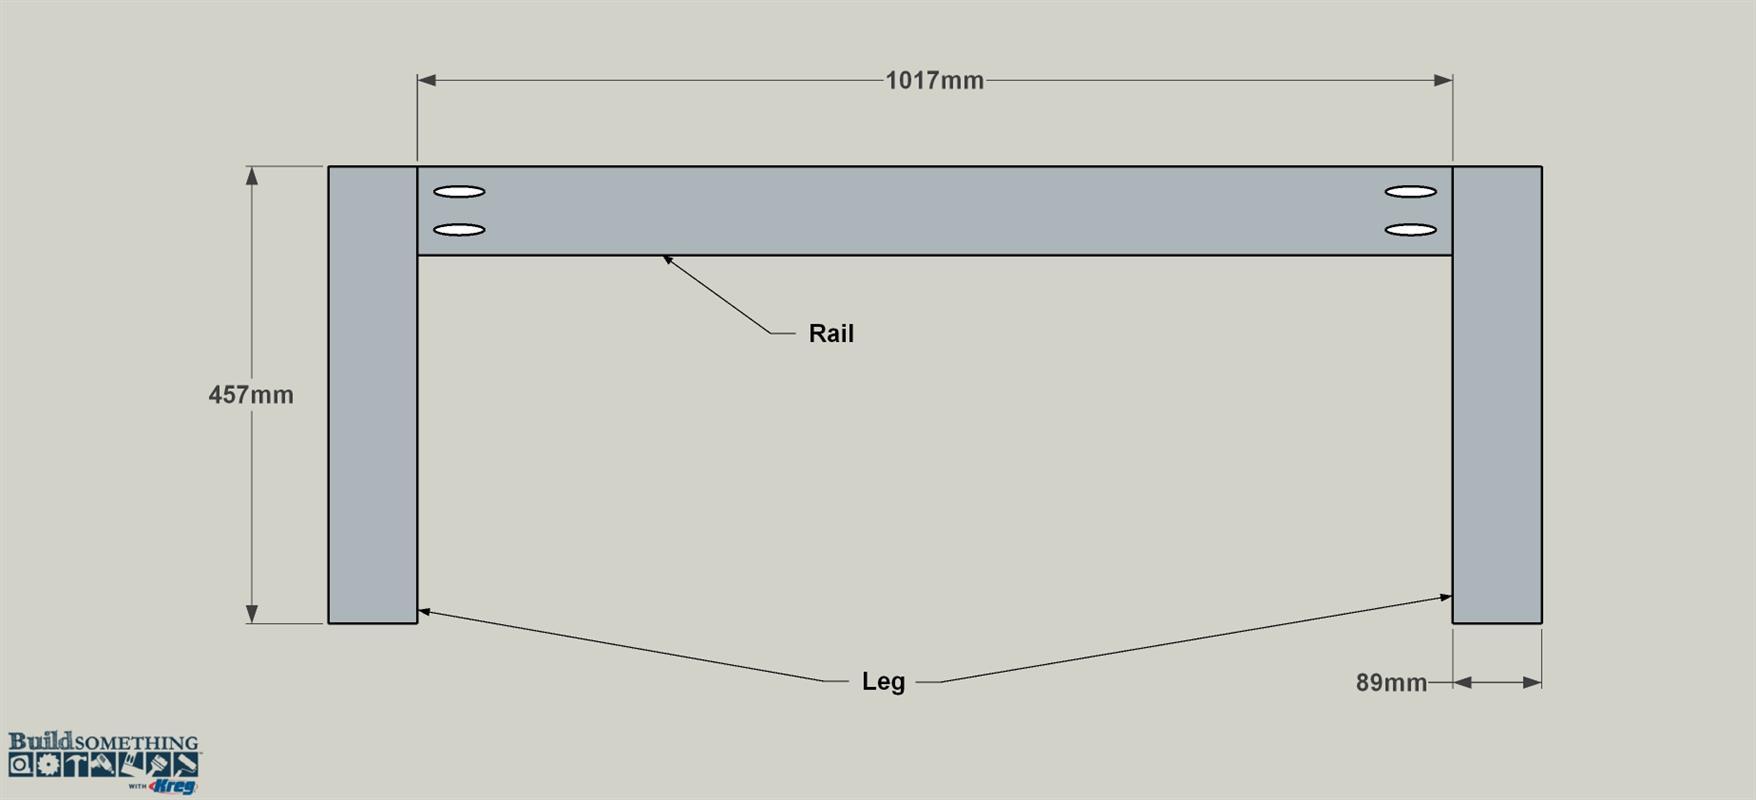
Create the Legs and Side Rail
Cut four Legs and two Side Rails to length from 19 x 89mm boards, as shown in the cutting diagram. Set your Kreg Jig for 19mm material, and then drill pocket holes in the ends of each of the Side Rails as shown.
-
Assemble the Side Frames
Position two Legs against one Side Rail, as shown, and attach the Legs using 32mm fine-thread Kreg screws to create a leg frame. Repeat this to create the other leg frame.
-
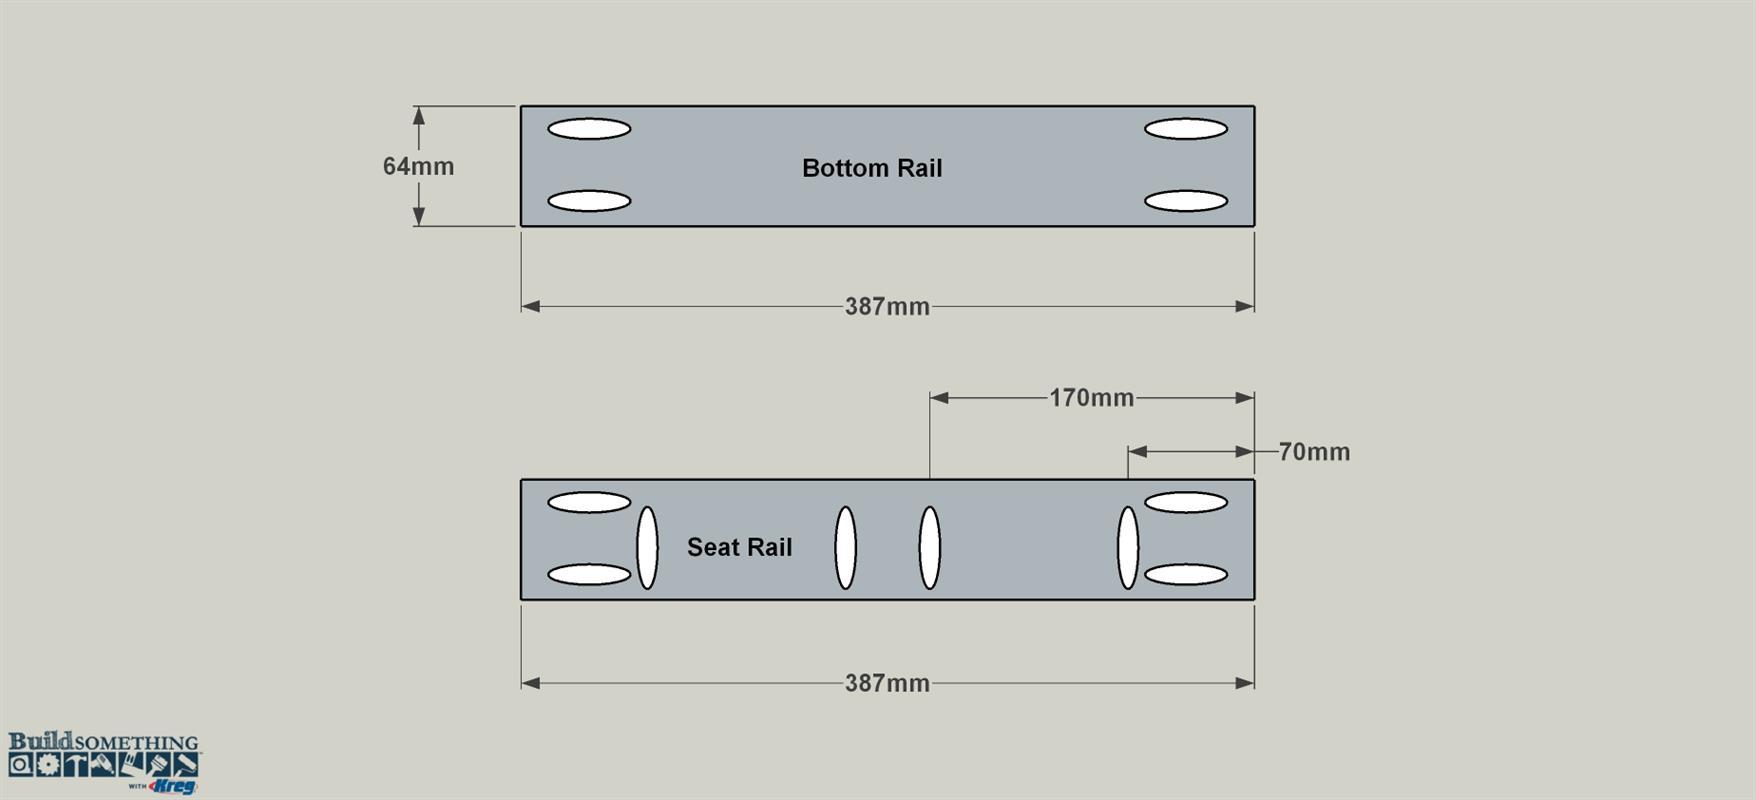
Make the Bottom and Seat Rails
Cut four Seat Rails, as well as two Bottom Rails to length from a 19 x 63mm board, as shown in the cutting diagram. Drill pocket screws into both ends of each Rail, and then set two aside. These will be Bottom Rails. In the remaining four rails, drill additional pocket screw holes along one edge, as shown. These will be Seat Rails.
-
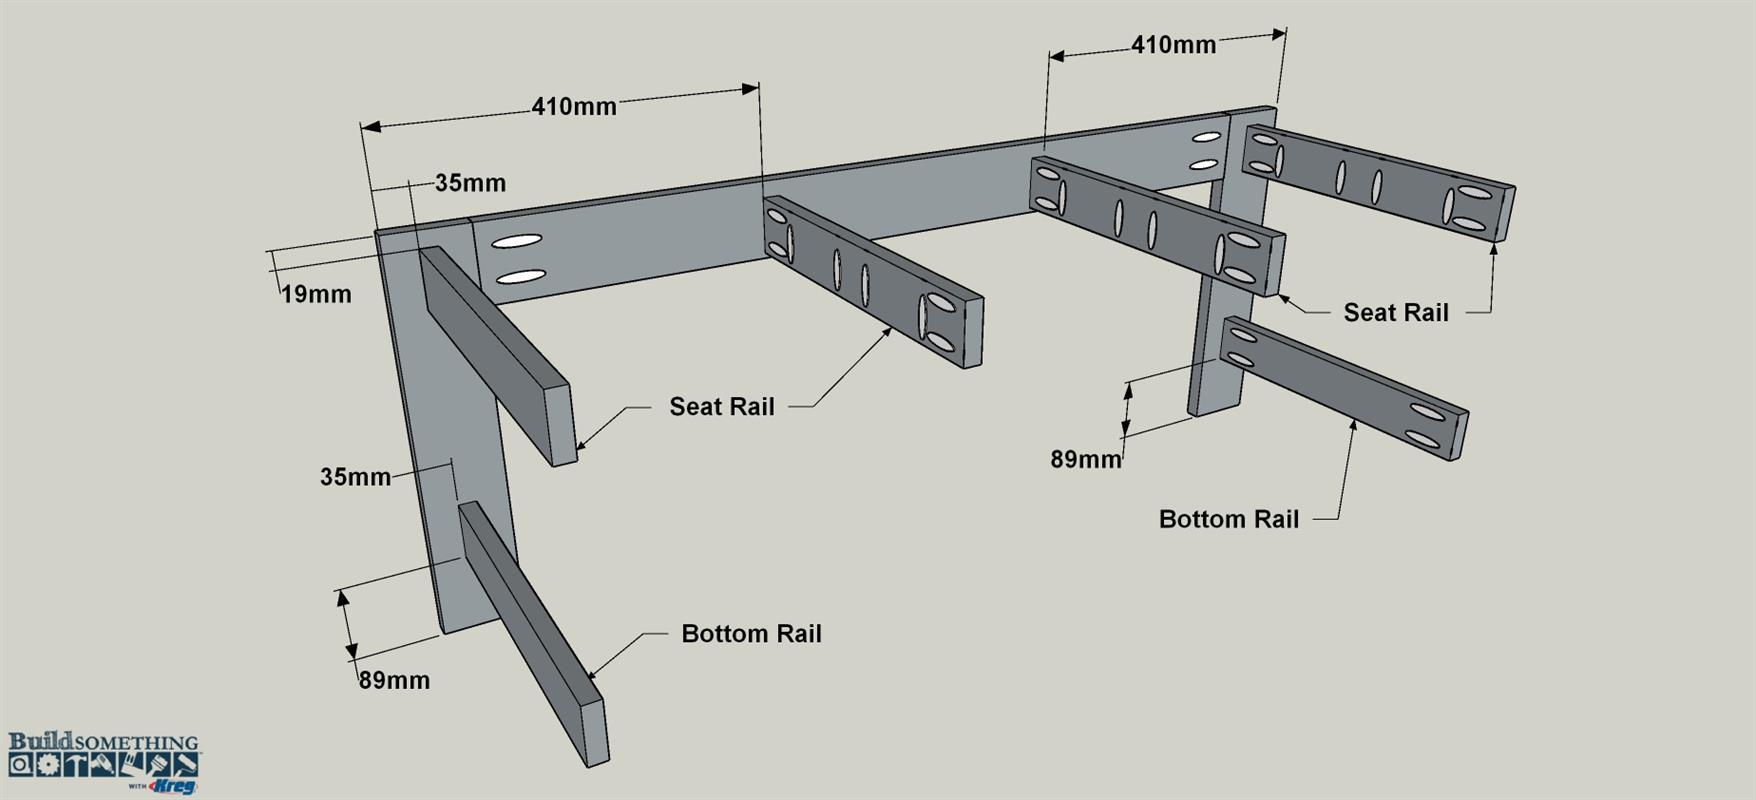
Start Bench Assembly
With a leg frame lying flat on a work surface, position and install the two bottom rails using 32mm fine-thread Kreg screws. Then position the Seat Rails, as shown. Make sure the pocket holes are oriented correctly for attaching the Seat Slats later. Then attach the Seat Rails using 32mm coarse-thread Kreg screws.
-
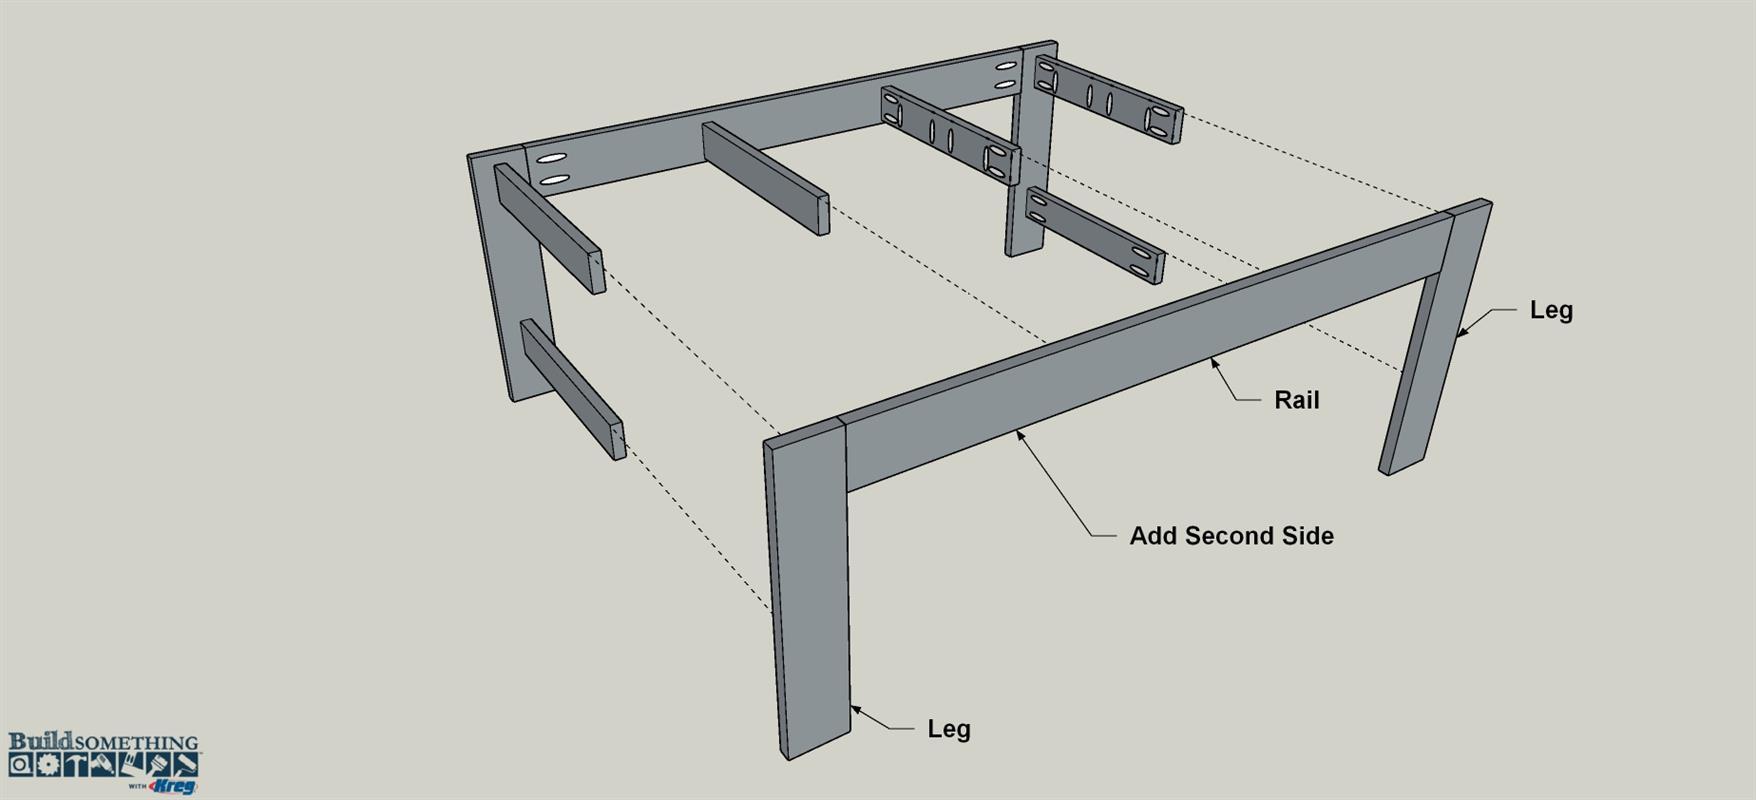
Add the Other Side Frame
Now position the assembly you just made on top of the second leg frame. Make sure everything is aligned, and then secure the assembly to the frame using 32mm fine-thread Kreg screws.
-
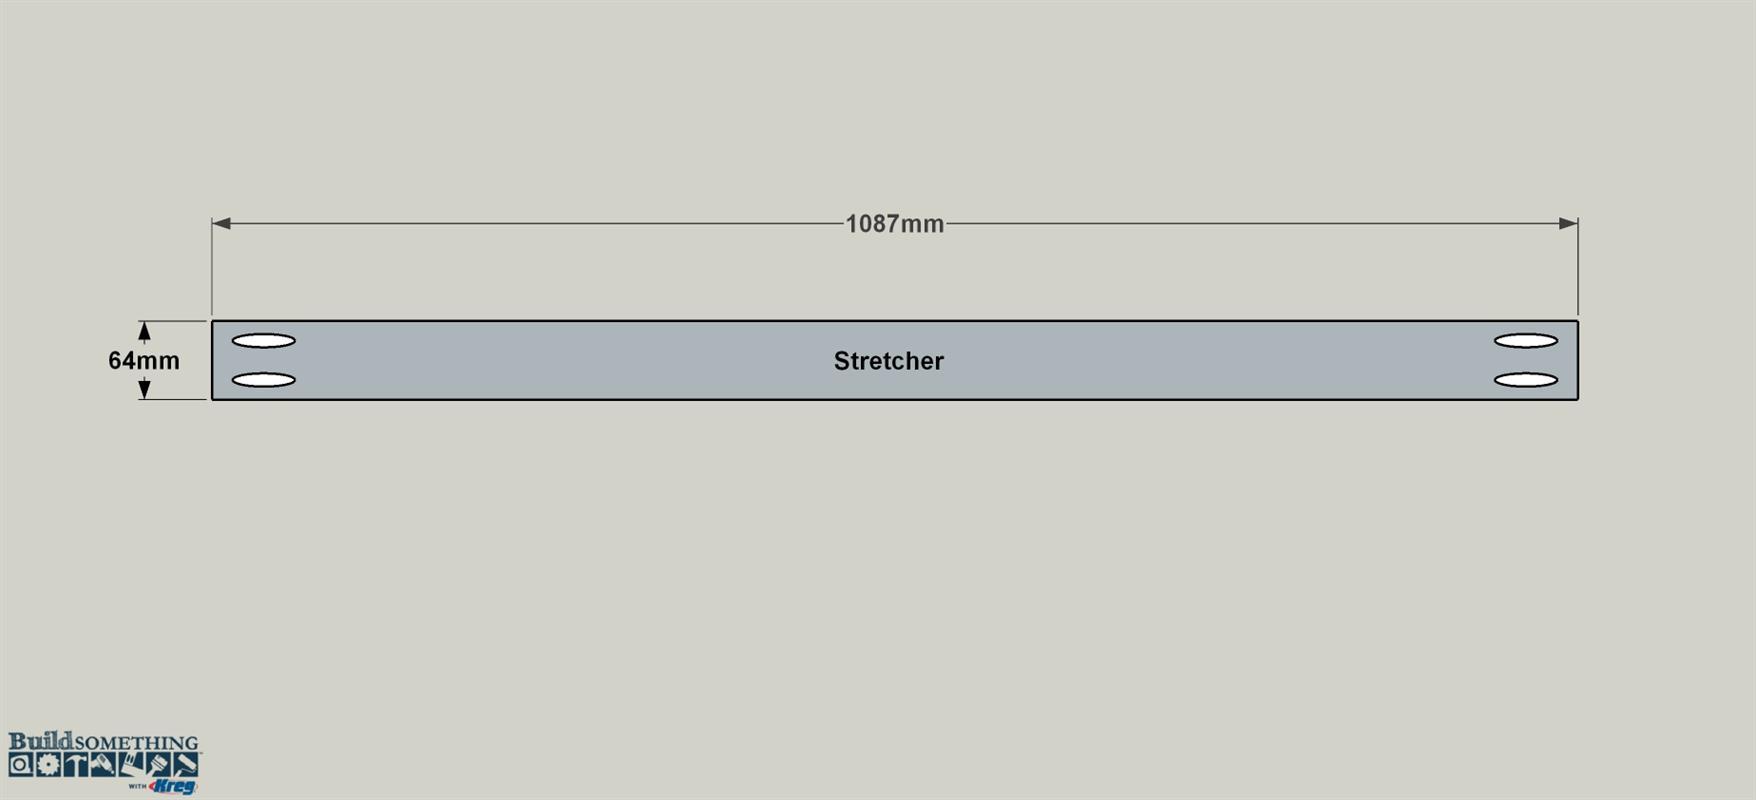
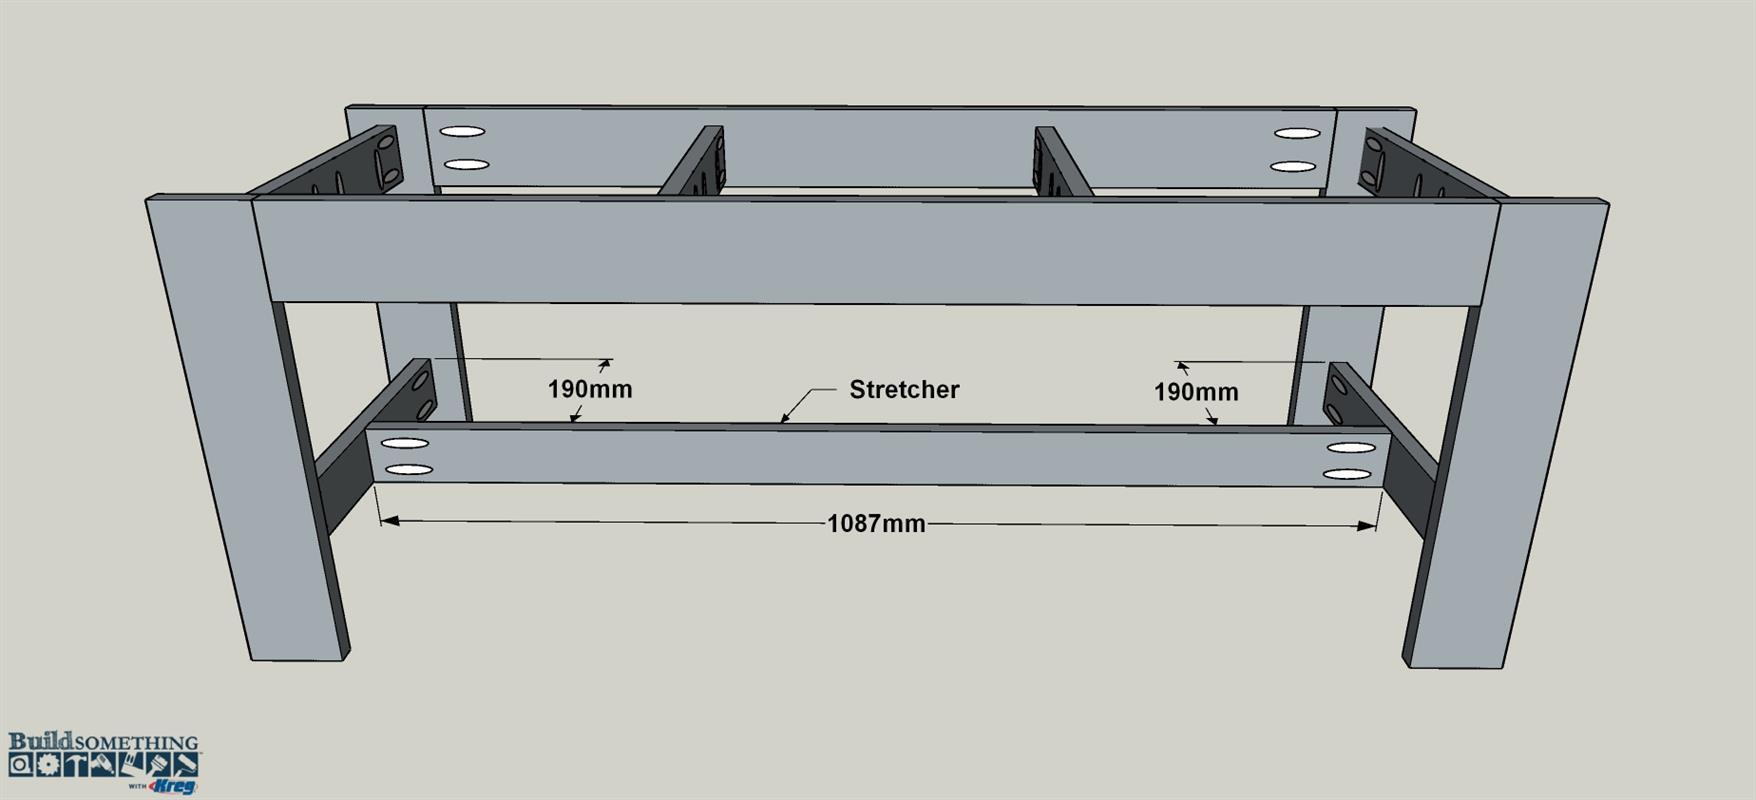
Add Support with a Stretcher
Cut one Bottom Stretcher to length from a 19 x 63mm board, as shown in the cutting diagram. Then drill pocket holes in both ends of the Bottom Stretcher, as shown.
-
Install the Stretcher
Set the bench base assembly upright on your work surface. Now position the Bottom Stretcher so it is centered on the length of the Bottom Rails. Secure the Stretcher using 32mm fine-thread Kreg screws. If you want to hide the pocket holes in the Bottom Stretcher and Bottom Rails, you can glue in pocket-hole plugs, and then sand them flush. The holes in the Seat Rails won’t show after the Seat Slats are installed.
-
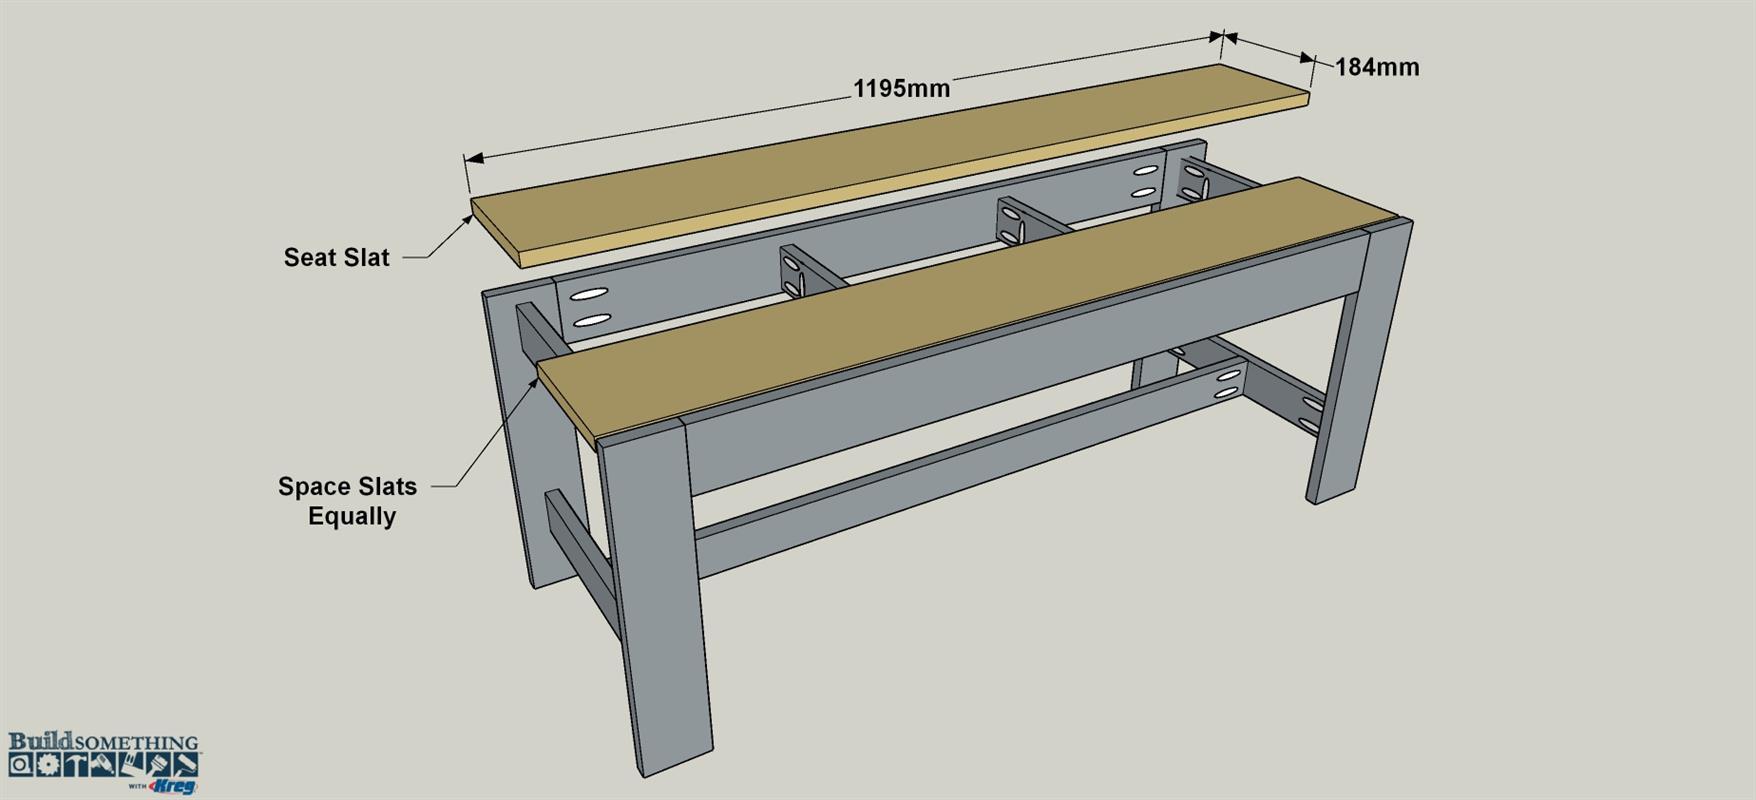
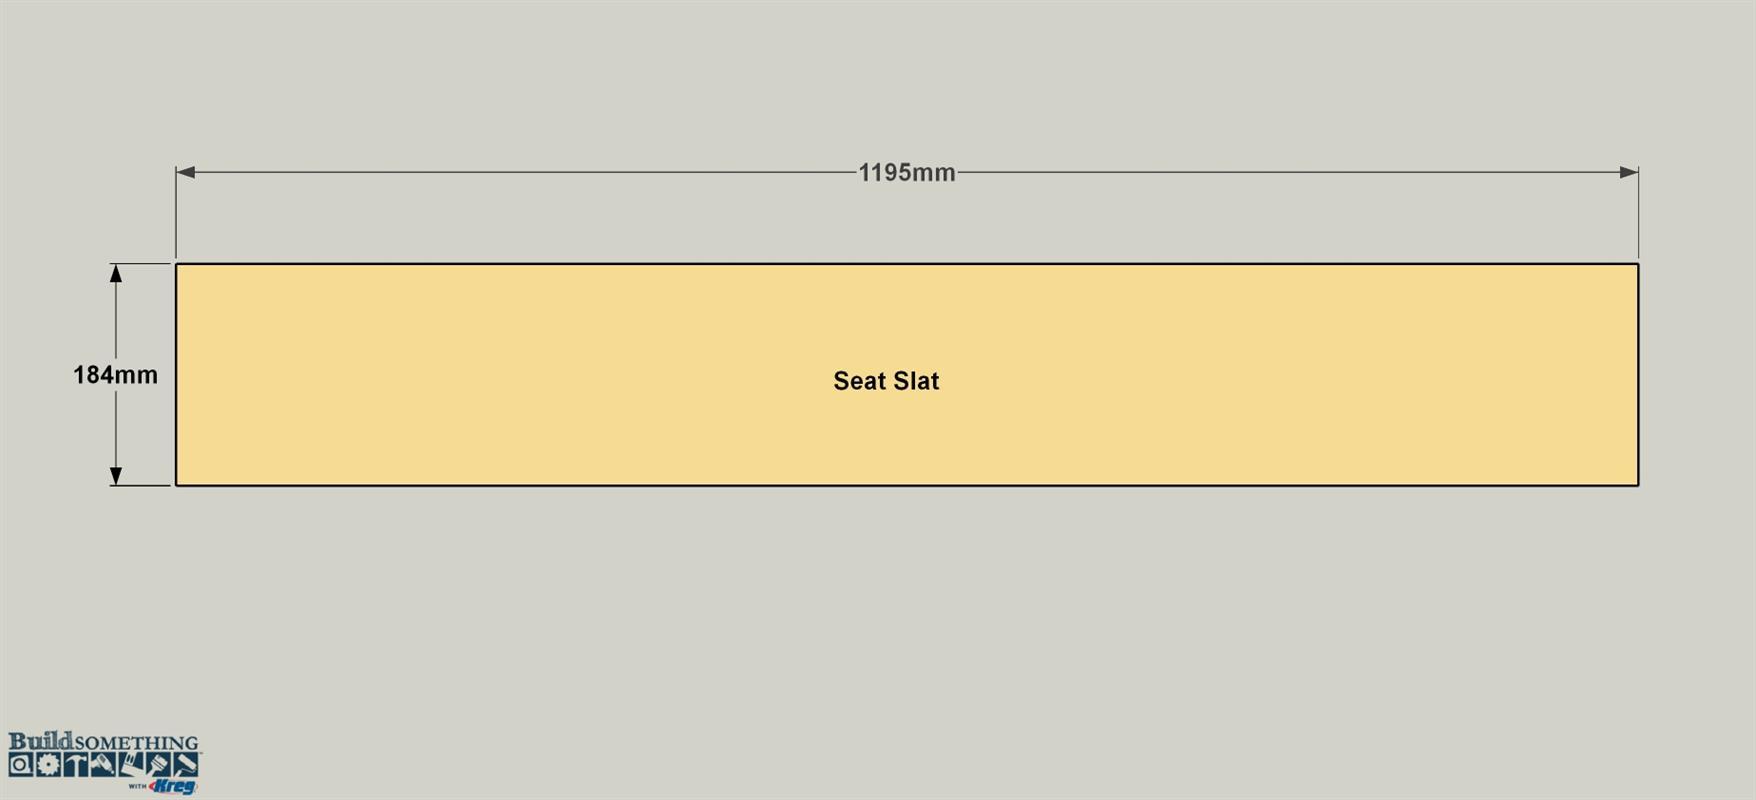
Cut the Seat Slats
Cut two seat slats to length from a 19 x 184mm board, as shown in the cutting diagram.
-
Finish, then Install the Seat Slats
Before you install the Seat Slats, it’s a good time to paint or finish the bench—especially if you plan to paint the base and clear-finish the slats, as we did. Once the paint/finish has dried, you can position the Seat Slats, as shown, so that all the gaps are consistent (approximately 6mm wide). Then attach the Slats to the bench base using 32mm fine-thread Kreg screws.