

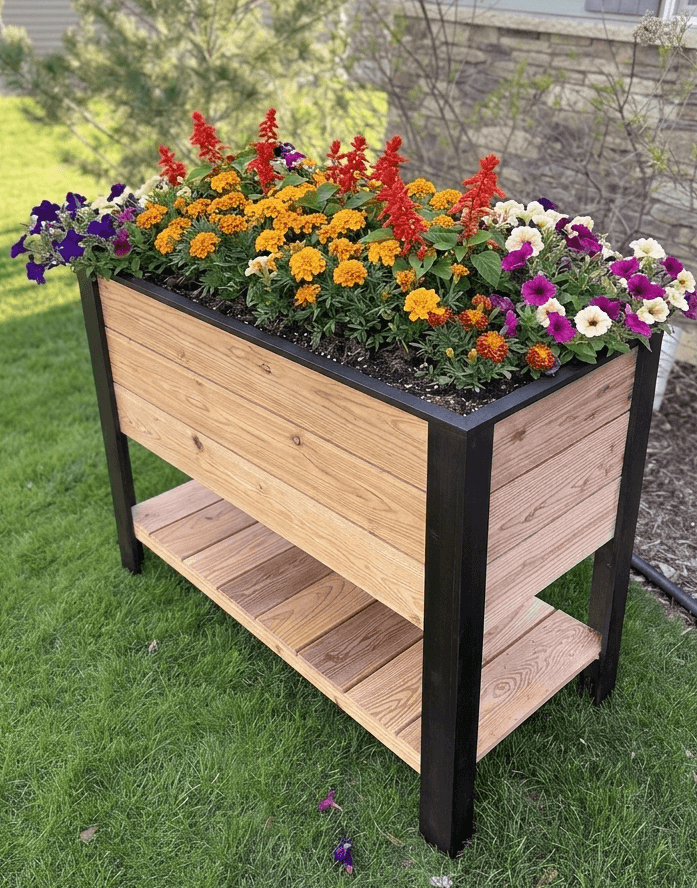
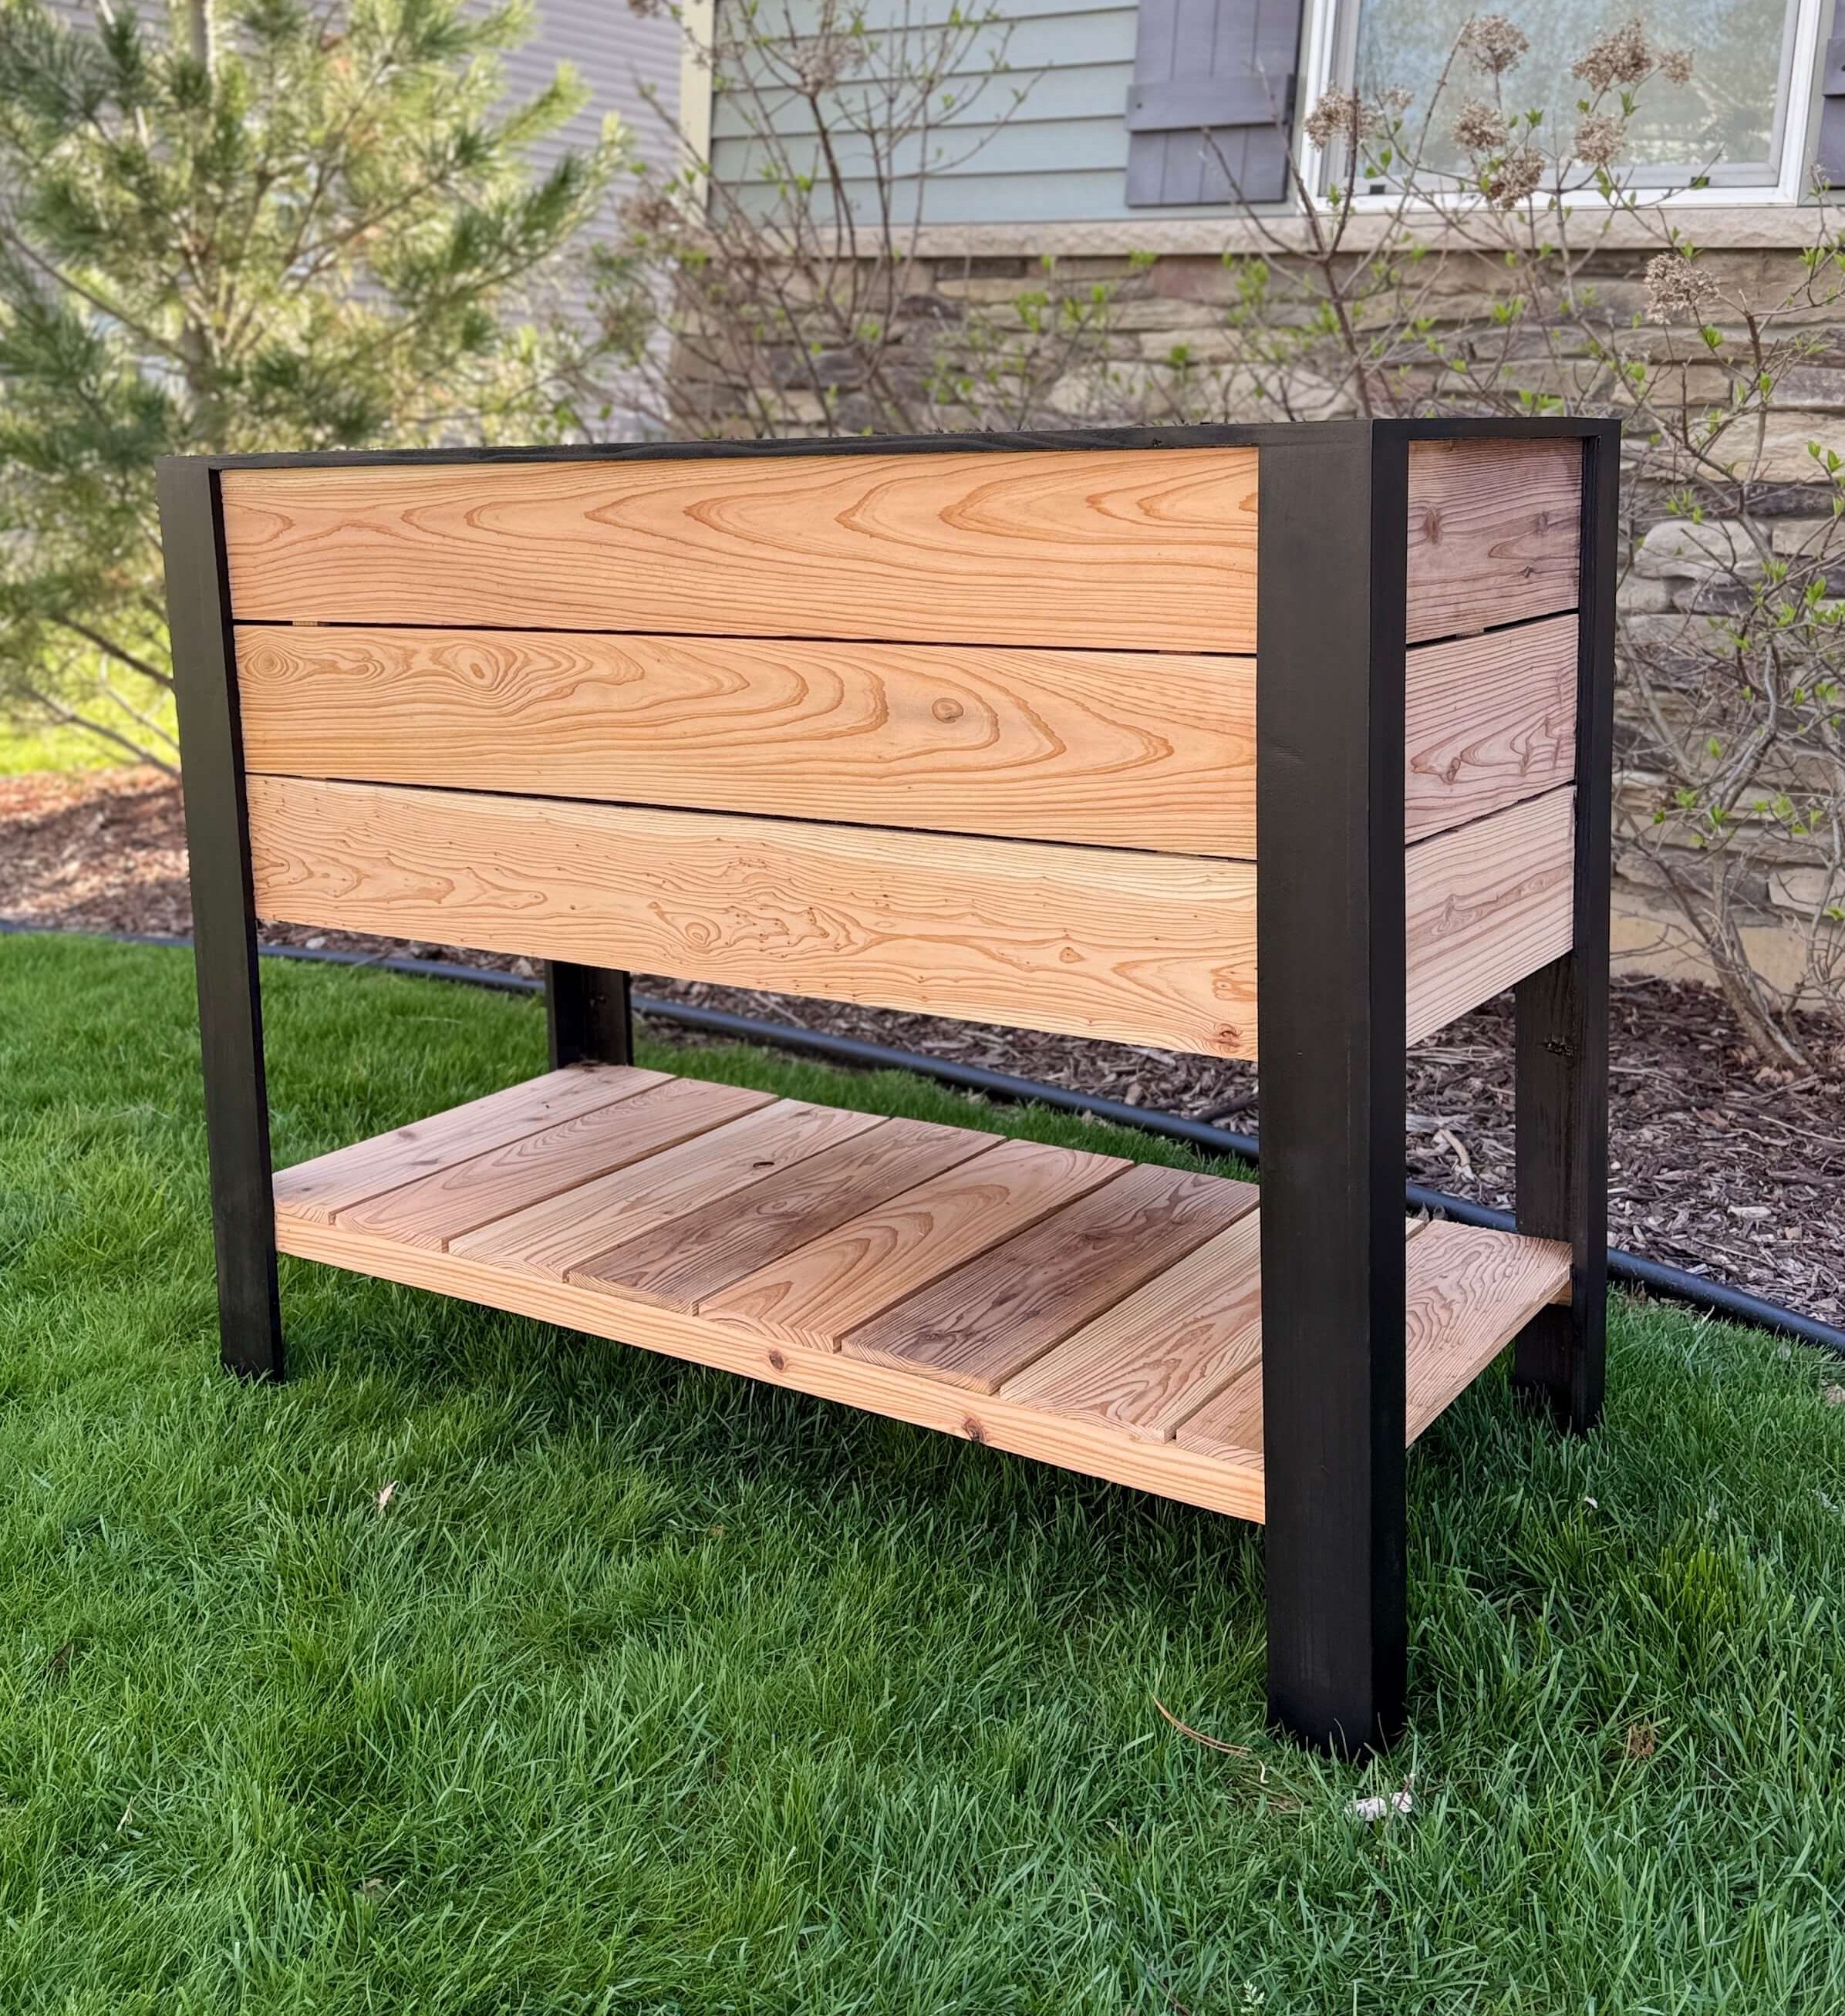


Upgrade your patio or garden with this simple DIY raised planter box tutorial! Designed specifically for beginners, this guide walks you through the materials list, basic cuts, and easy assembly. No advanced woodworking skills required to grow your own veggies or flowers this season.
Tools
Kreg Tools


Other Tools
-
Miter saw

-
Nail gun
Materials
Wood Products
- 4 1 x 3 x 8' cedar , 3/4" x 2.5" x 96"
- 13 1 x 6 x 7' cedar picket , 5/8" x 5.5" x 72"
- 6 1 x 2 x 8' cedar , 3/4" x 1.5" x 96"
Hardware & Supplies
- 50 1 1/4" exterior screw
- 1 Titebond 3 wood glue (safe for outdoors)
- 1 Black paint
- 1 Thompsons waterseal spray
- 50 1 1/4" exterior pocket screw
- 50 1 1/4" brad nails
- 1 Exterior wood filler
- 1 Cloth or plastic garden bed liner
- 100 Heavy duty staple
- 1 Staple gun
Directions
-
1
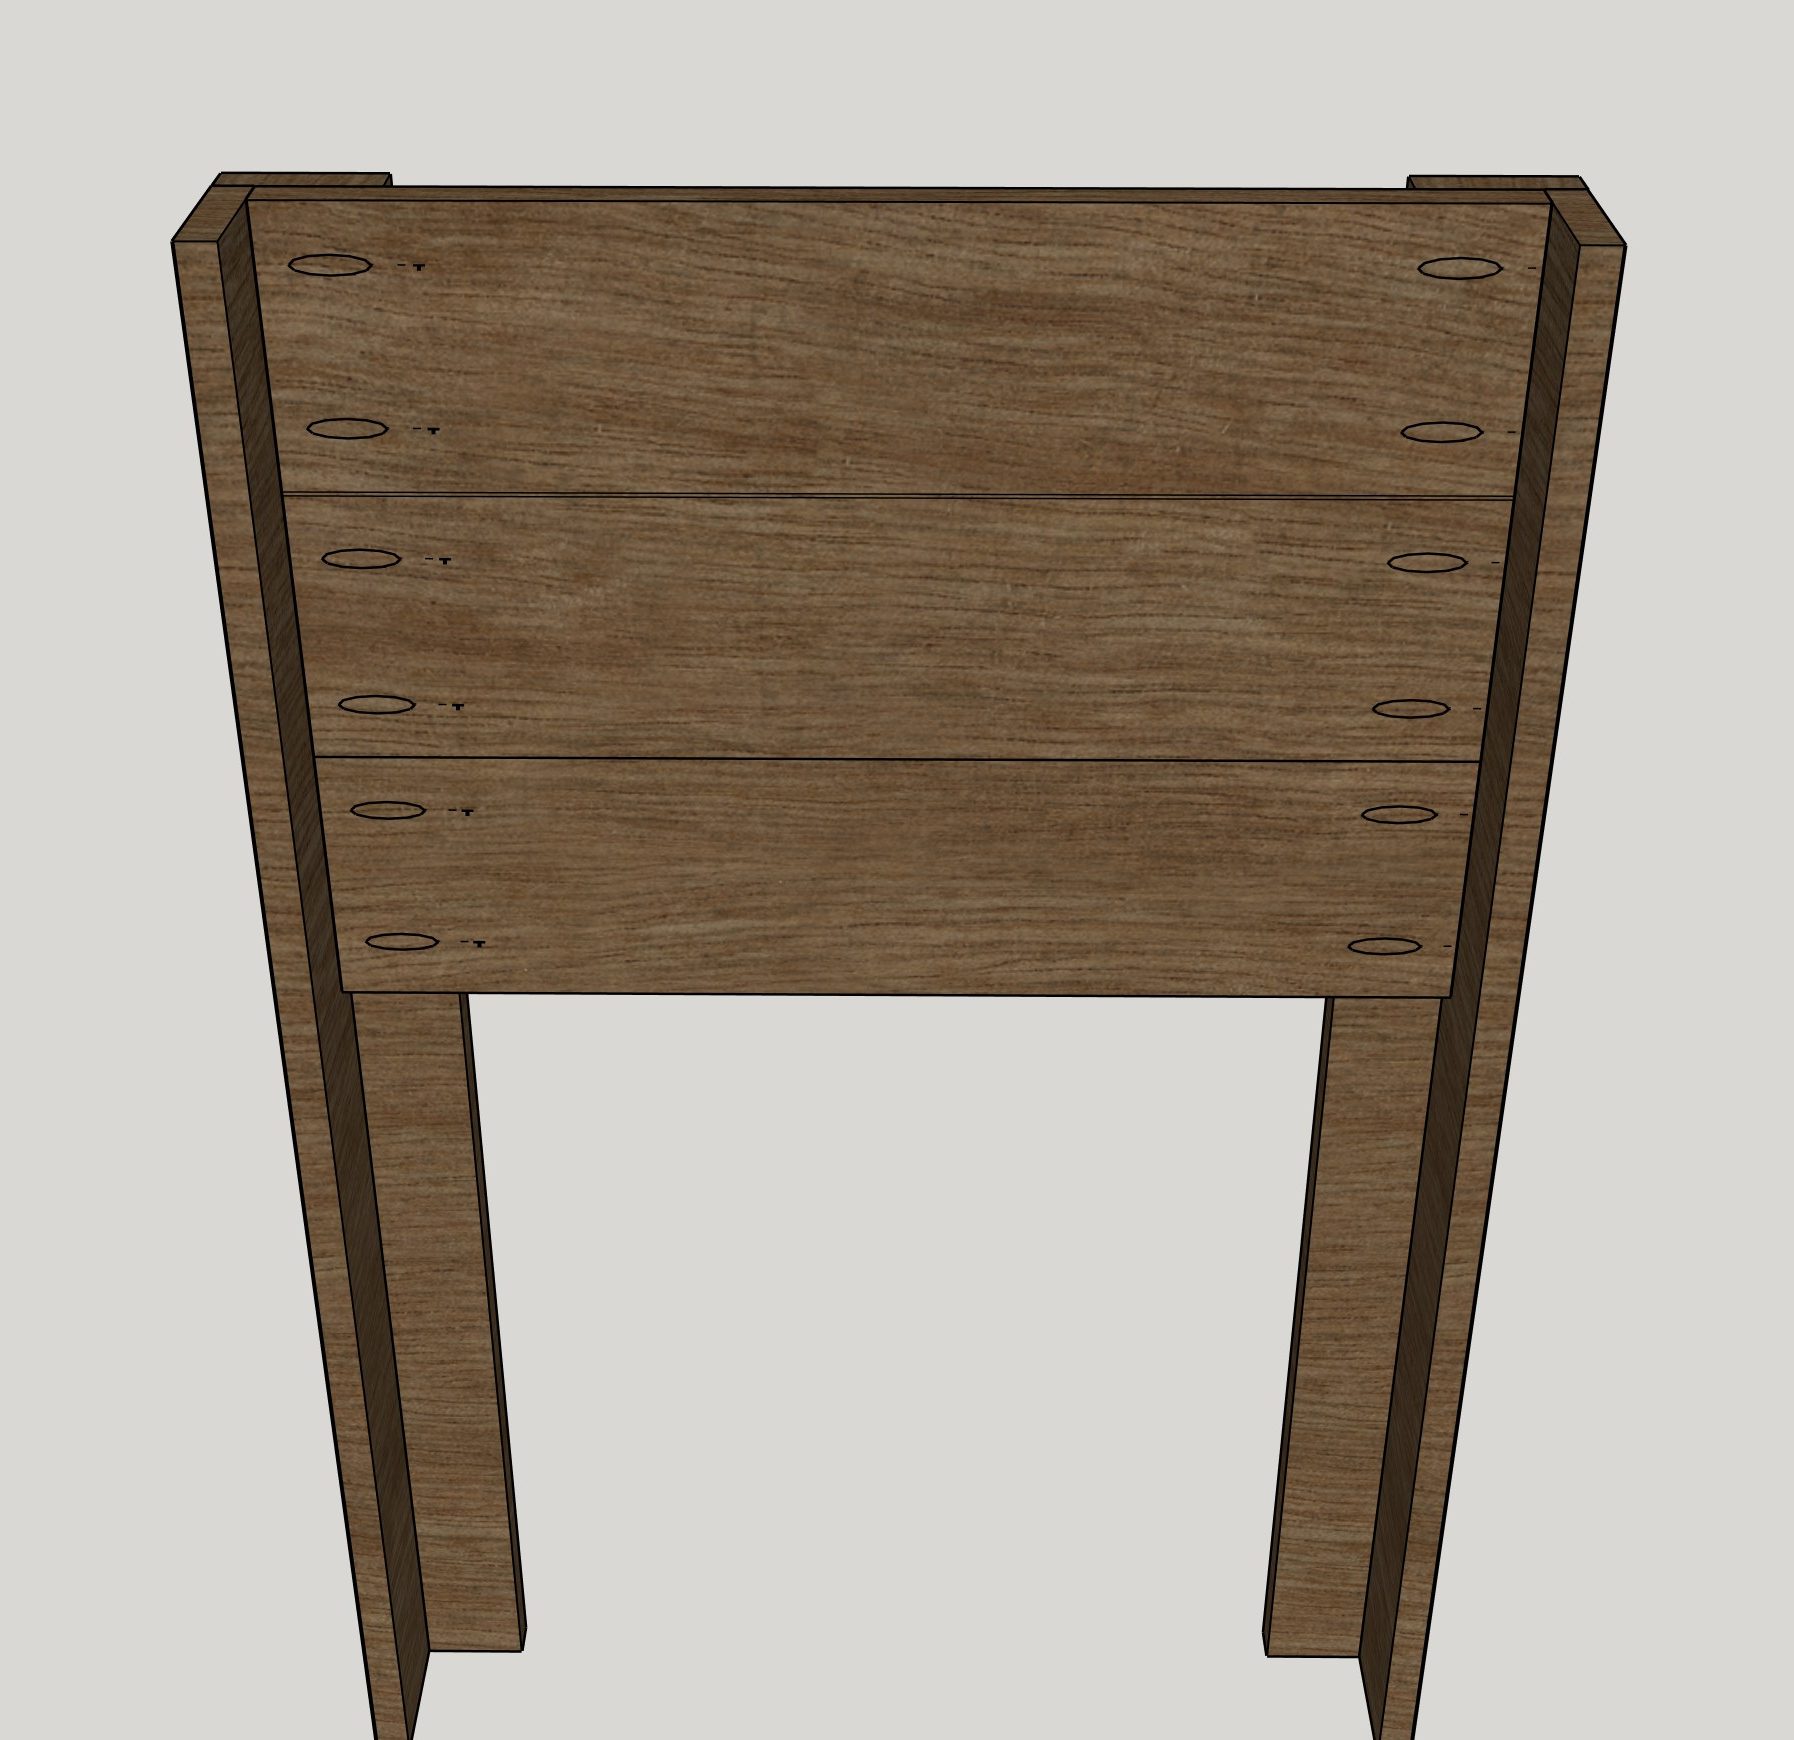
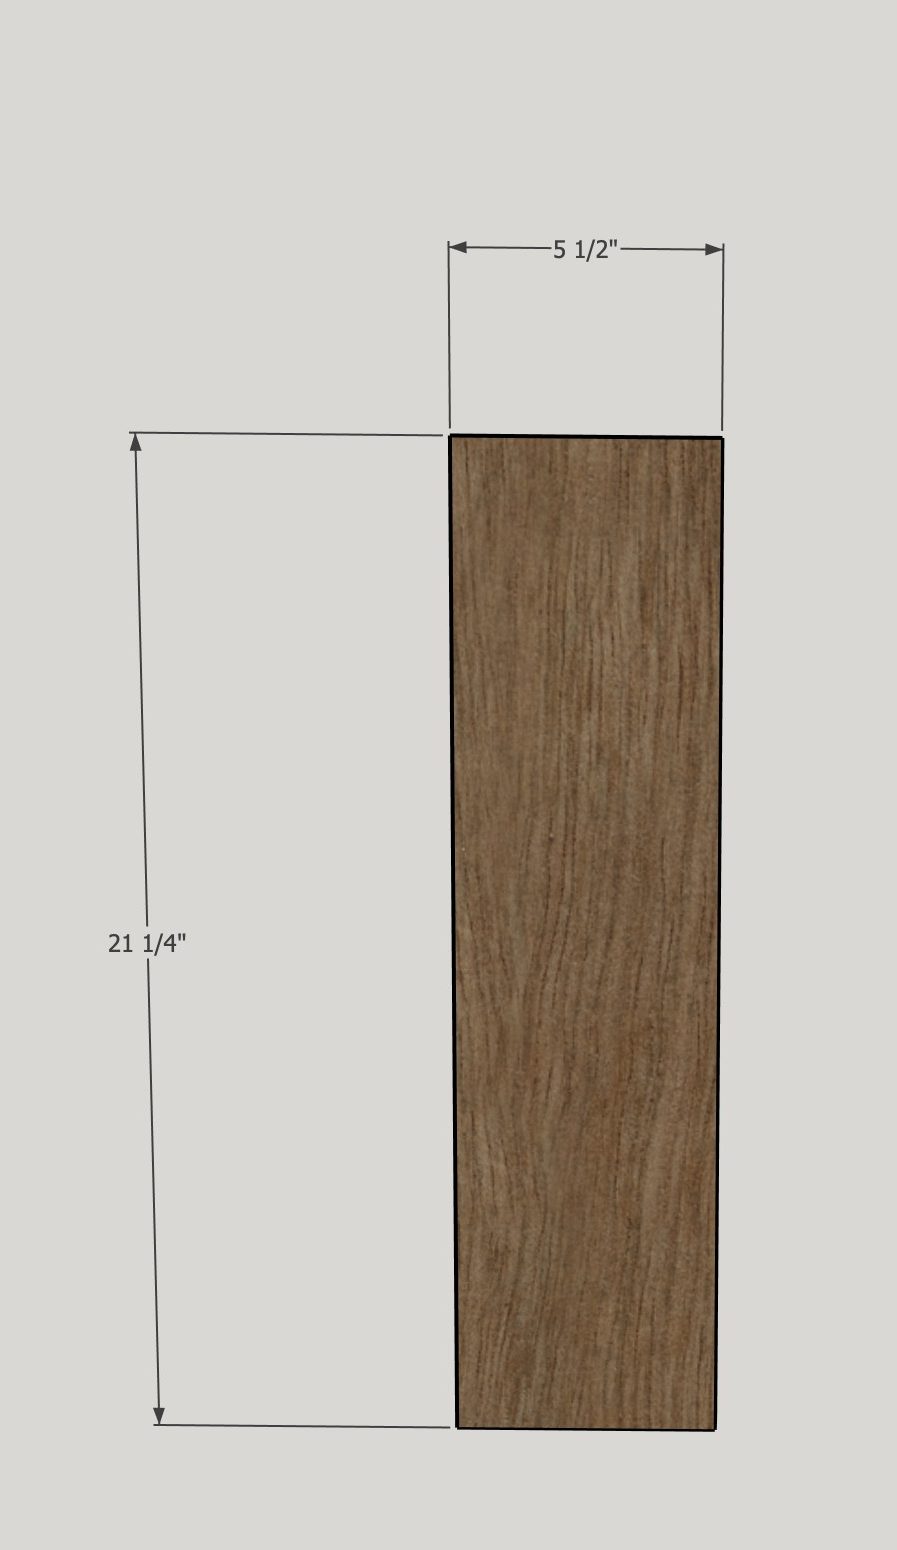
Cut the legs to size using the 1x3 cedar boards.

-
2
Drill pocket hole on 4 of the leg boards, then screw the legs together as shown in the picture using 1 1/4" pocket screws and wood glue.

-
3
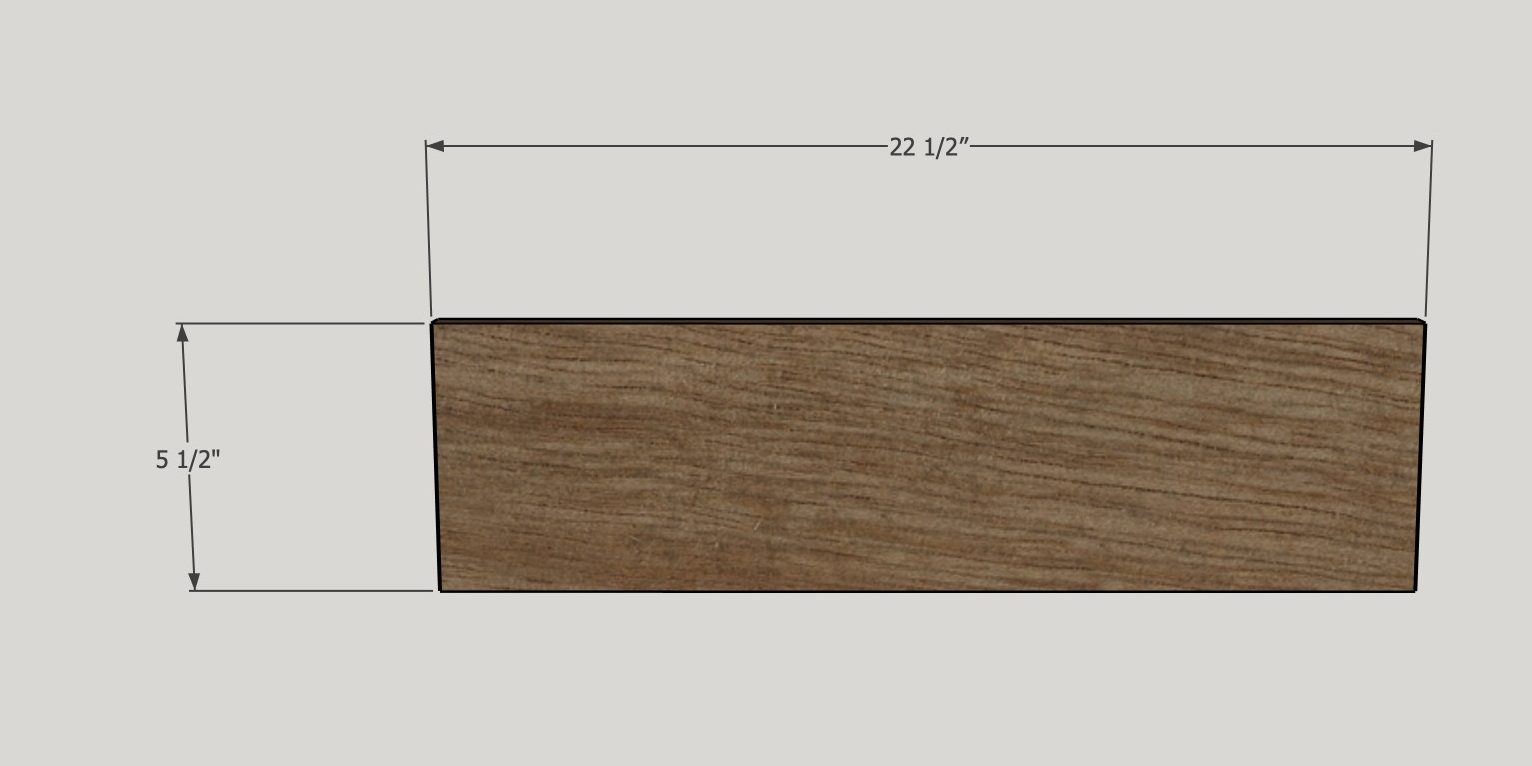
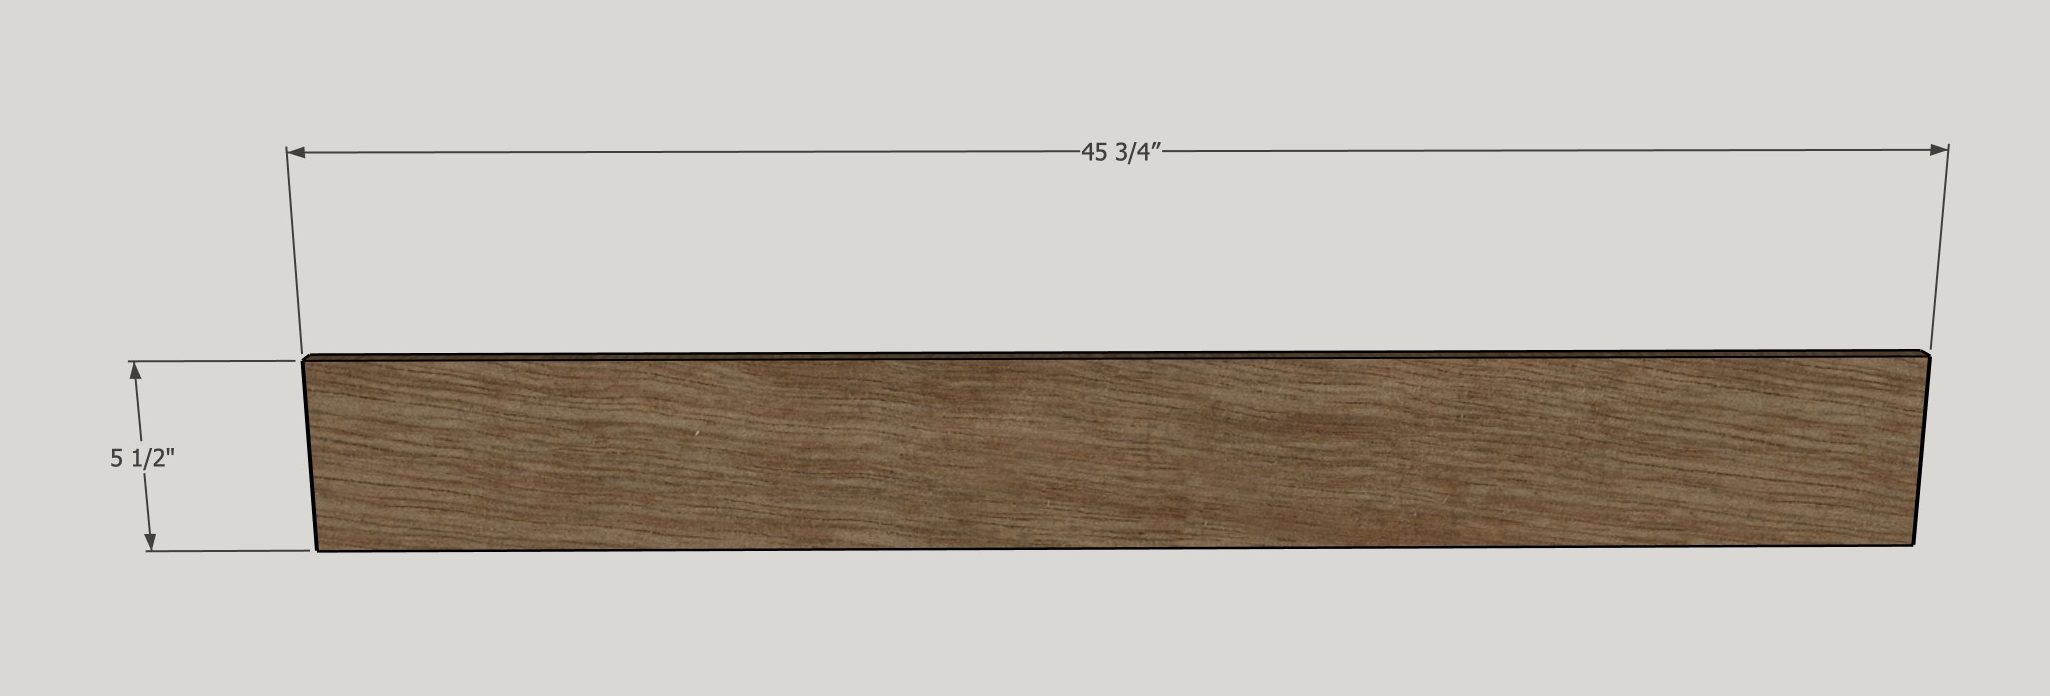
Cut the side planks to size.
-
4
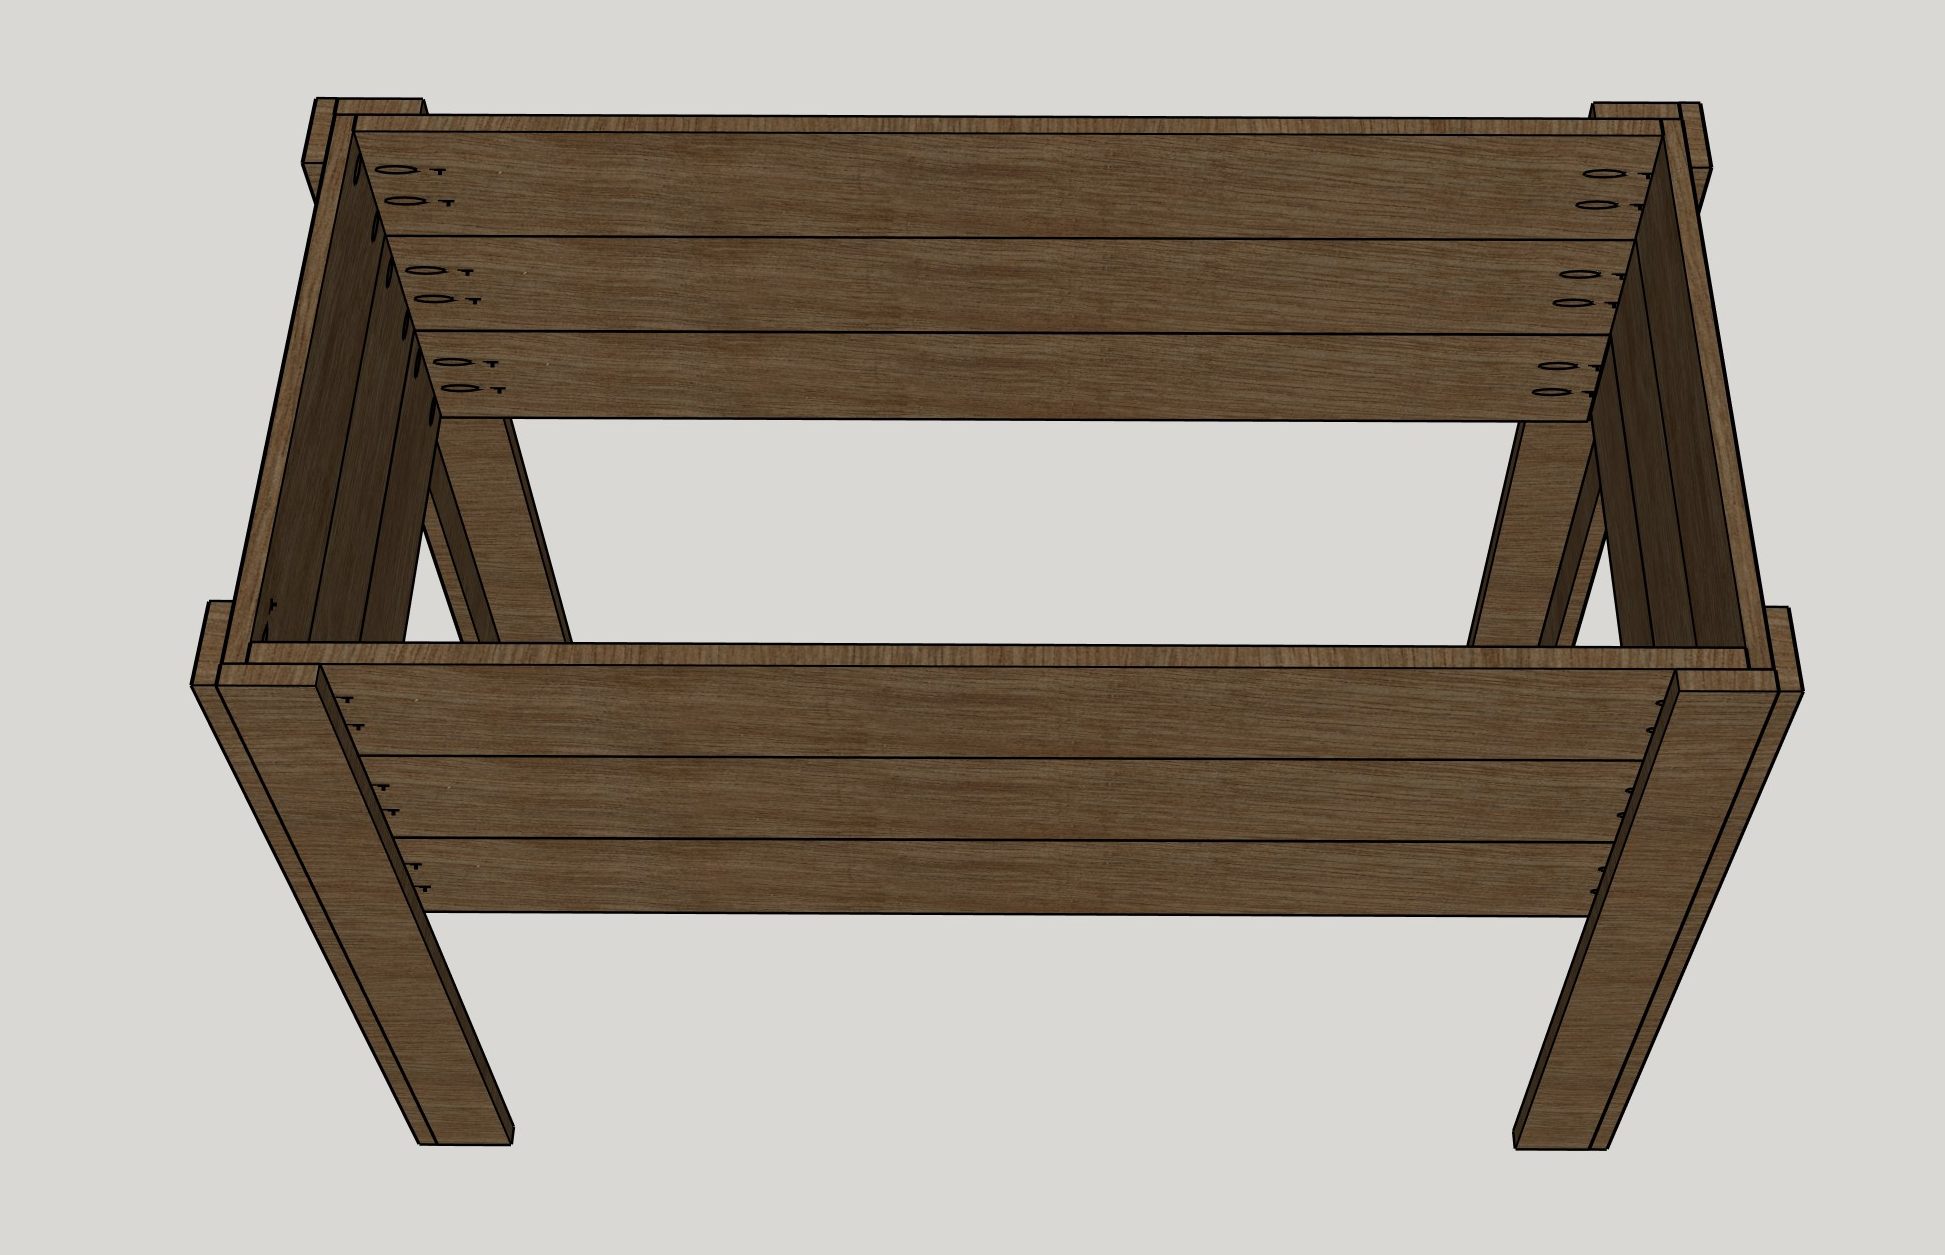
Attach sides to legs with 1 1/4" pocket screws and wood glue. Put 1/4" space between each board using a piece of 1/4" plywood.
-
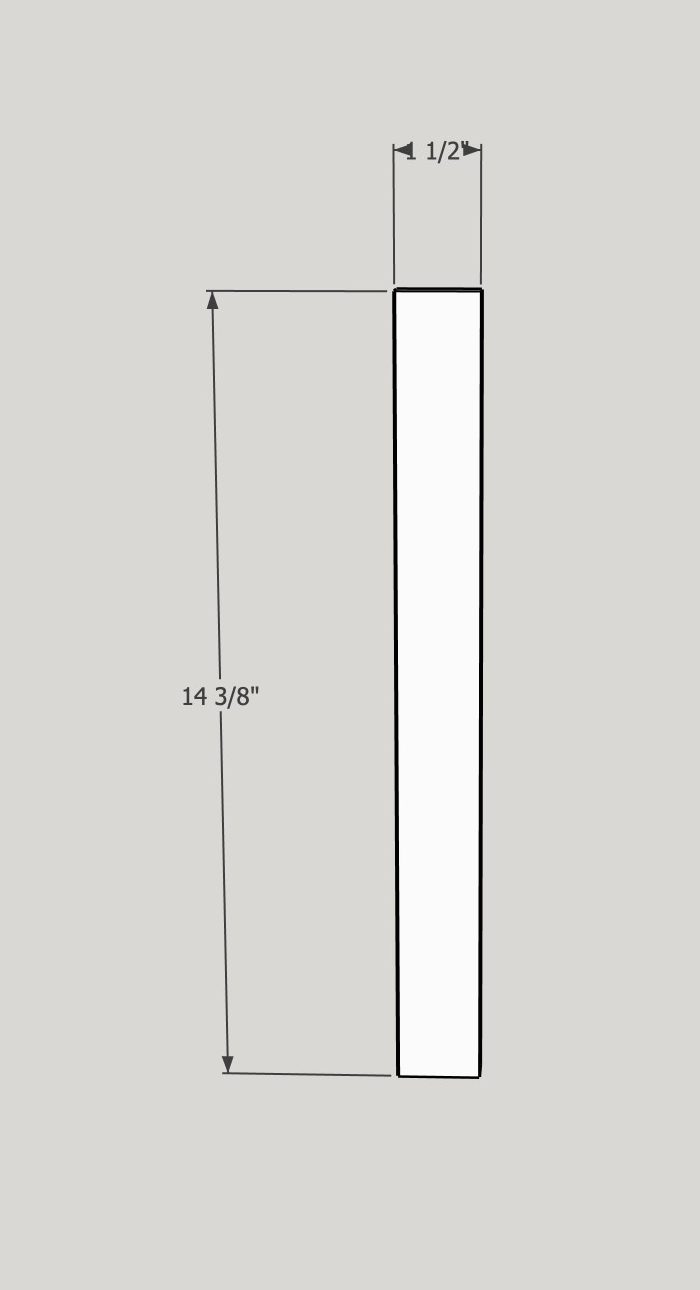
5
Cut the front planks to size.
-
6
Attach the front planks to the sides with 1 1/4" pocket screws and wood glue. Make sure the pocket screws aren't hitting the pocket screws on the side planks.
-
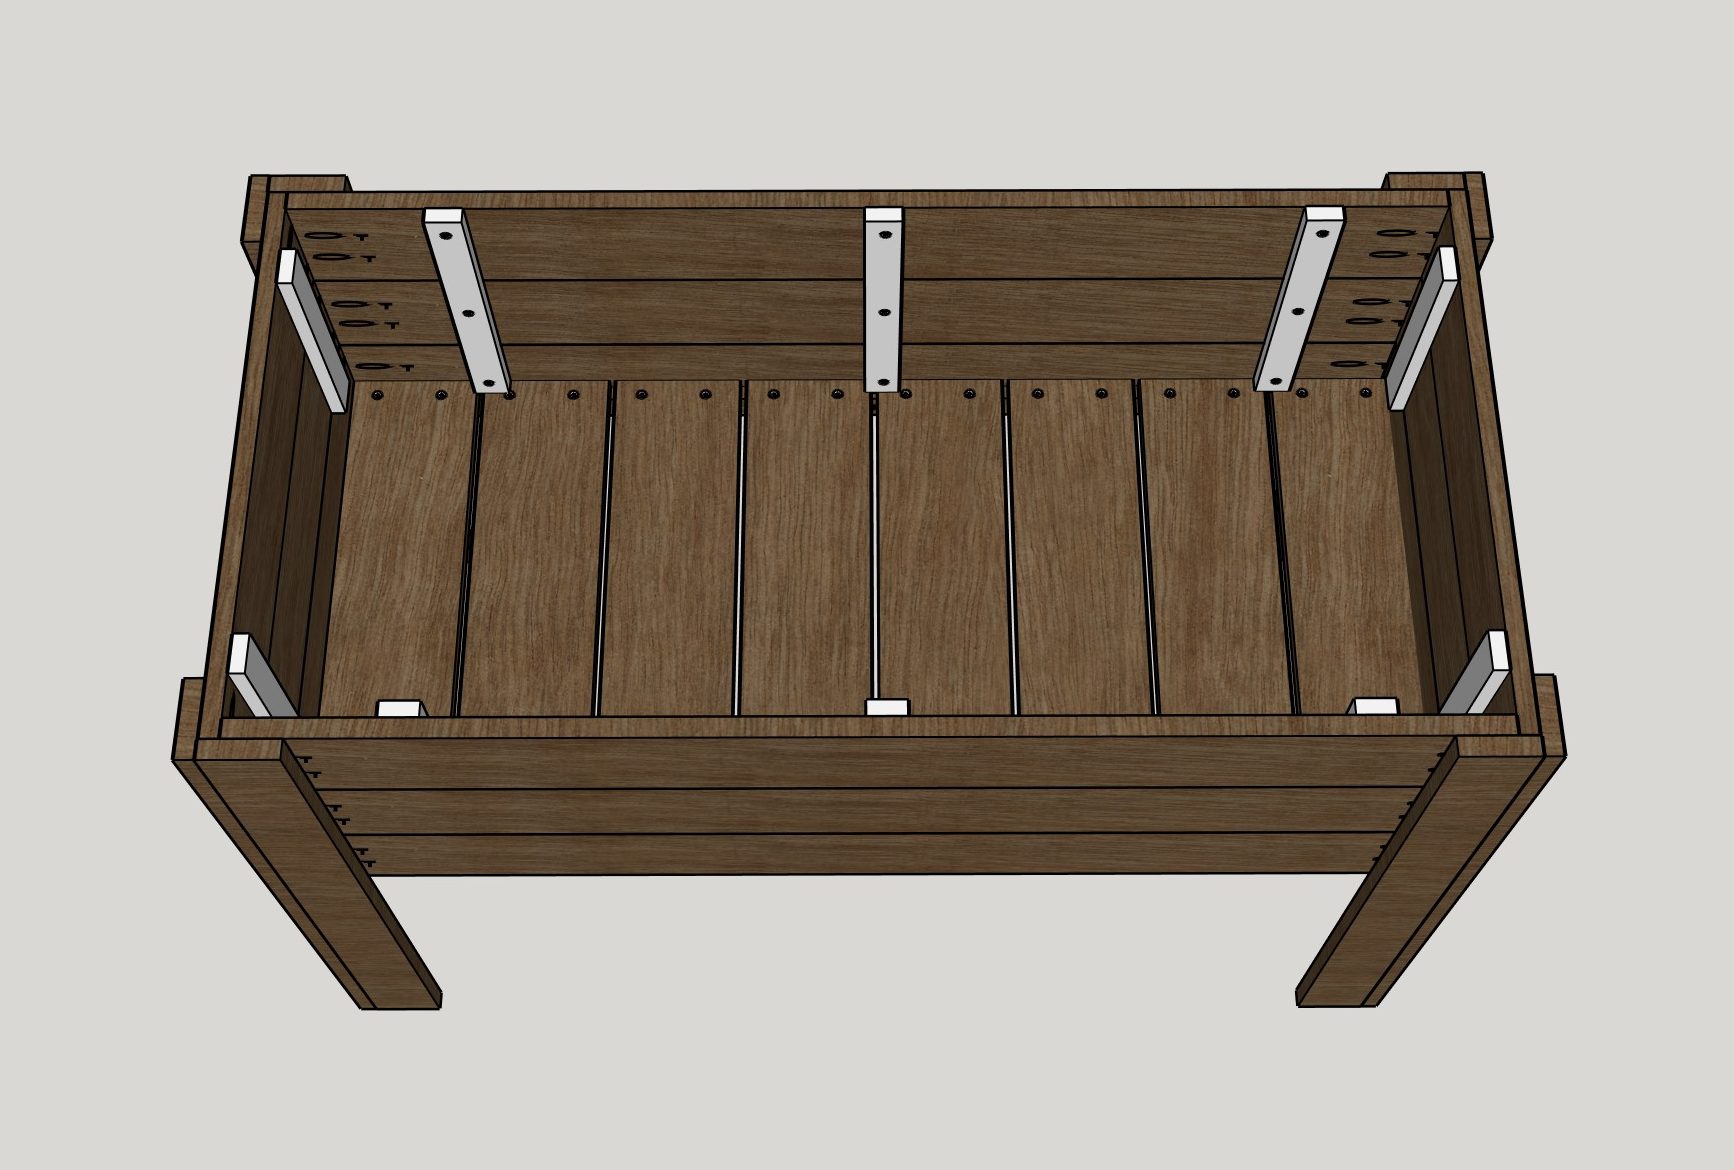
7
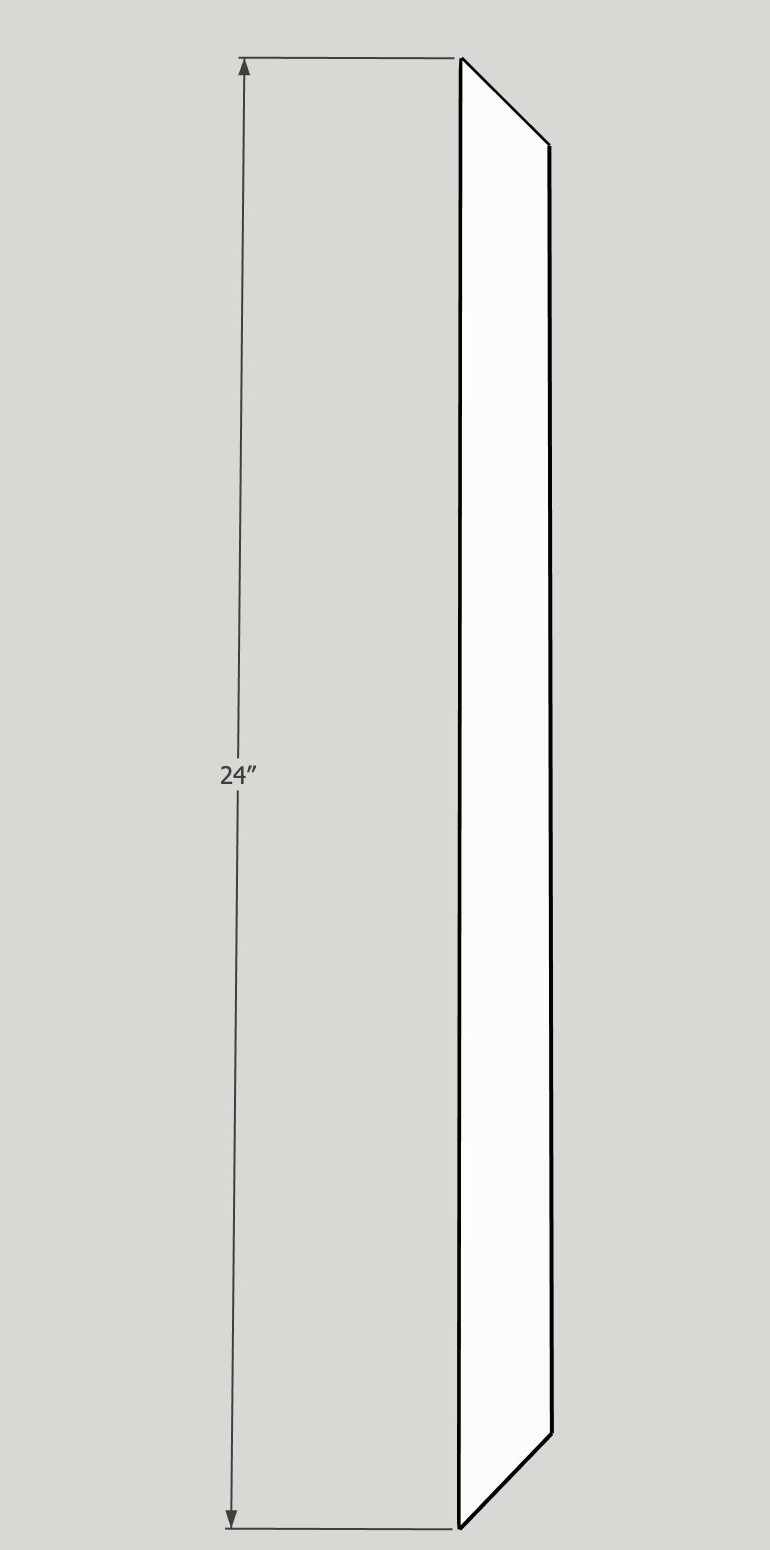
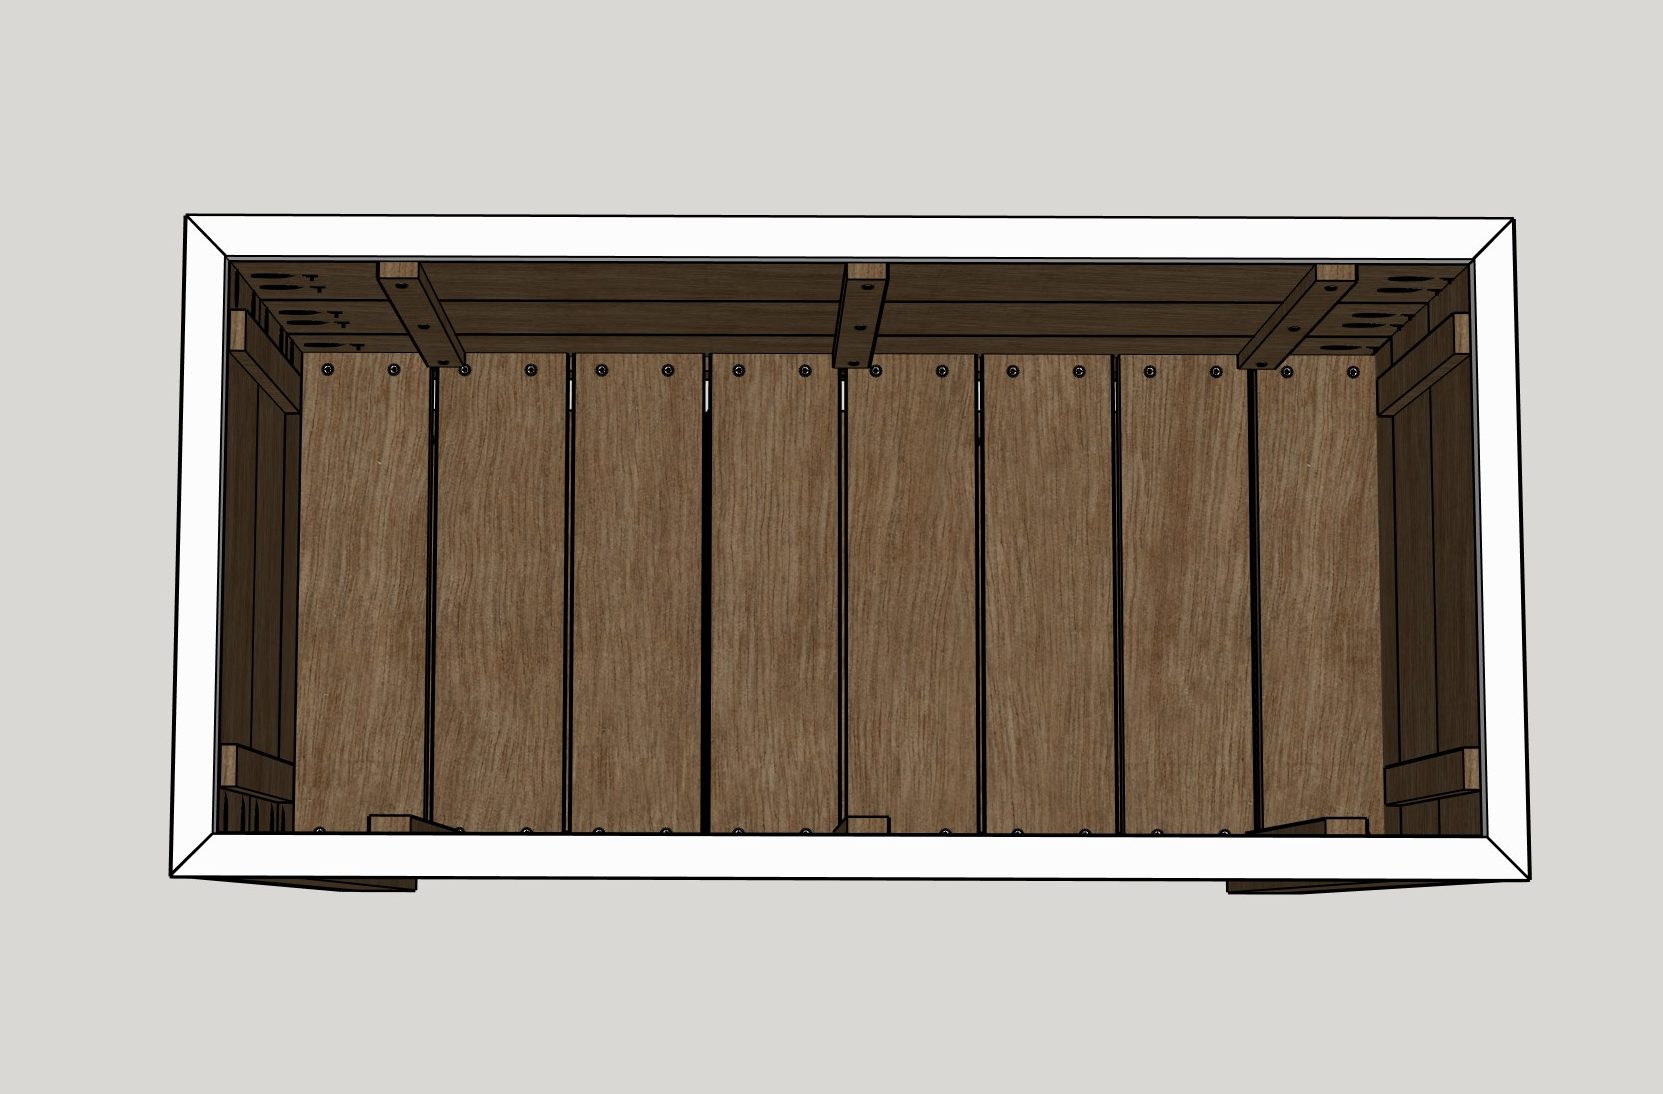
Cut the planter box shelf supports to size and screw and glue them into the bottom of the inside of the planter box using 1 1/4" exterior wood screws.
-
8
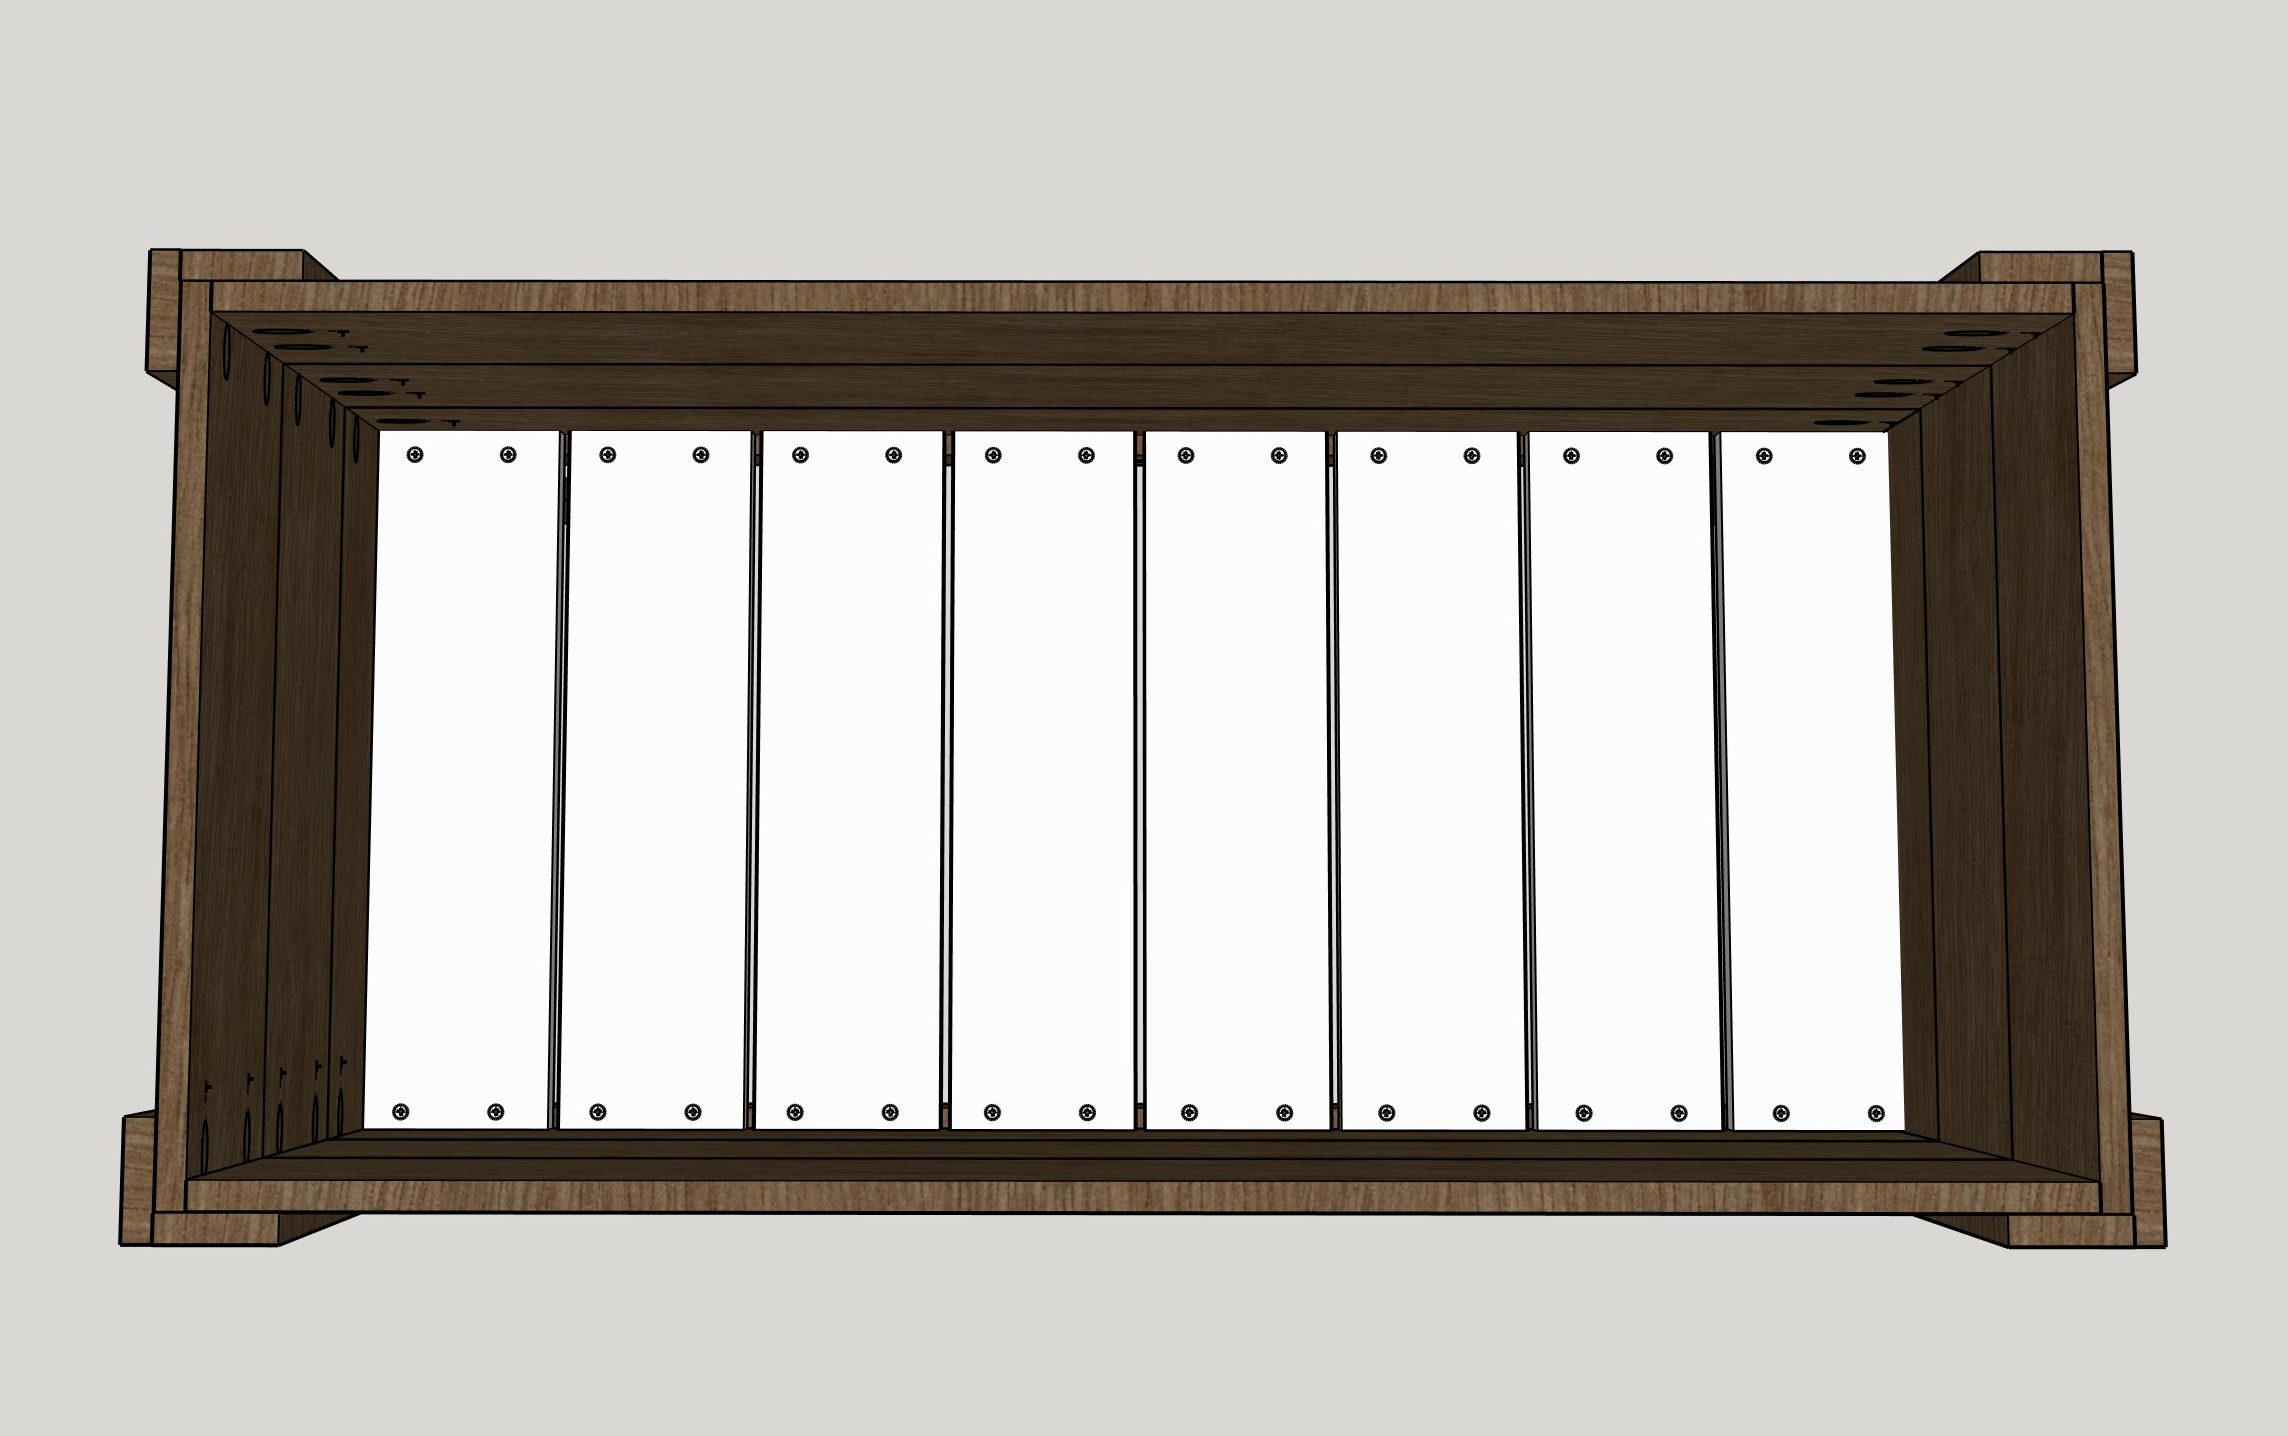
Cut the top shelf slats to size.
-
9
Screw the slats into the slat supports using 1 1/4" wood screws or 1 1/4" nails with a nail gun. Space them evenly apart.
-
10
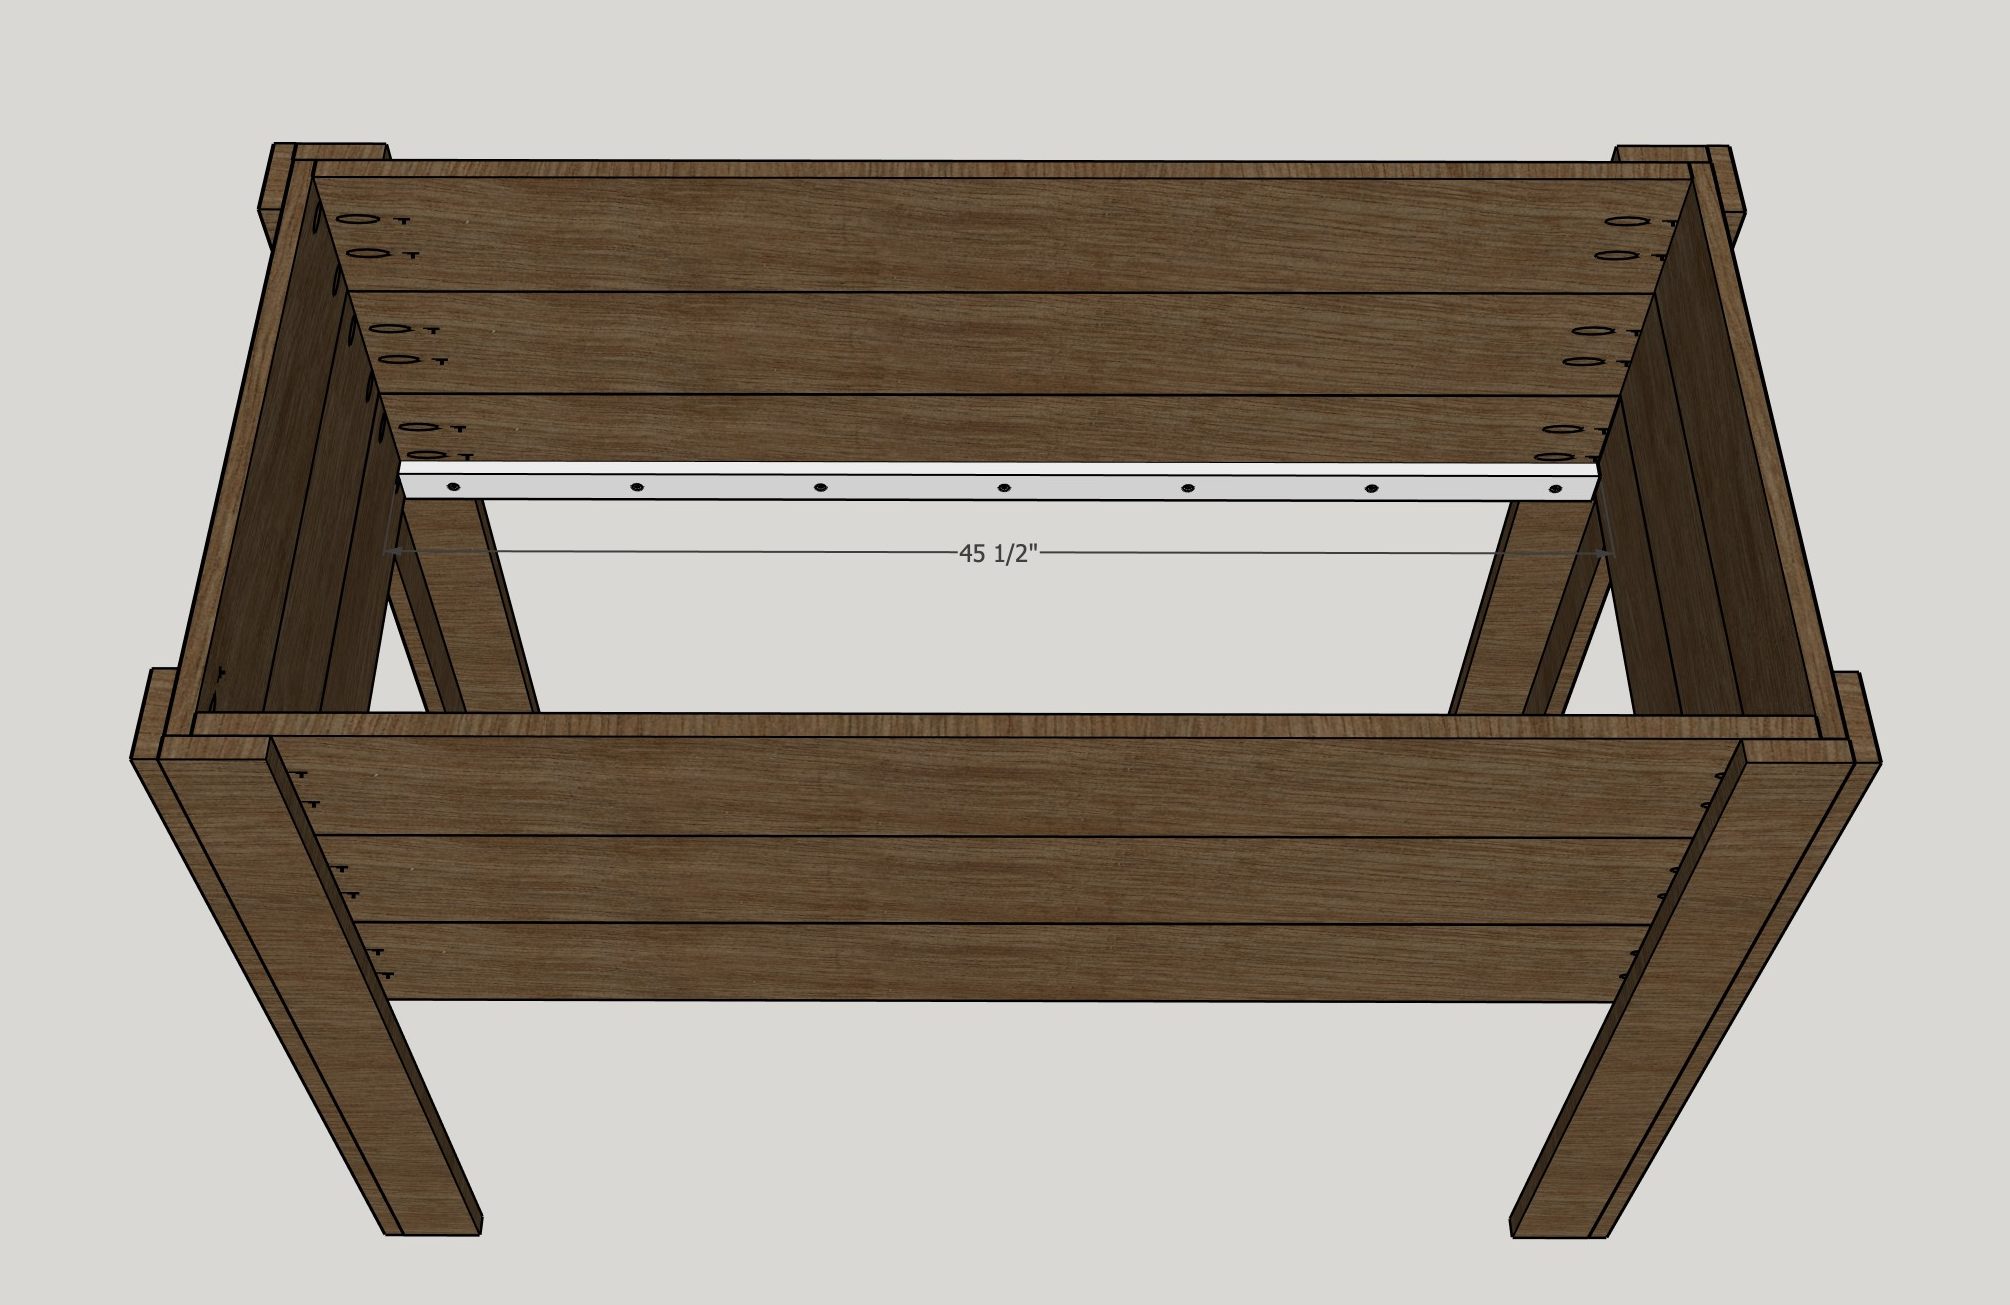
Cut the planter box stabilizers to size.
-
11
Screw in the stabilizers as shown in the picture. Use 1 1/4" exterior wood screws. Don't glue.
-
12
Cut the bottom shelf supports to size.

-
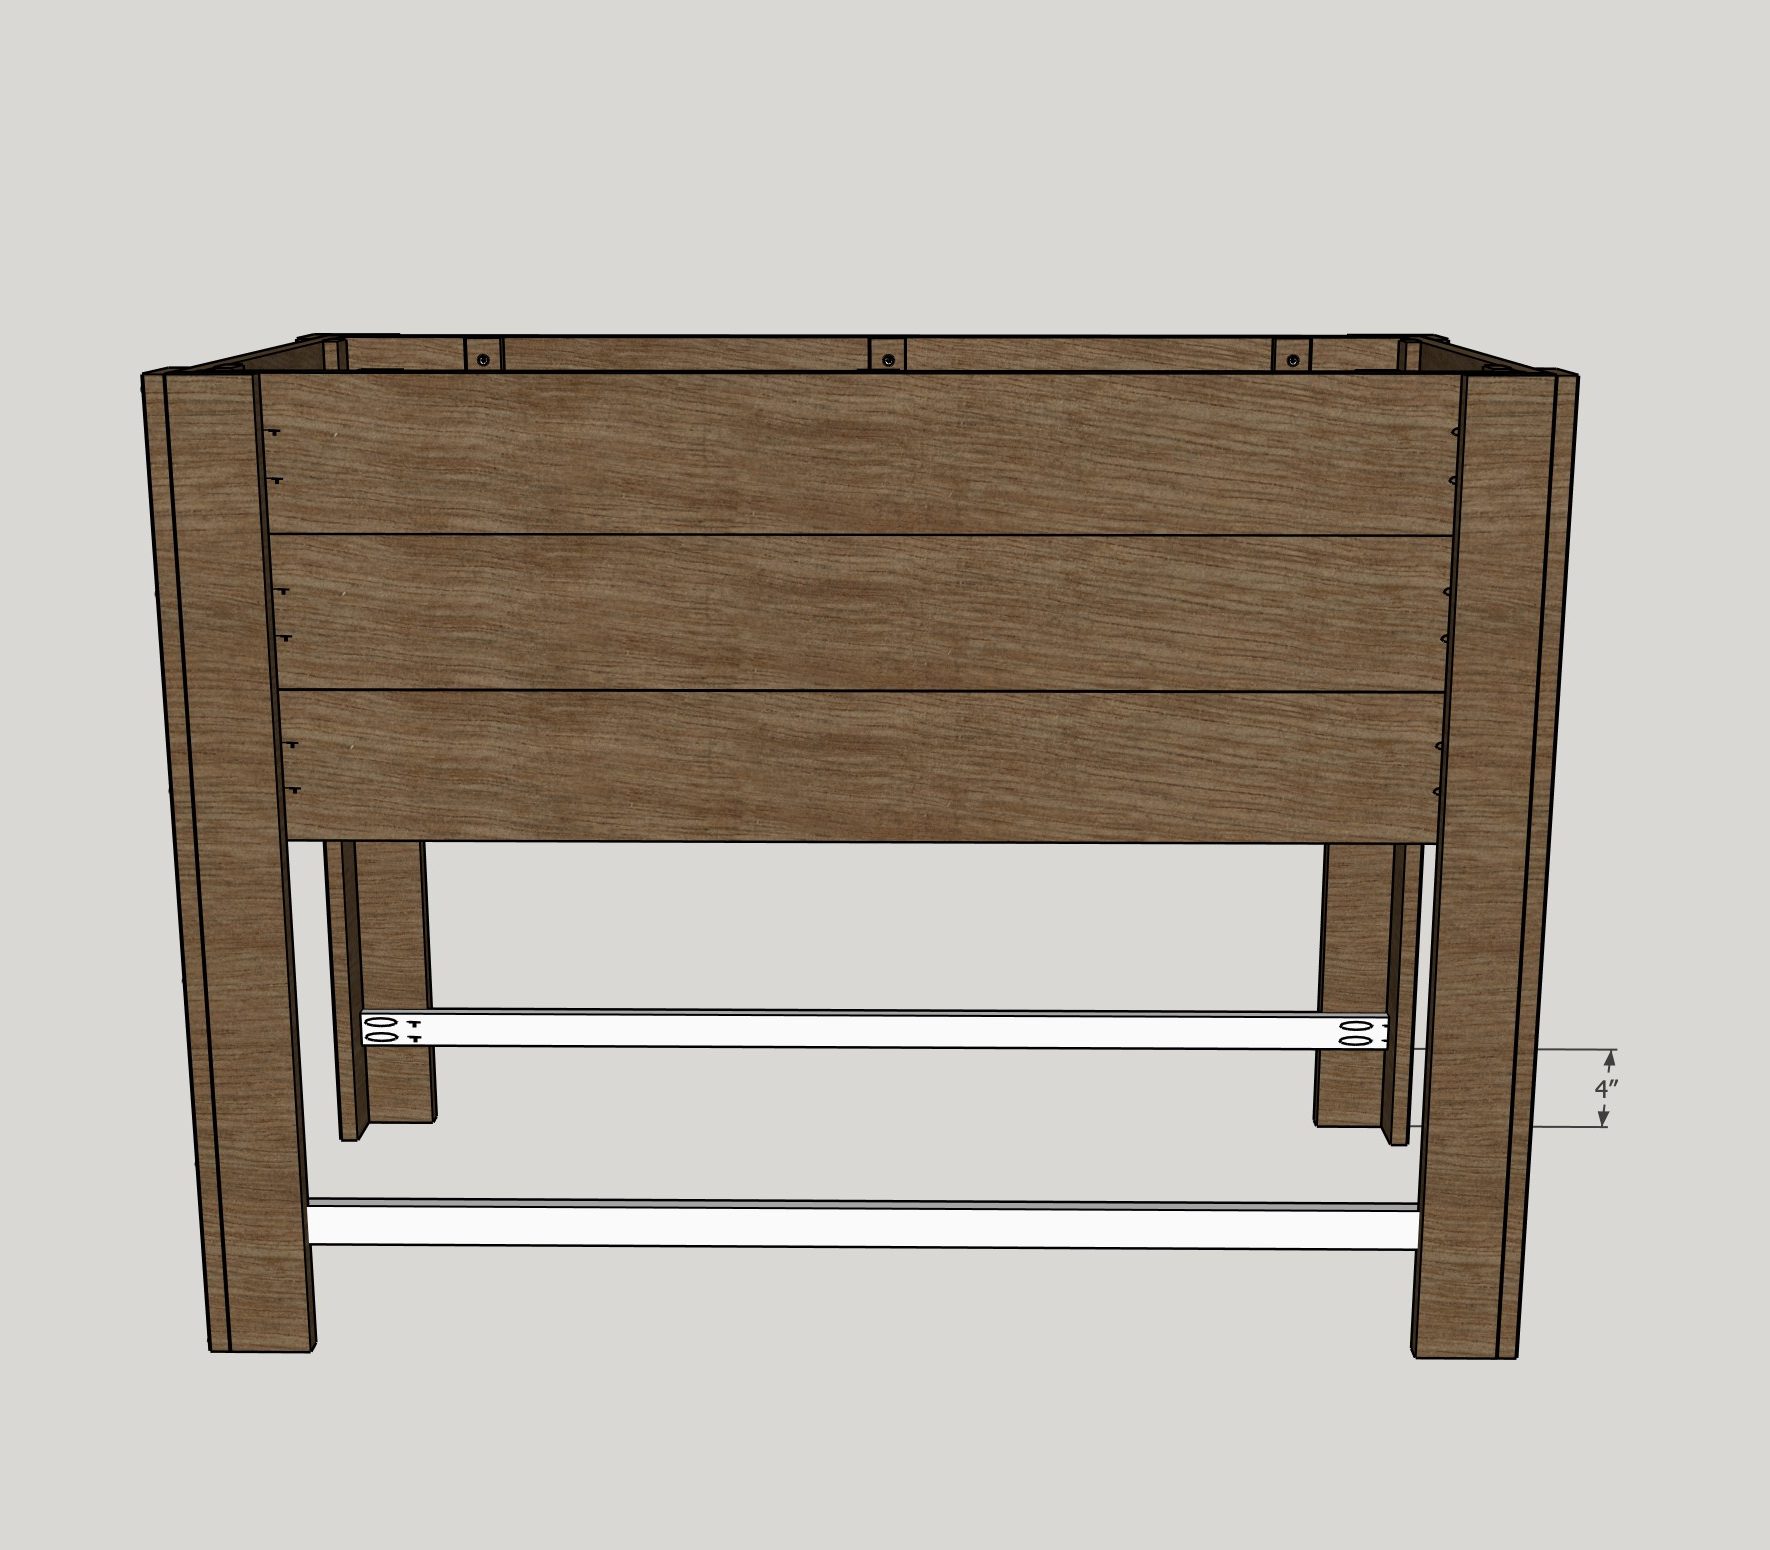
13
Pocket screw the bottom shelf supports into the side of the legs as shown in the picture using wood glue and 1 1/4" pocket screws.
Make sure the supports are 4" up from the bottom of the leg.Tip: use a scrap piece of wood that is 4" tall and put it under the supports before screwing them in.
-
14
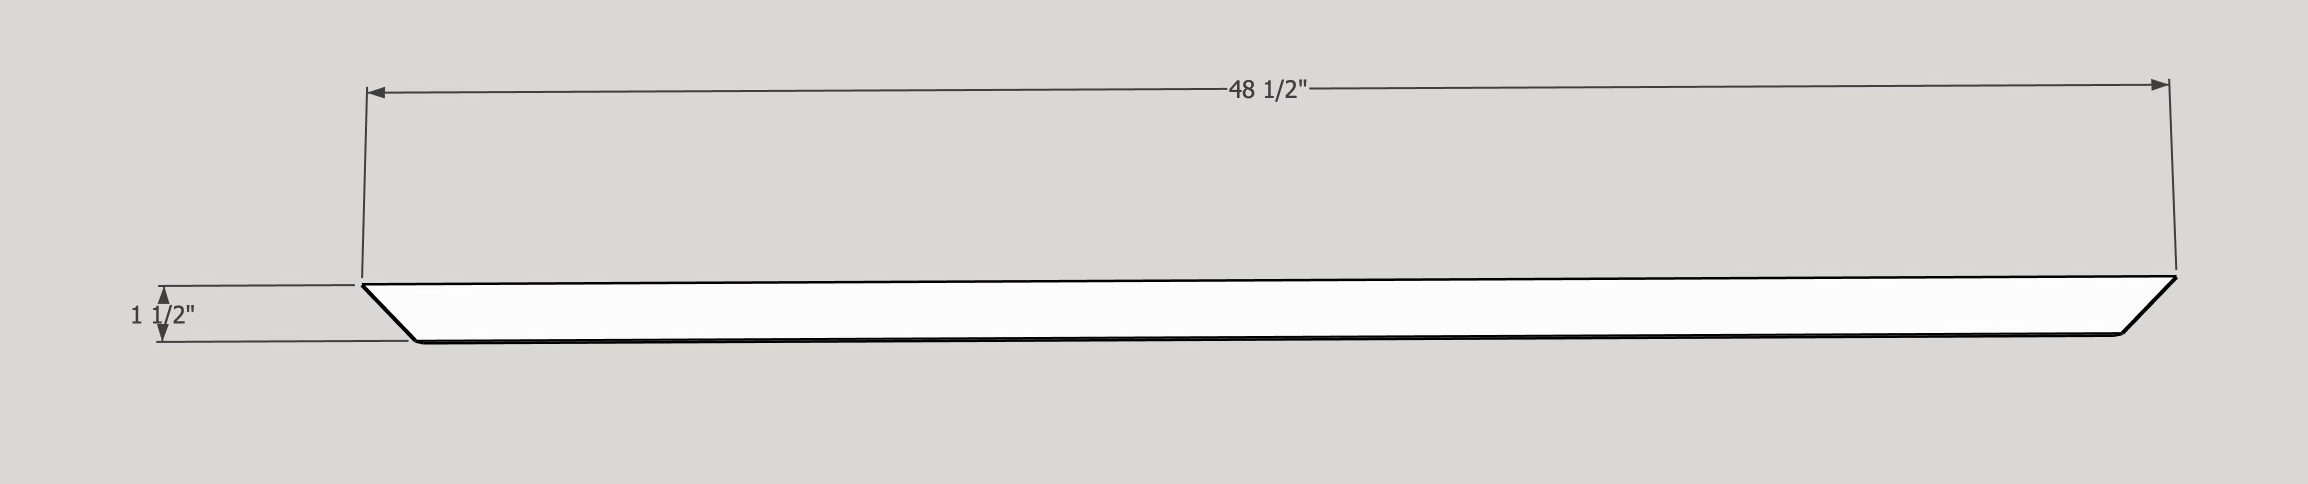
Cut the bottom shelf planks to size.

-
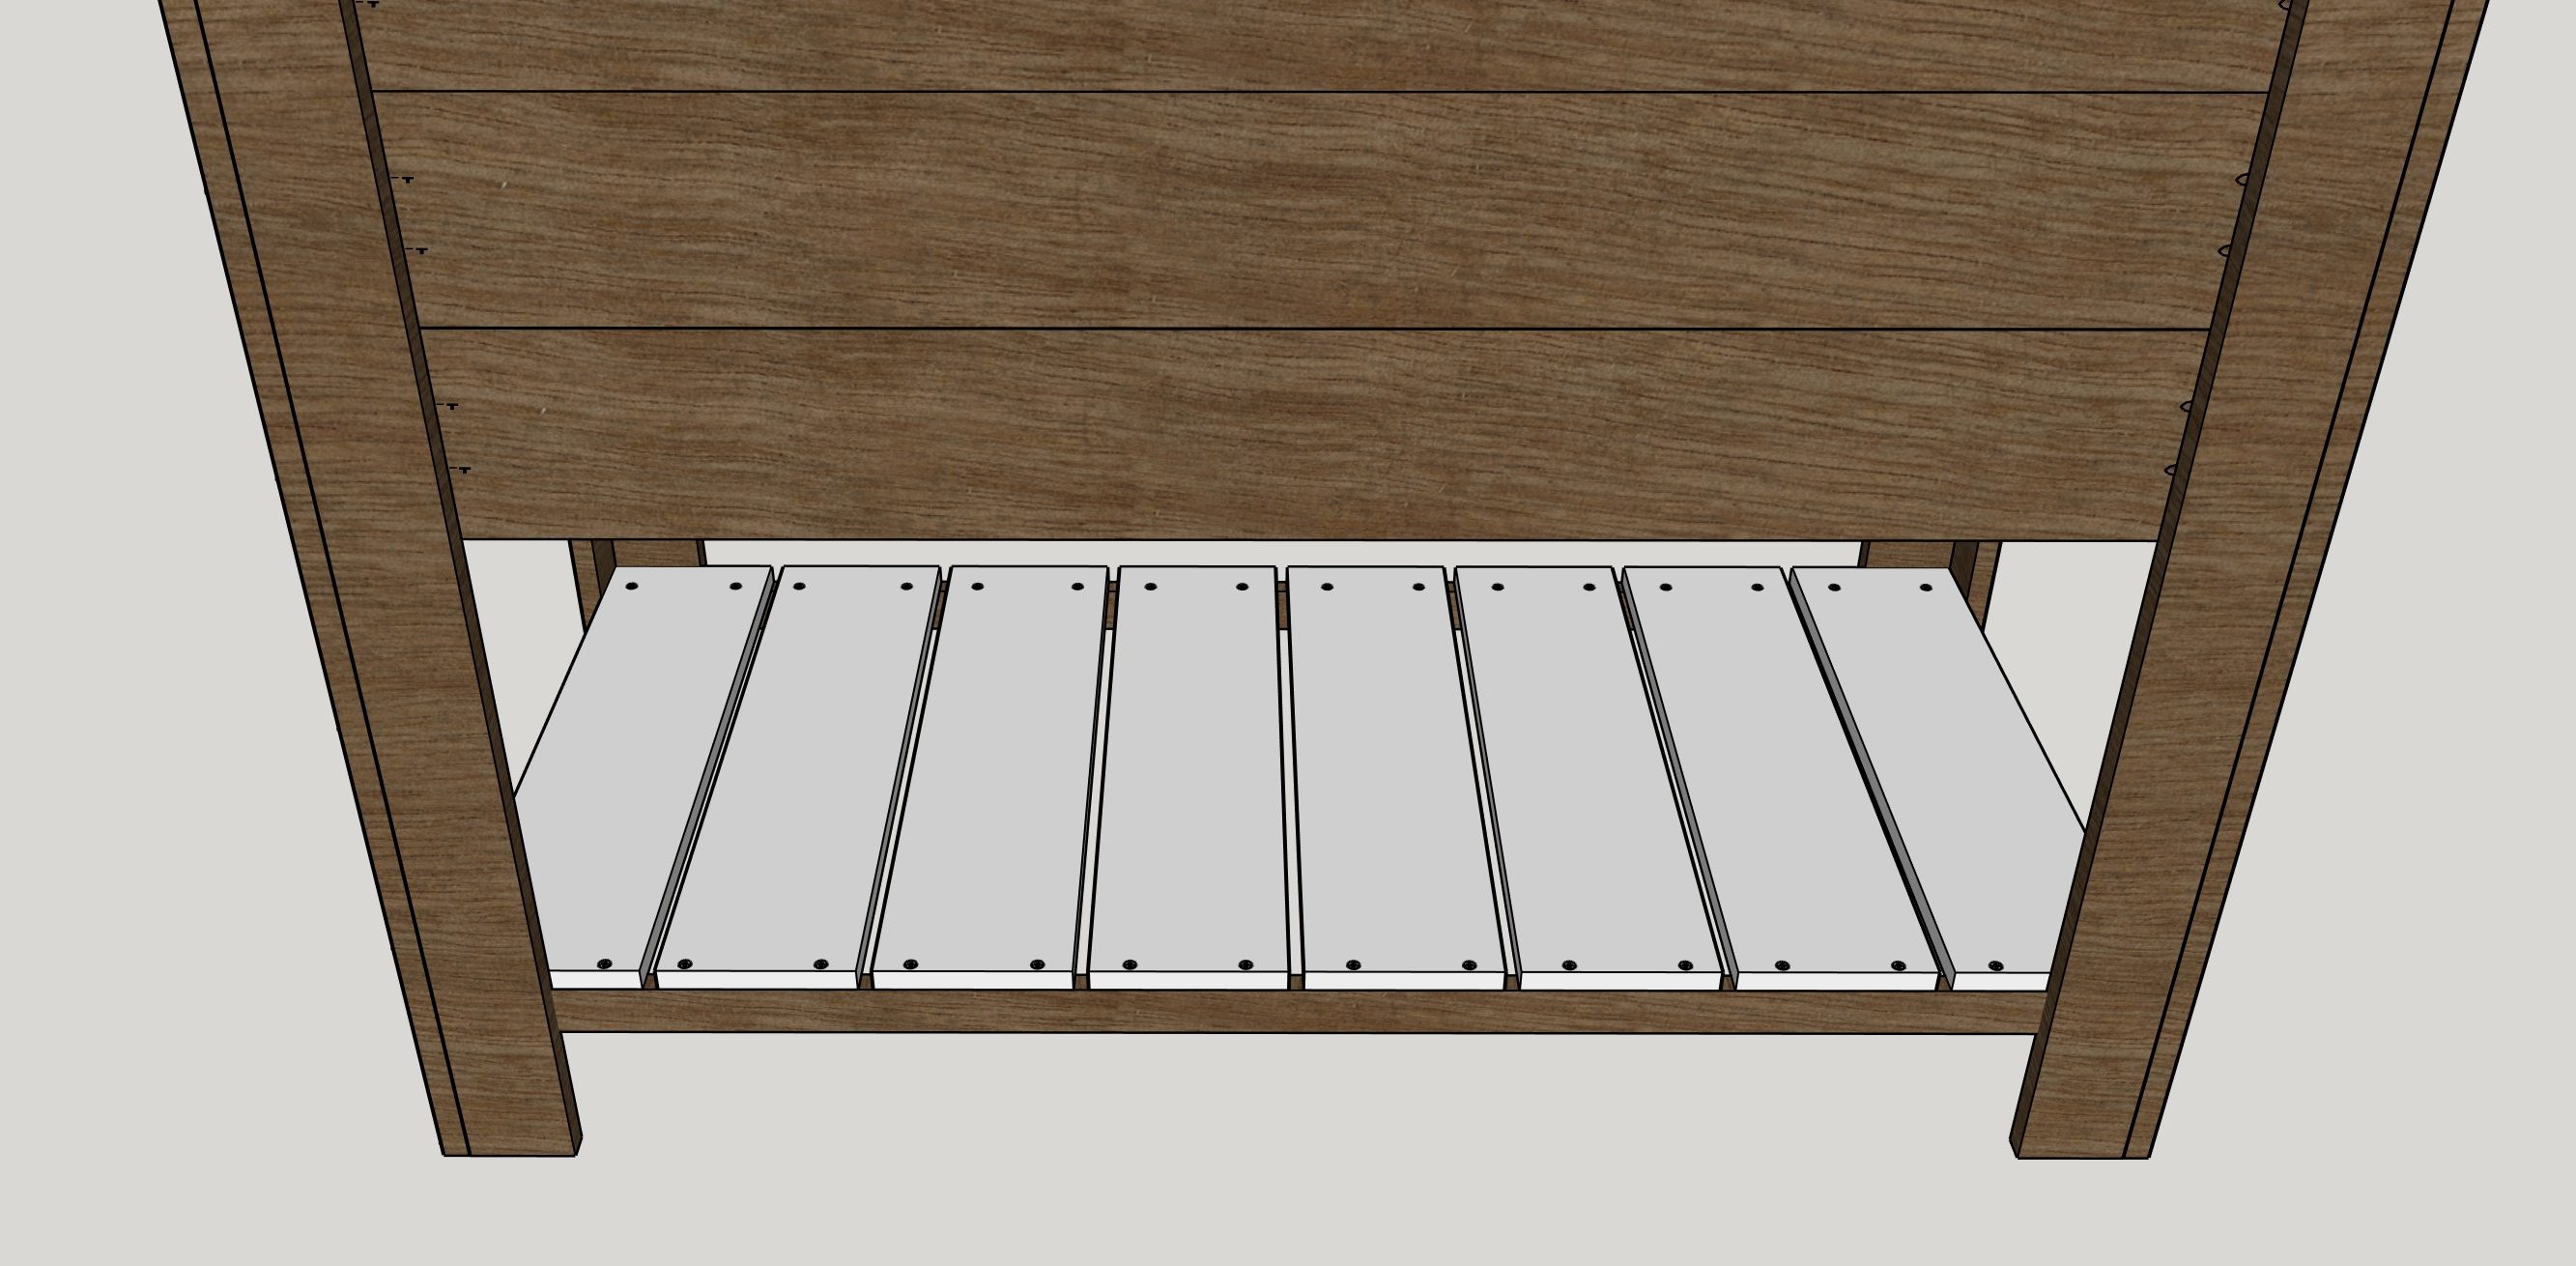
15
Screw the bottom shelf planks into the bottom shelf supports using 1 1/4" wood screws or a nail gun and 1 1/4" brad nails.
-
16
Cut the top trim to size, making sure to cut 45 degrees on each end as shown in the picture.
-
17
Cut the top, short trim pieces to size making sure to cut 45 degrees on each end as shown in the picture.
-
18
Use 1 1/4" brad nails and wood glue to nail the top trim onto the top of the planter as shown in the picture.
-
19
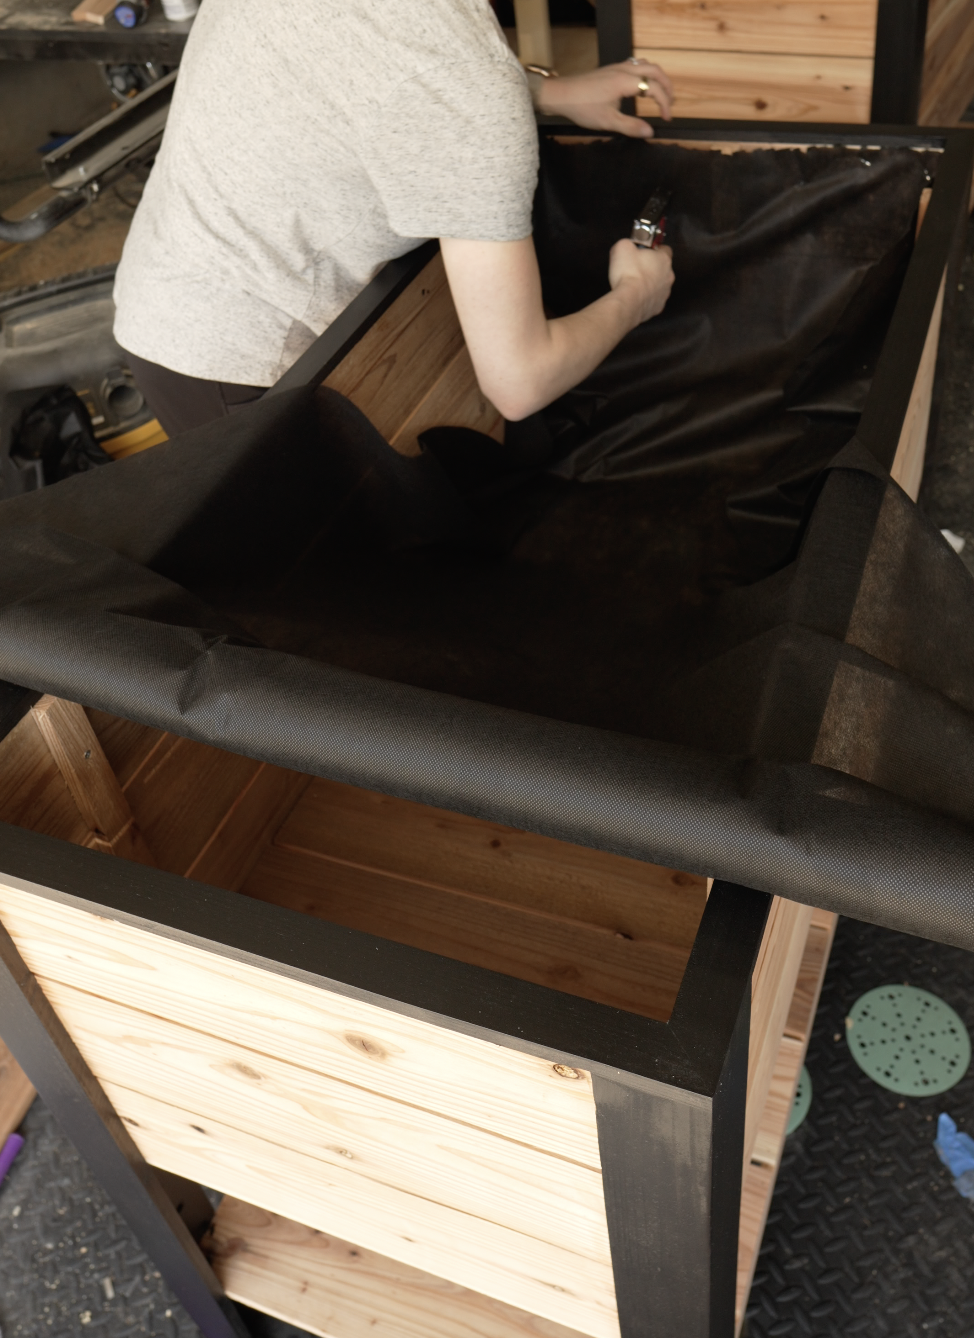
Staple in the liner. You can use cloth or plastic.
-
20
Sand, paint the legs (optional) and finish off by spraying on the finish.