


This is the most darling dollhouse! It is the perfect homemade gift idea. This dollhouse can be made as elaborate as you imagine it, but the basic structure is a pretty simple build with basic tools. A table saw or a circular saw with a Kreg Rip Cut makes quick work of ripping the plywood.
Tools
Kreg Tools


Other Tools
-
Brad nailer (optional)

Materials
Wood Products
- 1 Sheet of plywood , 96”x48”x ¾”
- 1 Half sheet of plywood , 48” x 48”x ¼”
Hardware & Supplies
- 1 Box of 1 ¼” pocket hole screws (see tools list)
- 1 Wood glue
- 1 Sandpaper, Stain or paint of choice
- 1 Eye and ear protection and other safety gear
- 1 Measuring tape
Directions
-
Step One
If you are careful with your cuts, this entire build should only require one full sheet (96”x48”) of ¾” plywood. See the cut diagram for cuts.
Tip:
Please note the following:
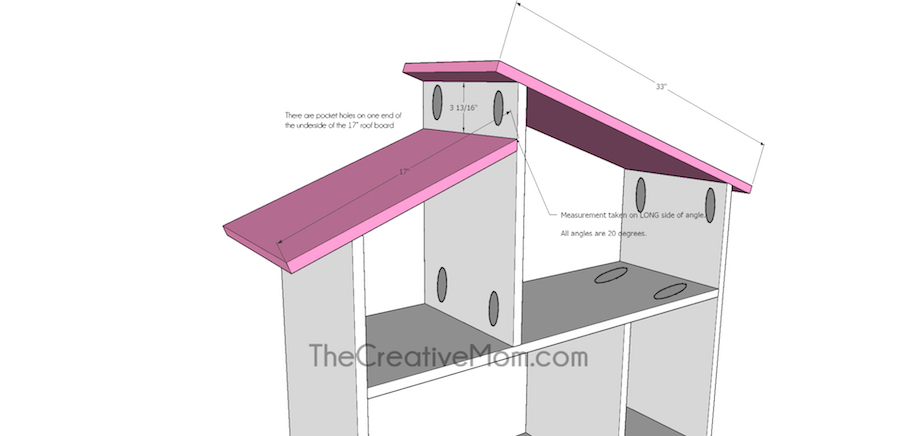
All angles are 20 degrees, and measurements are taken on the LONG side of the angle. I recommend cutting these pieces long, on square, and then trimming the angle to size.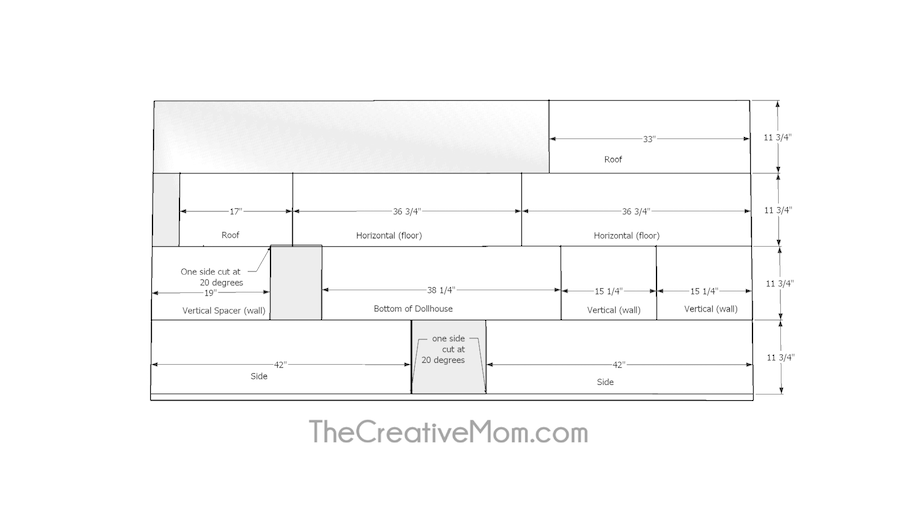
-
Step Two
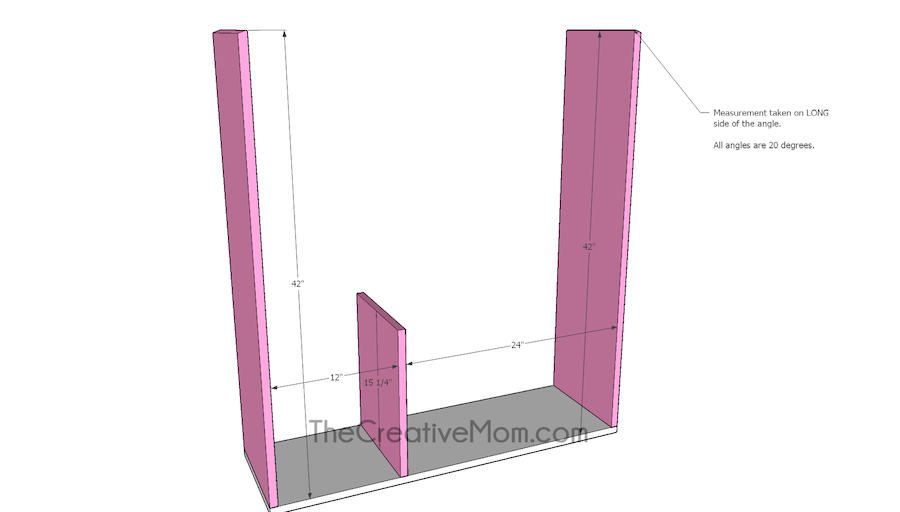
Use your 38 ¼” plywood piece for the bottom. Drill pocket holes in both ends of the two 42” pieces. Using wood glue and 1 ¼” pocket hole screws, attach them to the bottom piece. The angled sides should be at the top, and the long side toward the inside of the dollhouse. Drill pocket holes in both ends of one 15 ¼” piece. Using wood glue and 1 ¼” pocket hole screws, attach this to the bottom piece. You can put this wall wherever you’d like, but I put mine at 24” from one side, and 12” from the other side.
-
Step Three
Drill pocket holes in both ends of a 36 ¾” piece. Using wood glue and 1 ¼” pocket hole screws, attach this piece to the sides of the dollhouse.
Using wood glue and 1 ¼” pocket hole screws, attach the vertical walls to the floors. You’ll need to attach the one you installed in step three as well.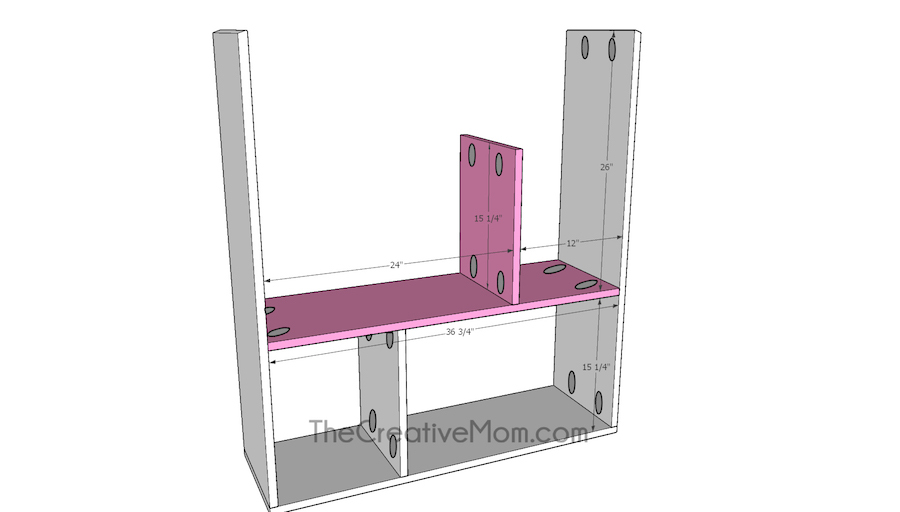
-
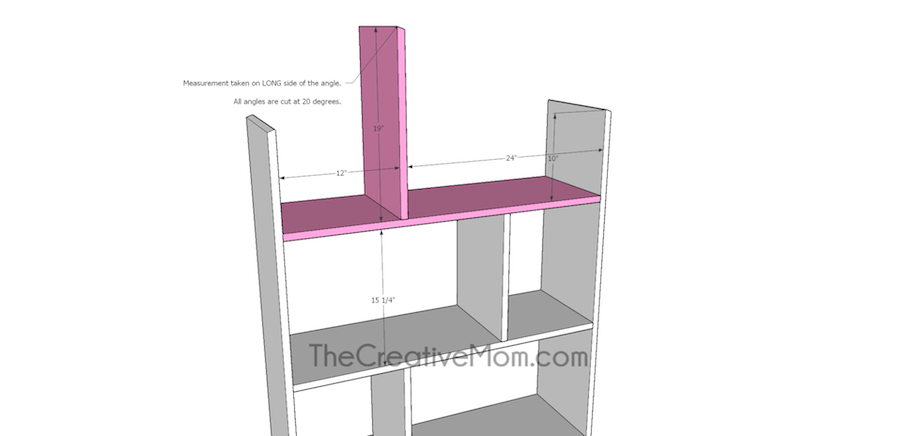
Step Five
Drill pocket holes in one end of the underside of your 17” board (the angeled end). Then, using wood glue and 1 ¼” pocket hole screws, attach the roof to the vertical boards of your dollhouse.

-
Step Six
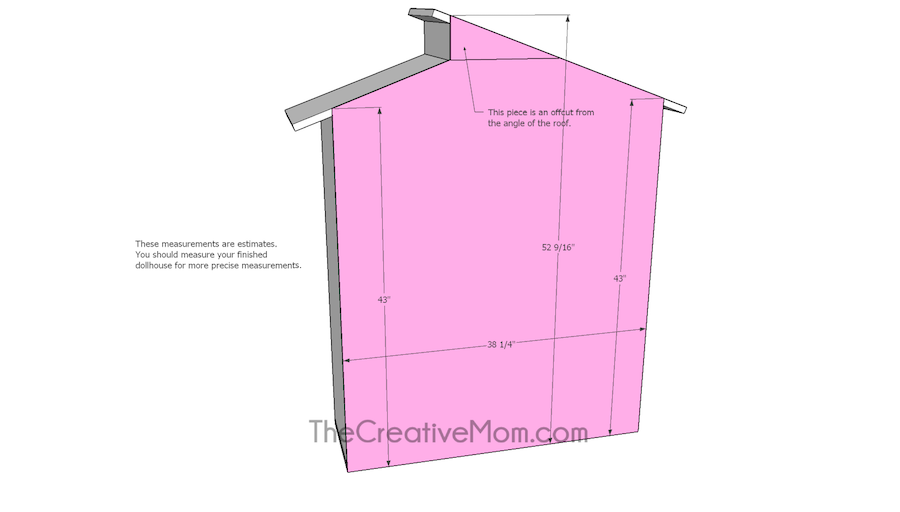
Now our dollhouse is built, we can attach a back. You will need a ½ sheet of ¼” plywood. Measure your dollhouse, and using a jig saw or circular saw, cut the plywood to size. You will notice that you will need to piece together a small off cut to fit the angle on the roof. If you would rather not piece this together, you can use a full sheet of plywood. Once the back is cut, you can attach with brad nails or 1 ¼” pocket hole screws
-
Step Seven
Cut two 111 ½” 2x6’s. Both ends of each board will be mitered at 45 degrees. Drill pocket holes along one side of each board. Cut two 45 ¼” 2x6’s. Both ends of each board will be mitered at 45 degrees. Drill pocket holes in both ends of each board. Using wood glue and 2 ½” outdoor pocket hole screws, attach these boards to create a frame around the table top planks.
-
Step Eight
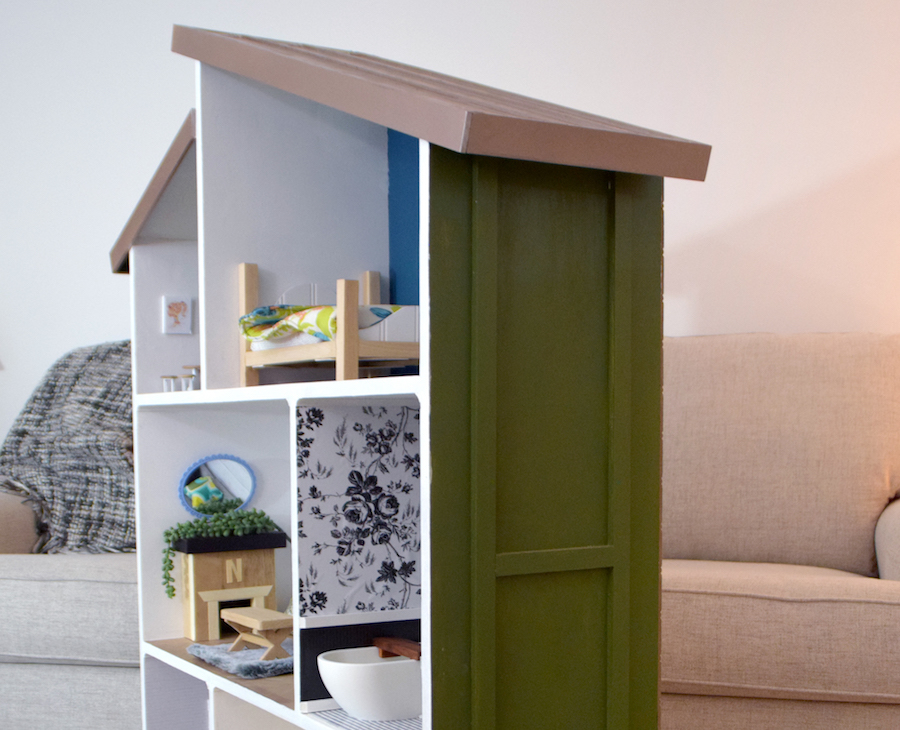
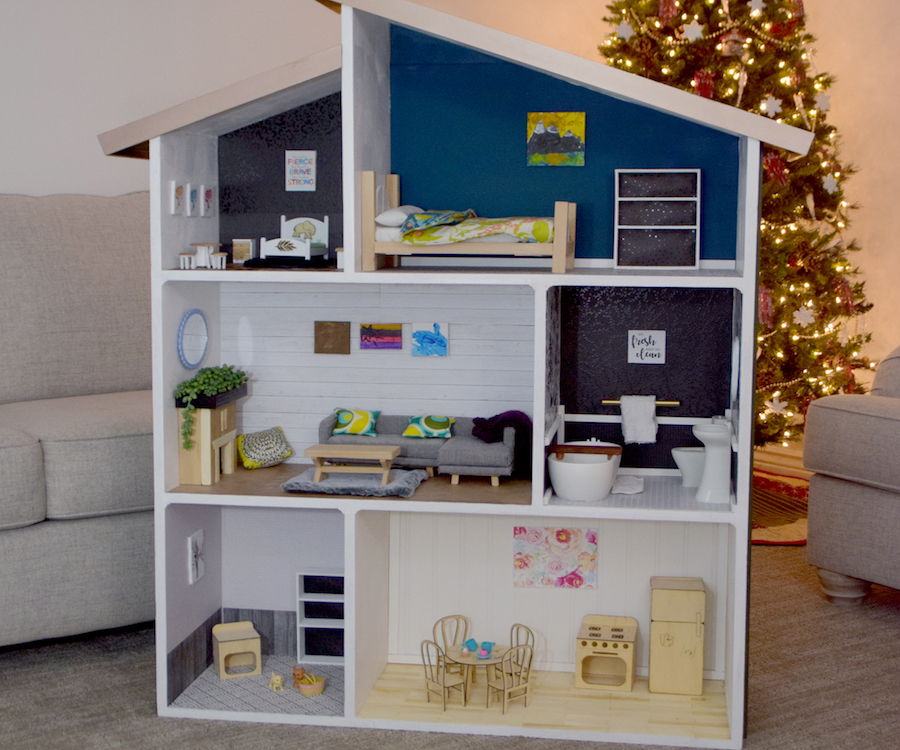
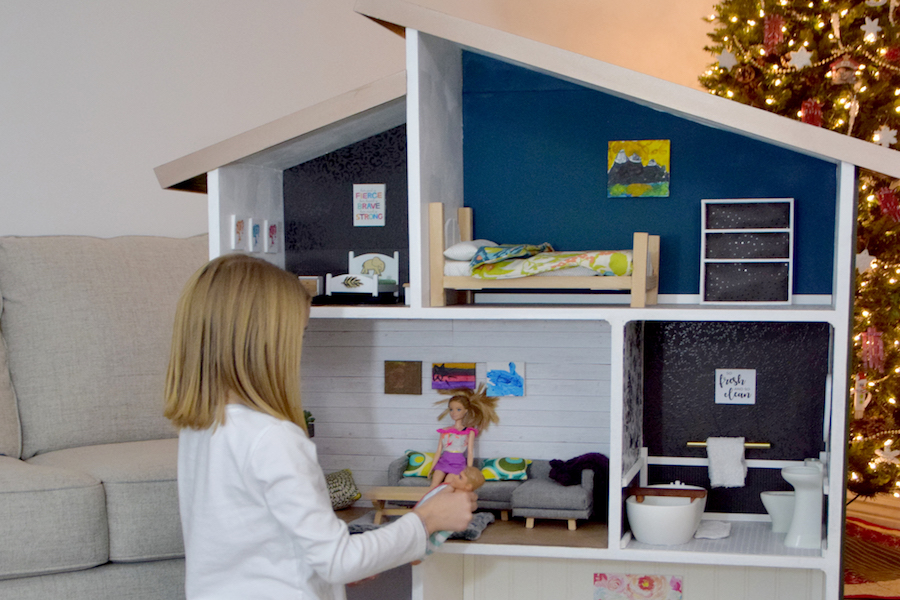
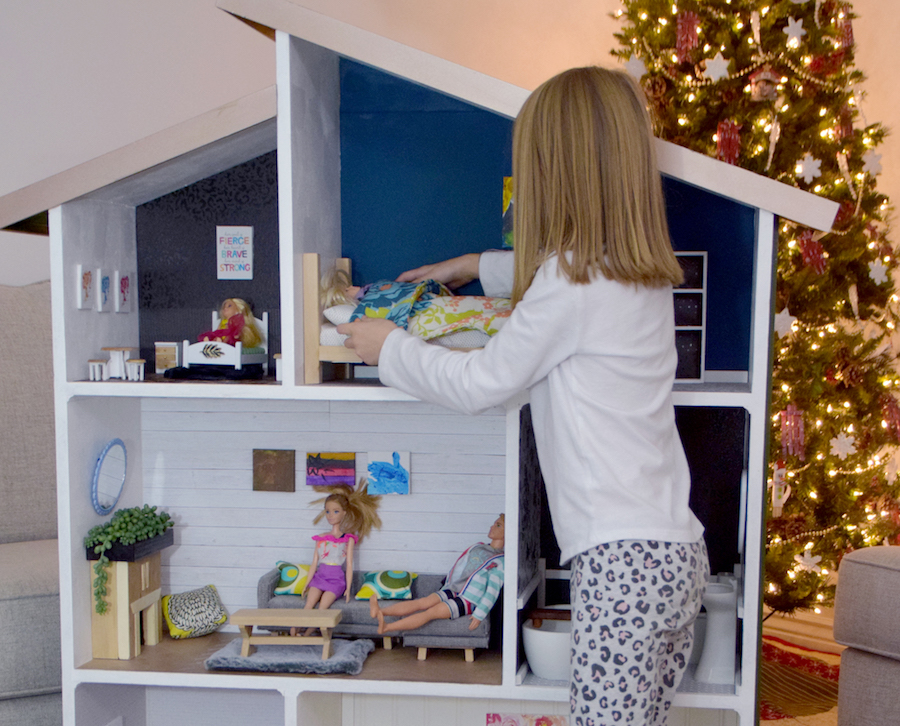
Now your dollhouse is complete. Plug your pocket holes, then sand and finish with paint. You can add other embellishments and trim as desired.
-
Step Nine
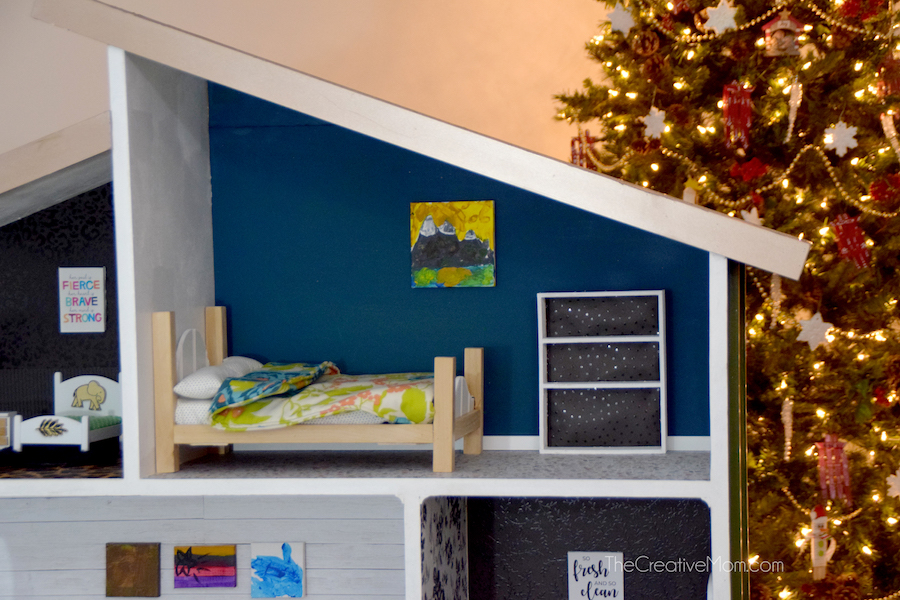
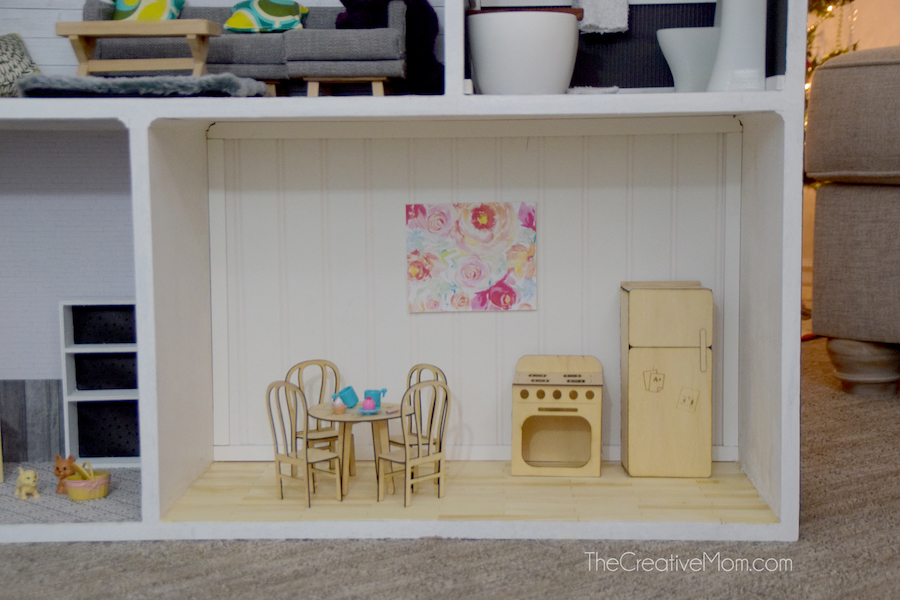
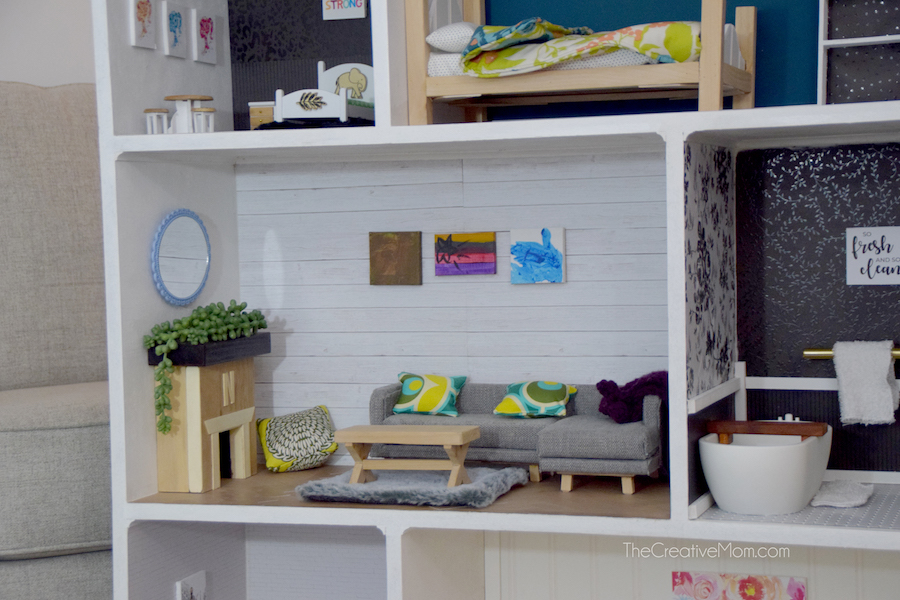
We added other embellishments and decor. You can go to my blog,
http://www.thecreativemom.com/
to see more about our finishes and how we made the decor for the dollhouse.