

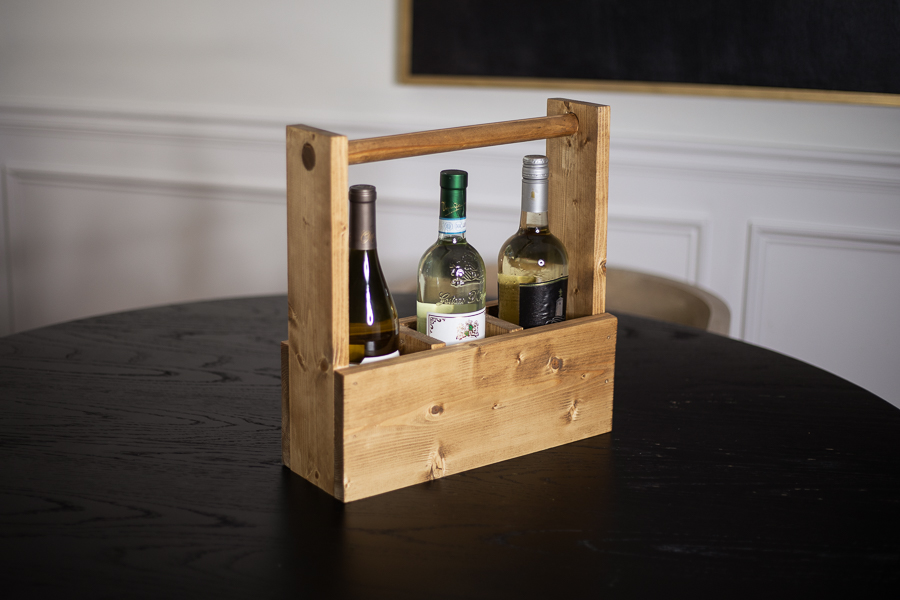


This DIY wine caddy is perfect for picnics or for toting to parties! Carry your favorite wine wherever you want to go.
Tools
Kreg Tools


Other Tools
-
Saw

-
Brad Nailer
Materials
Wood Products
- 1 1x4 Board , 1x4x6
- 1 1" Dowel Rod , 1" x 4'
- 1 1x6 Board , 1x6x6
Hardware & Supplies
- 10 1 1/4" Pocket Hole Screws
- 8 1" Brad Nails
- 1 Stain
- 1 1" Forstner Drill Bit
Directions
-
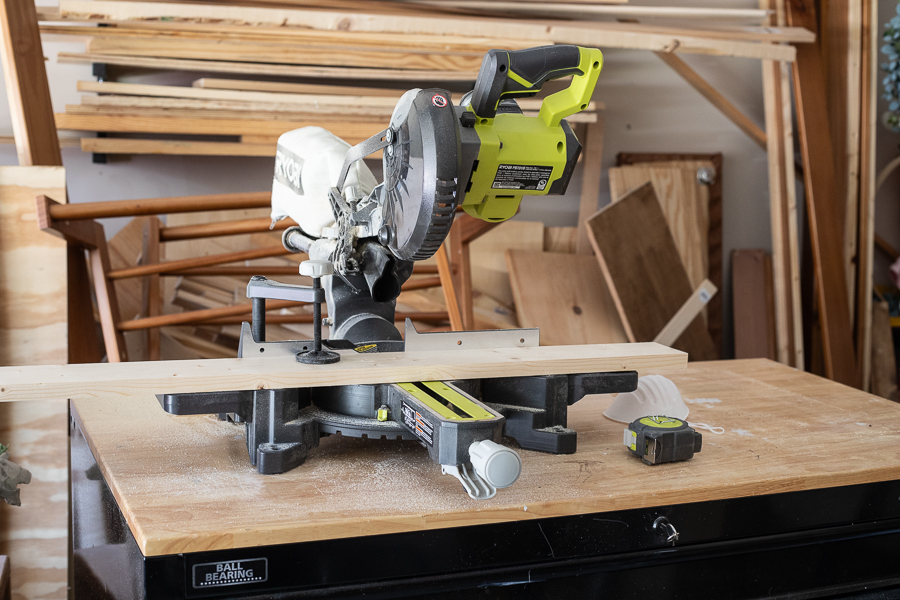
Cut Wood
Cut your wood to the specified dimensions.
-
Drill Pocket Holes
Drill pocket holes as follows: 3 pocket holes along each side of your bottom piece; 2 pocket holes at each end of the bottom piece; 2 pocket holes at one end of each divider piece.

-
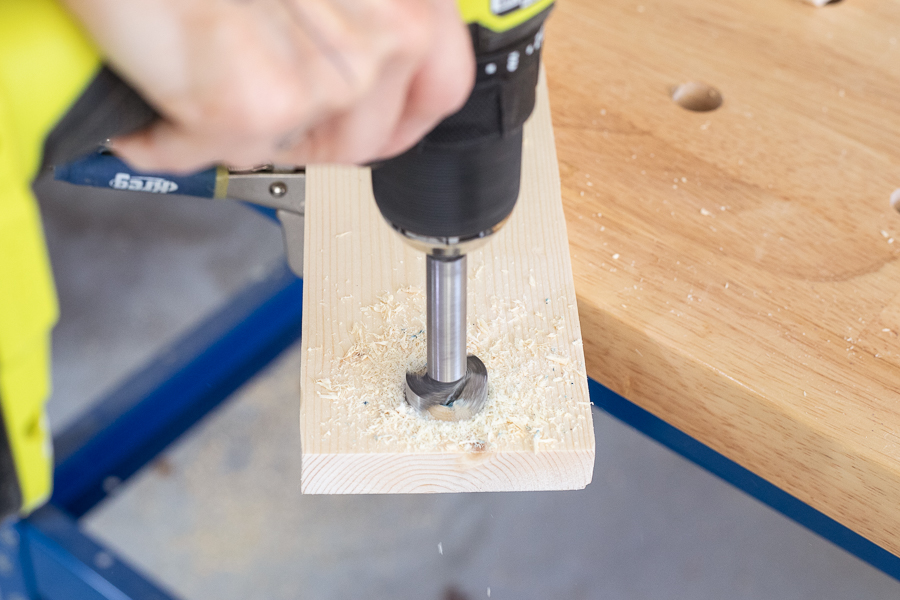
Drill Handle Holes
Use a 1" Forstner bit to drill a hole, centered, 1/2" inch from one end of both side pieces. This hole will accommodate your dowel rod handle.
-
Sand
Sand everything smooth.
-
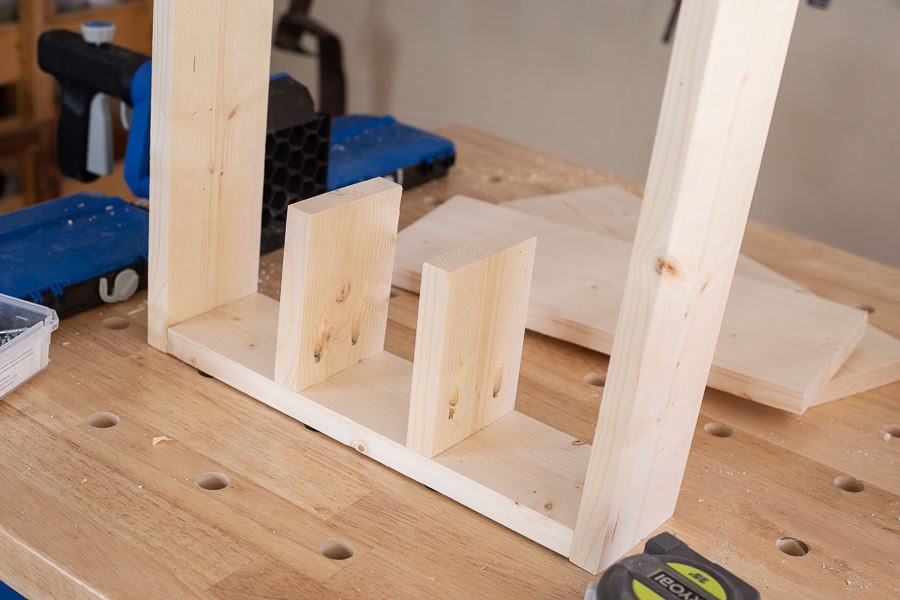
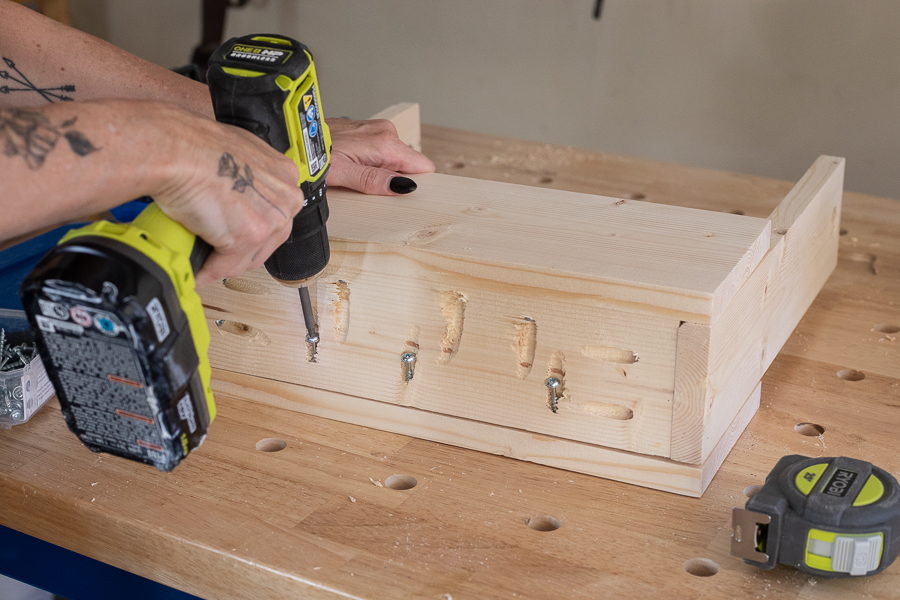
Attach Sides and Dividers
Use 1 1/4" pocket hole screws to attach your side pieces and dividers (evenly spaced) to your bottom piece. Make sure your 1" holes are positioned at the top when your sides are attached.
-
Attach Front and Back
Use 1 1/4" pocket hole screws to attach the front and back, making sure the pocket holes are facing down. It's easiest to turn the whole piece on its side when attaching these.
-
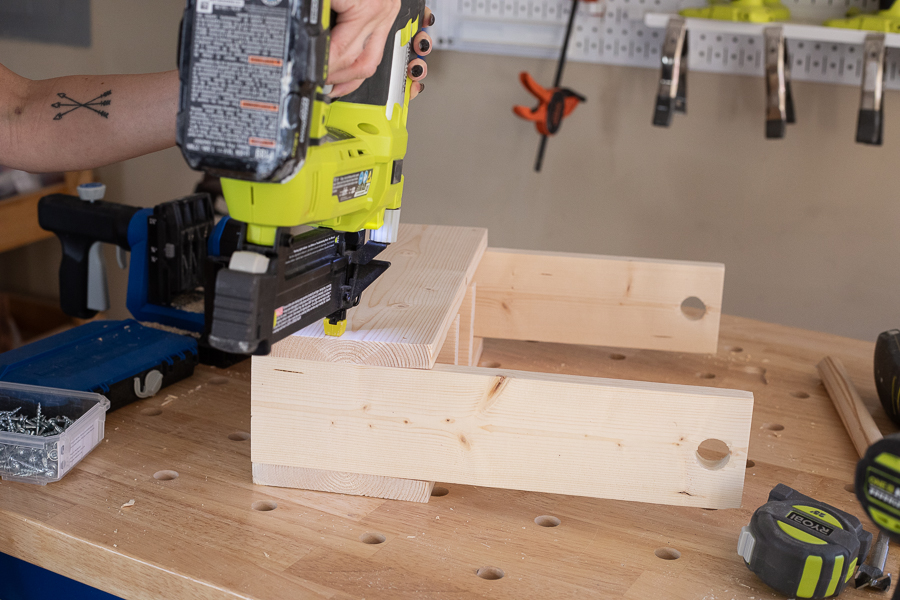
Reinforce Front and Back
Use a brad nailer to secure your front and back piece to the sides.
-
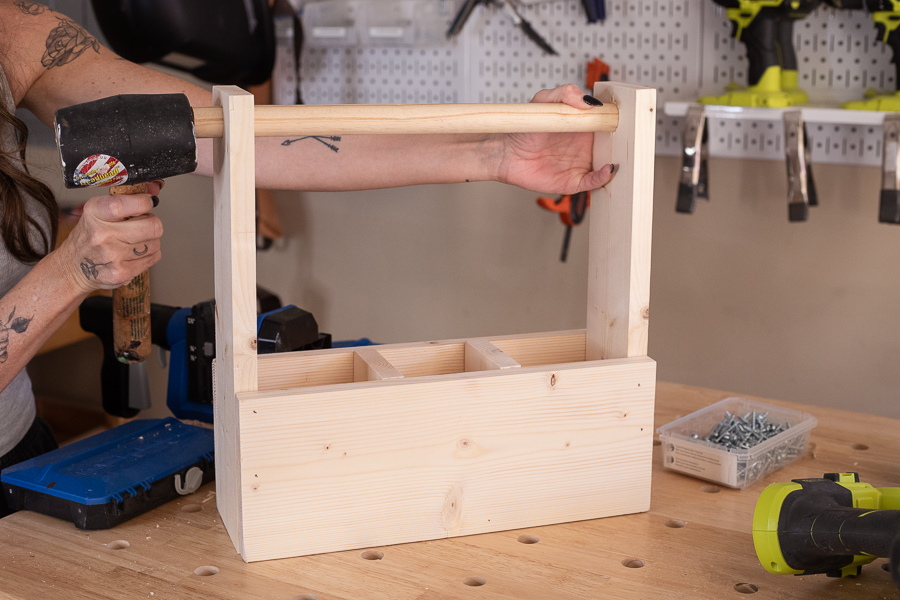
Add Handle
Slide your dowel rod through the holes in your side pieces, using a mallet to assist you.
-
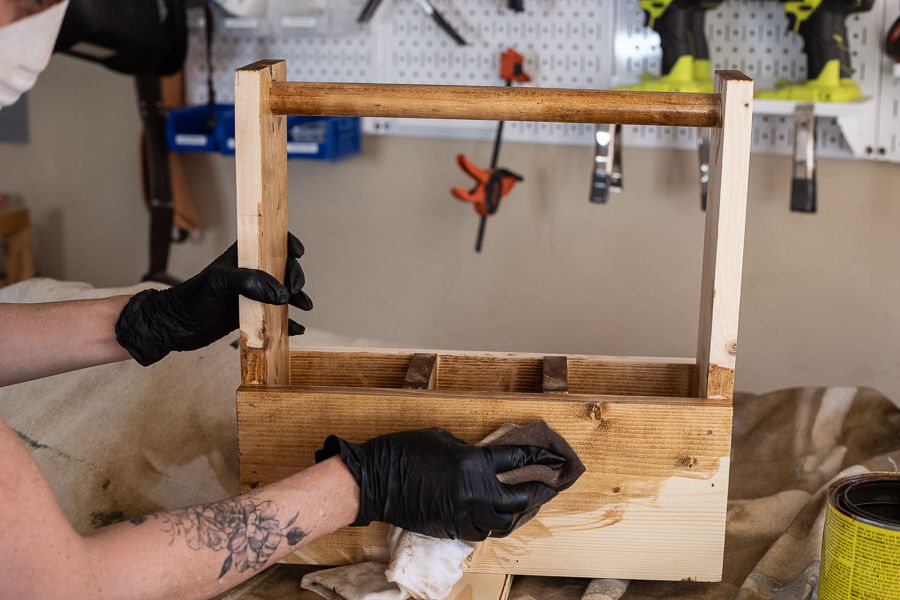
Stain
Stain your wine caddy any color you choose. This one is Special Walnut.
-
Add Wine
Add 3 bottles of your favorite wine!