

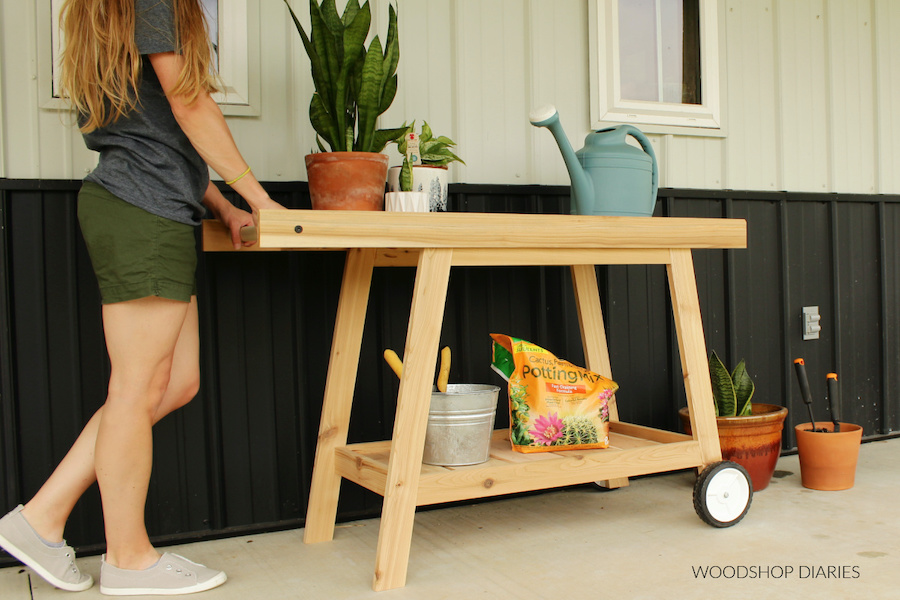
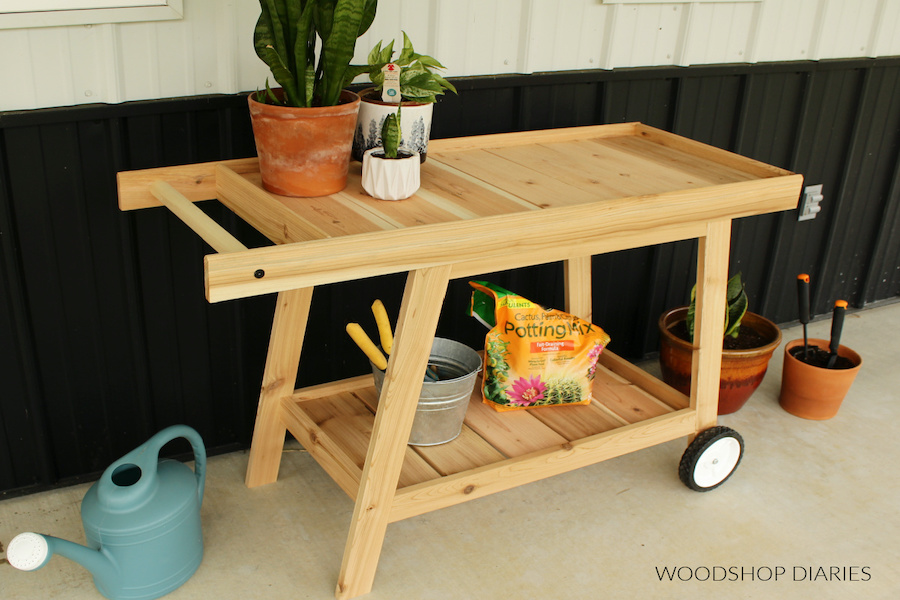
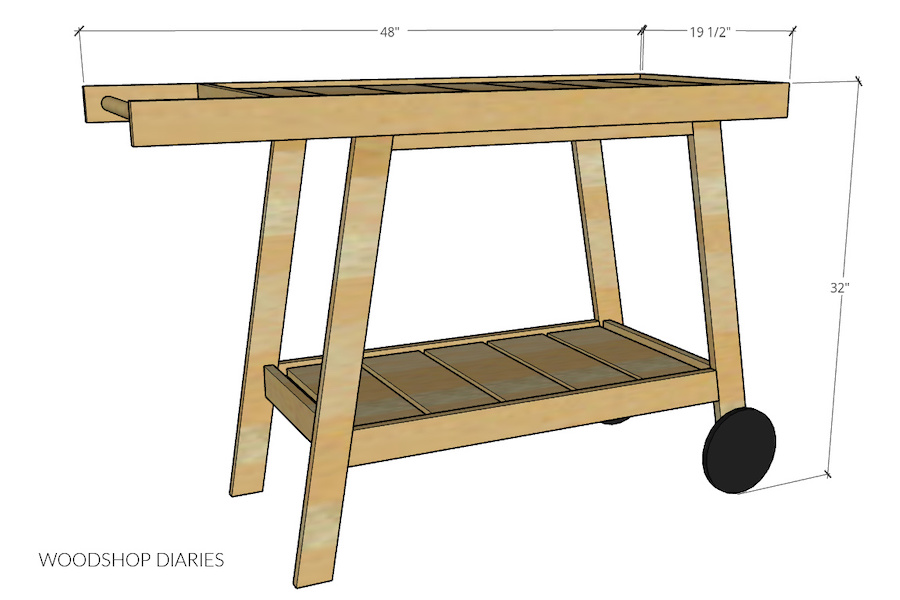


This DIY mobile potting bench is the perfect addition to your garden, porch, or patio! Build this adorable cart to display your plants, store your supplies, and give you a work surface to repot all your favorite indoor and outdoor plants. Or, use it as a serving cart for your outdoor gatherings!
Tools
Kreg Tools


Other Tools
-
Miter Saw

-
18 ga Nail Gun
-
Level
Materials
Wood Products
- 5 Boards , 1x3x8
- 1 Boards , 1x2x8
- 3 Boards , 1x6x8
- 1 Dowel rod , 1" (18" long)
Hardware & Supplies
- 1 Box of 1 ¼” Kreg Pocket Hole Screws (See tools list)
- 2 7” plastic wheels (or cut wooden wheels)
- 2 2 1/2” long bolts + nuts to attach wheels
- 1 Box of 1 ¼” wood screws
- 1 Box of 2” wood screws
- 1 Box of Brad nails
- 1 Wood glue
Directions
-
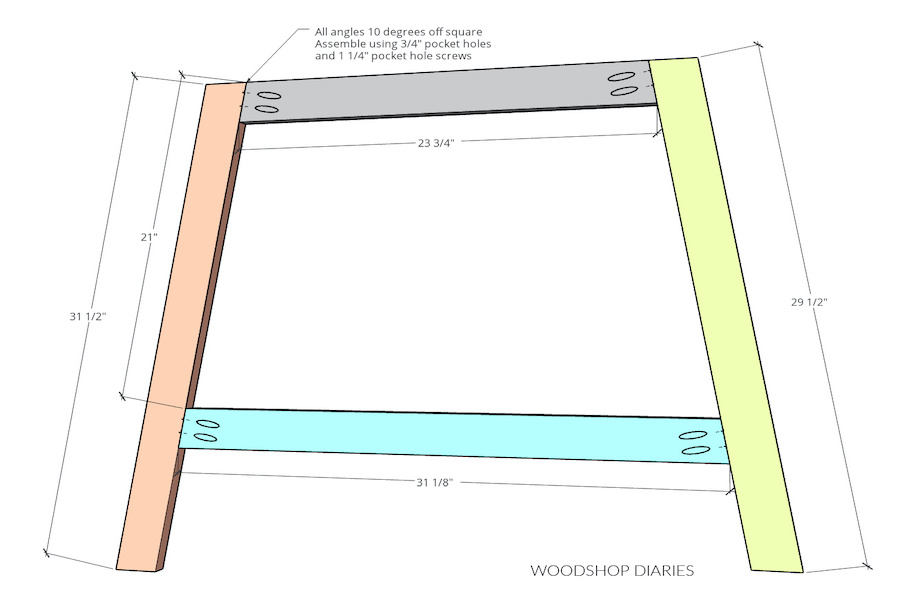
Assemble Cart Sides
Cut 1x3 pieces like shown in the diagram. Notice there is one 29 ½” long leg and one 31 ½” long leg—both with ends mitered 10 degrees off square parallel to each other. Cut a piece of 1x3 with ends mitered 10 degrees NOT parallel to each other to 23 ¾” long at the longest point for the top and another to 31 1/8” long at the longest point for the bottom.
Assemble a side frame together like shown using ¾” pocket holes and 1 ¼” Kreg pocket hole screws.
Cut and assemble a second frame the same way only mirrored to this one—build one with the short leg on the left and one with the short leg on the right so that when put together in the next step, the pocket holes all face the inside.
Tip:
NOTE: If using project outdoors, use Kreg Blue Kote screws for this.
-
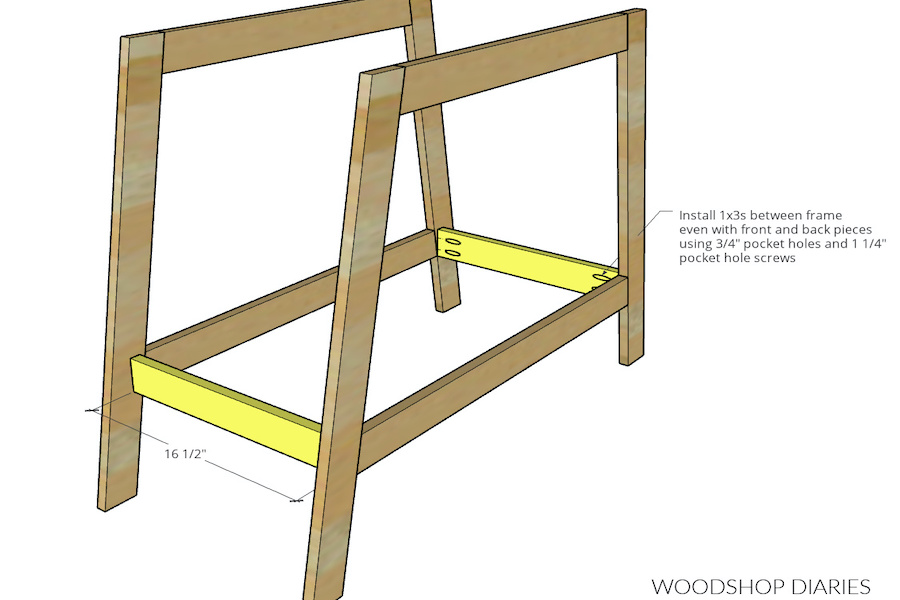
Install Bottom Shelf Sides
Cut (2) 1x3 boards to 16 ½” long and drill ¾” pocket holes into the ends of each. Assemble like shown using 1 ¼” Kreg pocket hole screws (Blue Kote if using outdoors) between the two side frames so that they are flush to the inside corner and level to the bottom pieces on the frames. Install these straight up and down (square to the floor), but don’t worry if they’re perfect.
Tip:
Make sure to keep the shorter legs both on the same side. The wheels will go on these shorter legs later.
-
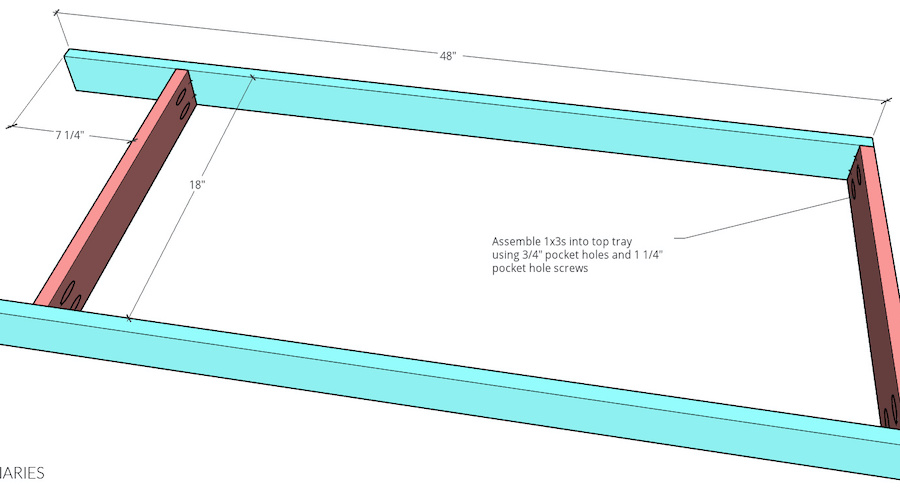
Assemble Top Shelf Tray
Cut 1x3s like shown and assemble a tray using ¾” pocket holes and 1 ¼” Kreg pocket hole screws (Blue Kote if using outdoors).
-
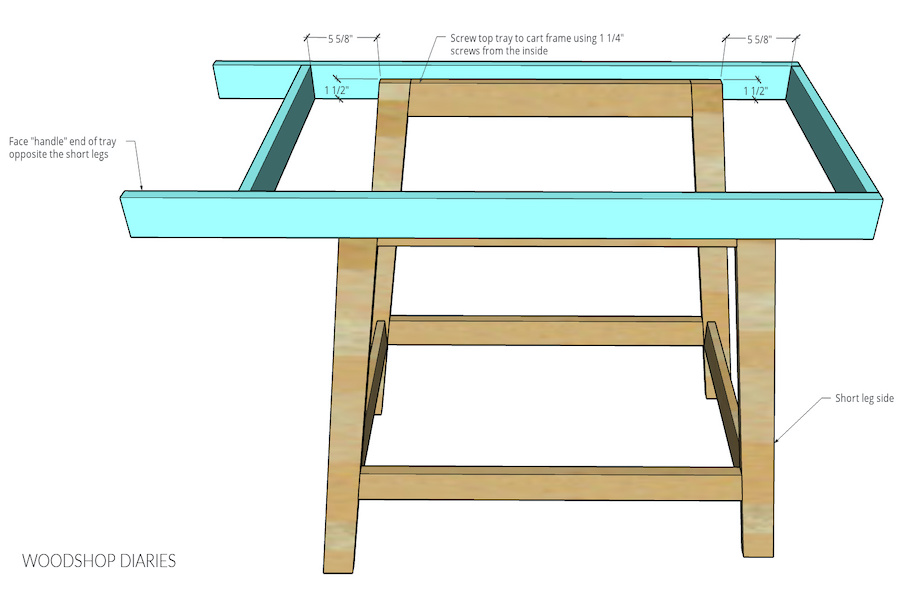
Add Top Tray to Frame
Install tray onto the top of the cart frame using 1 ¼” wood screws (exterior rated if using outdoors). Use 5 screws on each side and install so that the tray overlaps the frame by 1 ½” and is centered side to side.
Predrill holes before driving screws to prevent wood splitting.
Tip:
Note that the “handle end” of the tray should face opposite the side with the shorter legs.
-
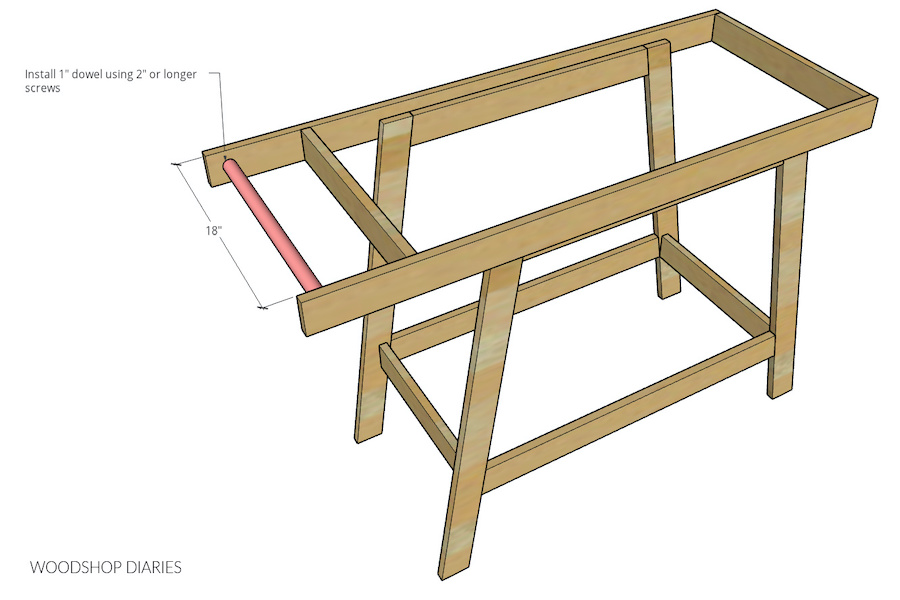
Add Handle
Cut a 1” dowel rod to 18” and install in the open section of the top tray as a handle. Use 2” or longer wood screws to install. It’s not critical how high or how far in the handle goes, so feel free to install it anywhere in this opening.
-
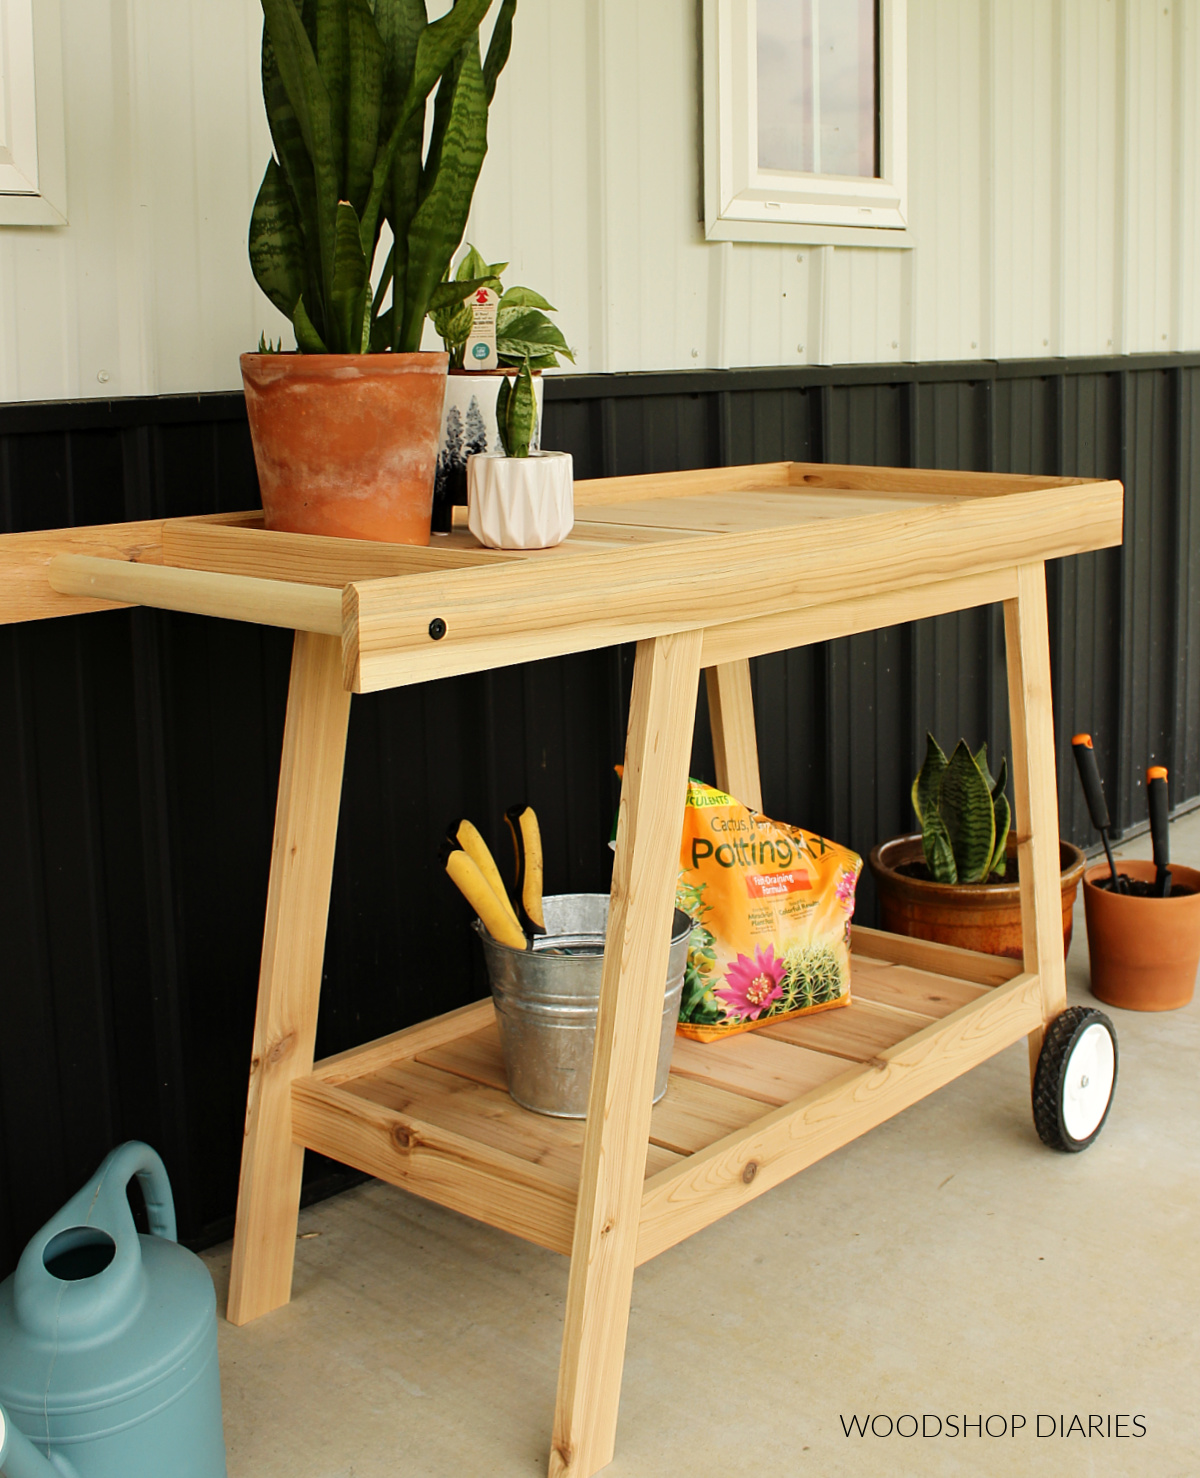
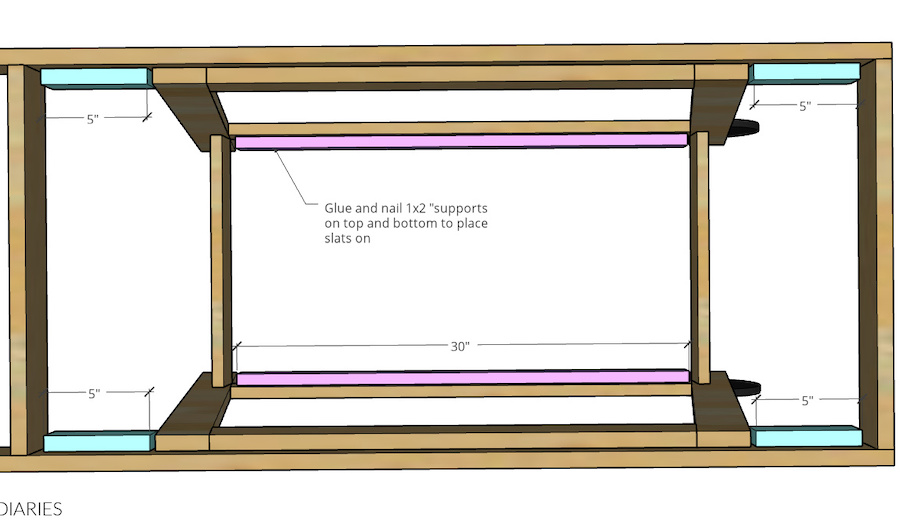
Add Slat Supports
Cut (2) 30” long 1x2s to use as the slat supports at the bottom and (4) 5” long 1x2s to use as slat supports at the top.
Glue and either brad nail or screw these in place so that they are flush with the bottom of the frame pieces they are glued on—that way the slats can sit down into the tray later. Use either 1 ¼” long brad nails or wood screws to secure.
-
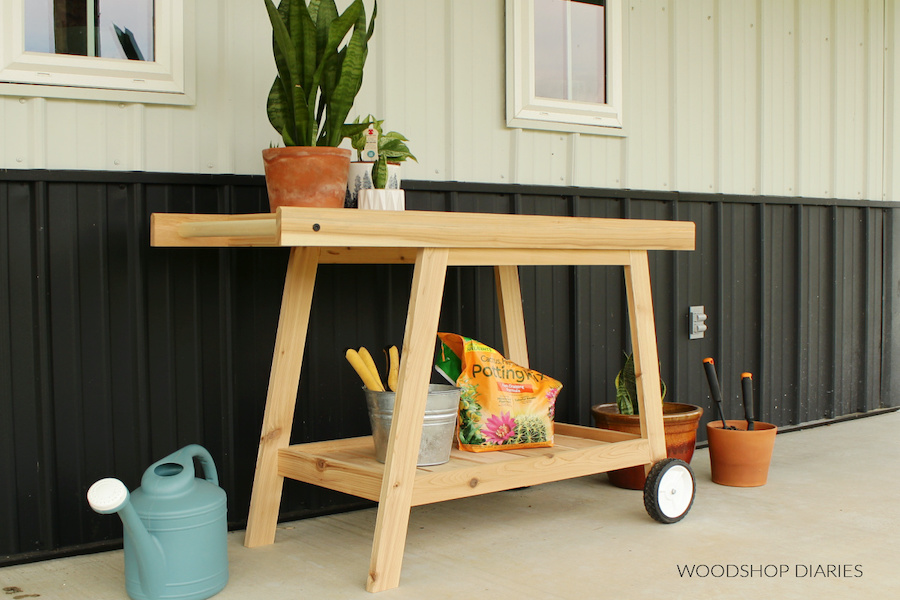
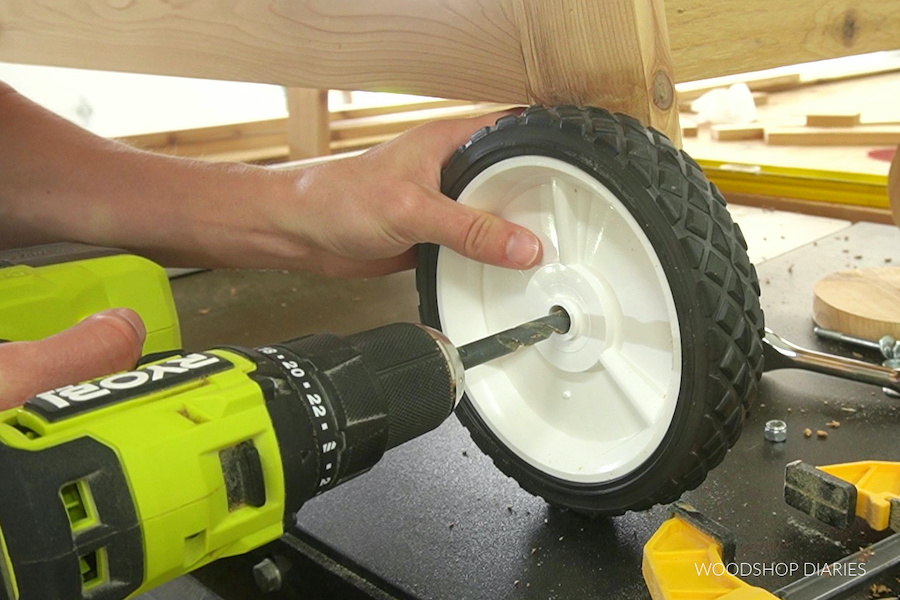
Add Wheels
You can use any size or material wheel for this you’d like. You can cut your own wooden wheels, but I used these 7” plastic lawn mower wheels. Place the cart on a flat, level surface and place a level on the top tray and/or bottom front/back frame pieces. Raise the “short leg side” up until the top tray and bottom frame are level (approx. 2” or so off the floor) and clamp the wheels onto the short legs at this height. Drill a hole through the center of the wheels through the short legs and secure with a bolt and a nut. The size of the bolt isn’t critical, but it should be just SLIGHTLY smaller in diameter then the hole you drill and long enough to go through the wheel and the leg and be able to tighten the bolt onto the inside. You want the wheel to be loose enough to turn freely, but not so loose that they wobble or bow.
Tip:
See video in the extras tab for additional information.
-
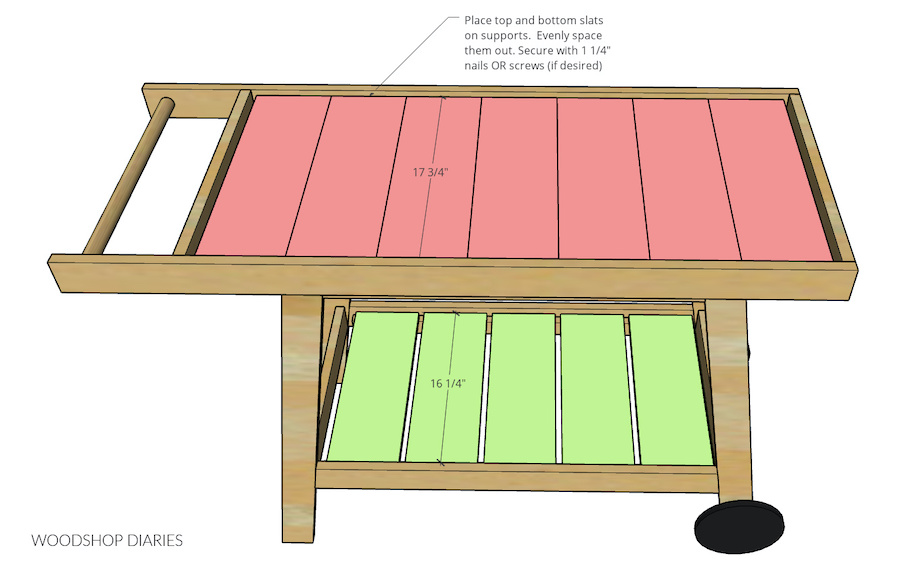
Install Shelf Slats
Cut (5) 1x6 boards to 16 ¼” long and place along bottom shelf slat supports. Cut (7) 1x6 boards to 17 ¾” and place along top support slats. Evenly space the slats and IF DESIRED, secure with 1 ¼” brad nails and/or 1 ¼” screws. You don’t have to secure the slats—that’s optional.
-
Finish As Desired
Apply paint and/or stain as desired making sure to use an exterior finish if you plan to use this outdoors.
Check out her website – https://woodshopdiaries.com/diy-potting-bench-with-wheels/
And the video – https://youtu.be/2DQvDb01y_Q