

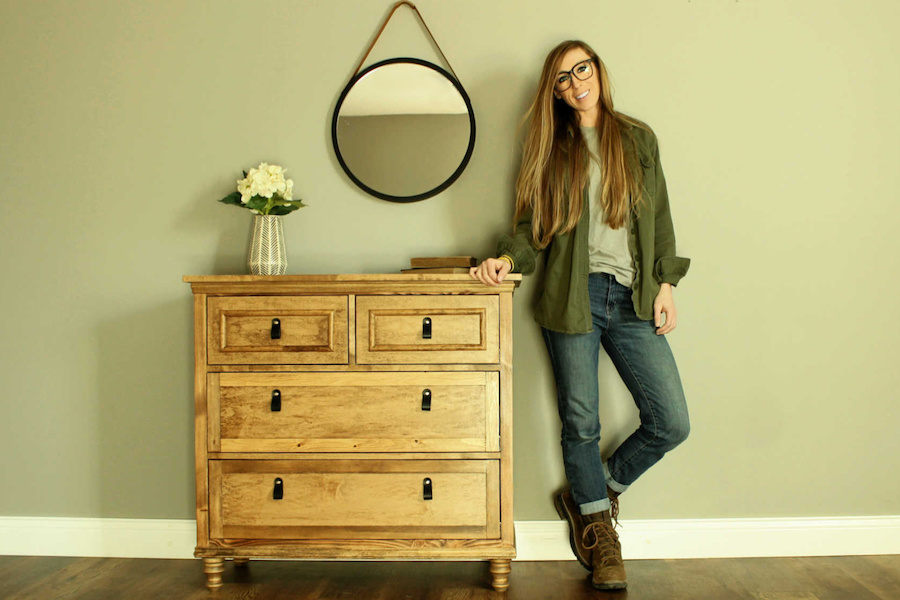
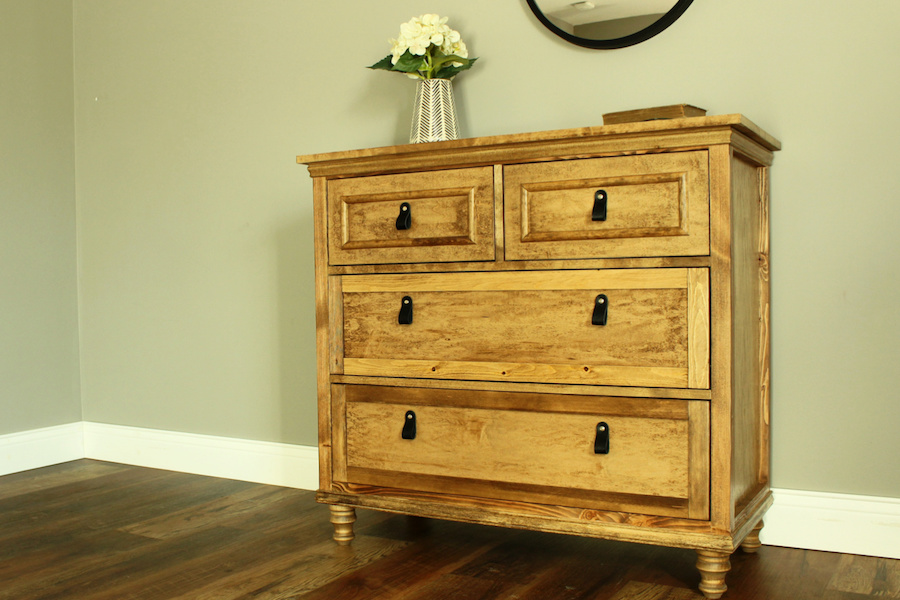
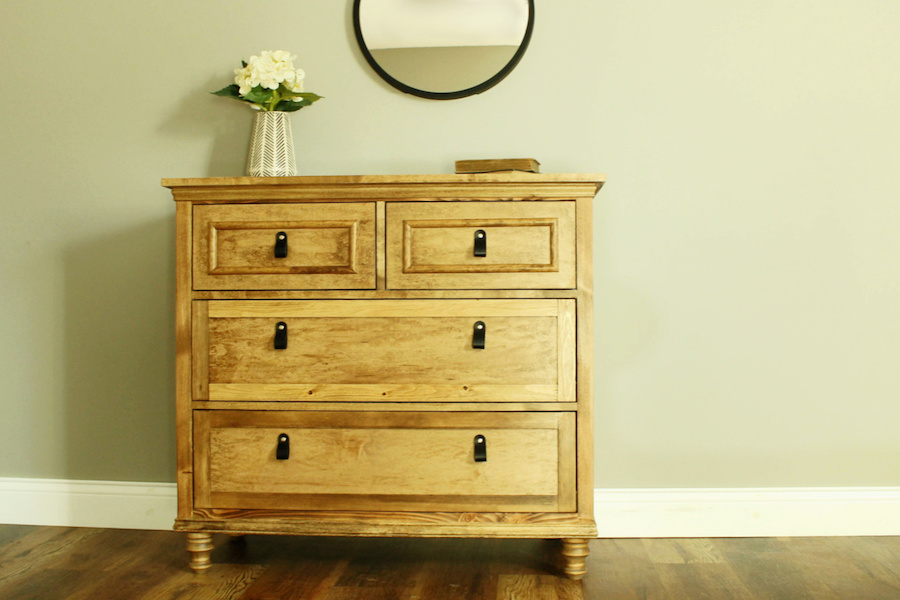


Make this beautiful dresser your own by dressing up the front frames and adding your own taste of hardware. This addition can be placed in a bedroom or living area for that always needed extra storage!
Tools
Kreg Tools


Other Tools
-
Miter Saw

-
Table Saw (Optional)
-
Brad Nailer
-
Clamps
Materials
Wood Products
- 1.5 Sheets of plywood , ¾” x 4' x 8'
- 1 Sheet plywood , ¼” x 4' x 8'
- 4 Boards , 2x2x8
- 2 Lattice trim , ¼” x 1 ½” x 8’
- 2 Chair rail molding , 1 ¼” tall
- 1 Half round molding (optional) , 3/8” x ¾” x 8’
- 4 Furniture feet , 4” tall
Hardware & Supplies
- 4 Furniture feet inserts OR plate brackets
- 4 Pair 16” ball bearing drawer slides
- 1 Box of 2 ½” pocket hole screws (See tools list)
- 1 Box of 1 ¼” pocket hole screws (See tools list)
- 1 Box of 1 ¼” wood screws
- 1 Box of 2” wood screws
- 1 Box of 1 ¼” brad nails
- 1 Box of 5/8” wood screws
- 6 Knobs/drawer pulls
- 1 Wood glue
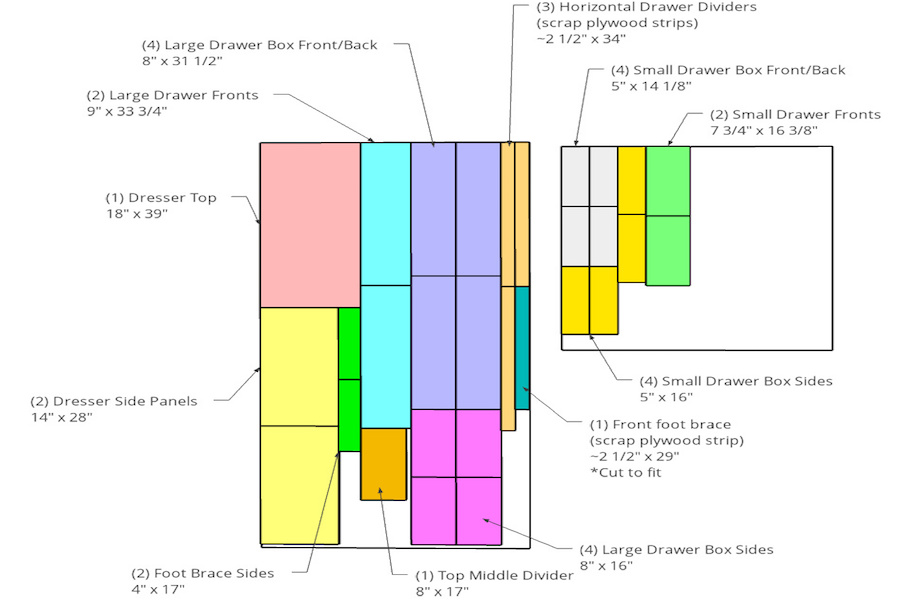
Cut List & Parts
- 2 Side panels (¾” plywood) , 14” x 28”
- 3 Horizontal drawer dividers (cut from scraps of ¾” plywood) , ~2 ½” x 34”
- 1 Top drawer divider panel (¾” plywood) , 8” x 17”
- 4 Top drawer box sides (¾” plywood) , 5” x 16”
- 4 Top drawer box front/back (¾” plywood) , 5” x 14 1/8”
- 4 Bottom drawer box sides (¾” plywood) , 8” x 16”
- 4 Bottom drawer box front/back (¾” plywood) , 8” x 31 ½”
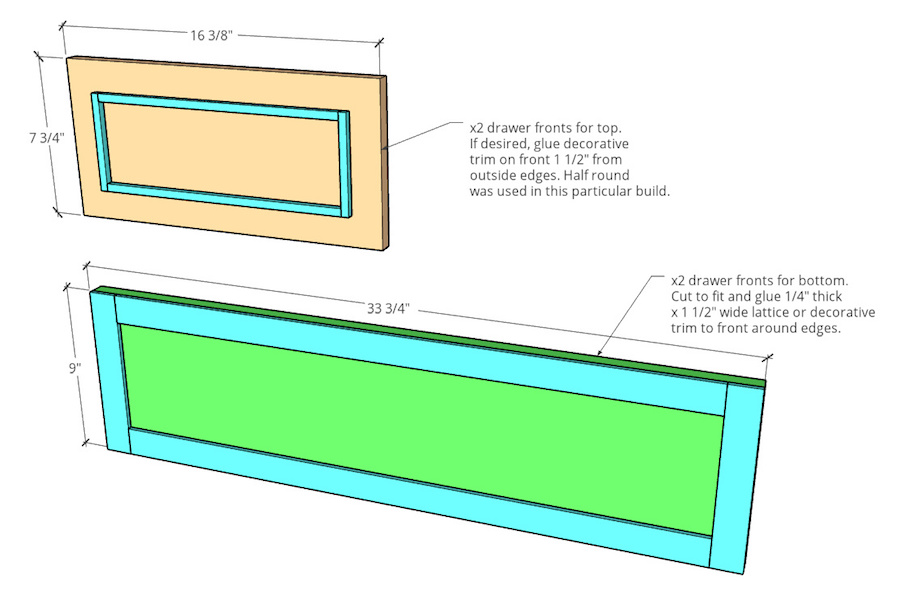
- 2 Top drawer fronts (¾” plywood) , 7 ¾” x 16 3/8”
- 2 Bottom drawer fronts (¾” plywood) , 9” x 33 ¾”
- 1 Top panel (¾” plywood) , 18” x 39”
- 2 Bottom side foot braces (cut from scraps of ¾” plywood) , 4” x 17”
- 1 Bottom front brace (can be cut from scraps of ¾” plywood) , 2 ½” x 29”
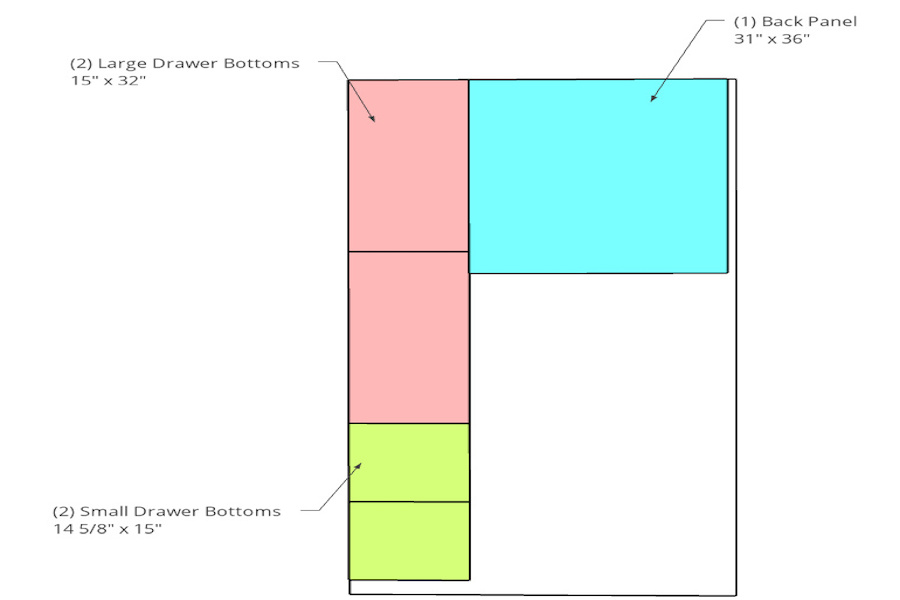
- 2 Top drawer bottoms (¼” plywood) , 14 5/8” x 15”
- 2 Bottom drawer bottoms (¼” plywood) , 15” x 32”
- 1 Back panel (¼” plywood) , 31” x 36”
- 4 Sides of side panel frame (2x2 boards) , 31” long
- 4 Top/bottom side panel frame (2x2 boards) , 14” long
- 4 Dresser front/back horizontal frame pieces (2x2 boards) , 34” long
- 1 Lattice, Half Round, and Chair Rail Trim , Cut to fit around dresser frame and drawer fronts
Directions
-
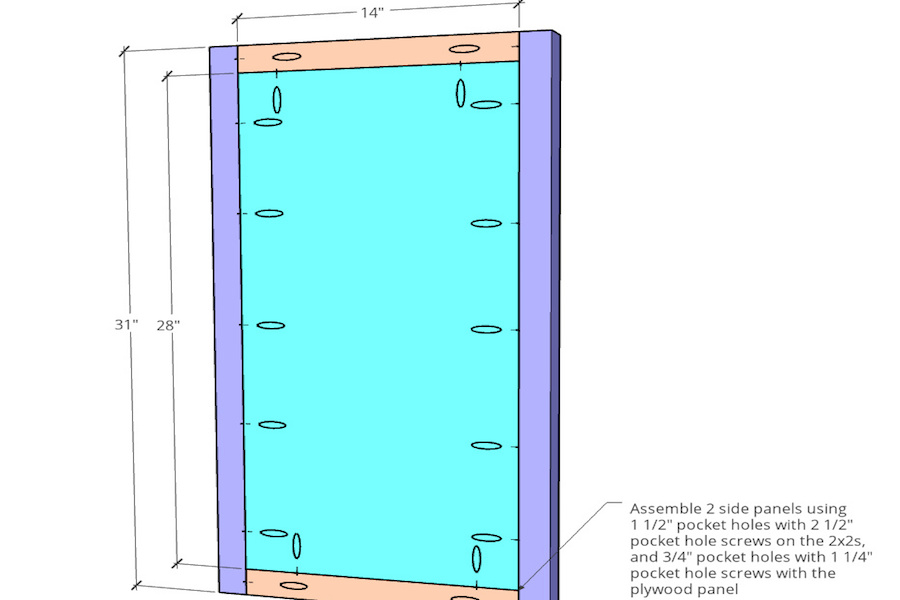
Assemble Dresser Sides
Cut ¾” plywood side panels and 2x2s for the side panel frame according to the cut list and the diagram shown below. Drill ¾” pocket holes around the edges of the plywood panel and 1 ½” pocket holes into the ends of the top/bottom side panel frame pieces. Assemble two dresser sides like shown using wood glue and 1 ¼” pocket hole screws in the plywood panel and 2 ½” pocket hole screws in the 2x2s.
-
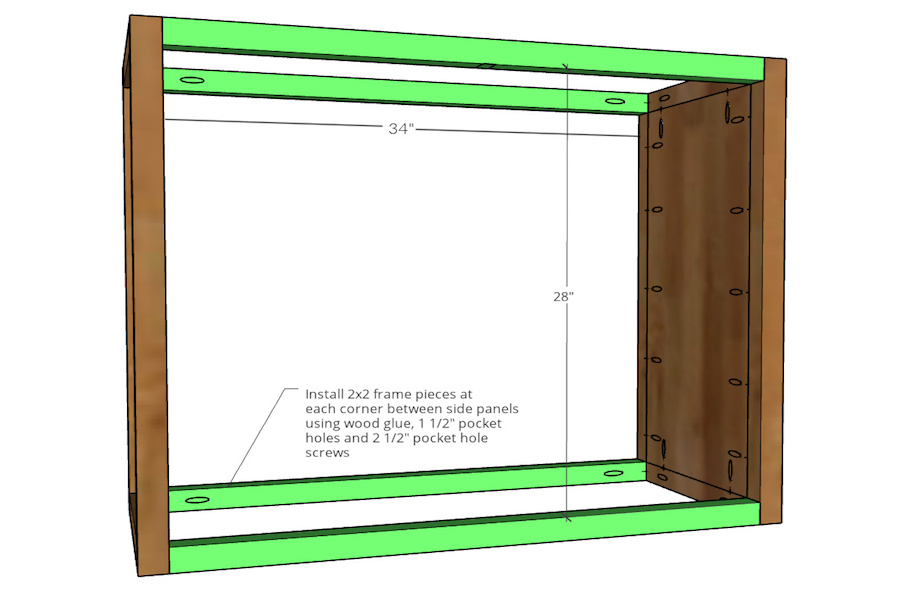
Assemble Dresser Frame
Cut four 2x2s to 34” long and drill 1 ½” pocket holes into the ends. Assemble the dresser frame by attaching these 2x2s at each corner between the sides from step 1 with wood glue and 2 ½” pocket hole screws.
-
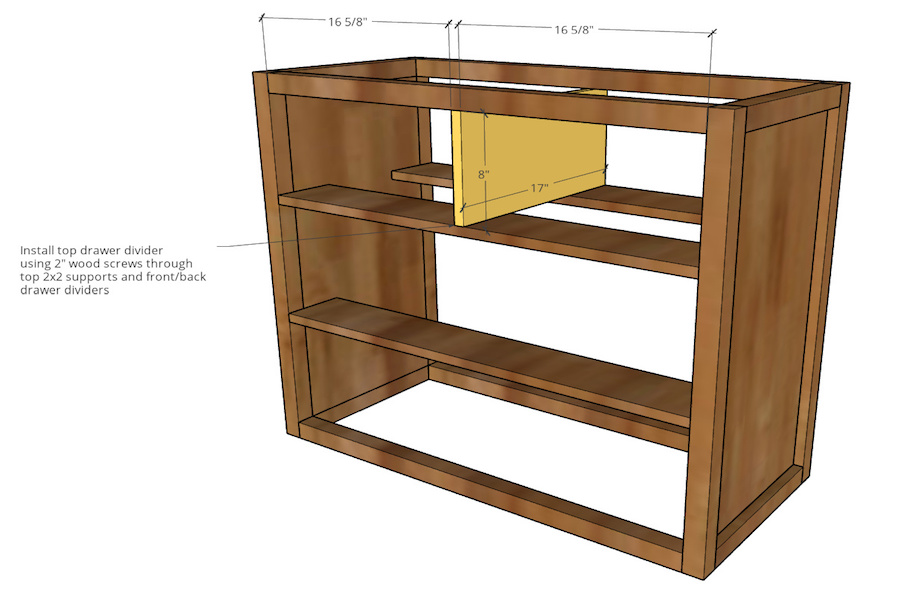
Attach Horizontal Drawer Dividers
Cut three ¾” plywood strips to 34” long. The exact widths don’t matter here, so feel free to cut these from scraps. Drill ¾” pocket holes into the ends of each and install them into the dresser frame—two at the front and one at the back using 1 ¼” pocket hole screws. Install the top two (one at the front and one at the back) 8” from the top 2x2s and the bottom one 9 ¼” from the bottom 2x2.
Tip:
NOTE: Edge band the front edges where the plywood will be exposed if desired.

-
Install Top Drawer Divider Panel
Cut a ¾” plywood panel to 8” x 17” to divide the top section of the dresser into two. Edge band the front edge of this piece if desired and center it between the dresser sides. Install between the top two drawer dividers and the top 2x2s using 2” wood screws.
-
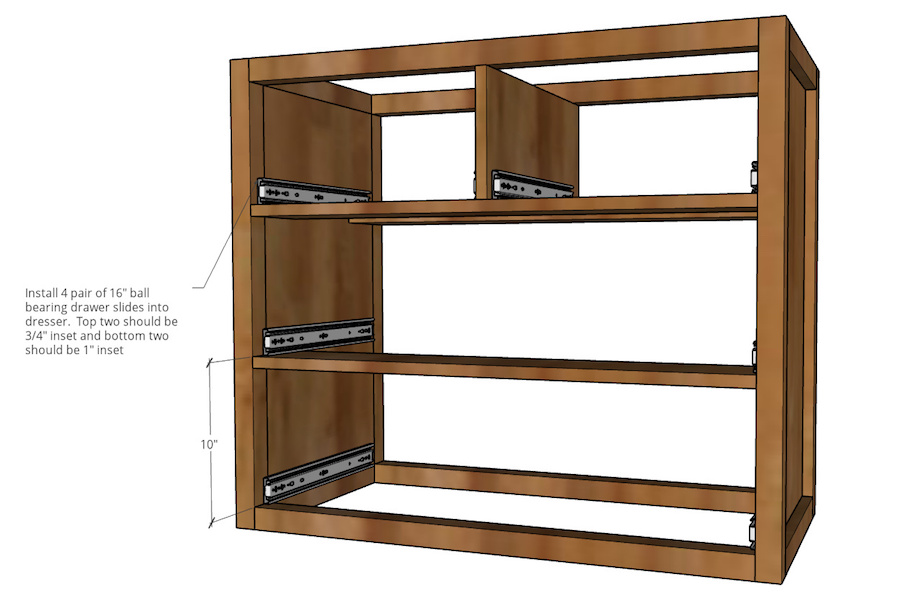
Install Drawer Slides
Use 5/8” wood screws to install four pair of 16” ball bearing drawer slides into the dresser frame. Install the large bottom drawer slides 1” inset from the front edge and the top smaller drawer slides ¾” inset from the front edge.
-
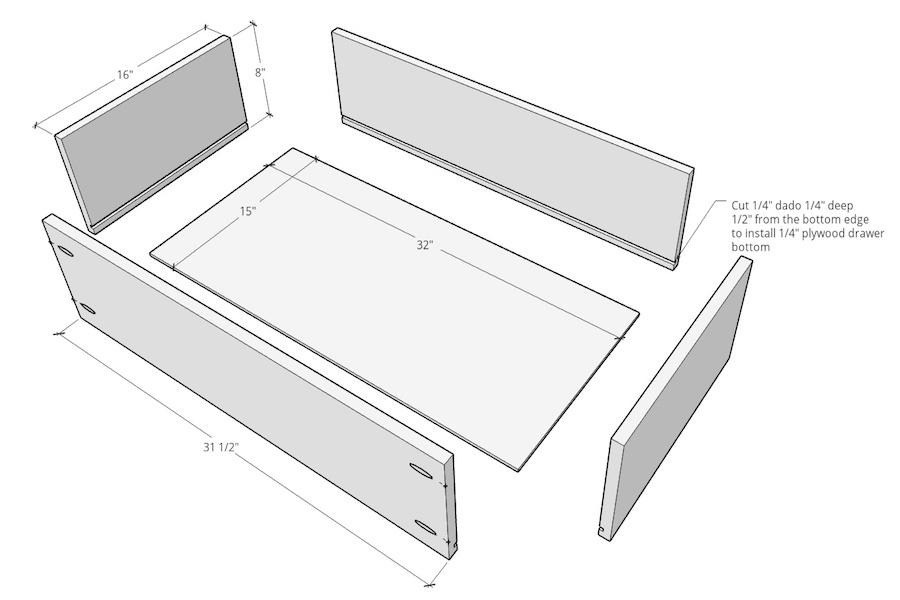
Build Large Drawer Boxes
Cut the pieces to assemble the two large bottom drawer boxes—the sides are ¾” plywood and the bottom is ¼” plywood. Cut ¼” dadoes, ¼” deep, ½” from the bottom edge of the drawer box sides to insert the ¼” plywood bottom and assemble using ¾” pocket holes and 1 ¼” pocket hole screws.
-
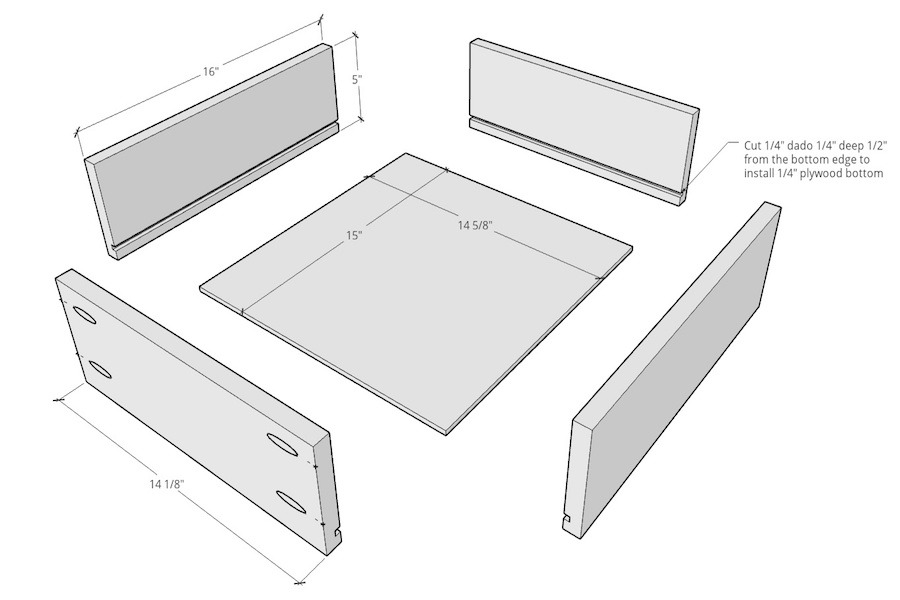
Build Small Drawer Boxes
Cut the pieces to assemble the two smaller top drawer boxes—the sides are ¾” plywood and the bottom is ¼” plywood. Cut dadoes and assemble just like the larger drawers in step 6.
-
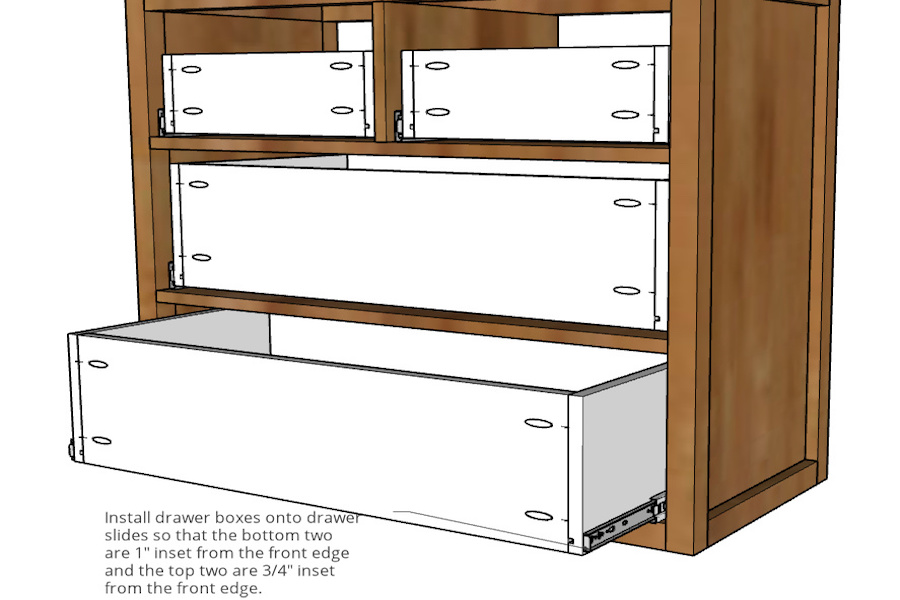
Install Drawer Boxes
Install drawer boxes into dresser using 5/8” wood screws. Keep the bottom two drawers 1” inset from the front edge of the dresser and the top two drawers ¾” inset from the front edge. Install each drawer so that it is ¼” above the boards below it (you can use some scrap ¼” plywood as a spacer block while you install).
-
Cut and “Dress Up” Drawer Fronts
Cut ¾” plywood drawer fronts and cut to fit ¼” thick lattice trim around large bottom drawer fronts. Glue in place around edges. Cut to fit half round (or other) molding to install on small drawer fronts so that it makes a rectangle 1 ½” in from each edge. Glue these pieces onto the small drawer fronts. Feel free to get creative here with your trim options and dress up your drawer fronts as you wish.
-
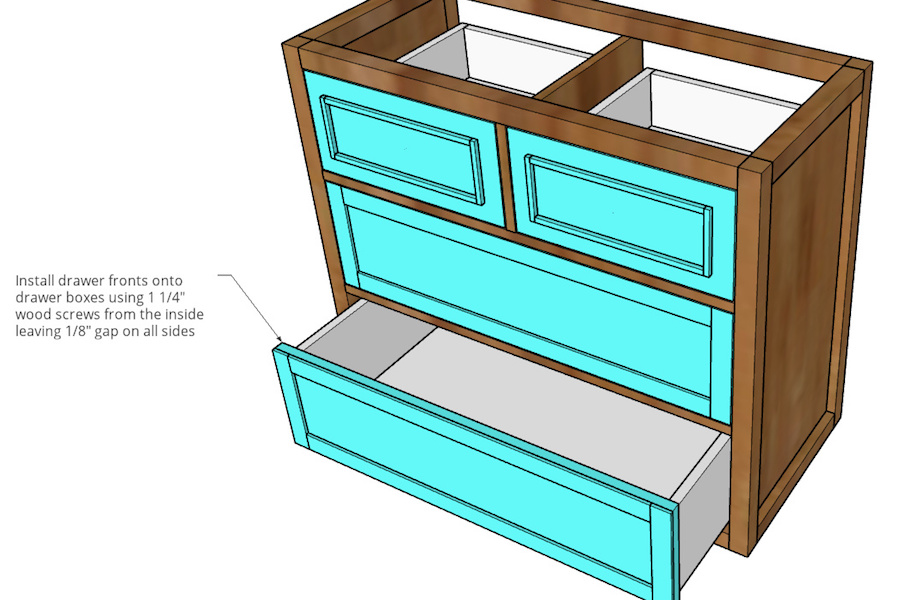
Install Drawer Fronts
After glue on trim in step 9 is dry, install drawer fronts onto drawer boxes from the inside using 1 ¼” pocket hole screws (or wood screws). Make sure to install so that there is about 1/8” gap around all sides when drawers are closed.
-
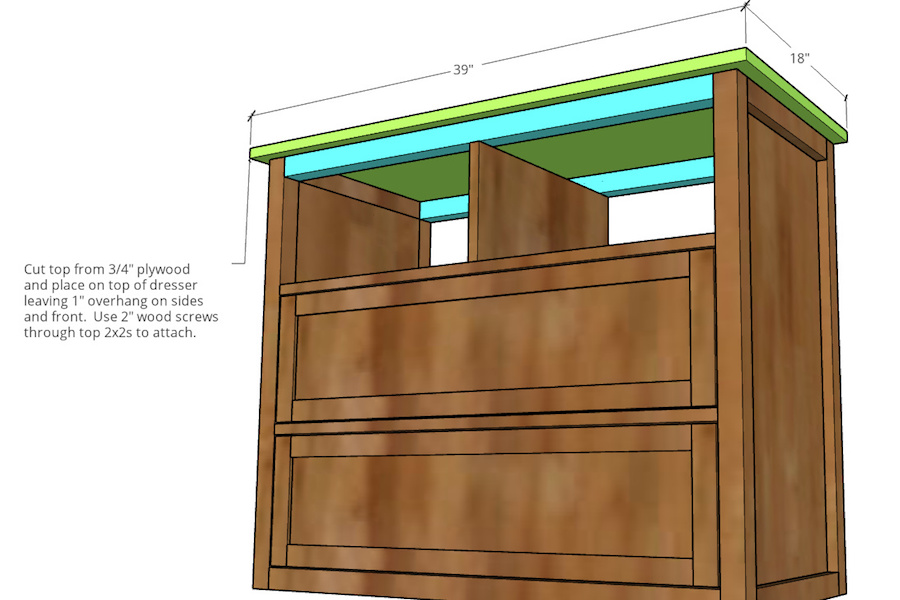
Attach Top Panel
Cut ¾” plywood top panel and edge band edges if desired. Remove top two drawers (use the tabs on the drawer slides to simply slide the boxes out), and place the top panel on the frame leaving 1” overhang on front and both sides. Use 2” wood screws through the top 2x2 frame pieces to secure.
-
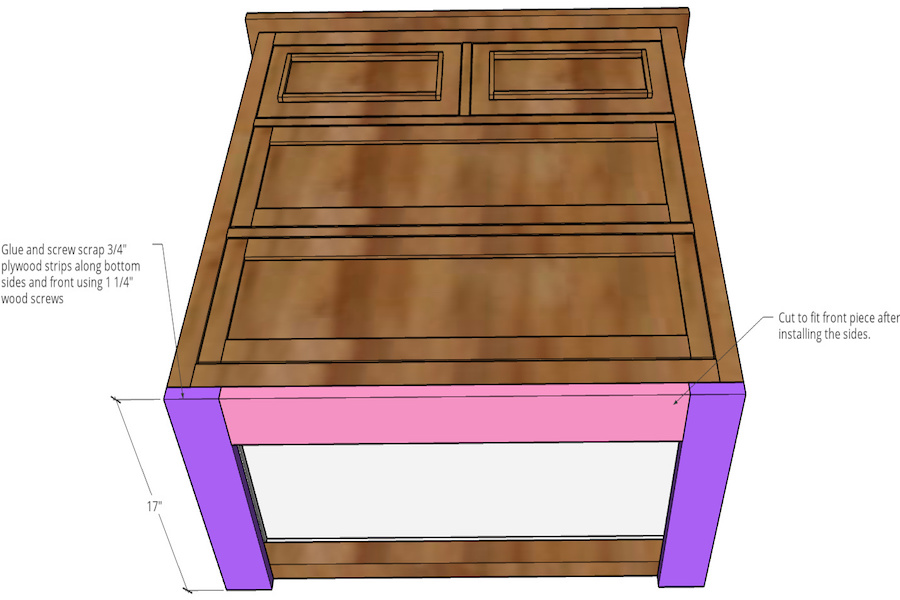
Add Foot Braces
The furniture feet used in this project were about 3 ½” diameter and were installed using inserts. Because the insert would need to be placed so close to the edge of the bottom frame, “foot braces” were installed at the bottom in order to insert the furniture feet inserts into. These pieces are just scrap plywood glued and screwed onto the bottom of the dresser frame along the sides and front. They do not need to be a specific width and can be simply glued and screwed in place using 1 ¼” wood screws from the bottom.
-
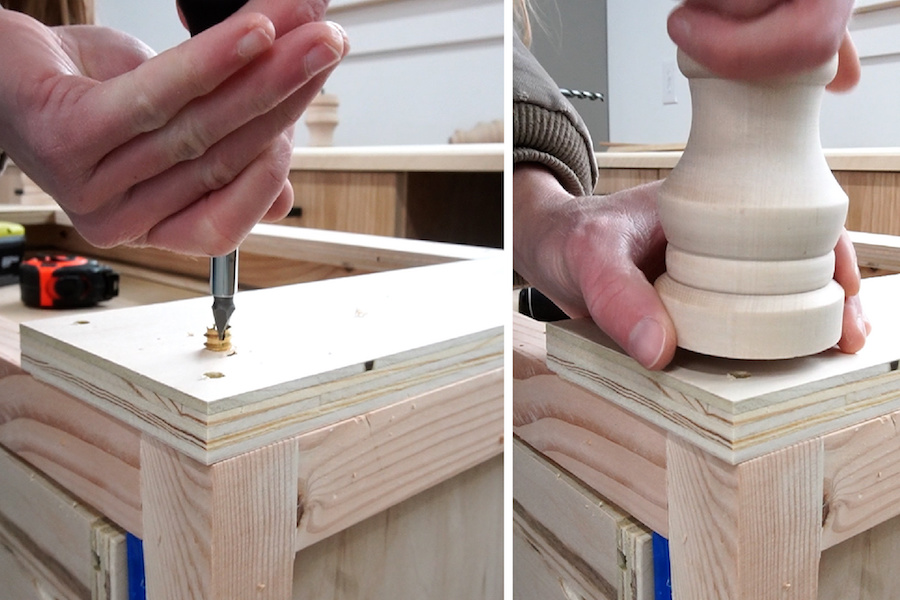
Install Furniture Feet Inserts and Screw Feet in Place
See video for more detail on installing the furniture feet inserts. Flip dresser upside down and drill out a hole into the braces in step 12 at each corner far enough from the edges that the feet you use won’t stick out past the dresser frame when installed. Screw the insert into the hole and screw the feet into the insert.
-
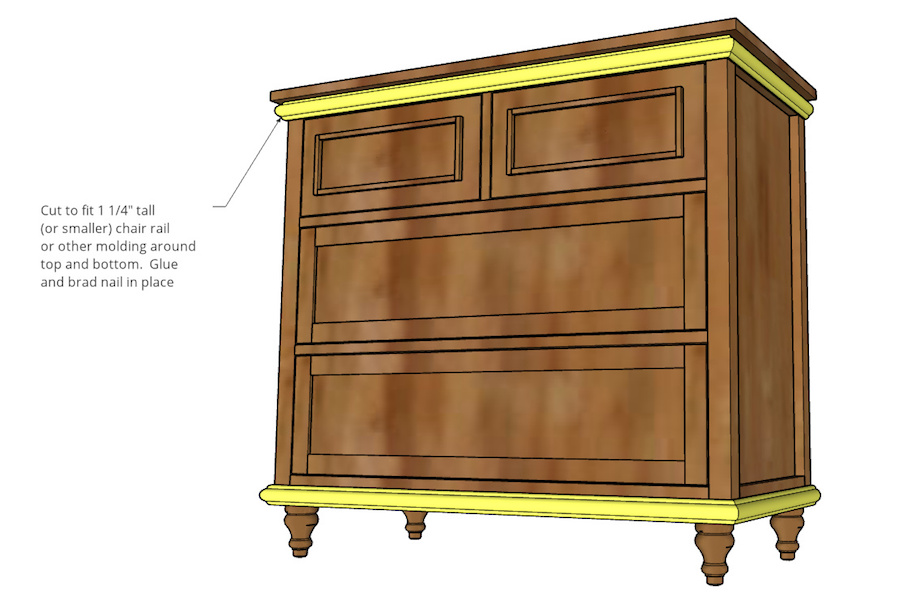
Trim Dresser
Cut to fit 1 ¼” tall (or smaller) chair rail or other decorative molding around the top and bottom of the dresser. Miter the corners 45 degrees, but keep the back ends square. Glue and brad nail pieces in place.
-
Add Back Panel
Cut ¼” plywood back panel and staple or glue/brad nail the panel onto the back (it will be inset the sides by about ¾” on each side).

-
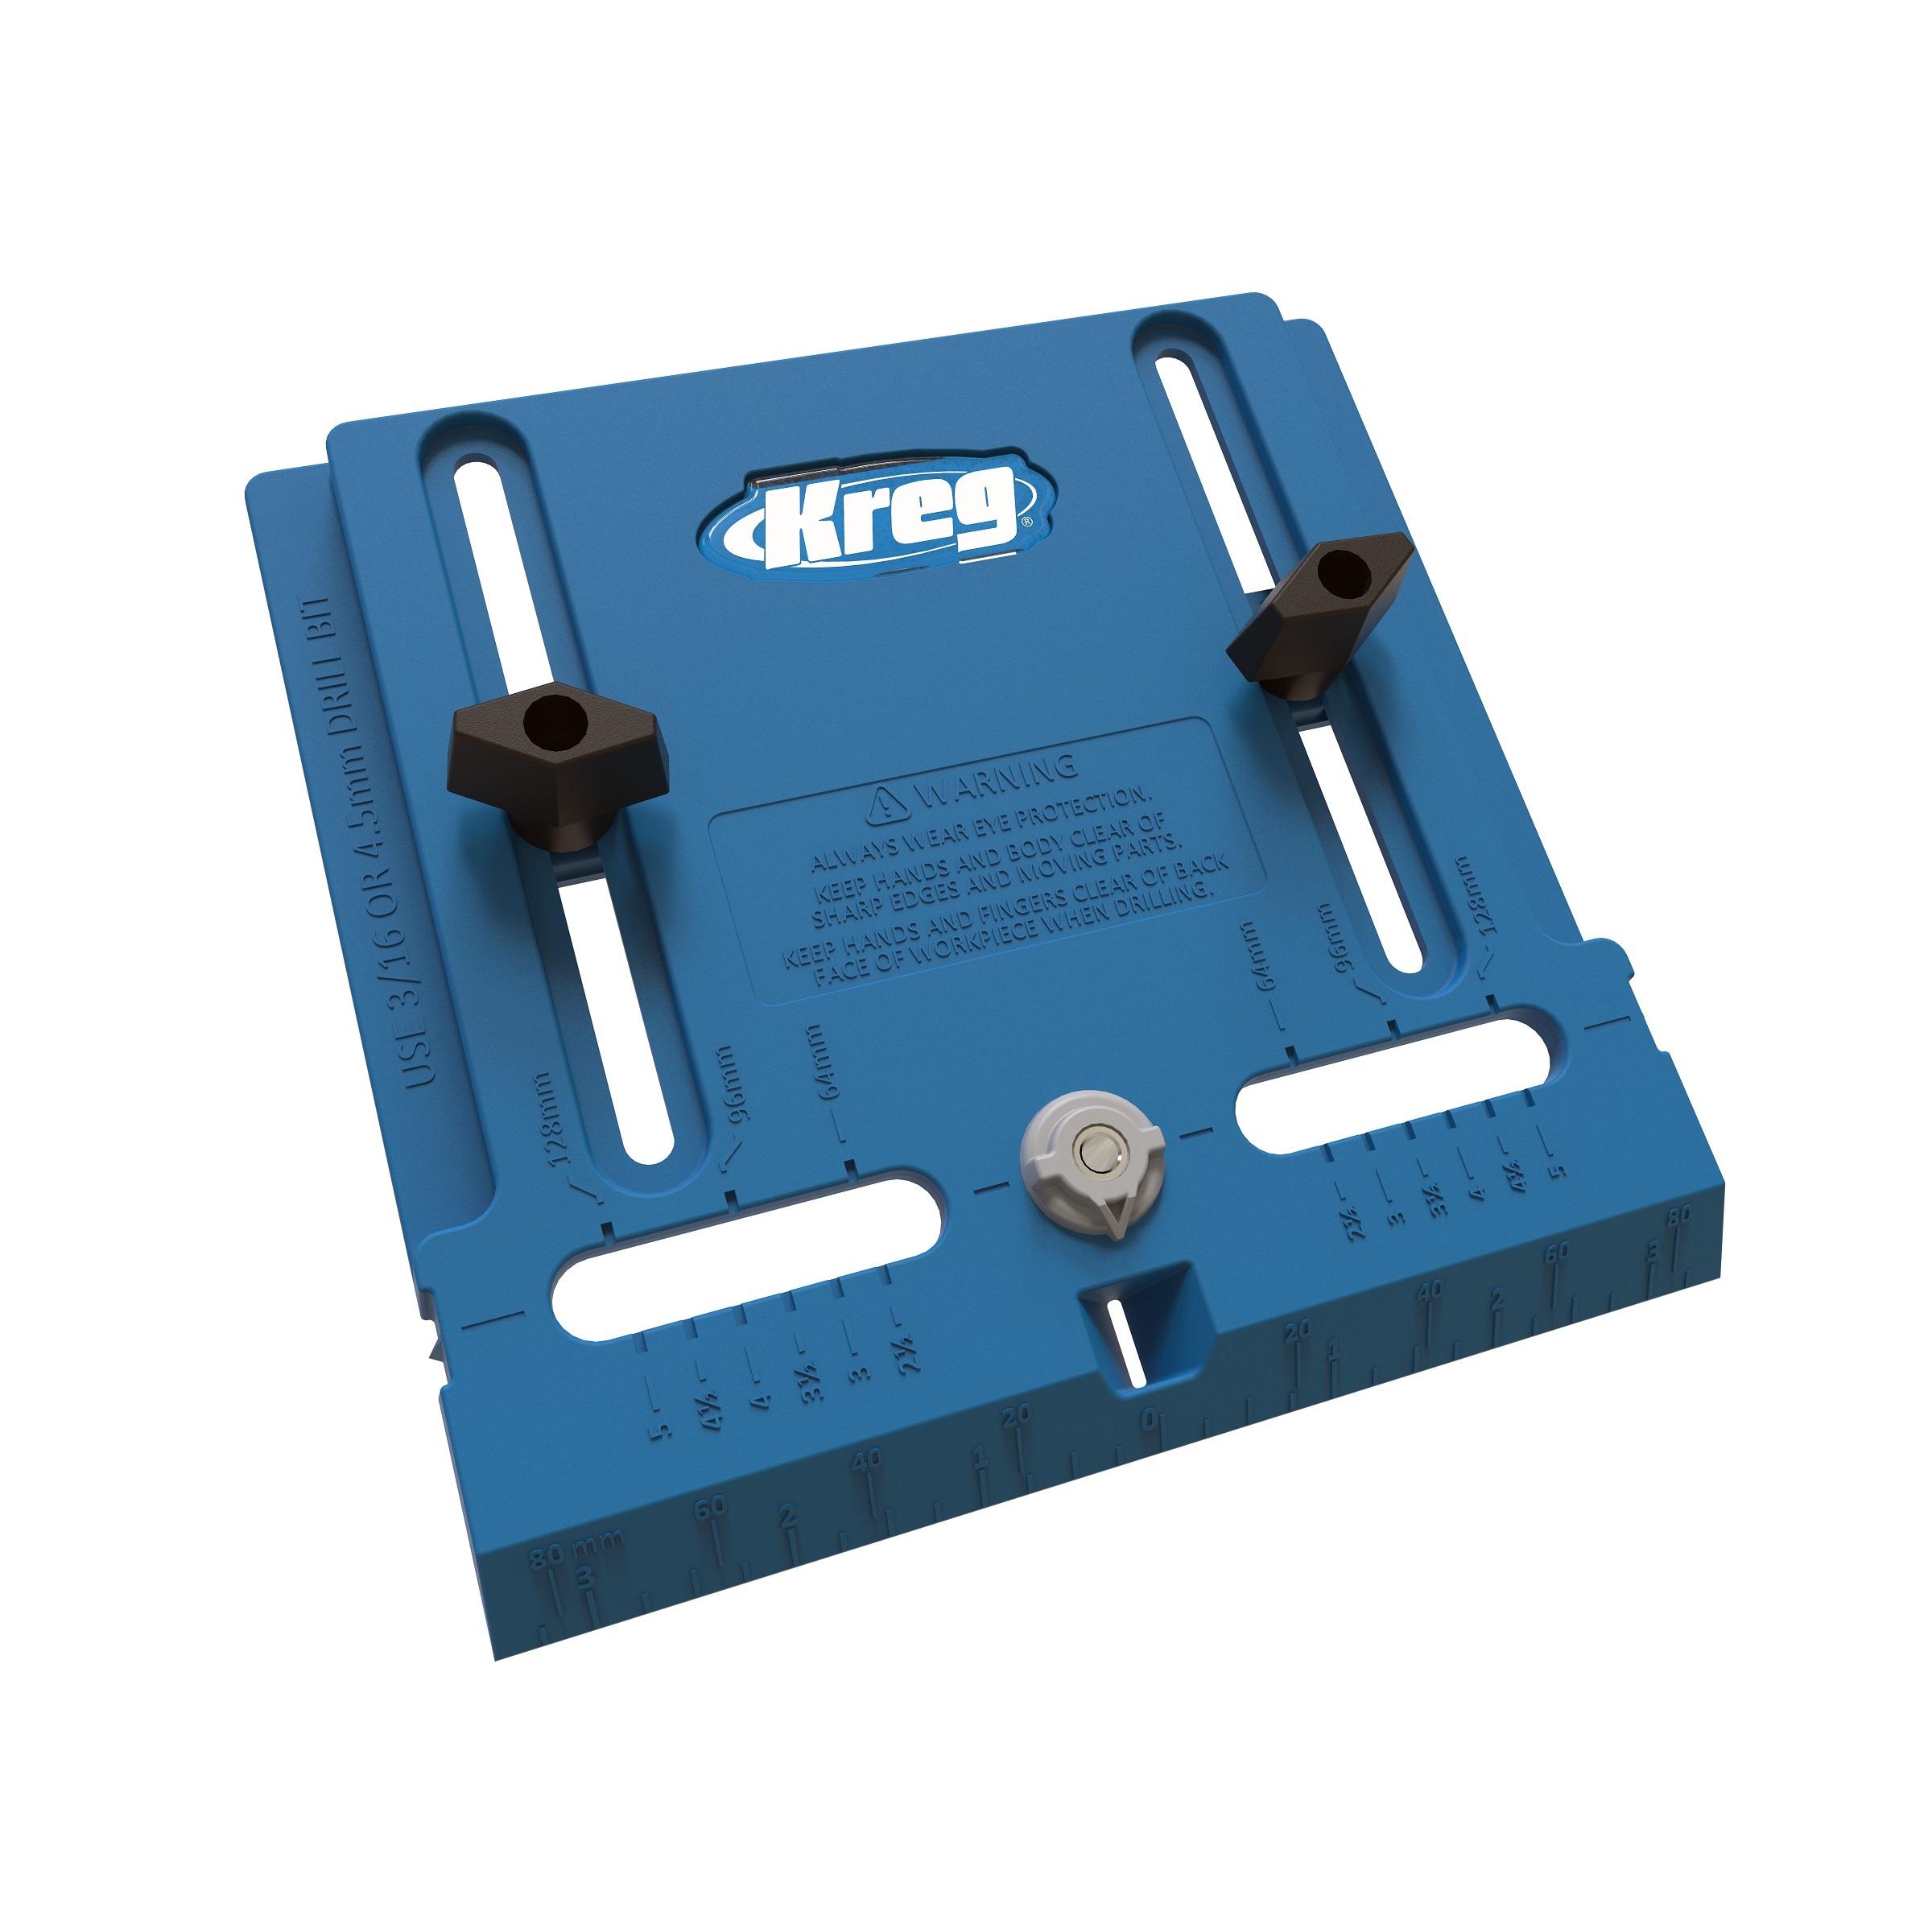
Finish as Desired and Add Drawer Pulls/Knobs
Putty over nail holes and corners of trim and give the piece a final sanding. Then, finish dresser as desired—paint, stain and/or poly. Then add drawer hardware of your choice.
Watch the YouTube video for this project at https://www.youtube.com/watch?v=K0iekAg6HXw&t=1s
Check out more from Woodshop Diaries here:
WoodshopDiaries.com
Instagram
Facebook
YouTube
TikTok