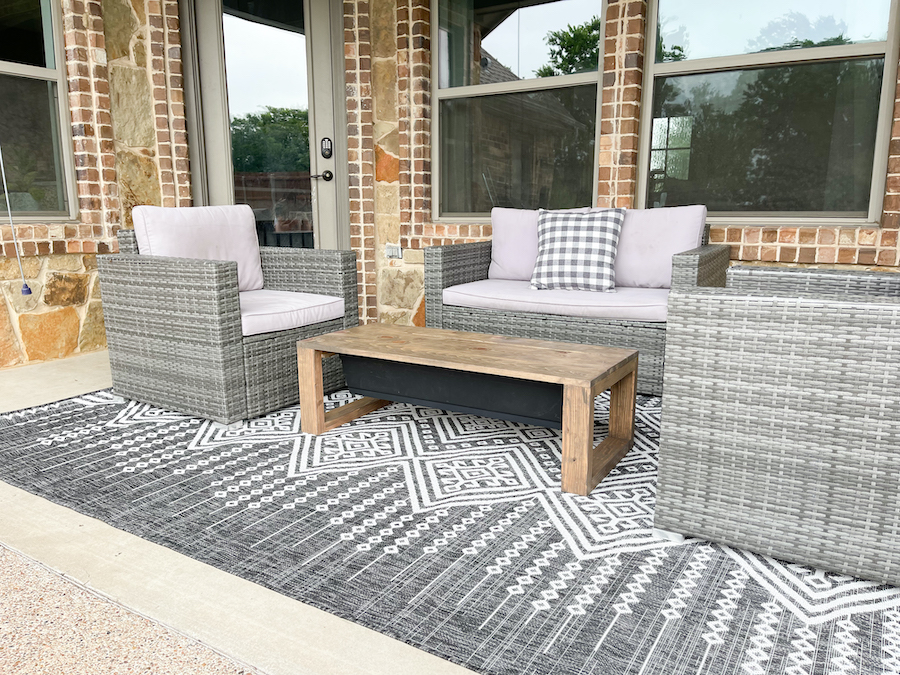
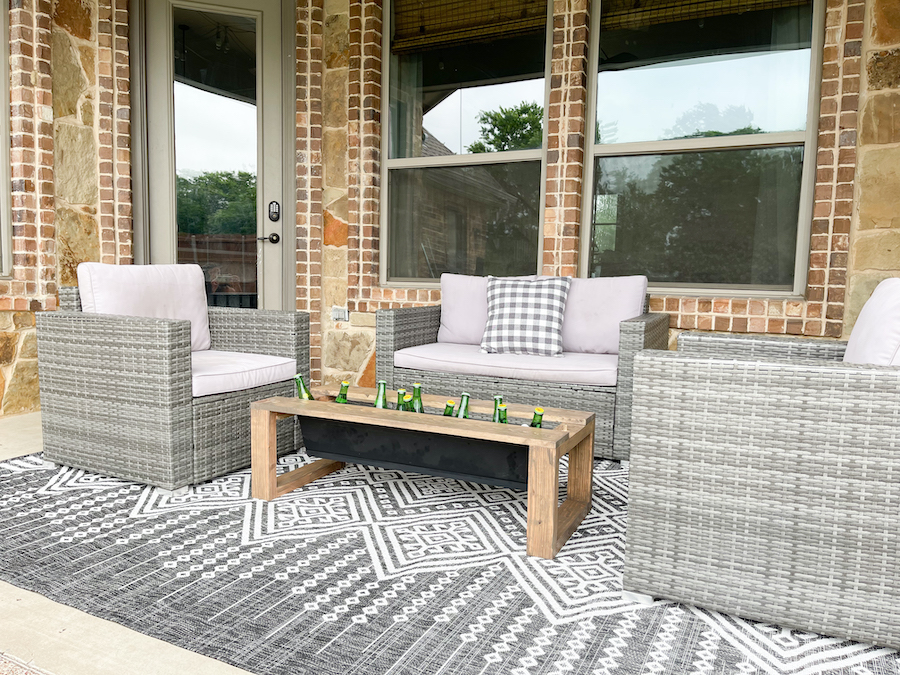


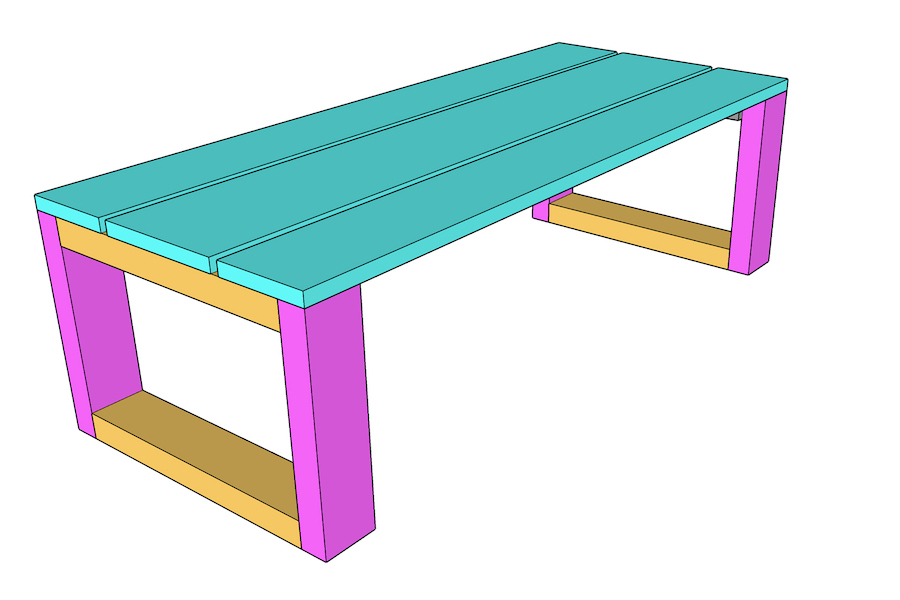
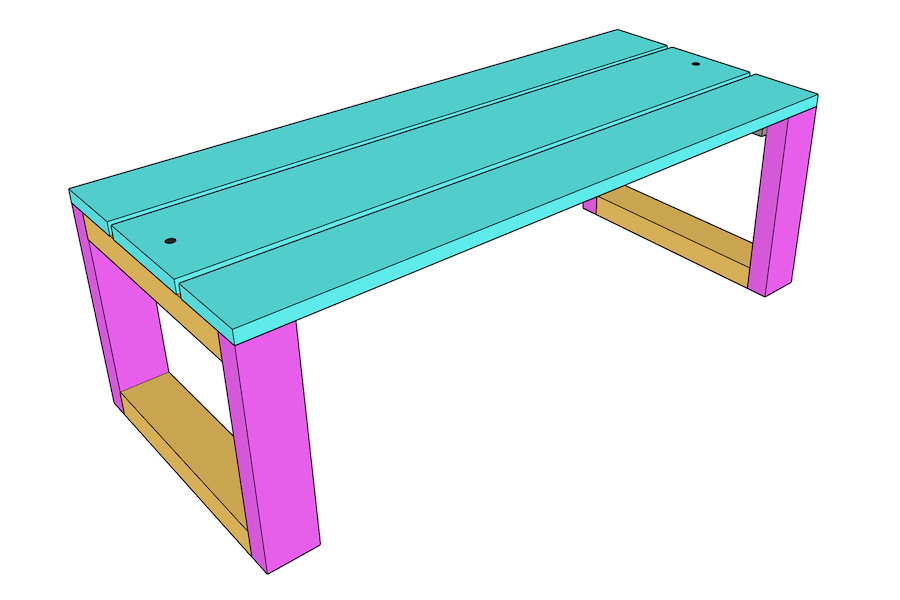
Sit back and relax this summer around this outdoor coffee table with a removable built in cooler- completely eliminating the need to get up for that second round.
Tools
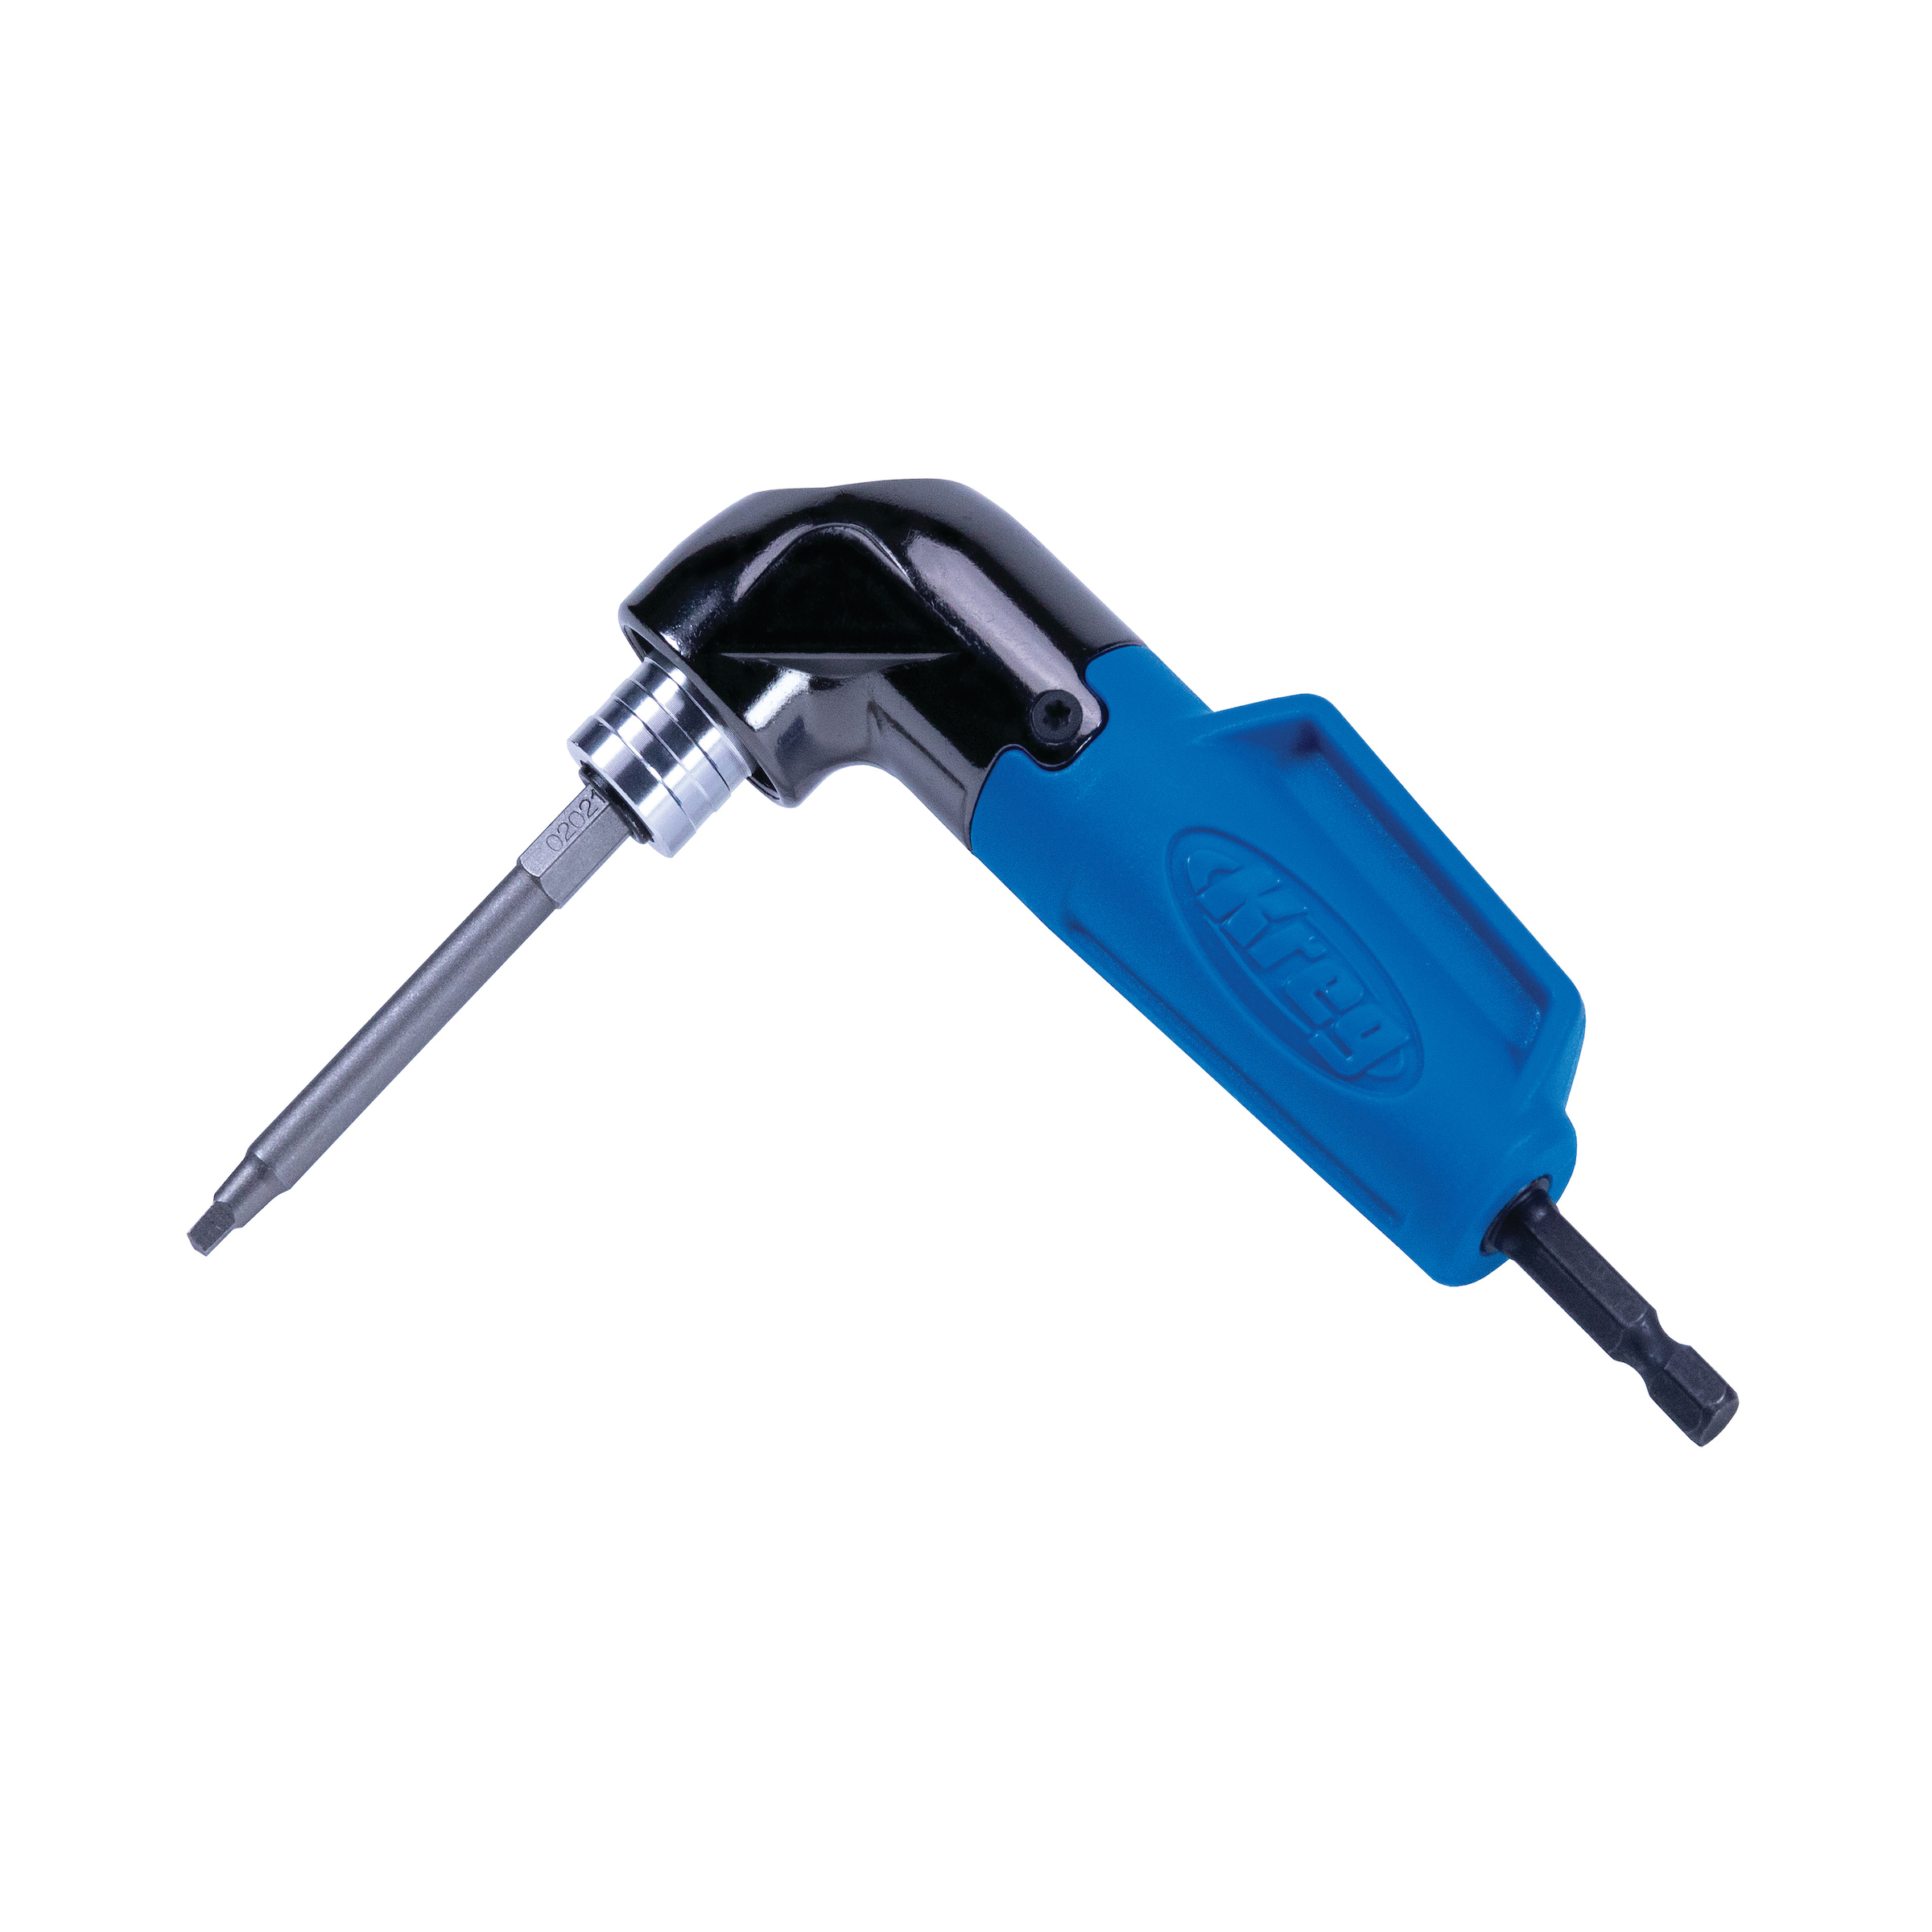
Kreg Tools


Other Tools
-
Brad Nailer

Materials
Wood Products
- 2 Pine or Common Board , 1x8x8
- 2 Framing Lumber , 2x4x4
- 1 Square Dowel- Pine , 1/2" x 36"
- 1 Round Dowel- Pine , 1/2" x 36"
Hardware & Supplies
- 1 Box of 2 1/2" Pocket Hole Screws (See tools list)
- 1 Box of 1 1/4" Brad Nails
- 1 Wood glue
- 1 Planter Box - 7.86 x 35.75 inches
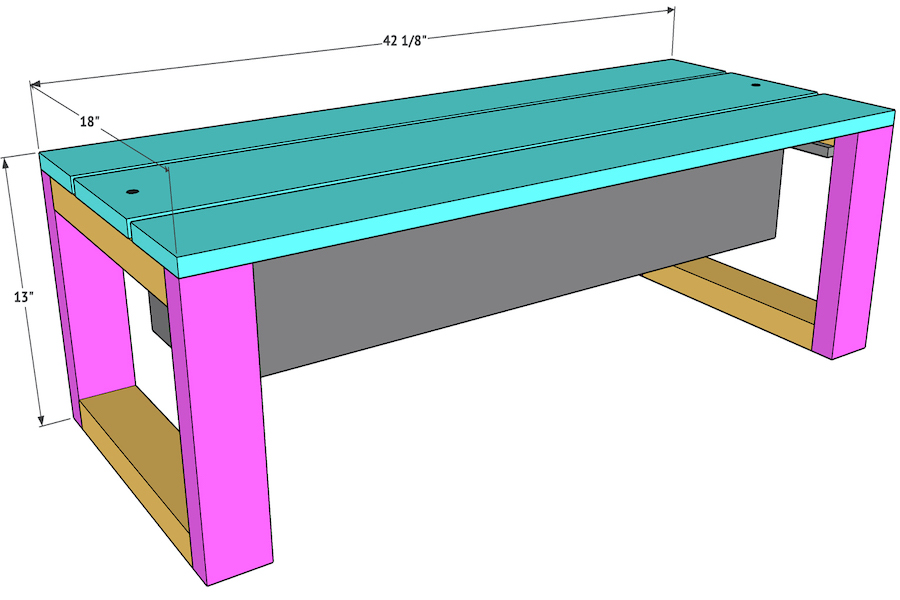
Cut List & Parts
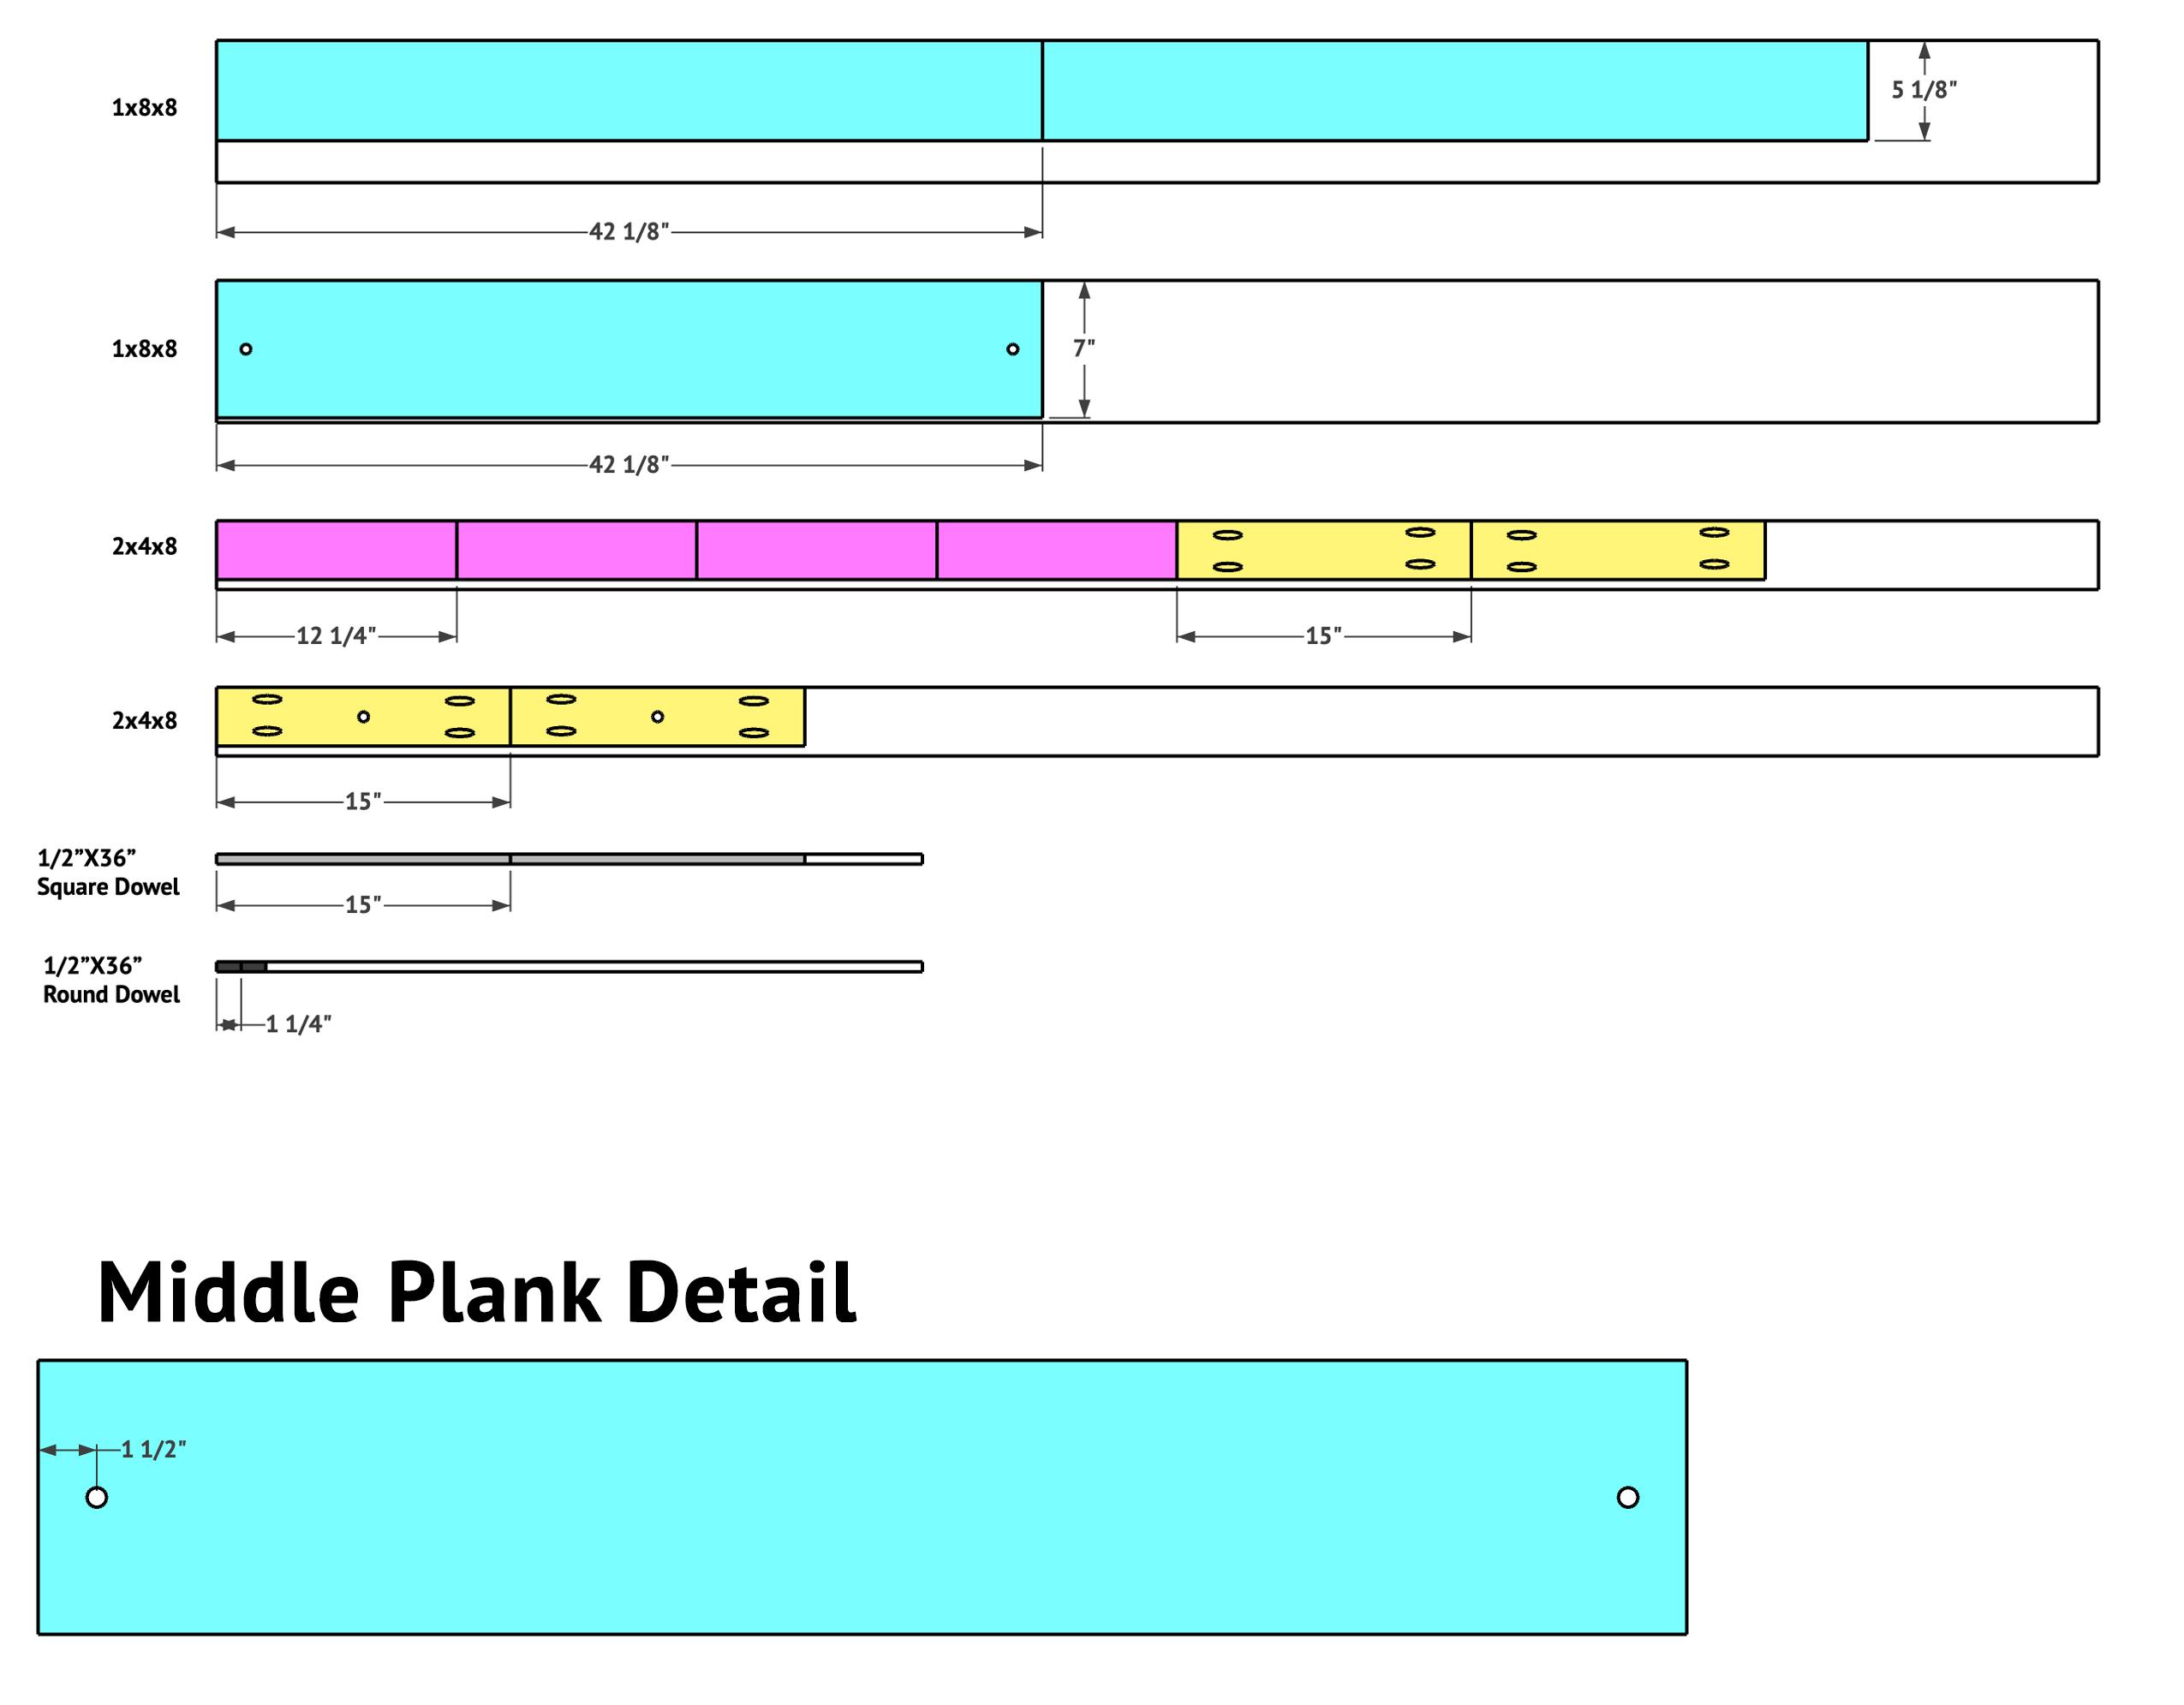
- 1 Board , 1"x8"x8', ripped down to 1"x5 1/8" x 42 1/8"
- 1 Board , 1"x8"x8', ripped down to 1"x7"x 42 1/8"
- 1 Board , 2"x4"x8', ripped down to 1"x3"x 12 1/4" (x4) and 1"x3"x 15" (x2)
- 1 Board , 2"x4"x8', ripped down to 1"x3"x 15" (x2)
- 1 Square dowel , 1/2"x36" cut down to two 15" pieces
- 1 Round dowel , 1/2"x36" cut down to one 1 1/4" piece
- 1 See cut list image for further explanation and pocket-hole and dowel placements
Directions
-
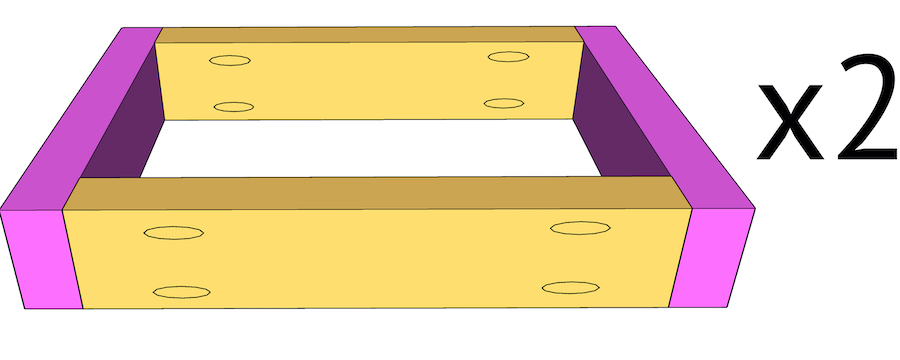
Step 1
Cut the leg base piece to size. Drill 1 1/2" pocket holes at both ends of the horizontal pieces. Attach the horizontal pieces to the vertical pieces with 2 1/2" pocket hole screws and wood glue. Build two base assemblies.
Tip:
*Many of these cuts are best made as you go. If you have questions, check out the tutorial on their site!
-
Step 2
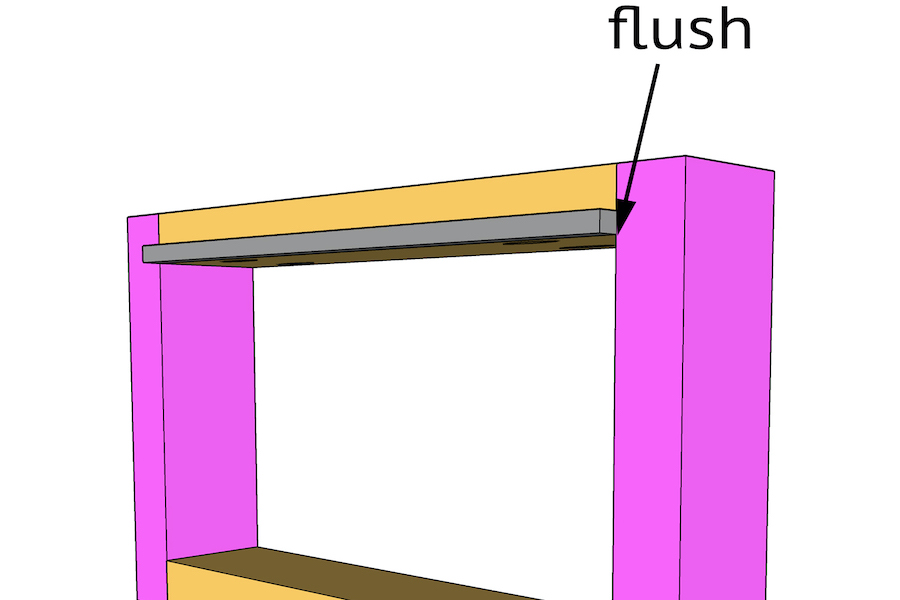
Cut the square dowels to size and attach one to the inside of each base assembly with 1 1/4" brad nails and wood glue. The dowel should be flush with the bottom of the top horizontal piece. Pocket holes should face down.
-
Step 3
Cut the outside table top planks to size. With the planks facing down, lay the base assemblies on top of the planks. Attach the bases to the planks with 2" pocket hole screws from the inside of the base, into the planks. The planks should be flush with the base assemblies.

-
Step 4
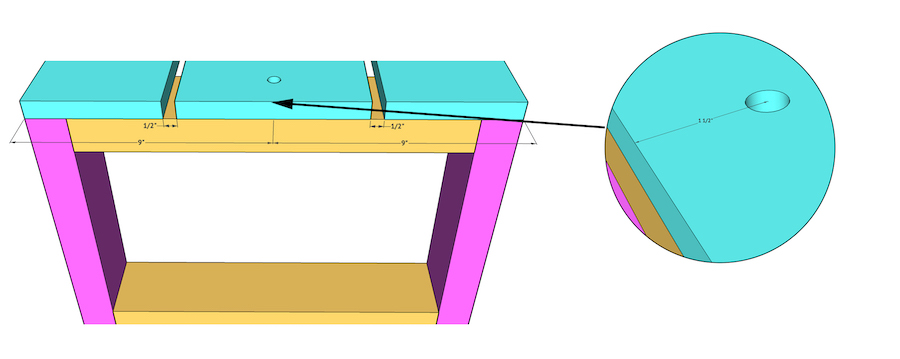
Cut the middle plank to size and lay it on top of the table base. This plank will not be attached to the base.
-
Step 5
Center the middle plank and drill a 1/2" hole through the middle plank and into the top of the base assemblies. Only drill about 1/2" into the base assemblies. Do this on both ends of the middle plank.
-
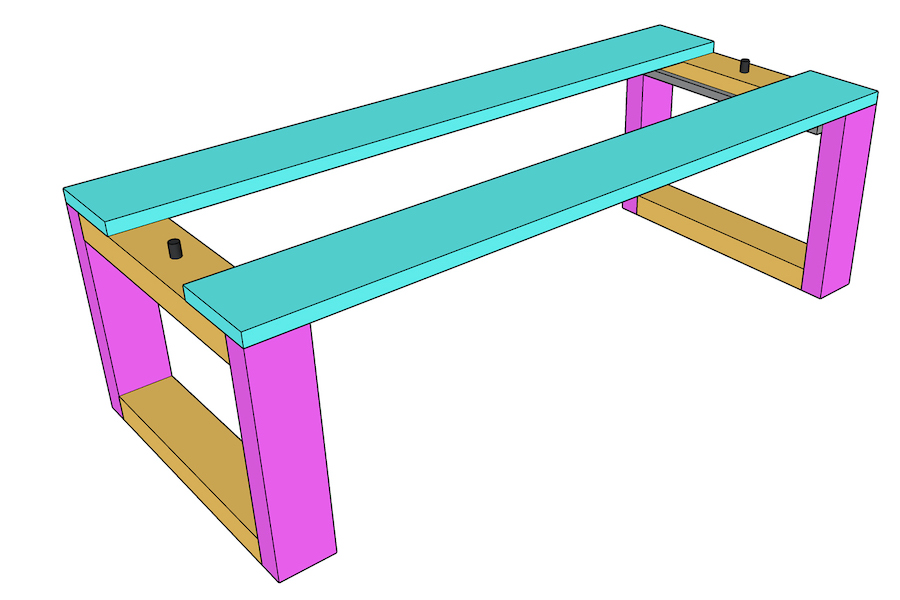
Step 6
Measure and cut for the dowels. You can do this by dropping the dowel into the plank and base and marking for your cut. Cut the dowels and secure them in each base with wood glue.
-
Step 7
Slide the middle plank over the dowels. You can sand them down a bit to make sure they are flush with the table top.
-
Step 8
Sand the entire table down, add a finish and an outdoor sealer and you're done! Now you can slide the planter box in, fill it with ice and drinks, kick back and enjoy the fruits of your labor!
Make sure to share your builds with us on social media and use #shanty2chic so we can share them too!