


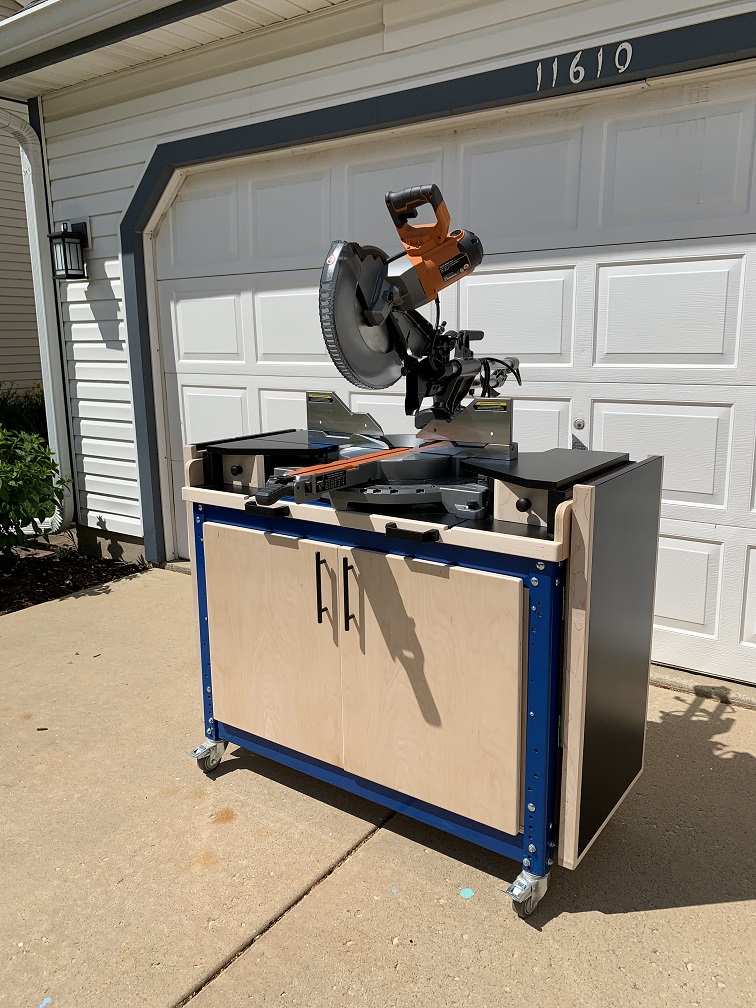
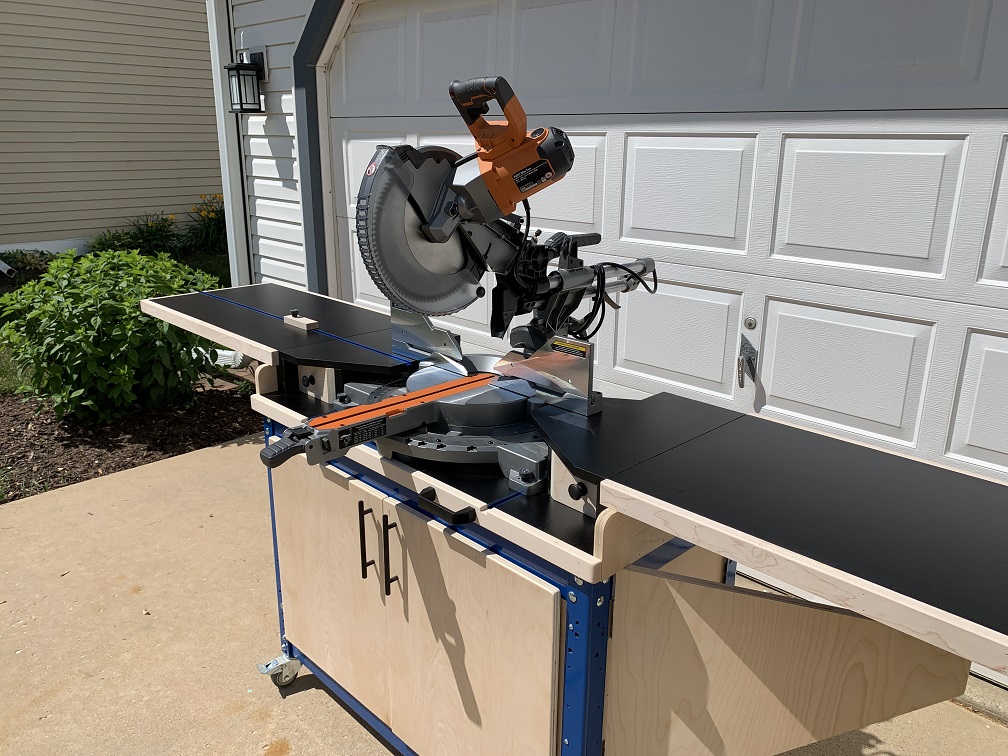


I recently got a new 12” sliding miter saw and I couldn’t wait to start using it. However, it would not fit into my existing Paulk style miter station. I decided that I needed to build a new mobile miter saw stand and that I was going to center the build on a Kreg Universal Workbench.
Now, you can simply bypass this step and build your own 2x4 frame if you want, but I like the nature of the metal base and heavy-duty carriage bolt hardware. I also chose to add folding wings and supports to each side. Let me show you how I did it!
Tools
Kreg Tools


Other Tools
-
Table Saw (optional)

-
Clamps
-
Miter Saw
-
18ga Brad Nailer
-
Level
-
Speed Square
-
Long Ruler
-
Iron (for edge banding)
-
Edge Banding Trimmer
-
5 minute epoxy for t-tracks
Materials
Wood Products
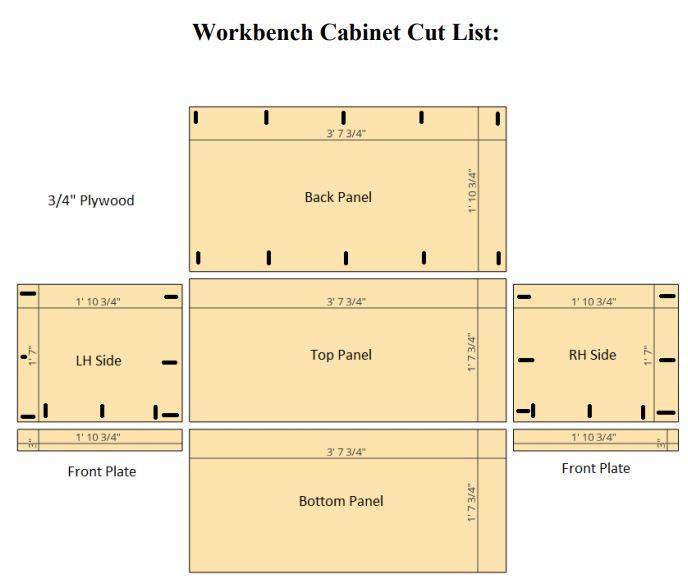
- 2 Plywood sheets , ¾”
- 1 Plywood sheet , ½”
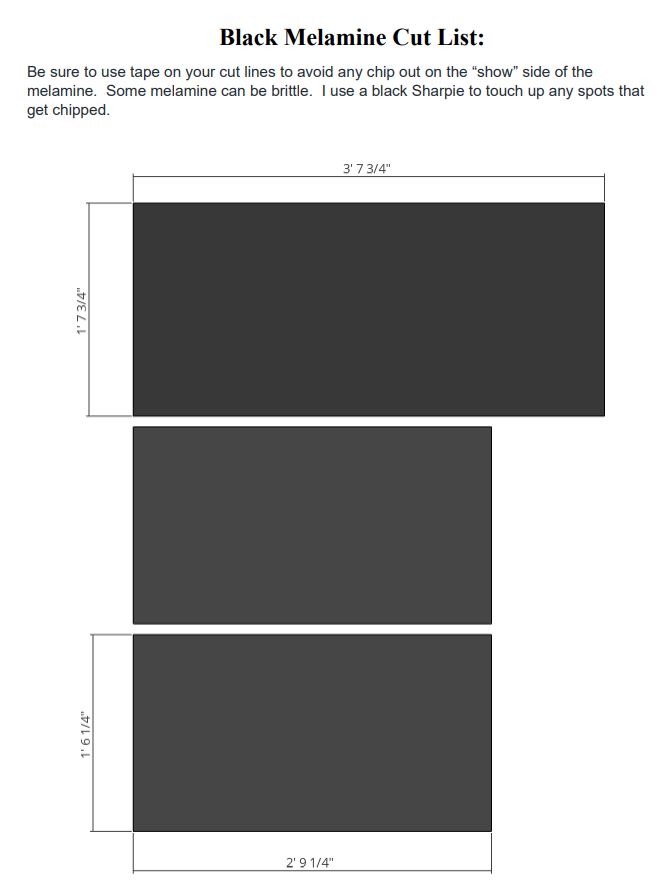
- 1 Black melamine , ¾”
- 1 Hard maple , 1"x2" , Depends on how much trim you want to add
Hardware & Supplies
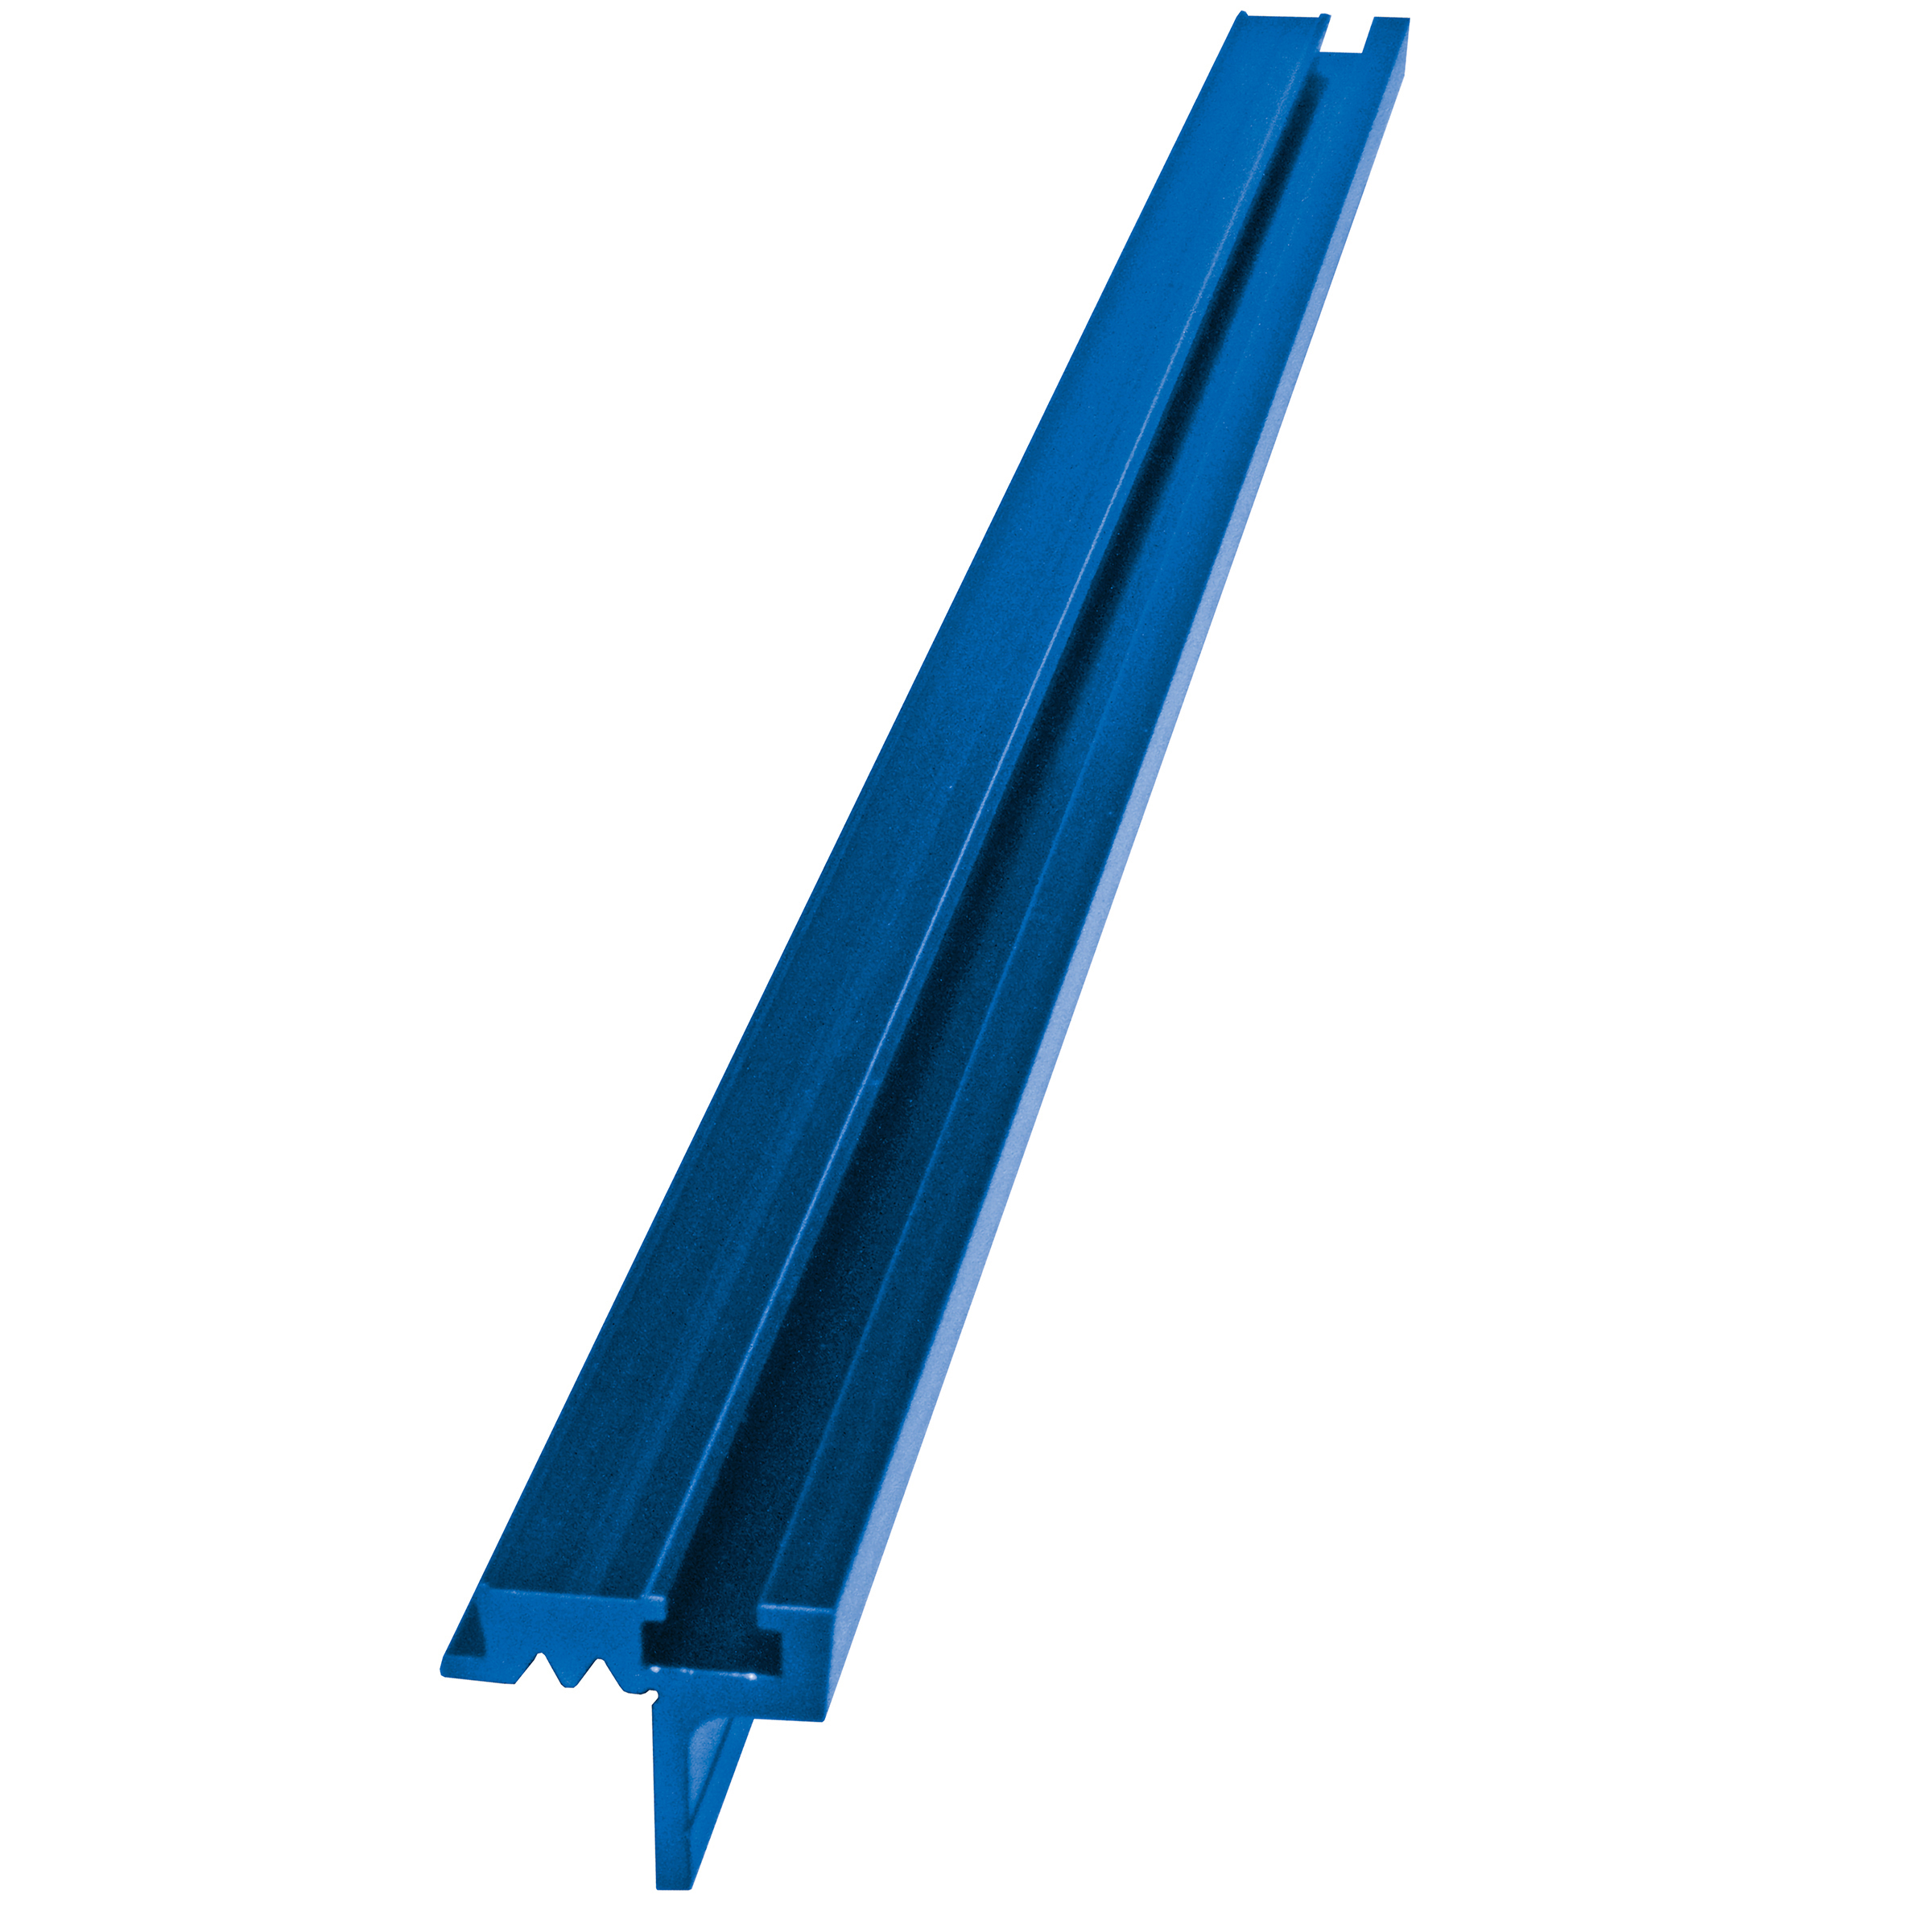
- 2 Kreg Top Track 48" (see tool list)
- 5 ¼” x 3” T-bolts
- 5 ¼” Knobs
- 8 3" Hinges
- 2 5/16” Carriage Bolts
- 2 5/16” Threaded Inserts
- 8 ¼” x 1-1/4” Hex Bolts
- 8 ¼” Threaded Inserts
- 1 Box of 1-1/4” Brad Nails
- 50 Kreg 1-1/4” Pocket Screws (see tool list)
- 1 CA Glue
- 1 Wood Glue
- 1 Roll Black Edge Banding
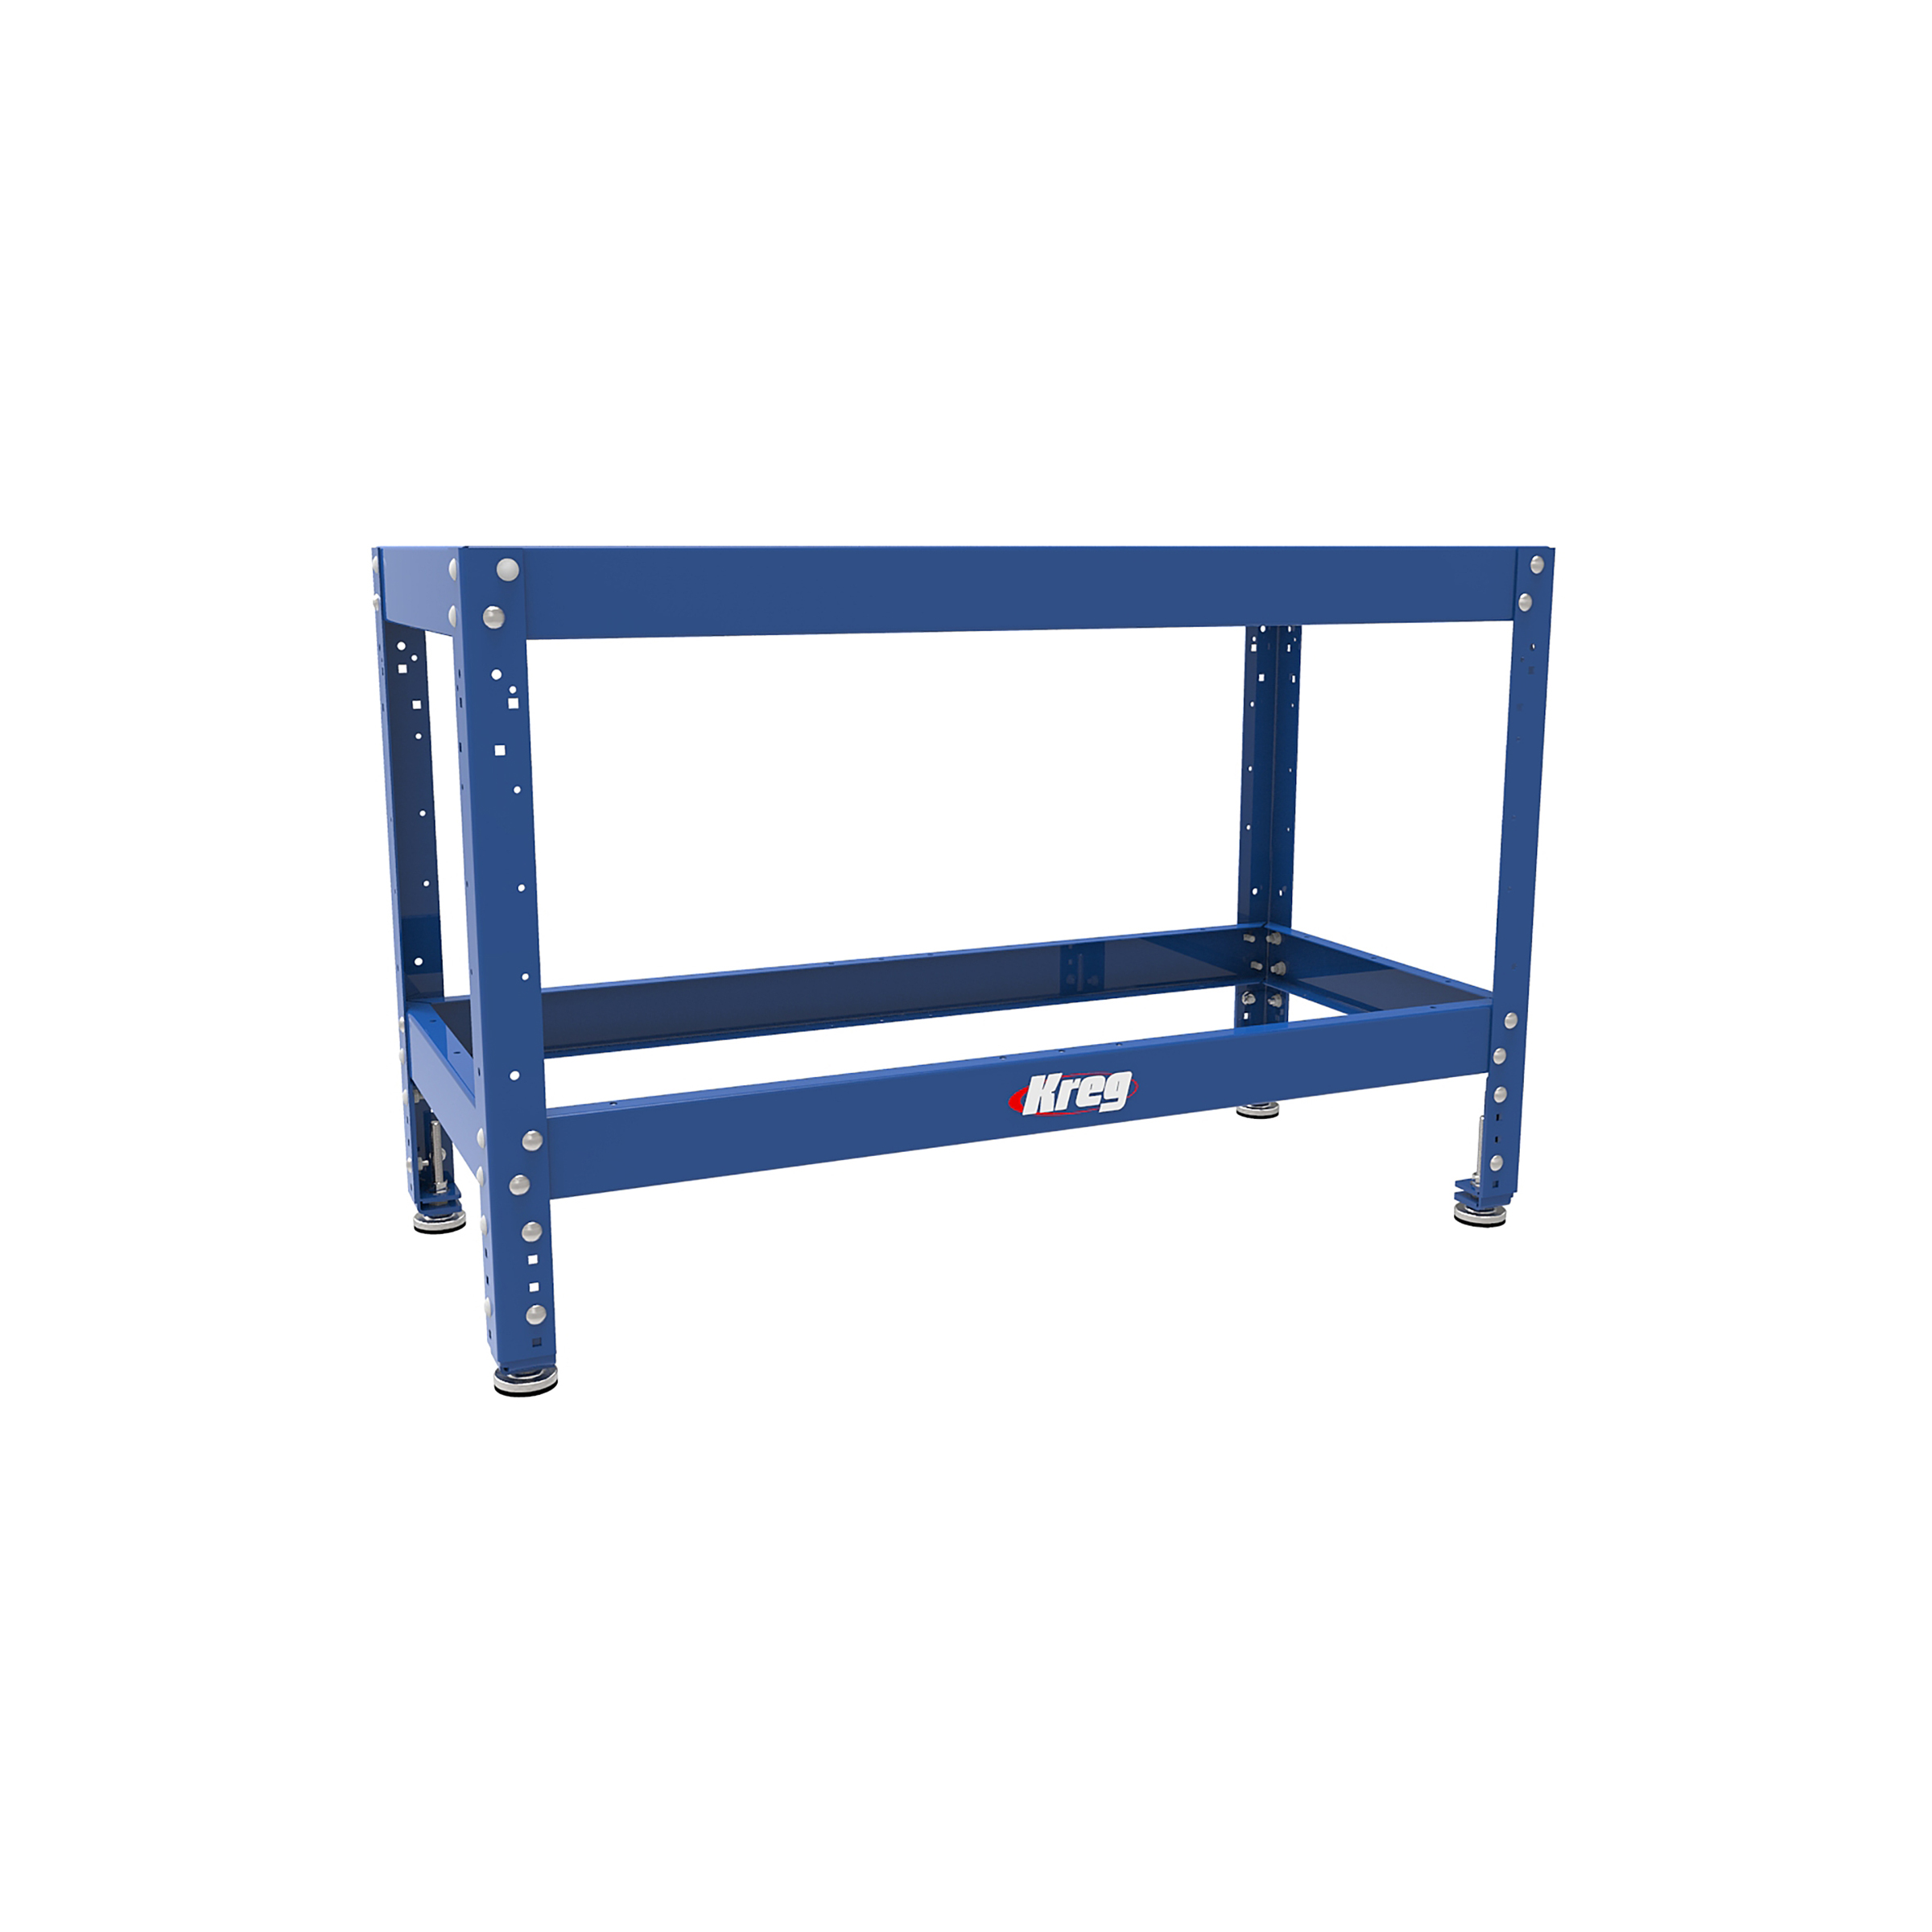
- 1 Kreg 20” x 44” Universal Work Bench with Standard Leg Set (see tool list)
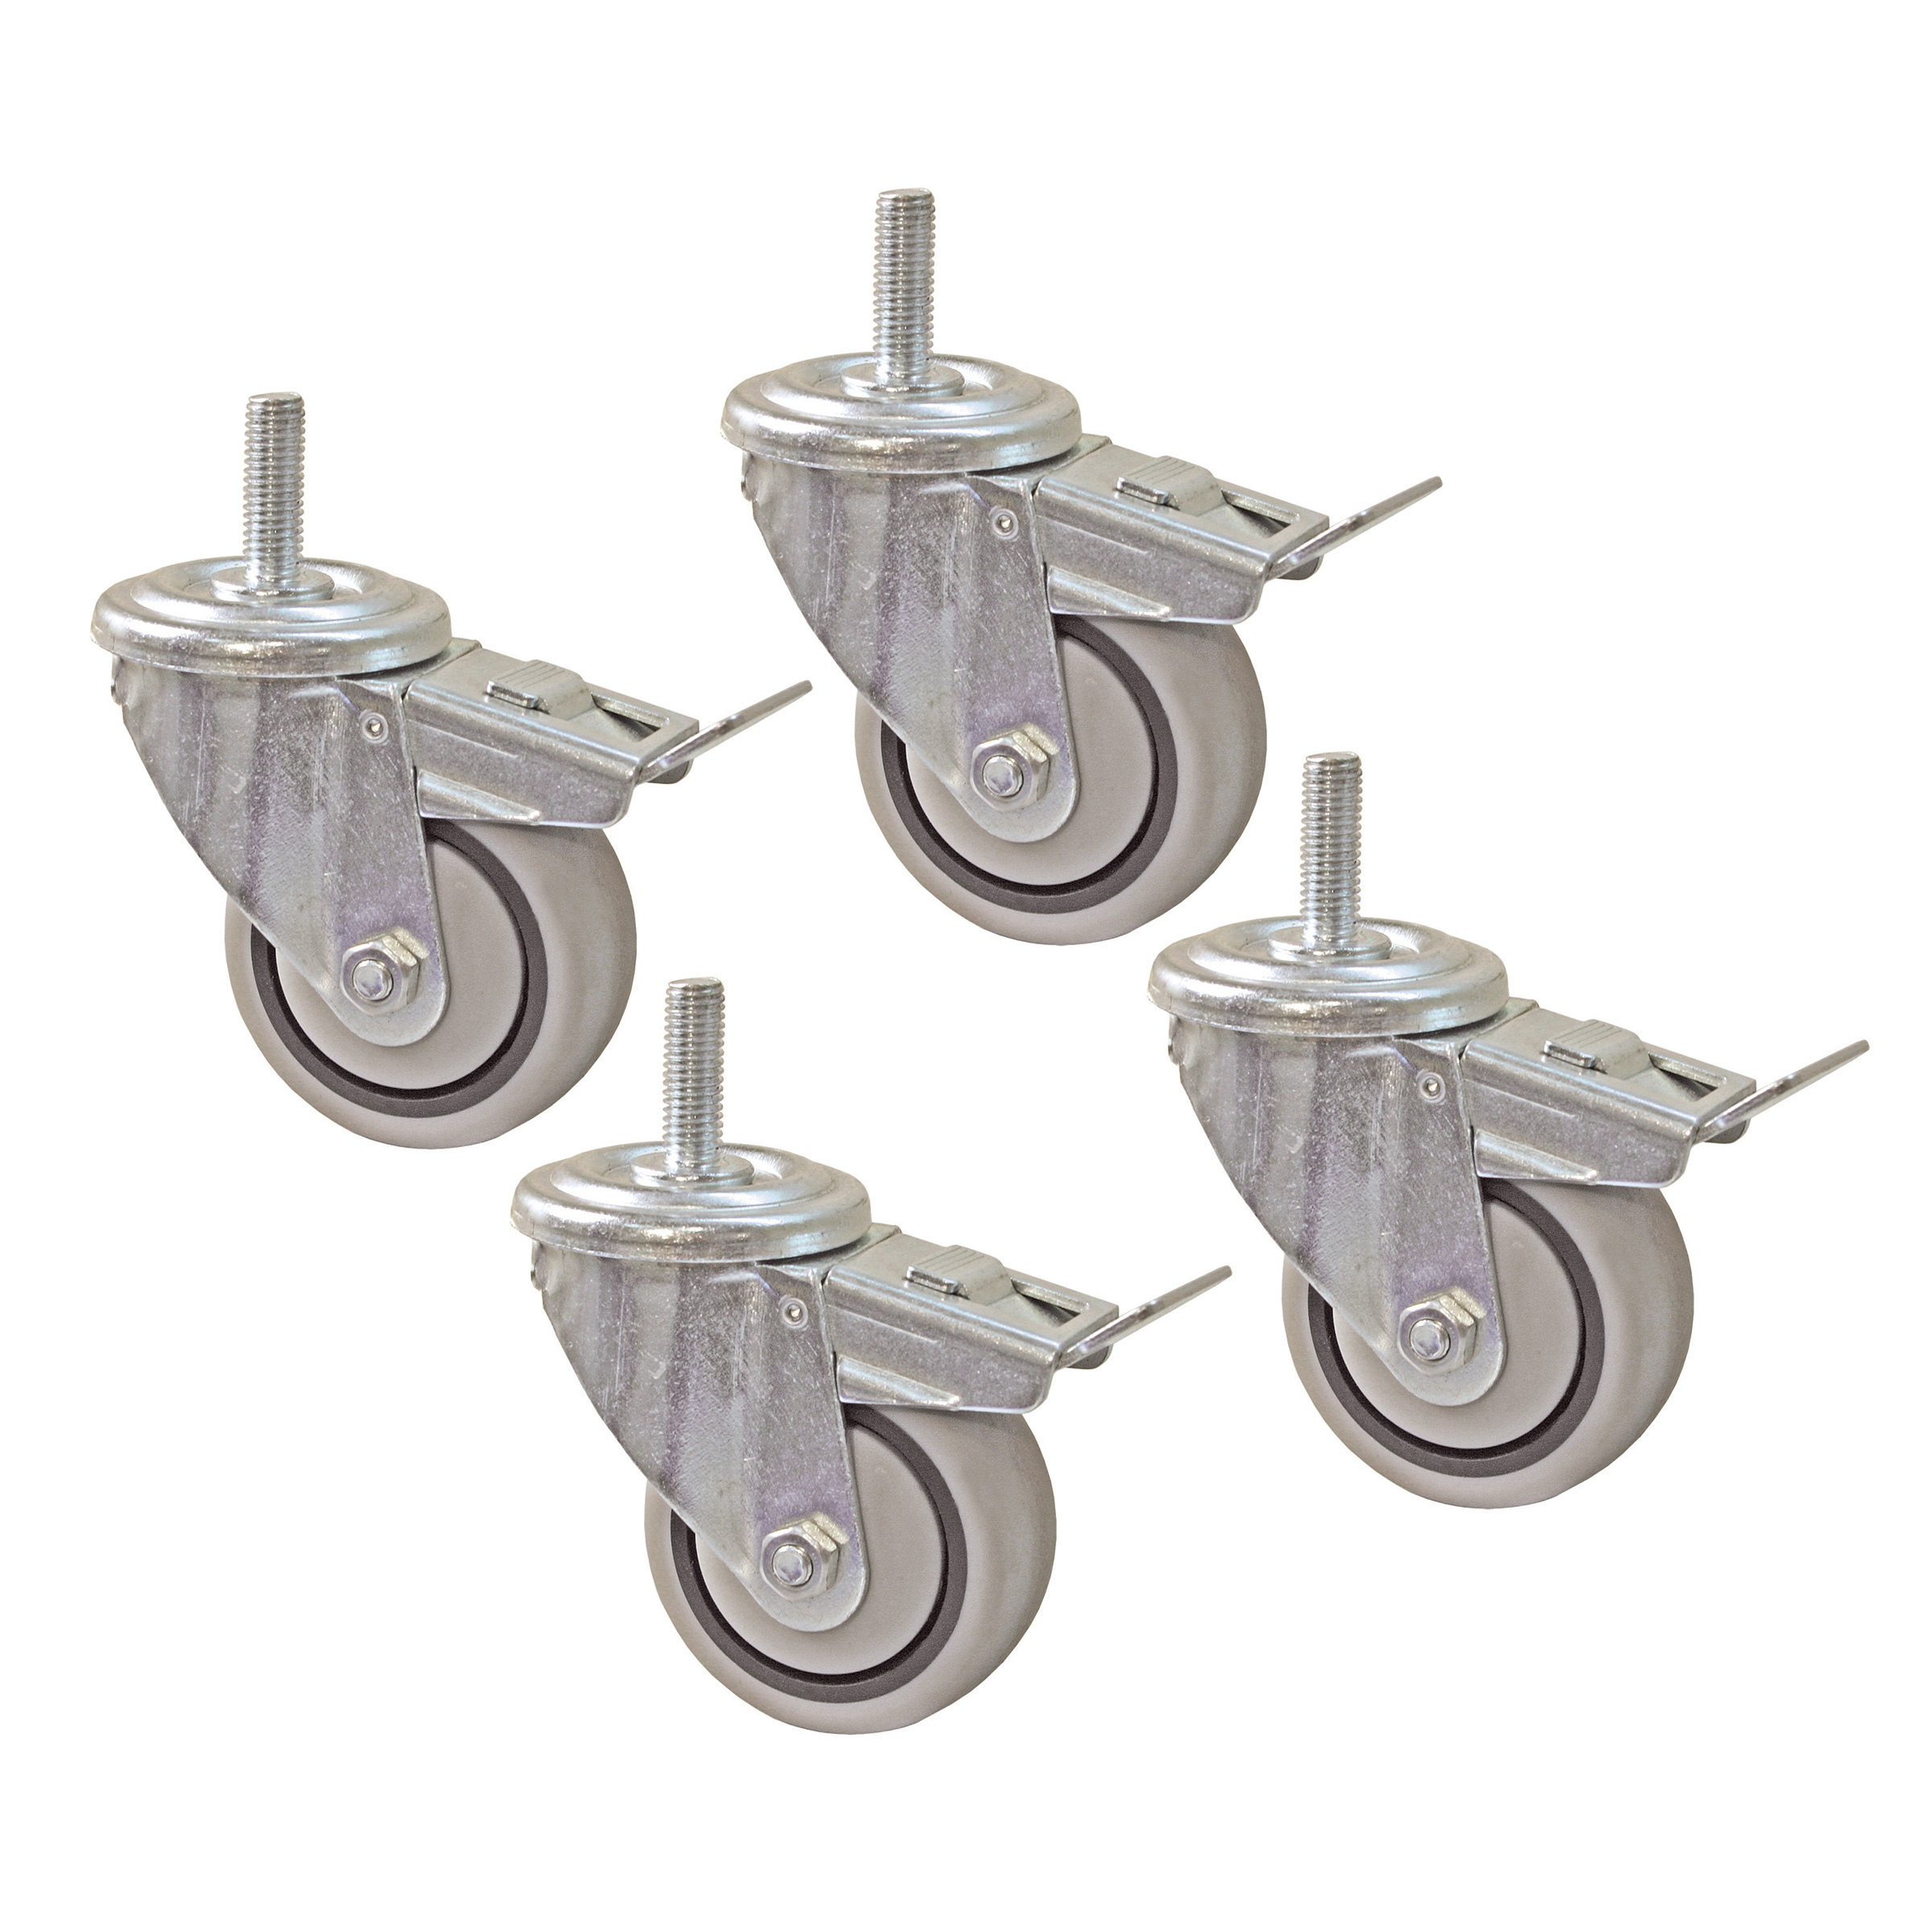
- 1 Set of Kreg 4" Casters (see tool list)
- 2 Door Handles/Pulls
- 2 Sets of Cabinet Door Hinges
- 4 Plastic handles for moving the cart and for the folding wings
Cut List & Parts
- 1 Cabinet back, plywood , 22-3/4" x 43-3/4"
- 2 Cabinet top/bottom, plywood , 19-3/4" x 43-3/4"
- 2 Cabinet side, plywood , 19" x 22-3/4"
- 2 Cabinet front plate, plywood , 3" x 22-3/4"
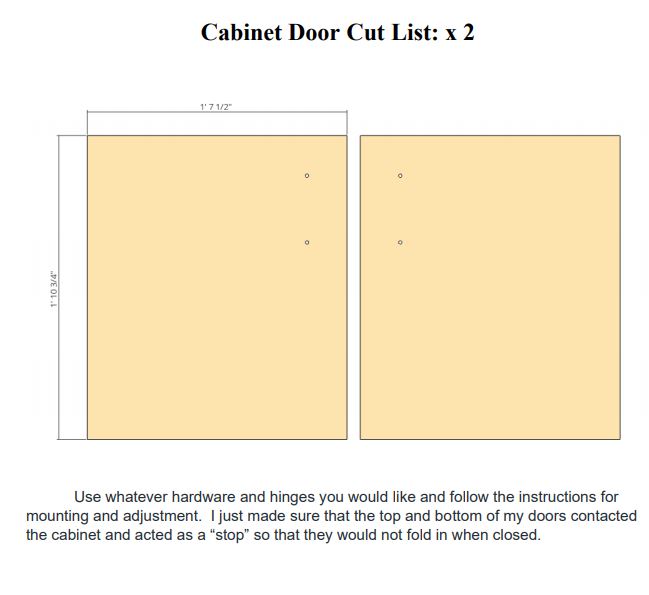
- 2 Cabinet doors, plywood , 19-1/2" x 22-3/4"
- 1 Bench top - top - melamine , 19-3/4" x 43-3/4"
- 4 Bench top - top layers - plywood , 1-1/2" x 16-3/4"
- 2 Bench top - top layers - plywood , 1-1/2" x 43-3/4""
- 2 Wings - top - melamine , 18-1/4" x 33-1/4"
- 4 Wings - frame - plywood , 15-1/4" x 1-1/2"
- 4 Wings - frame - plywood , 32" x 1-1/2"
- 4 Wings - trim - maple , 34" x 1-1/2"
- 2 Wings - trim - maple , 18-1/4" x 1-1/2"
- 2 Wing supports - plywood , 21" x 22-1/2"
- 2 Wing supports - support block - plywood , 3" x 3"
- 4 Deck - side - melamine , 18" x 3-3/4"
- 2 Deck inner side - melamine , 15-1/2" x 3-3/4"
- 2 Deck back - melamine , 7-3/4" x 3-3/4"
- 2 Deck bottom - plywood , 6-1/4" x 15-1/2"
- 2 Deck top - melamine , 18" x 12-3/8" (Cut to Shape) L&R
- 2 Wing mount - plywood , 19-3/4" x 4-1/2"
Directions
-
Building the Kreg Universal Bench
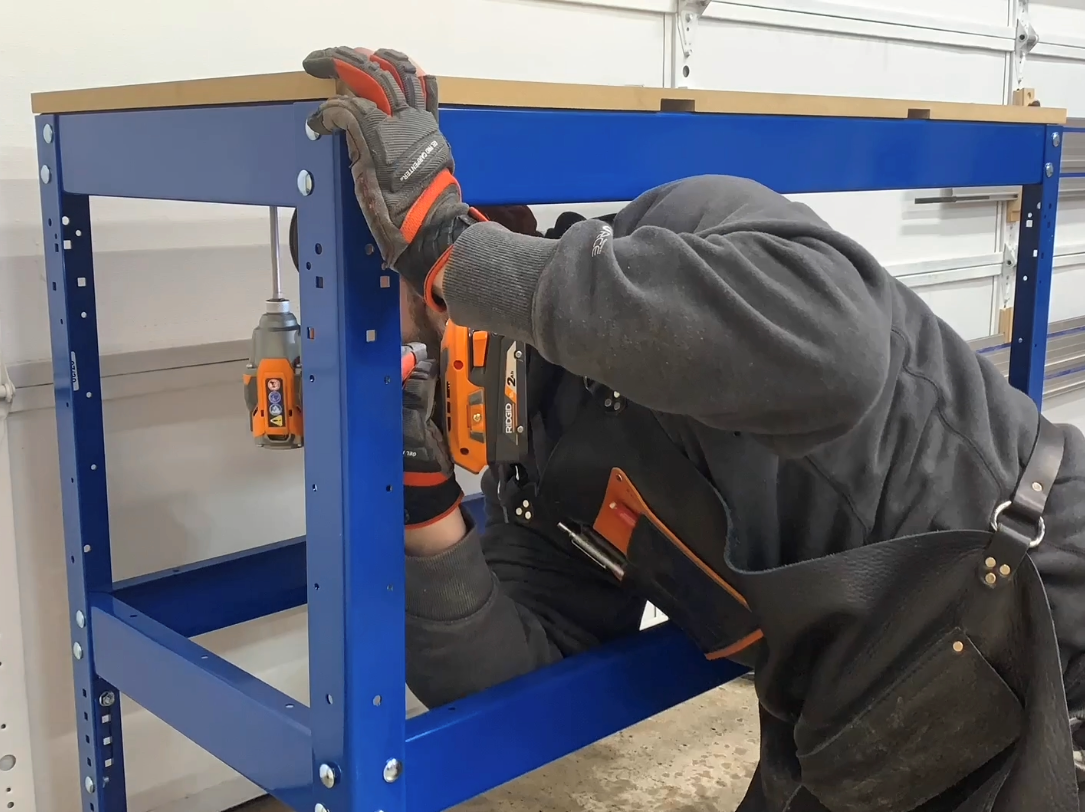
I started off by building my Workbench to the instruction specs. The bench that I chose is the 44” x 20” with standard height legs (31-39”). I also added Kreg’s stud mount locking casters so that the entire cart can be mobile. After using the cart as a general spot for the miter saw for a couple of days, I decided that I wanted more room in the center section for the cabinet to sit. I modified the workbench legs to accommodate the stretchers into the lowest end of the legs. This would allow me to get the largest cabinet space possible. I drilled new hole locations to allow the bracket to flush with the bottom of the vertical legs. You will need washers to shim the legs to the top stretchers. You can skip this and just build a smaller cabinet as well. That would be the easier step.
-
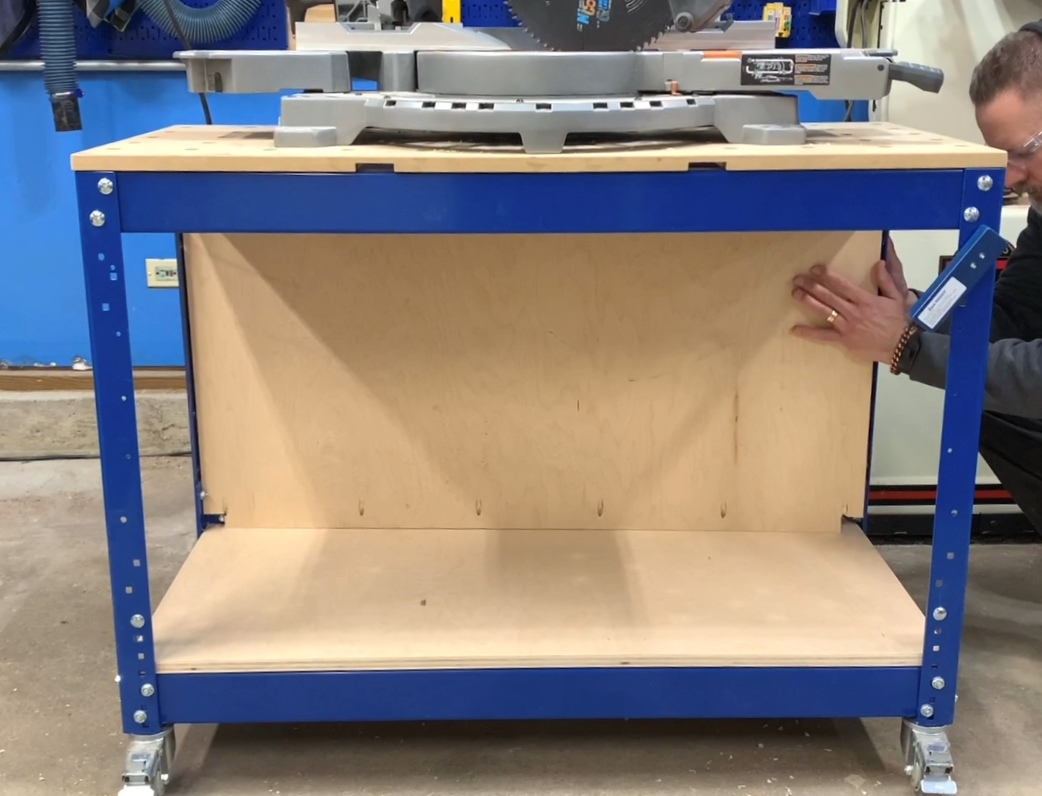
Installing the Cabinet Carcass
I measured the interior dimensions of the work bench and started cutting my plywood to size. I added pocket holes to the side panels and back panel. This will have to be built into the workbench so it will be one piece at a time. I did use glue to help keep everything locked together and then ran in the screws. Depending on the layout of the bench that you build, you may need to notch the corners to clear some of the nuts and bolts that hold the workbench together. The construction is considerably basic as you will be making an identical top and bottom and two identical sides, and a single back panel. I am not going to give you the cut list dimensions here as there are too many variables to account for. Basically, build whatever type of base you want to use, and then measure the interior dimensions.
-
Front Door Assembly
To get the front face plates and side panels to fit in, you will need to drill some pockets into the plate so that it can sit flush to the legs of the bench. Set the plates in place and mark the location where the bolt would contact it. After drilling the holes, mount the plates to the side panels using pocket hole screws and glue. Once the panels are built, slide them in place on each side and secure them with pocket screws and glue. For added stability, I also added some screws from the outside of the workbench to keep the sides in place. I chose basic soft close door hardware and followed the manufacturers specs for installation. Keep in mind that I mounted my doors outside the cabinet so that the carcass would act as a door stop. You can also add the door hardware of your choice at this point and mount the doors.
-
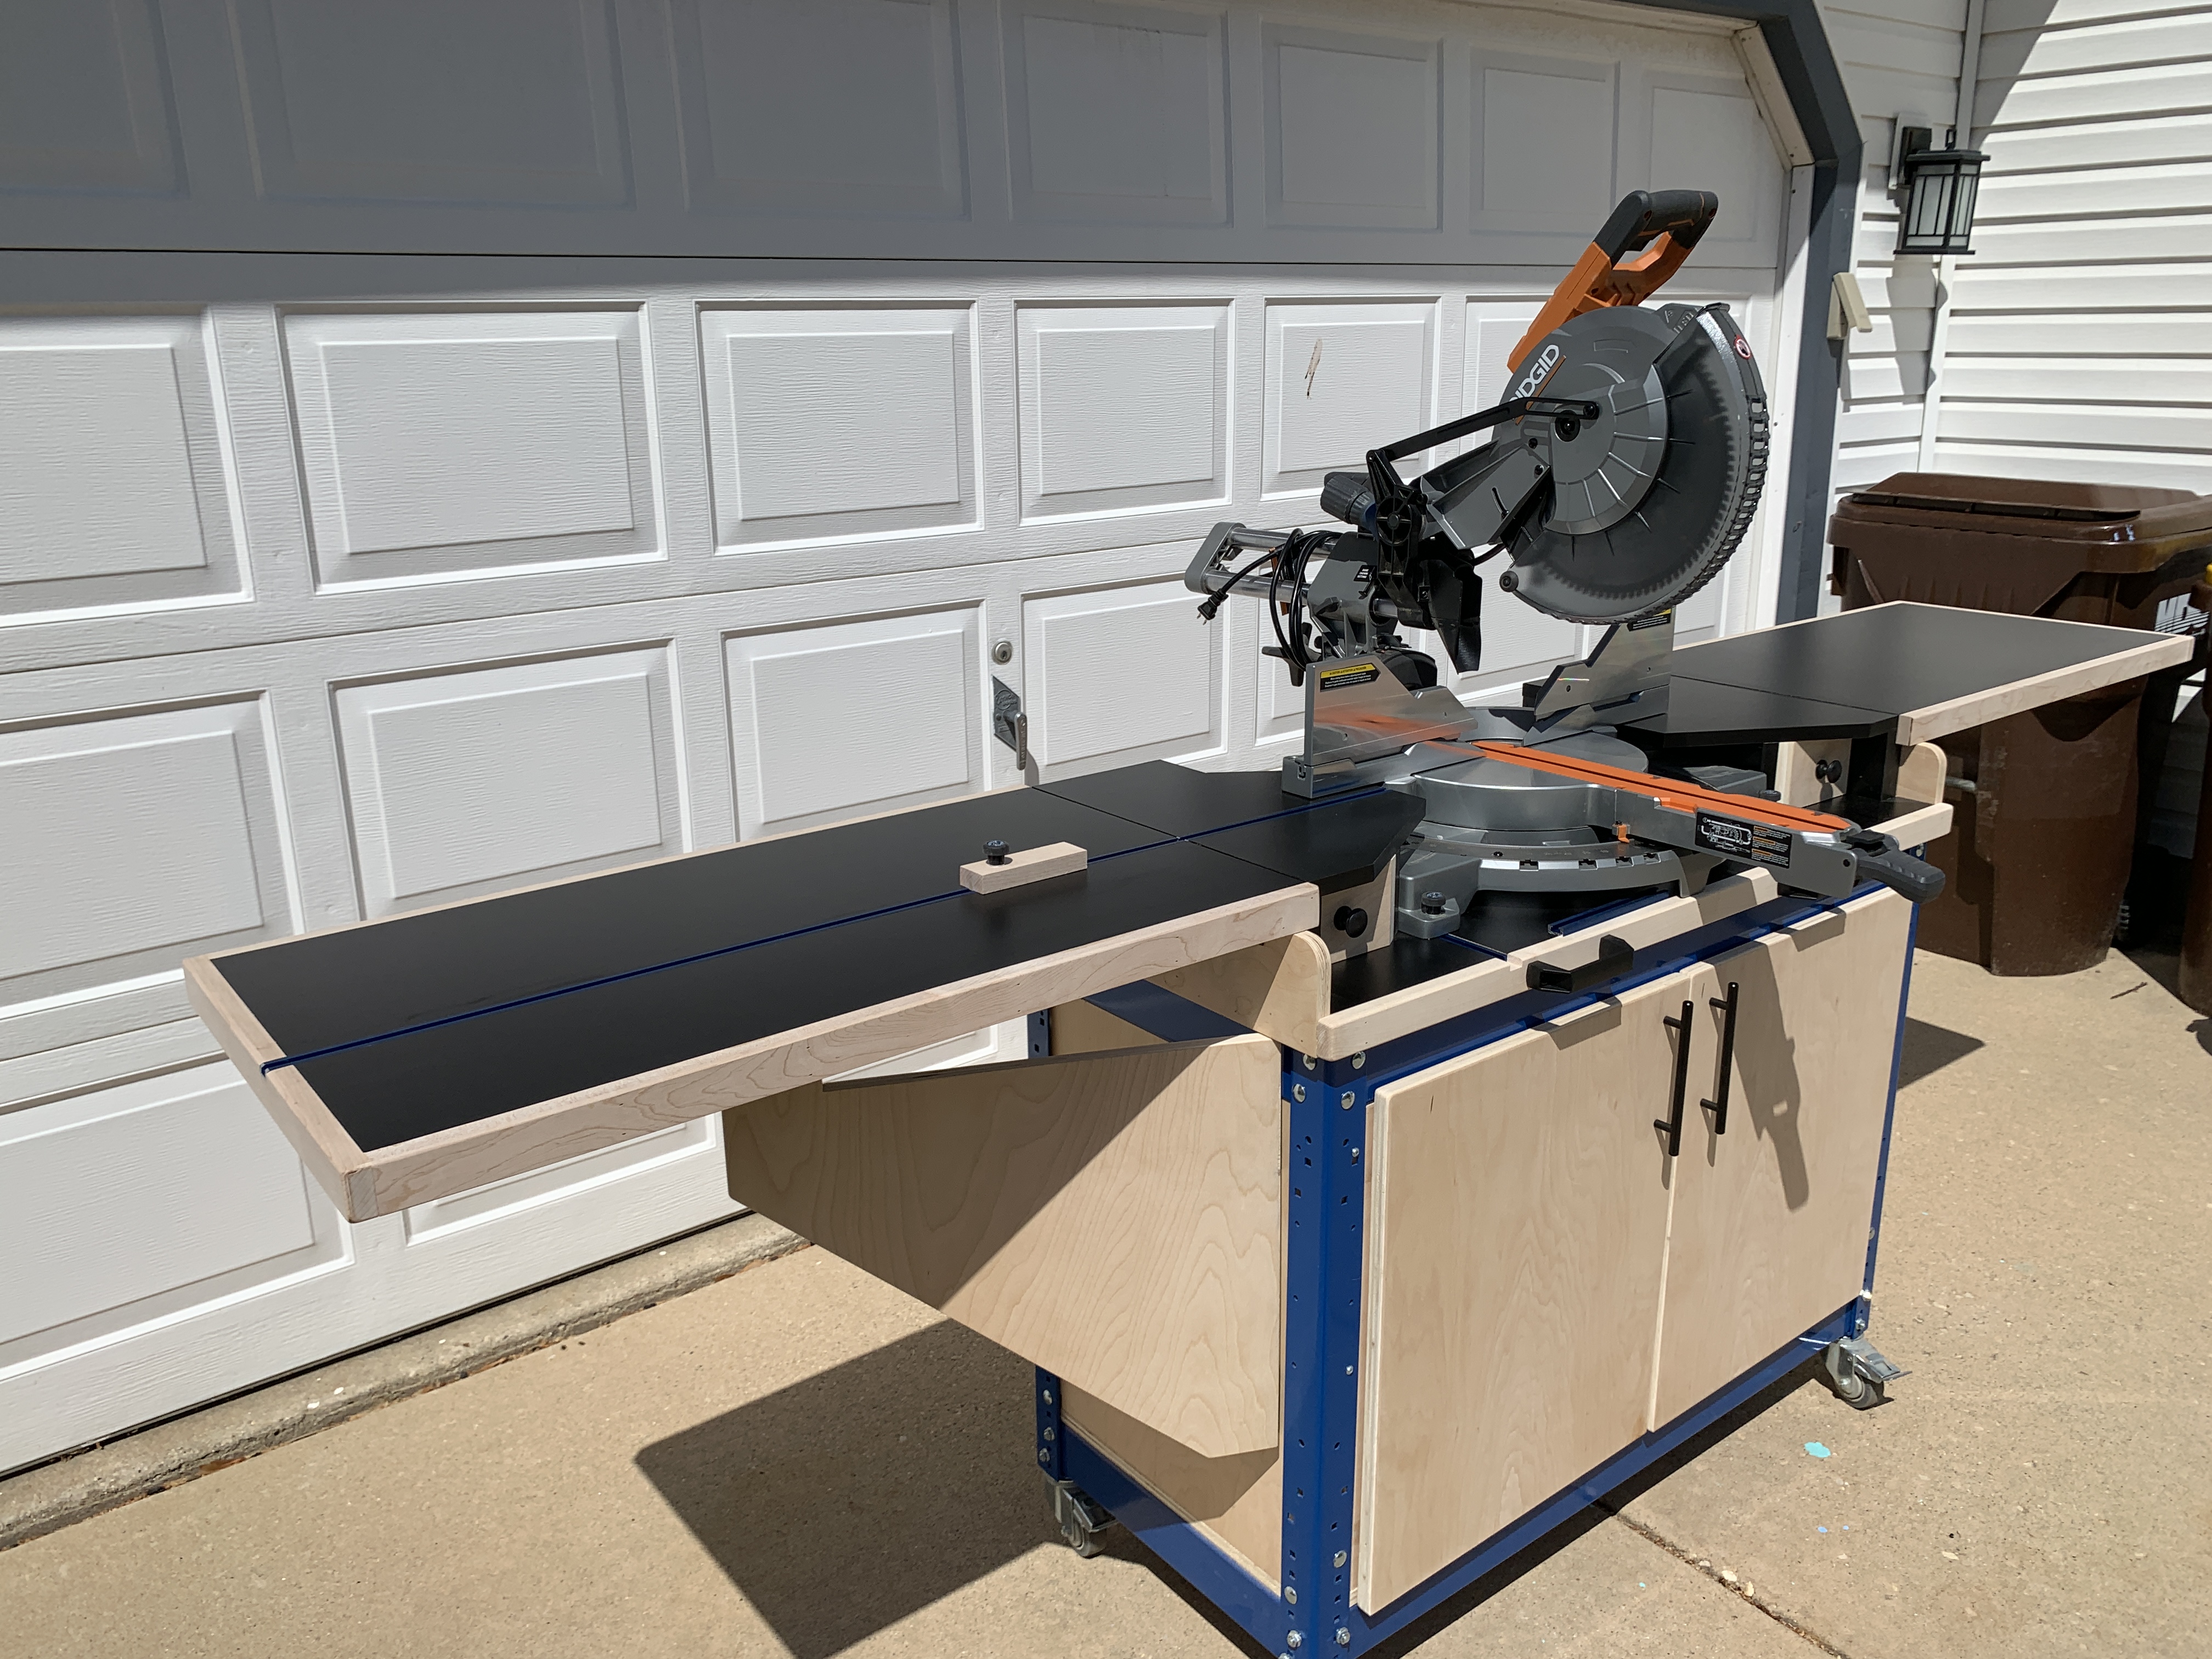
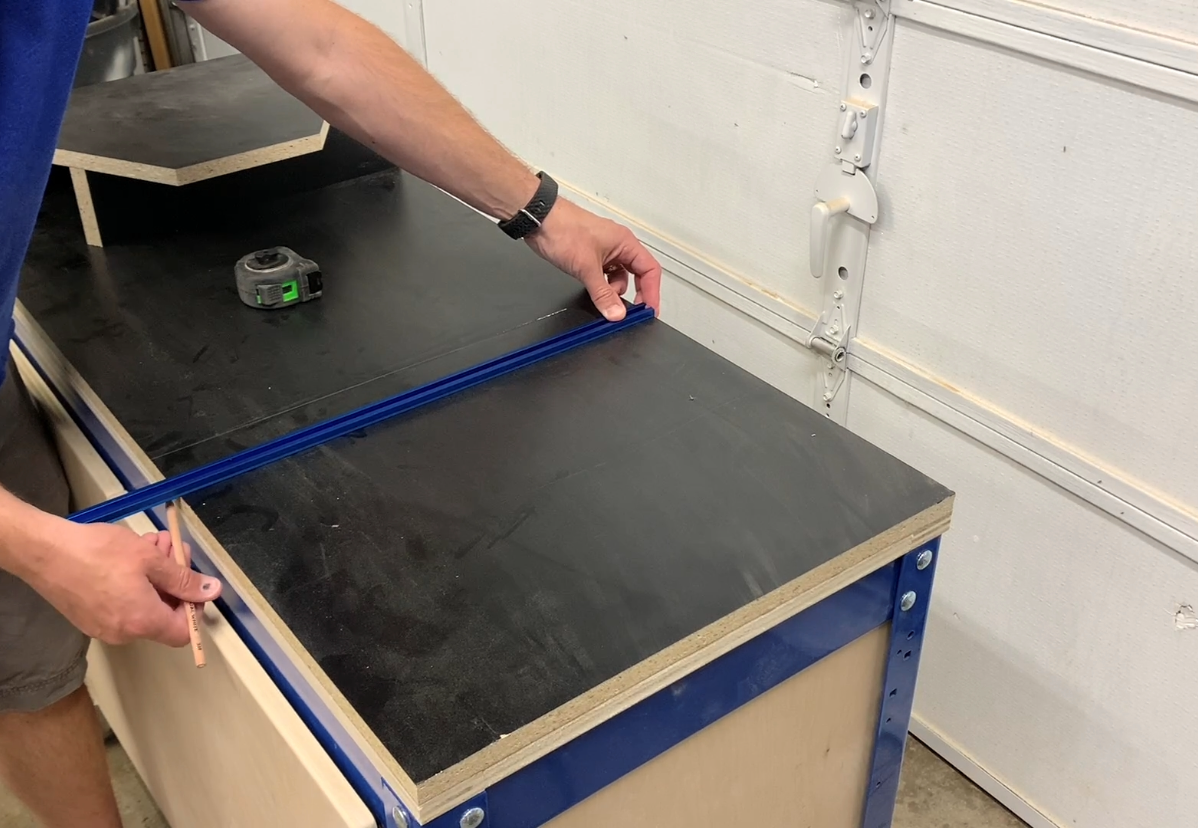
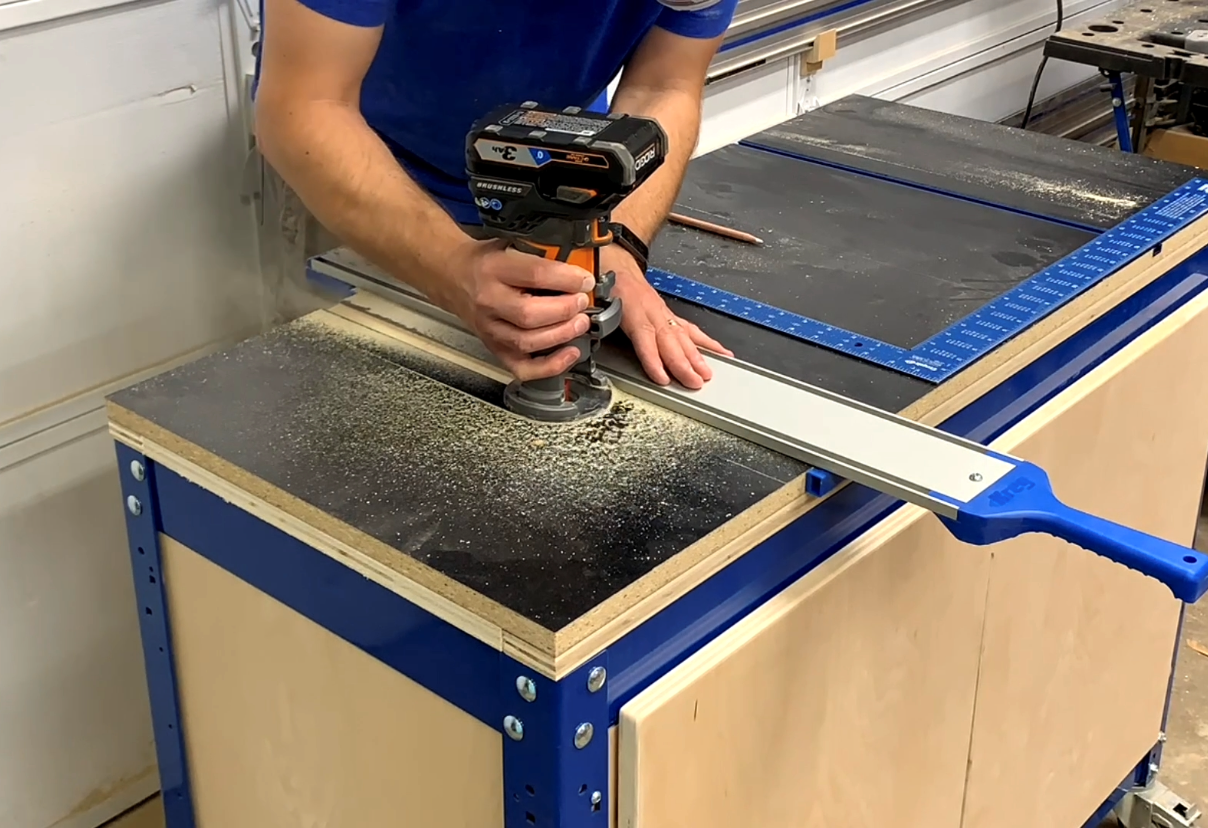
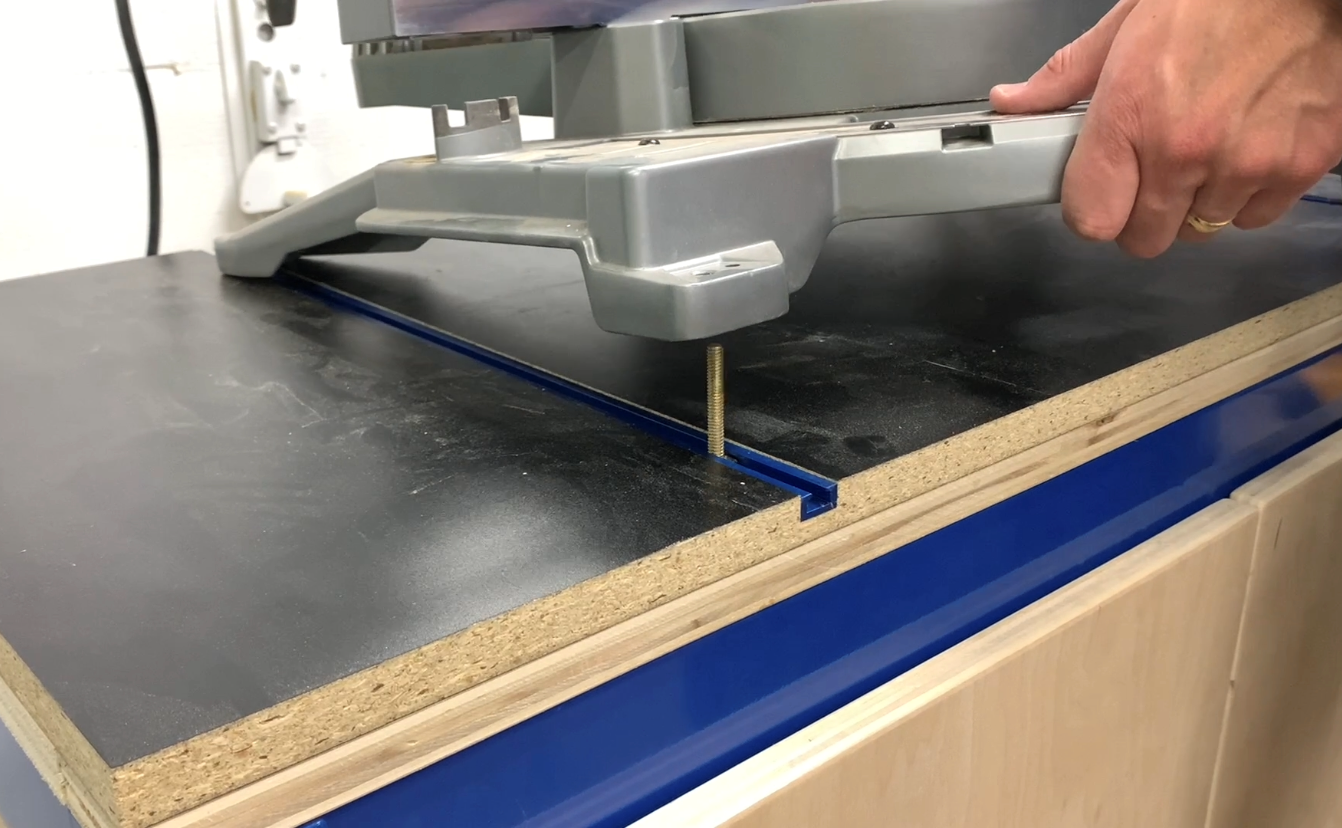
The Top and Tracks
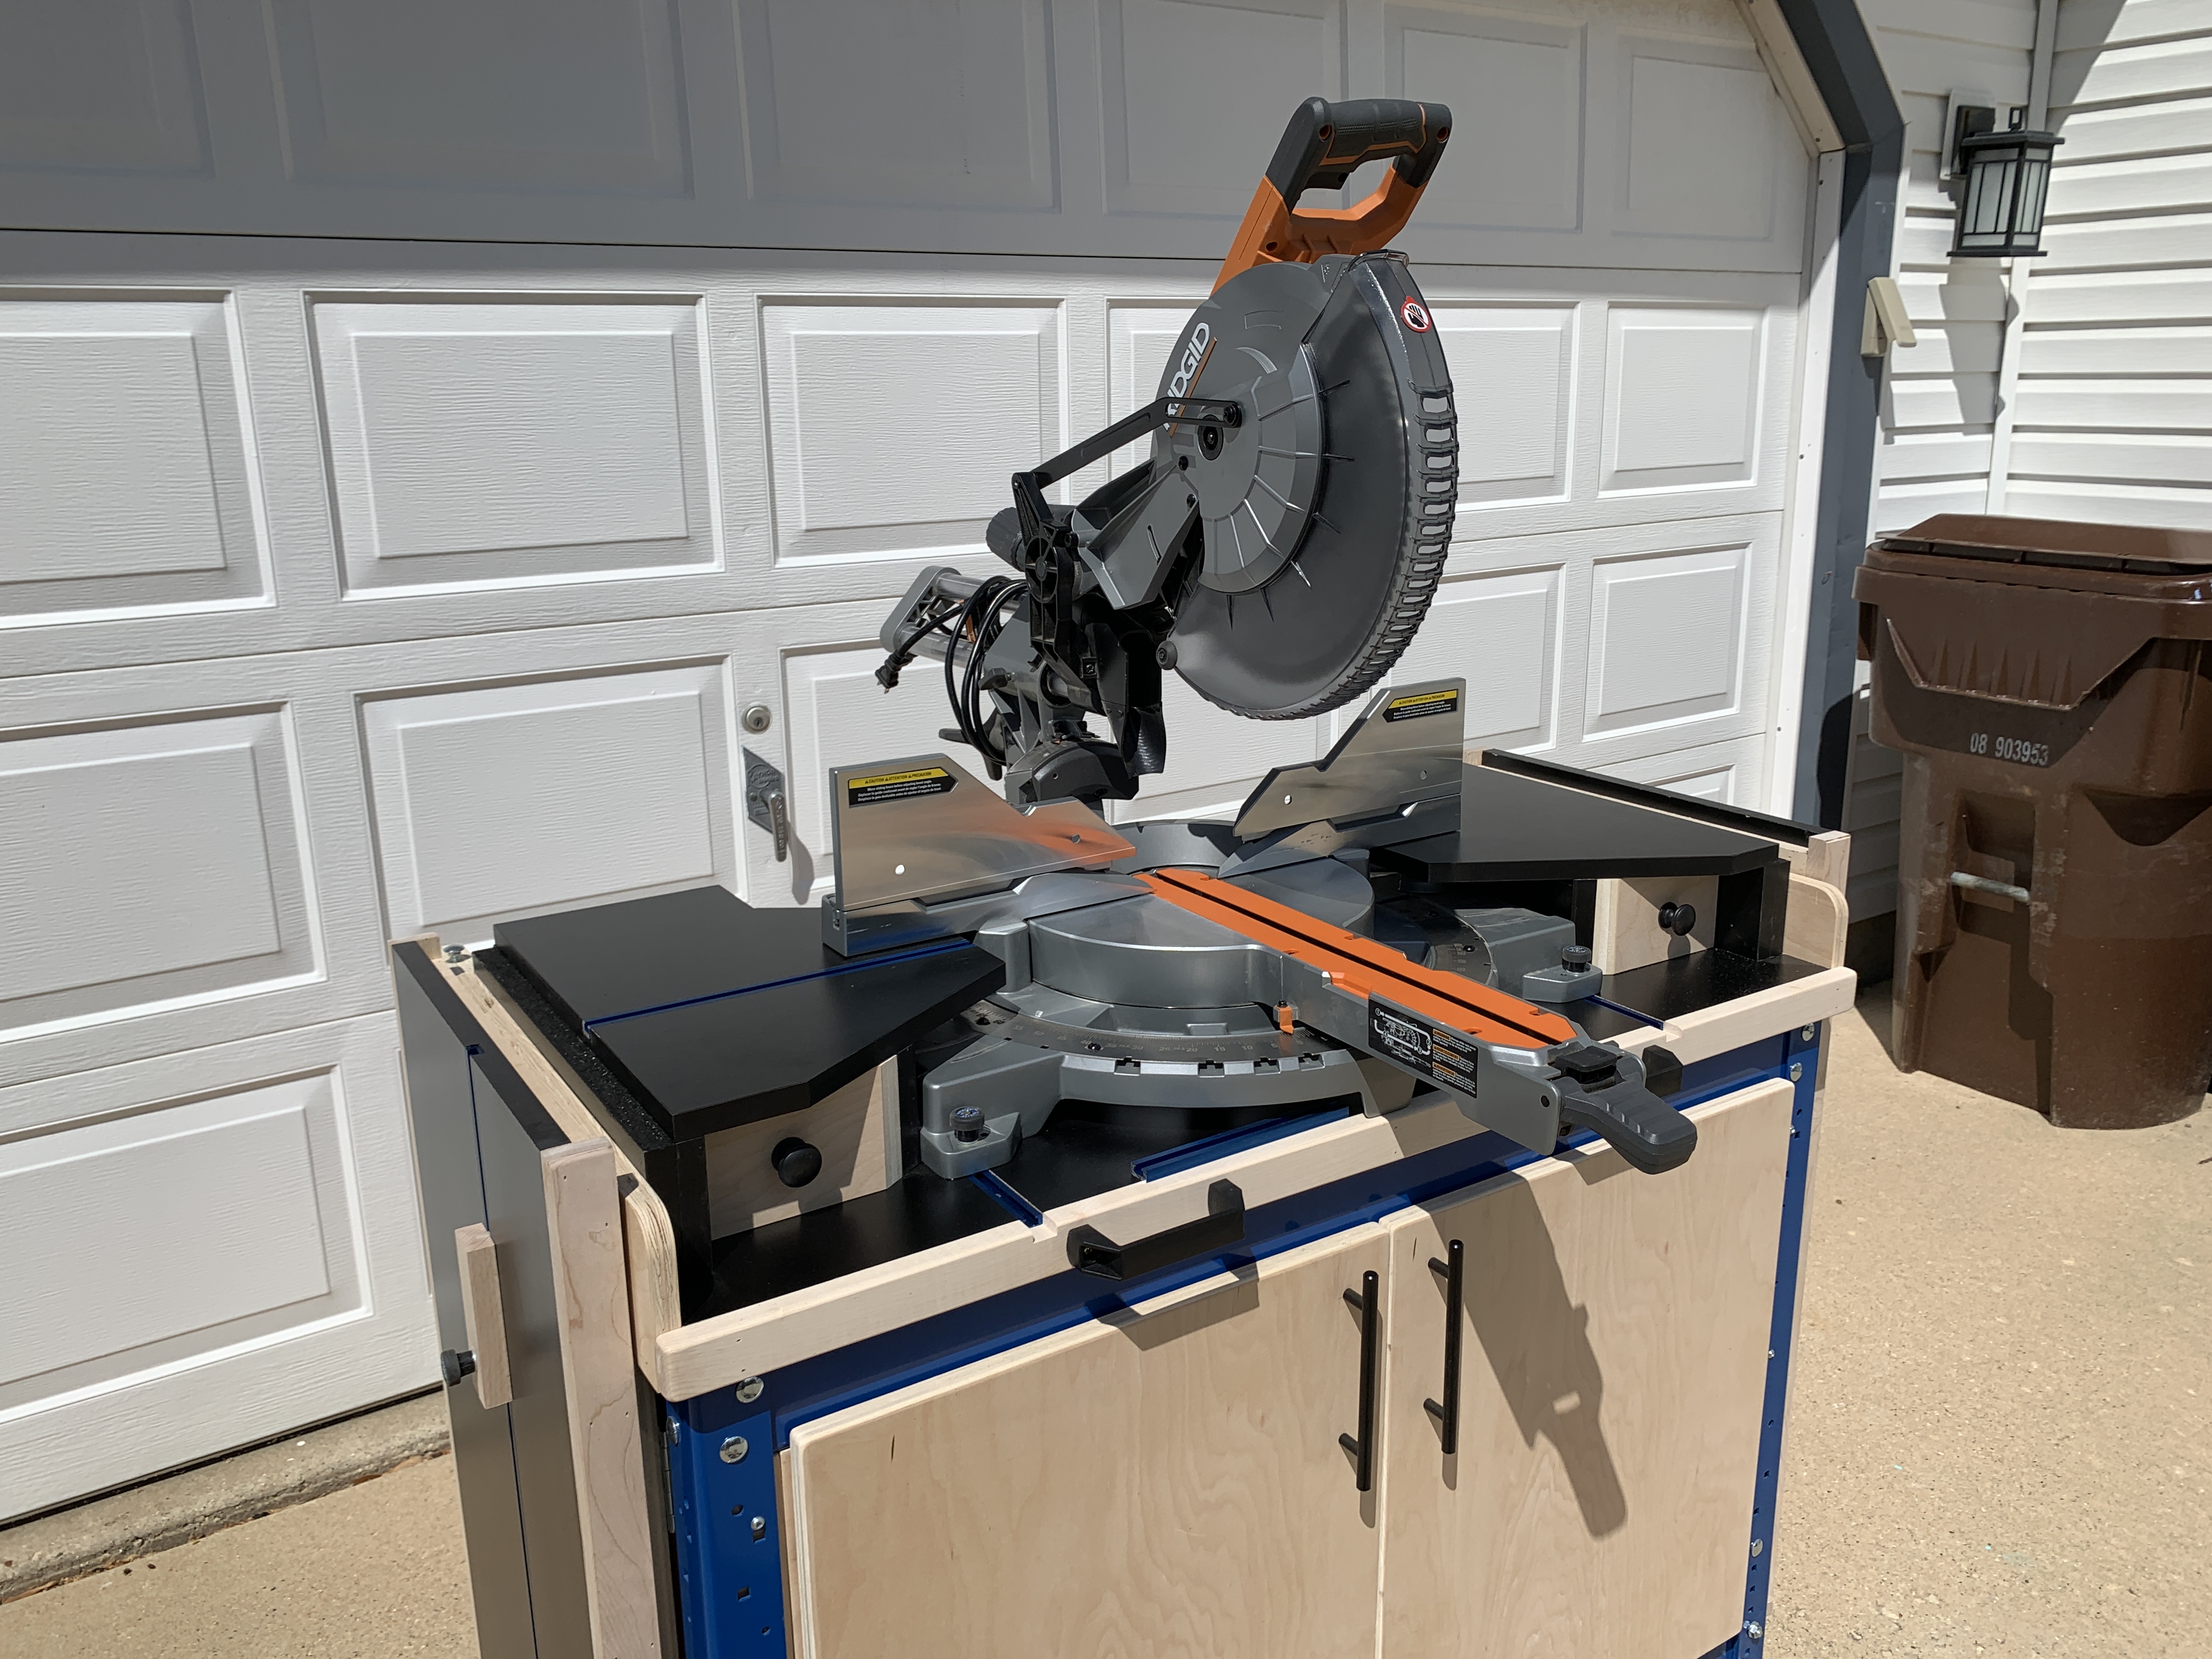
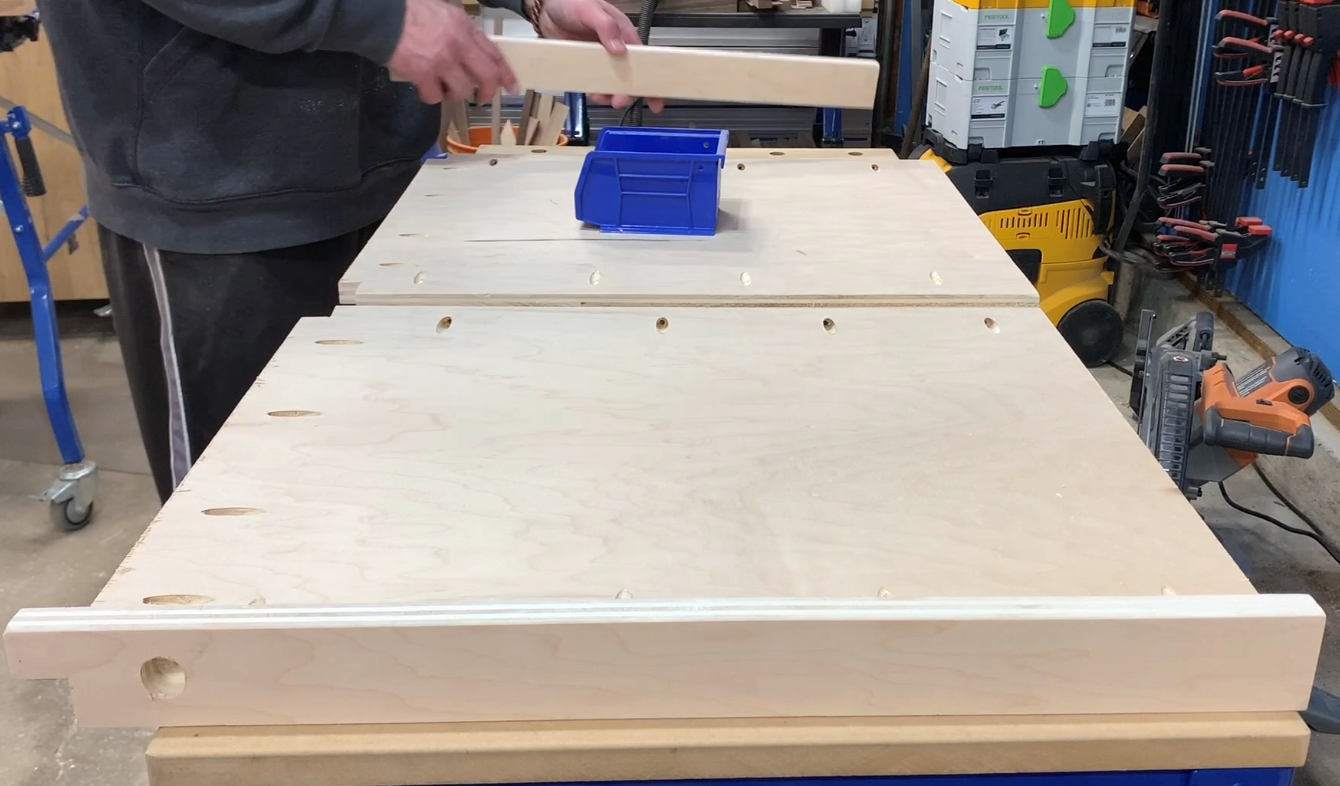
For the tops, I chose to use black melamine as it is exceptionally smooth and easy to clean off dust and debris. I also added some ¾” plywood material to the bottom around the perimeter and under the spots where I would be adding the t-track for mounting the saw. I cut the melamine panel to the 20” x 44” dimensions and glued the plywood in place underneath. I used 1-1/4” brad nails to hold everything in place. Instead of just screwing the saw into the top, I chose to add some Kreg T-track and t- bolts to secure it. Depending on your saw and needs, mount the t-track where needed. Make sure that you put the ¾” plywood underneath where you will be having the track at. This will ensure that the screws are secure and will not pull out. I used the Kreg Straight Edge to keep the router in place while cutting the grooves. I use a ¾” dado bit plunging from 1/8” up to the 3/8” depth so that the track was just sub flush to the top. Take your time and focus on the cut.
-
Miter Saw Decks
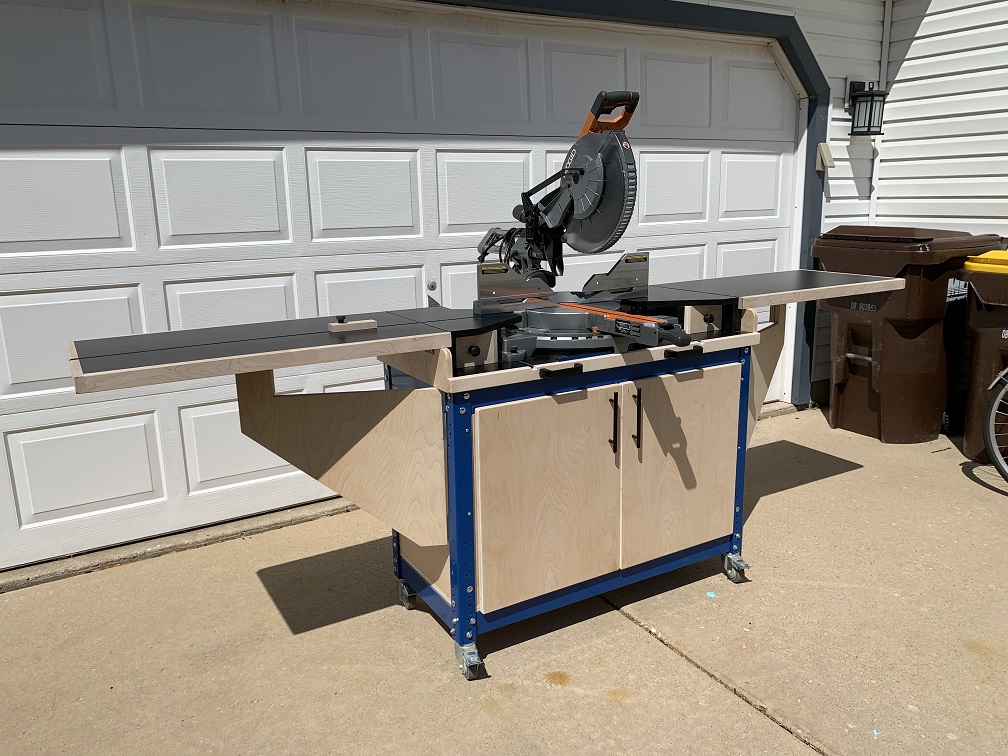
For the top of bench, I wanted to add some features where the saw was not the only means of support for the workpiece. I decided to add some melamine decks next to the saw on either side. I also wanted to add some folding wings that would allow for a long support surface for my workpieces, but still fold up tight and fit into the footprint of my shop. These wings would need to be mounted to the decks. I added black edge banding to all exposed edges of the melamine.
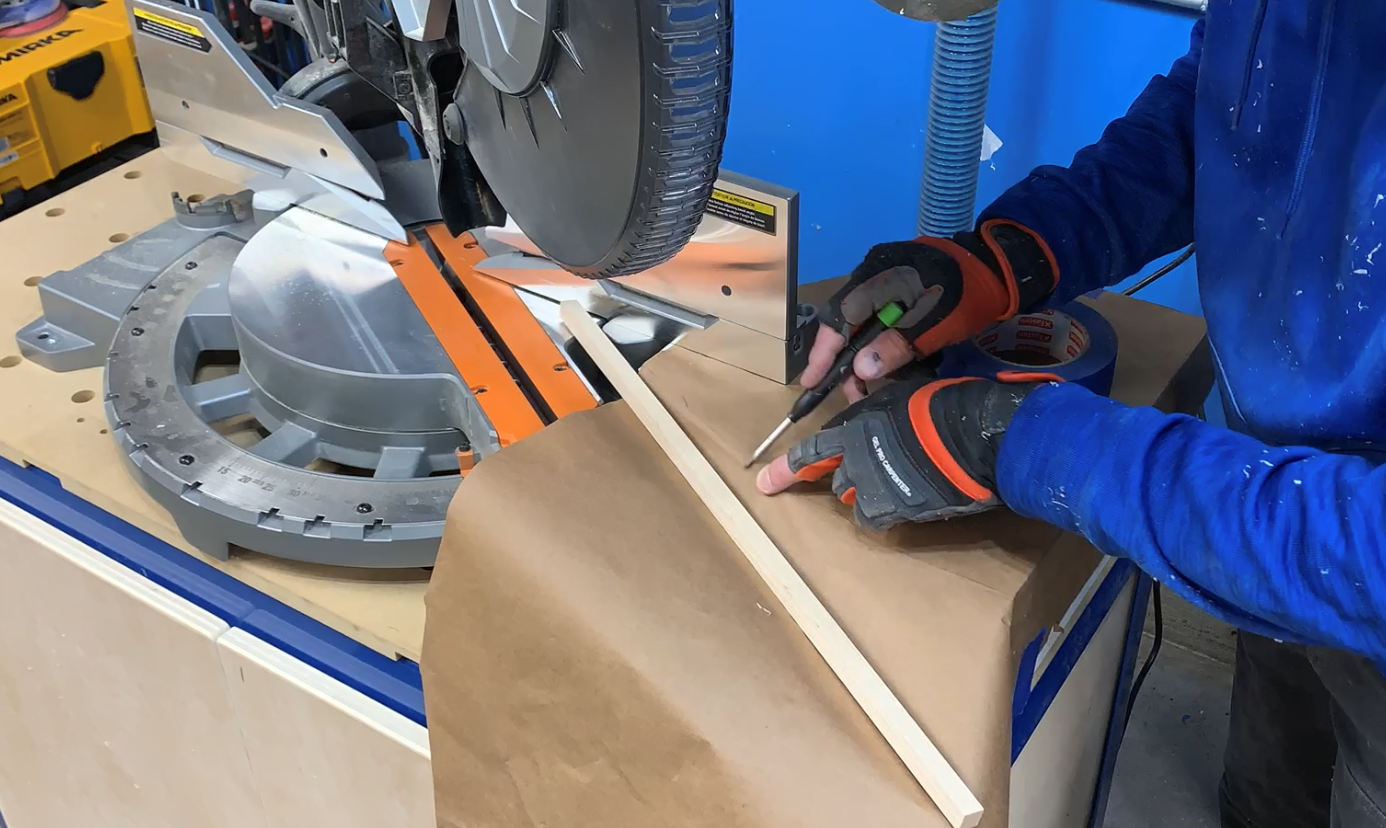
To build the decks, I used brown kraft paper to trace out the shape that I wanted. I then measured up to the 4-1/2” deck height of the saw and measured backwards to find the dimensions of what I wanted the vertical pieces to be. I made two sets of the outside vertical pieces as I wanted some meat for screws to sink into. NOTE: My cultist reflects my Ridgid 12” Sliding miter saw.
For most of the construction of the decks, I used CA glue and wood glue and locked everything together with brad nails. Do not add the top at this time. You cannot really use pocket holes as you cannot access the inside with a screw gun. Make sure your cuts are nice and square and you’ll be fine. You do what fits your style and needs.
-
Deck Mounting
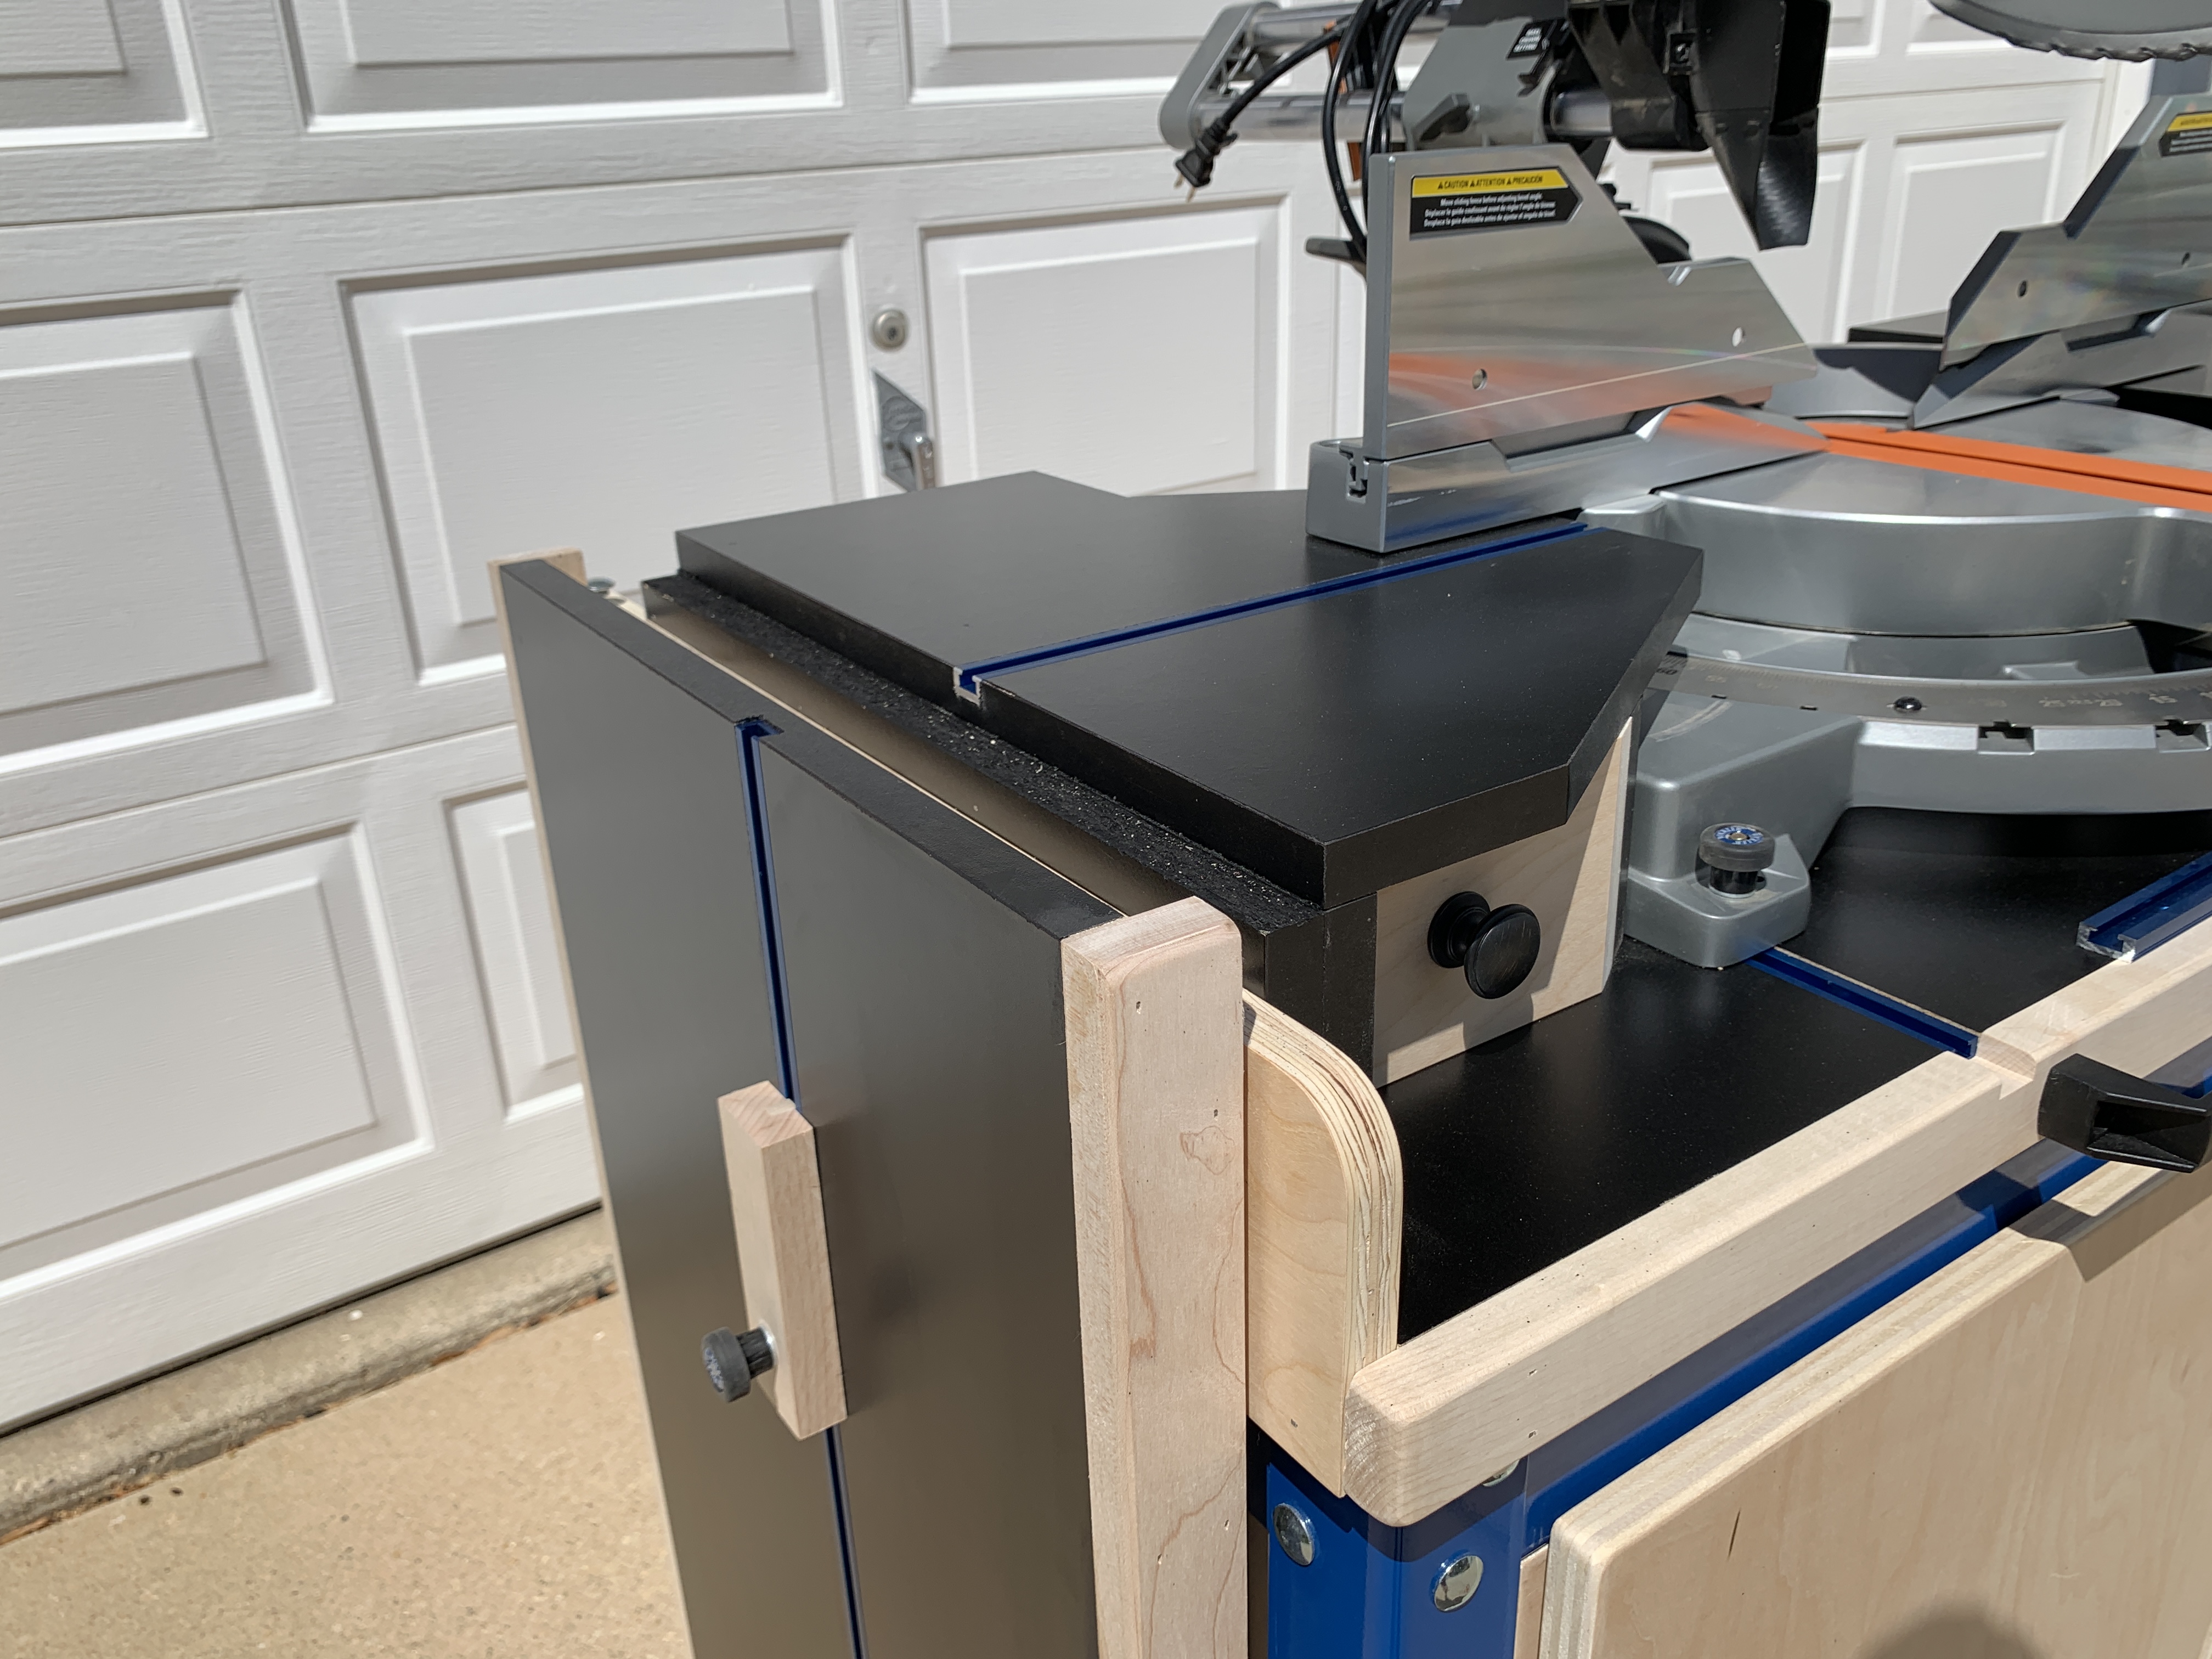
To mount the decks, I chose to use threaded inserts into the black melamine of the top. I locked the decks down where I wanted them (based on my miter saw) and then drilled an 1/8” hole through the plywood bottom of the deck and into the black melamine top on the bench. I then walked up the bit size to match the requirement of the threaded insert. I used some CA glue on the insert for some extra grip and security. I drilled the holes oversize in the plywood deck bottom to allow me to adjust the position of the deck prior to tightening it down.
Add the second vertical piece to the outside of the deck box to help align it. Once aligned with back and the side of the top, I used hex bolts and washers to secure the deck. To put the top on the deck, I only used CA glue as it sticks well to the melamine. If I ever find down the road that I need more holding power, I can add brad nails or even screws if desired, but for now, I like the clean look. To secure the second side vertical, I used CA glue and brad nails. Screws will go through this later.
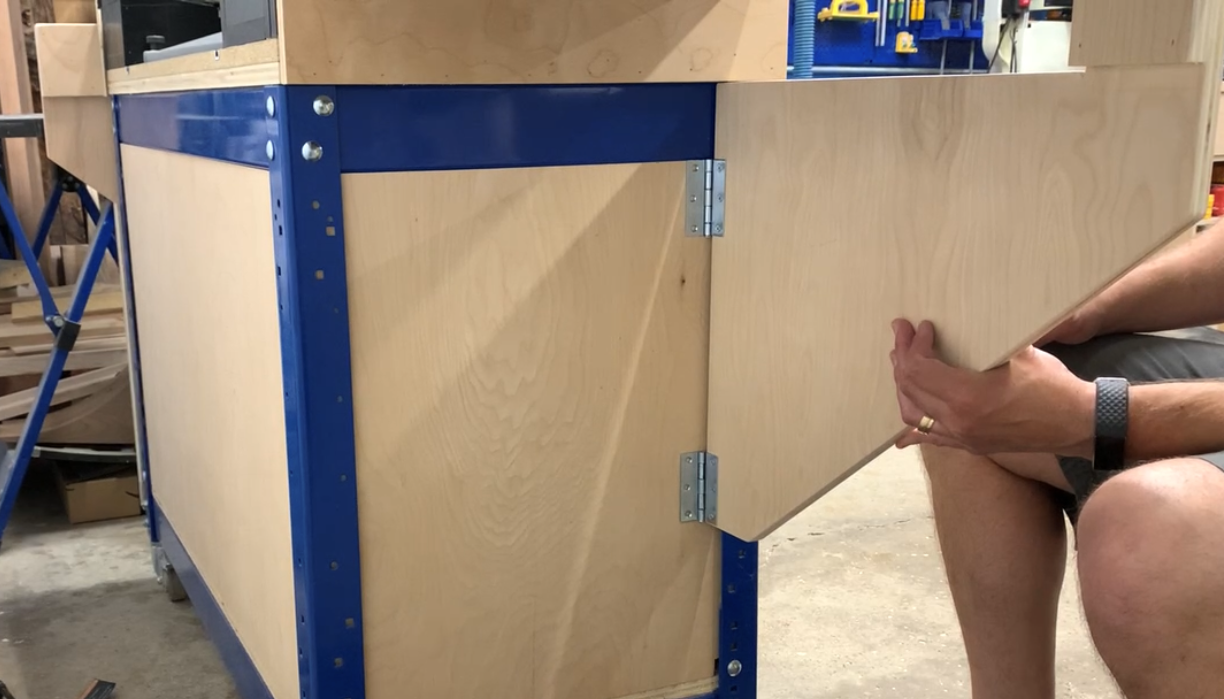
Next, we will add the plywood panel that will attach to the side of the melamine vertical of the deck. This panel is flush with the bottom of the bench top and about ¾” lower than the black melamine sides. This piece will dictate the height of the wings and hold the hinges. Again, secure using glue and brad nails. The hinge screws were 2” long and went into all three pieces for a nice solid engagement.
-
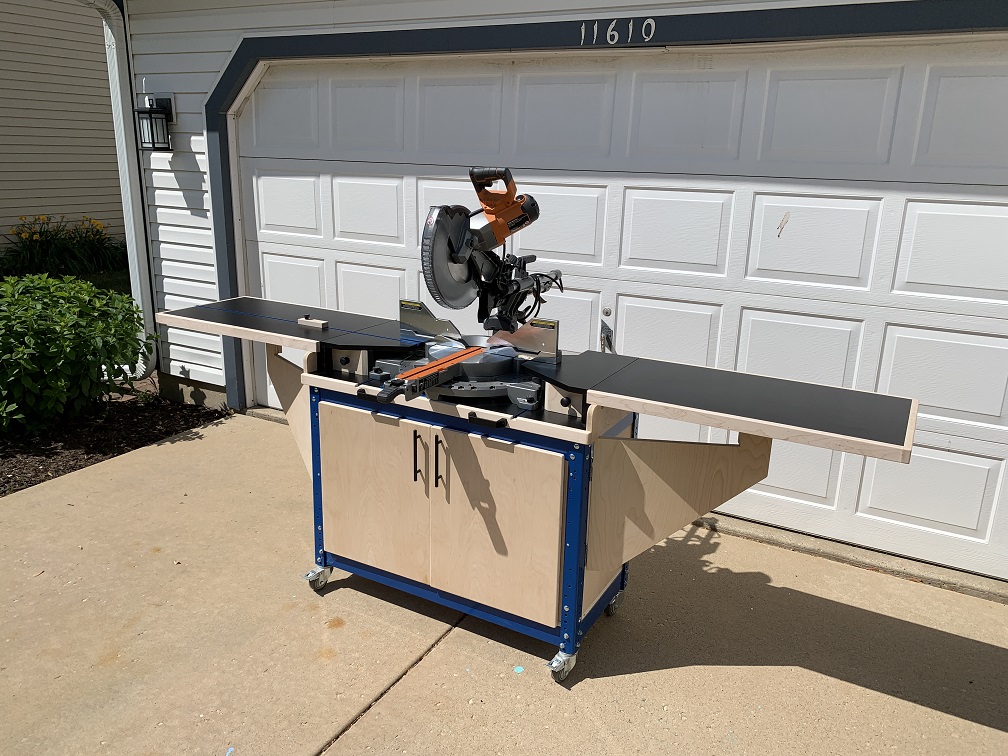
Folding Wings
Again, this is an area that you can tune to your needs simply by adjusting your overall dimensions. The big thing to consider is that you need to clear the casters on the bottom when the wings are folded down, and you can still roll the cart around. Just like the top of the bench, I used black melamine lined with ¾” plywood on the bottom. The dimensions for where to mount the hinges and wings relative to the decks is the key to getting the setup correct. The way that I attached the wings to my bench was to use hinges and have a ¾” recess where the fold would occur. This allows for nesting when the wings are folded up and lets them sit lower than the deck height when folded down.
-
Folding Wing Supports
For the folding wing supports, they need be able to tuck in flat to allow the wings to fold down completely flat. The main point here is to make sure that all the moving components clear each other. I used basic 3” hinges from the box store and just made sure that I mounted them level and securely. The trick that I used for proper hinge placement is this: First I mark where I need the hinge to sit as well as the holes for mounting. Now, you can either predrill the center of those circles. My method is to drill the center of the 3 holes and attach the hinge. I then use a Vicks bit to center and drill the second and third holes.
-
Wing Adjustment
The way the wings sit level is by adding a threaded insert to the top of the wing support where we glued the additional plywood block on. I use a long 5/16 carriage bolt and drill the hole deep enough that the bolt can sink all the way down. This extra length acts as a lock nut to keep the bolt from freely spinning out of the insert and messing up the wing height. I then drilled a clearance pocket into a ¾ piece of plywood. I then added glue to it and held it on the carriage bolt head and let the wing sit down on top of it. After the glue dried, I ran in some brad nails for good measure. Using a long level, I then adjusted the carriage bolts until the wings were level with the decks.
-
Finishing
To finish off the bench, I added some basic handles here and there to make moving the unit easier. I also added a power strip with a 15’ power cord on the back side. This will allow full mobility in the shop to most areas where I would set it up. I also added some 1x2 hard maple capping to the edges of the work top and wings. I simply used glue and brad nails to secure these sections. You can leave the little cubbies open under the deck or I decided to add some simple friction slide drawers for tape measures and pencils. The drawers are slip fit to the interior dimensions of the cubbyhole. I also trimmed the drawer fronts to match the angles of the decks. This allows for the saw to still swing to 60°. If you accommodate for this ahead of time, you can fully recess the drawer front and not have to cut that angle on the edge.
Tip:
There is a lot of flexibility in this design and these plans were more for frame of reference and not step by step, inch by inch follow along assembly. This was a difficult build and is up to the end user in how detailed or basic they want to build it.