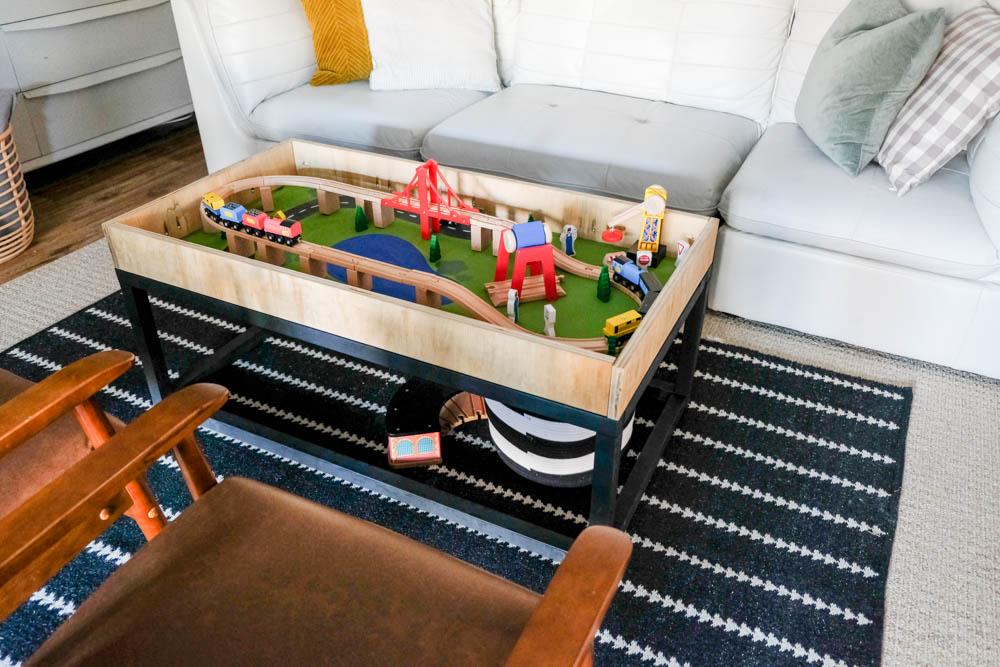
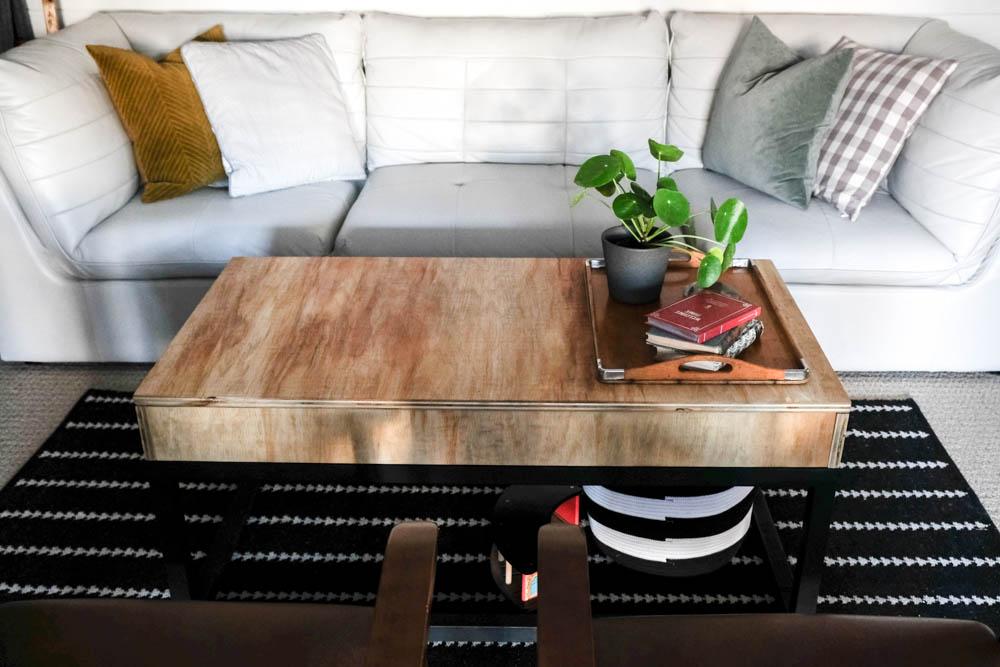
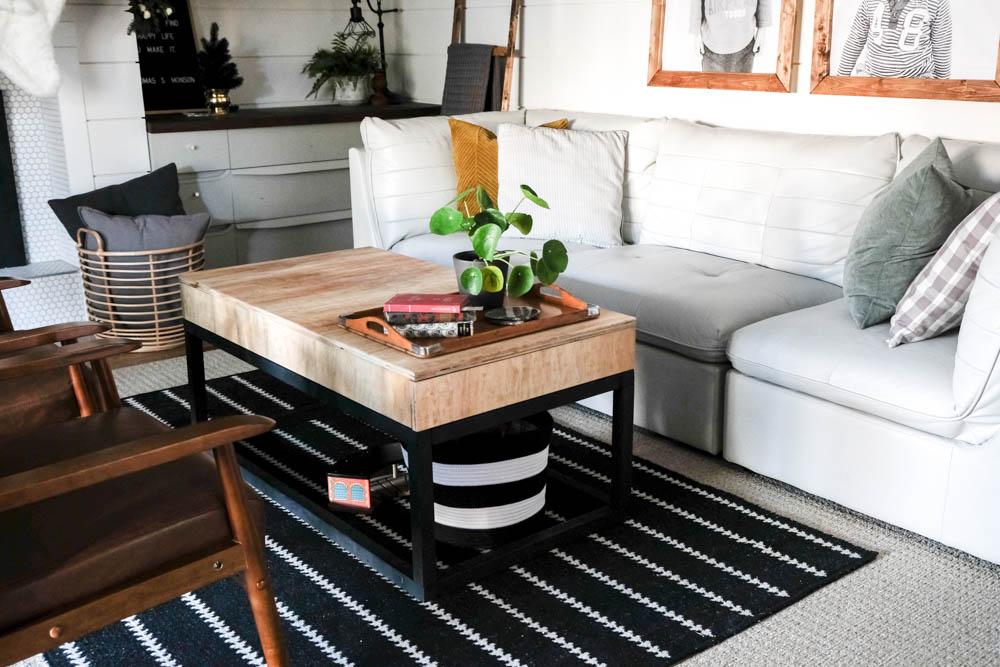
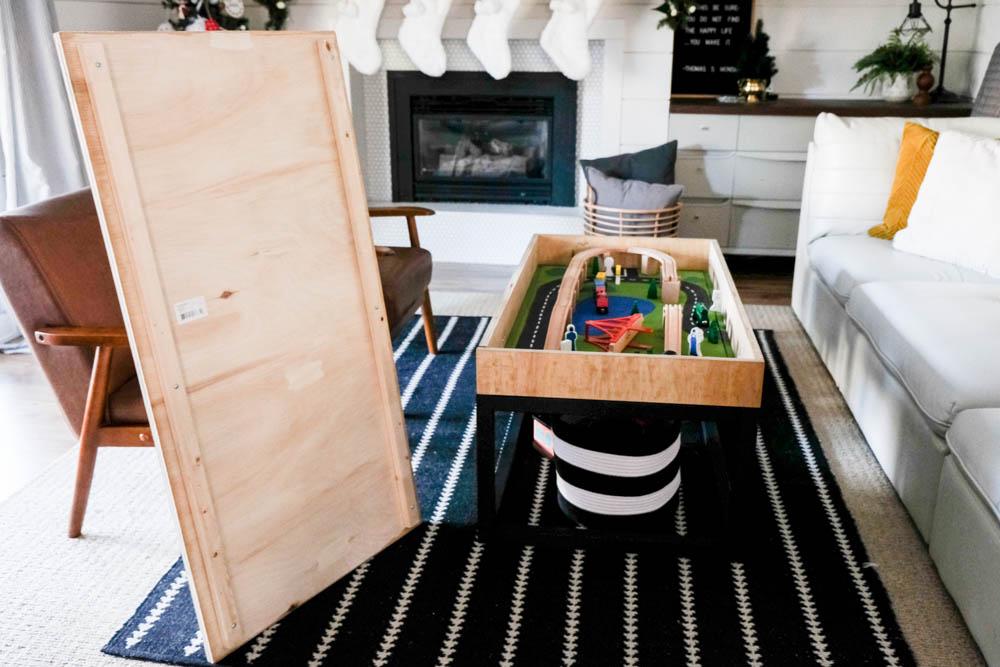


In this plan you’ll see how to build a coffee table with a simple, modern base and train table on top, which can also be used as storage. This can also be used without the storage above, but it makes a great place to store things like board games and other things not used daily.
Tools
Kreg Tools


Other Tools
-
Miter Saw

-
Table Saw
-
Tape Measure
Materials
Wood Products
- 4 Board , 2x2 , 96"
- 2 Board , 1x2 , 96"
- 1 Plywood , 3/4" Thick , Full Sheet
Hardware & Supplies
- 30 1-1/4" Kreg Pocket Hole Screws
- 50 2-1/2" Kreg Pocket Hole Screws
- 1 Black paint
- 1 Sanding block - 60 grit
- 1 Sanding block - 120 grit
- 1 Wood stain in colour of choice
- 18 1-1/2" Kreg Pocket Hole Screws
- 5 Small craft paintbrushes
- 1 Variety of acrylic paints (I used light green, dark green, blue, charcoal, and white)
Directions
-
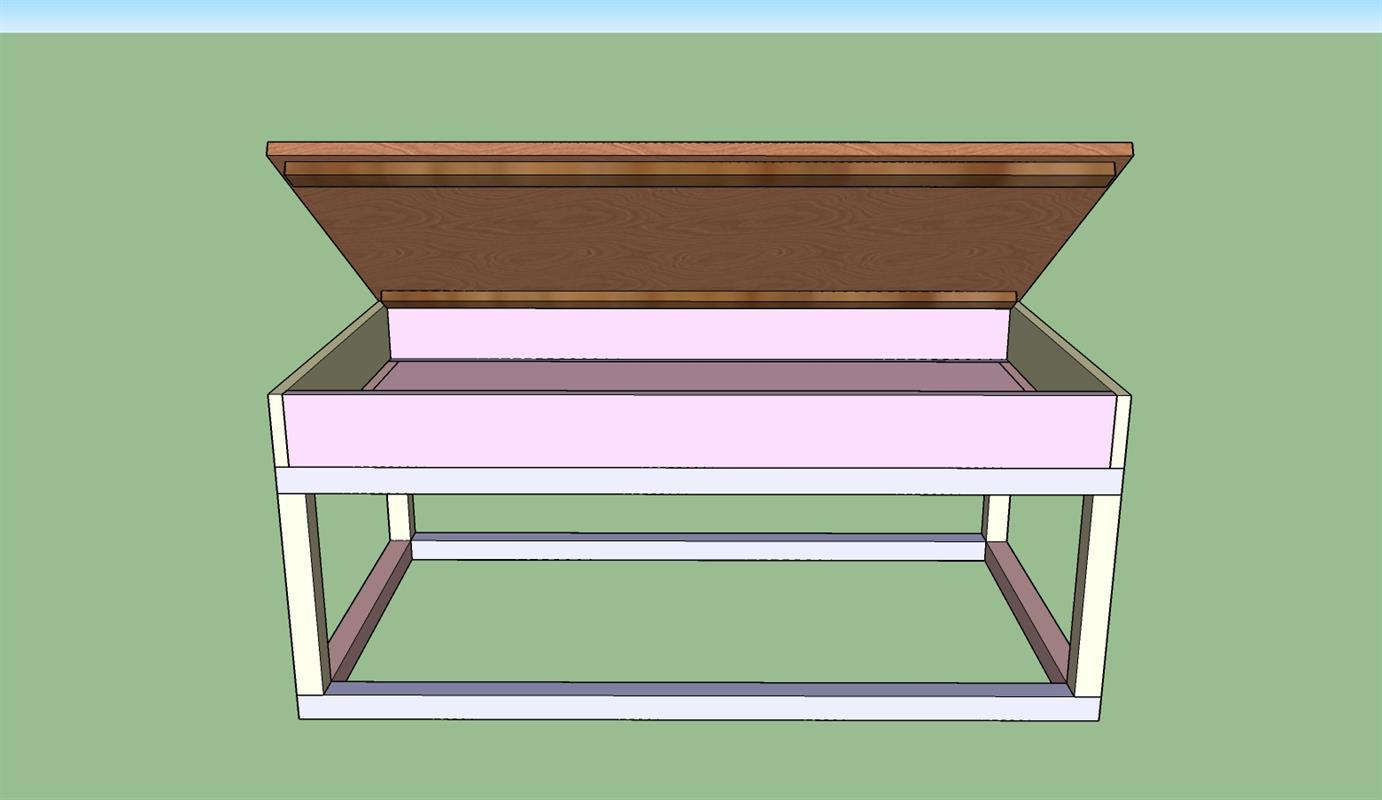
Prepare base
Once pieces are cut to size according to cut list, drill pocket holes into all of the 1-1/2"x 1-1/2" pieces for the base, except the 12" ones. Sand all pieces.

-
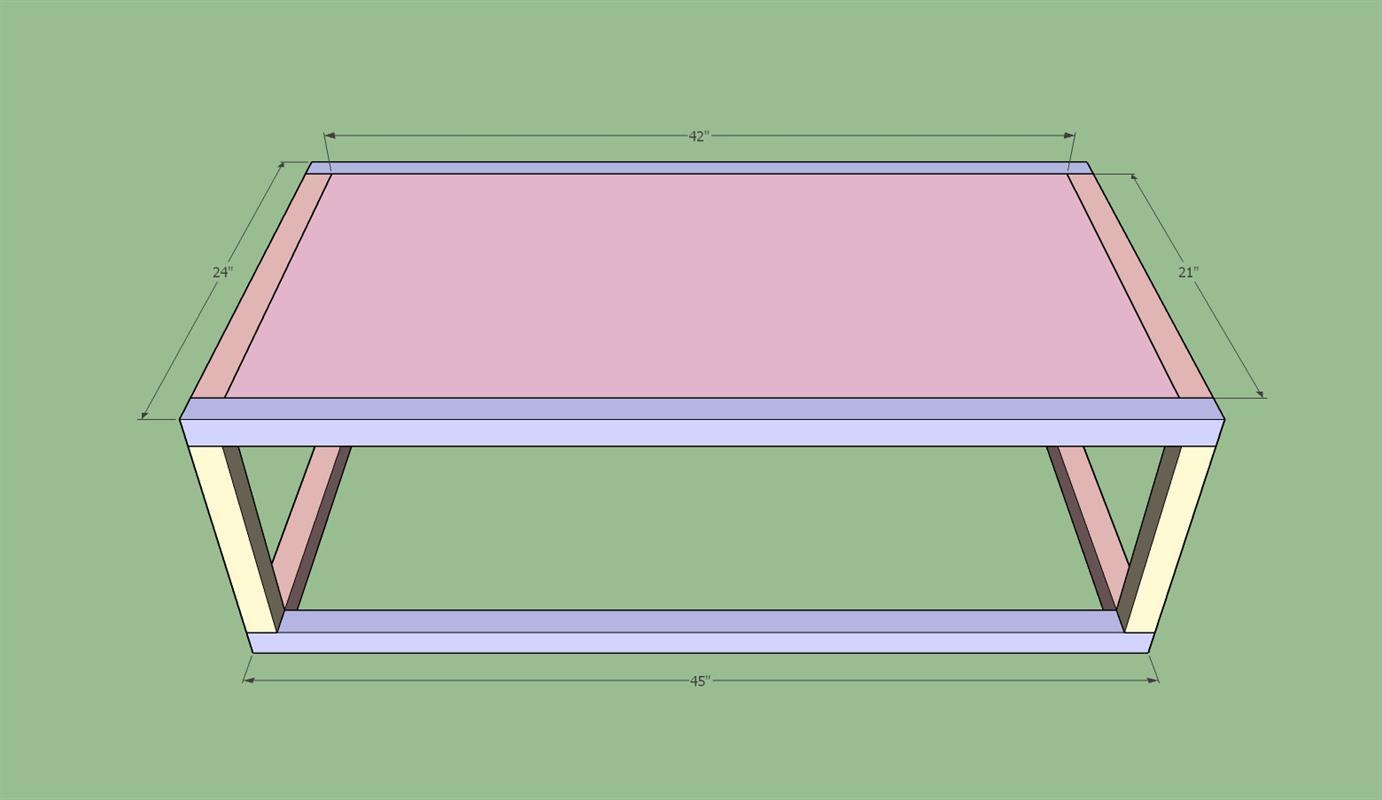
Prepare tabletop surround
Drill pocket holes into all four pieces, plus an additional two holes on the sides of the longer pieces to create a "box." Attach all four pieces using 1-1/4" pocket screws.
Sand all pieces smooth with 120 grit sandpaper.
-
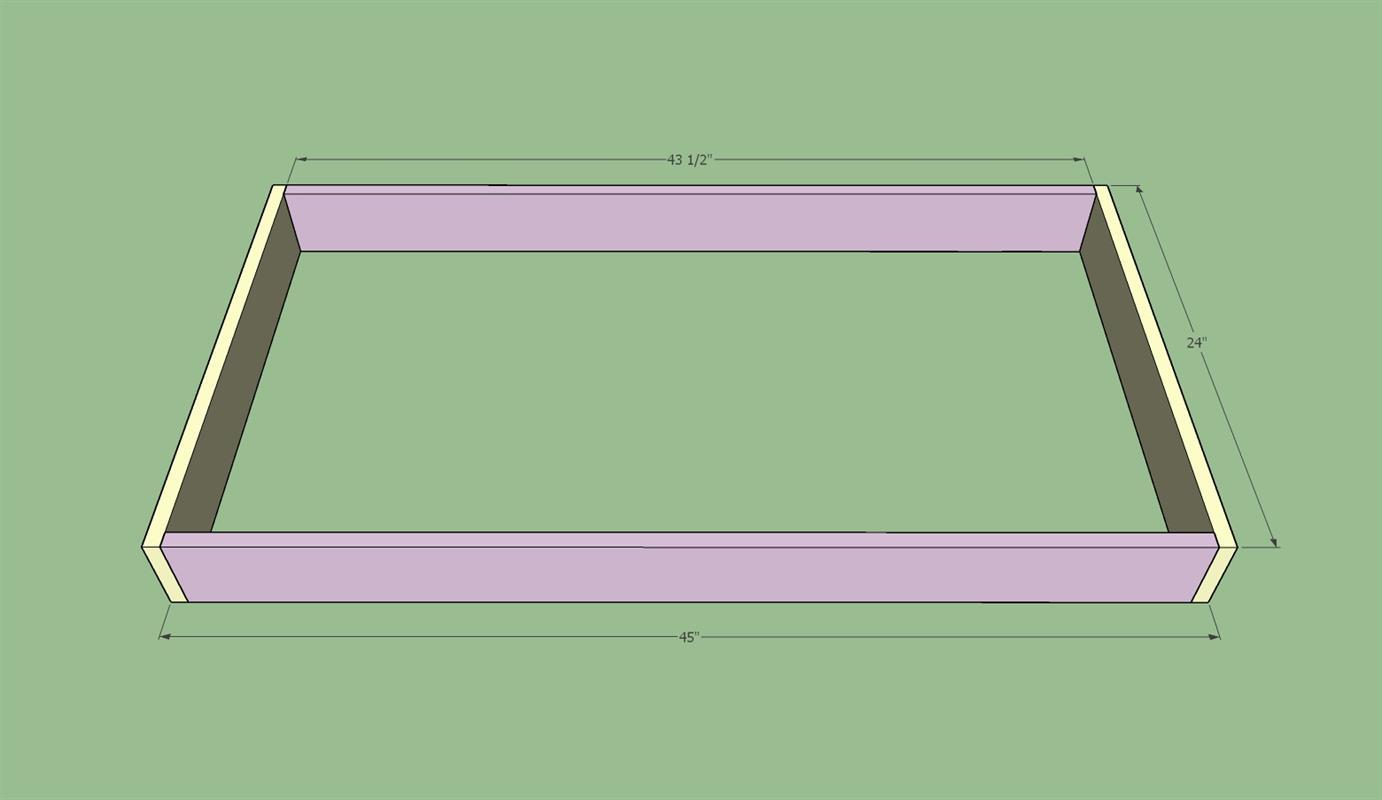
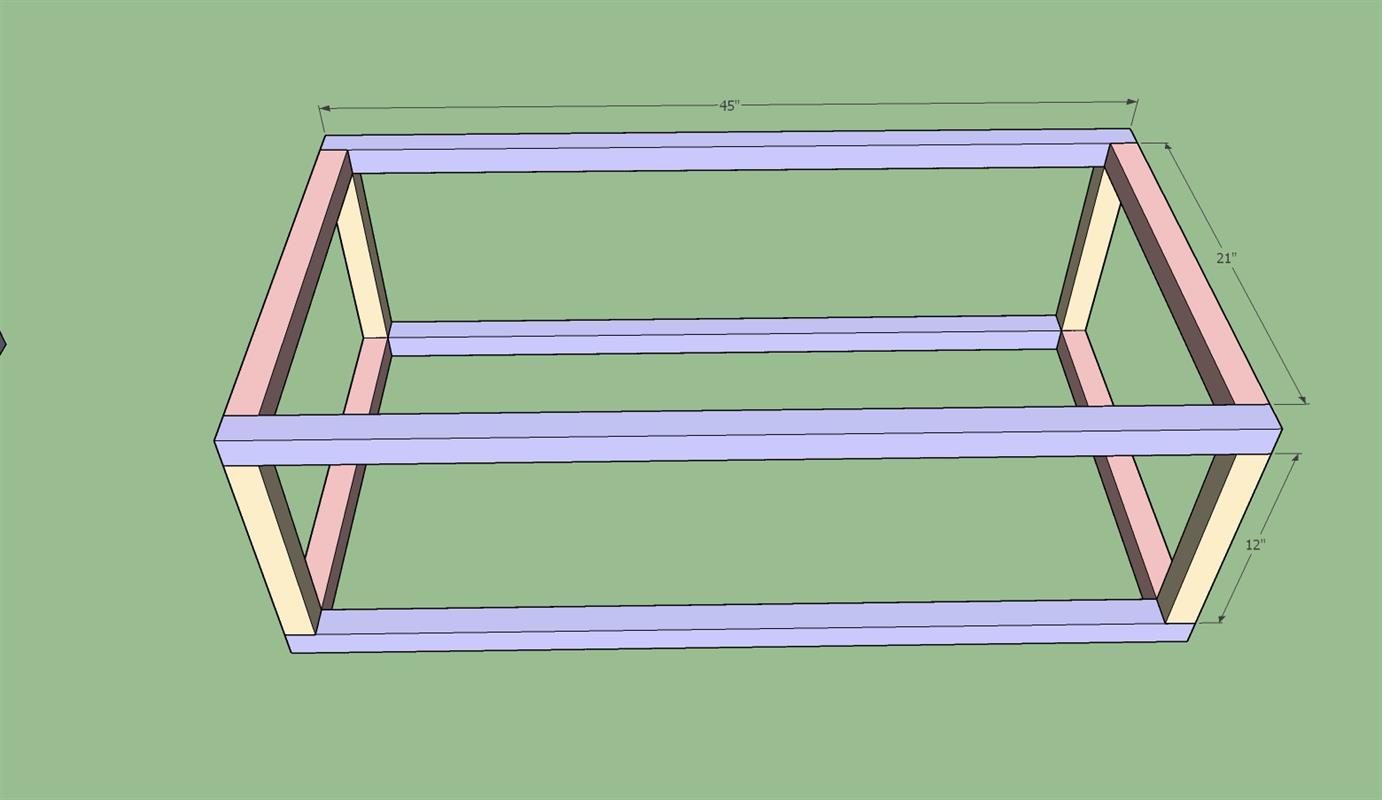
Build frame base - part 1
Using 45" and 21" pieces of the 1-1/2"x1-1/2" boards, create two frames as illustrated in image using 2-1/2" pocket screws.
-
Build frame base - part 2
Attach 1-1/2"x1-1/2"x21" pieces to the frames using 2-1/2" pocket screws.
-
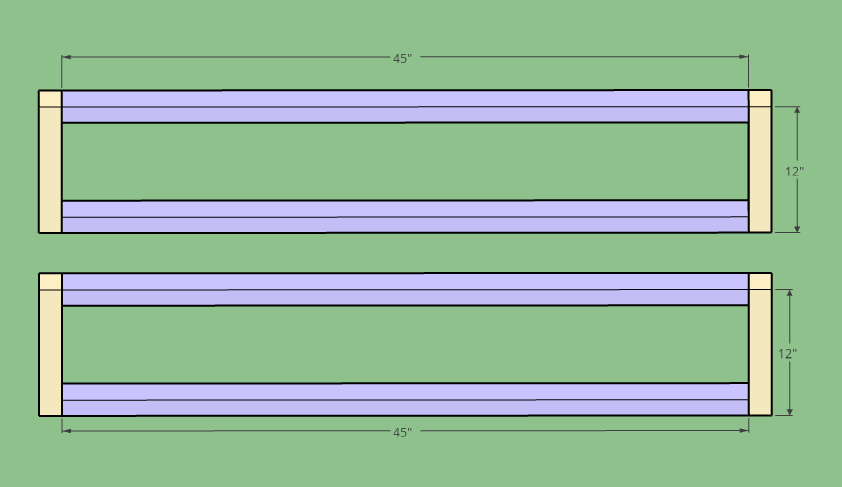
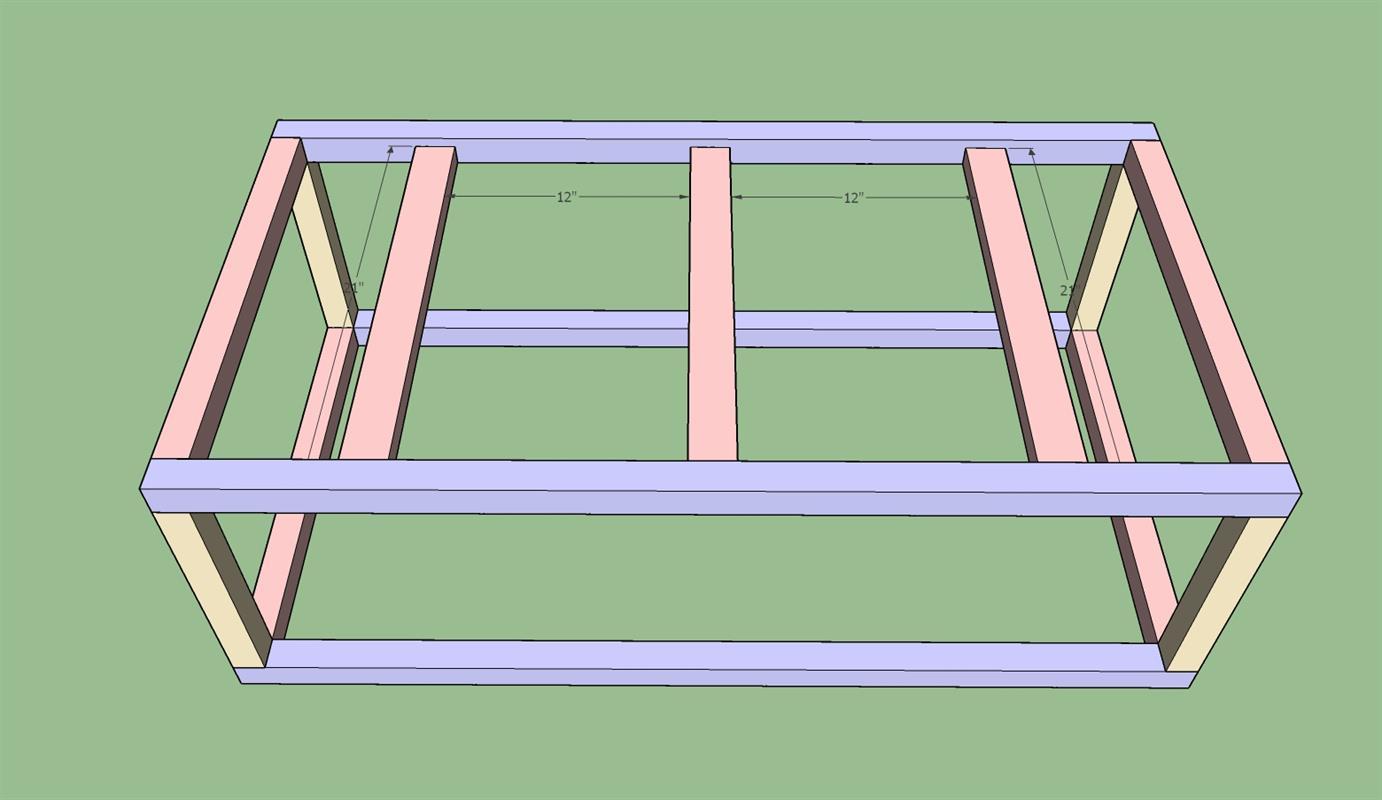
Build bottom supports
Attach the 3/4"x1-1/2"x21" boards to the base frame to create a support for the bottom of the tabletop.
-
Add plywood bottom
You can use screws for this, but it should be a tight enough fit that you don't need to.
-
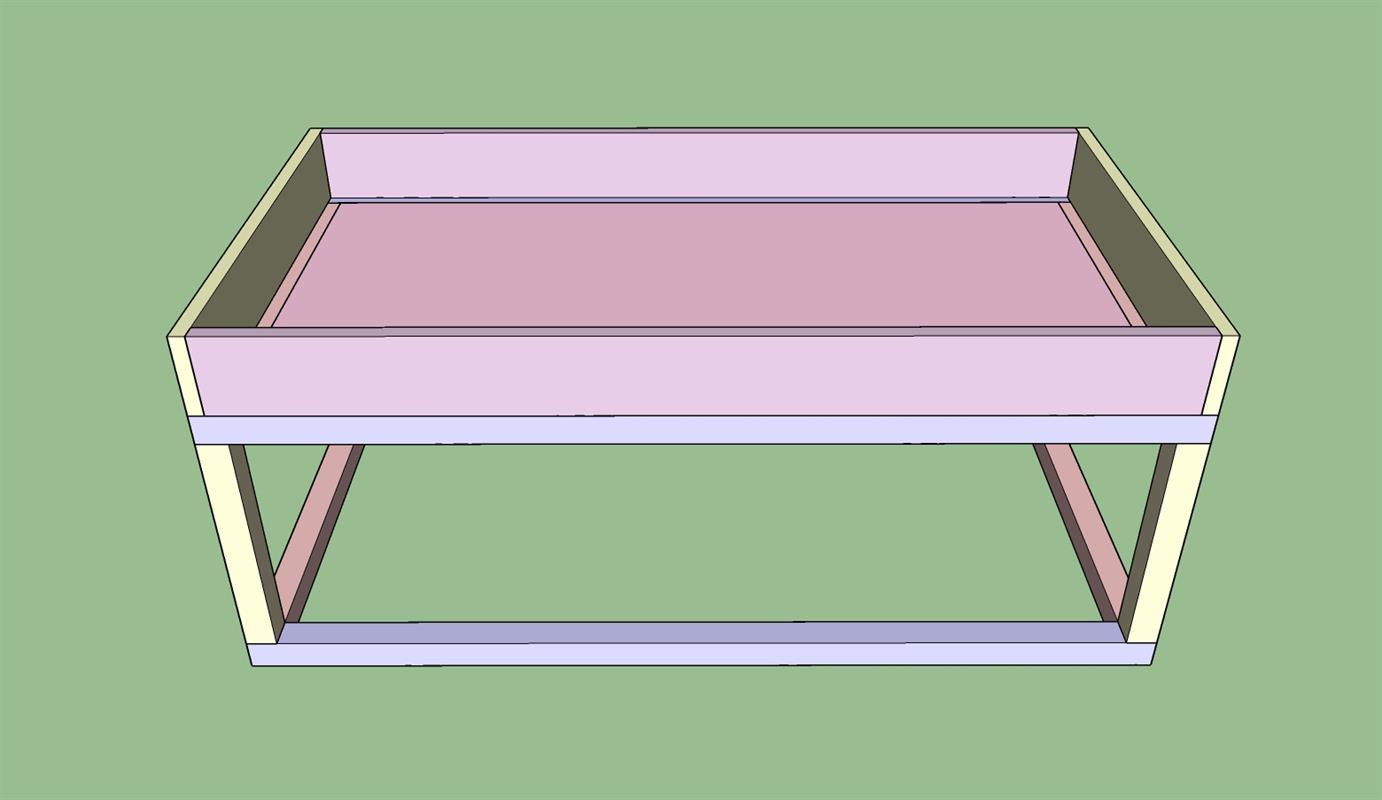
Attach train table surround
Stain the entire thing in the colour of your choice, then, using 1-1/2" pocket screws, attach top piece.
-
Prepare tabletop
Add stoppers to the tabletop so that the top doesn't slide around. Stain in colour of choice.
-
Paint base
Using a matte black paint of your choice, paint the base.

-
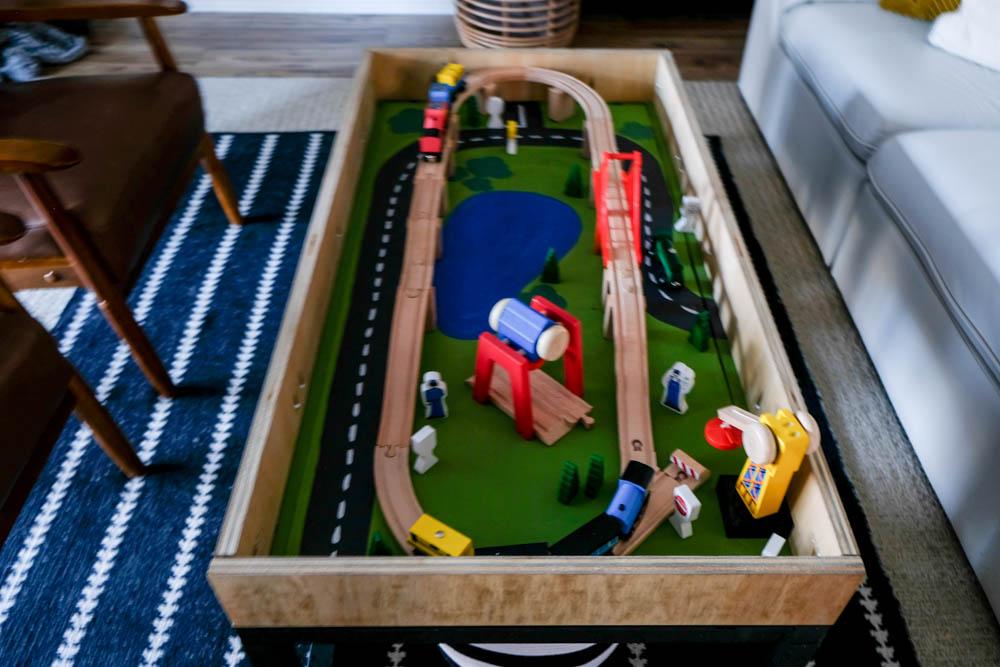
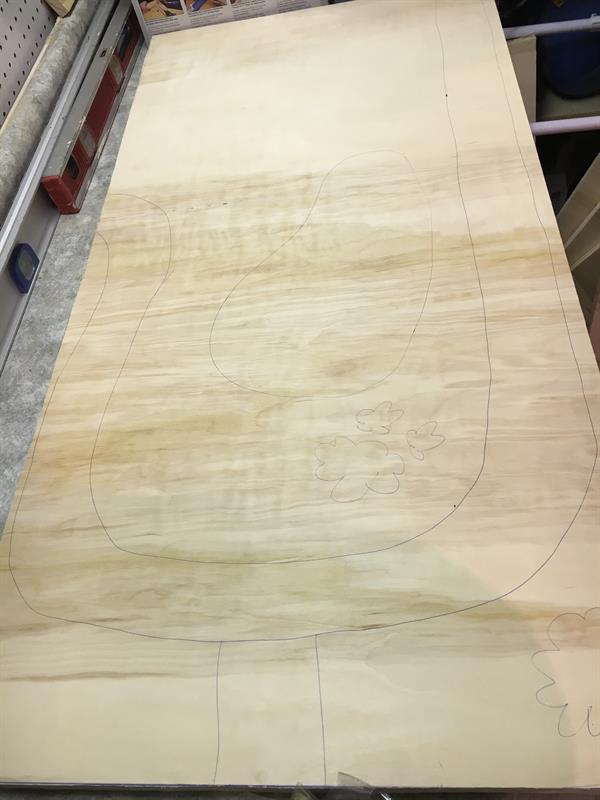
Draw train table landscape
Using a pencil, draw a road, lake, trees, and whatever else you'd like as part of your train table landscape on the plywood base.
-
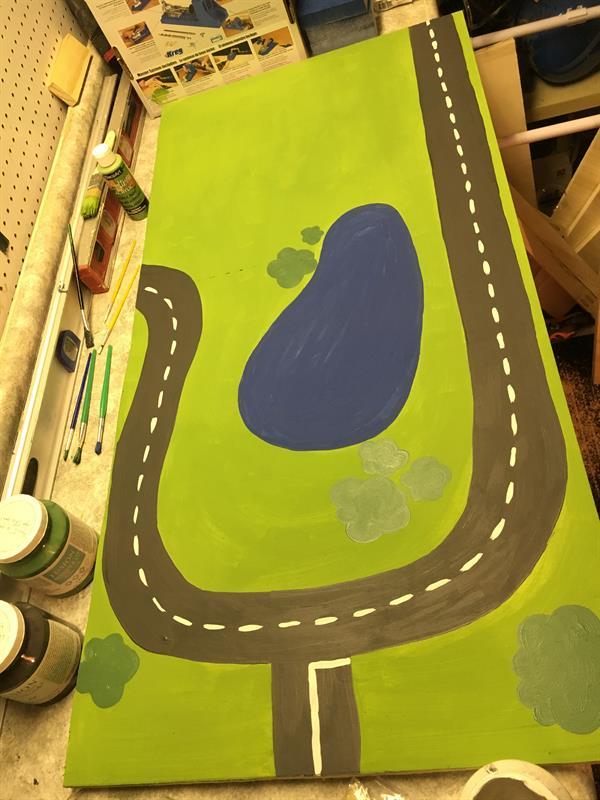
Paint lansdcape
Using acrylic paint and small craft paintbrushes, paint the grass, water, road, etc.
-
Add trains!
Add in your trains and let the kiddos play! When they're done, just add the top back on!