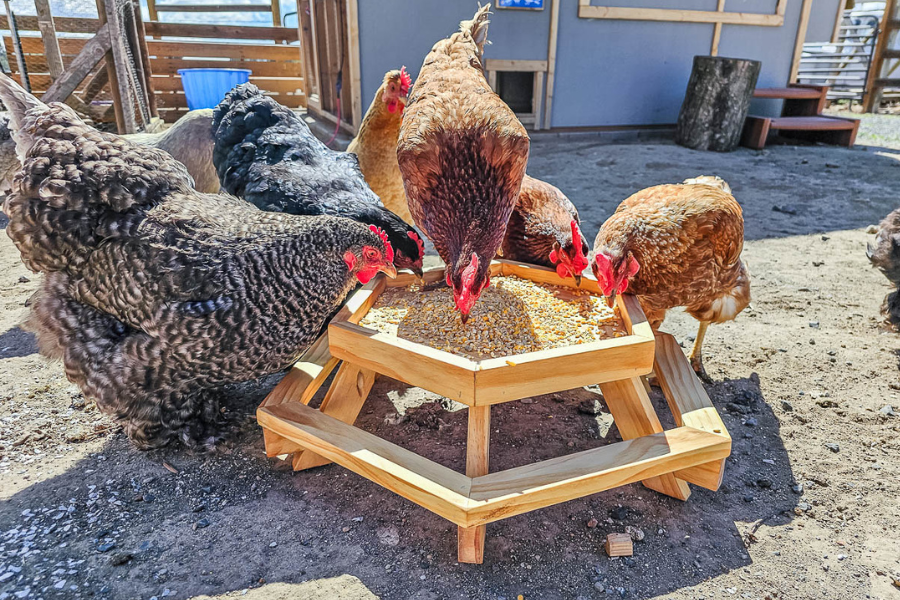
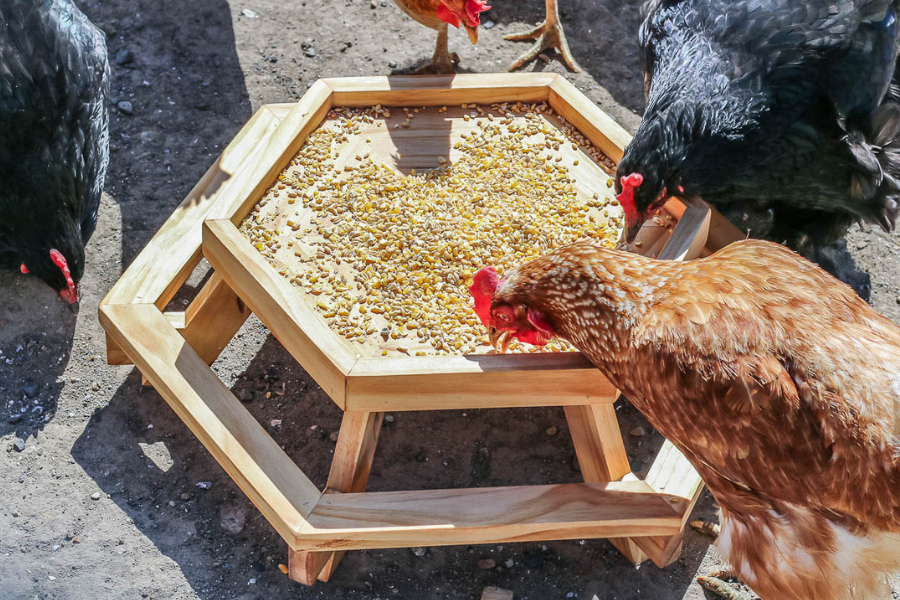
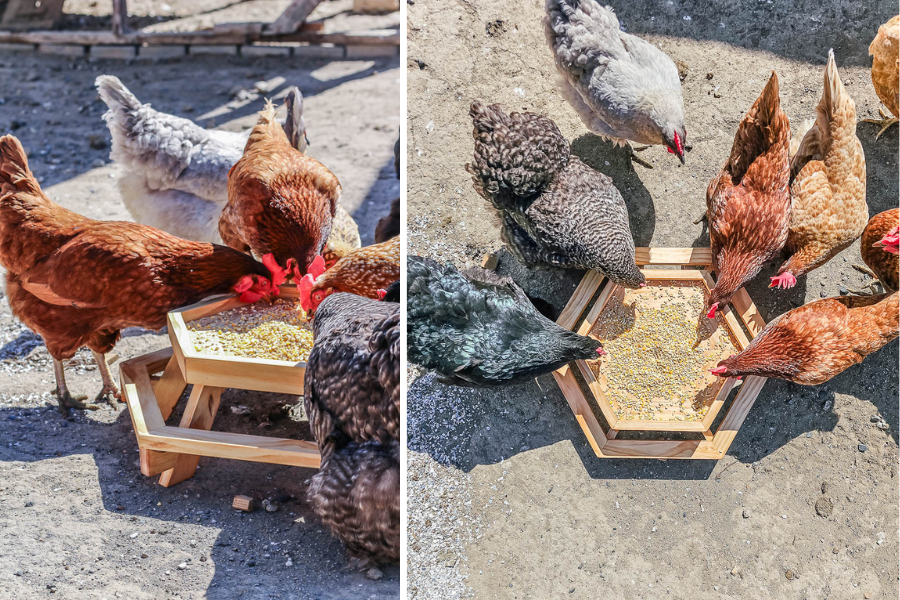
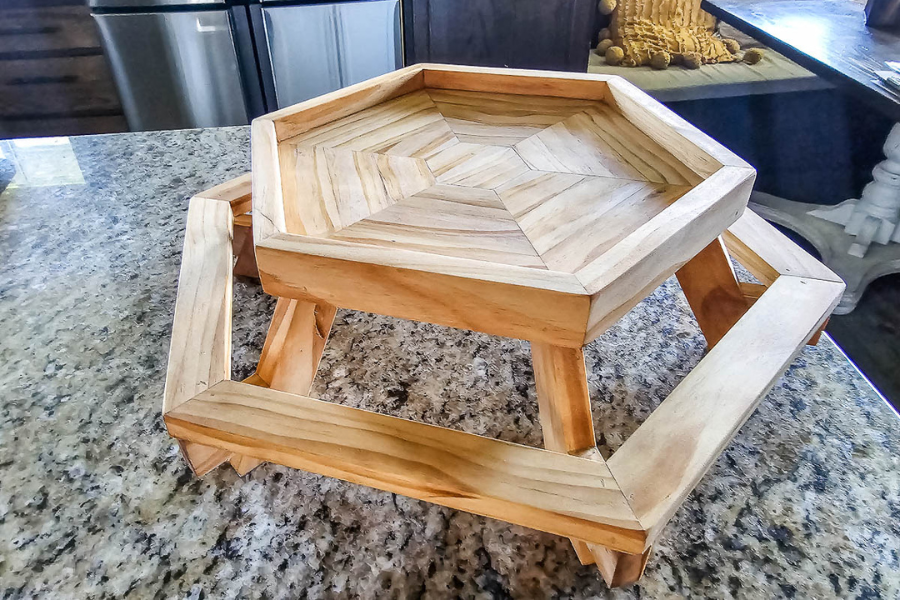


Do you love your chickens? Build your own chicken feeder picnic table with woodworking plans!
Tools
Kreg Tools


Other Tools
-
Miter saw

-
Tape measure
-
Brad nail gun
-
Bar clamps
Materials
Wood Products
- 1 Select Pine , 1x12 , 4'
Hardware & Supplies
- 50 Kreg zinc pan-head pocket hole screws (1 1/4") - see tools list
- -- 80-grit sandpaper
- -- 150-grit sandpaper
- -- 1 1/2" brad nails
- -- Wood glue
- -- Wood filler
- -- Linseed oil
- -- Staining cloth
Cut List & Parts
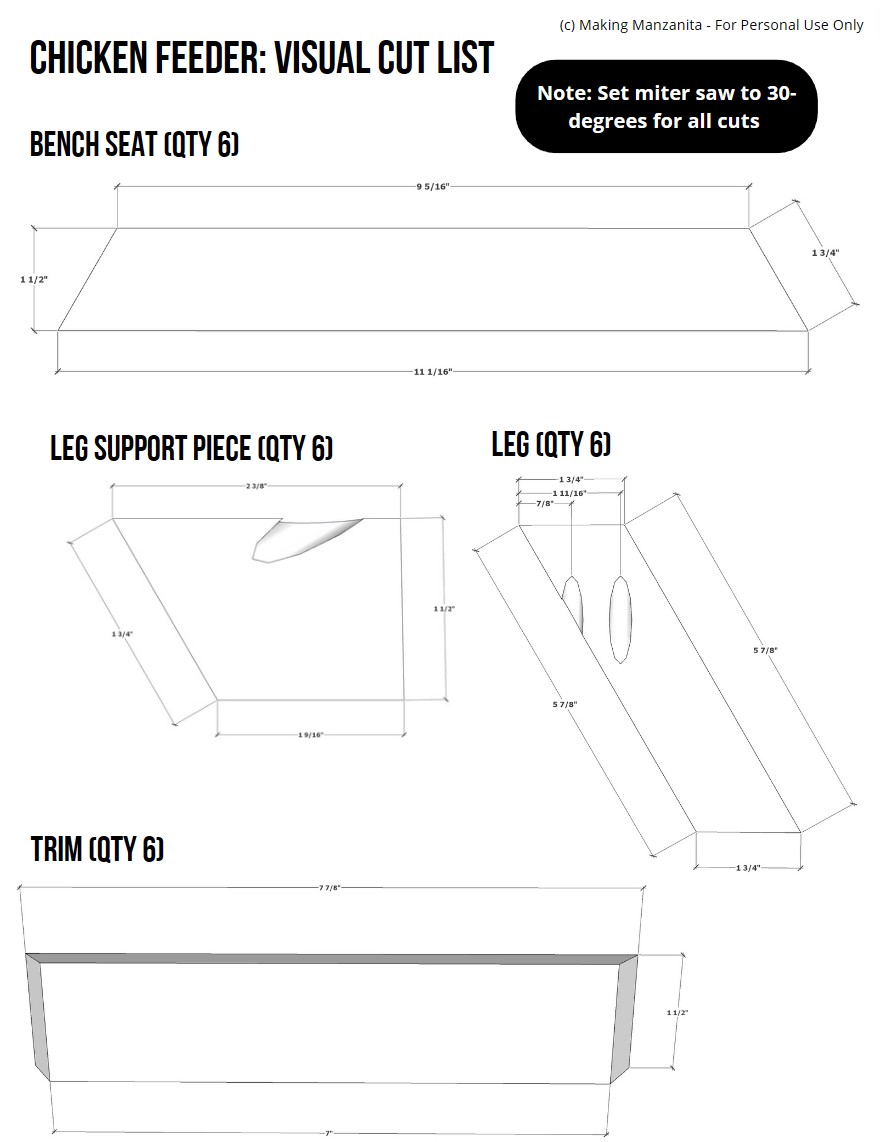
- 6 Bench Seat , ¾” x 1 1/2” x 11 1/16” on long edge and 9 5/16” on short edge
- 6 Leg Support Piece , ¾” x 1 1/2” x 2 ⅜” on long edge and 1 9/16” on short edge
- 6 Leg , ¾” x 1 3/4” x 5 7/8” cut at 30-degree angle
- 6 Trim , 3/4” x 1 1/2” x 7 ⅞” on long edge and 7” on short edge
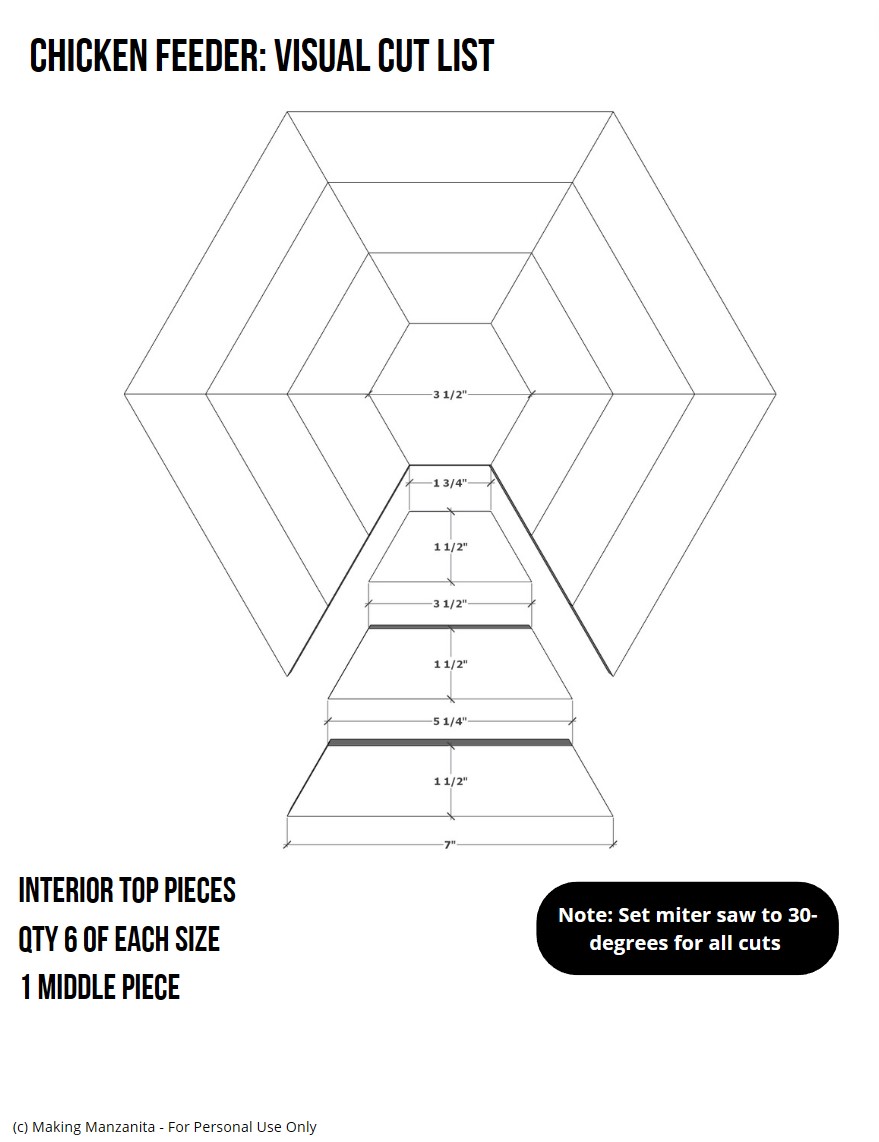
- 1 Interior Top Middle Piece , ¾” x 3 ½” x 3 ½” cut in hexagon shape with 30-degree angled
- 6 Interior Top Inner Ring Piece , ¾” x 1 ½” x 3 ½” on long edge and 1 ¾” on short edge
- 6 Interior Top Middle Ring Piece , ¾” x 1 ½” x 5 ¼” on long edge and 3 ½” on short edge
- 6 Interior Top Outer Ring Piece , ¾” x 1 ½” x 7” on long edge and 5 ¼” on short edge
Directions
-
Cut wood
Cut wood according to the visual cut list in the woodworking plans with a miter saw for the lengths and angled cuts. We opted to use a 4’ length of a 1x12 and rip it down to the correct sizes, which saved us money. If you use a large piece of wood, you’ll also need a table saw or circular saw with RipCut to rip down these pieces. Otherwise, you can purchase 1x2s to avoid this step.
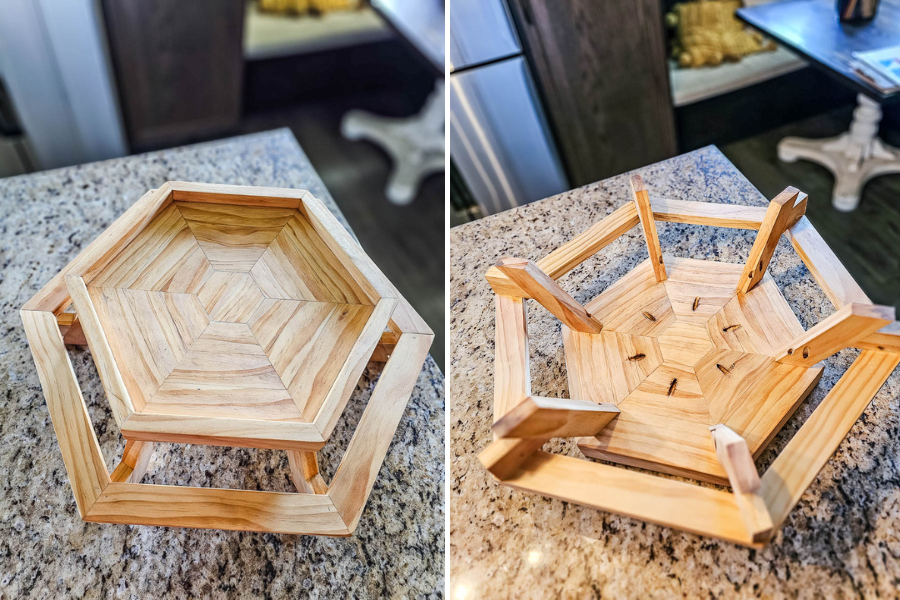
Note: The top of the table has a lot of small pieces with intricate angles. Once you have all of the wood pieces cut according to the woodworking plans, dry-fit the pieces to make sure everything is accurate.The top of the table has a lot of small pieces with intricate angles. Once you have all of the wood pieces cut according to the woodworking plans, dry-fit the pieces to make sure everything is accurate.
Angles
For the hexagon shape, the math works out to 30-degree angles. When cutting the interior pieces, we recommend setting your miter saw to 29.5-degree angle to give yourself a little wiggle room and make everything fit together easily. You will add wood filler later, so there is no need to be perfect.

-
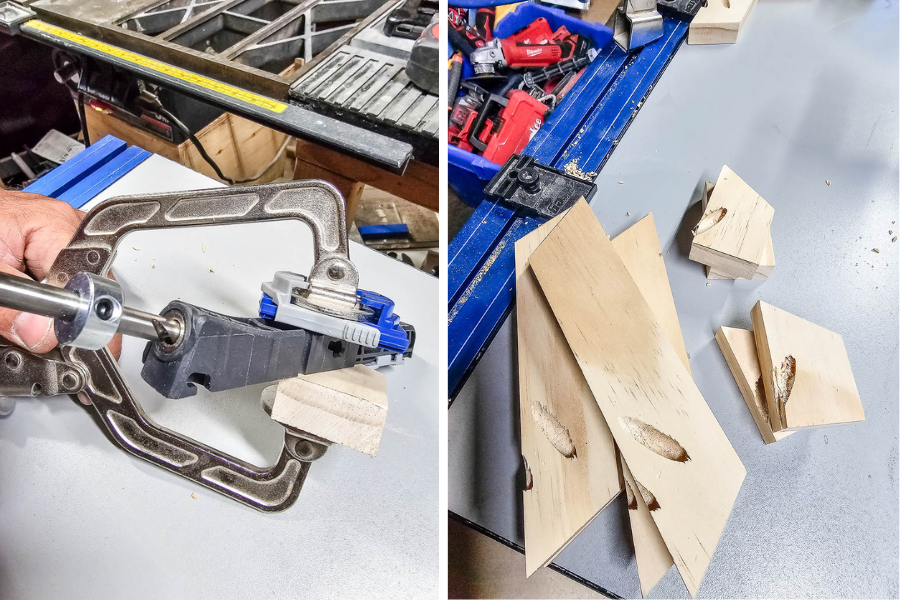
Drill pocket holes
Drill pocket holes as shown in the woodworking plans. Because the pieces are small, we recommend the Kreg Pocket Hole Jig Micro, which makes slightly smaller pocket holes.
-
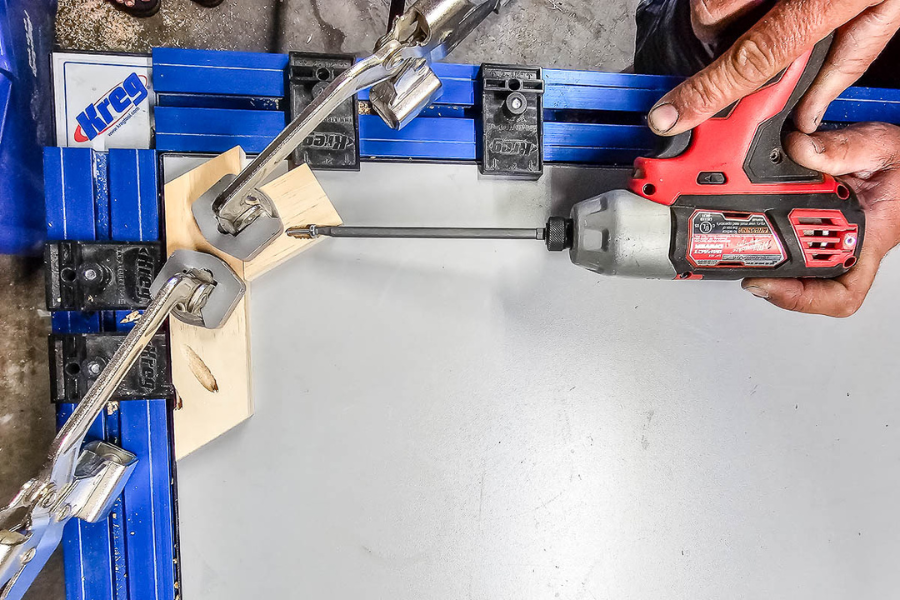
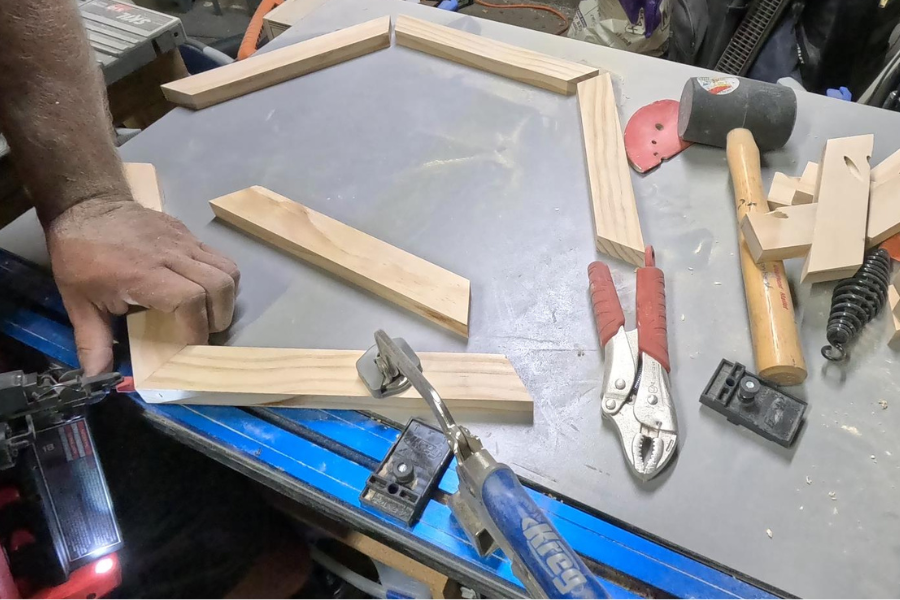
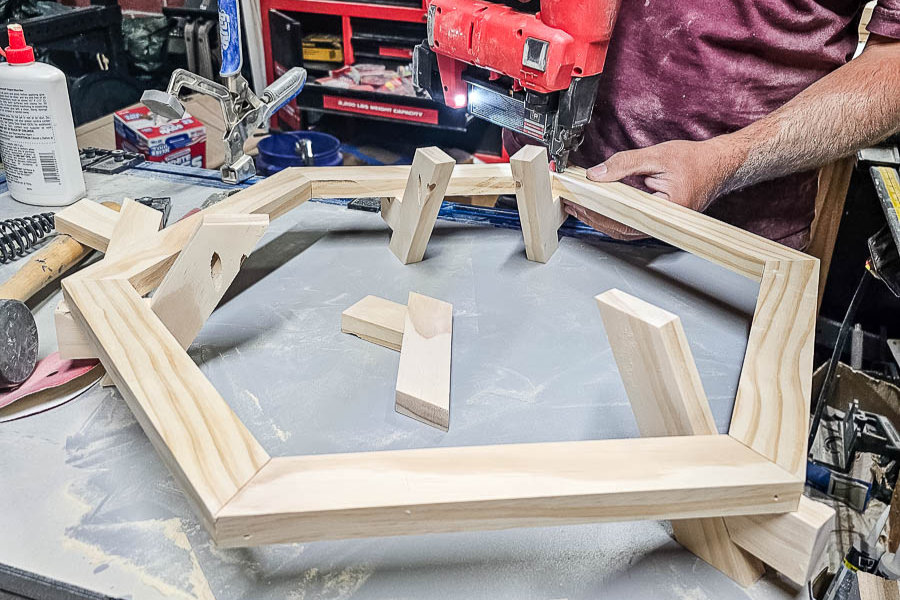
Attach support pieces to the legs
Make a mark on the leg to indicate where the support piece should be attached. Clamp your workpieces down and attach them together using the pre-drilled pocket holes. The Kreg Clamp Table works great for keeping everything straight and square while assembling here.
-
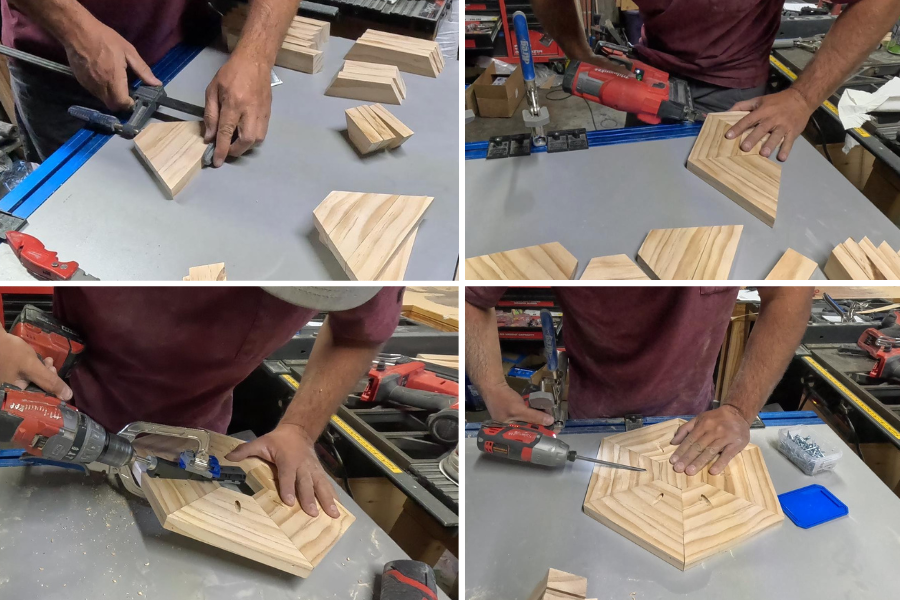
Assemble interior top pieces
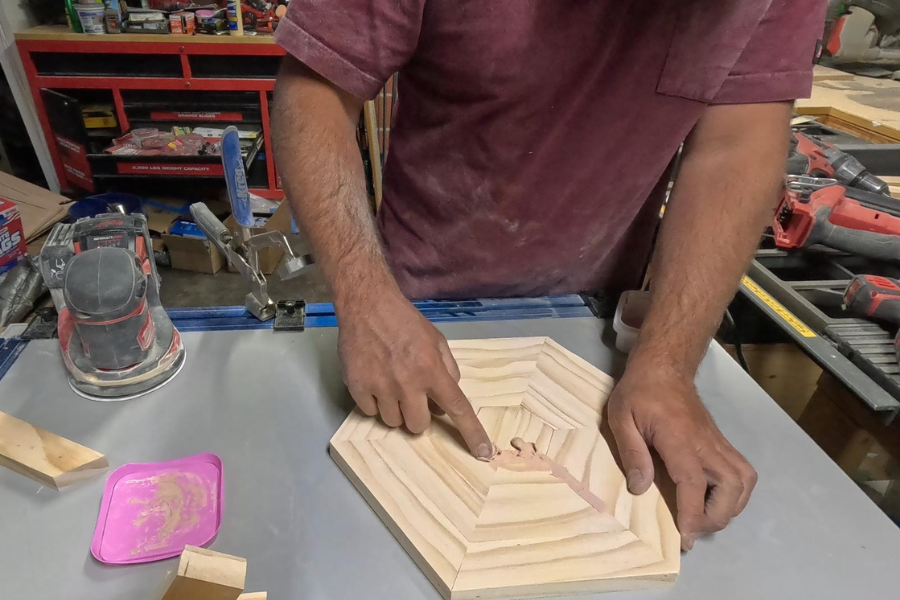
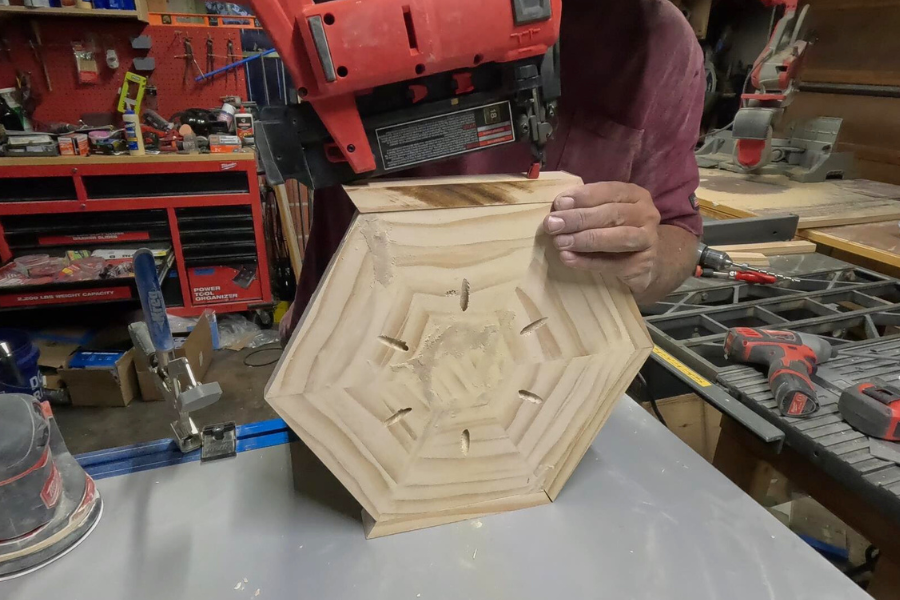
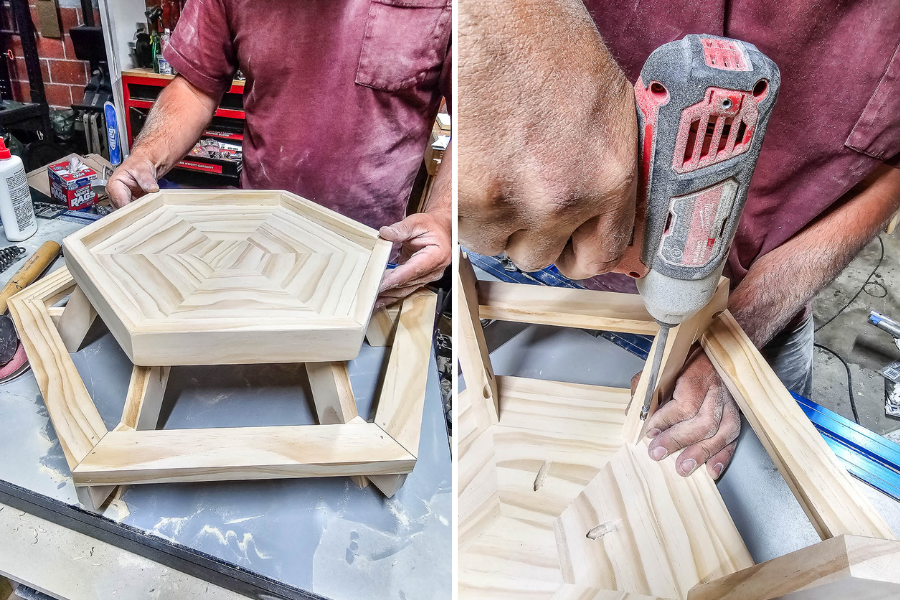
Apply wood glue to the edges of the tabletop interior pieces and clamp together all three pieces of each wedge. Because we’re using a hexagon shape, there will be six wedges total. Once clamped together, apply 1 ½” brad nails from an outside edge going in at an angle. Then clamp all six wedges together and sand edges with an orbital sander and 80-grit then 150-grit sandpaper to get flush edges. Drill one pocket hole on the short side of each wedge, which will attach the middle piece to the center of the hexagon. Next glue & clamp together three wedges to make one half of the hexagon and apply brad nails in each corner joint. Repeat with the other three wedges of the hexagon. Attach both hexagon halves together with wood glue and brad nails. Lastly, add in the hexagon middle piece. Sand the edges of the middle piece if needed. Secure with the pocket holes.
-
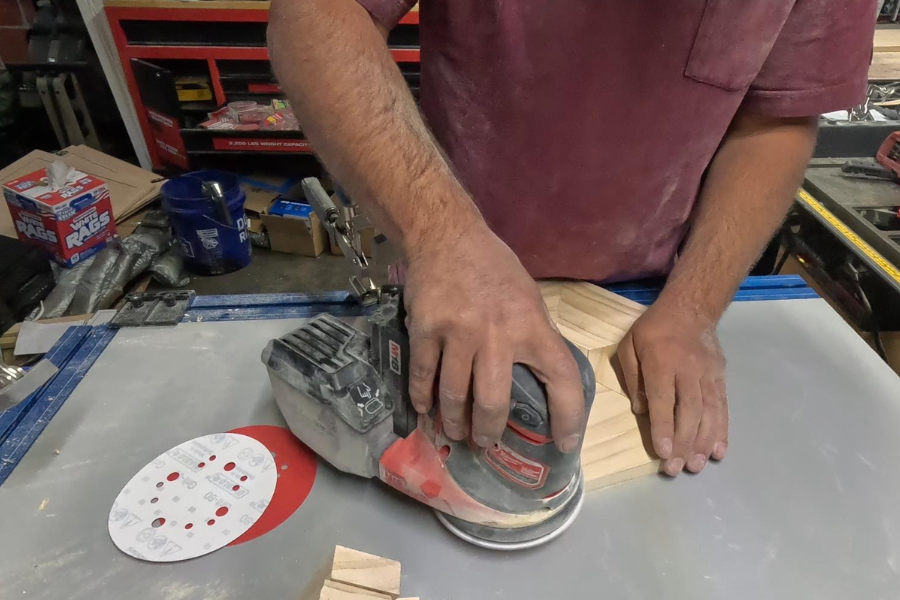
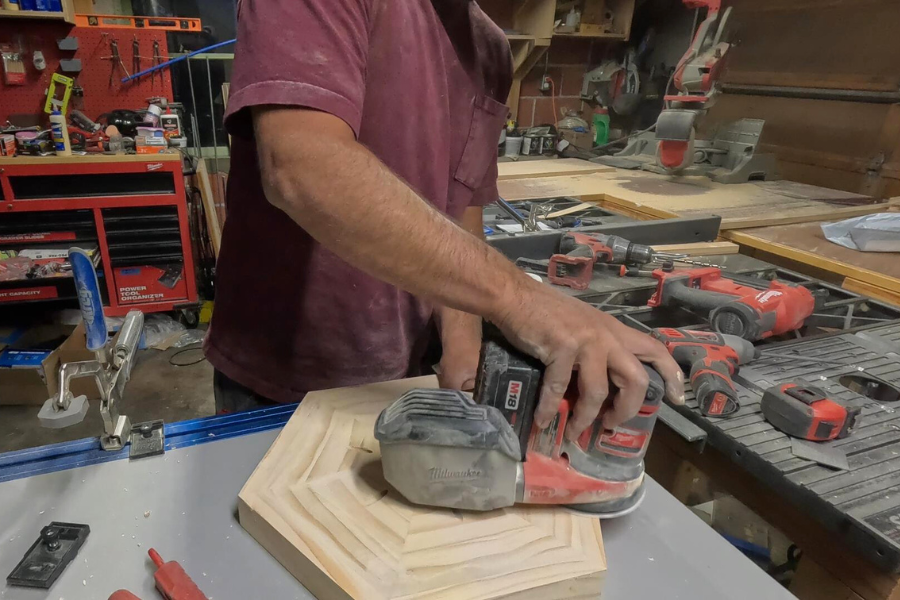
Sand
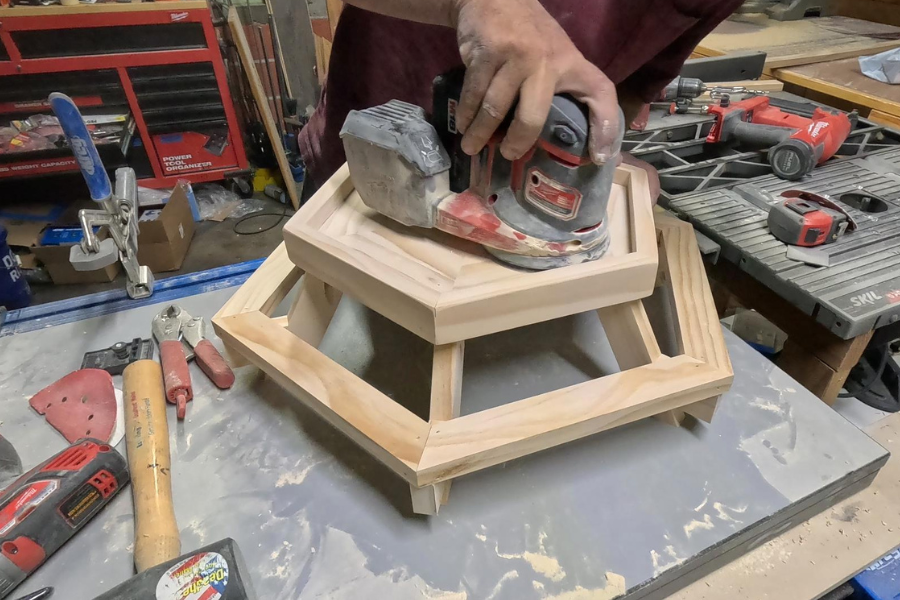
Once all of the top interior pieces are attached, you can sand everything with 80-grit then 150-grit sandpaper and an orbital sander.
-
Fill gaps with wood filler
Fill all gaps with wood filler.
-
Attach top trim pieces
Use wood glue to attach the trim pieces around the interior top pieces and secure them with brad nails. Fill nail holes with wood filler.
-
Sand the top again
Sand the top again now that the trim has been added so that everything is flush and smooth.
-
Attach bench seat pieces
Use wood glue on the edges to attach the bench seat pieces together and secure them with brad nails from the outside corners going in at an angle.
-
Add legs to the bench
Add a small amount of wood glue to the top edge of the support piece on the legs and put it under the bench seat at each joint. Add two brad nails from the top to secure. Fill nail holes with wood filler.
-
Add top
Set the tabletop into place and secure it with pre-drilled pocket holes.
-
Sand
Once everything has been assembled, give it another sanding with the orbital sander and 80-grit then 150-grit sandpaper. Follow up by hand sanding along the edges and corners to smooth with a small piece of 150-grit sandpaper.
-
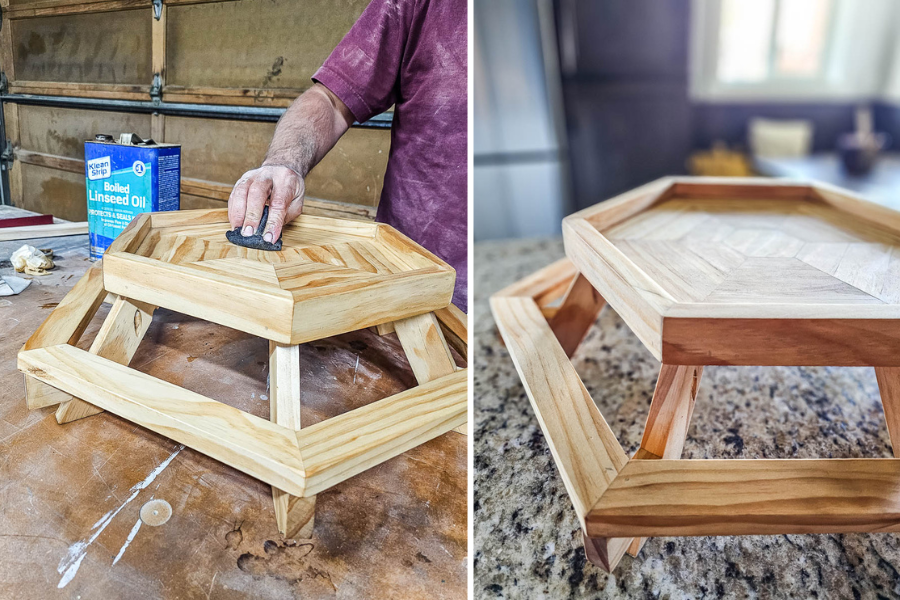
Seal
Wipe everything clean and seal with a sealer of your choice. We opted for linseed oil.