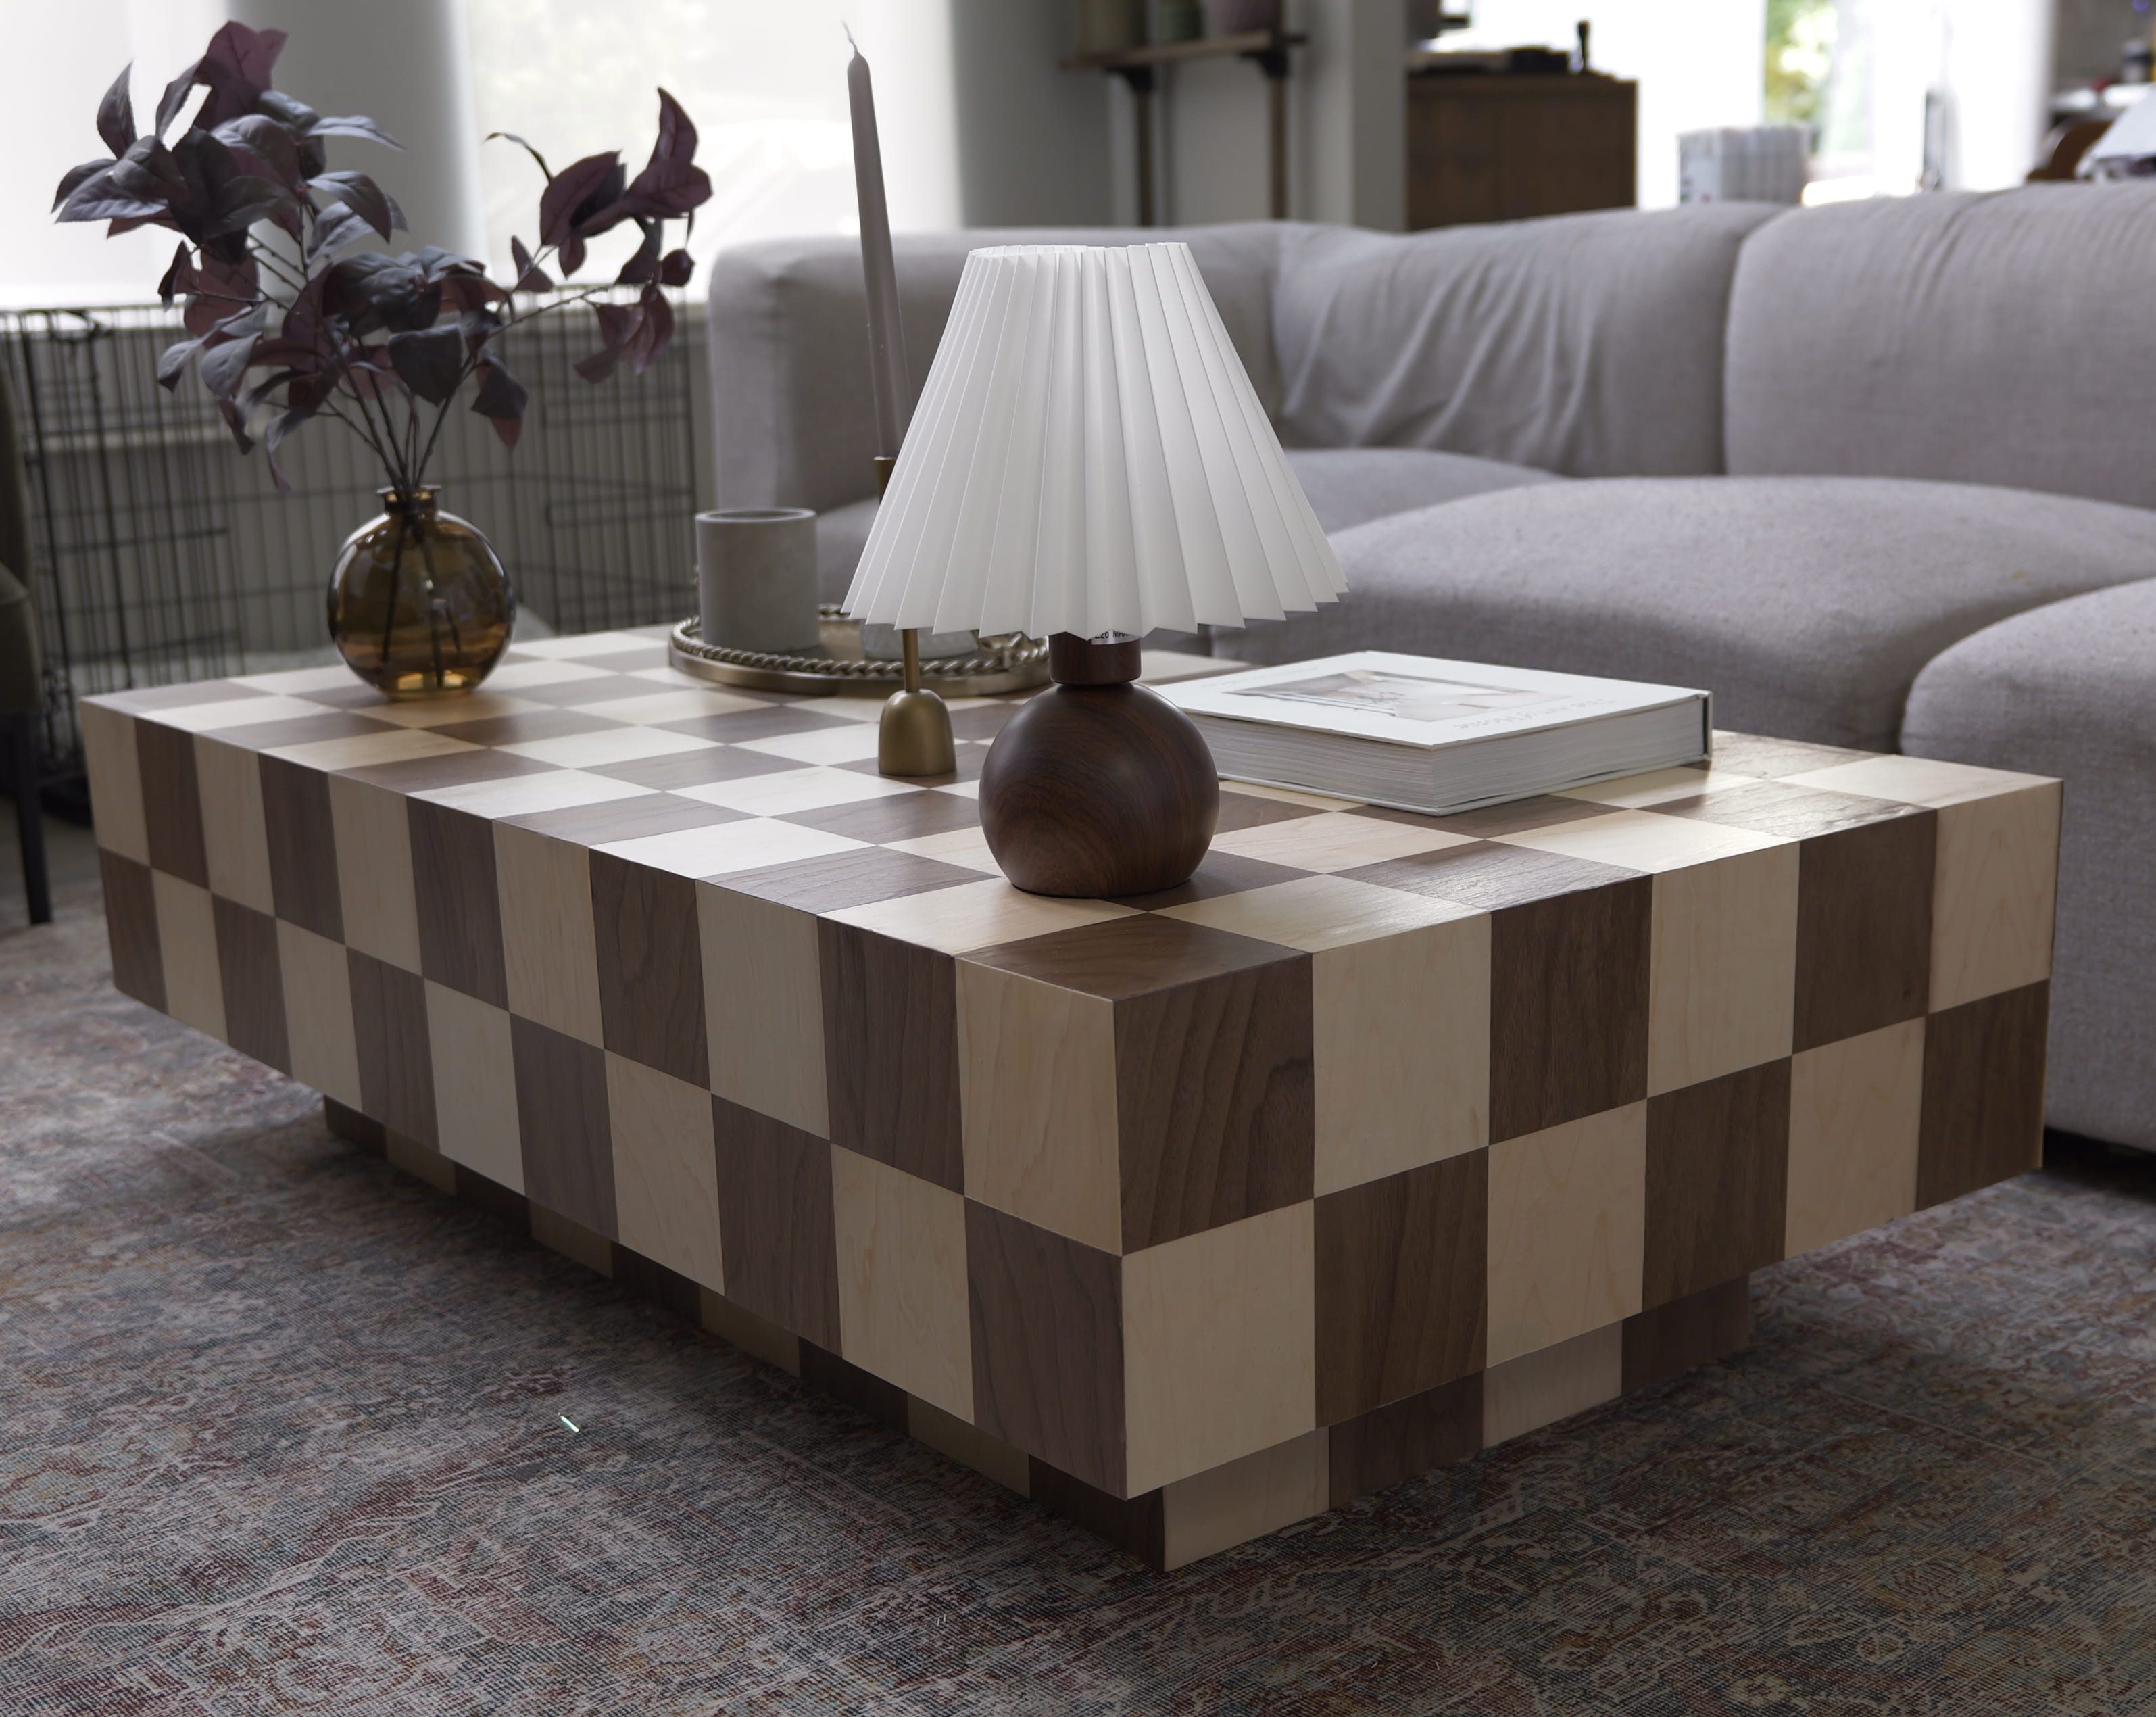
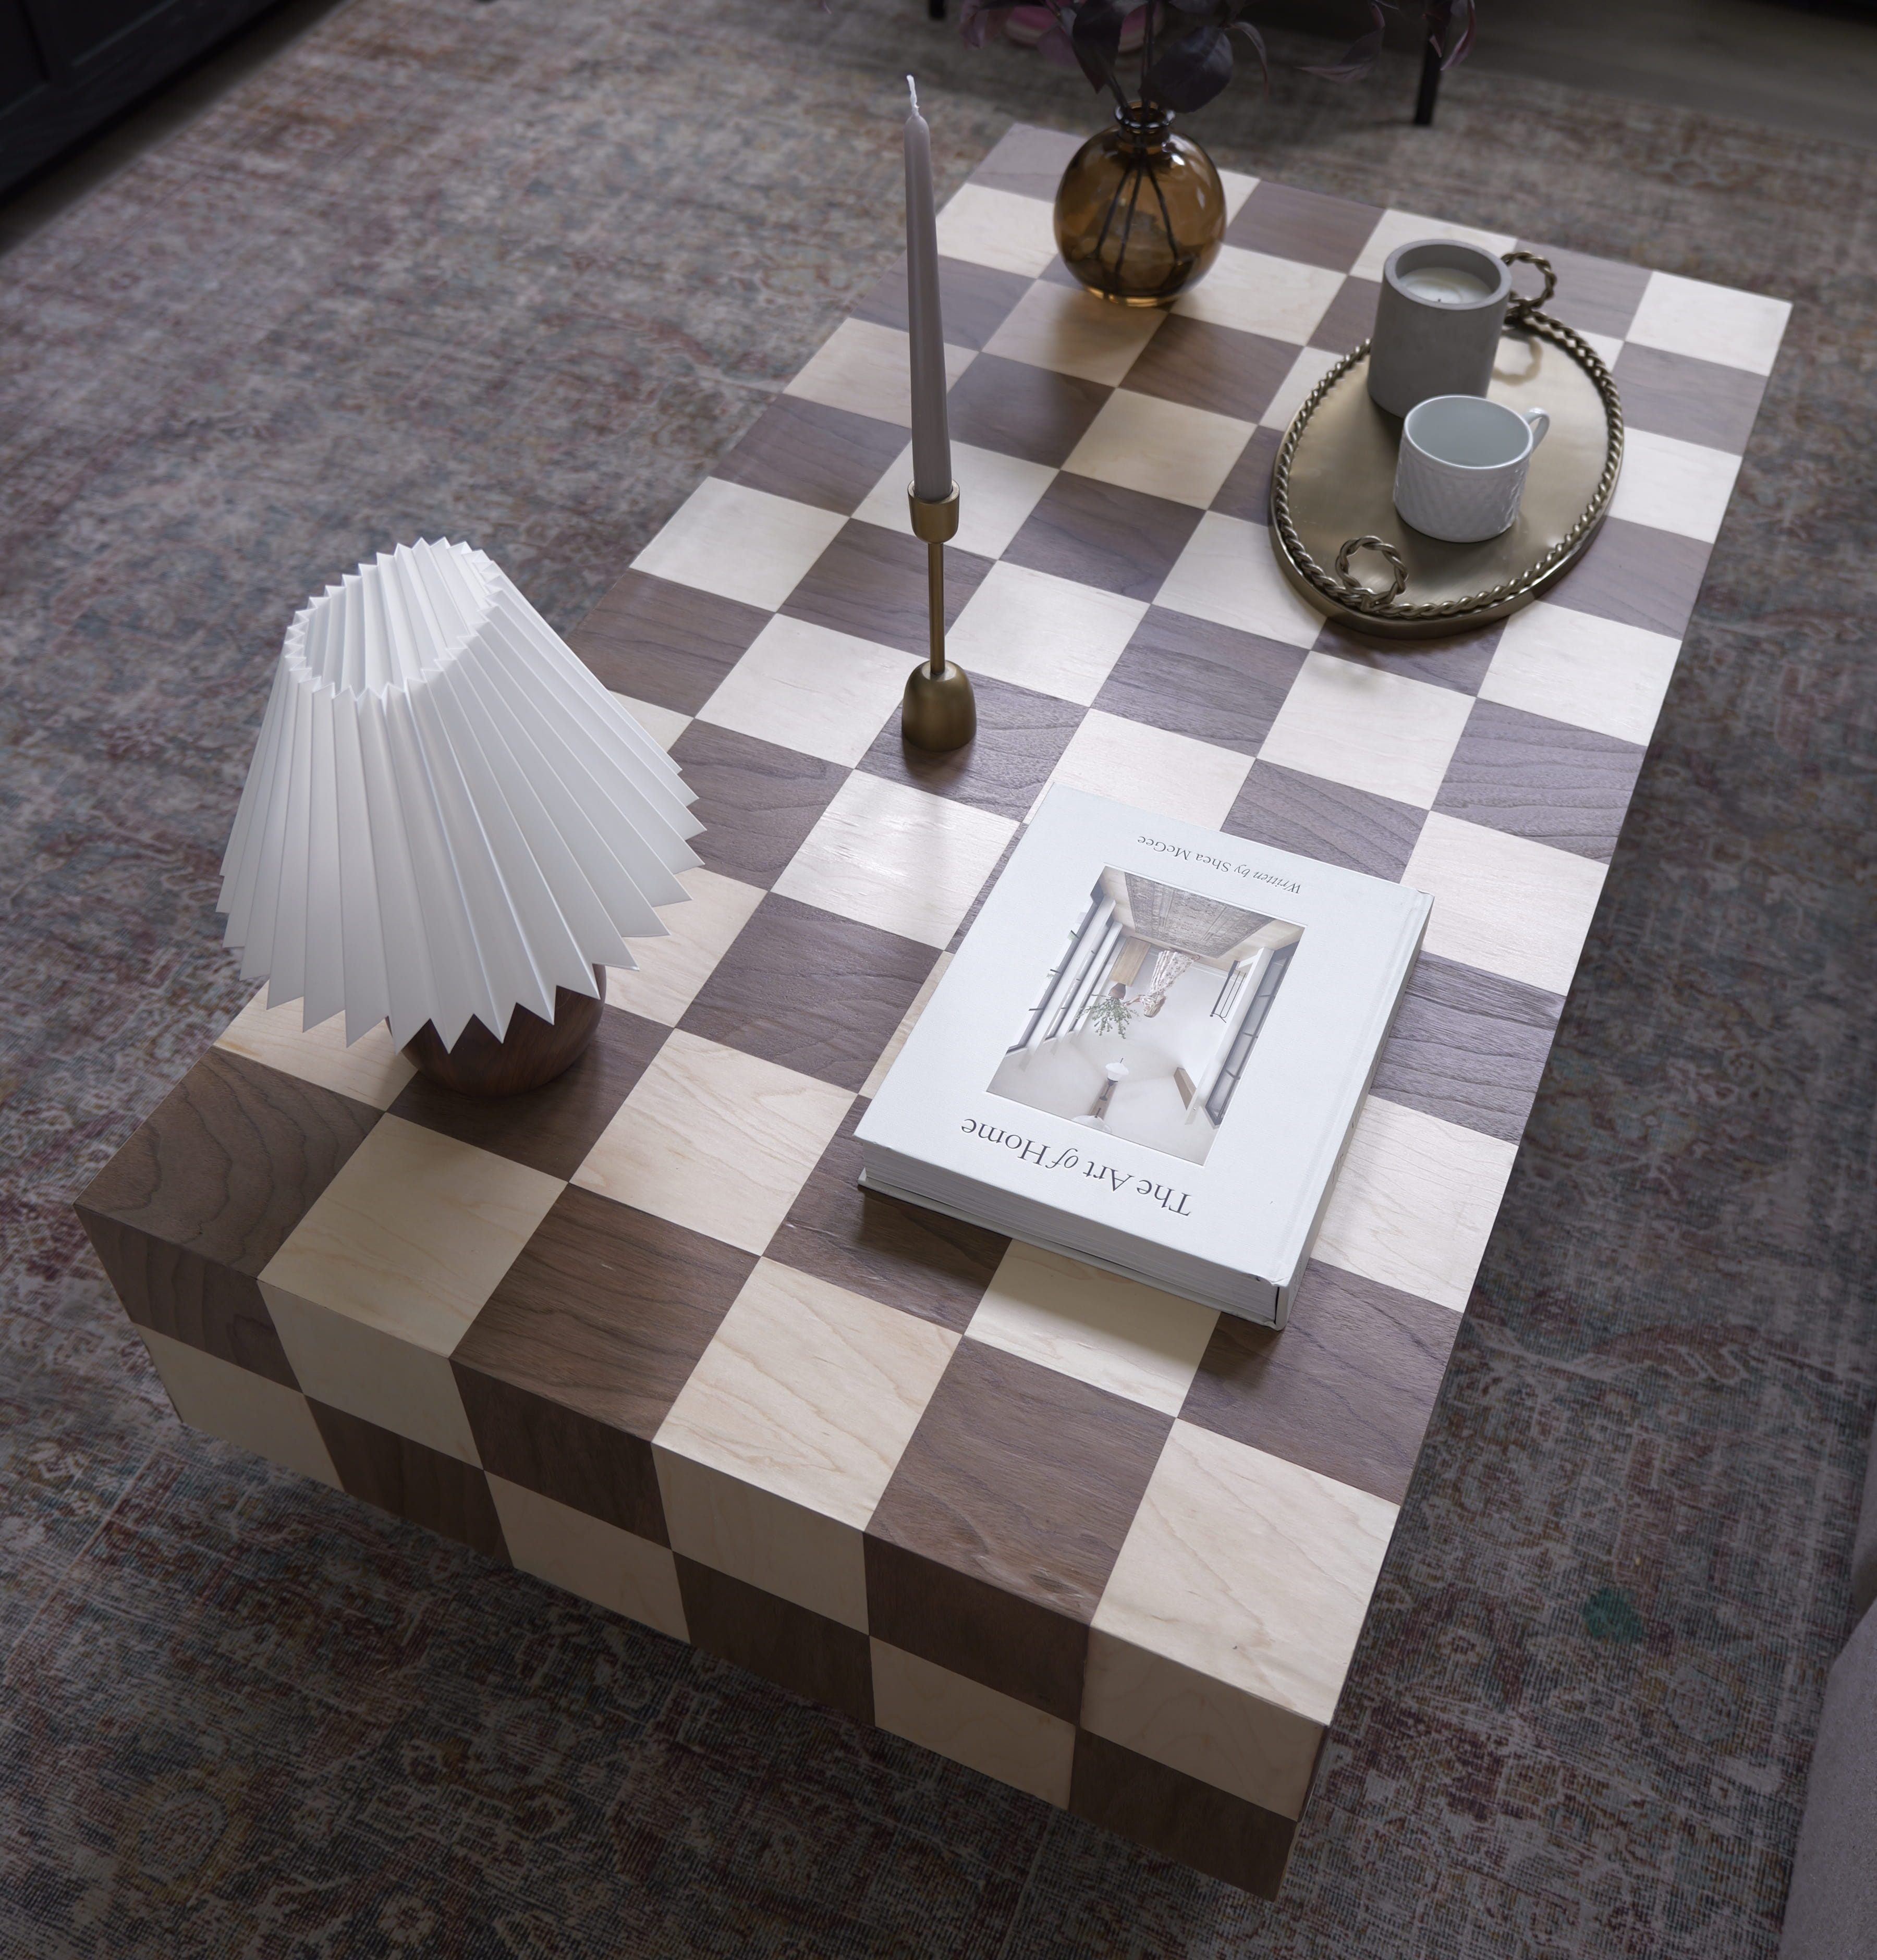
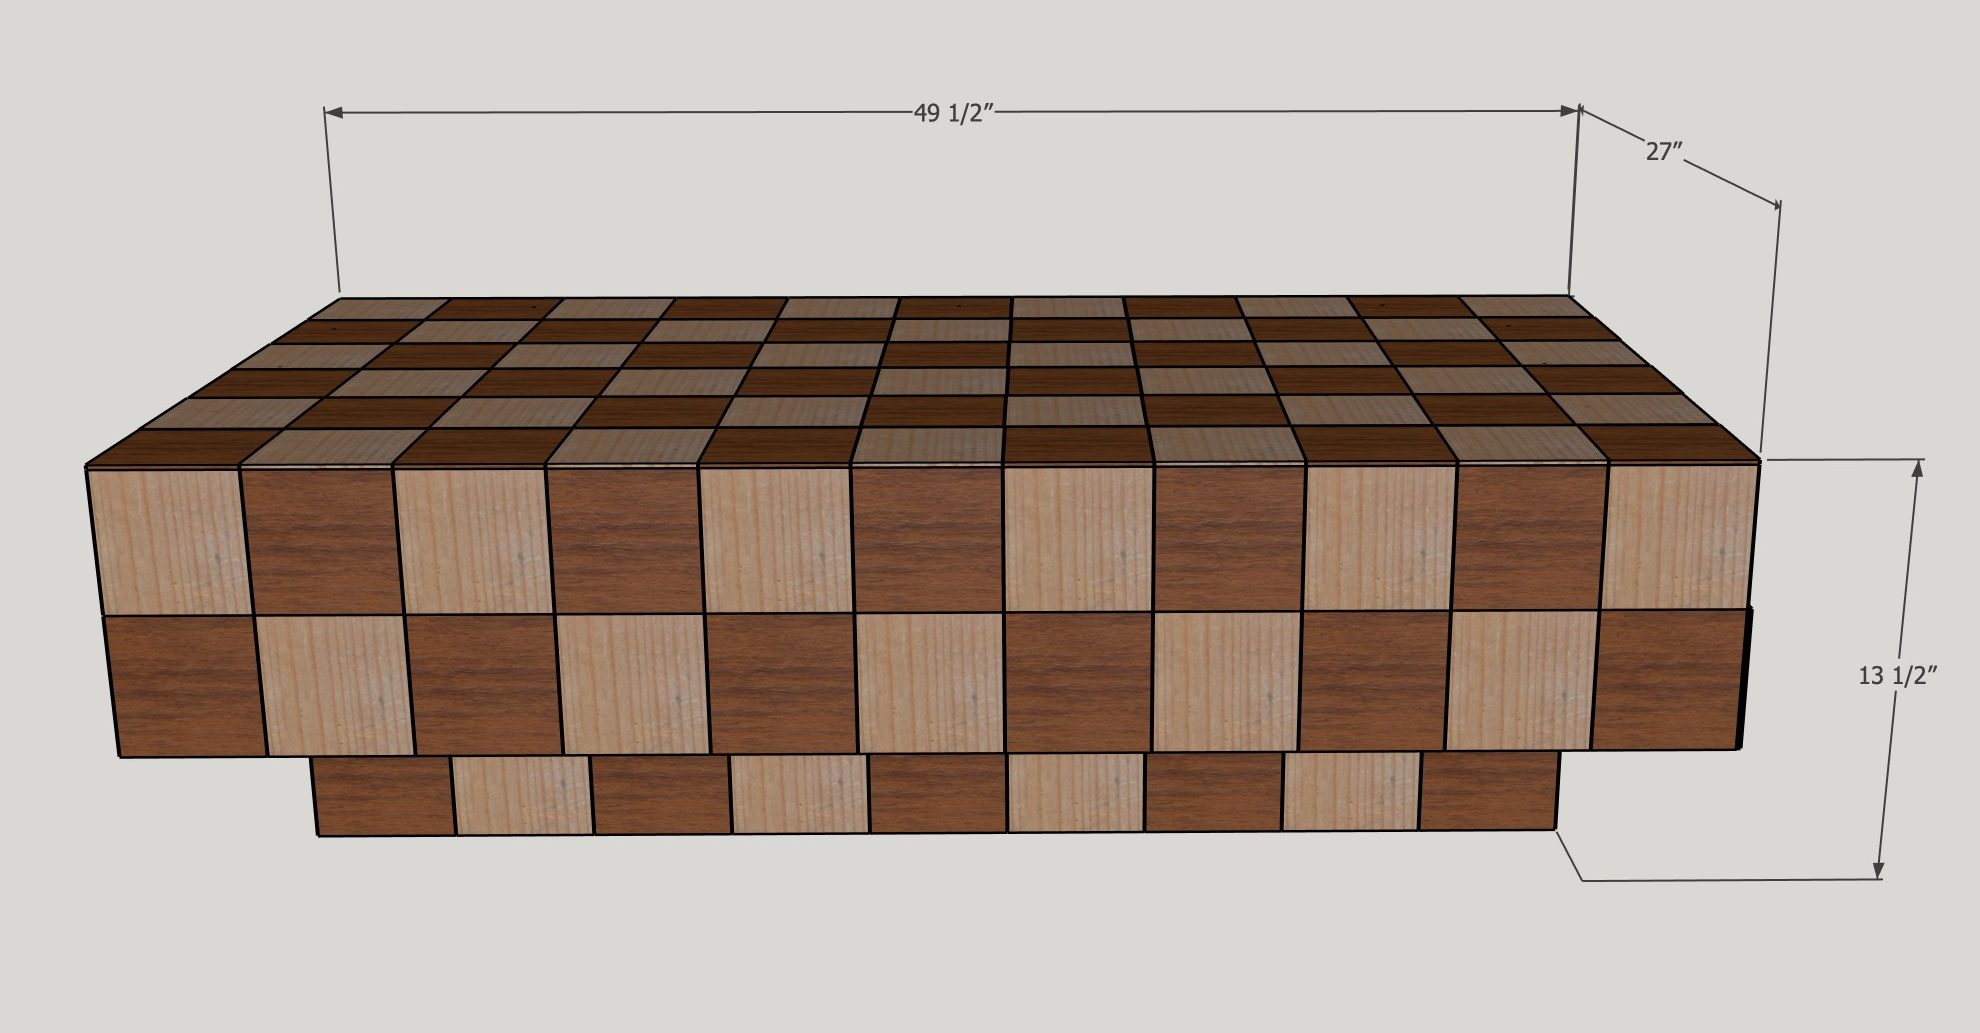


Bring high end designer style into your living room without the crazy price tag. This modern checkerboard coffee table pairs an eye catching contrast of natural walnut and birch wood veneer with a sleek, minimalist plinth style.
Built around a solid 3/4" plywood core assembled with strong, hidden pocket hole joinery, the entire exterior is wrapped in 166 cut veneer squares using an easy iron on glue technique, no vacuum press or specialized veneering equipment required.
Tools
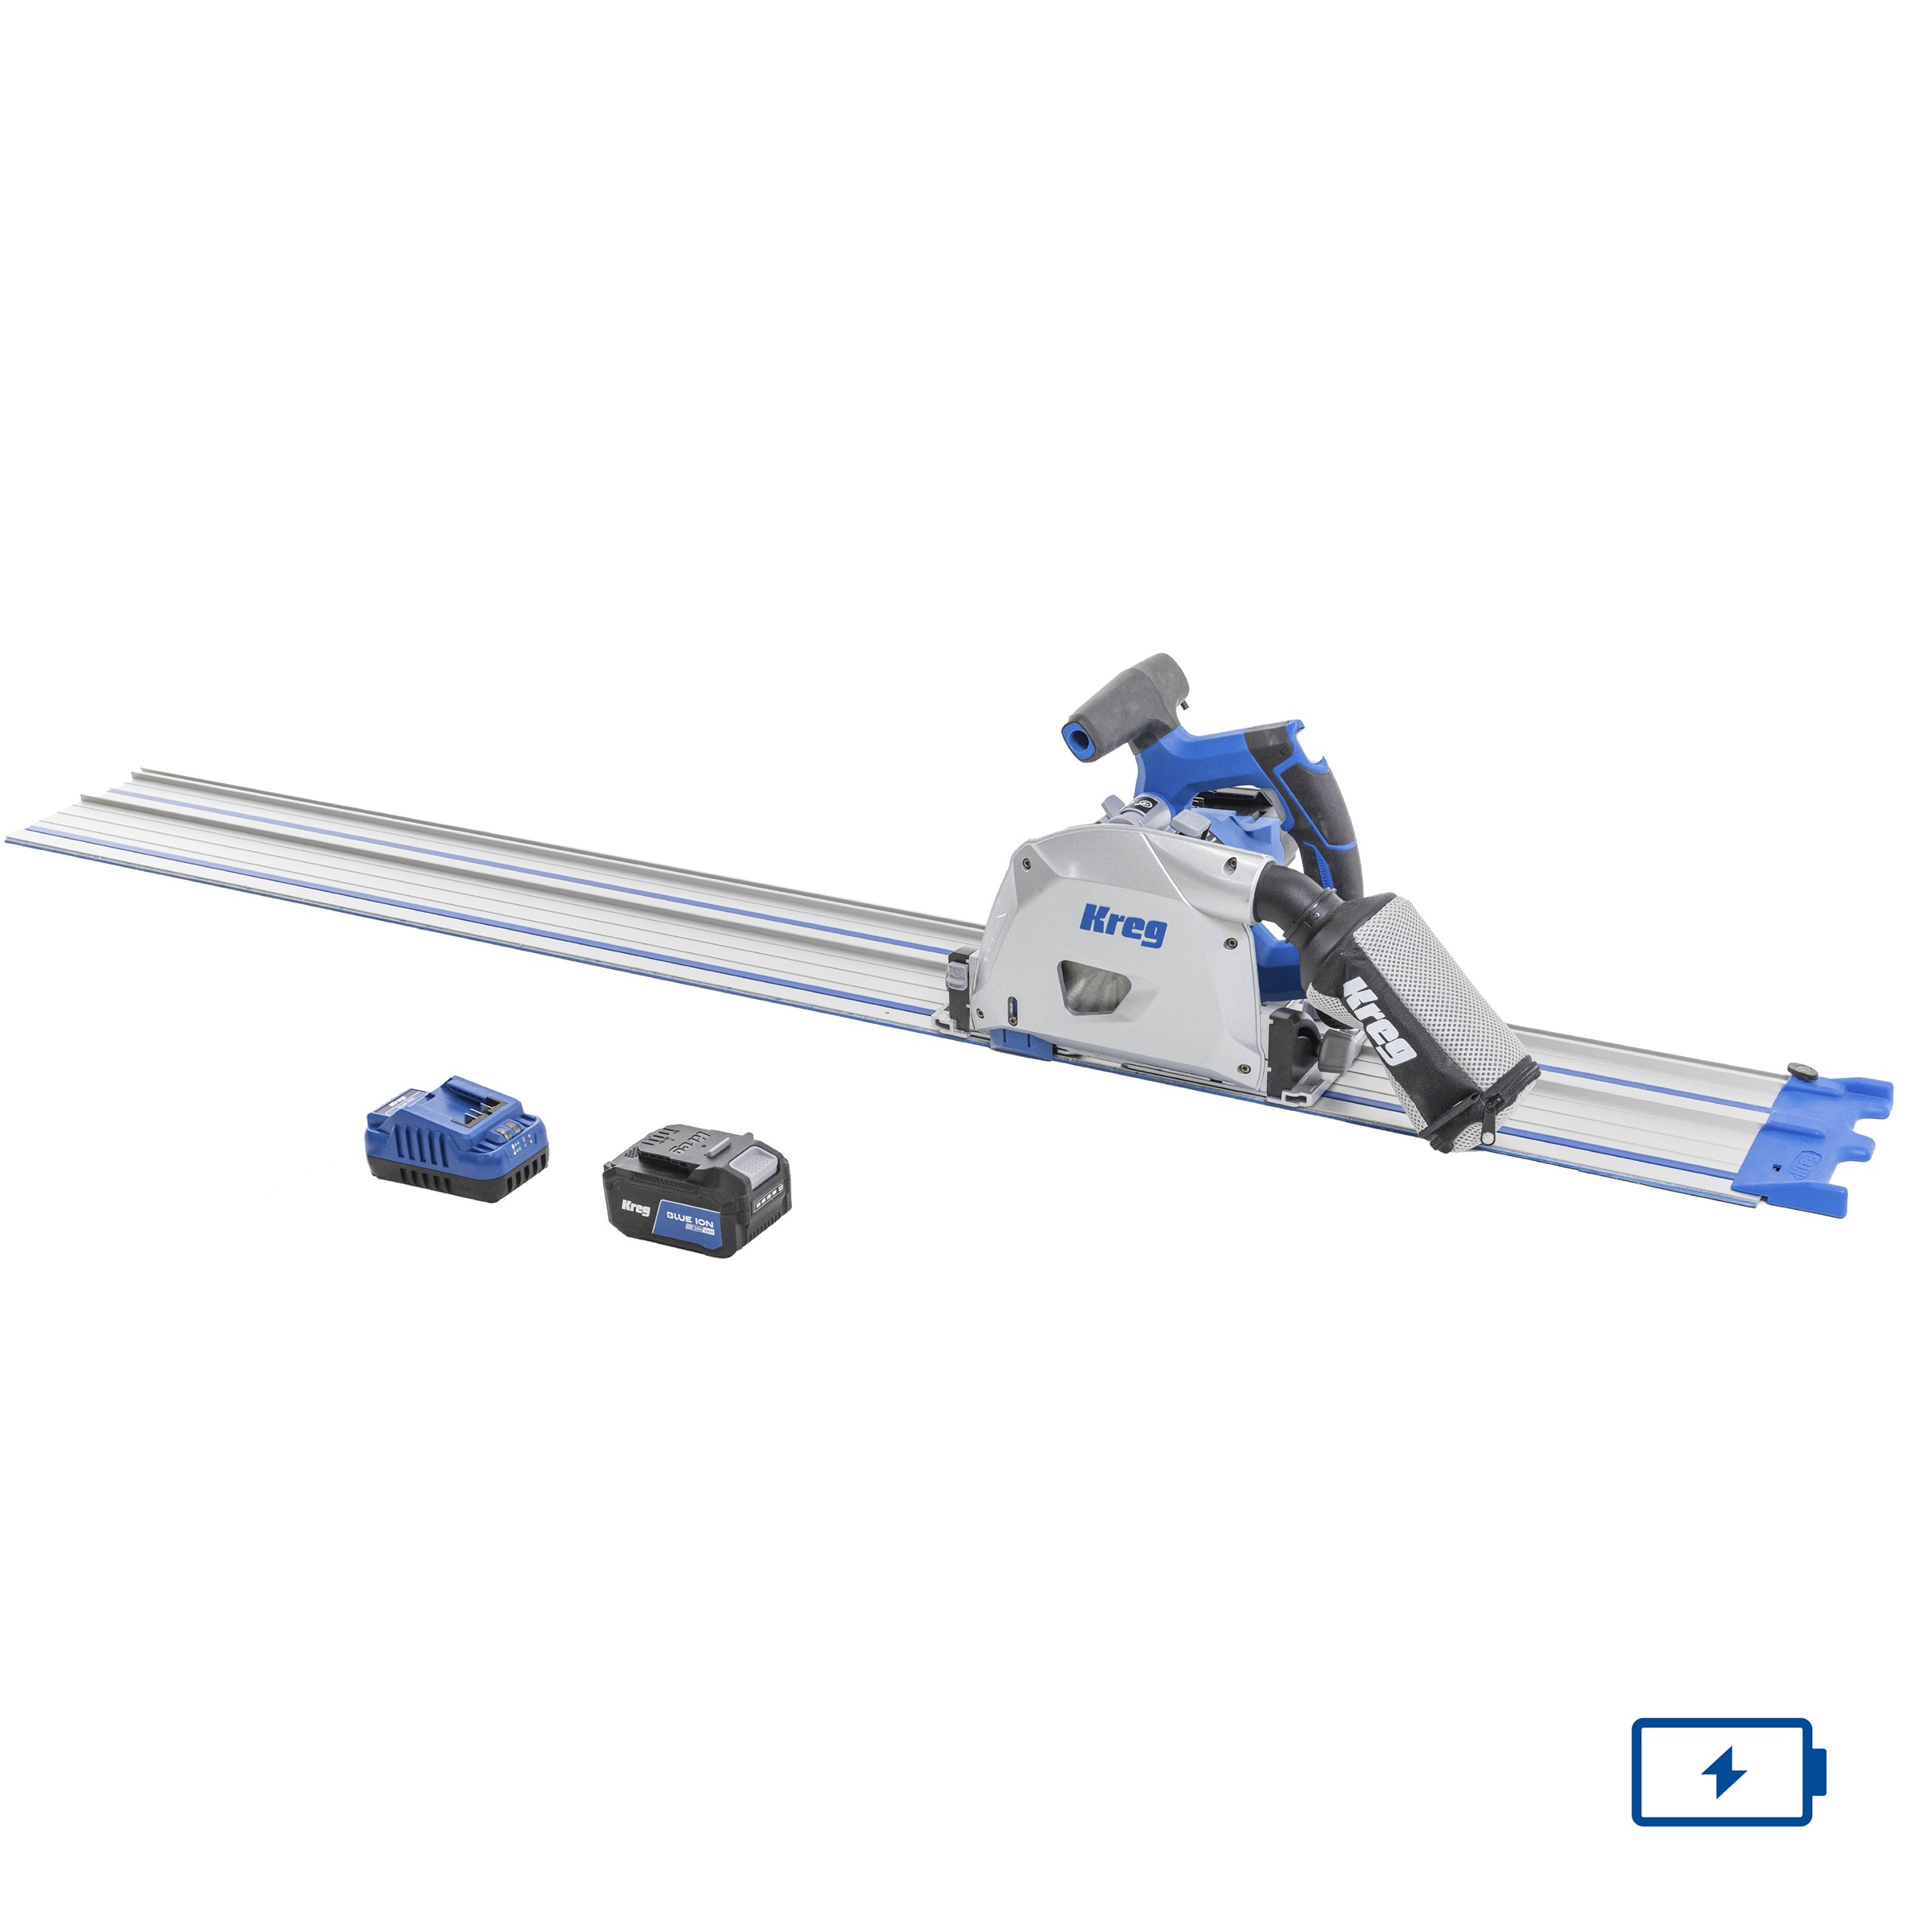
Kreg Tools


Materials
Wood Products
- 2 4' x 8' x 3/4" plywood , 48" x 96" x 3/4" (you can use cheap plywood)
- 1 2' x 8' light veneer sheet , 24" x 96", I used maple
- 1 2' x 8' dark veneer sheet , 24" x 96", I use walnut
Hardware & Supplies
- 50 1 1/2" pocket screws
- 1 Wood glue
- 1 Foam roller and tray
- 1 Painters tape
- 1 Parchment paper
- 1 Household iron
- 1 Utility knife
- 1 Craft ruler
- 1 Cutting mat
- 10 Figure 8 fasteners
- 1 1" Forstner bit
- 1 Polycrylic/finish of choice
- 1 220 grit sanding block
Cut List & Parts
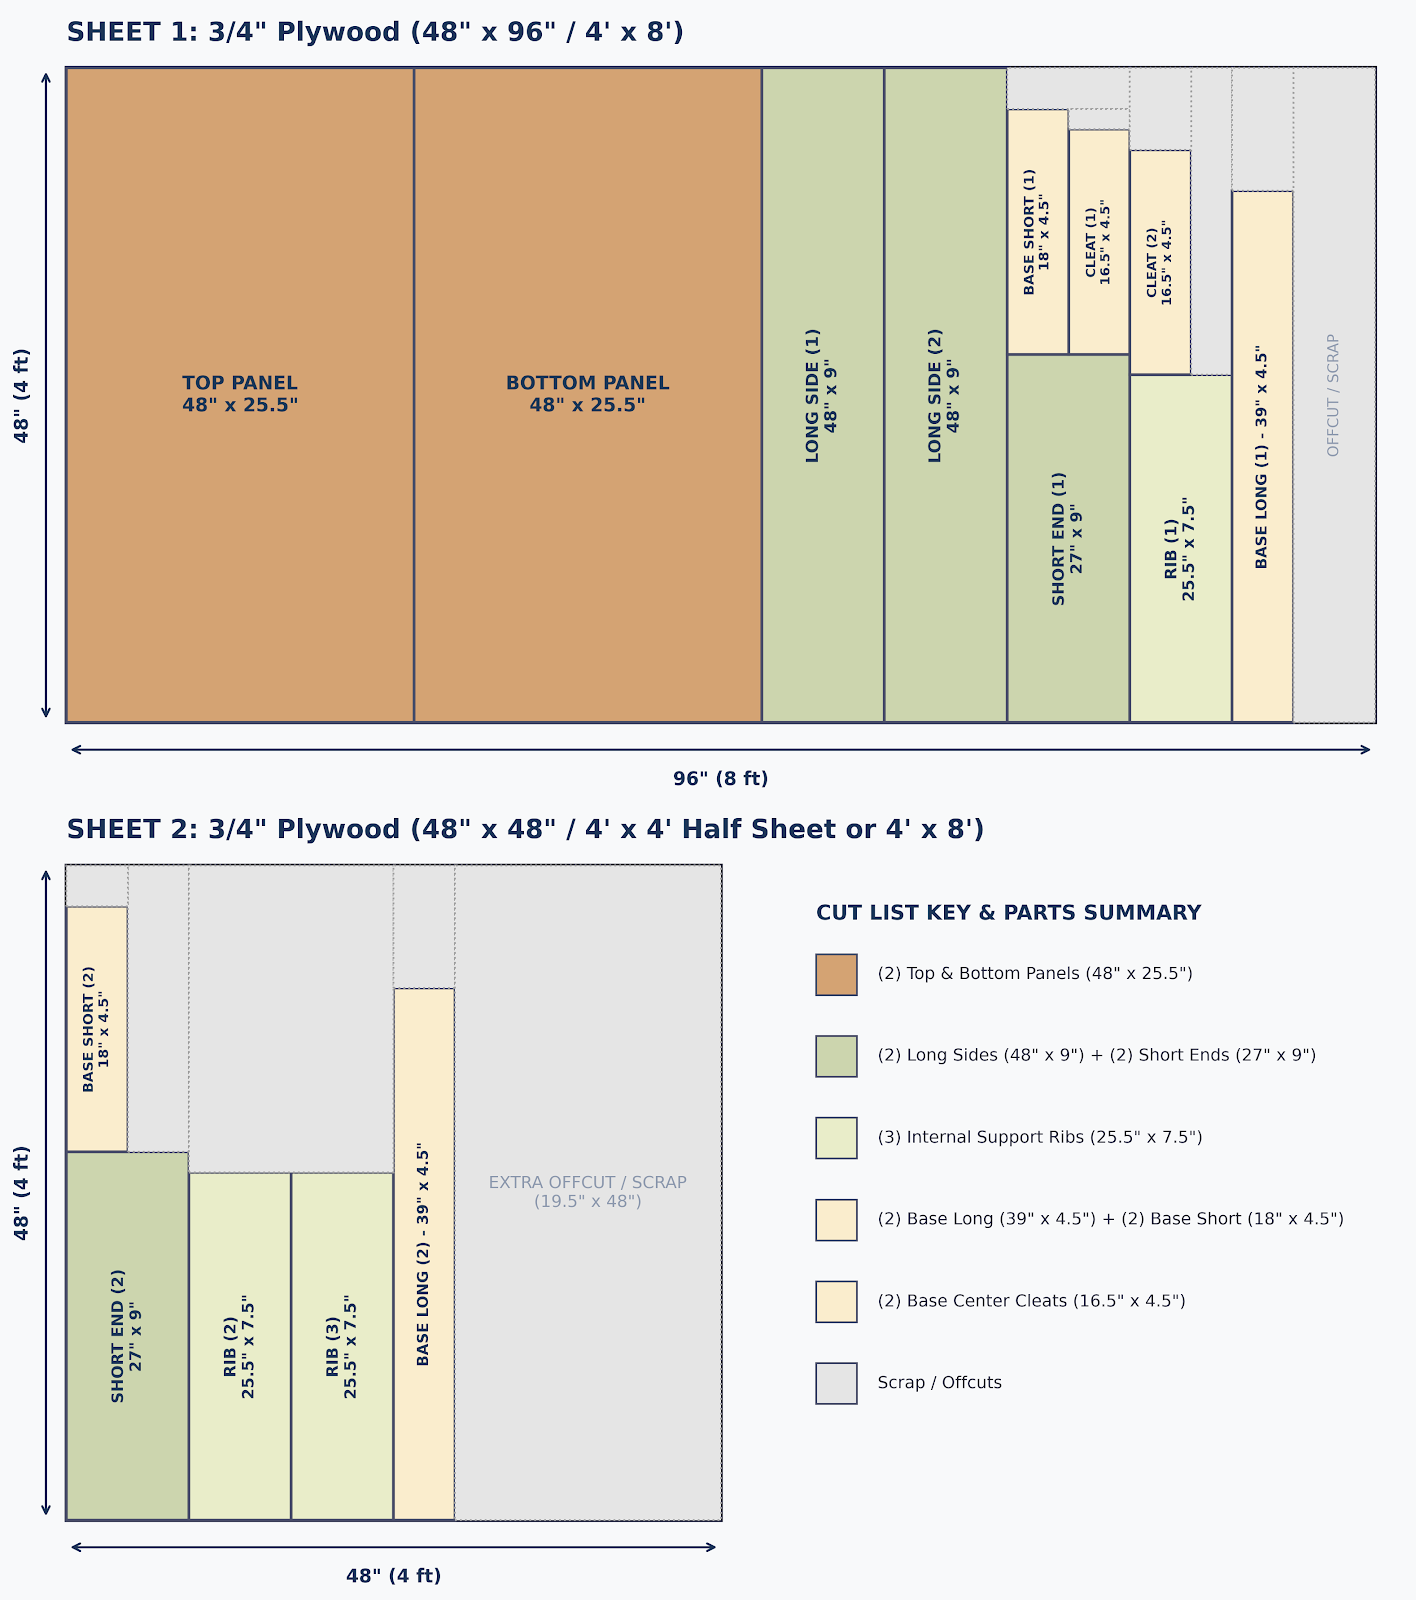
- 2 Base long side, 39" x 4 1/2" x 3/4" plywood
- 2 Base short sides, 18" x 4 1/2" x 3/4" plywood
- 2 Base cleat/supports, 16 1/2" x 4 1/2" x 3/4" plywood
- 2 Top + bottom panels, 48" x 25 1/2" x 3/4" plywood
- 2 Top long sides, 48" x 9" x 3/4" plywood
- 2 Top short sides, 27" x 9" x 3/4" plywood
- 3 Top supports/ribs, 25 1/2" x 7 1/2" x 3/4"
- 83 4 1/2" x 4 1/2" light wood veneer
- 83 4 1/2" x 4 1/2" dark wood veneer
Directions
-
1
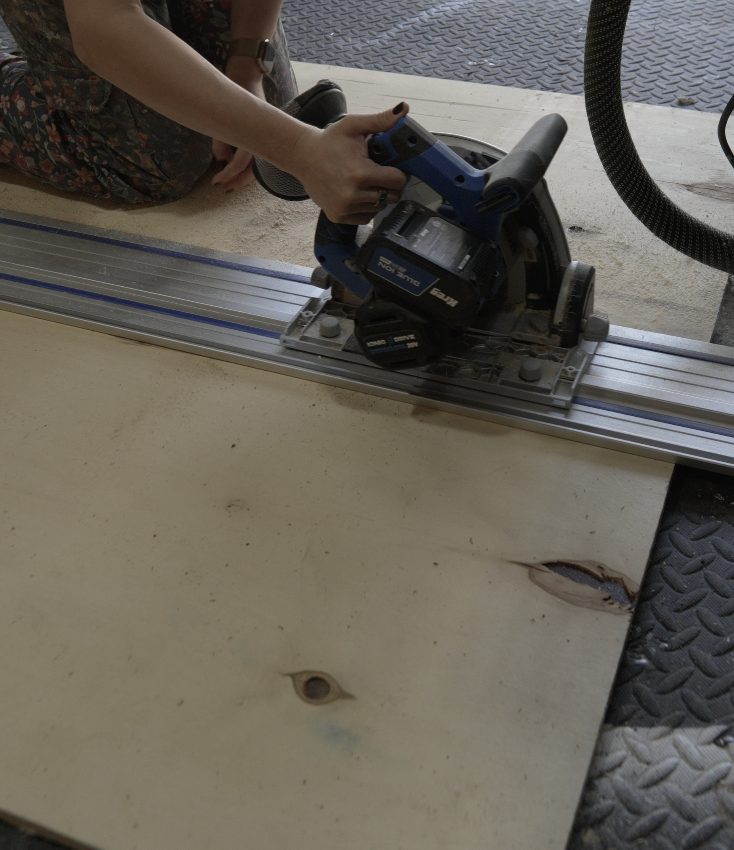
Using a track saw or circular saw with a straight edge guide, break down your 3/4" plywood sheets according to the cut list.
-
2
Set your Kreg joiner and drill bit stop collar to the 3/4" material thickness setting.
Drill pocket holes along both long sides of the base pieces. Use wood glue and 1 1/2" pocket screws to attach them together.
Make sure the long sides are between the short sides.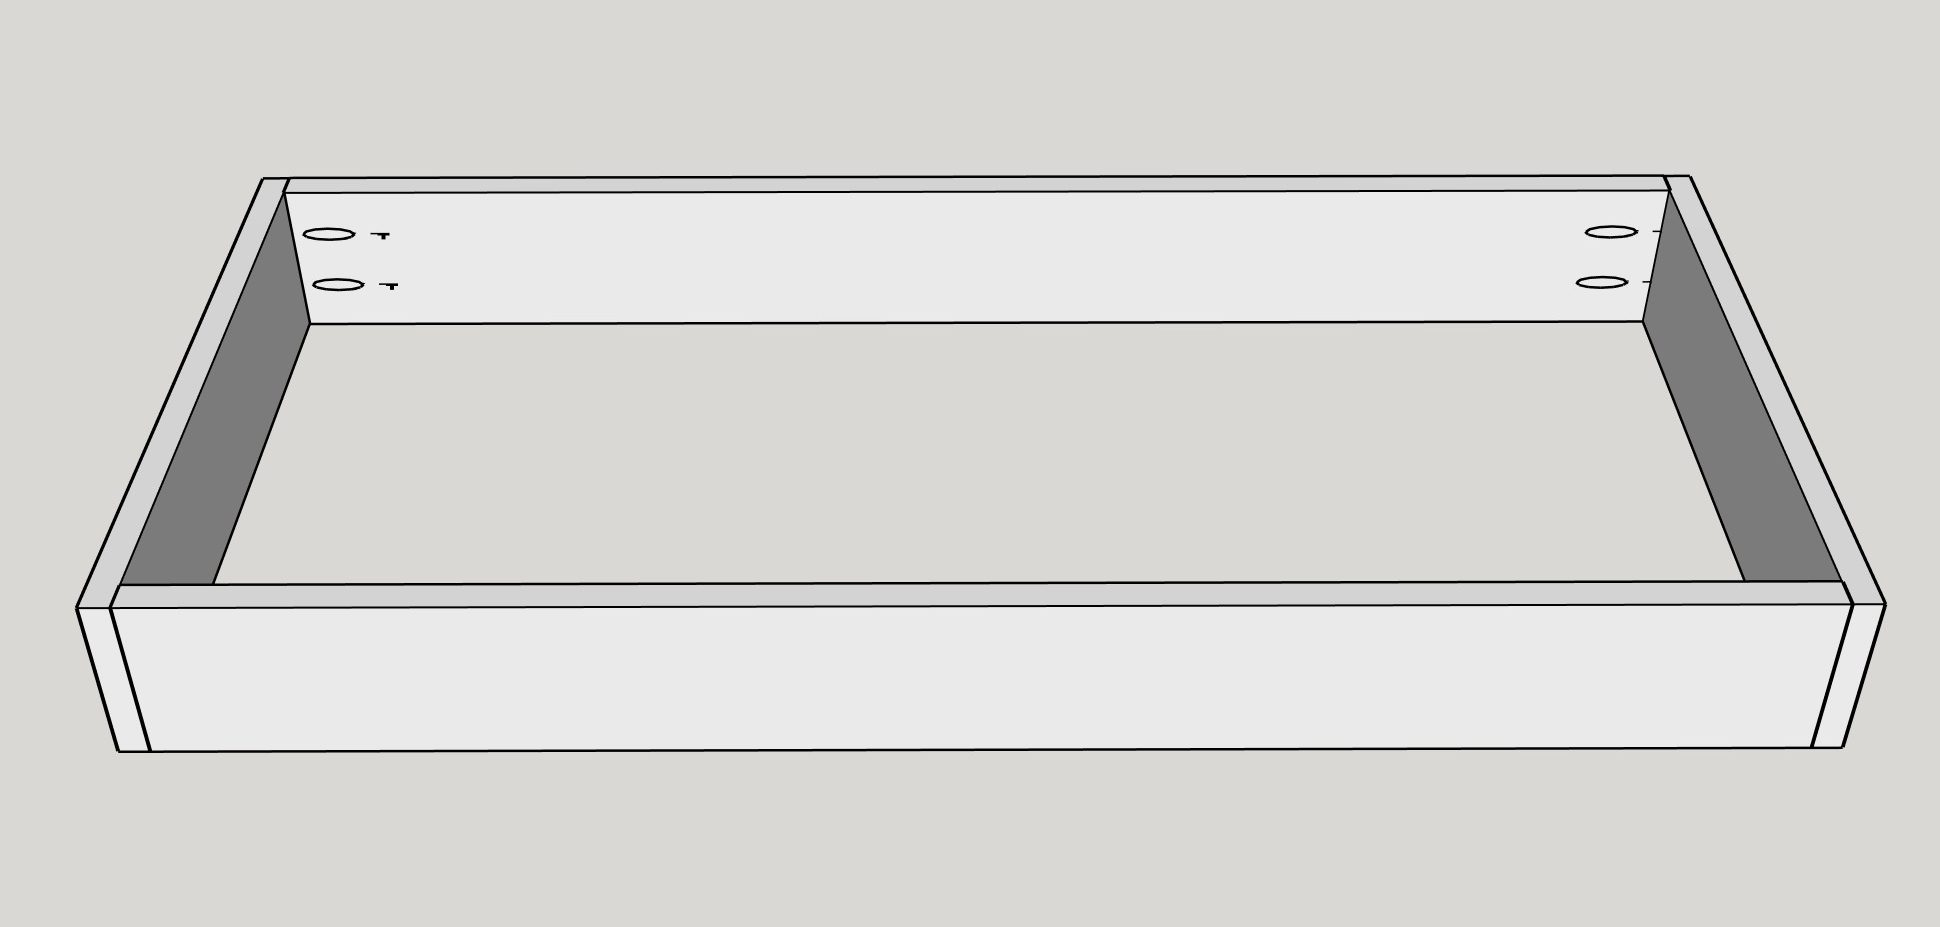
-
3
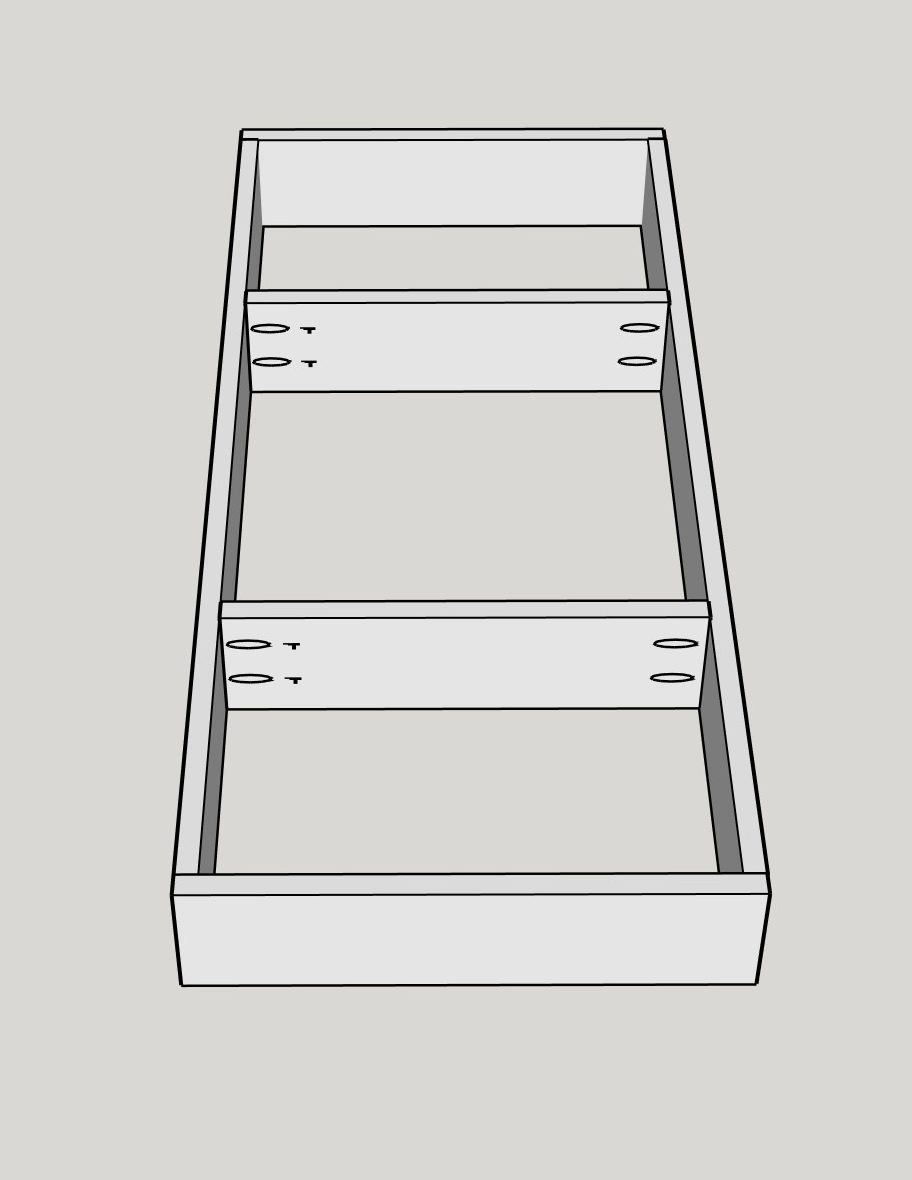
Pocket hole the base cleat/supports and attach them to the base using wood glue and 1 1/2" pocket screws.
Space them apart as evenly as possible.
-
4
Now that the base is done, lets move to the top!
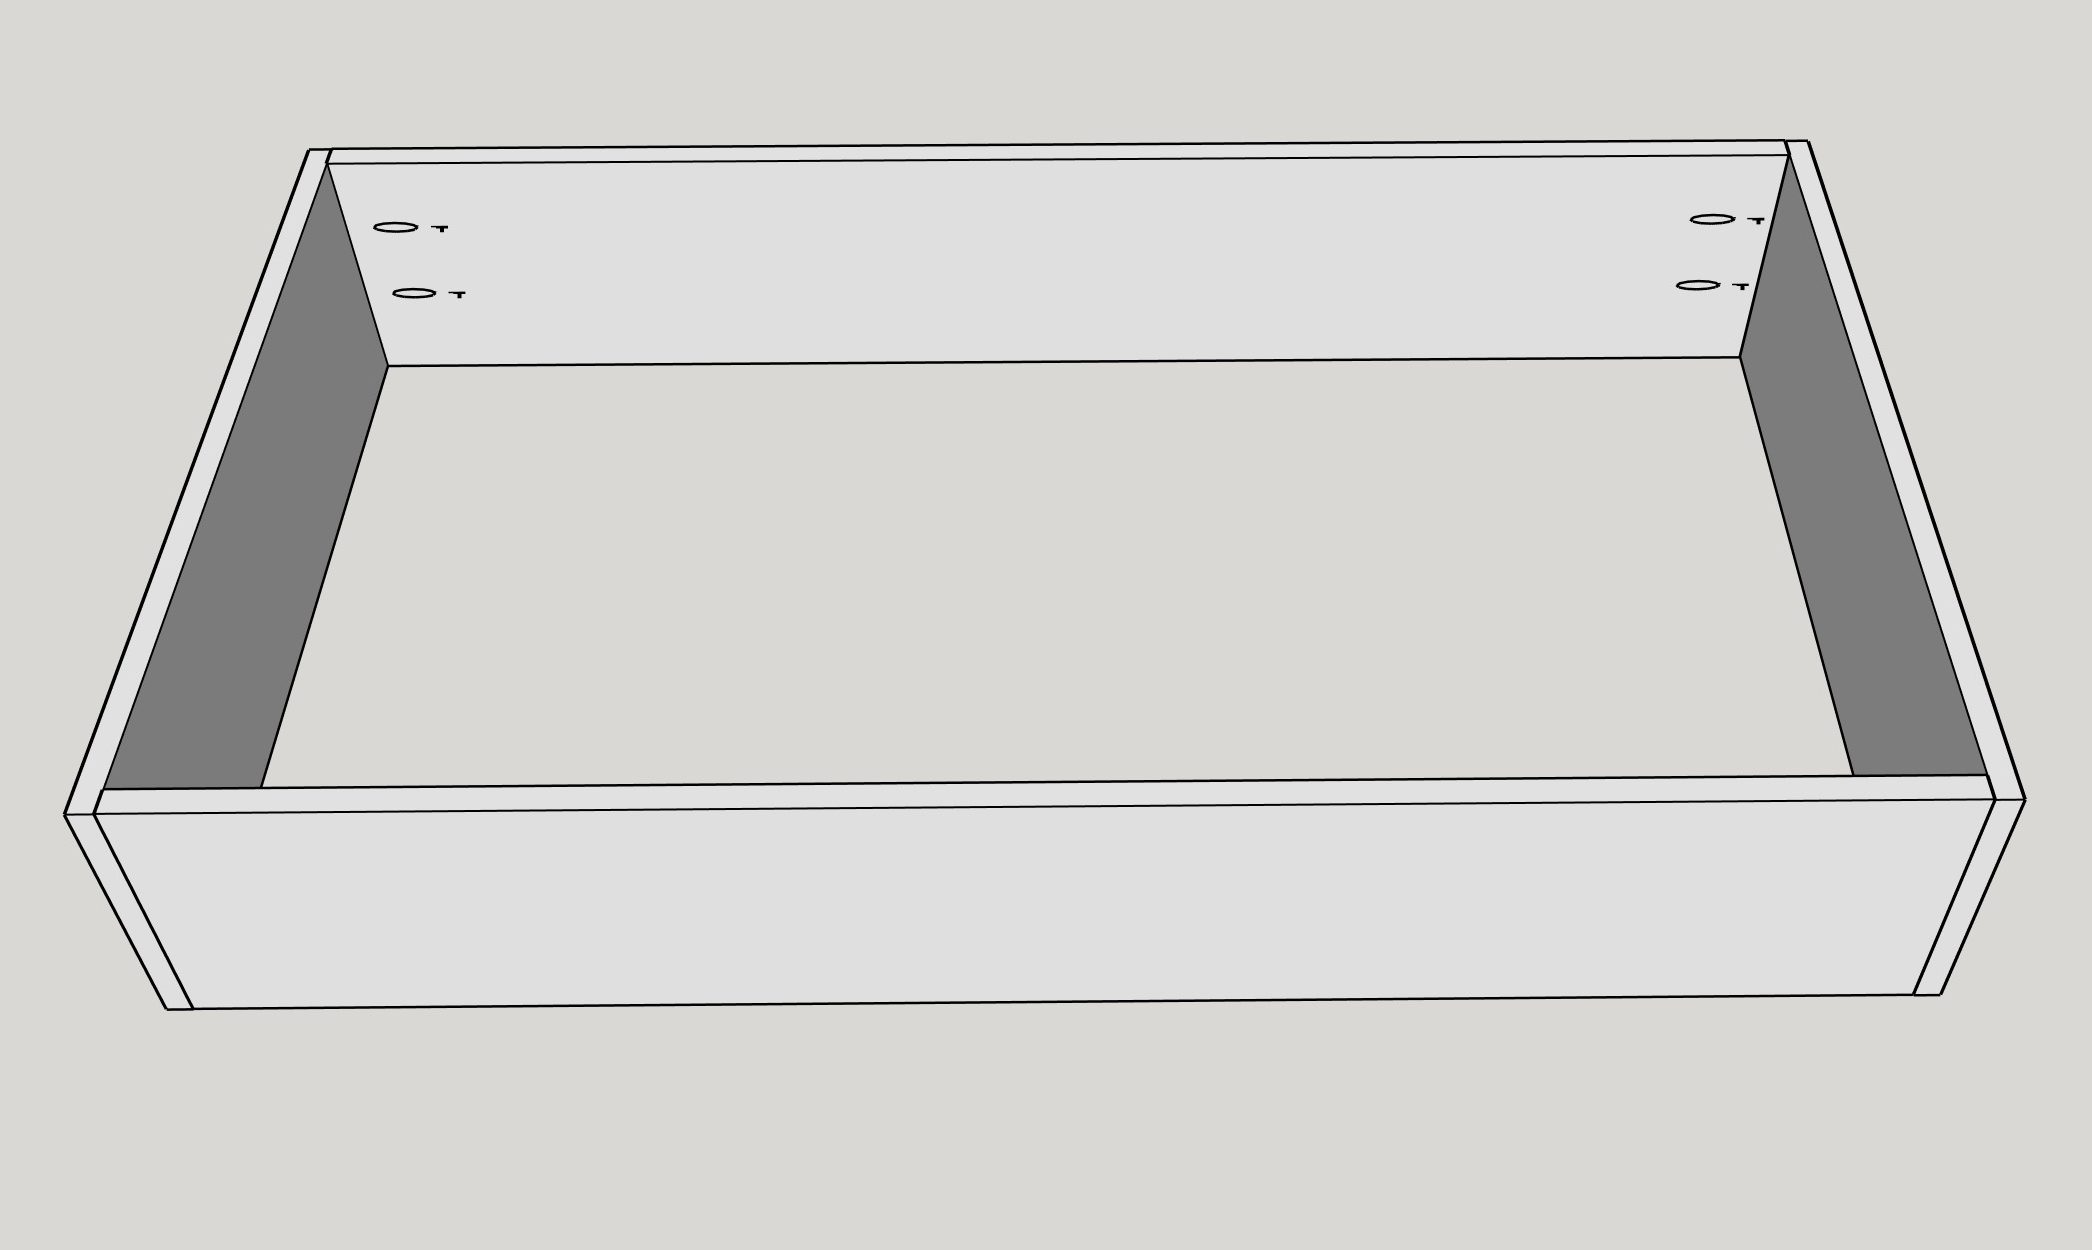
Keep your Kreg joiner at 3/4" and drill pocket holes on the inside of the long sides for the coffee table top.
Screw the long sides and short sides together using 1 1/2" pocket screws and wood glue according to the picture.
-
5
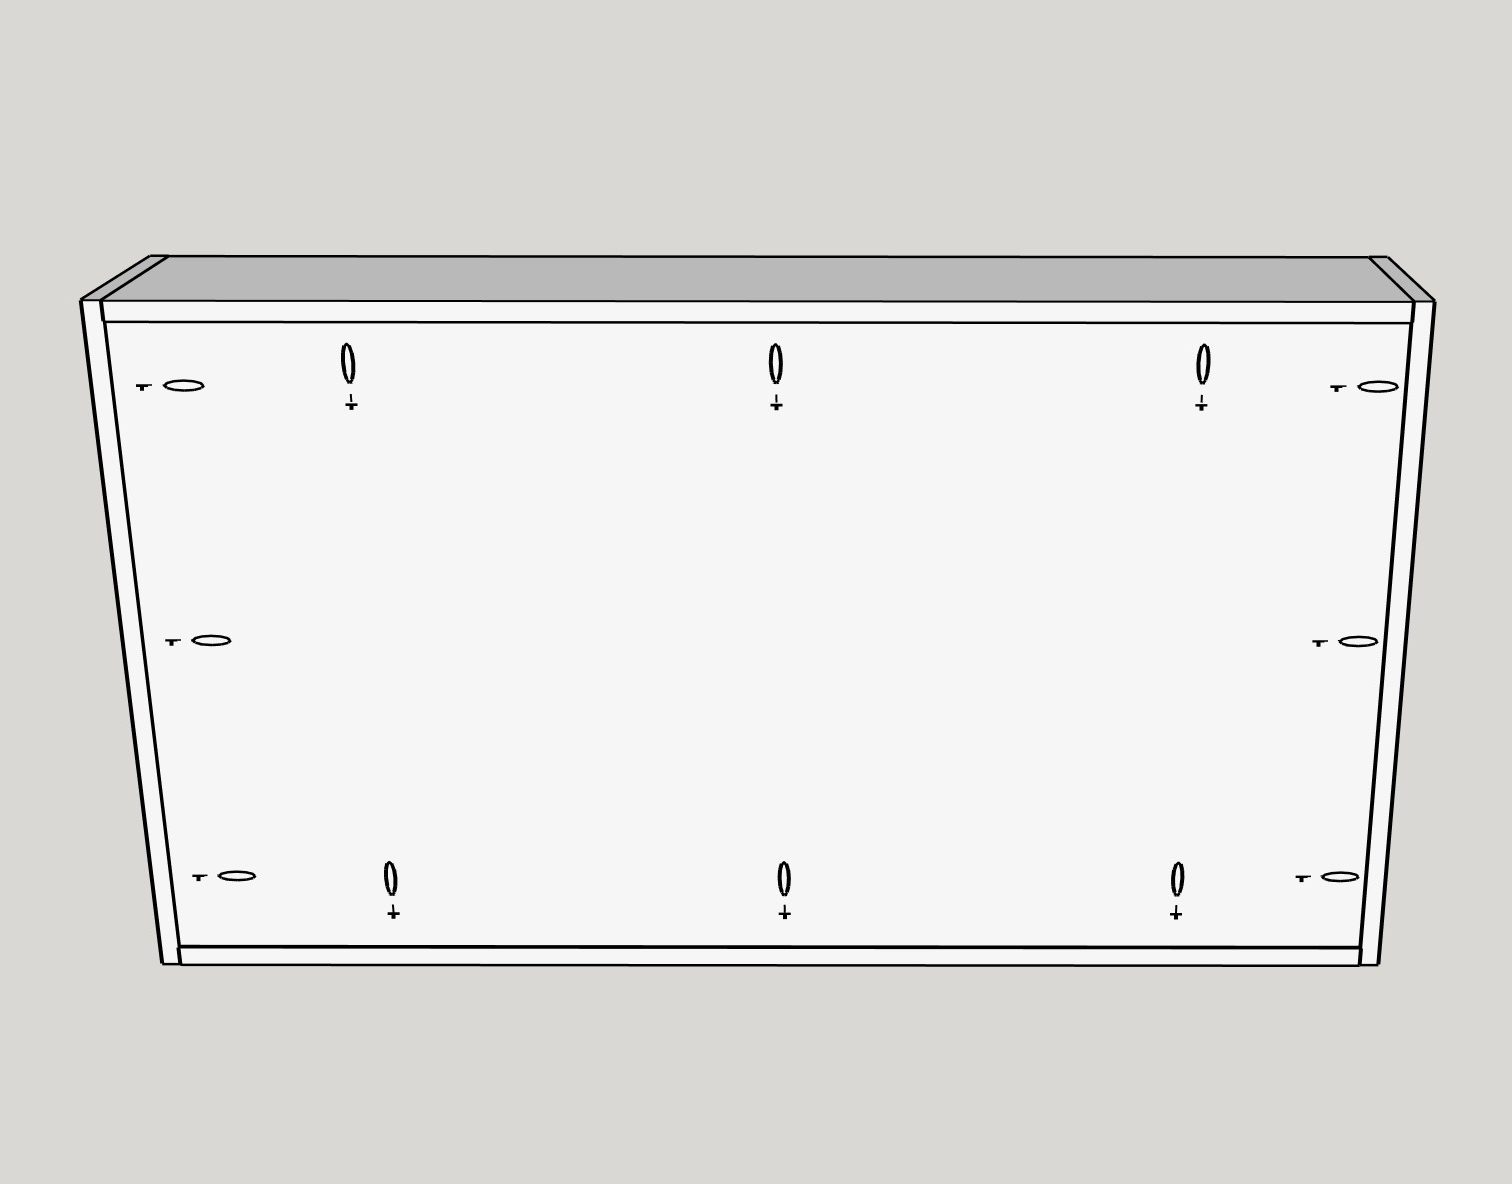
Drill pocket holes into the bottom panel.
Screw and glue the bottom panel flush with the bottom of the coffee table top as shown in the picture.
-
6
Drill pocket holes into the supports/ribs for the top of the coffee table.
Use wood glue and pocket screws to attach them flush with the bottom of the coffee table top.
There should be 3/4" of space between the very top of the supports to the top of the sides of the coffee table. This is important for the next step!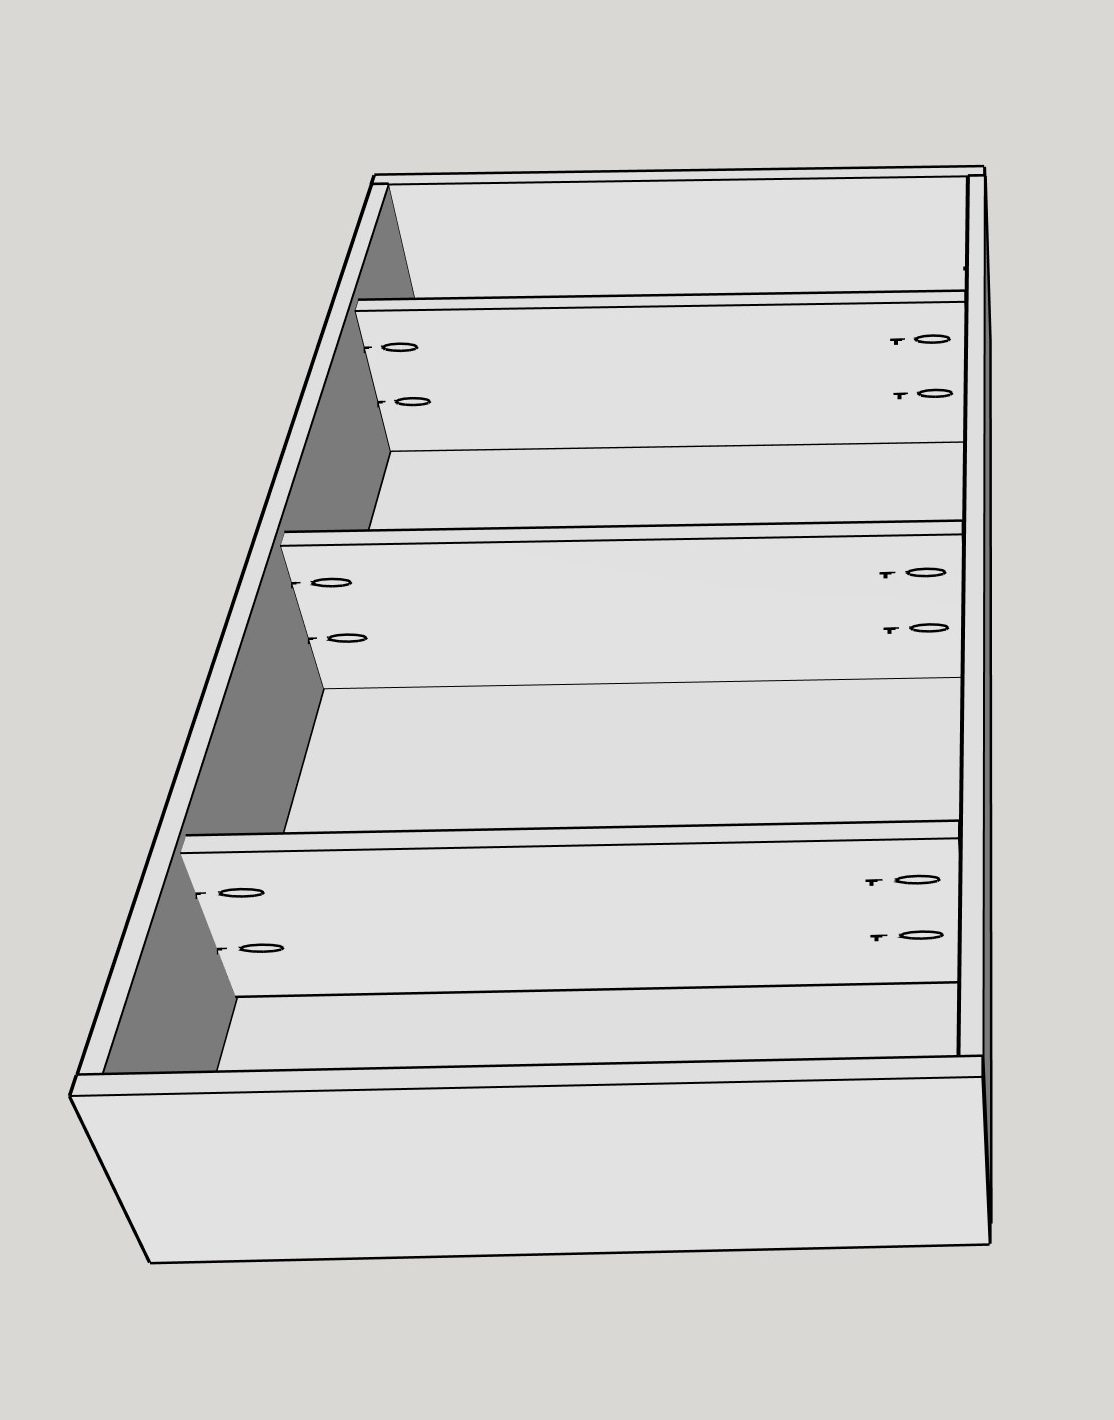
-
7
Drill pocket holes into the top panel for the coffee table top as shown in the picture.
Place the top panel of the coffee table top onto the supports you just screwed in.
Attach the top panel using wood glue and 1 1/2" pocket screws as shown in the picture.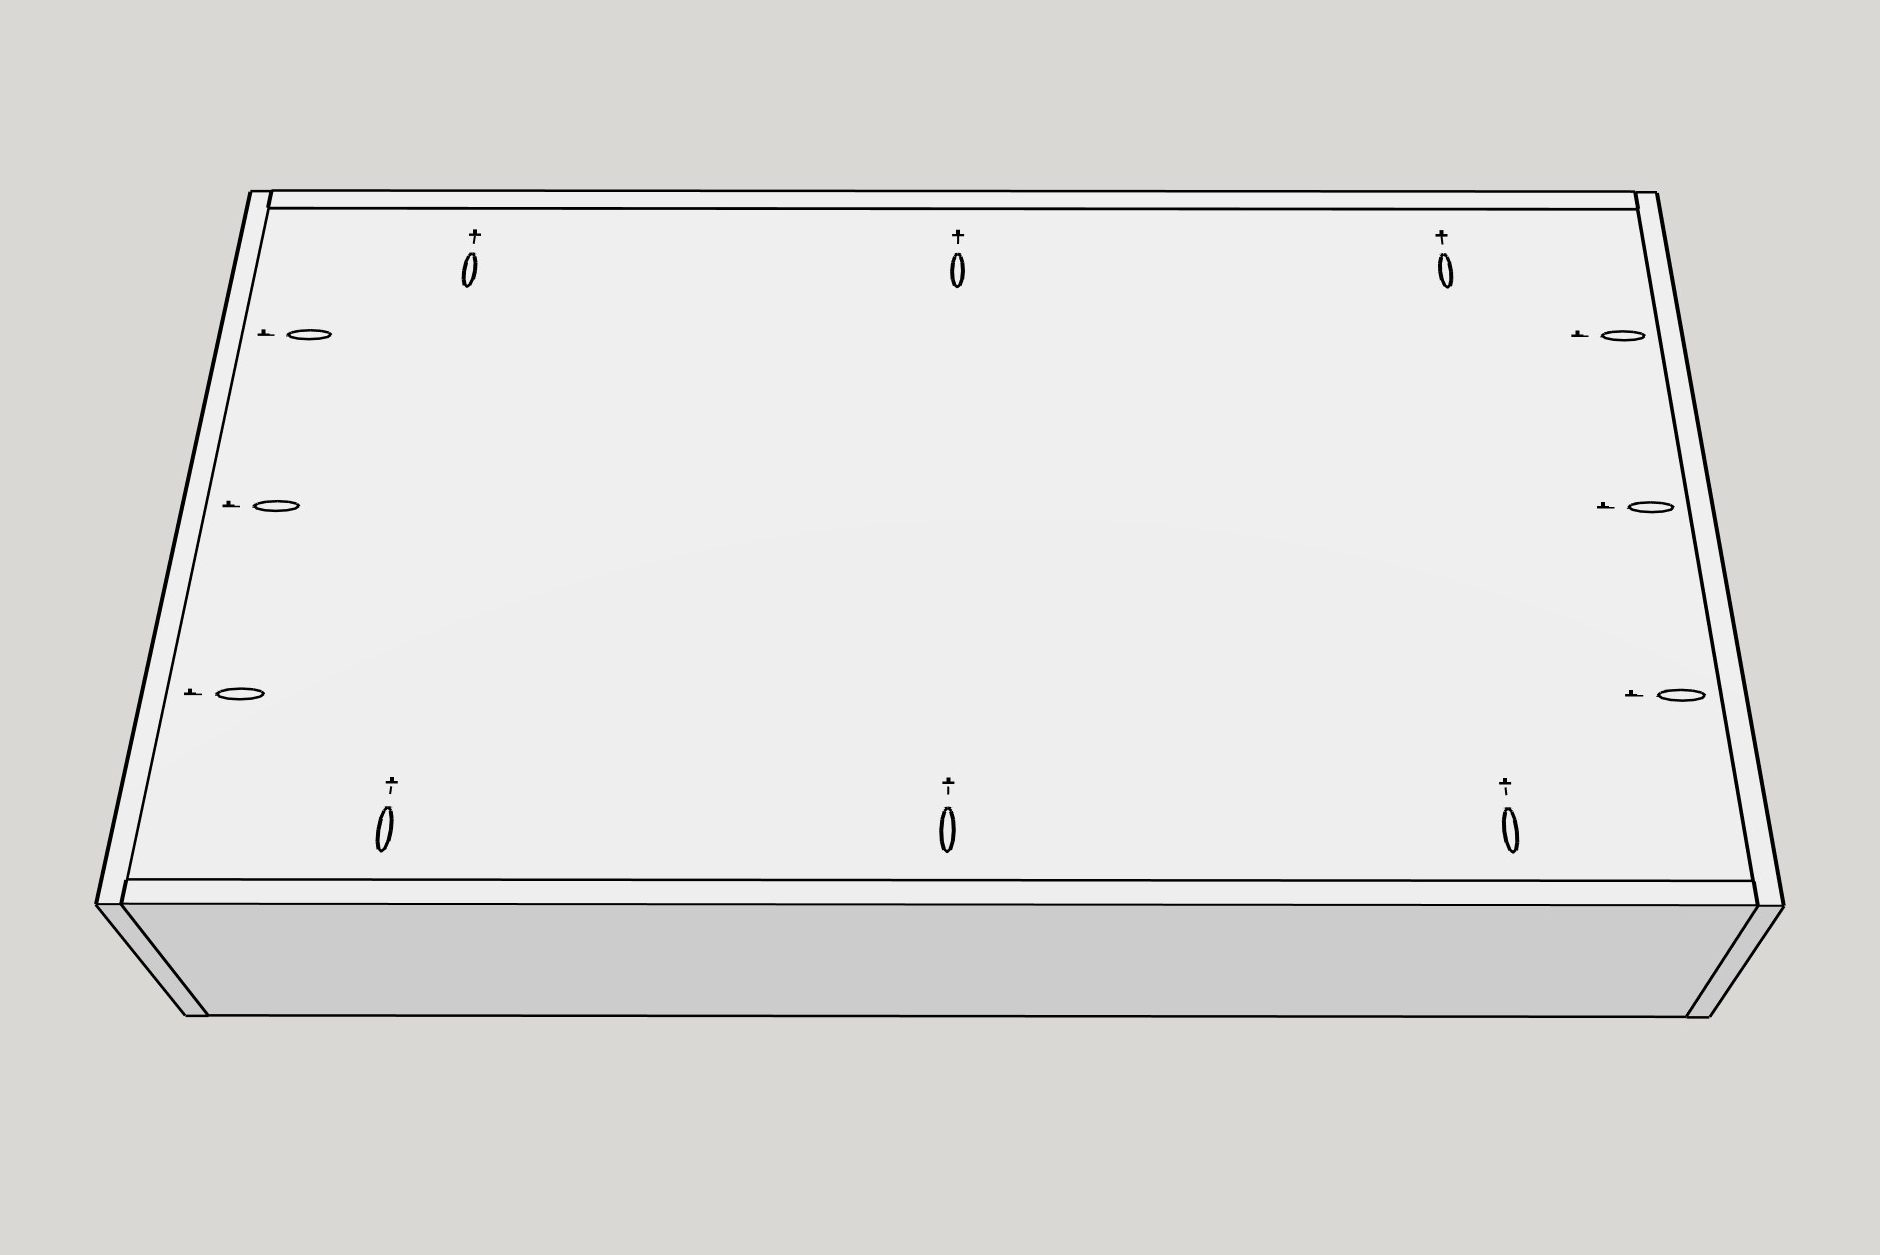
-
8
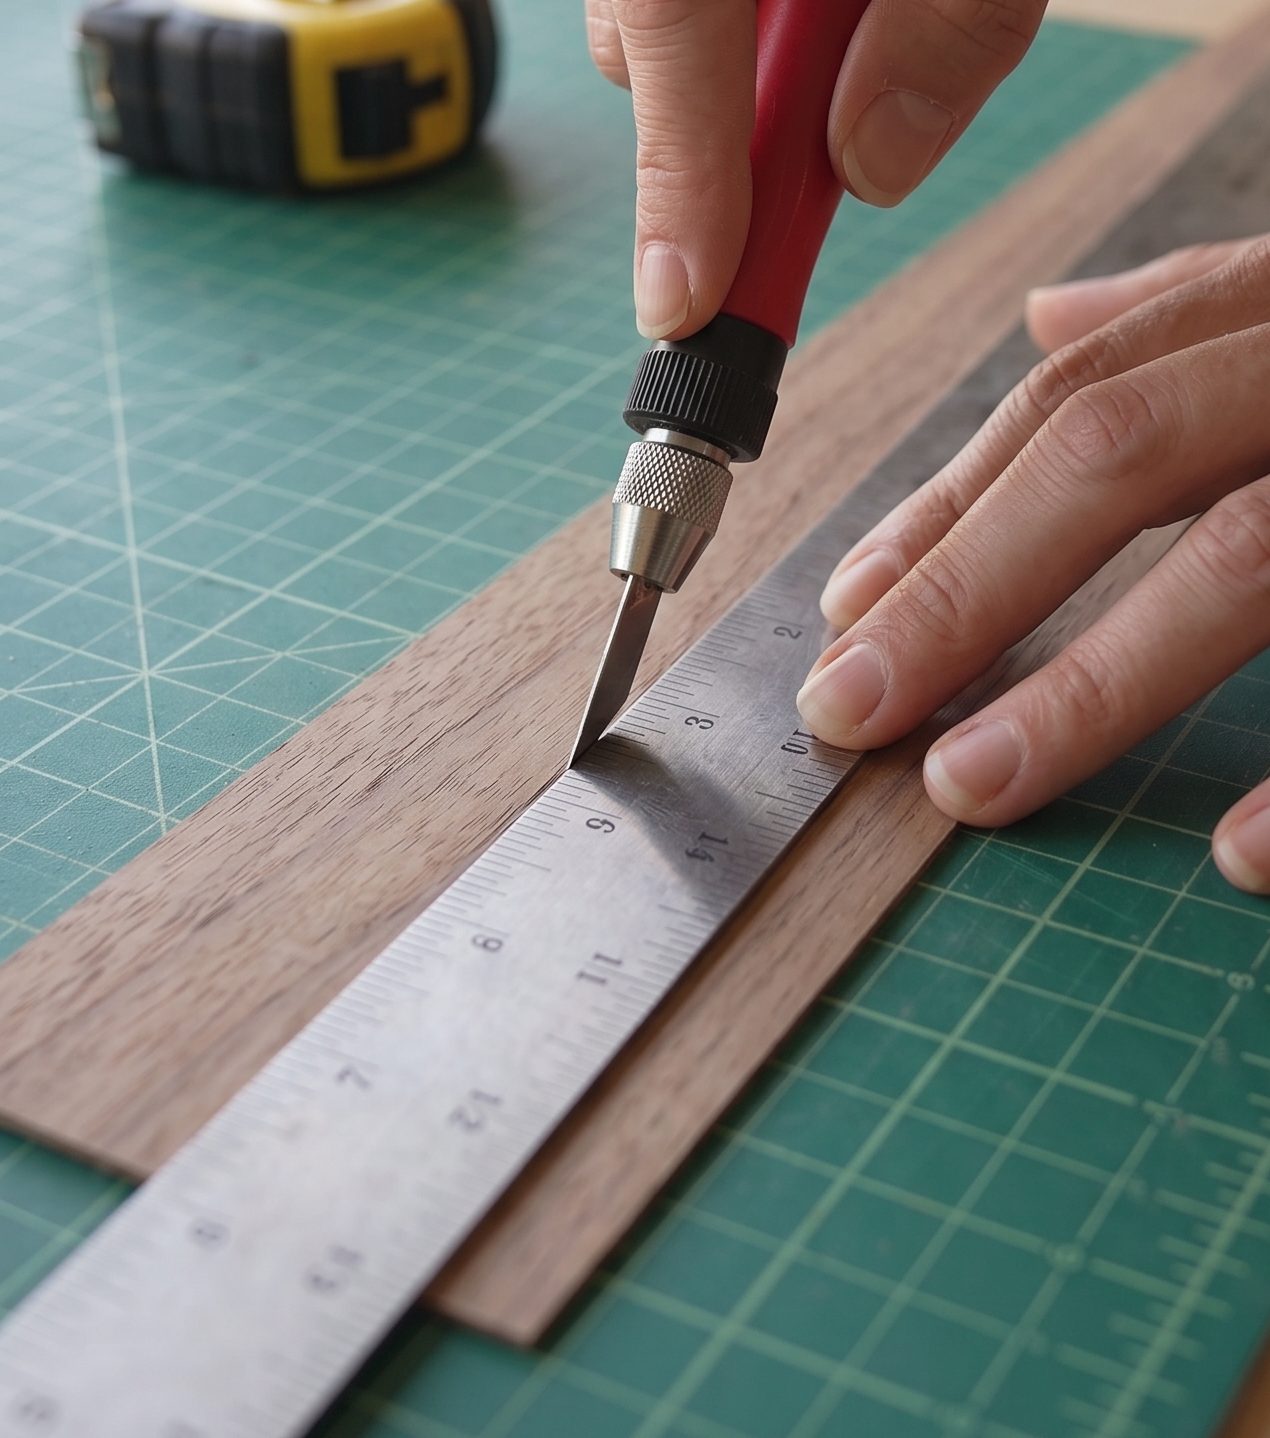
Cut 83 squares from light wood veneer (Birch or Maple) and 83 squares from dark wood veneer (Walnut) sized to 4.5" × 4.5".
Option A (Cricut / Digital Cutter): Secure veneer sheets to a StrongGrip mat, tape the borders with blue tape, and batch cut using a Knife Blade.
Option B (Manual): Place veneer on a cutting mat. Use a cork backed metal ruler or acrylic quilting square with a sharp 45mm rotary cutter or fresh snap off utility knife. Make 2–3 light passes per cut.
-
9
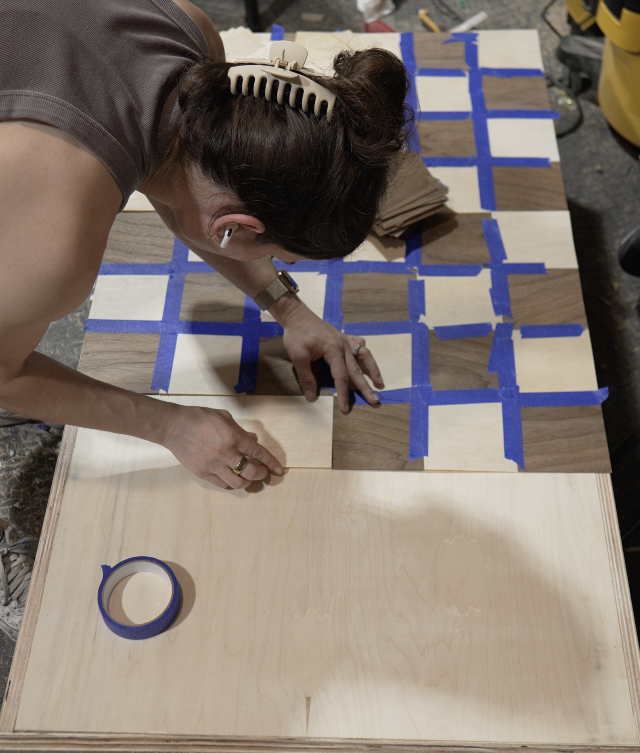
Lay out the veneer squares face up (show side up) on a flat work table in an alternating checkerboard pattern.
Apply blue painter's tape tightly across every horizontal and vertical seam.
The taped assembly will now function as a single continuous veneer sheet. Do this for every side of the coffee table and the base.
-
10
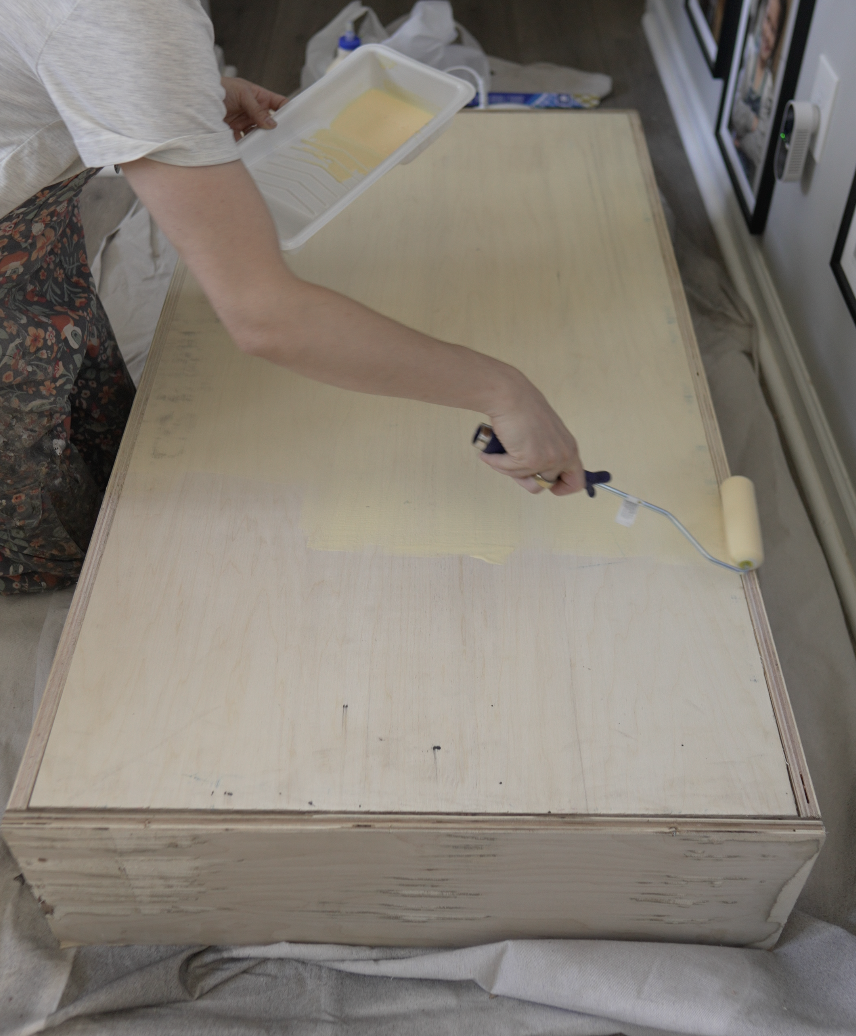
Using a high density foam roller, apply an even, medium weight layer of standard PVA wood glue (such as Titebond II) over the top and sides of the plywood box.
Allow the glue to dry completely (roughly 45–60 minutes) until it turns yellow and is dry to the touch.
-
11
Carefully align your taped veneer sheet over the dry glue surface on the table box (taped side facing up, raw wood facing the dry glue).
-
12
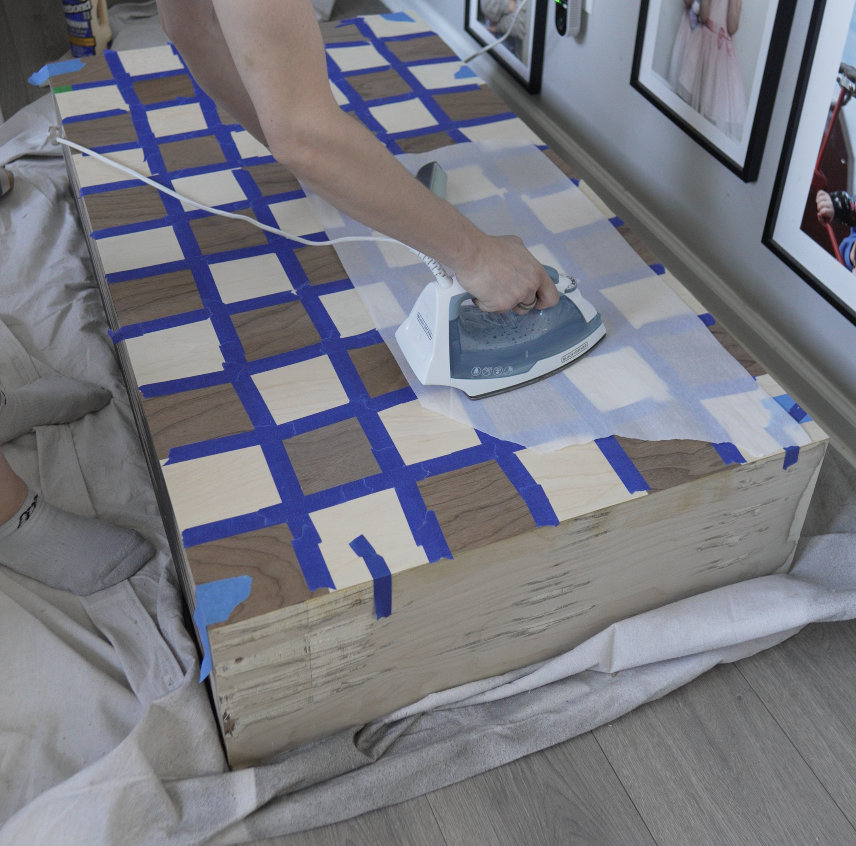
Place a sheet of parchment paper over the veneer.
Set a standard household dry iron to medium high heat (cotton/wool setting, no steam).Press firmly and move the iron slowly across the surface. The heat reactivates the dried PVA glue beneath, creating an instant, permanent bond.
Immediately follow behind the iron with a seam roller or wooden block to press the veneer flat while the glue cools.
Once the surface cools to room temperature, gently peel off the blue painter's tape by pulling it back flat against itself at a 45 degree angle to avoid lifting wood fibers.
-
13
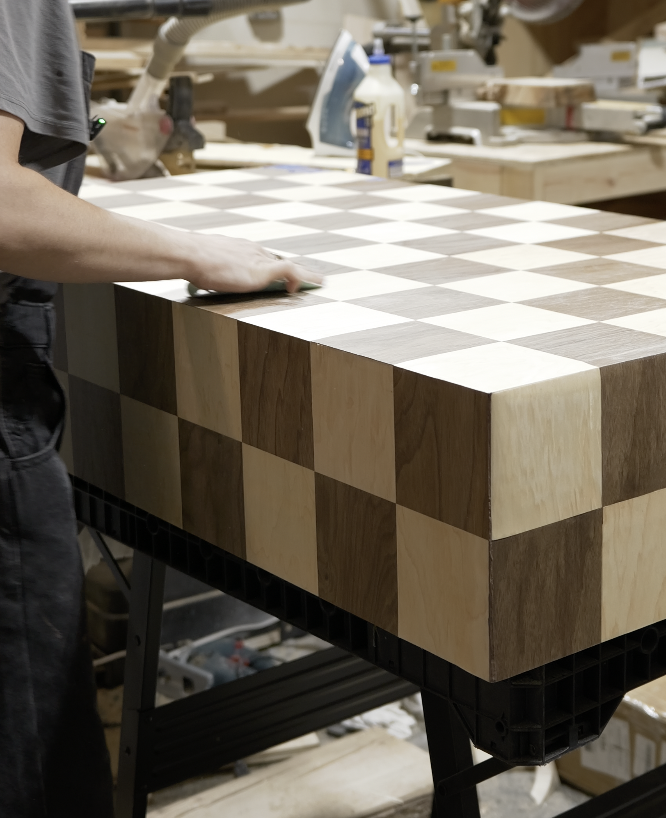
Lightly hand sand the entire surface using 220 grit sandpaper with the grain.
-
14
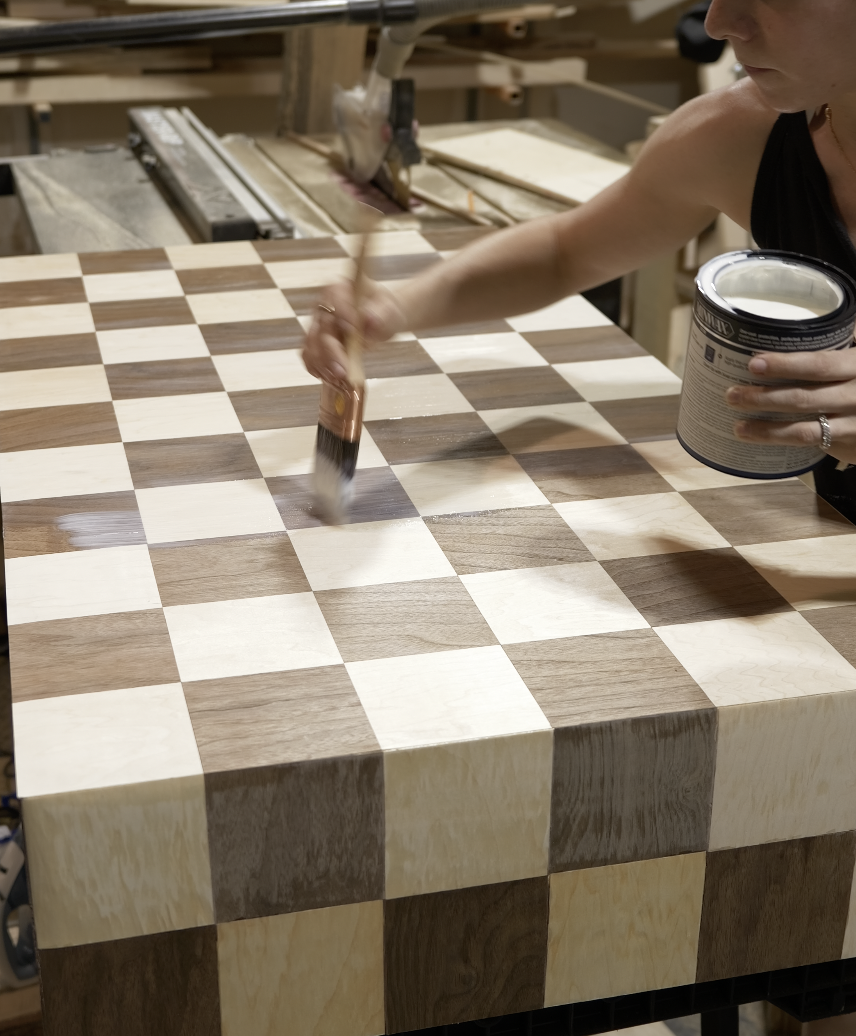
Wipe away all dust and apply 2 to 3 coats of clear polycrylic with a high quality synthetic brush, lightly sanding with 320 grit between coats.
-
15
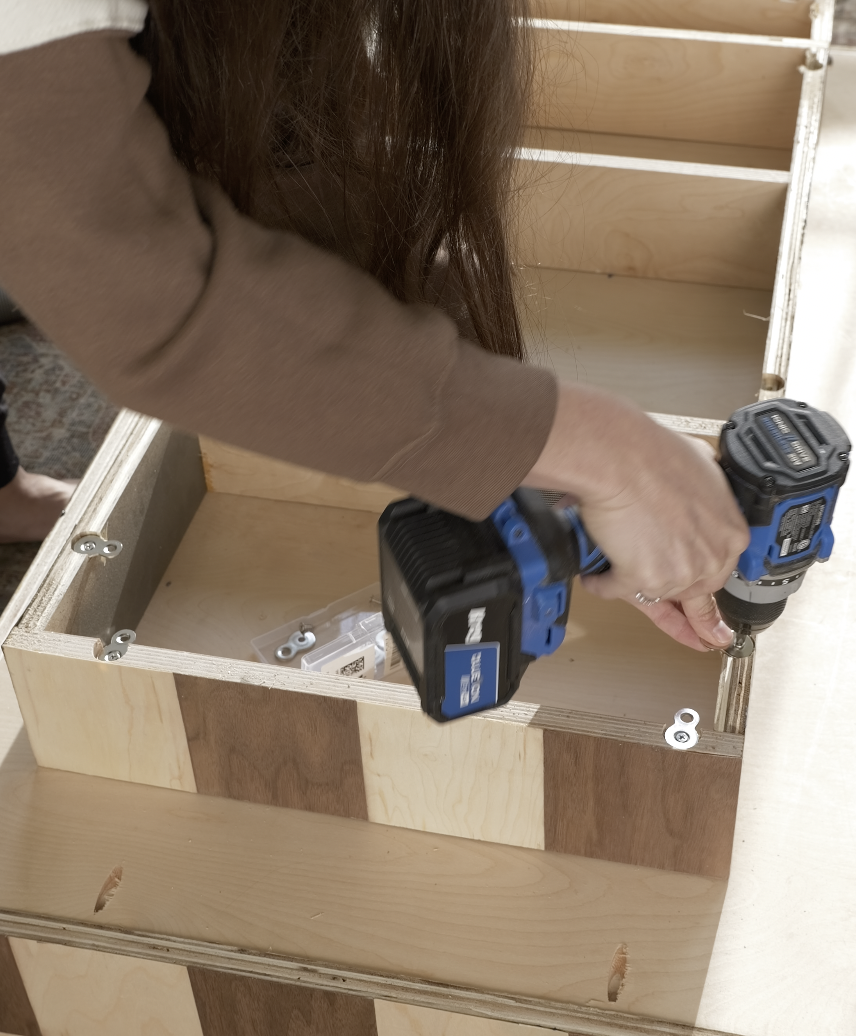
Using your drill and forstner bit, drill evenly around the top of the base so the figure 8 fasteners sit flush with the top of the base.
Screw the fasteners in.
Flip the coffee table upside down and make sure the base is 4.5" in from each side of the top of the table. Screw the figure 8 fasteners from the base into the top.