

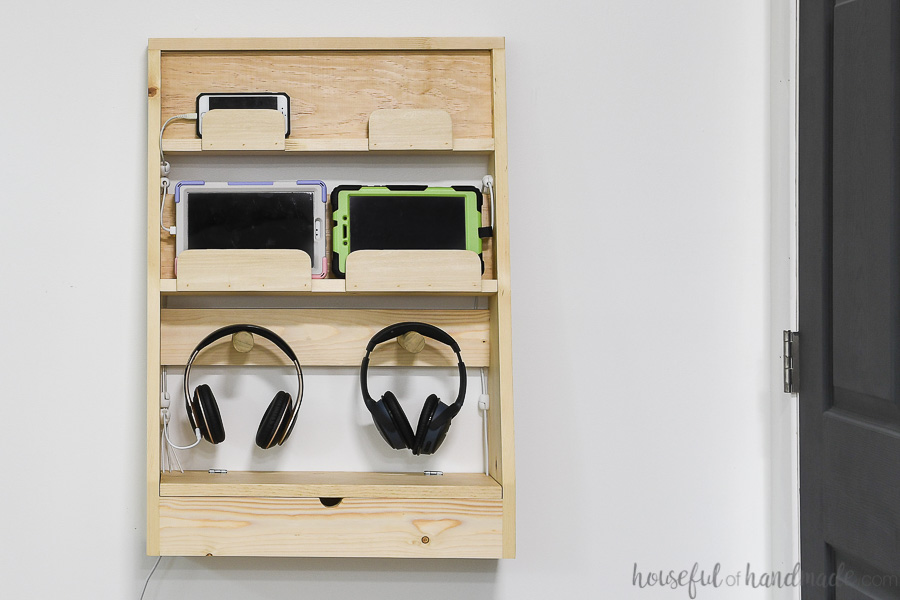
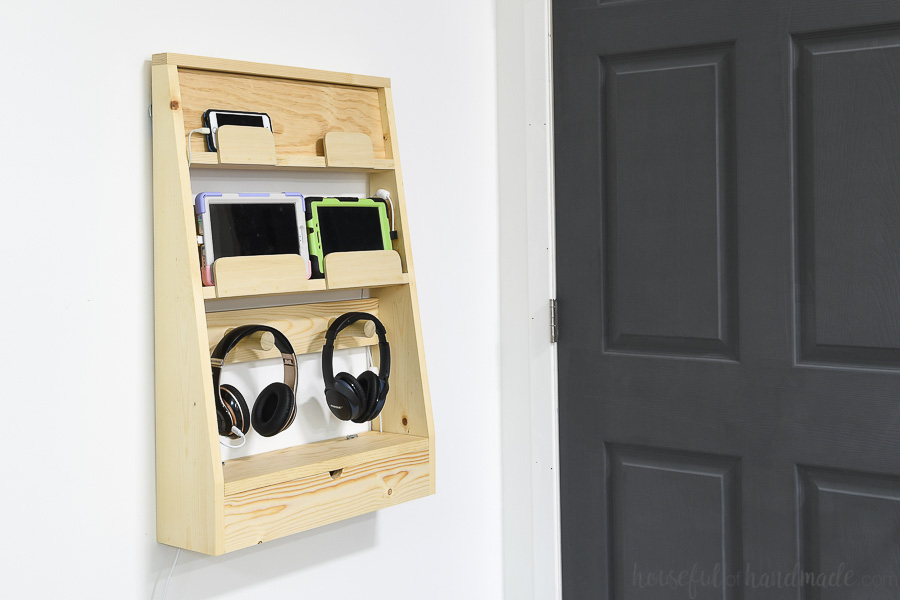


Keep your kid’s electronics organized and properly charged with this handy charging station. The simple build has room for 2 phones, 2 tablets and 2 headphones. The box on the bottom hides all the cords and cables.
Tools
Kreg Tools


Other Tools
-
Miter saw

-
Brad nailer
Materials
Wood Products
- 2 Boards , 1x6x6'
- 1 Board , 1x4x8'
- 1 Board , 1x3x2'
- 1 Board , 1x2x4'
- 1 Board , ¼” x 2 ½” x 3’
- 1 Dowel , 1 ¼” x1’
Hardware & Supplies
- 1 Box of 1 ¼” Kreg Pocket Hole Screws (See tools list)
- 1 Box of 1 ¼” brad nails
- 2 1” hinges
- 2 D-ring hangers
- 1 Wood glue
Directions
-
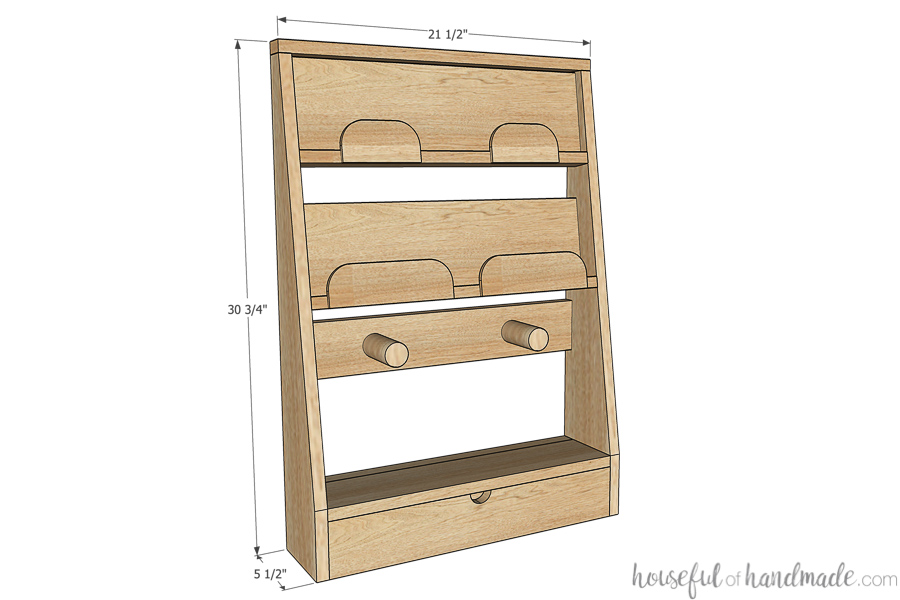
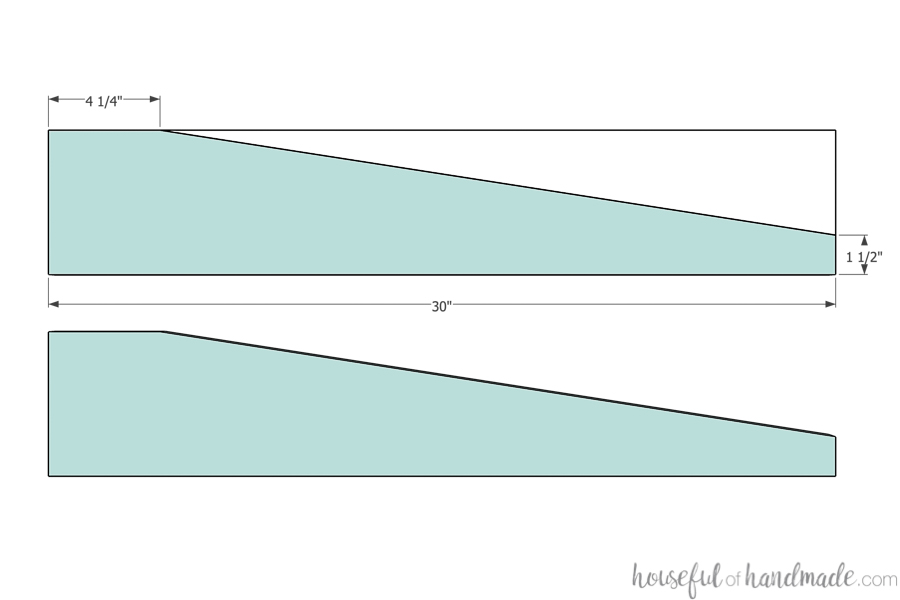
Cut Angle in Sides
On both side boards, measure 4 ¼” up from the bottom on the front and 1 ½” in from the back on the top. Draw a line between these two marks and cut along it.
-
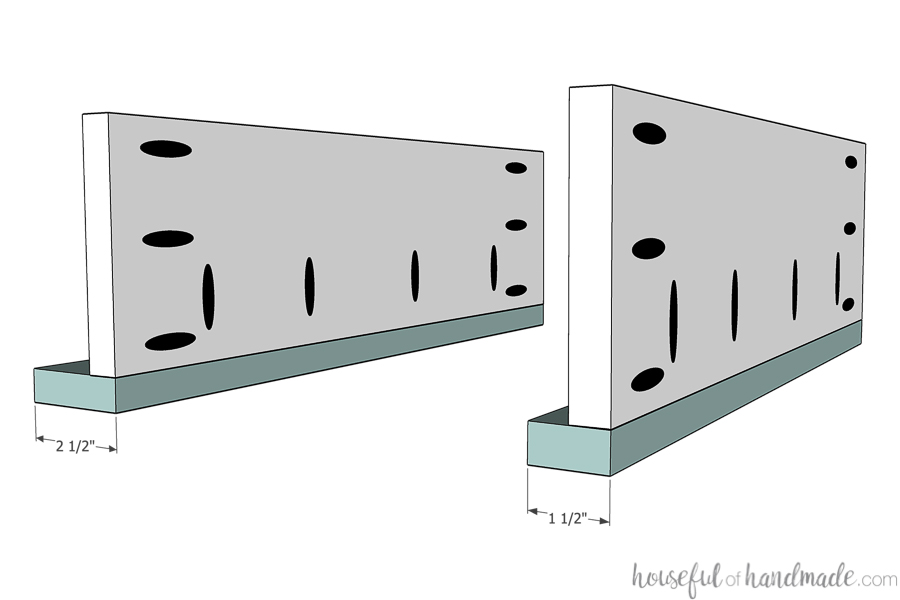
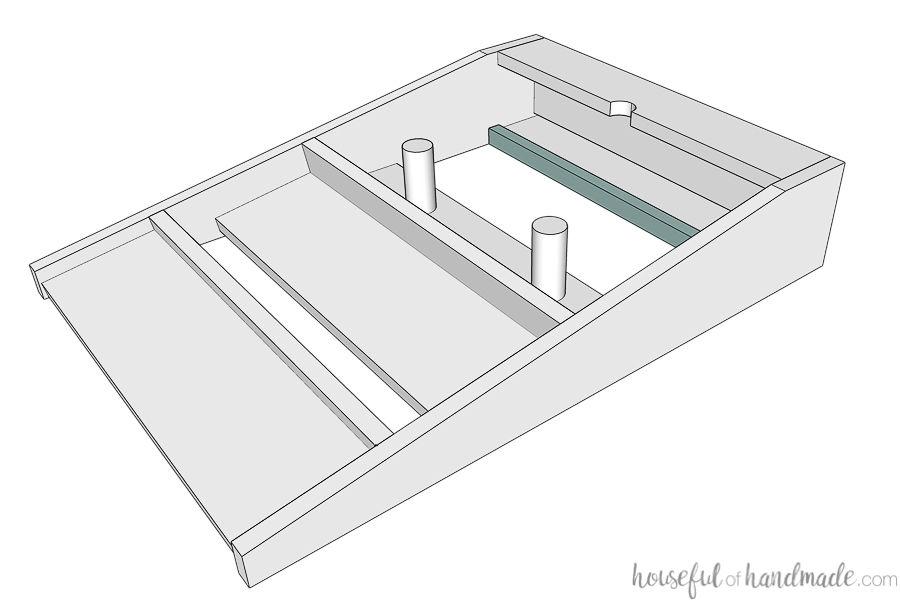
Build Ledges
Set your Kreg pocket hole jig for ¾” thick material. Drill 3 pocket holes in each end of the back rest boards and 4 pocket holes along the bottom edge. Attach the tablet ledge to the bottom of one of the back rest boards with 1 ¼” pocket hole screws and wood glue. Attach the phone ledge to the bottom of the other one the same way.
-
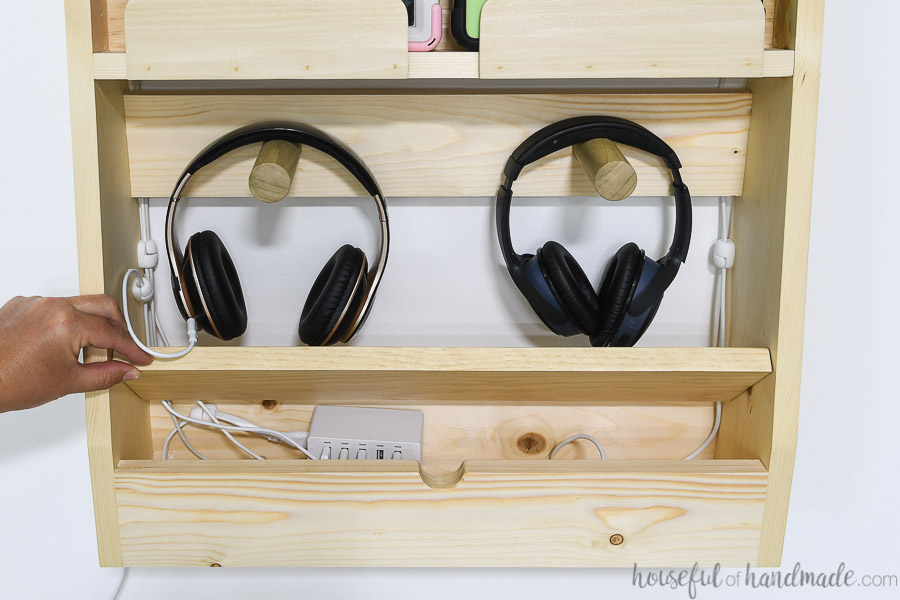
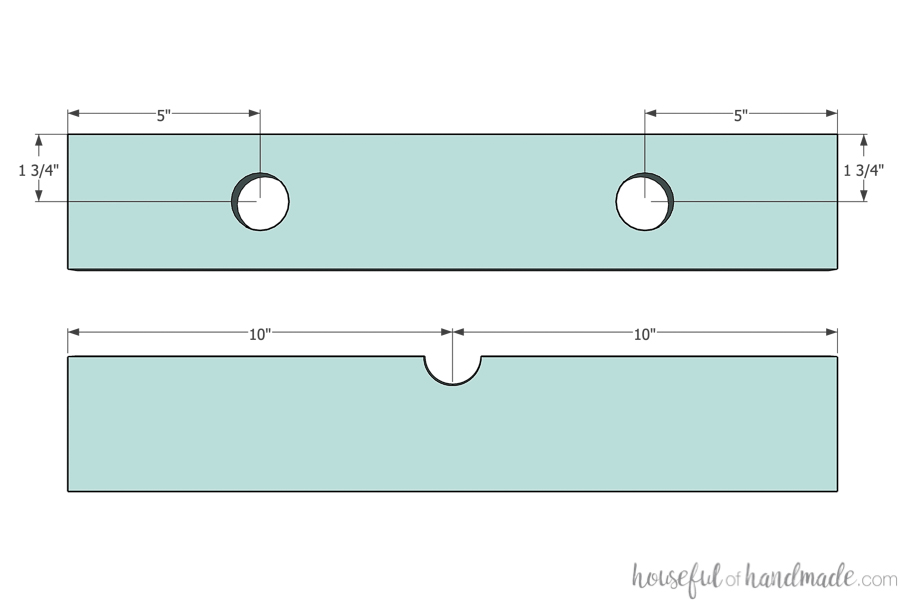
Prepare Headphone and Box Front Boards
For the headphone piece, measure in 5” from each side and down 1 ¾” (centered on the board). Drill a 1 ¼” hole through the board at these marks. For the box front piece, measure the center of the top and drill a half-hole (using the same drill bit). Use a drill press or clamp a scrap to the other side of the board to make it easier. Then drill pocket holes set for ¾” thick material in both ends of the back of these boards and the other box pieces.
-
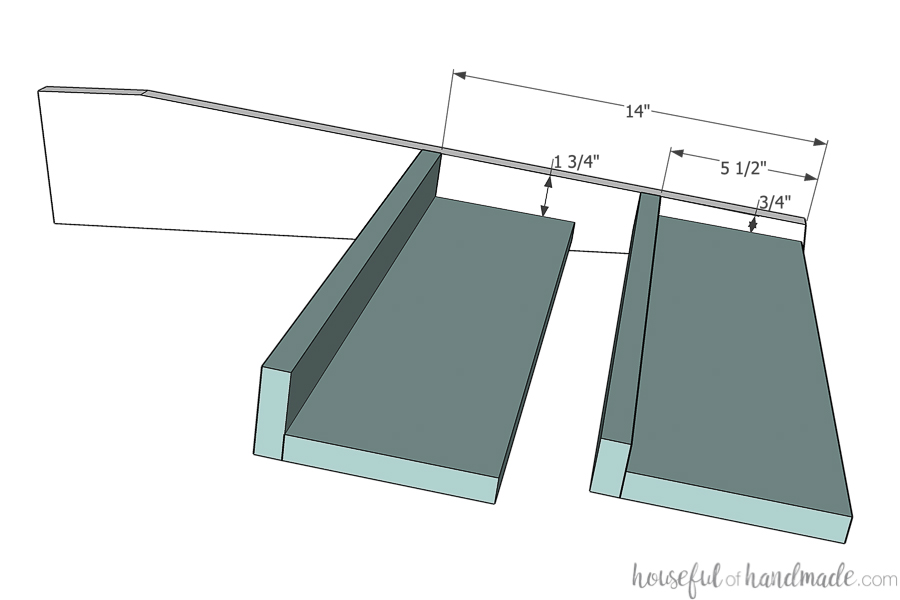
Attach the Ledges
Attach the ledges to one of the side boards using 1 ¼” pocket hole screws through the holes previously drilled in the back. The top ledge should be 5 ½” down from the top of the side with the back rest ¾” away from the front. The second ledge should be 14” down from the top of the side with the back rest 1 ¾” away from the front.
-
Attach the Headphone Piece
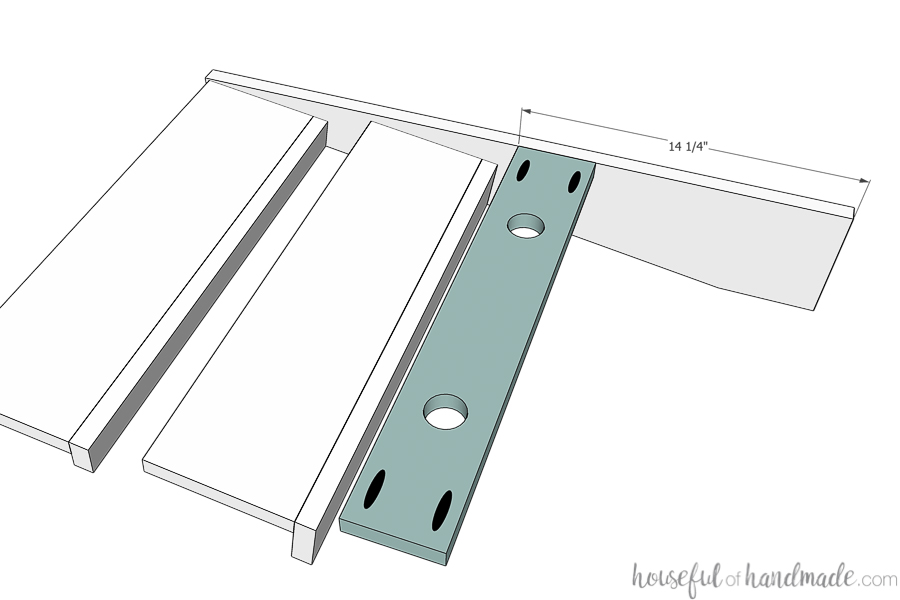
Attach the headphone piece to one of the side boards using 1 ¼” pocket hole screws through the holes previously drilled in the back. The top of the board should be 14 ¼” up from the bottom of the sides and it should be flush with the back.
-
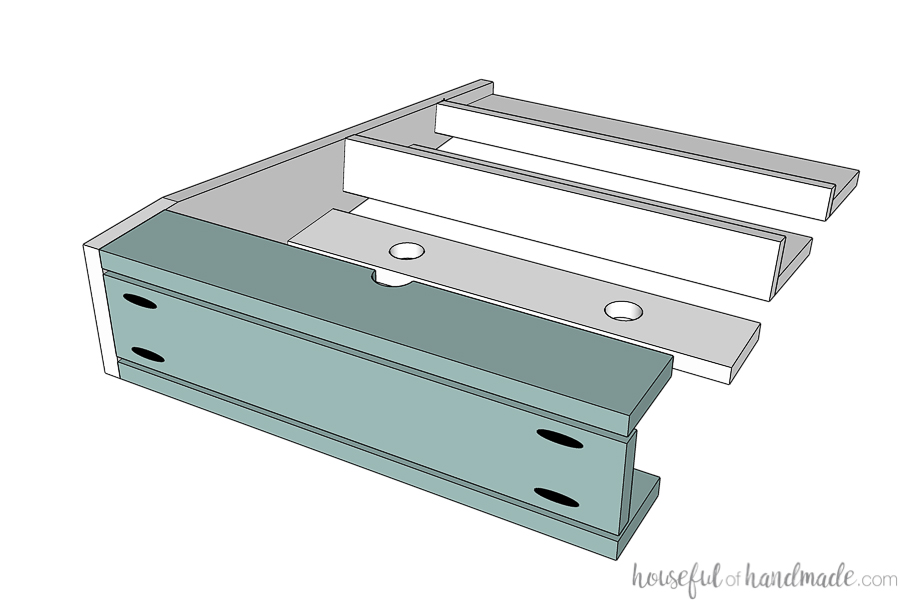
Build the Box
Attach one side of the box pieces to the side piece using 1 ¼” pocket hole screws through the holes previously drilled in the back. The box front and back should be flush with the bottom of the side piece and flush with the front or back. The bottom piece should be flush with the bottom and centered between the front & back. There will be a ¼” gap on each side of the bottom piece to allow airflow to the charging cords.
-
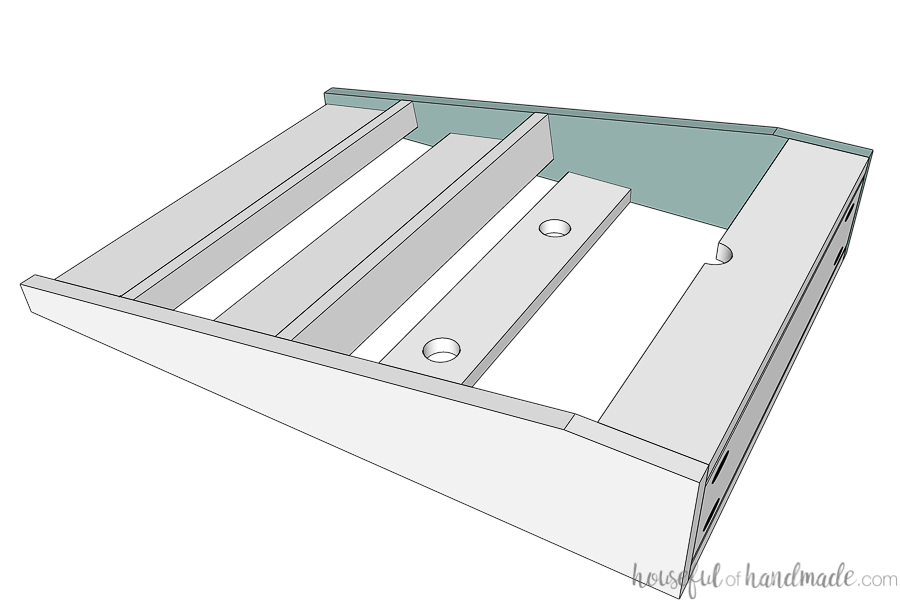
Attach the Other side
Attach the other side piece to all the pieces using the same spacing as the first side. Secure with 1 ¼” pocket hole screws and wood glue.
-
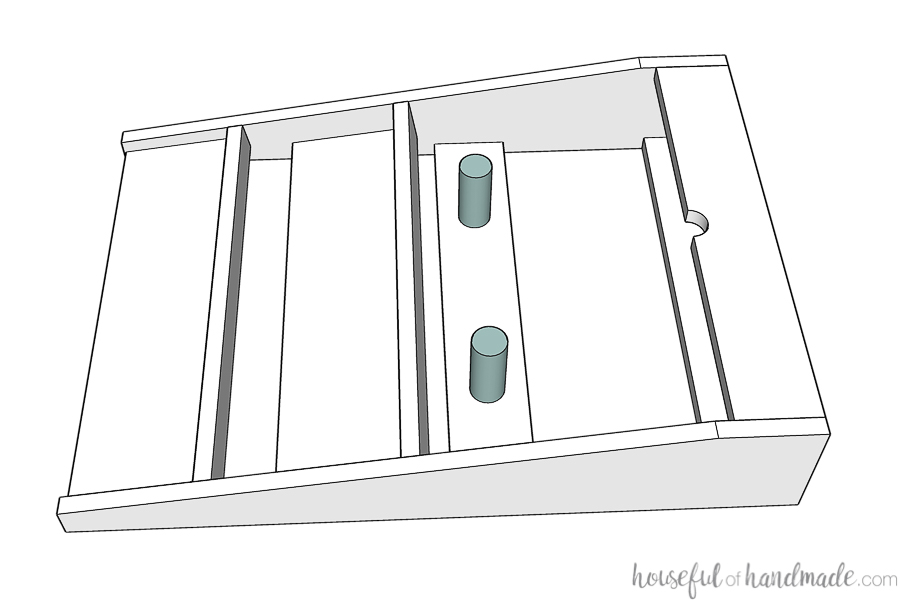
Attach Headphone Pegs
Add glue to the inside of the holes on the headphone piece. Press the headphone peg dowels into the holes until they are flush with the back. Let dry.
-
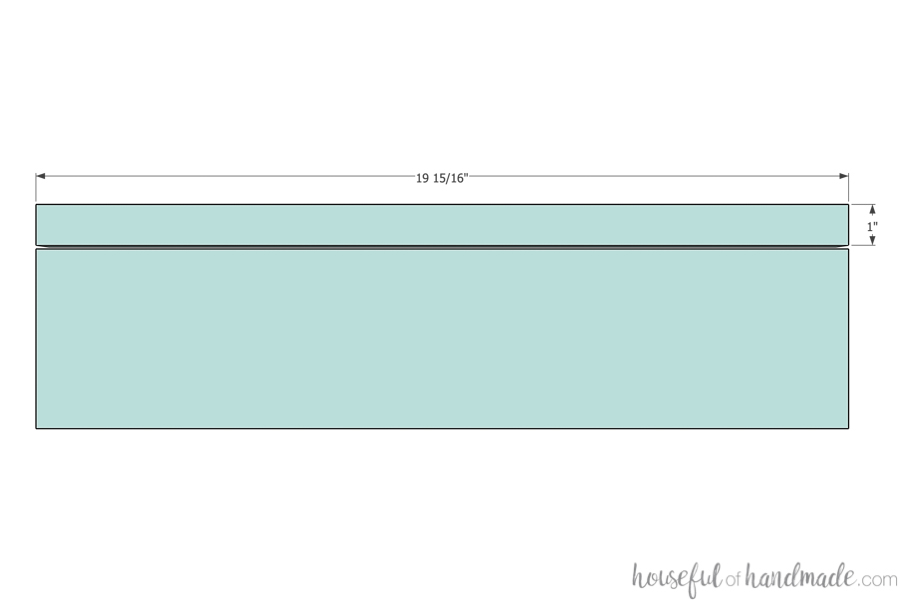
Cut the Lid Piece
The lid piece is cut to be slightly narrower than the space to make it easy to lift ii in between the sides. Rip the lid piece lengthwise so you have a 1” piece and the remaining piece.
-
Attach the Lid
Attach the 1” piece to the top of the back box piece with wood glue and brad nails so it is flush with the back. The other piece from the lid will be attached to this back piece with the hinges (after painting/staining) without routing/carving in the hinges. This will make up for the kerf of the blade so the front of the lid is flush with the front of the box and allow a little more airflow.
-
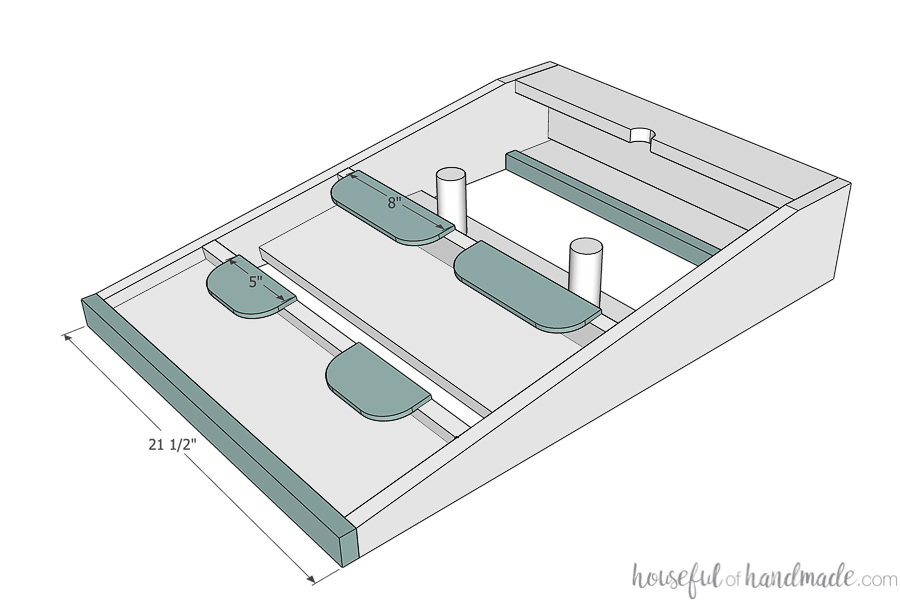
Finish the Charging Station
If desired, round the corners of the phone and tablet holder pieces. Center them on each half of the front of the ledges. Secure with wood glue and brad nails. Then attach the top piece to the top of the sides with wood glue and brad nails.
-
Enjoy!
Paint/stain your new charging station. Attach the hinges to the lid (see step 10). Drill holes in the back/bottom of the box for the cords to come out. Place your charging power strip inside the box and use cord holders to secure them to the side of the charging station. Attach 2 D-rings to the back sides to hang it on the wall. And visit Housefulofhandmade.com for more things to build to keep your family organized!
Watch the YouTube video here: https://youtu.be/ObrLkE86DDo
https://housefulofhandmade.com
https://housefulofhandmade.com/charging-station-build-plans/