Canopy Bed
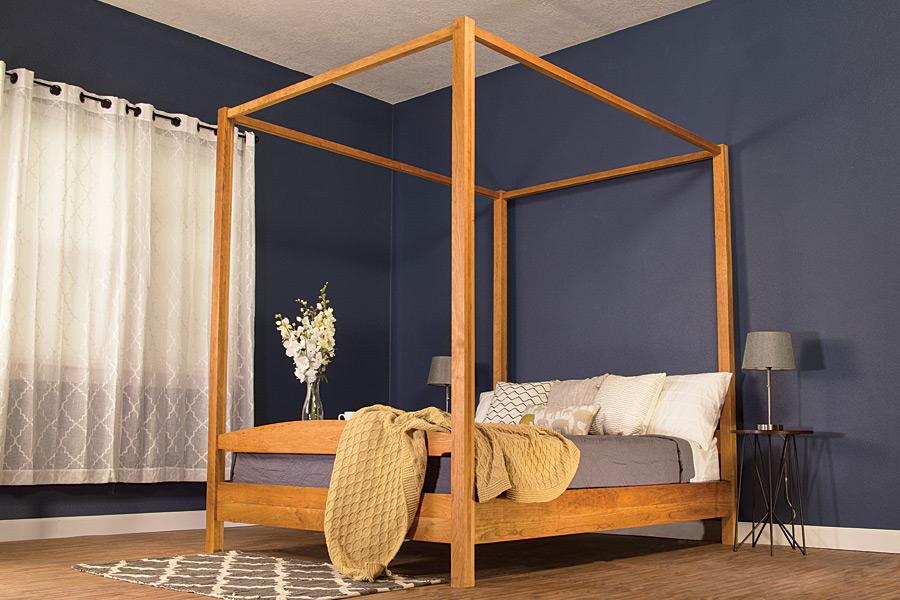
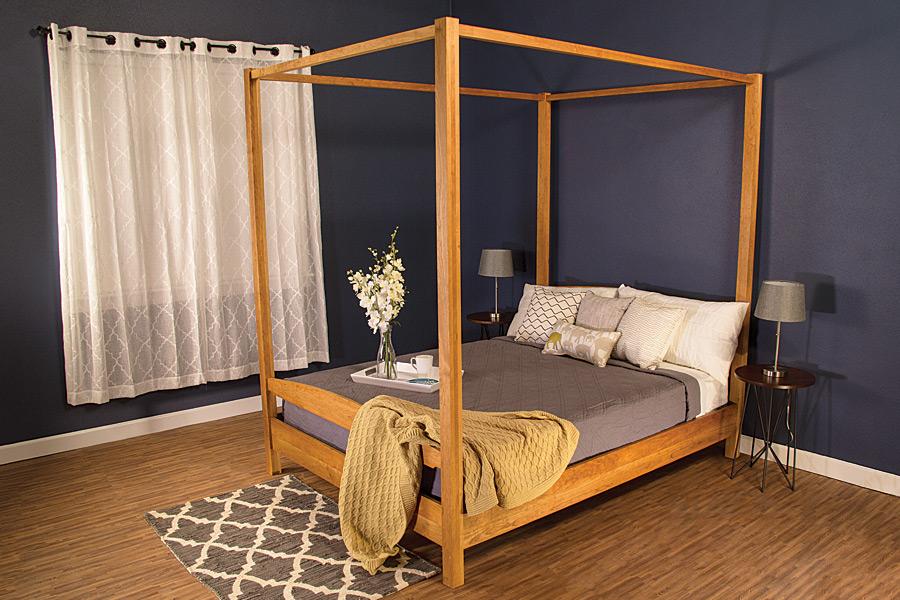
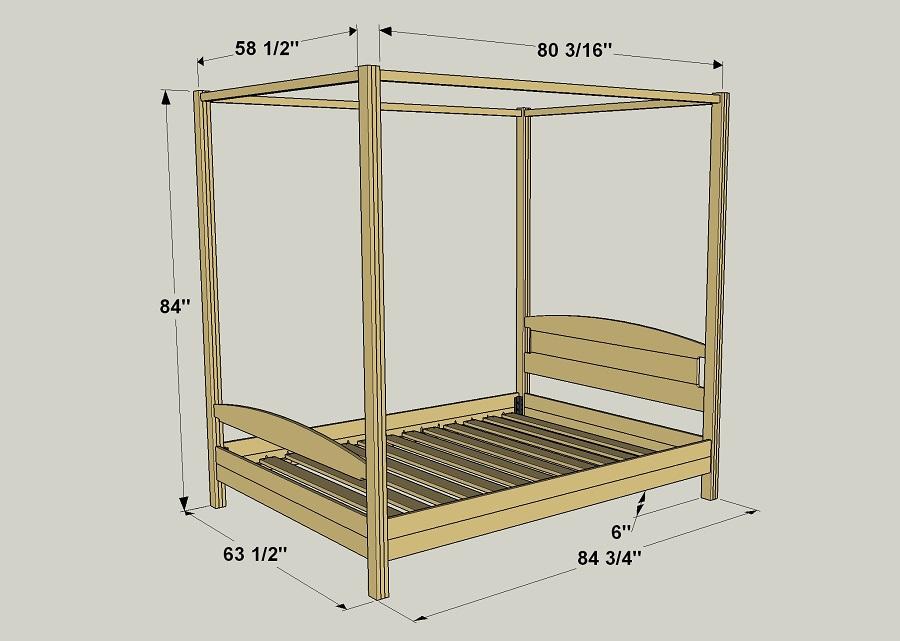
By Kreg ToolWhether your bedroom is traditional or contemporary, this canopy bed is sure to fit in. Simple details, clean lines, and cherry wood add classic beauty. You can make one more easily than you may think by gluing ordinary boards to make thicker, wider stock. It’s designed for a Queen-size mattress.
Directions
-
Make the Posts
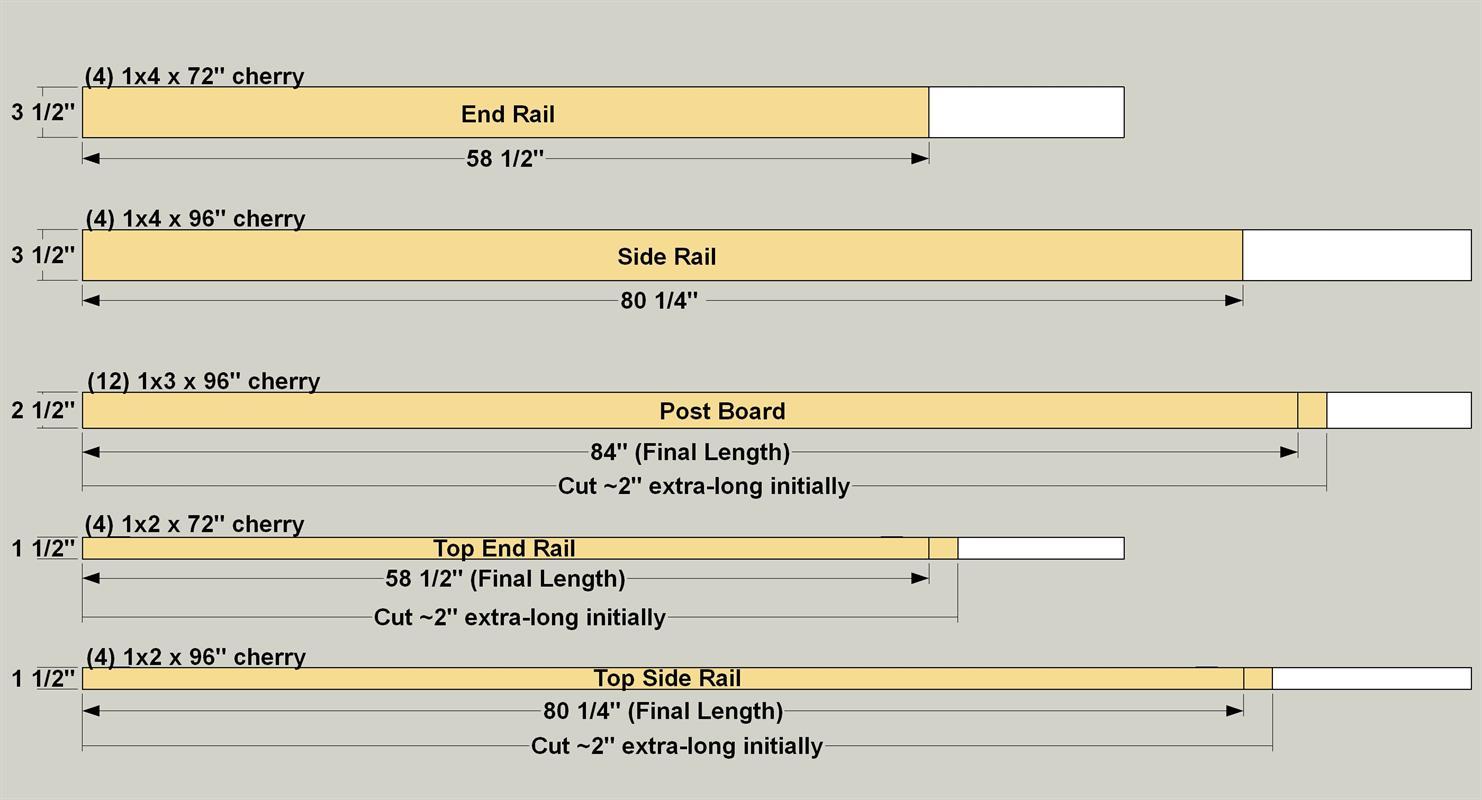
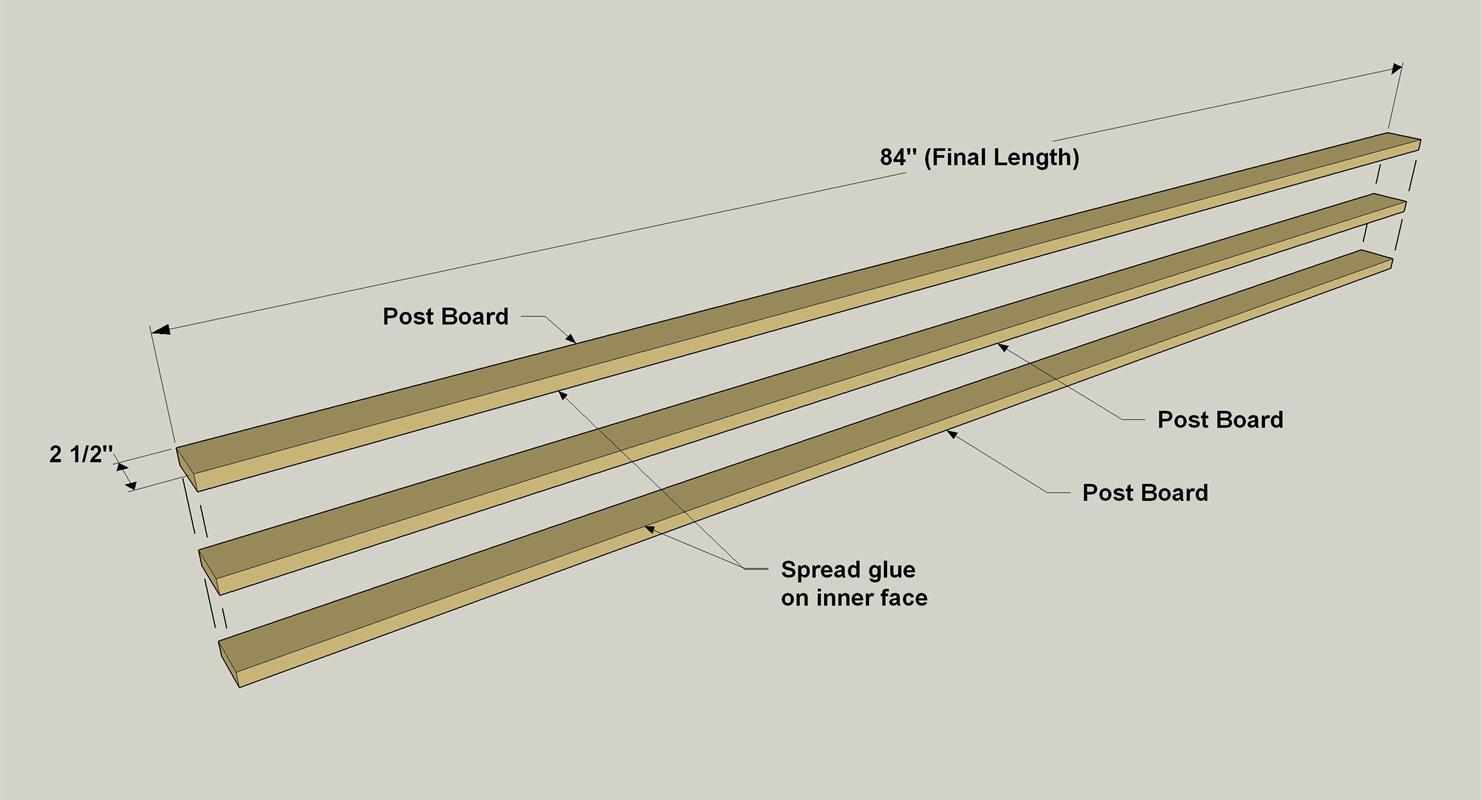
Cut 12 Post Boards from 1x3 boards as shown in the cutting diagram, making them a little extra-long. Then arrange the Post Boards in groups of three. Apply glue to one face of two boards in each group, place the third board between them, align the edges and clamp them together. You could also wrap them tightly with painters tape if you don’t have enough clamps. Be sure to align the edges, but because the boards are a bit extra-long, it's not necessary for the ends of the boards to be flush at his time. After the glue dries, sand the Posts smooth and then cut them to finished length. Do this for all four posts, and set them aside for now.
-
Prepare the Bed Rails
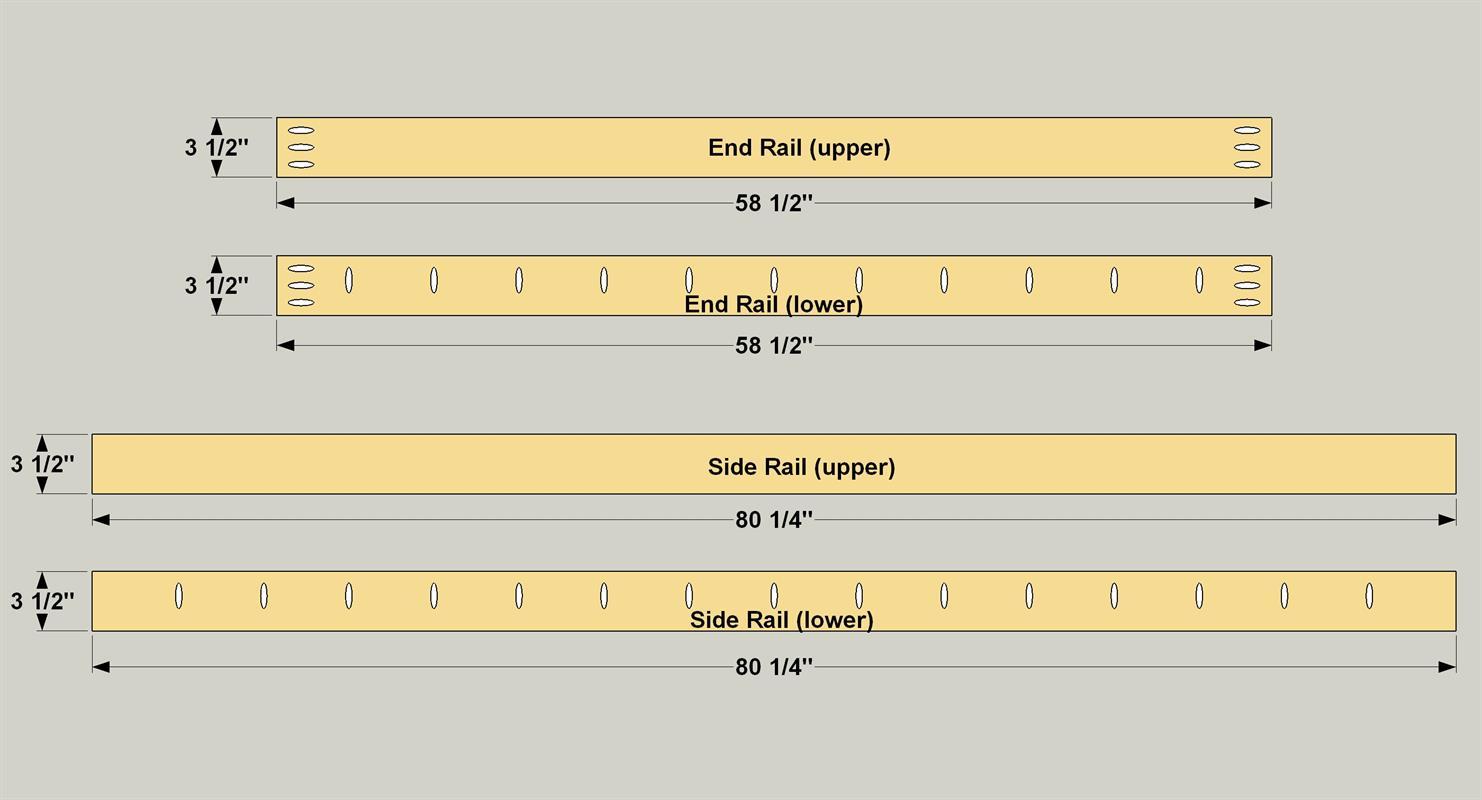
Cut four End Rails, and four Side Rails to length from 1x4 boards, as shown in the cutting diagram. Set your pocket-hole jig for 3/4"- thick material, and then drill pocket holes in two of the Side Rails and in all four of the End Rails at the locations shown.
-
Assemble the Bed Rails
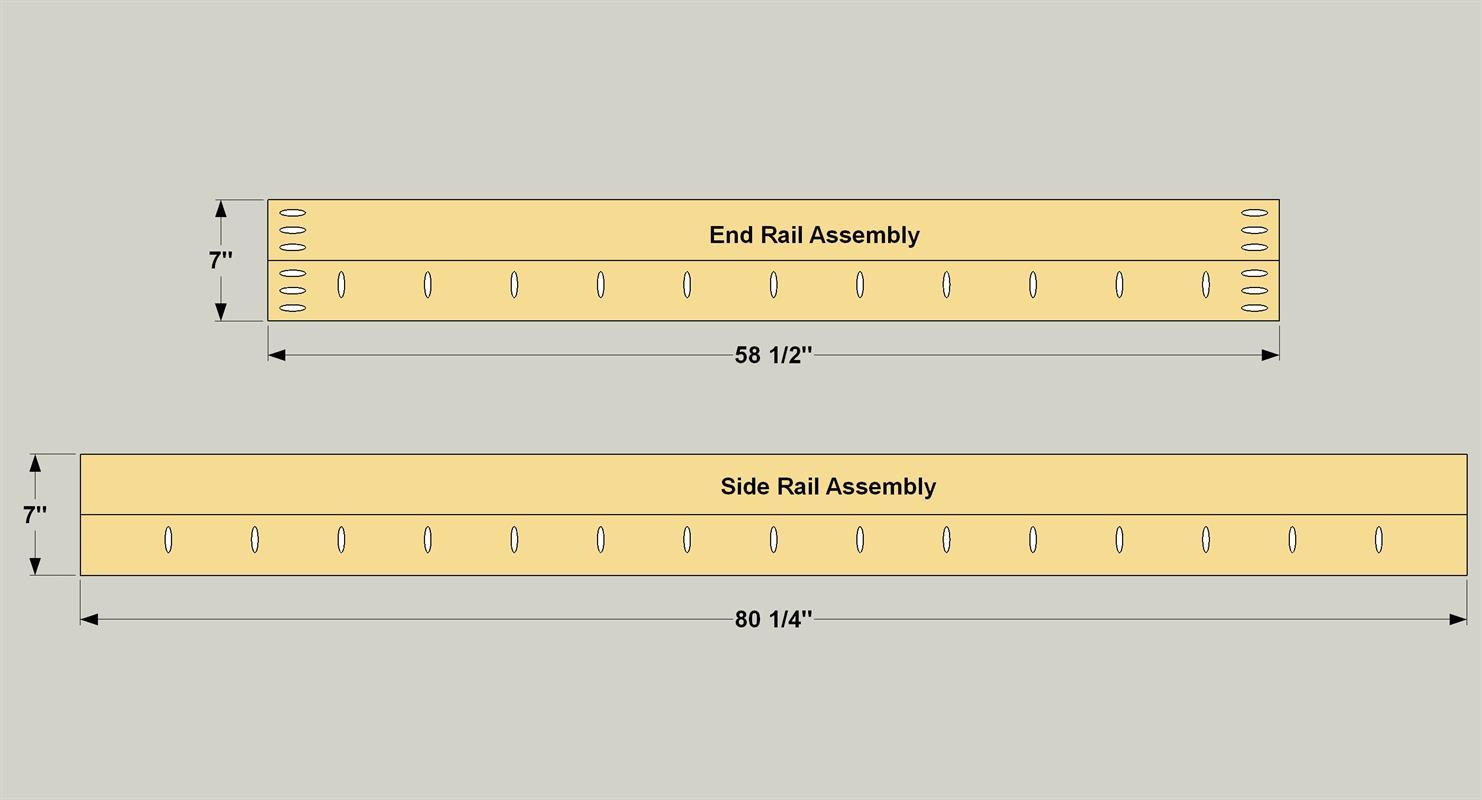
Glue and clamp two Side Rail boards together as shown. Make sure the faces and ends are flush, and then secure the Rails together with glue and 1 1/4" fine-thread pocket hole screws. Do this for the other Side Rail and for both End Rails.
-
Make a Headboard and Footboard
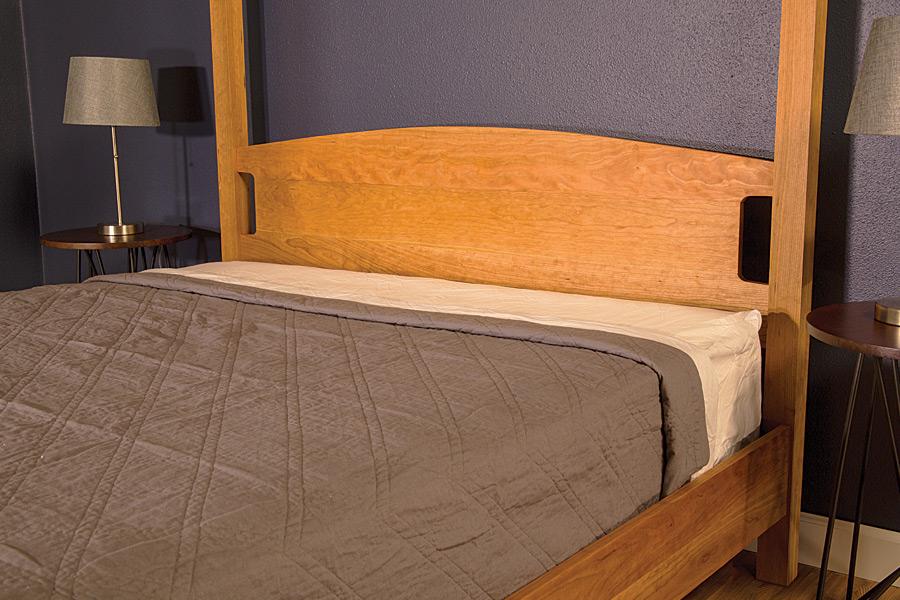
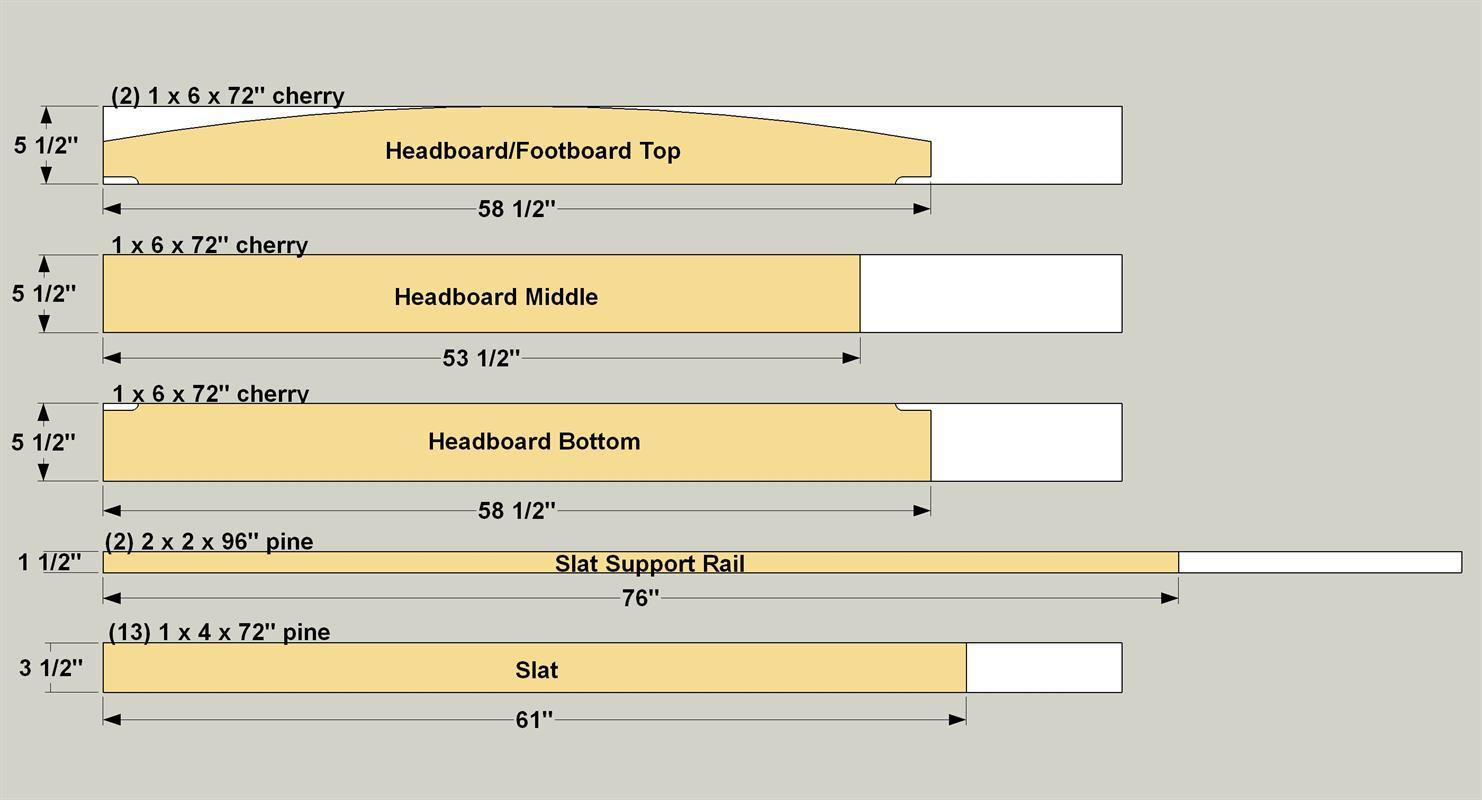
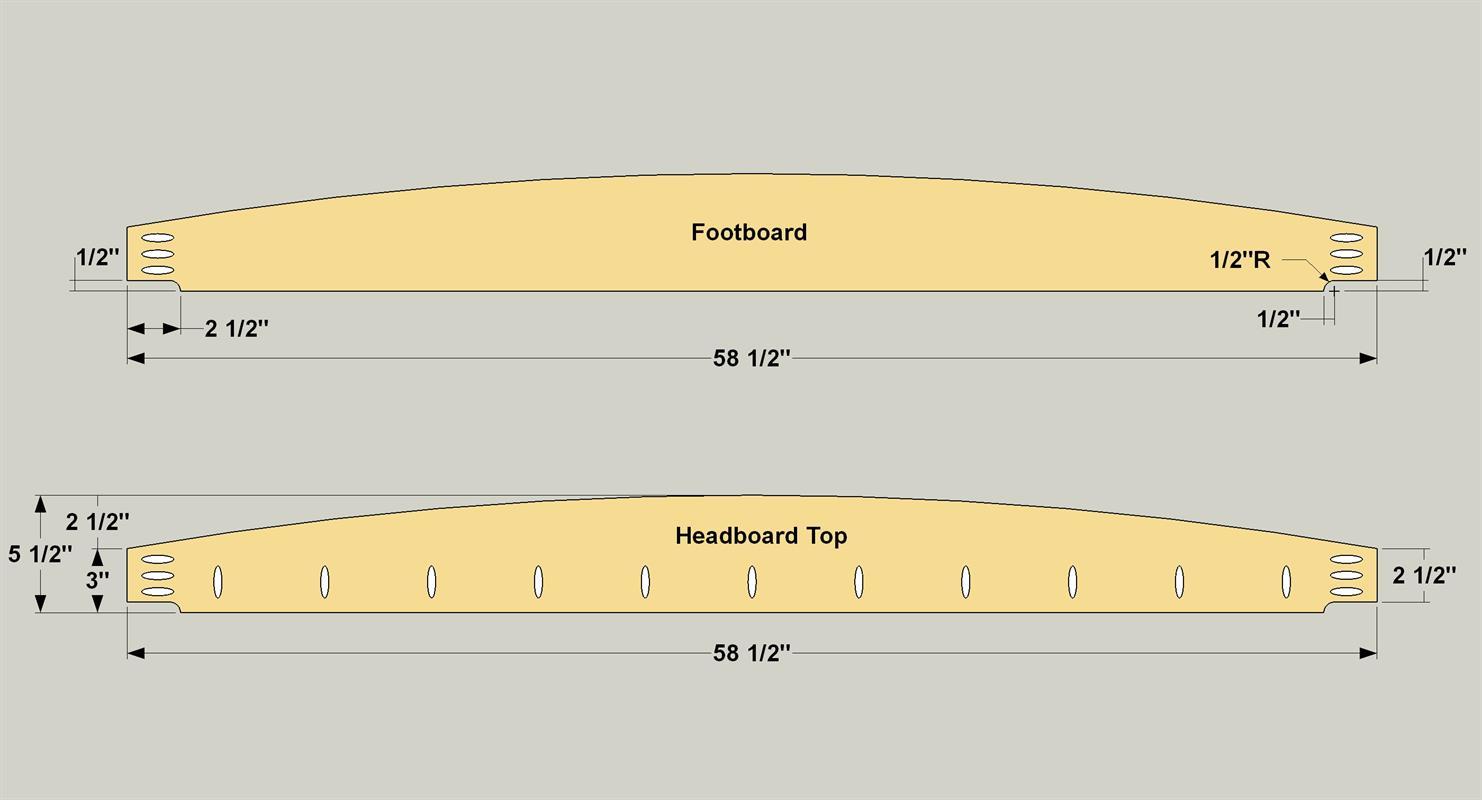
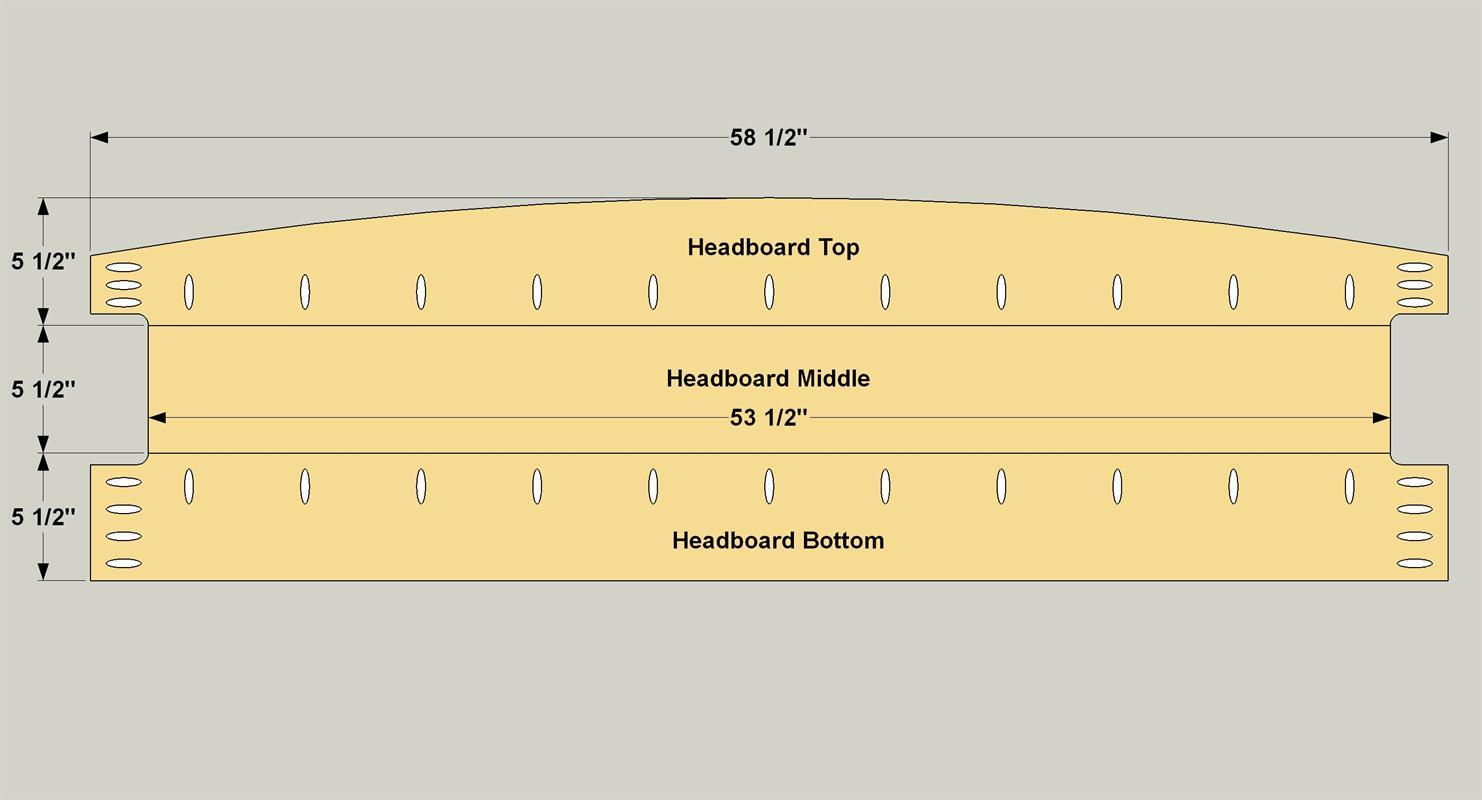
Cut the Footboard Top and the Headboard Top to length from 1x6 boards, as shown in the cutting diagram. Lay out the curved edge and the notched corners on one of the boards. Cut out the shapes on this board using a jigsaw. Sand the shapes smooth. Use the finished board as a pattern for the second board, and then cut it to shape, as well. Now drill pocket holes in each of the boards at the locations shown.
-
Make a Headboard Middle and Bottom
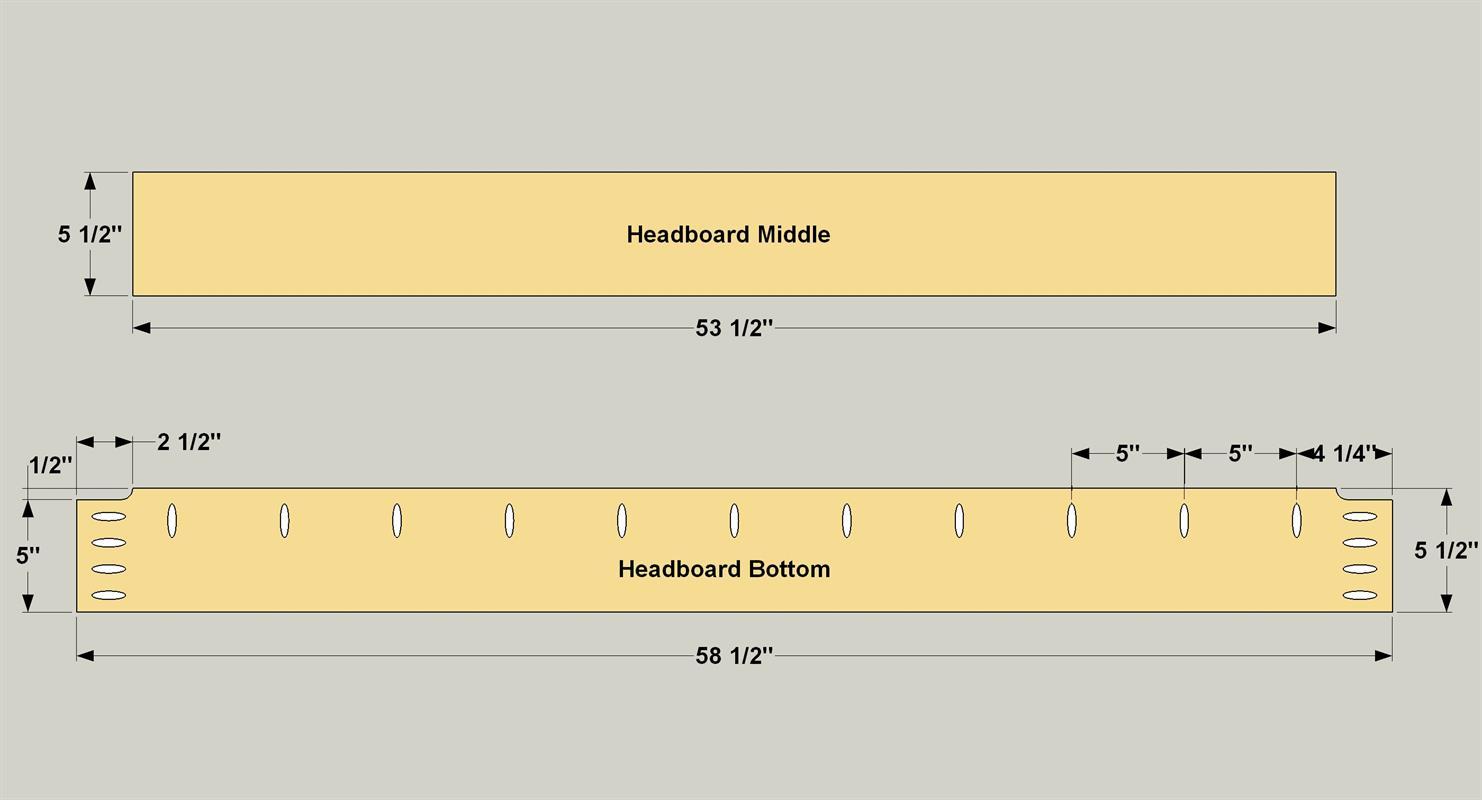
Cut the Middle Headboard and the Bottom Headboard to length, as shown in the cutting diagram. Use the Headboard Top you cut earlier as a pattern and trace only the corner notches onto the Headboard Bottom. Cut them out with a jigsaw and sand them smooth. Now drill pocket holes in the Headboard Bottom at the locations shown.
-
Assemble the Headboard
Glue and clamp the Headboard Top, Middle and Bottom together. Make sure the faces are flush with one another and the ends are square and aligned. A framing square works great for this. Then secure the assembly using 1 1/4" fine-thread pocket-hole screws.
-
Prepare the Top Rail Boards
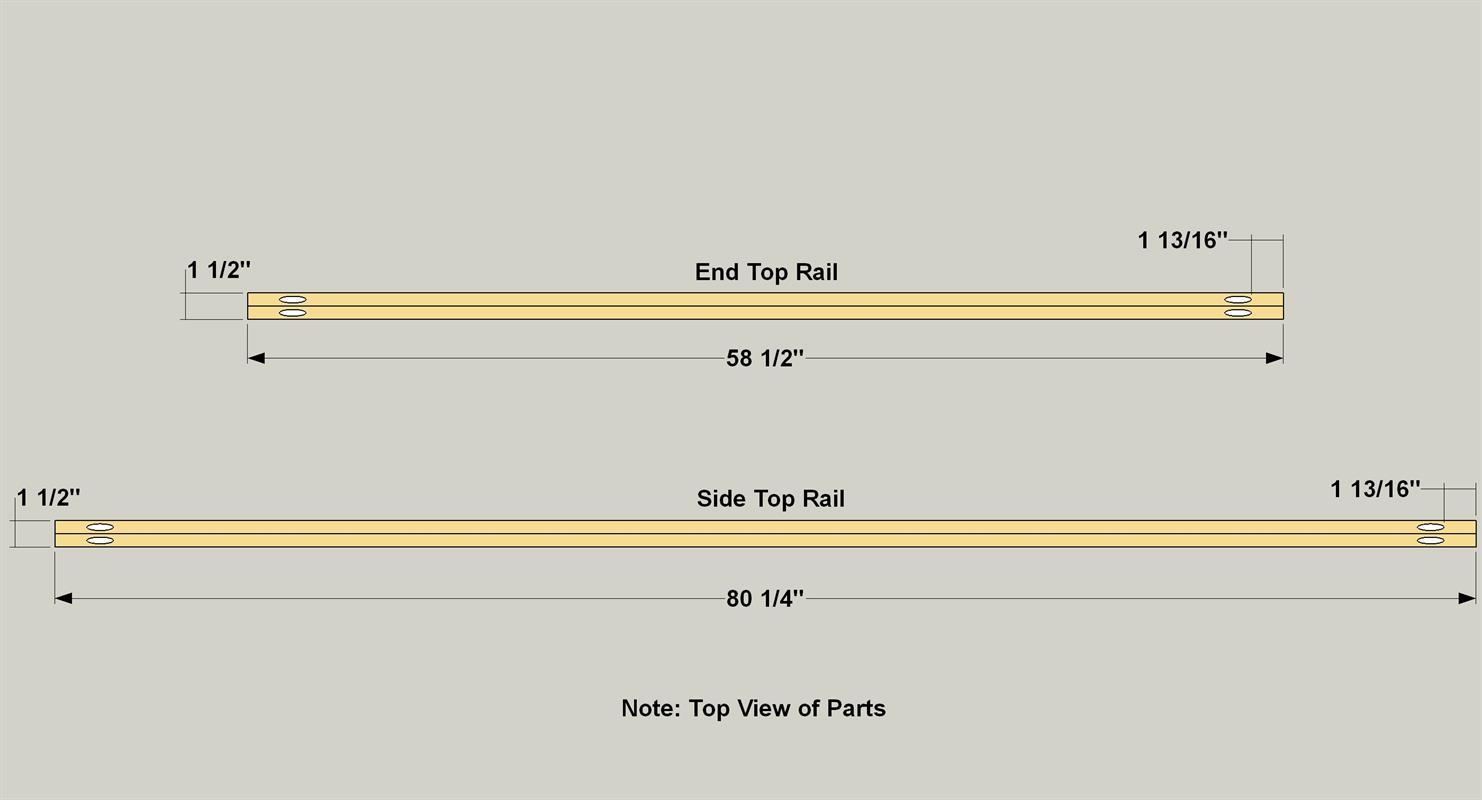
Cut four End Top Rails and four Side Top Rails to rough length from 1 x 2 boards as shown in the cutting diagram. Again, make them slightly long. Pair up the boards to make two Side Rails and two Top Rails, and then glue them up like you did with the posts, making sure the edges are flush. After the glue dries, sand them smooth. When you have all four rail assemblies done, cut them to final length. Now, rail assemblies cut to length, set your pocket-hole jig and bit for 1 1/2"-thick material, and drill pocket holes on all four of the rail assemblies at the locations shown.
-
Attach the Headboard to Posts
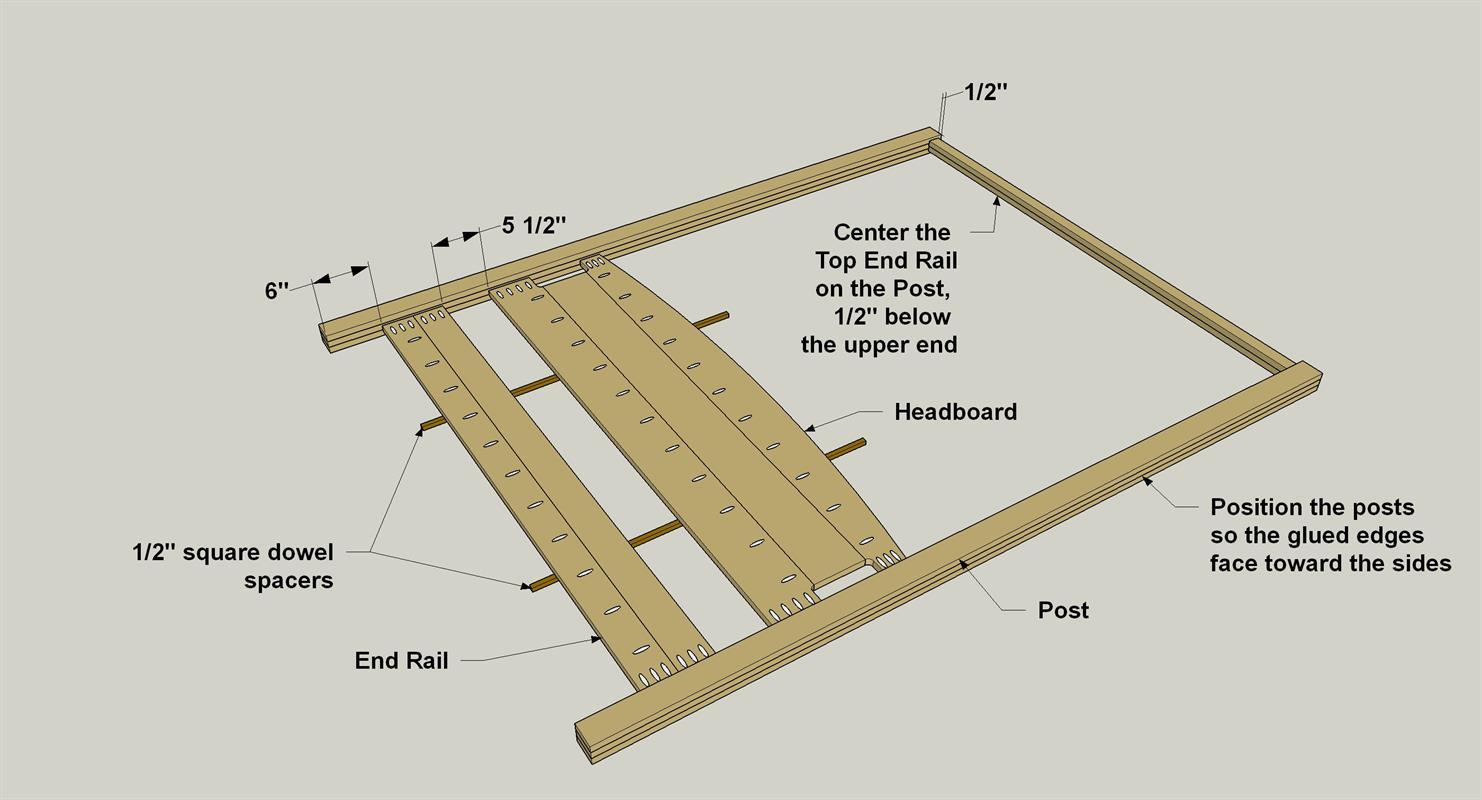
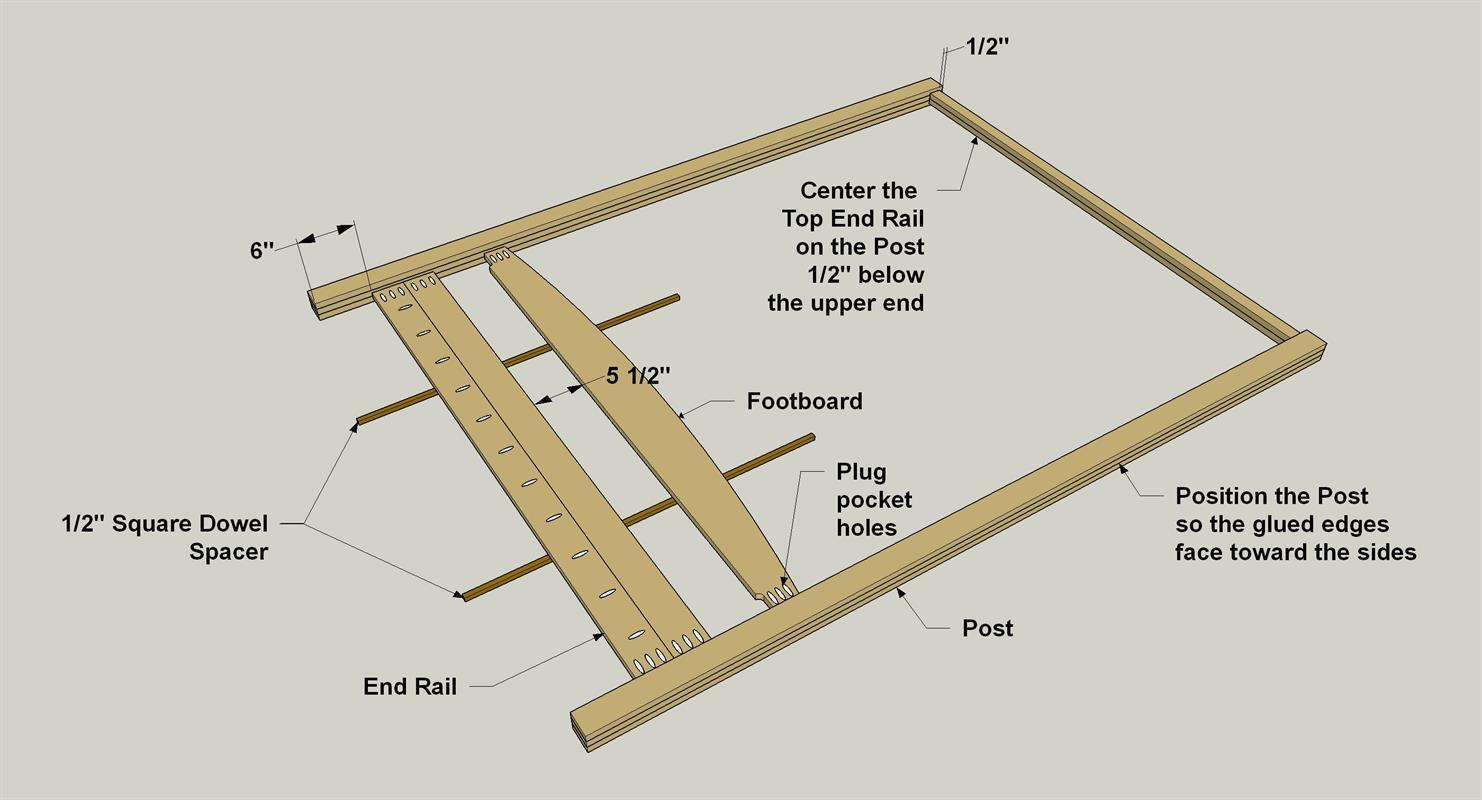
Lay two 1/2" square dowels on a flat floor or large work surface, as shown. Place the headboard assembly and one End Rail on the dowels with the pocket holes facing up. Next, lay two of the Posts on each end of the Rail and Headboard. Position headboard assembly and Rail as shown, and secure them to the Posts with 1 1/4" fine-thread pocket hole screws. Now set the End Top Rail in position, and secure it using 2 1/2" coarse-thread pocket hole screws.
Drive Long Screws in Stages
When screwing longer coarse-thread pocket hole screws into hardwoods, rather than drive them straight in, it's good to drive them in slightly then back them out a bit and repeat. This allows for the self-taping tip of the screw to cut and drive efficiently without splitting the wood.
-
Attach Brackets to the Side Rails
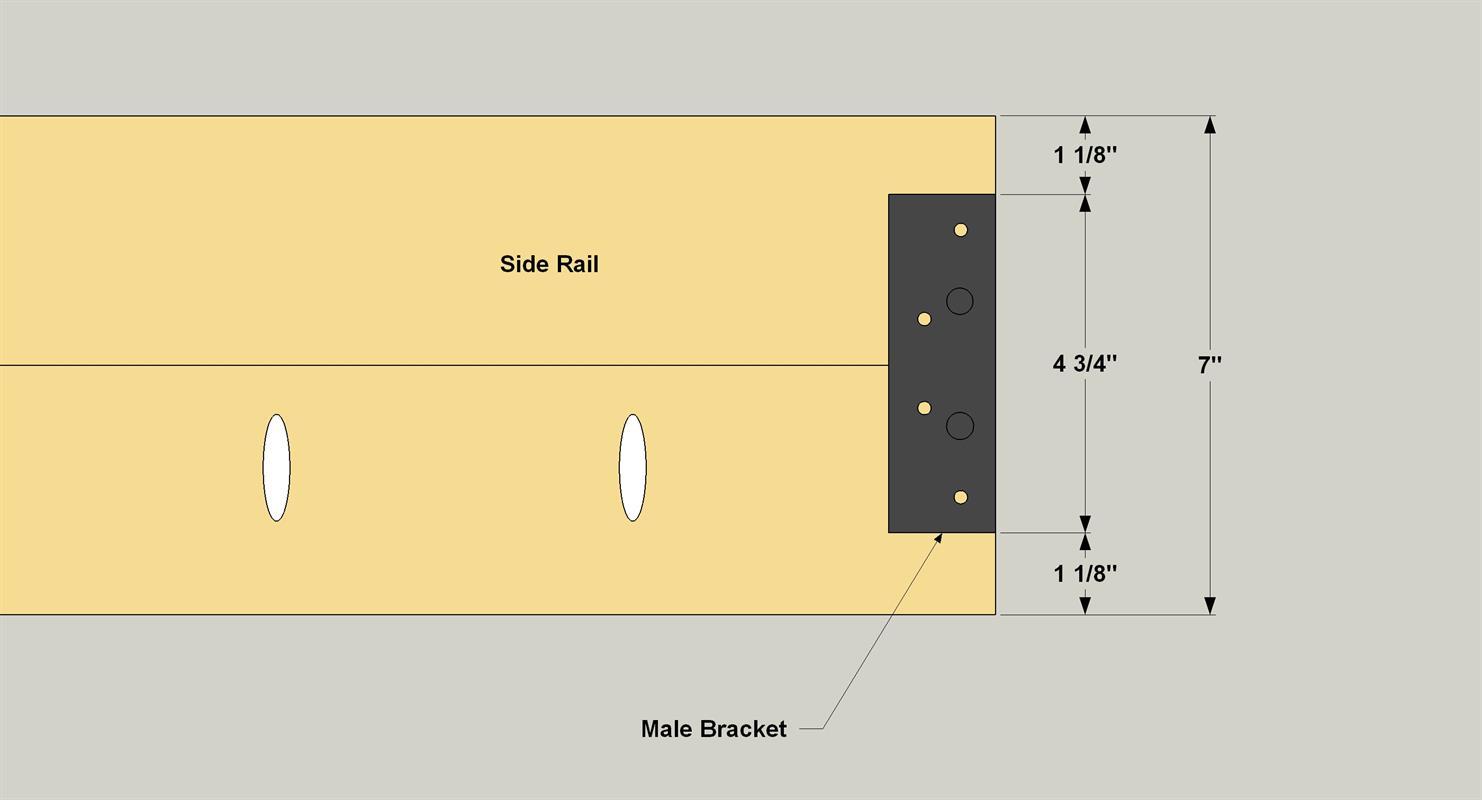
Place the four male bed brackets at each end of both Side Rails at the locations shown. With a #8 self-centering bit, drill pilot holes, and then secure the bracket to the Side Rails with #8 x 3/4" flat-head wood screws.
-
Finish Mounting the Rails
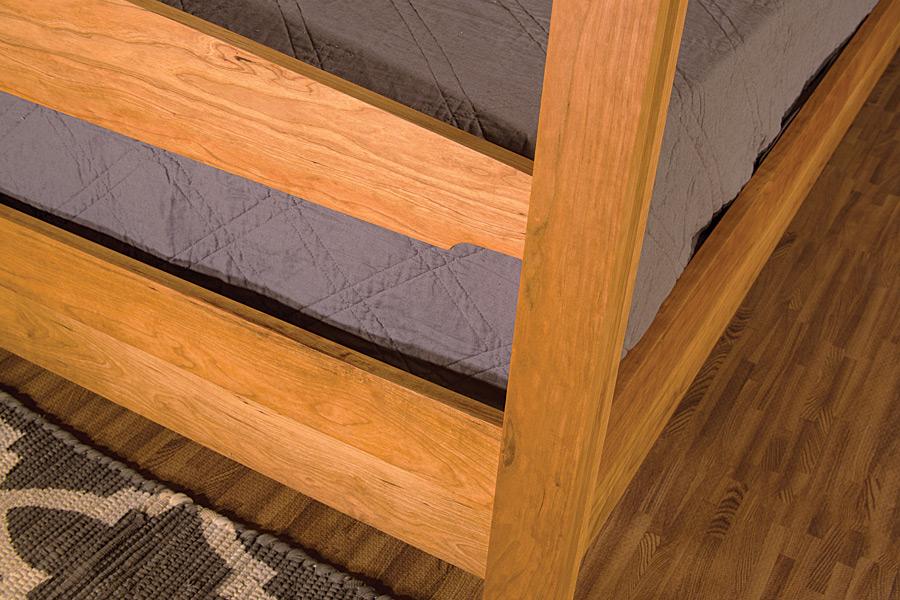
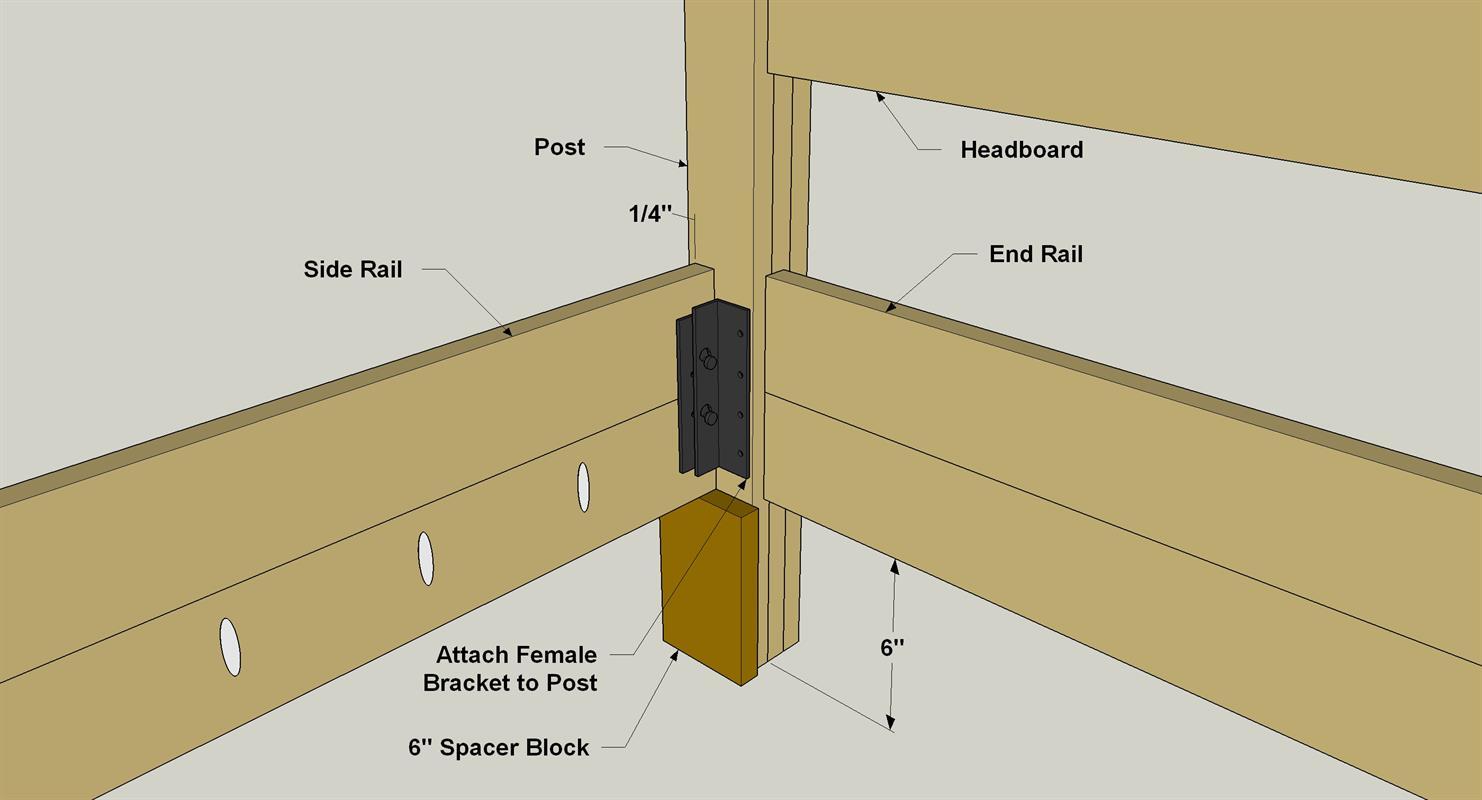
Stand the Footboard and Headboard upright and, with a helper, hold them in place. Make sure the pocket holes in the headboard are facing toward the outside. On the footboard end, make sure the plugged pocket holes are facing inward. Cut two scraps of wood 6" long position them under one of the side rails, as shown. Set one Side Rail on top of the scrap boards and push the Headboard and Footboard tight to the end of the rails. Place the female brackets over the male brackets and position the Side Rail so it is inset 1/4" from the outside edge of the post. Drill pilot holes with the self-centering bit, and then secure the female bracket to the Post using 1 1/2" flat-head wood screws. Complete the same procedure for the other Side Rail.
-
Install the Top Side Rails
Position the Top Side Rails to align with the End Side Rails, and then secure the rails using 2 1/2" coarse-thread pocket hole screws.
-
Make and Attach Slat Supports
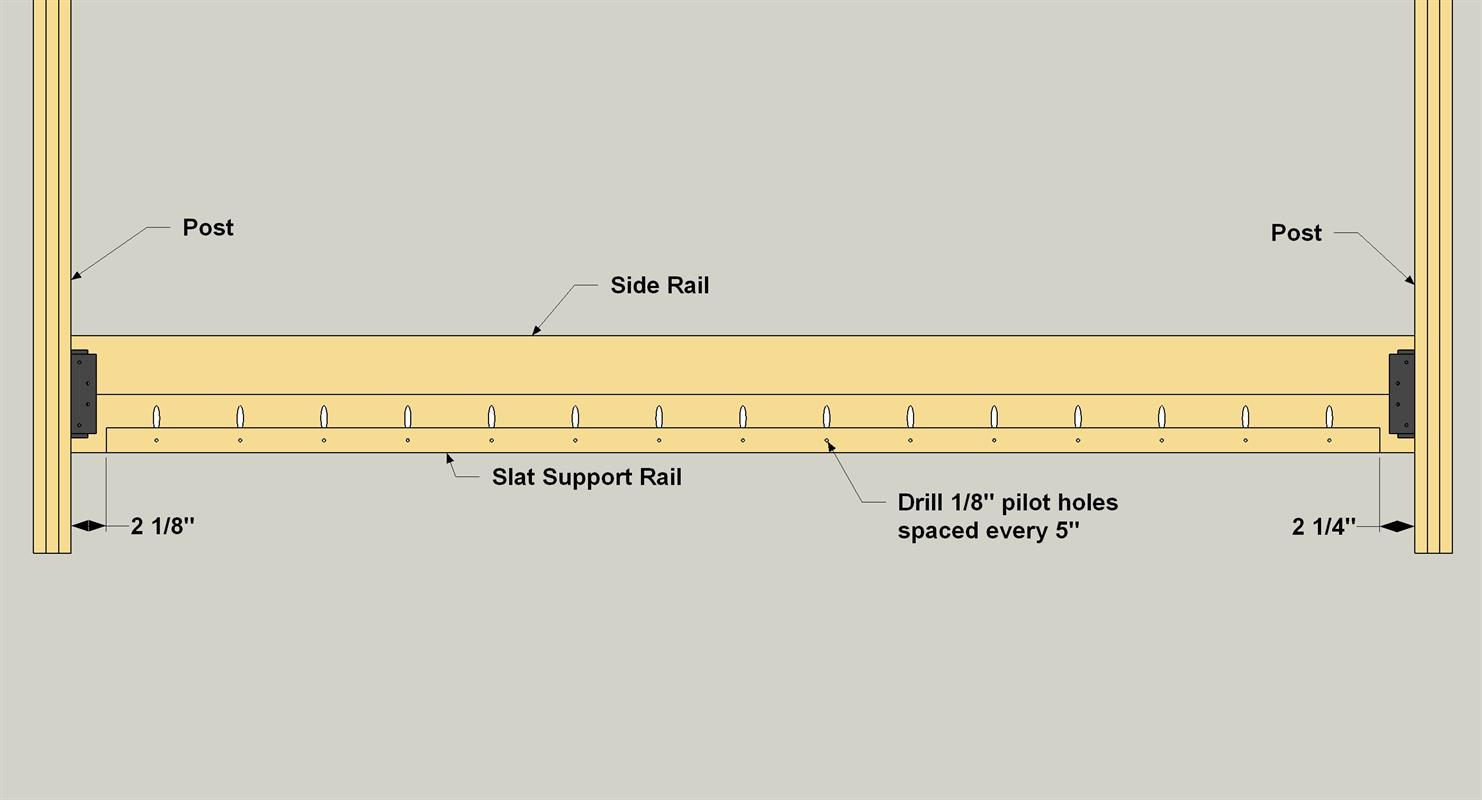
Cut two Slat Supports to length from 2x2 pine boards, as shown in the cutting diagram Drill pilot holes at the locations shown. Glue and clamp each Slat Support so they are centered on the length of the Side Rail and flush at the bottom. Secure them with 2" flat-head wood screws.
-
Make and Attach the Slats
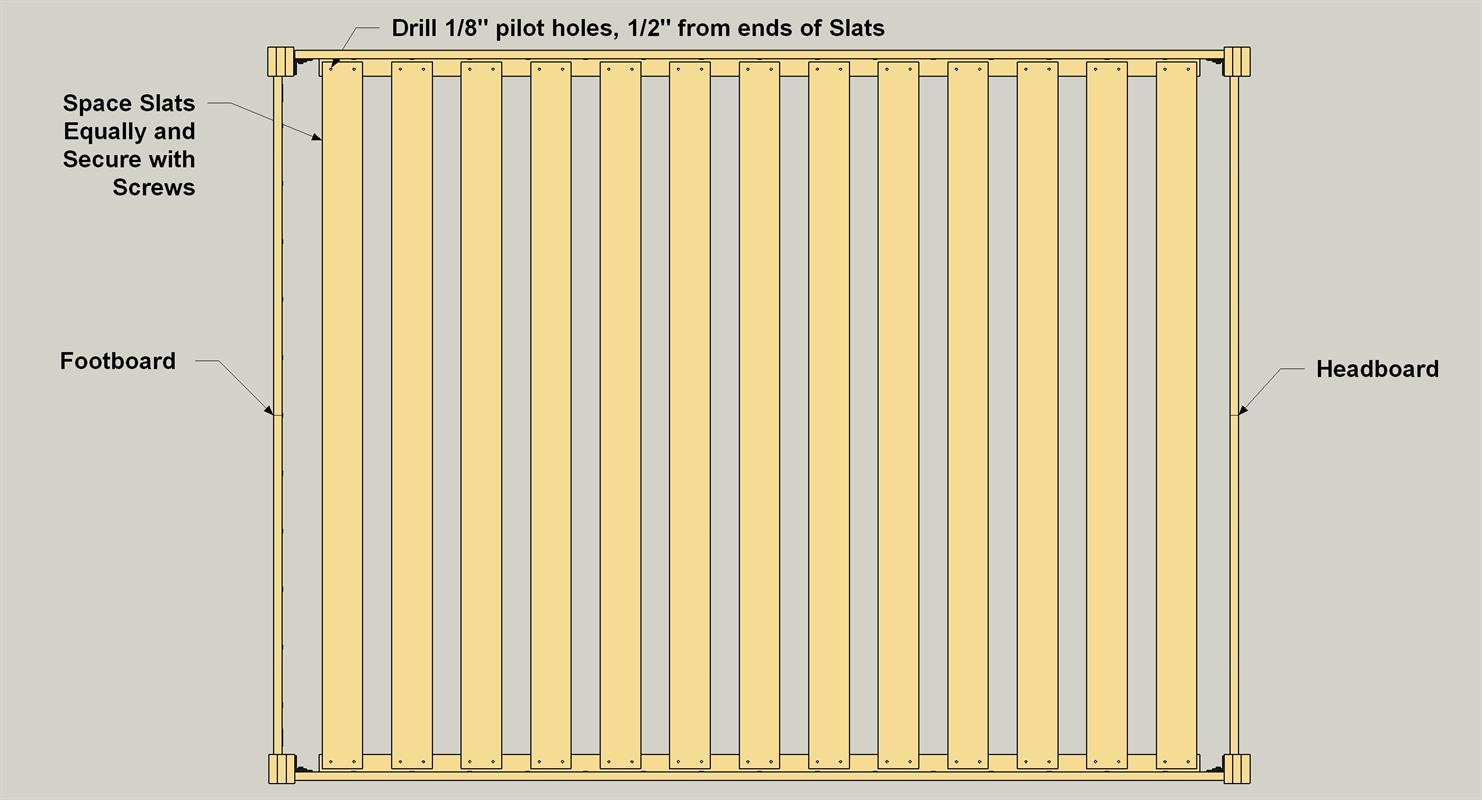
Cut 13 Slats to length from 1x4 pine as shown in the cutting diagram. Drill two pilot holes in each end of each Slat, and then lay them out evenly on the Slat Supports as shown. Exact spacing isn’t critical. Secure the Slats using 1 1/2" flat-head wood screws.
-
Sand and Finish
Sand all of the parts as needed to make sure they’re smooth and to ease the sharp edges. Then apply your favorite finish. We used an oil-based wiping varnish, and applied three coats.
-
Attach the Footboard to Posts
Now you can follow the same procedures to attach the Footboard and the second End Rail to the other two posts. On this end, the plugs in the Footboard will be visible above the mattress when the bed is complete, so you’ll also want to plug the six pocket holes in the Footboard. Glue six plugs in these pocket holes, allow the glue to dry, and then sand them flush.


