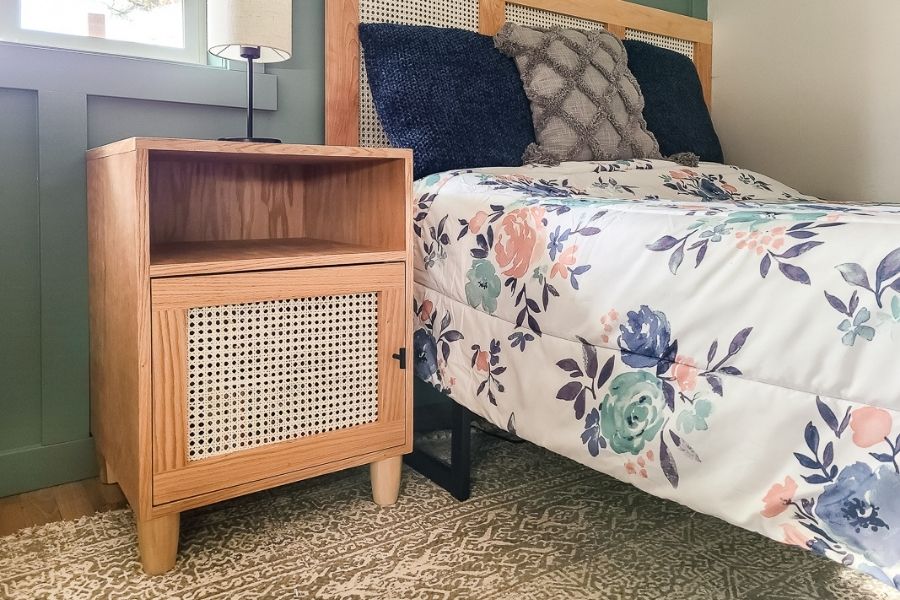
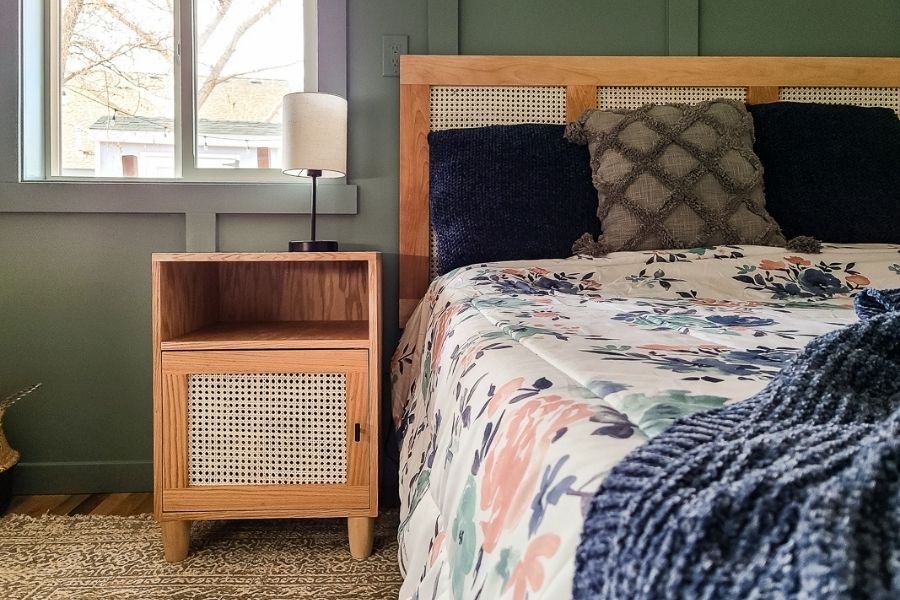
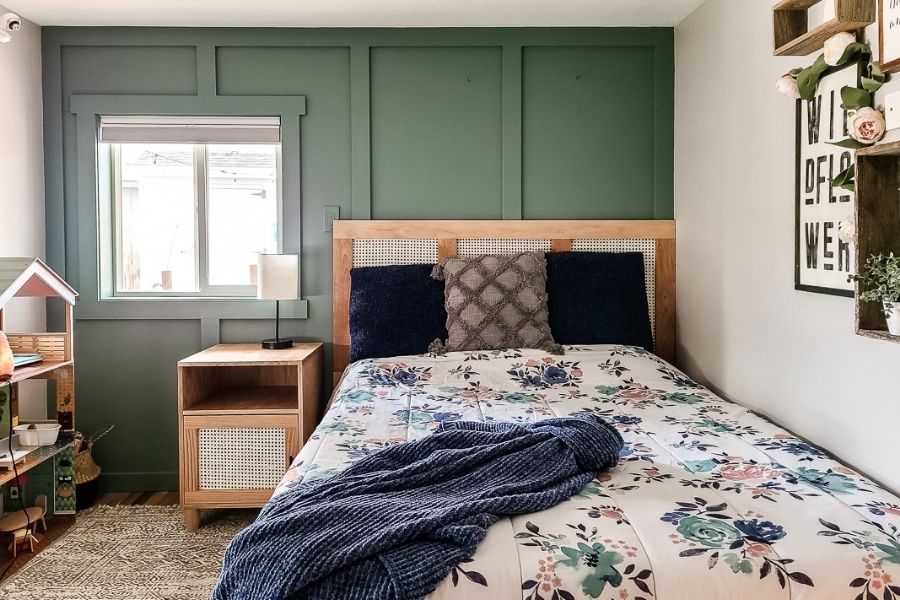
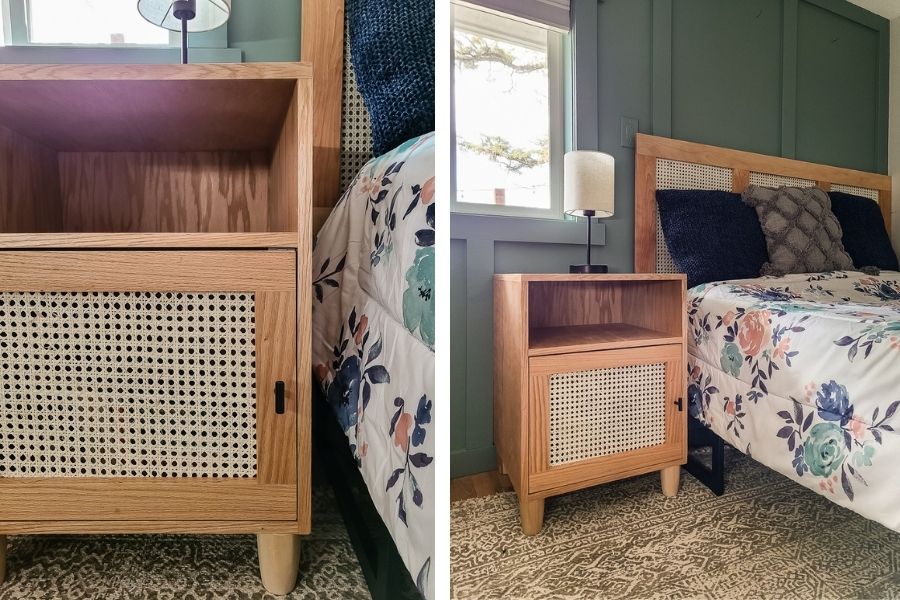


Need a trendy bedside table for your bedroom? Build this cane nightstand using plywood and oak with pocket hole joinery. It goes perfectly with the modern boho style.
Tools
Kreg Tools


Other Tools
-
Miter Saw

-
Table Saw
-
Tape Measure
-
Rubber Mallet
-
Utility Knife
-
Sanding Block
-
Finish Nailer
-
Hammer
-
Iron
-
Pneumatic Staple Gun
Materials
Wood Products
- 1 Sanded oak plywood , ¾” x 4’ x 8’
- 1 Red oak board , ¾” x 2 ½” , Approximately 4 linear feet
Hardware & Supplies
- 1 Box of 1 1/4" Kreg pocket-hole screws (see tool list)
- 1 80 & 150 grit sandpaper
- 1 Edge banding for plywood
- 1 Spray lacquer
- 1 Cane webbing
- 1 Wood glue
- 1 Box of 1 ½” finish nails
- 1 Set of inset hinges
- 1 Magnetic catch/strike
- 1 Cabinet door hardware
- 1 Wood filler
- 1 Box of ¾” staples
Directions
-
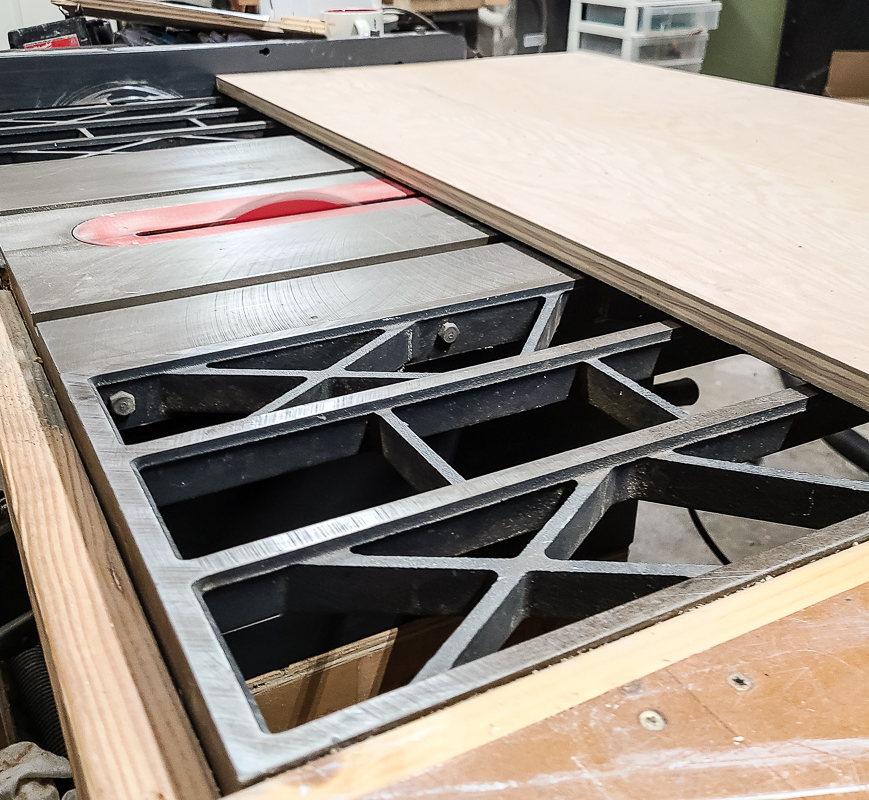
Cut wood.
Cut wood according to the visual cut list in the woodworking plans. Use a miter saw to cut the lengths of the oak and a table saw to cut the plywood down to size. Cut dado for shelf with a table saw according to the woodworking plans. Lightly sand all pieces of wood before assembling with an orbital sander and 80 grit sandpaper.
-
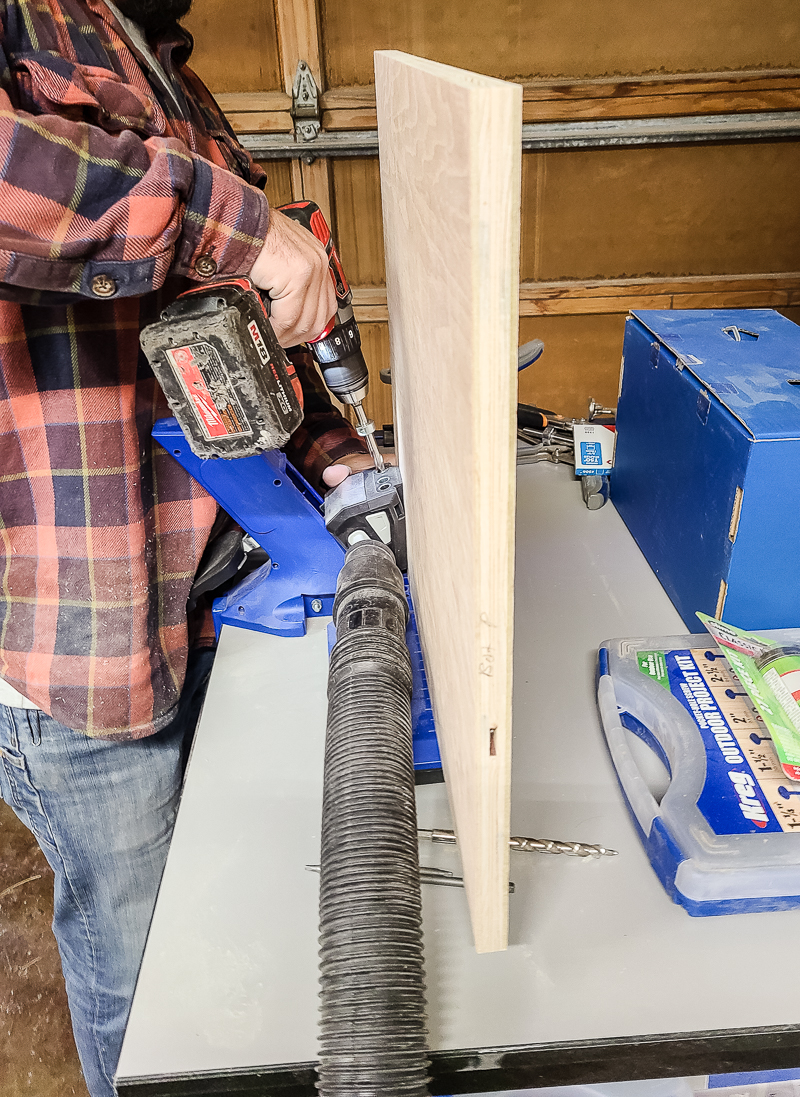
Drill pocket holes.
Drill pocket holes as shown in the woodworking plans. We used the Kreg 720 Pro.
-
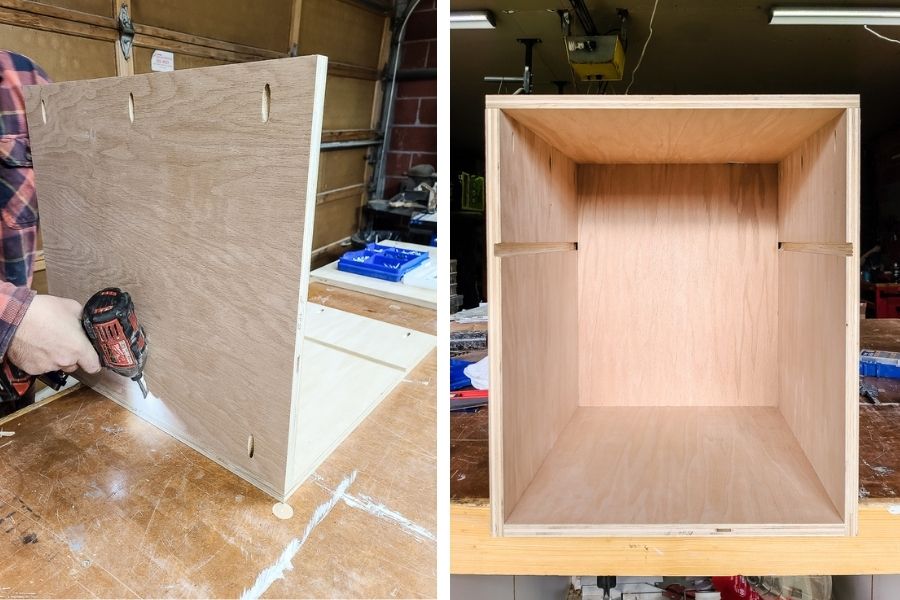
Assemble.
Assemble the outside perimeter of the cabinet (including the back panel) with the pocket holes and 1 ¼” inch pocket hole screws.
-
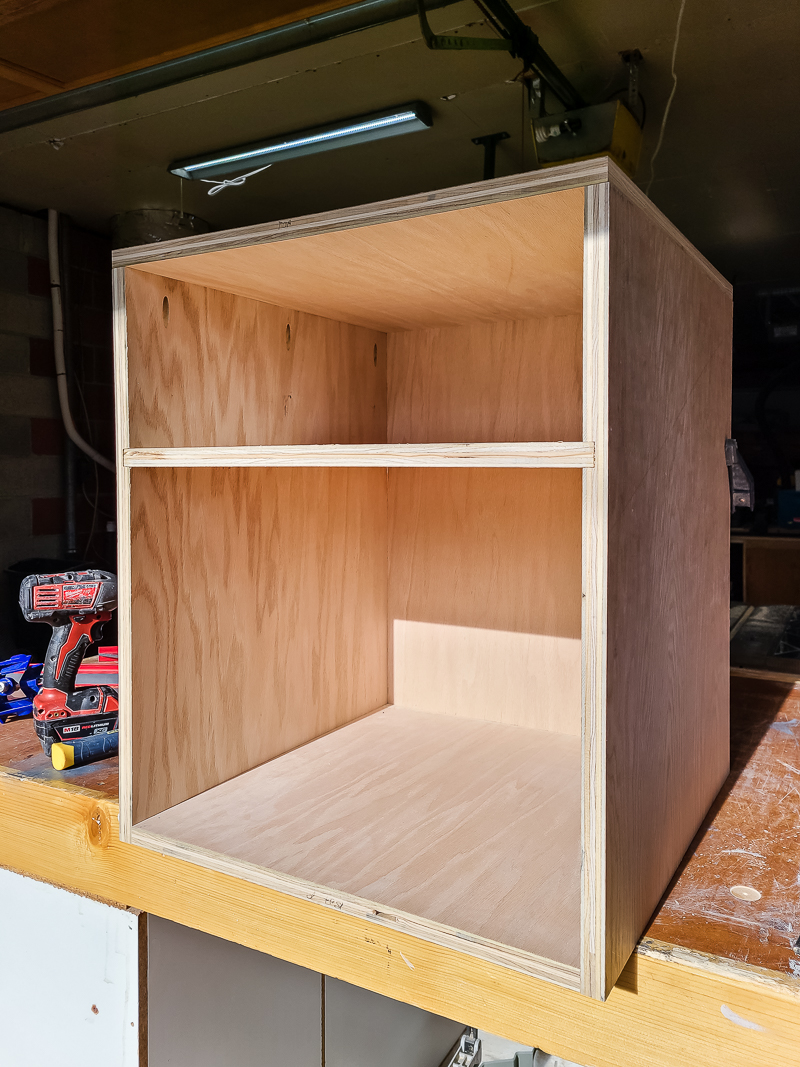
Add shelf.
Add wood glue on the inside of the dado and push the shelf into place. Use a rubber mallet if needed.
-
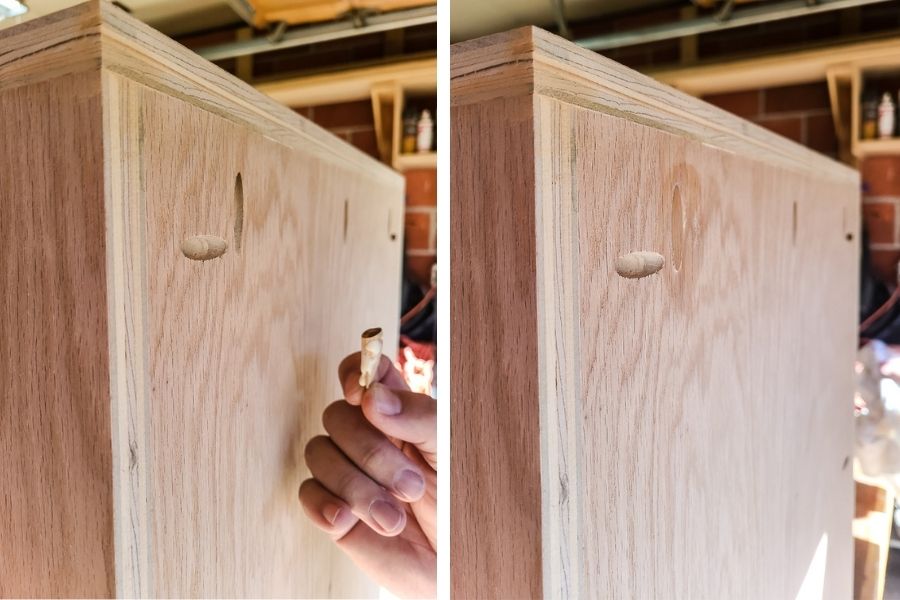
Fill pocket holes.
Use the custom pocket hole plug cutter to drill out plugs and add to pocket holes with wood glue.
-
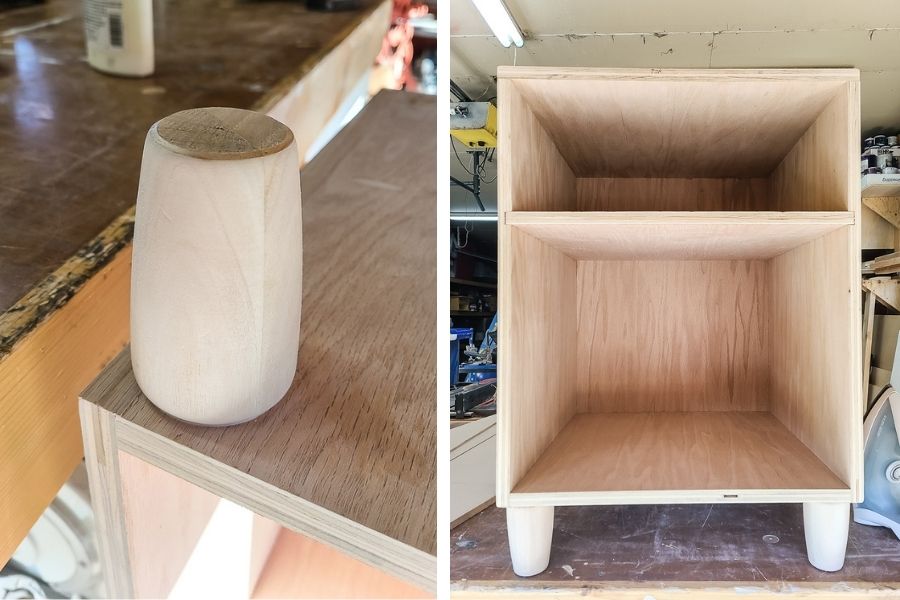
Add legs.
Predrill holes on the bottom for furniture legs. Apply wood glue and screw legs into place.
-
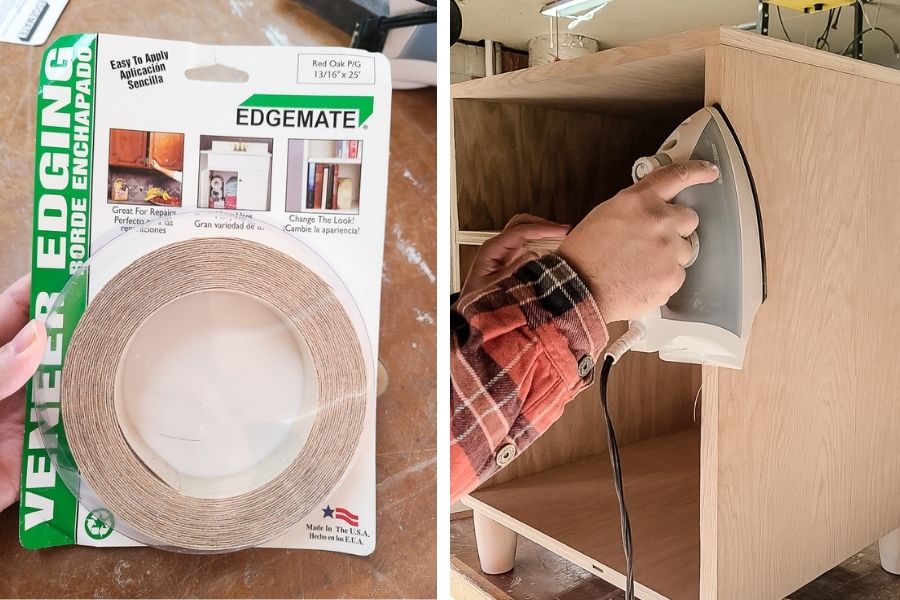
Apply edge banding.
Add edge banding to all exposed plywood edges. Follow the instructions on your edge banding for application and trim with a utility knife.
-
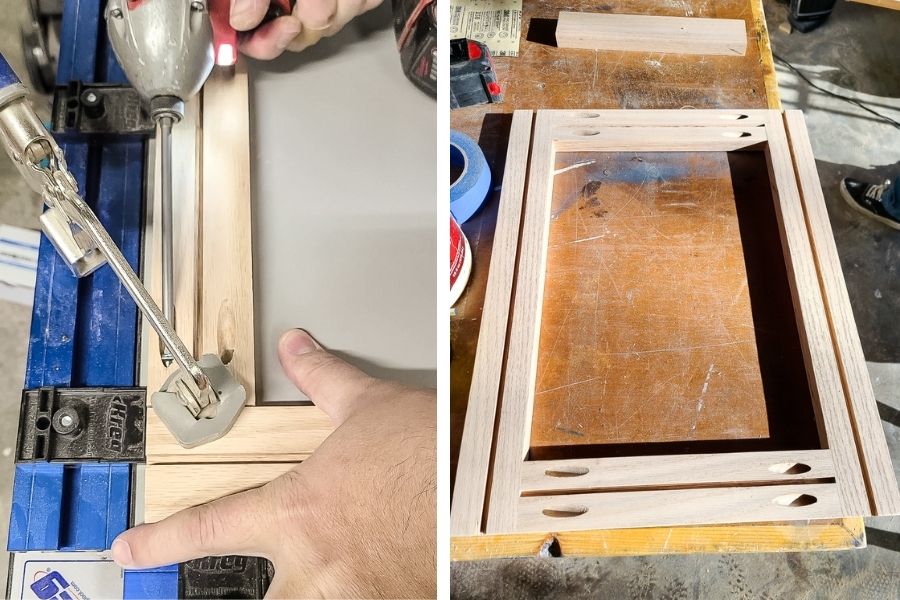
Build door.
Assemble door with pocket hole joinery. We clamped the pieces with the Kreg clamp table to make sure everything was square before screwing together. *Disregard the channel shown on the back of the door. We tried another method of attaching the cane with spline reed but ultimately decided to staple it, so the channel wasn’t needed.*
-
Sand.
Sand everything smooth with 150 grit sandpaper and an orbital sander. Wipe everything well after sanding to remove sanding dust.
-
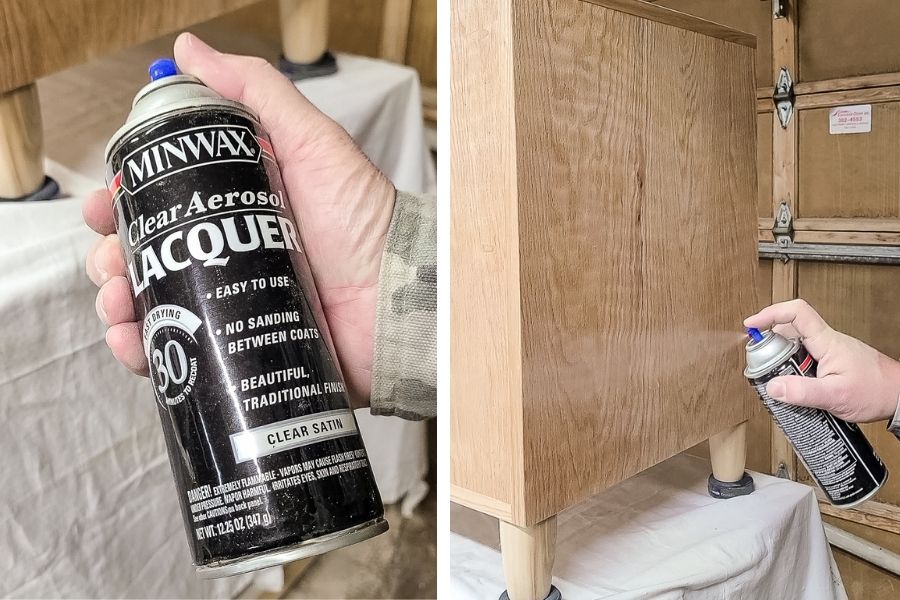
Seal or paint.
Seal with stain/oil or paint of your choice. We used spray lacquer for a natural finish.
-
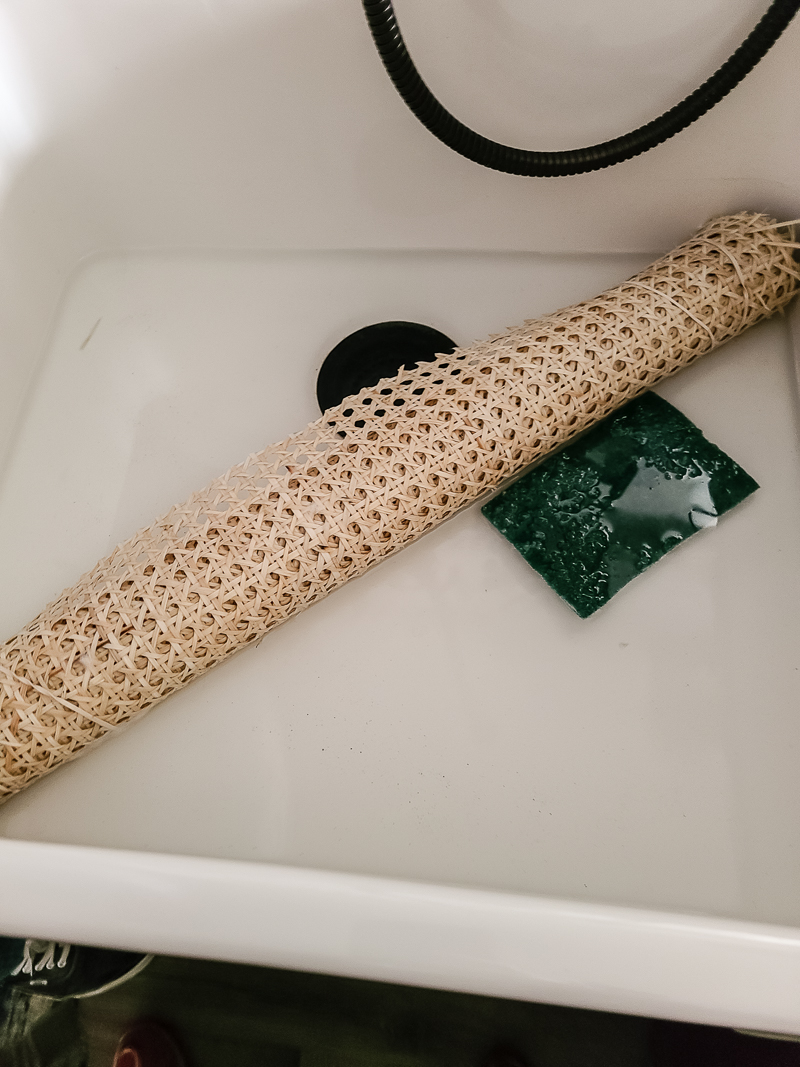
Soak cane webbing.
Soak cane webbing in water for 30 minutes to 4 hours. This allows the webbing to expand with the water. You want to attach it to the cabinet door while damp so that when it dries, it will contract and the webbing will be nice and taut.
-
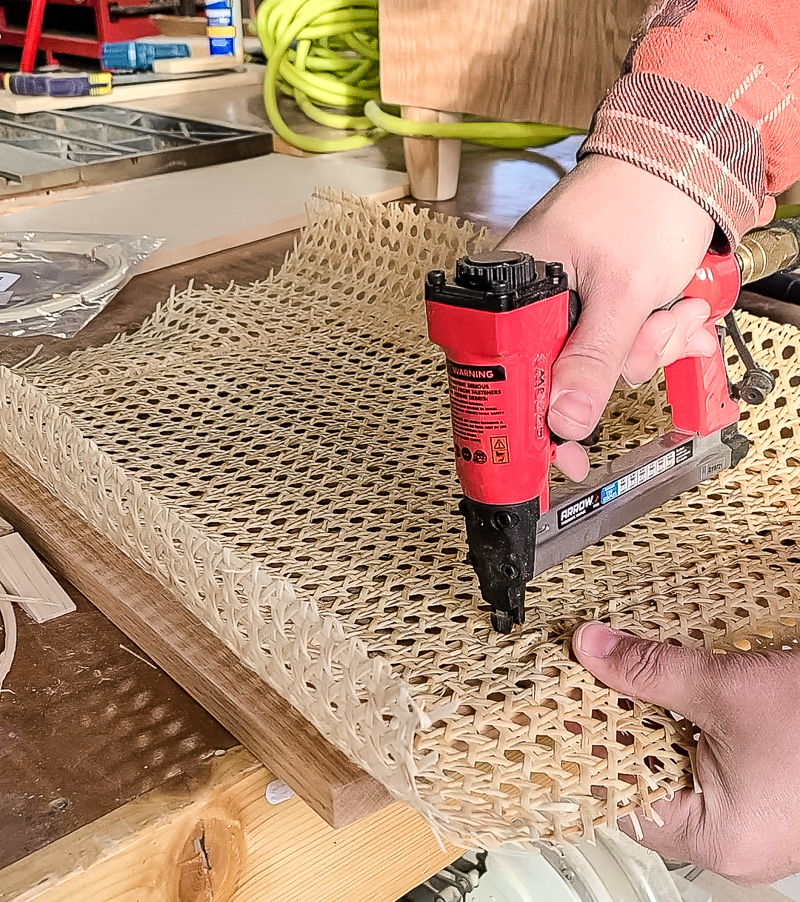
Attach cane webbing to the cabinet door.
Unroll wet cane webbing and pat with a towel so that it is not dripping wet. Cut to size so that it overhangs a few inches around each side of the frame. Have one person hold webbing straight while the other staples with a staple gun. Continue on the other sides of the frame in the same manner, while pulling taut to staple into place.
-
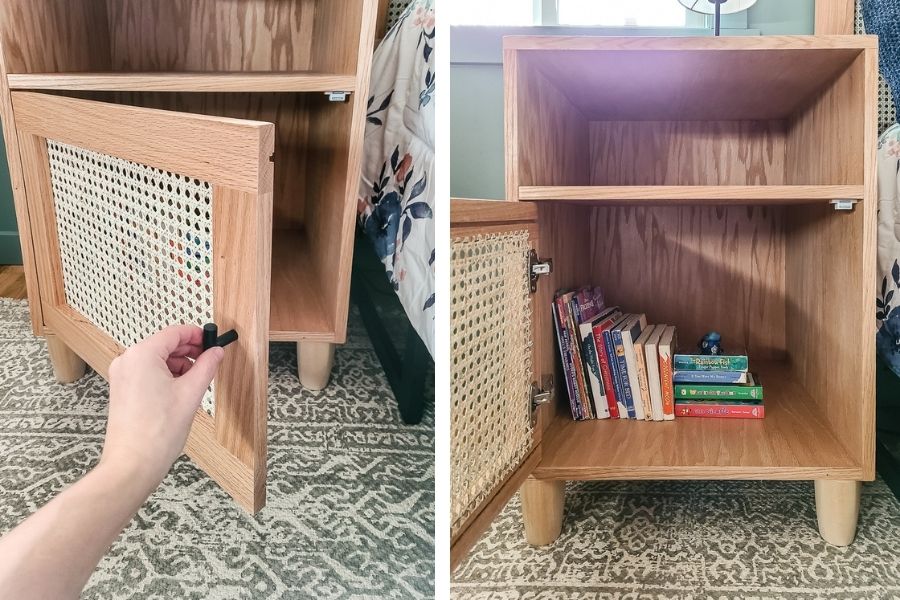
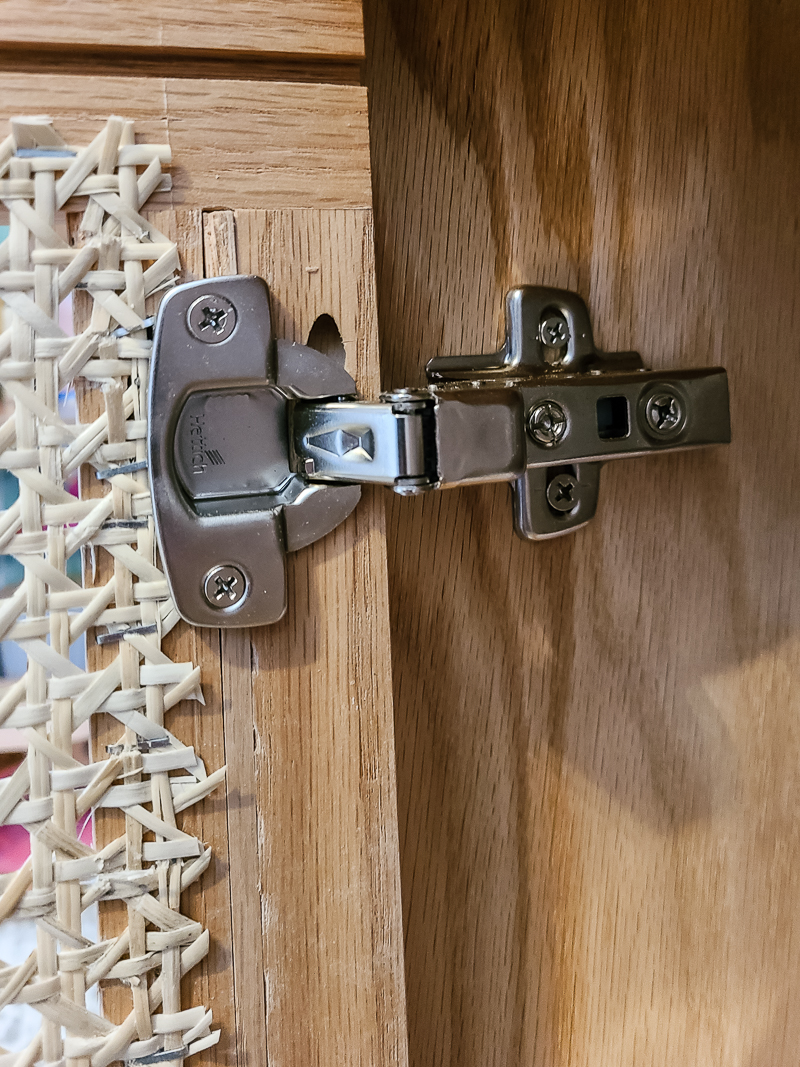
Attach hinges and hang cabinet door.
Using the template & instructions that come with the inset hinges, line up the door and mark accordingly. Drill holes for the hinges using a Forstner bit and screw into place on the cabinet. Next, attach the cabinet door to the hinges. Lastly, attach the magnetic catch to the top corner inside of the door and attach the strike to the door so they line up.
-
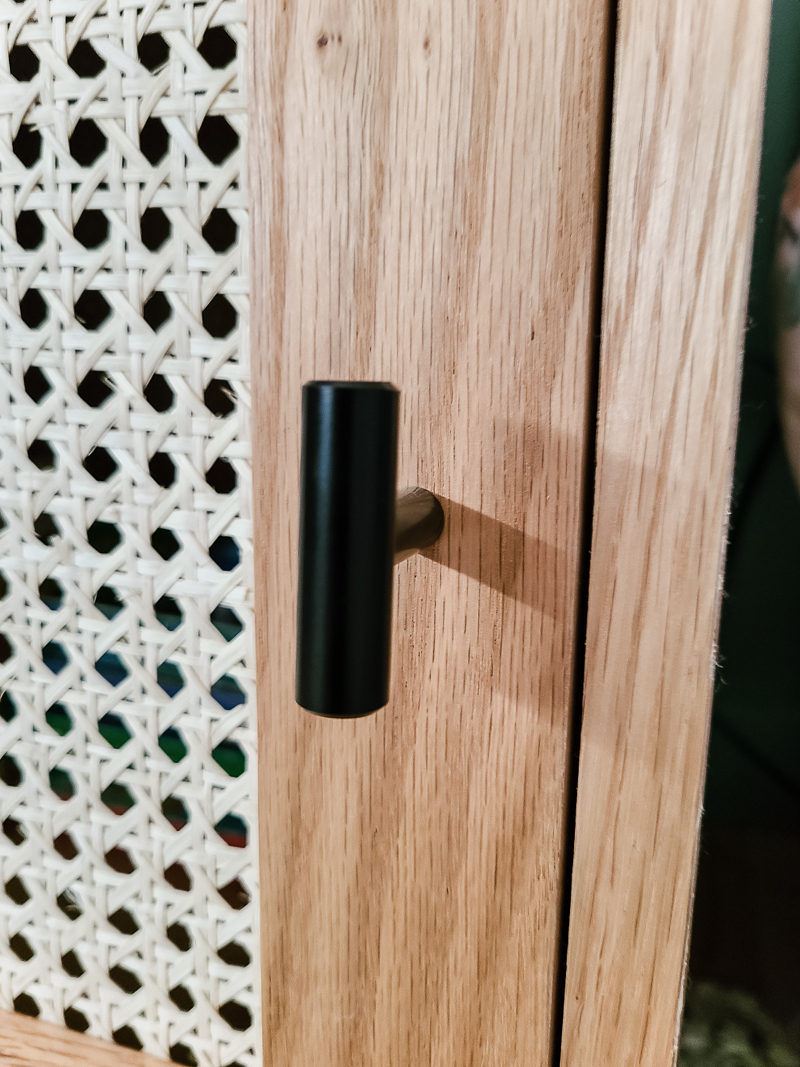
Attach door hardware.
Drill hole in the cabinet door and screw hardware into place.