

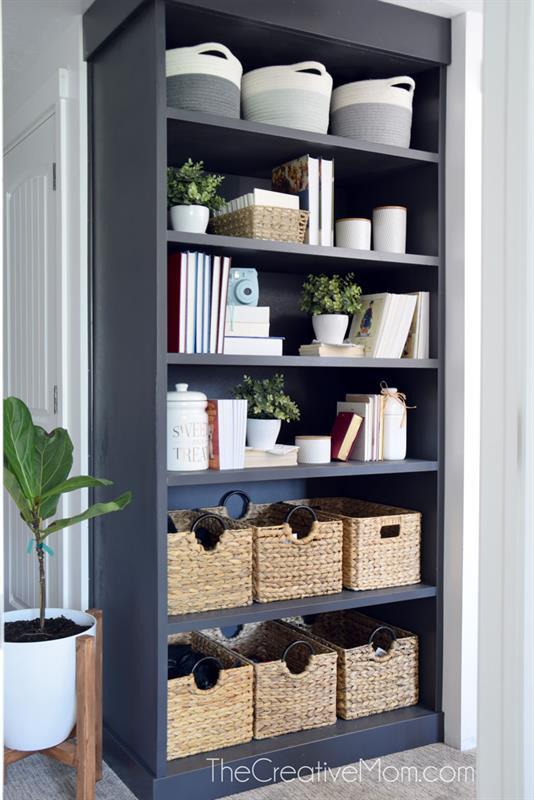


This is a basic bookcase, designed to fit in a 8 foot tall room. It is trimmed out to look like it's built in to your home. This can be freestanding or built in. This build uses basic tools and supplies easily found at your hardware store. You can adjust the measurements to fit your space.
Tools
Kreg Tools


Other Tools
-
Miter Saw

-
Tape Measure
-
Nail Gun
Materials
Wood Products
- 3 Plywood , 3/4" Thick , Full Sheet
- 1 Board , 1x4 , 96"
- 1 Board , 1x6 , 96"
- 5 Board , 1x2 , 96"
- 1 Plywood , 1/4" Thick , Full Sheet
Hardware & Supplies
- 100 1 1/4" pocket hole screws
- 100 1 1/4" brad nails
- 1 Wood Glue
- 1 Putty and Caulk for finishing
Directions
-
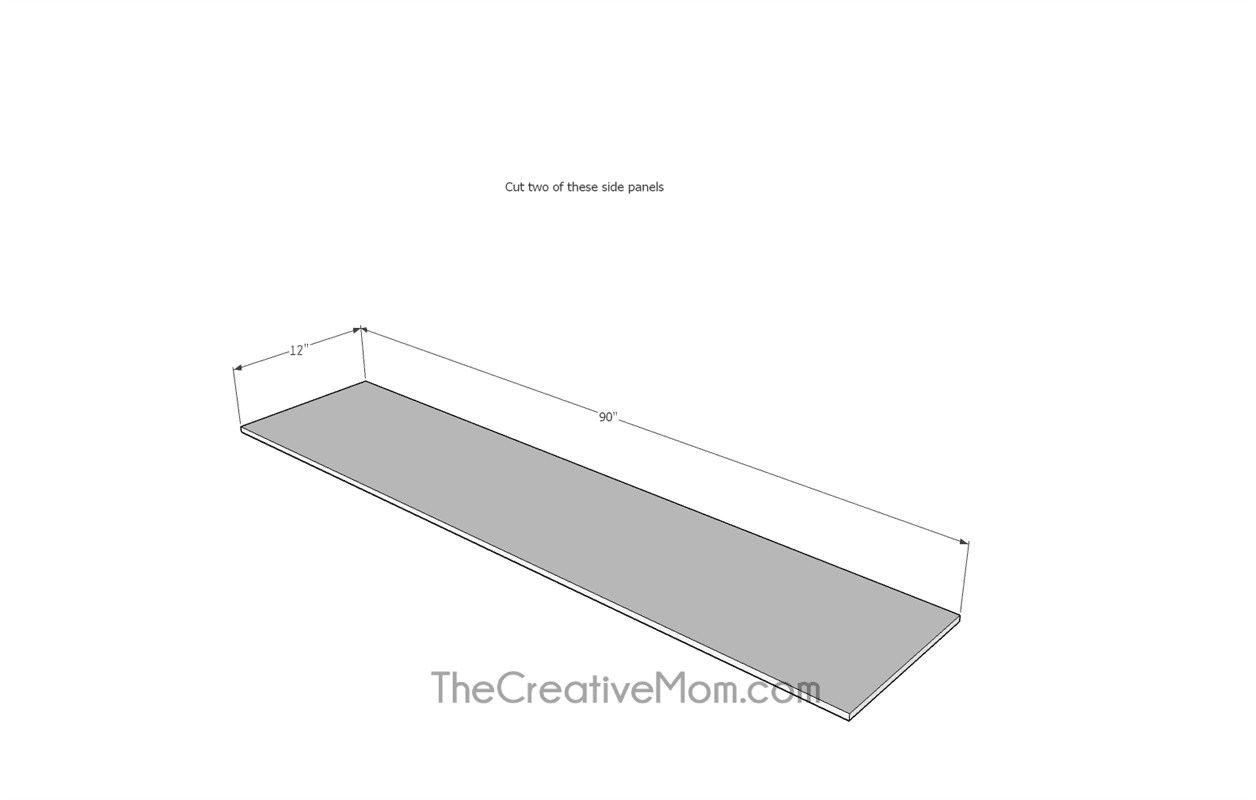
Cut Side Panels
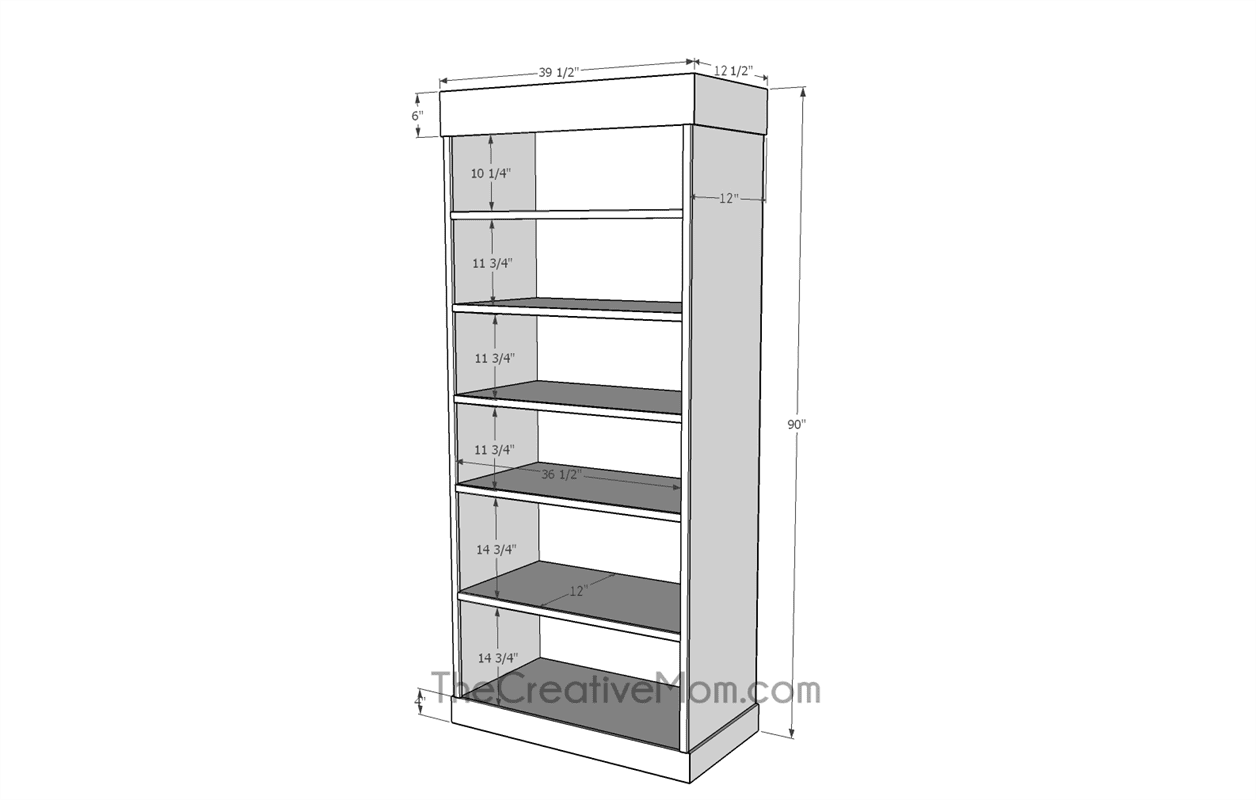
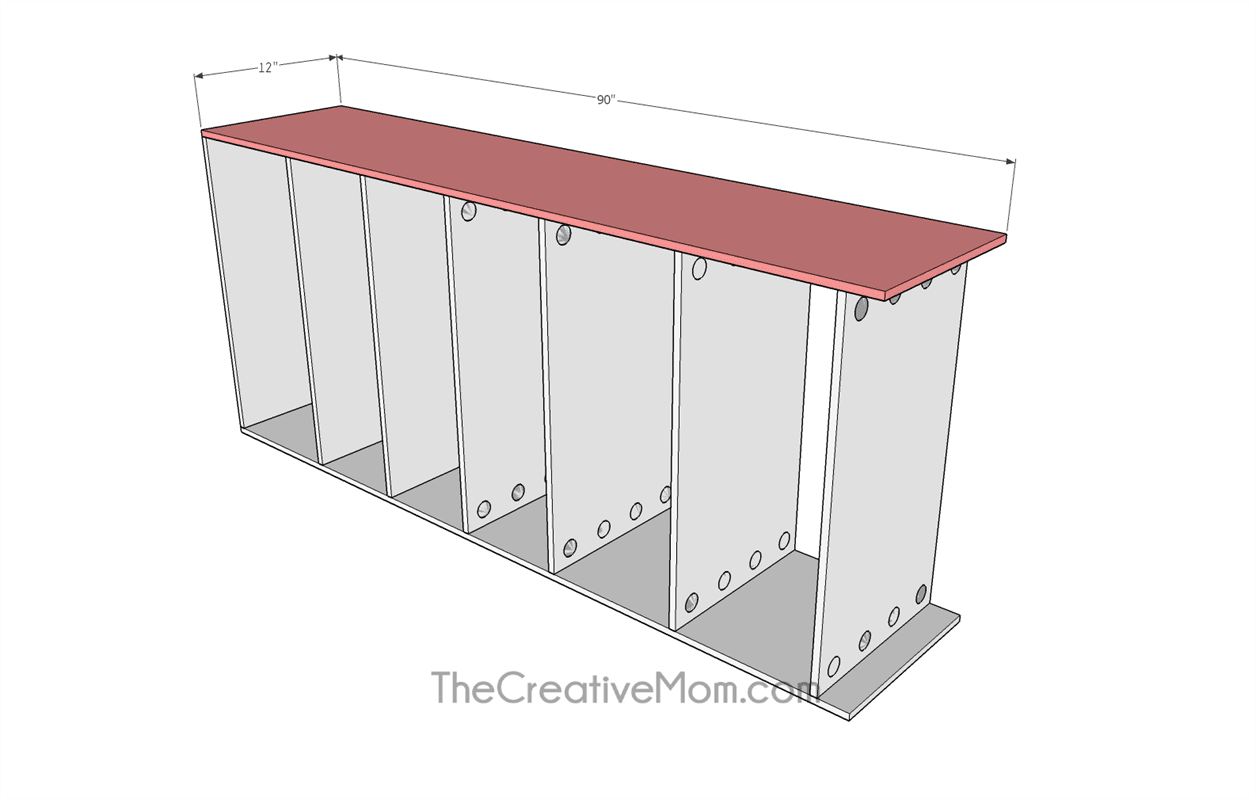
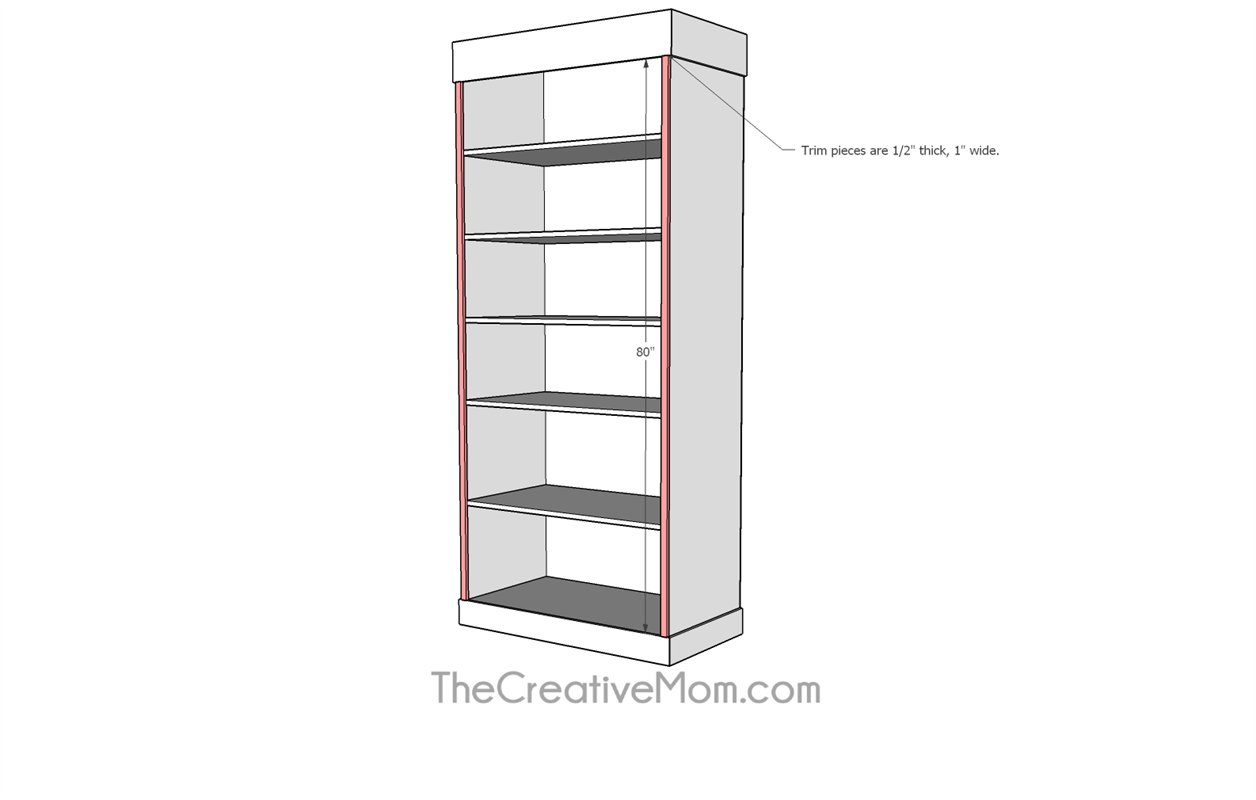
Cut TWO side panels out of 3/4" birch plywood. Each panel will be 12" x 90".
-
Attach Top & Bottom Shelf
Using 1 1/4" pocket hole screws and wood glue, attach the top and bottom shelves to one of your side panels. The bottom shelf should match the height of your trim pieces, so if you are using 4" trim, as shown in the plans, set the top of your bottom shelf at 4 inches.
The top shelf should be even with the top of your side panels.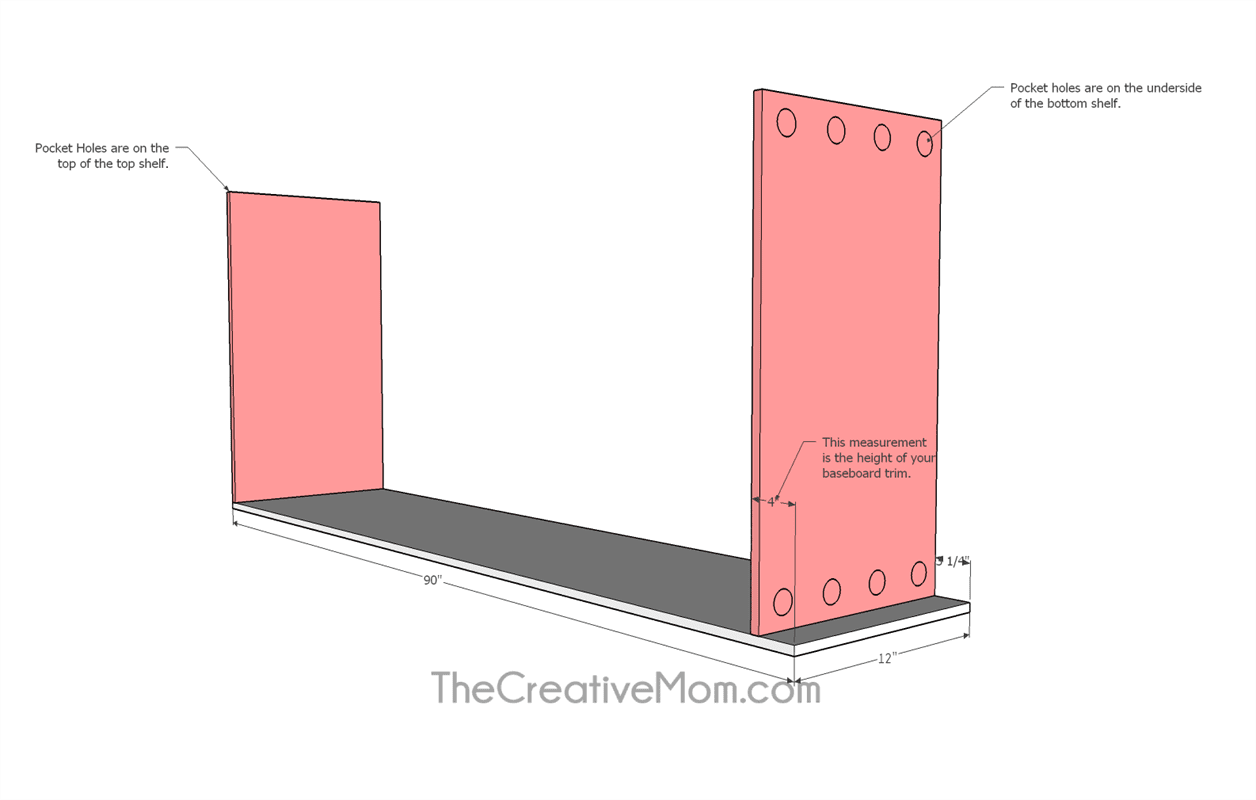
-
Cut Shelves
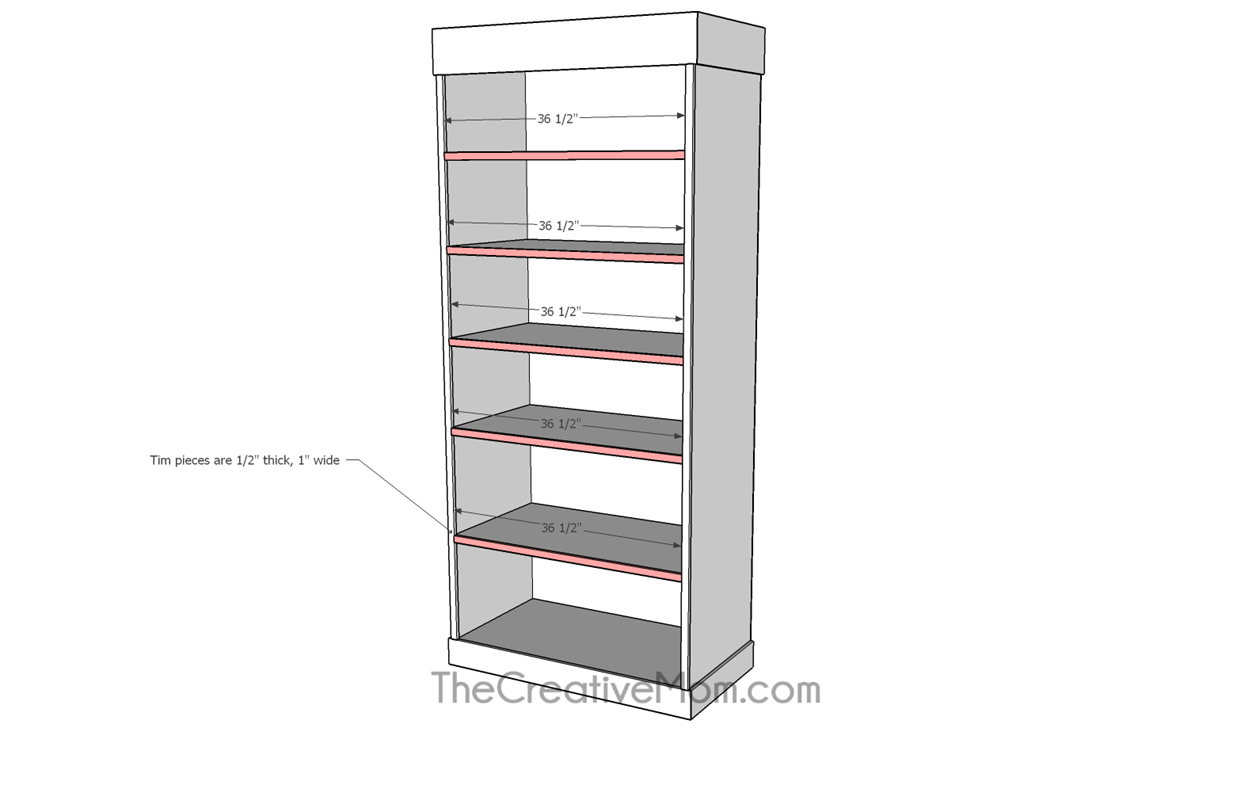
Cut SEVEN shelves out of 3/4" birch plywood. Each shelf will be 12" x 37".
Drill pocket holes in the ends (the short sides) of all seven shelves. If you want your shelves to be adjustable, only drill pocket holes in two of your shelves- the top and bottom shelves- the rest of the shelves will be held in with shelf pins.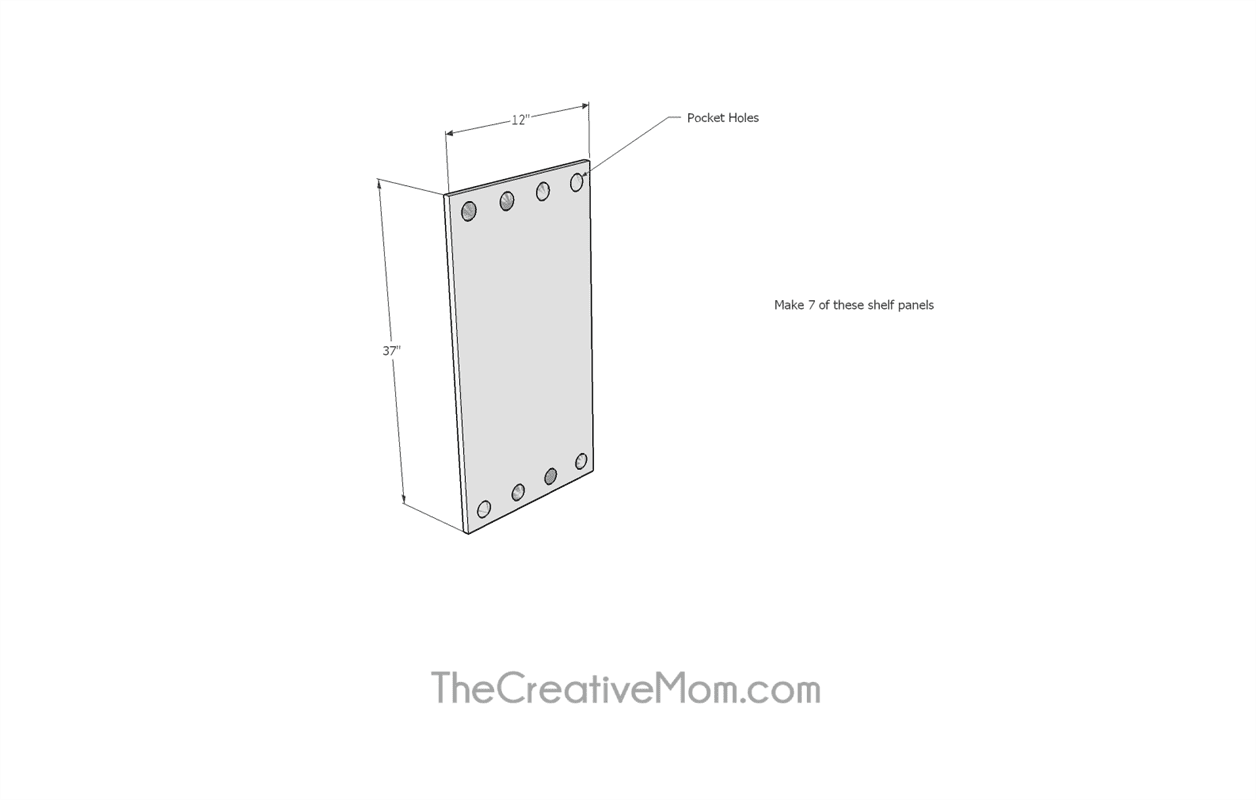
-
Attach Shelves
You can install the shelves two ways- to be adjustable or set in place. If you want the shelves to be adjustable, use Kreg's shelf pin jig, and drill shelf pin holes in the sides of your bookcase so you can adjust the shelves up or down.
.
If you want the shelves to be set in place, you will attach the shelves with pocket hole screws, using the following instructions:
.
Using 1 1/4" pocket hole screws and wood glue, attach the shelves to one of the side panels. You can space them however you want. I spaced mine at 15 inches for the bottom two shelves, and then 12 inches apart after that.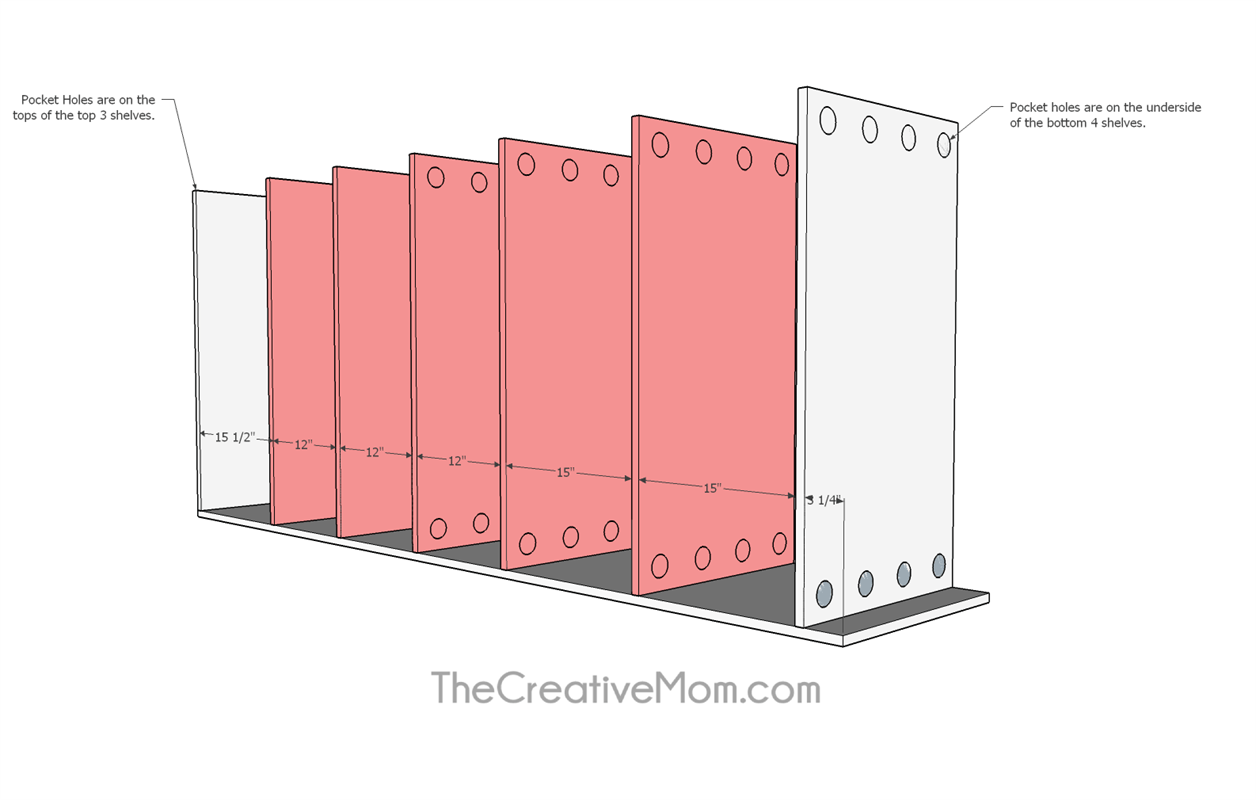
-
Attach Side Panel
Using 1 1/4" pocket hole screws and wood glue, attach the other side panel. Make sure to keep your spacing between the shelves even and level.
-
Add Backing
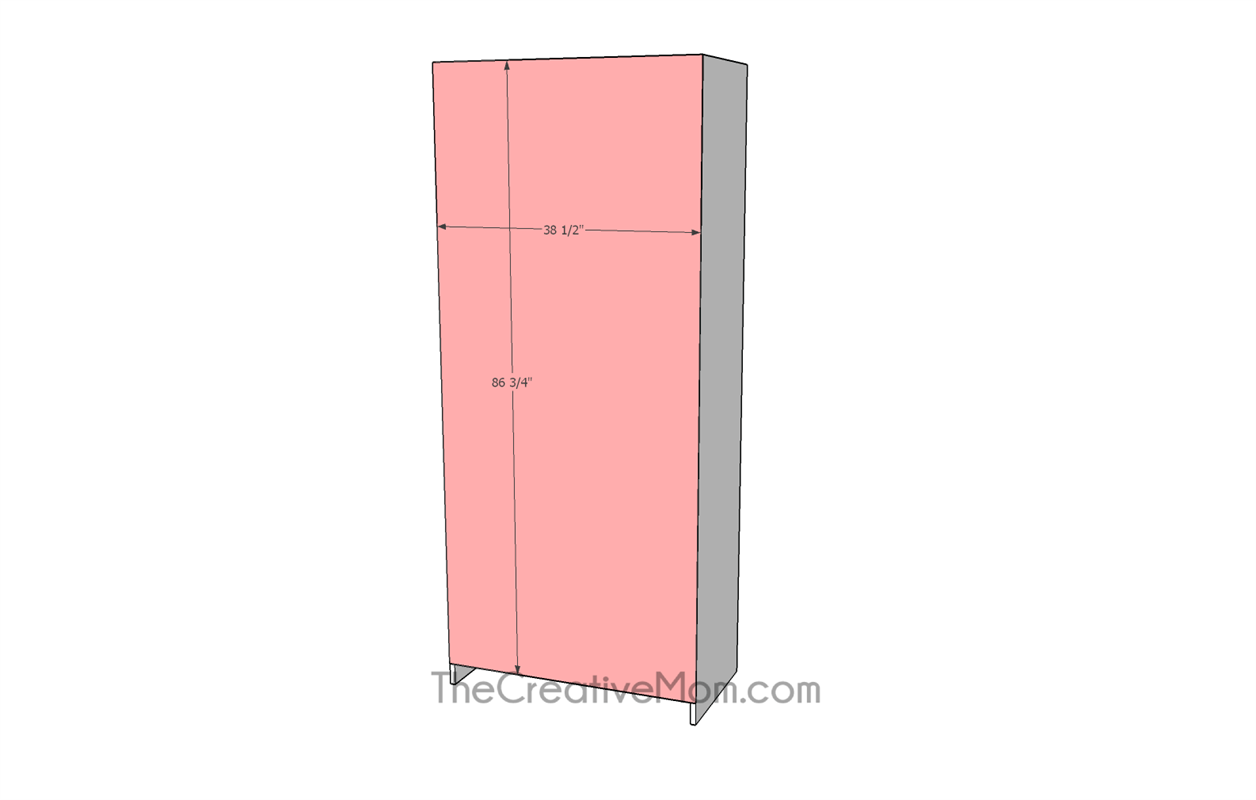
Cut your backing piece- a 1/4" sheet at 38 1/2" x 86 3/4". Using wood glue and brad nails or screws, attach the backing piece to the back of your bookcase.
-
Add Baseboard Trim
PLEASE NOTE: If you want the bookcase to have a "built-in" look, I would wait and put the trim in once it is installed. You may also want to match your bottom trim with the baseboard in your home for a cohesive look.
.
Add 4" wide, 1/2" thick trim to the bottom of your bookshelf with wood glue and brad nails. Make sure to miter the corners where they meet.
-
Add Top Trim
Add 6" wide, 1/2" thick trim to the top of your bookshelf with wood glue and brad nails. Make sure to miter the corners where they meet.
.
PLEASE NOTE: If you are looking for a "built-in" look, you will want the trim to sit flush up against your ceiling.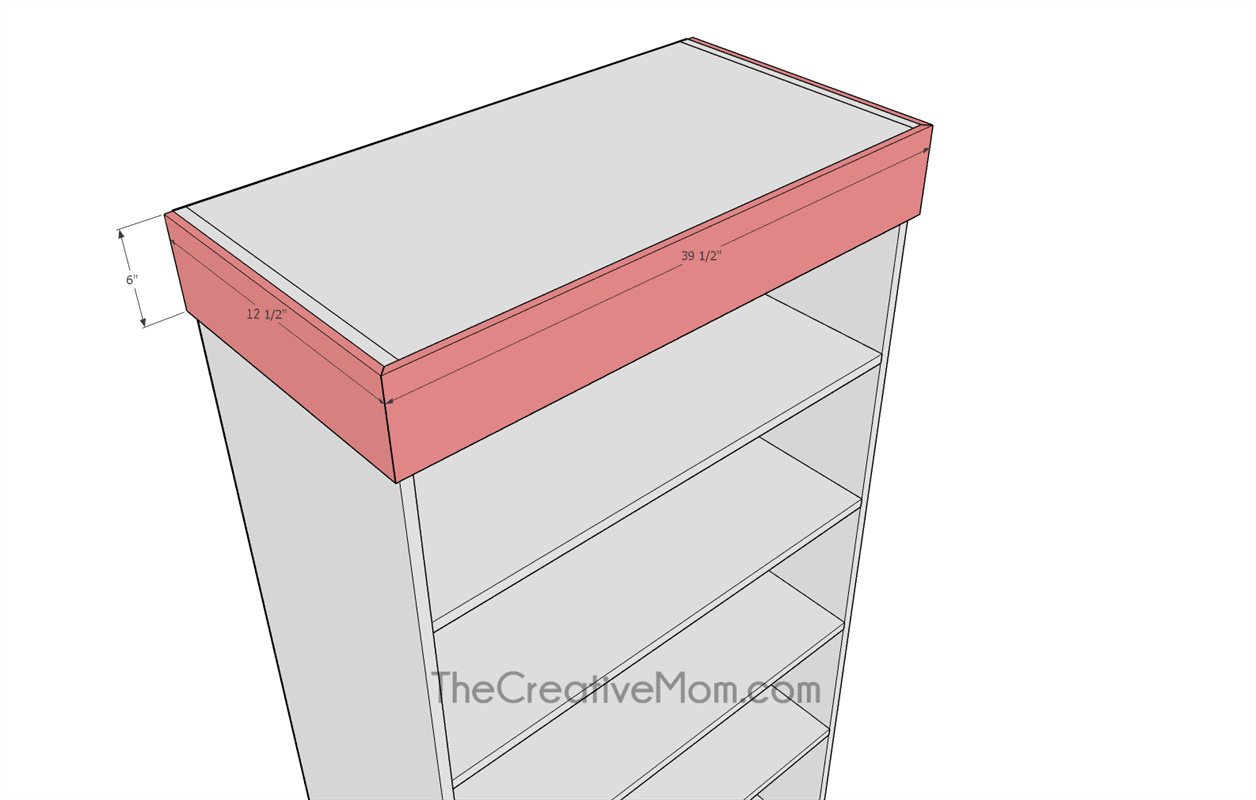
-
Add Trim to Face
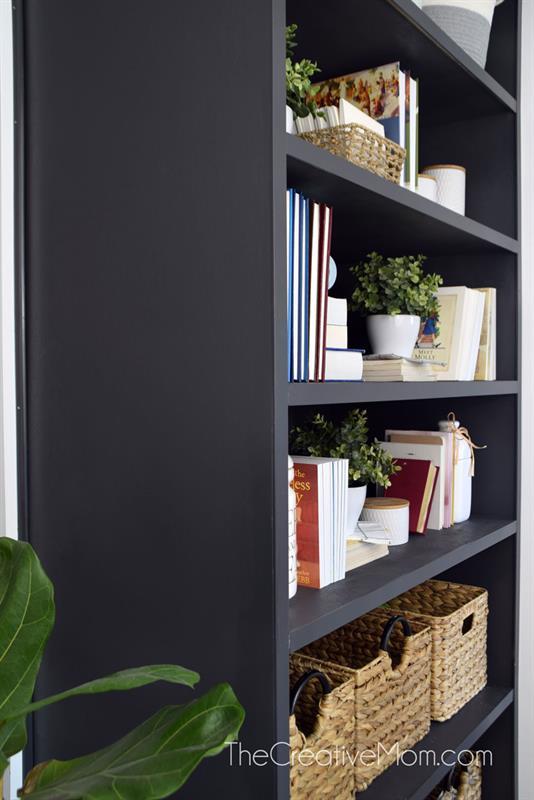
Using wood glue and brad nails, add trim to the faces of your side panels. The trim should be 1/2" thick & 1" wide.
-
Add Trim to Shelf Faces
Using wood glue and brad nails, add trim to the faces of shelves. The trim should be 1/2" thick & 1" wide.
-
Finish
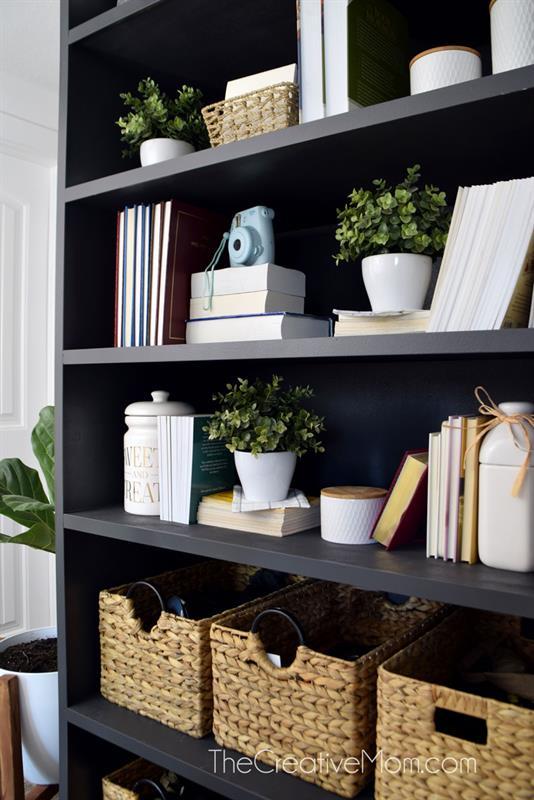
Paint or Stain your bookcase.

-
Install
Please make sure that this bookcase is secured to the wall, so it doesn't tip over. It is very heavy!
.
If you are going for a built in look, I suggest you take measurements and adjust the size to fit to your space. This bookcase is designed to fit in an 8 foot tall room, with the top of the bookcase being about 4 or 5 inches lower than the ceiling (for ease of install- you'll have to tip the bookcase up once you get it in your space).
.
Once you install the bookcase, you will attach the trim pieces to be flush with the floor, ceiling, and walls. This helps achieve the built in look.