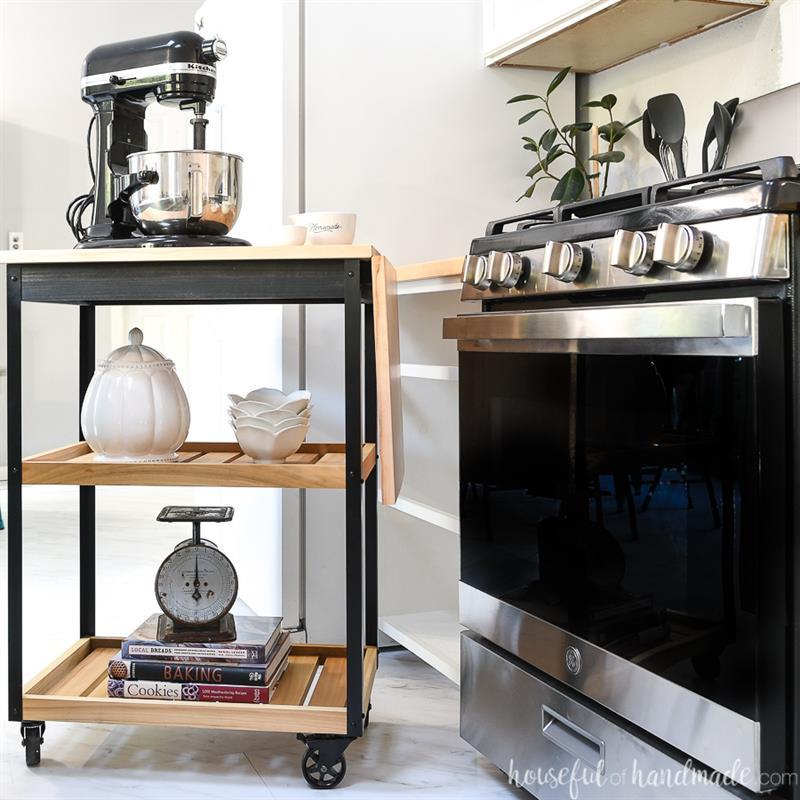
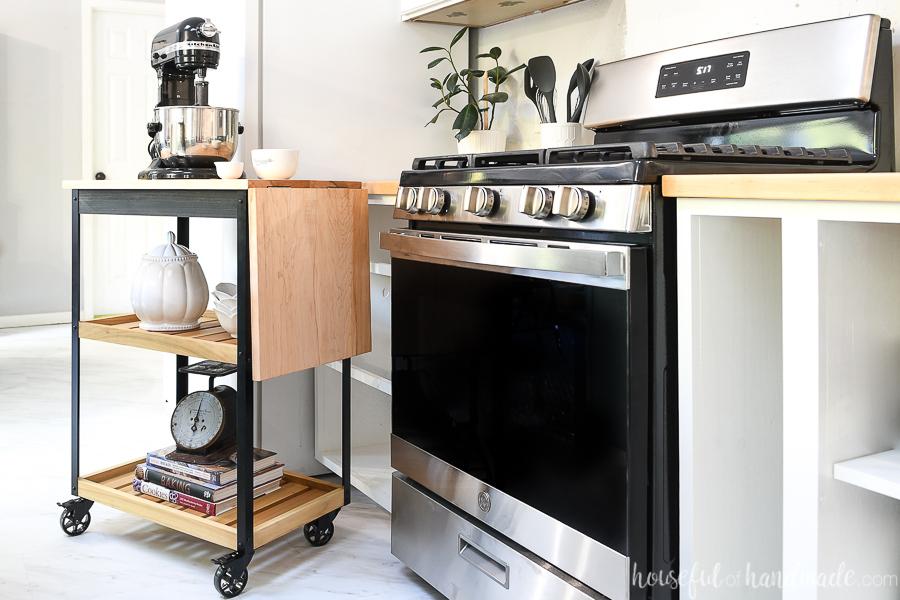
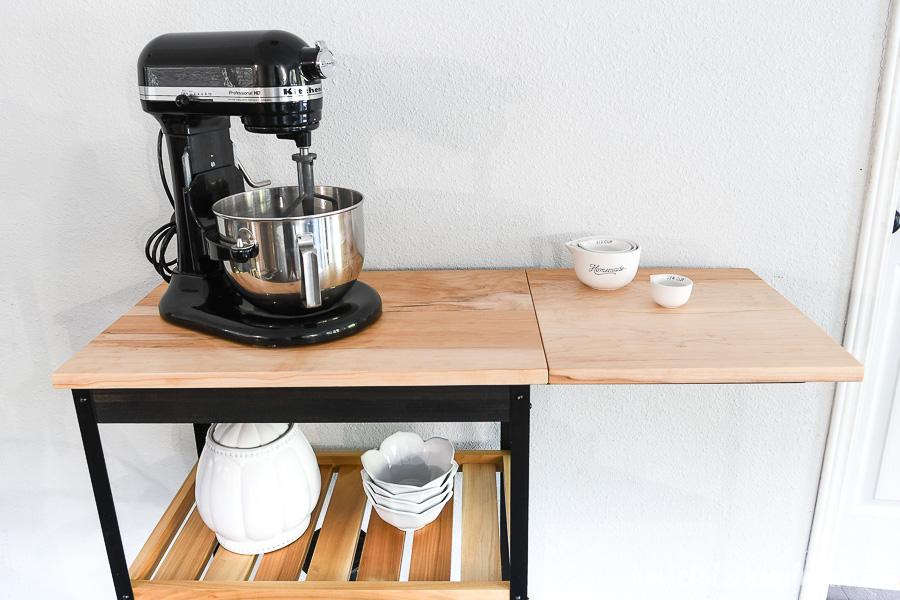
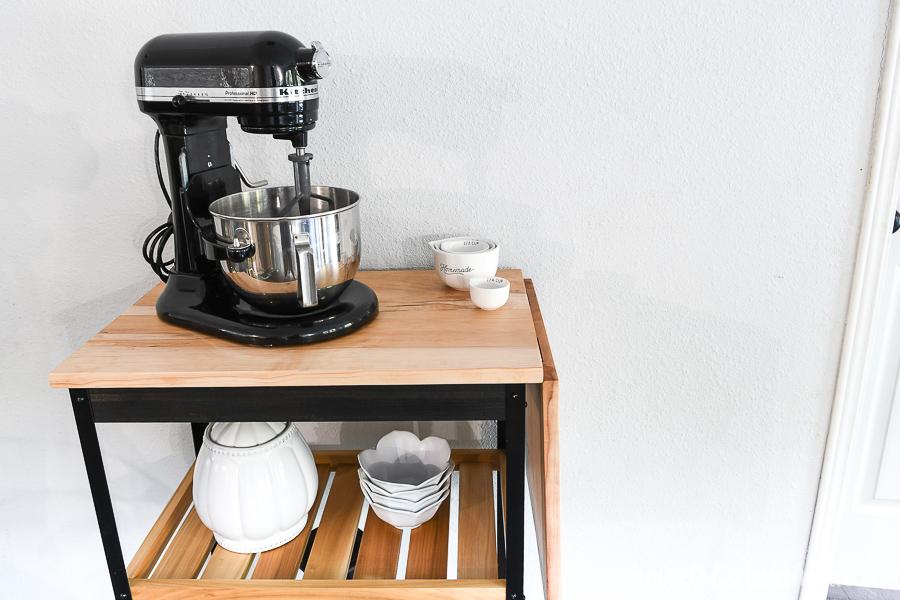


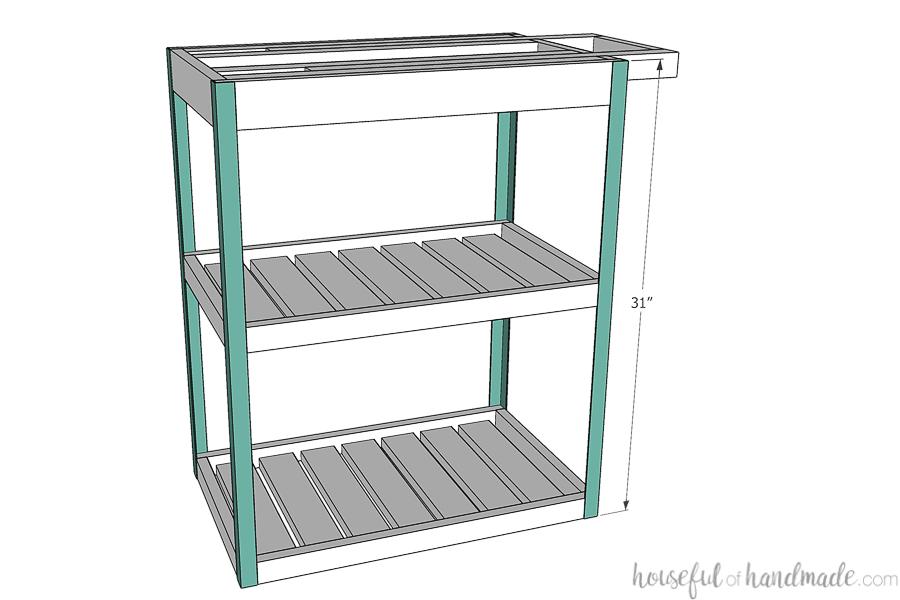
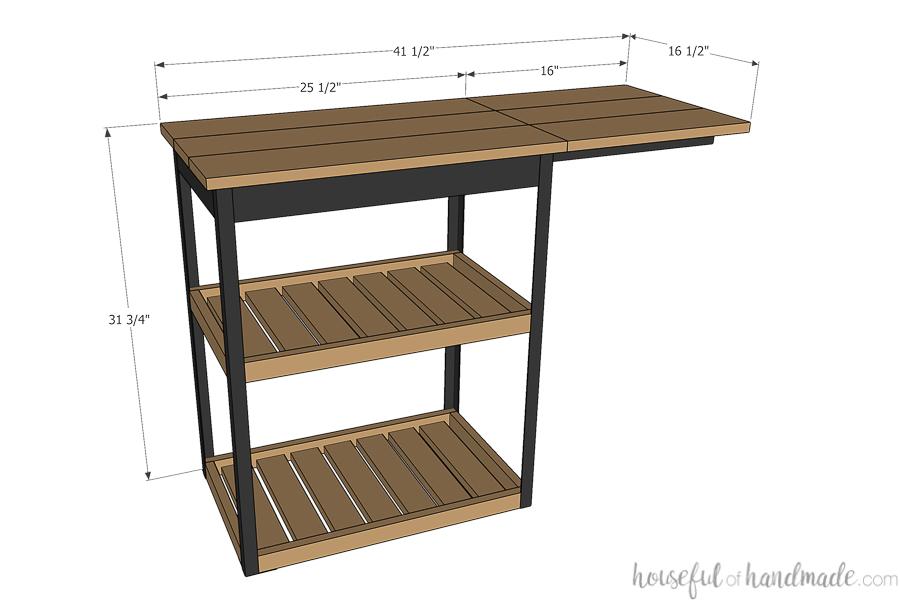
Add extra counter space to your kitchen with this beautiful baking cart. The cart is perfect for storing your stand mixer, plus has a folding leaf that can be raised up when you're baking and lowered for storage. Two shelves underneath add extra storage of all your baking supplies.
Tools
Kreg Tools


Other Tools
-
Miter Saw

-
Tape Measure
Materials
Wood Products
- 2 Board , 2x2 , 72"
- 3 Board , 1x3 , 96"
- 2 Board , 1x2 , 96"
- 2 Board , 1x6 , 72"
- 1 Dowel , 7/16" , 12"
Hardware & Supplies
- 2 6' long 1" wide 1/16" thick aluminum angle
- 125 1 1/4" pocket hole screws
- 4 3" castors (4" from floor to top)
- 4 Figure 8 fasteners
- 2 Hinges
Directions
-
Build leaf support
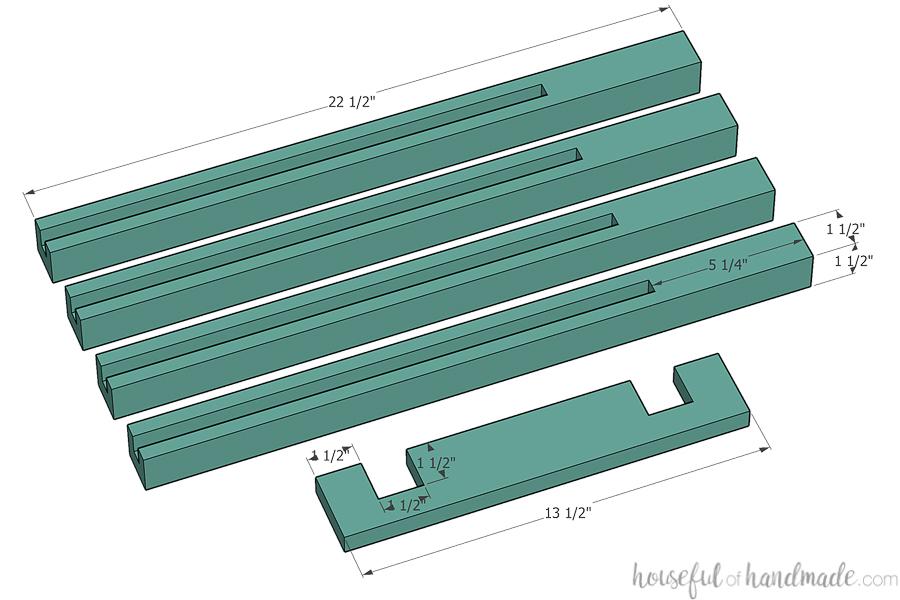
Start by drilling a 7/16" hole in the back of two of the top support boards. The center of the hole should be 1" in from the back and centered on the 2x2. Make sure the hole is straight through the board. Tap the piece of 7/16" dowel into the hole and center it so 5/8" is sticking out on each side. Next, with your Kreg Jig set for 3/4" thick material, drill pocket holes in each end of the top support handle. Also, to make it easier to pull out the leaf support, drill a 3/4" half circle on the center edge of the top support handle with a 1 1/2" Forstner bit. Attach the handle between the two support boards with 1 1/4" pocket holes and wood glue.
-
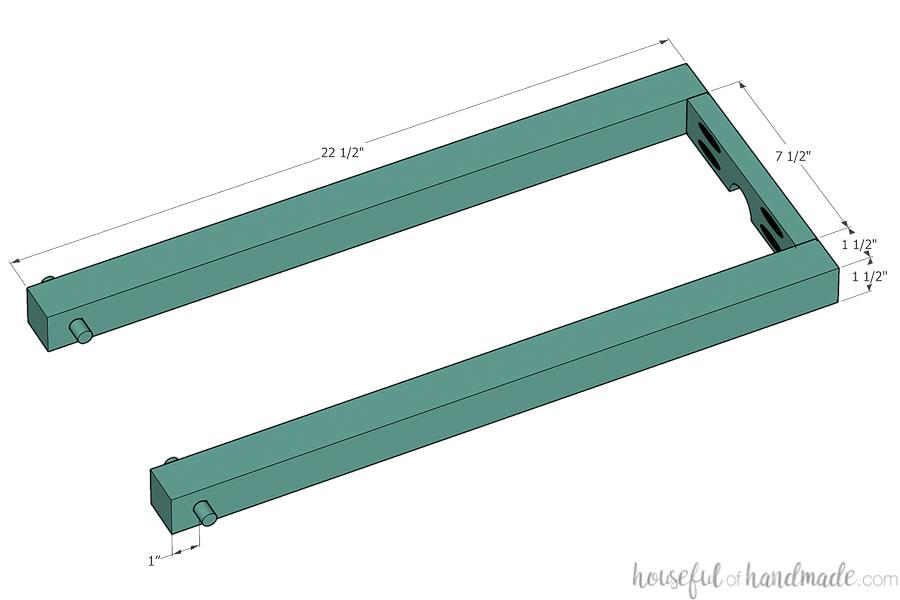
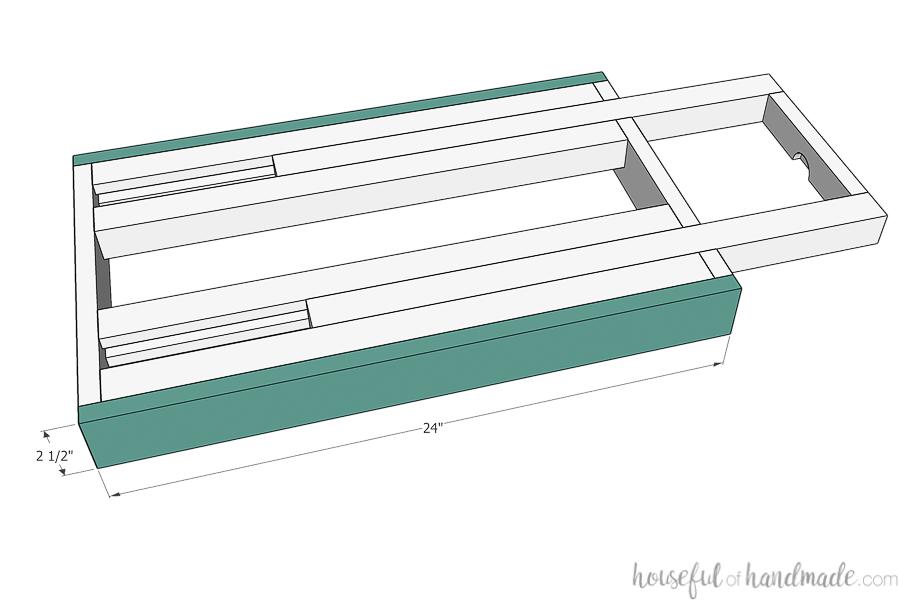
Prep the other support boards
For the rest of the top support boards, router a 3/4" deep by 1/2" wide groove in the center of one side. Stop the groove 5 1/4" before the end of the board. Router the groove out in passes taking a small amount of wood out with each pass to prevent chipping. Also, on one of the top frame side boards, measure out a 1 1/2" x 1 1/2" notch 1 1/2" in from each end and cut out with a jigsaw. Place the completed leaf support in the notches and make sure it fits and has room to slide easily. Make sure the top of the notches are flush with the top of the leaf supports.
-
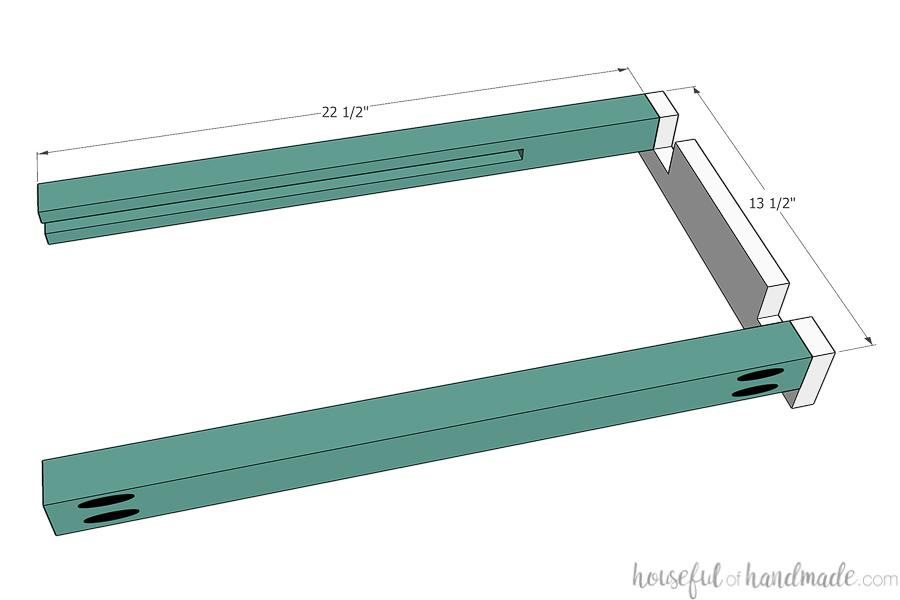
Start building top frame
With your Kreg Jig still set for 3/4" thick material, drill 2 pocket holes each end of the top support boards on the opposite side from the groove. Only drill a pocket hole for 3/4" thick material to prevent drilling through the grooves. Attach two of the support boards to the outside of the side frame board with the notches so they are flush with the top and the outside edge. Secure with 1 1/4" pocket hole screws and wood glue.
-
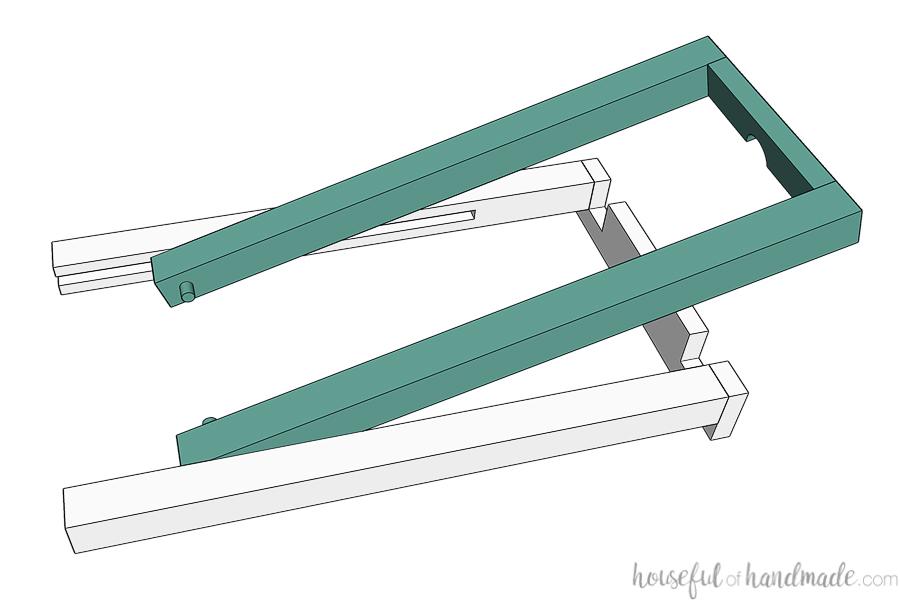
Insert leaf support
If you want to stain/seal/paint the leaf support, you need to do it before inserting it into the frame. The rest of the frame can be stained later if you want, but it is all hidden inside the frame. Slide the dowels on the leaf support into groves on the back of the frame and lay the handle on the outside of the side frame so the boards sit into the notches.
-
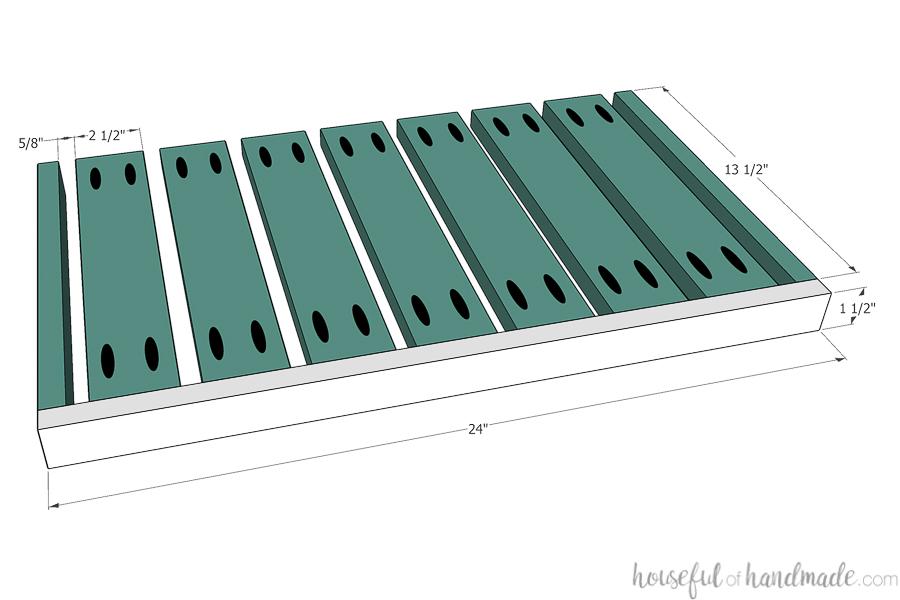
Attach other top support boards
Attach the other top support boards with the grooves so the side with no groove is attached to the board with the notches. Slide the dowels into the groves and hold the support boards together, but not too snugly so the leaf support can slide in and out. Secure with wood glue and 1 1/4" pocket holes.

-
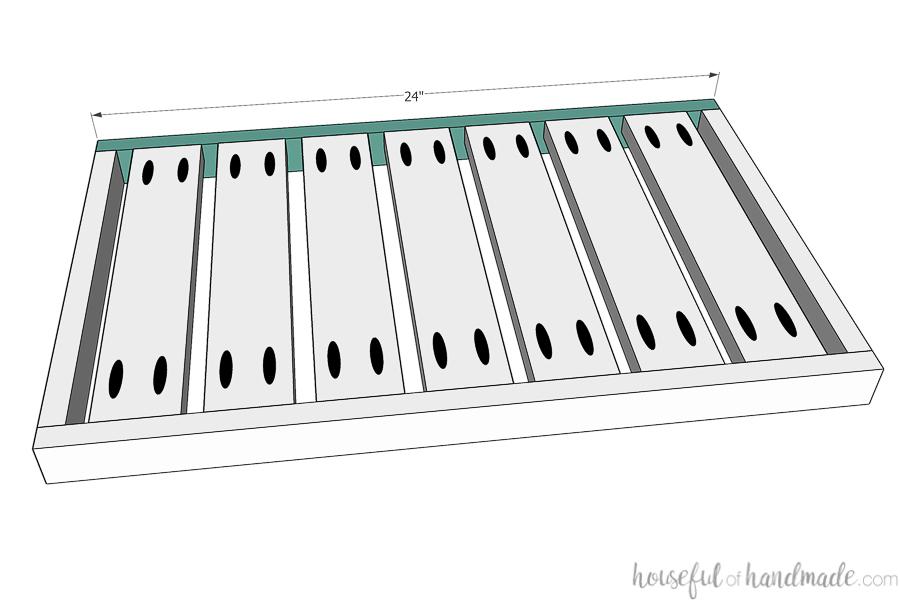
Attach other top frame side
Attach the other frame side board to the end of the top support boards so the outer boards are flush with the edges and the top is flush. Secure with wood glue and 1 1/4" pocket hole screws. Double check that the leaf support still slides easily and adjust if necessary.

-
Finish top frame
Attach the top frame front/back boards to the sides of the top supports with wood glue and 1 1/4" finish nails.
-
Start building the shelves
Drill pocket holes set for 3/4" thick material in each end of the shelf slat boards. Attach one end of the shelf sides with wood glue and 1 1/4" finish nails, then attach one end of the slat boards to the shelf front/back so they are flush with the bottom with a 5/8" gap between them.
-
Finish the shelves
Attach the other shelf front/back board to the other end of the shelf. Secure with wood glue and use finish nails on the side boards and 1 1/4" pocket hole screws on the slat boards. Repeat for the second shelf.
-
Assemble the cart
Cut the aluminum angle with a metal blade on a jigsaw or miter saw. If you want to paint the aluminum angle, use an Etching Primer spray first then finish with any color spray paint you want. Also, spray paint the heads of (24) 1 1/4" pocket hole screws to match. Drill holes in the angle iron where you will be attaching your top and shelves. Use 1 screw on each side of the angle iron, making sure to offset them at least 1/2" so the screws do not collide. Attach the top frame so it is flush with the top of the angle iron, the bottom shelf should be flush with the bottom and the center shelf can be adjusted to whatever height works best for you. Secure with the painted screws.
-
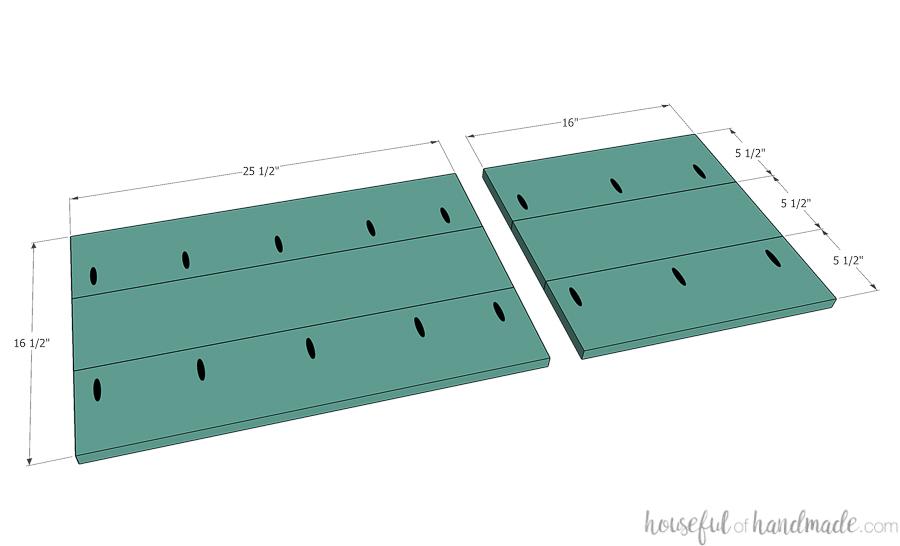
Build the table tops
Glue up the 3 pieces of the table top and leaf top boards together to create a 16 1/2" wide board. You can use pocket holes set for 3/4" thick material in the sides of 2 of the boards to secure them. I used some wider scrap maple boards to build my table top and held it together with biscuit joints and wood glue to avoid visible pocket holes on the leaf. But you can also use the pocket hole method and fill the holes with plugs.
-
Add table top hinges
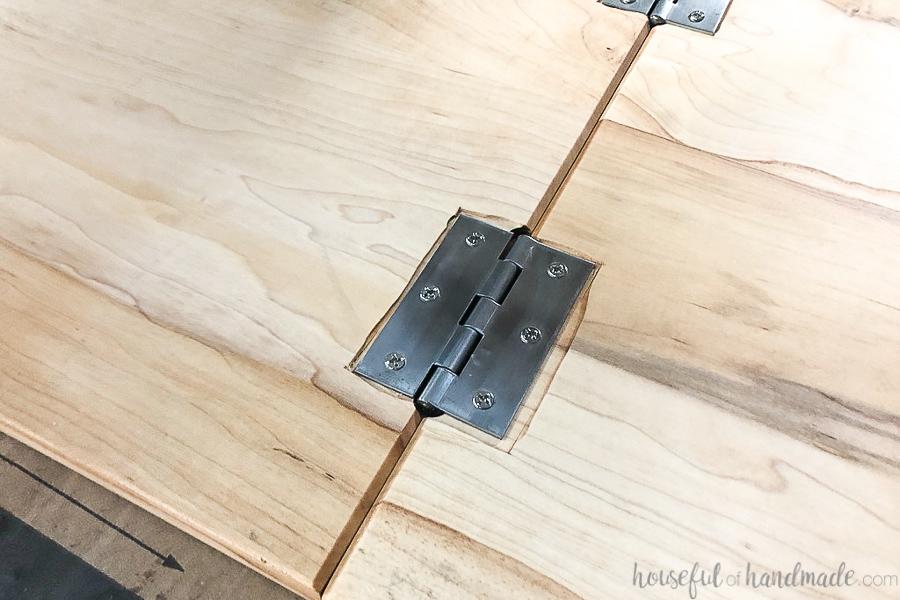
To be able to fold down the leaf, you will need to attach 2 hinges to the underside of the assembled table top and leaf pieces. These pieces will need to be routed out to fit the hinges flush with the bottom of the boards. Measure where the hinges will be and first router a space the thickness of the hinges. Then mark where the center of the hinge is and router a deeper groove for it to sit inside. Also, to ensure the top pieces open properly, router a chamfer on the bottom edge where they meet to allow them to pivot.
-
Attach the top
Attach the table top/leaf to the top of the baking cart so the non-leaf side has a 1/2" overhang and the front and back have a 3/4" overhang. Secure the top with 4 figure 8 fasteners in the inside of the top frame and support boards. Be careful not to tighten them too tight or the leaf support will not slide easily. Test the leaf lifting and sliding and adjust the hinges or leaf support if necessary.
-
Finish and enjoy!
Finish your baking cart by adding the castors to the bottom corners of the lower shelf. Make sure to use locking castors so your cart will not move around while you are baking! And then come say hi at Housefulofhandmade.com where I share lot of fun DIYs for the home and upcoming holidays.