Tips and Tricks for Optimal Plywood Cutting
Plywood is a great material for project building, but it presents some challenges. One of the biggest is making sure you get the most out of every sheet. Doing that will help you eliminate waste and save money on your projects. To do that, it really comes down to effectively laying out the parts, and then cutting them efficiently.
Organize similar parts
When laying out your parts on a sheet, try to organize them so items of the same/similar dimensions are aligned. This helps you cut more effectively, and it can help you use all of the sheet. You’ll stay more organized, and often be left with cutoffs that are more usable for making other small parts.
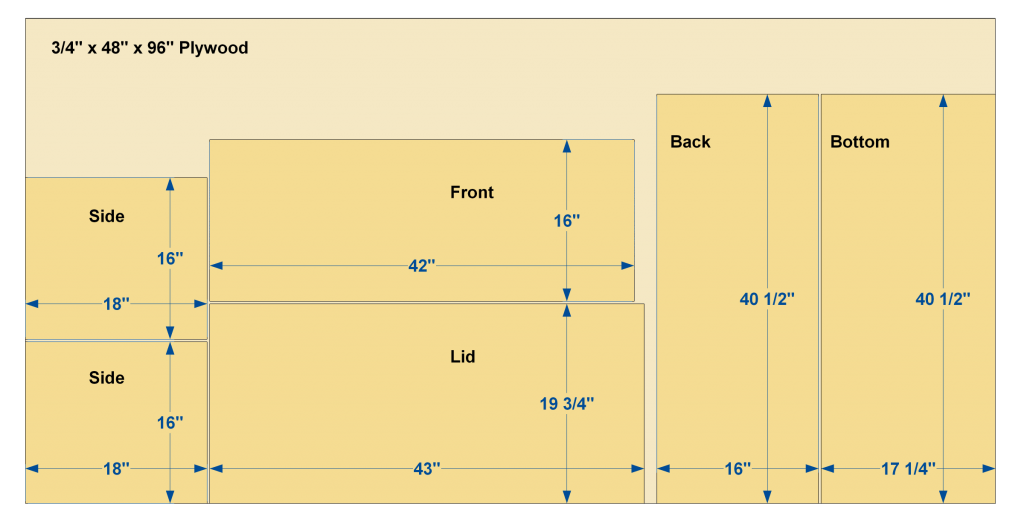
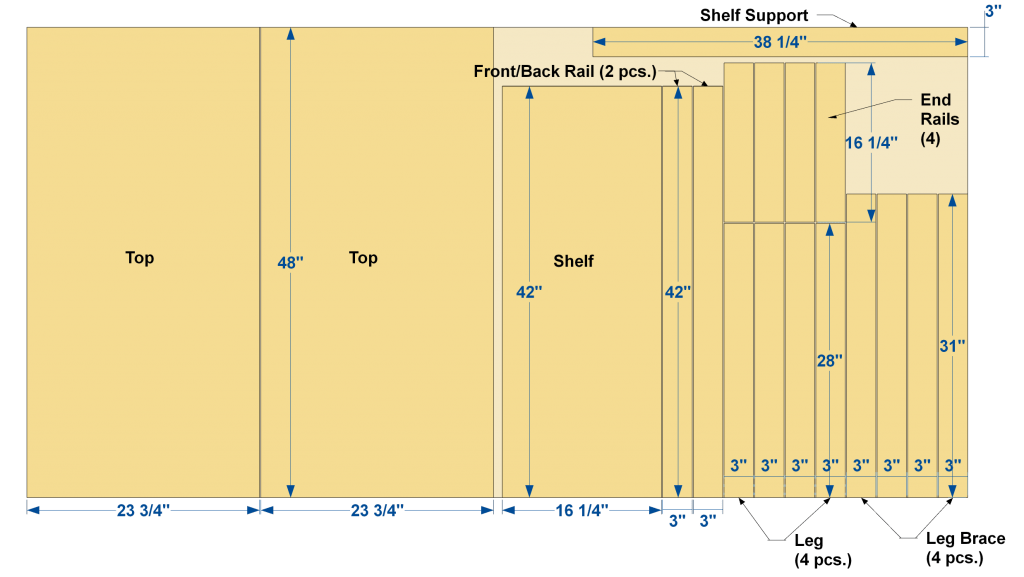
If you’re working from a well-designed project plan, then the cutting diagram should do this for you, like the diagrams shown below. You can see that the parts are organized to use the sheet as efficiently as possible, and to make cutting easier—which we’ll get to shortly. If you’re using a plywood cutting diagram that isn’t arranged effectively, you may want to make your own.
Make your own cutting diagrams easily
 One of the best ways to get better at working with plywood is to learn to create your own cutting diagrams. Whether you’re reworking a cutting diagram from an existing plan or you’re designing your own project, knowing how to make your own cutting diagrams gives you options.
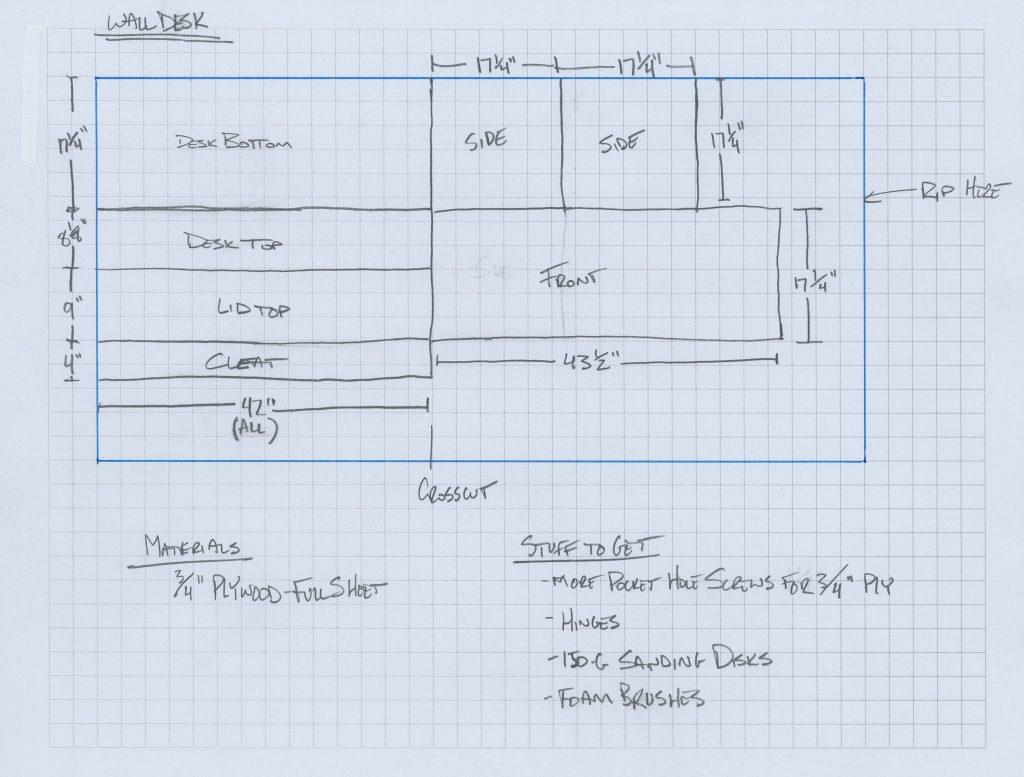
Rather than start with a blank page, draw your cutting diagram on graph paper. That used to mean making a trip to an office-supply store, but these days graph paper is as close as your computer. Just go online and search for “printable graph paper.” You’ll find lots of free options.
Paper with 1/4″ squares works great, as you can make 1 inch equal to 1 foot (which makes each 1/4″ square equal to 3″). And you can draw a full-size 4×8 sheet of plywood on standard printer paper. Draw the 4’x8′ sheet border in pen, and then lay out your parts using pencil, as shown below. That way you can erase and move parts around as needed until you create an effective parts layout. Your cutting diagram doesn’t have to be perfect, or even pretty. It just needs to help you organize the parts effectively, and to serve as reference when you cut.
Go with the grain
When your laying out parts on your cutting diagram, it’s important to remember that the wood grain runs lengthwise on a plywood sheet. So, you’ll want to make sure you don’t lay out similar parts in different directions on the sheet.
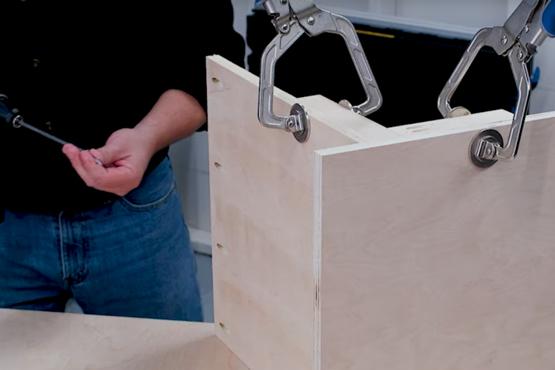
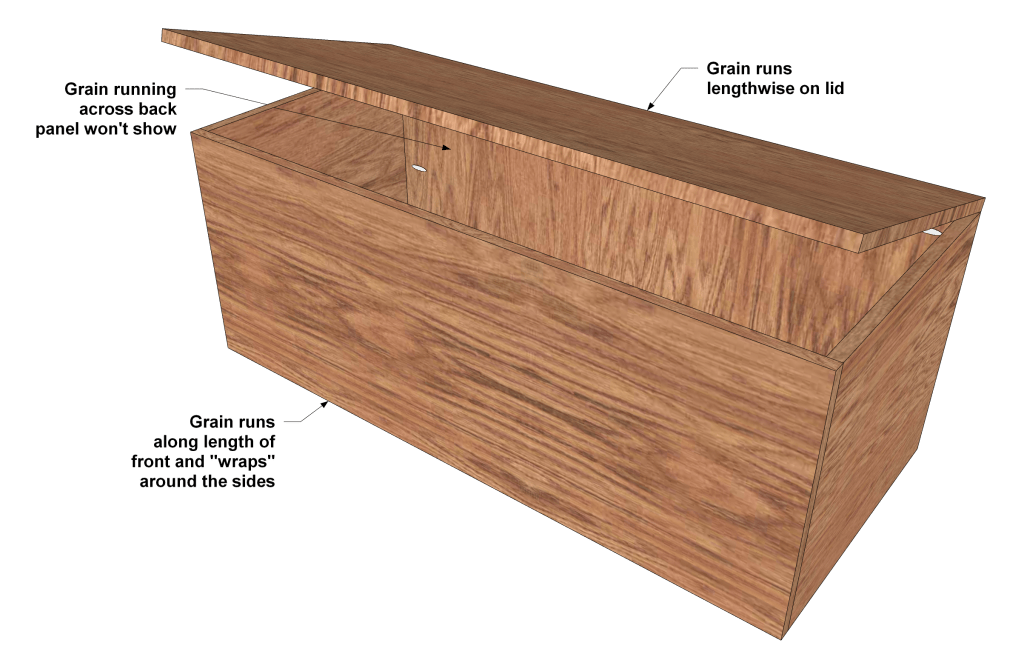 There are a few times, though, that it’s ok to break this rule. On painted projects, the grain won’t show so it won’t matter. For utility or storage projects, appearance may not be as important. Finally, sometimes you may need to change things up to maximize your sheets. The blanket chest used as an example here has all the major parts cut from a single sheet of plywood.
To fit it all on one sheet, though, a couple of the large panels had to be turned. The chest wouldn’t look right if the grain ran across the front, top, or sides instead of along their lengths. The bottom will really never be seen, though, and the back won’t really show because the chest will probably be against a wall or at the foot of the bed. So, having the grain run across these panels instead of along their lengths isn’t a big deal, and it prevents having to purchase a second sheet to complete the project.
Group your cuts
Another big advantage of organizing your parts on your plywood sheet is that it makes cutting a lot easier by letting you group your cuts. Instead of trying to cut one piece at a time, you can rip (cut lengthwise) or crosscut (cut across the sheet) to break the sheet down into smaller pieces, and then cut the individual parts to size from those. Plus, it means you won’t have to change saw setups as many times.
These illustrations show how the cutting diagram we’re using here can be broken down. The process, in this case, starts with a series of cuts crosscuts across the sheet/across the grain. Then, those smaller pieces get ripped (cut in line with the grain) to create the individual project parts.
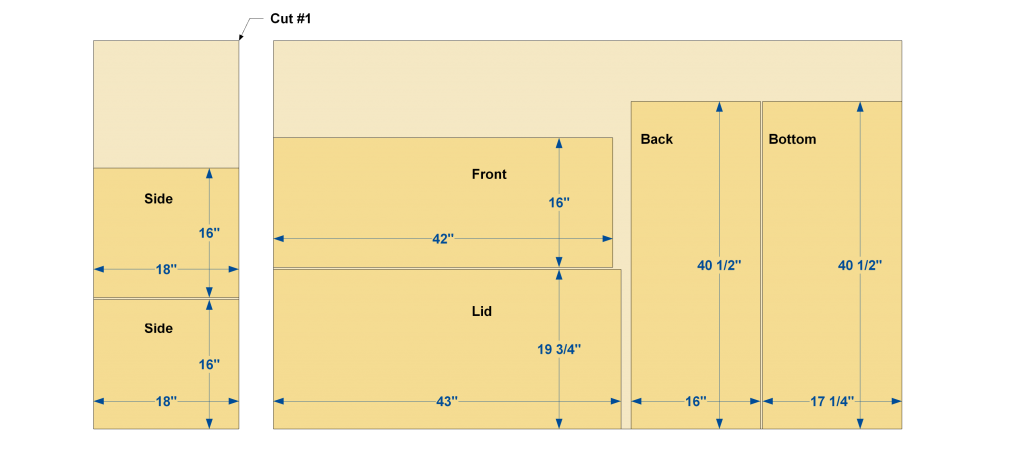
For this plywood layout, it makes sense to start with a crosscut at the dimension marked for the Side width.
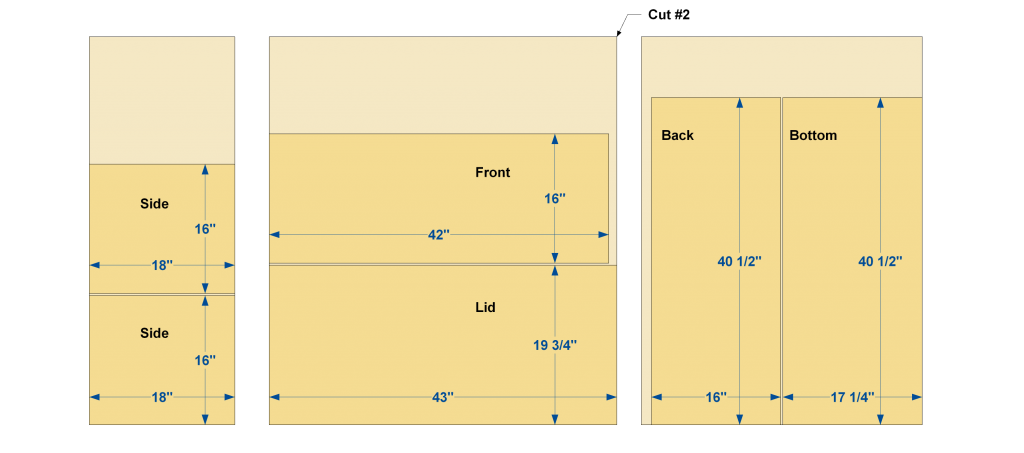
Another crosscut yields two more project parts. They’ll get ripped and trimmed to final size later.
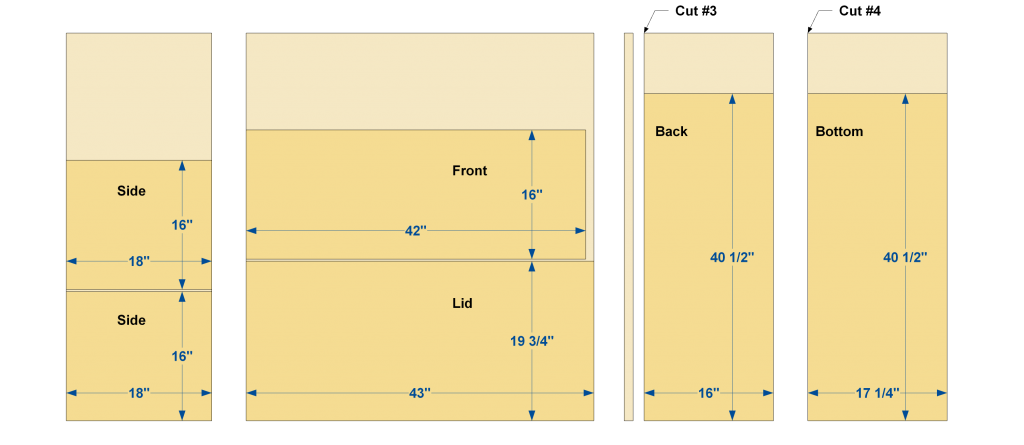
The third crosscut removes a narrow strip of waste. It’s the only piece from this sheet that’s really wasted, since it’s too small to save. Then one more separates the parts named “Back” and “Bottom.”
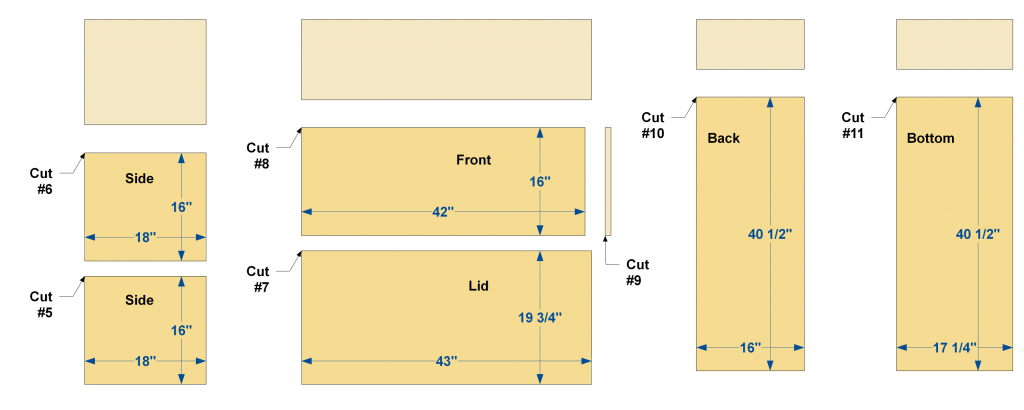
Now, it’s time to cut the individual parts to final size. All of these cuts will be will be rip cuts–going in the same direction as the grain–except for one final crosscut (across the grain) to trim the “Front” to final length.
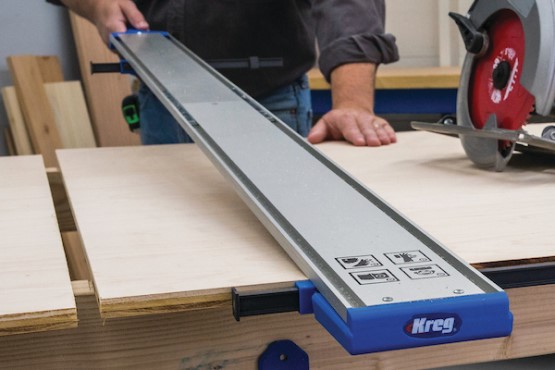
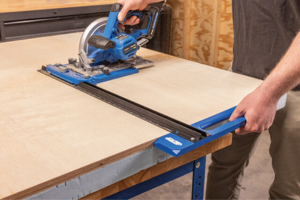
Use saw guides for straight, accurate cuts
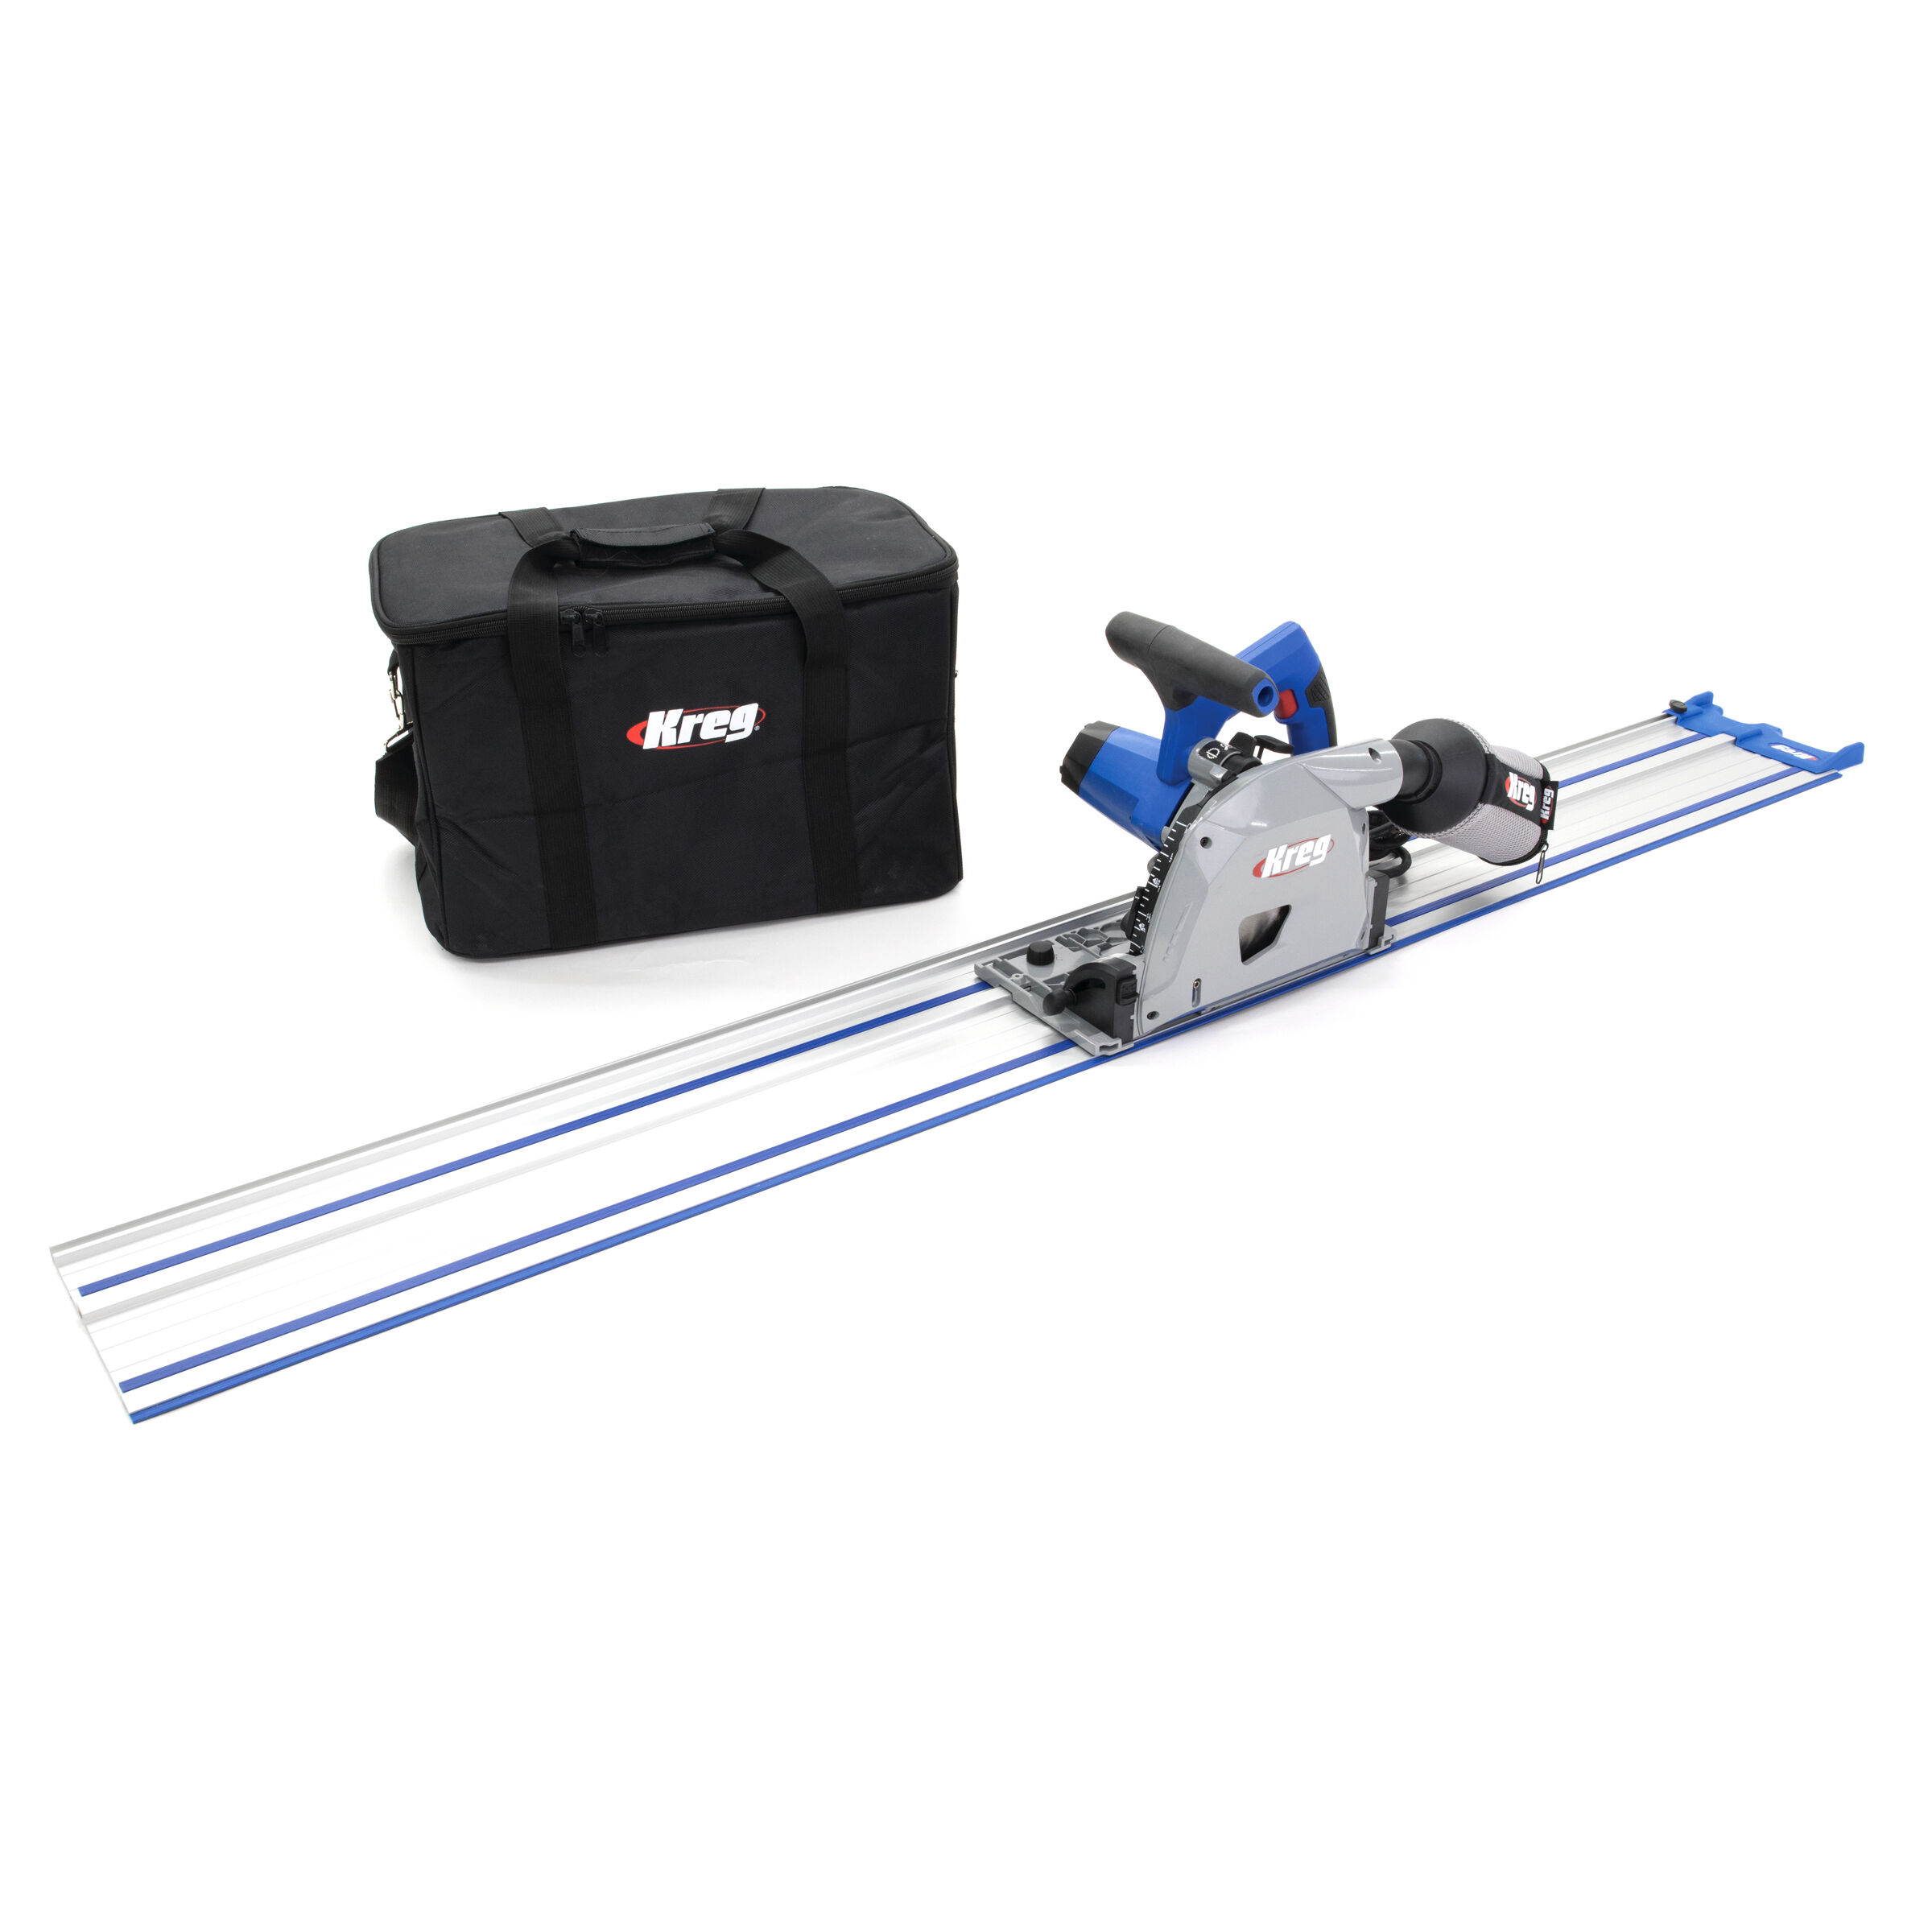
When you’re cutting plywood, a circular saw is a great tool to use. But it can be challenging to make long straight cuts accurately using one.
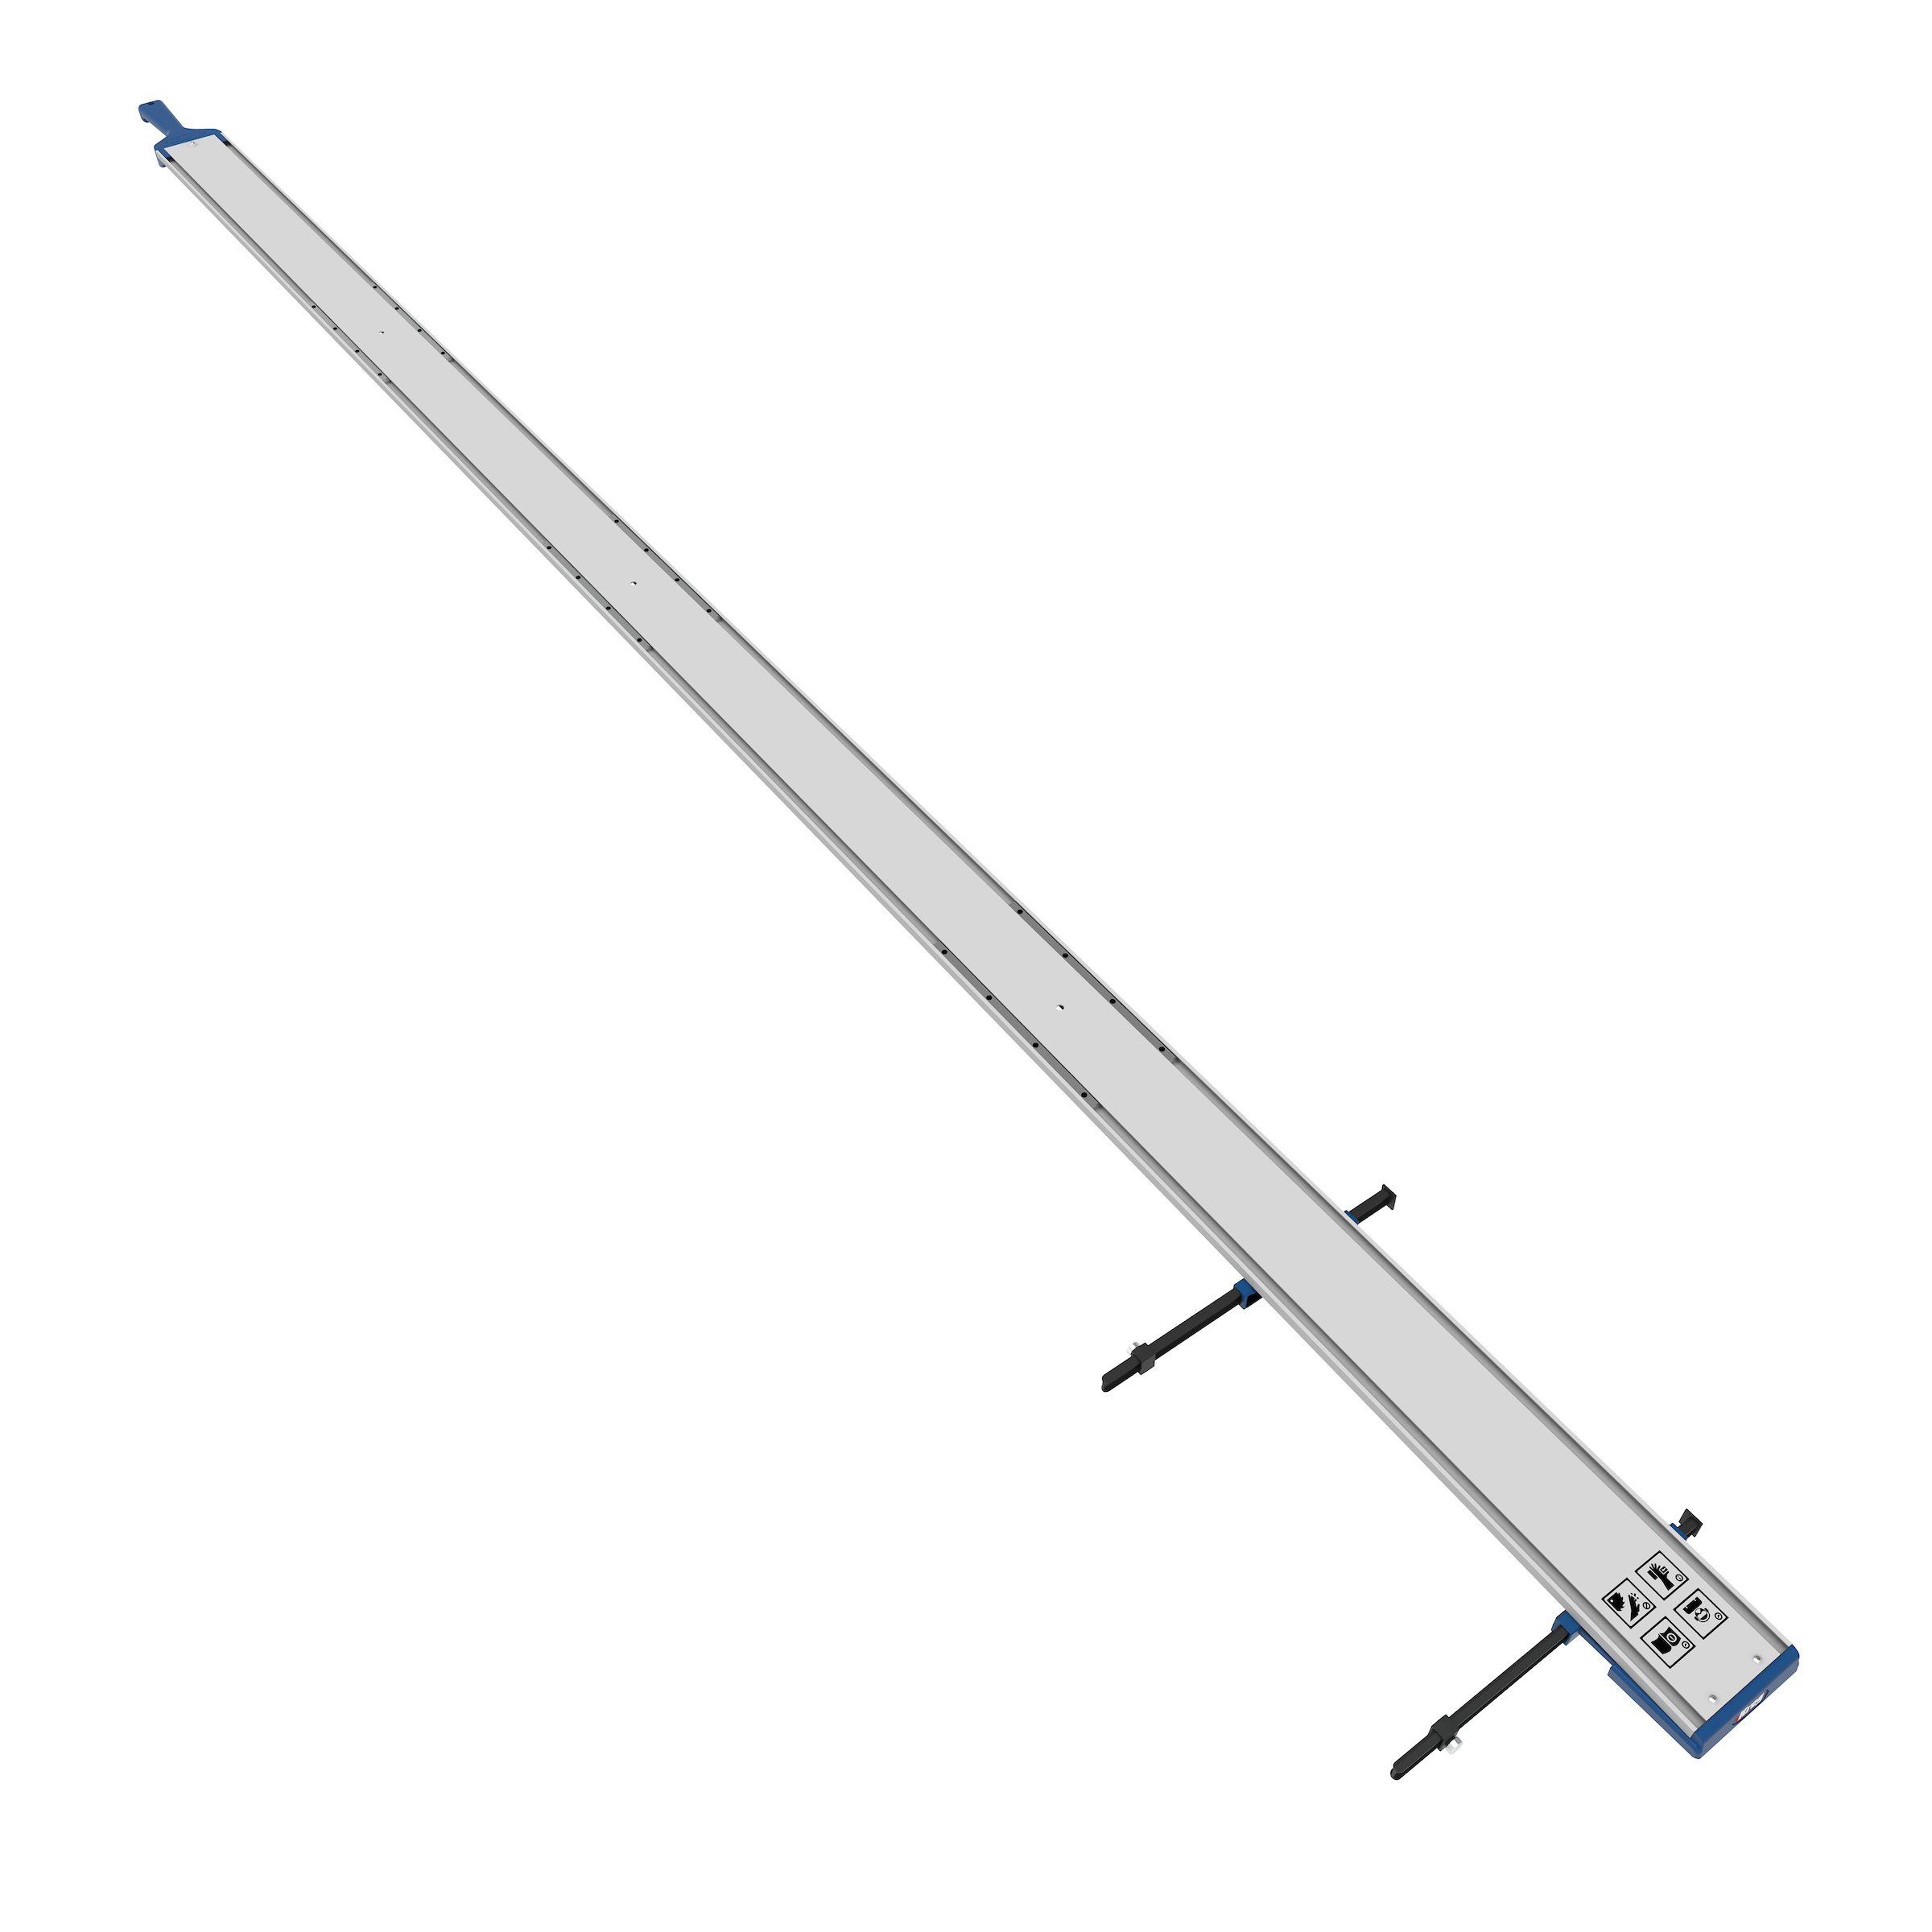
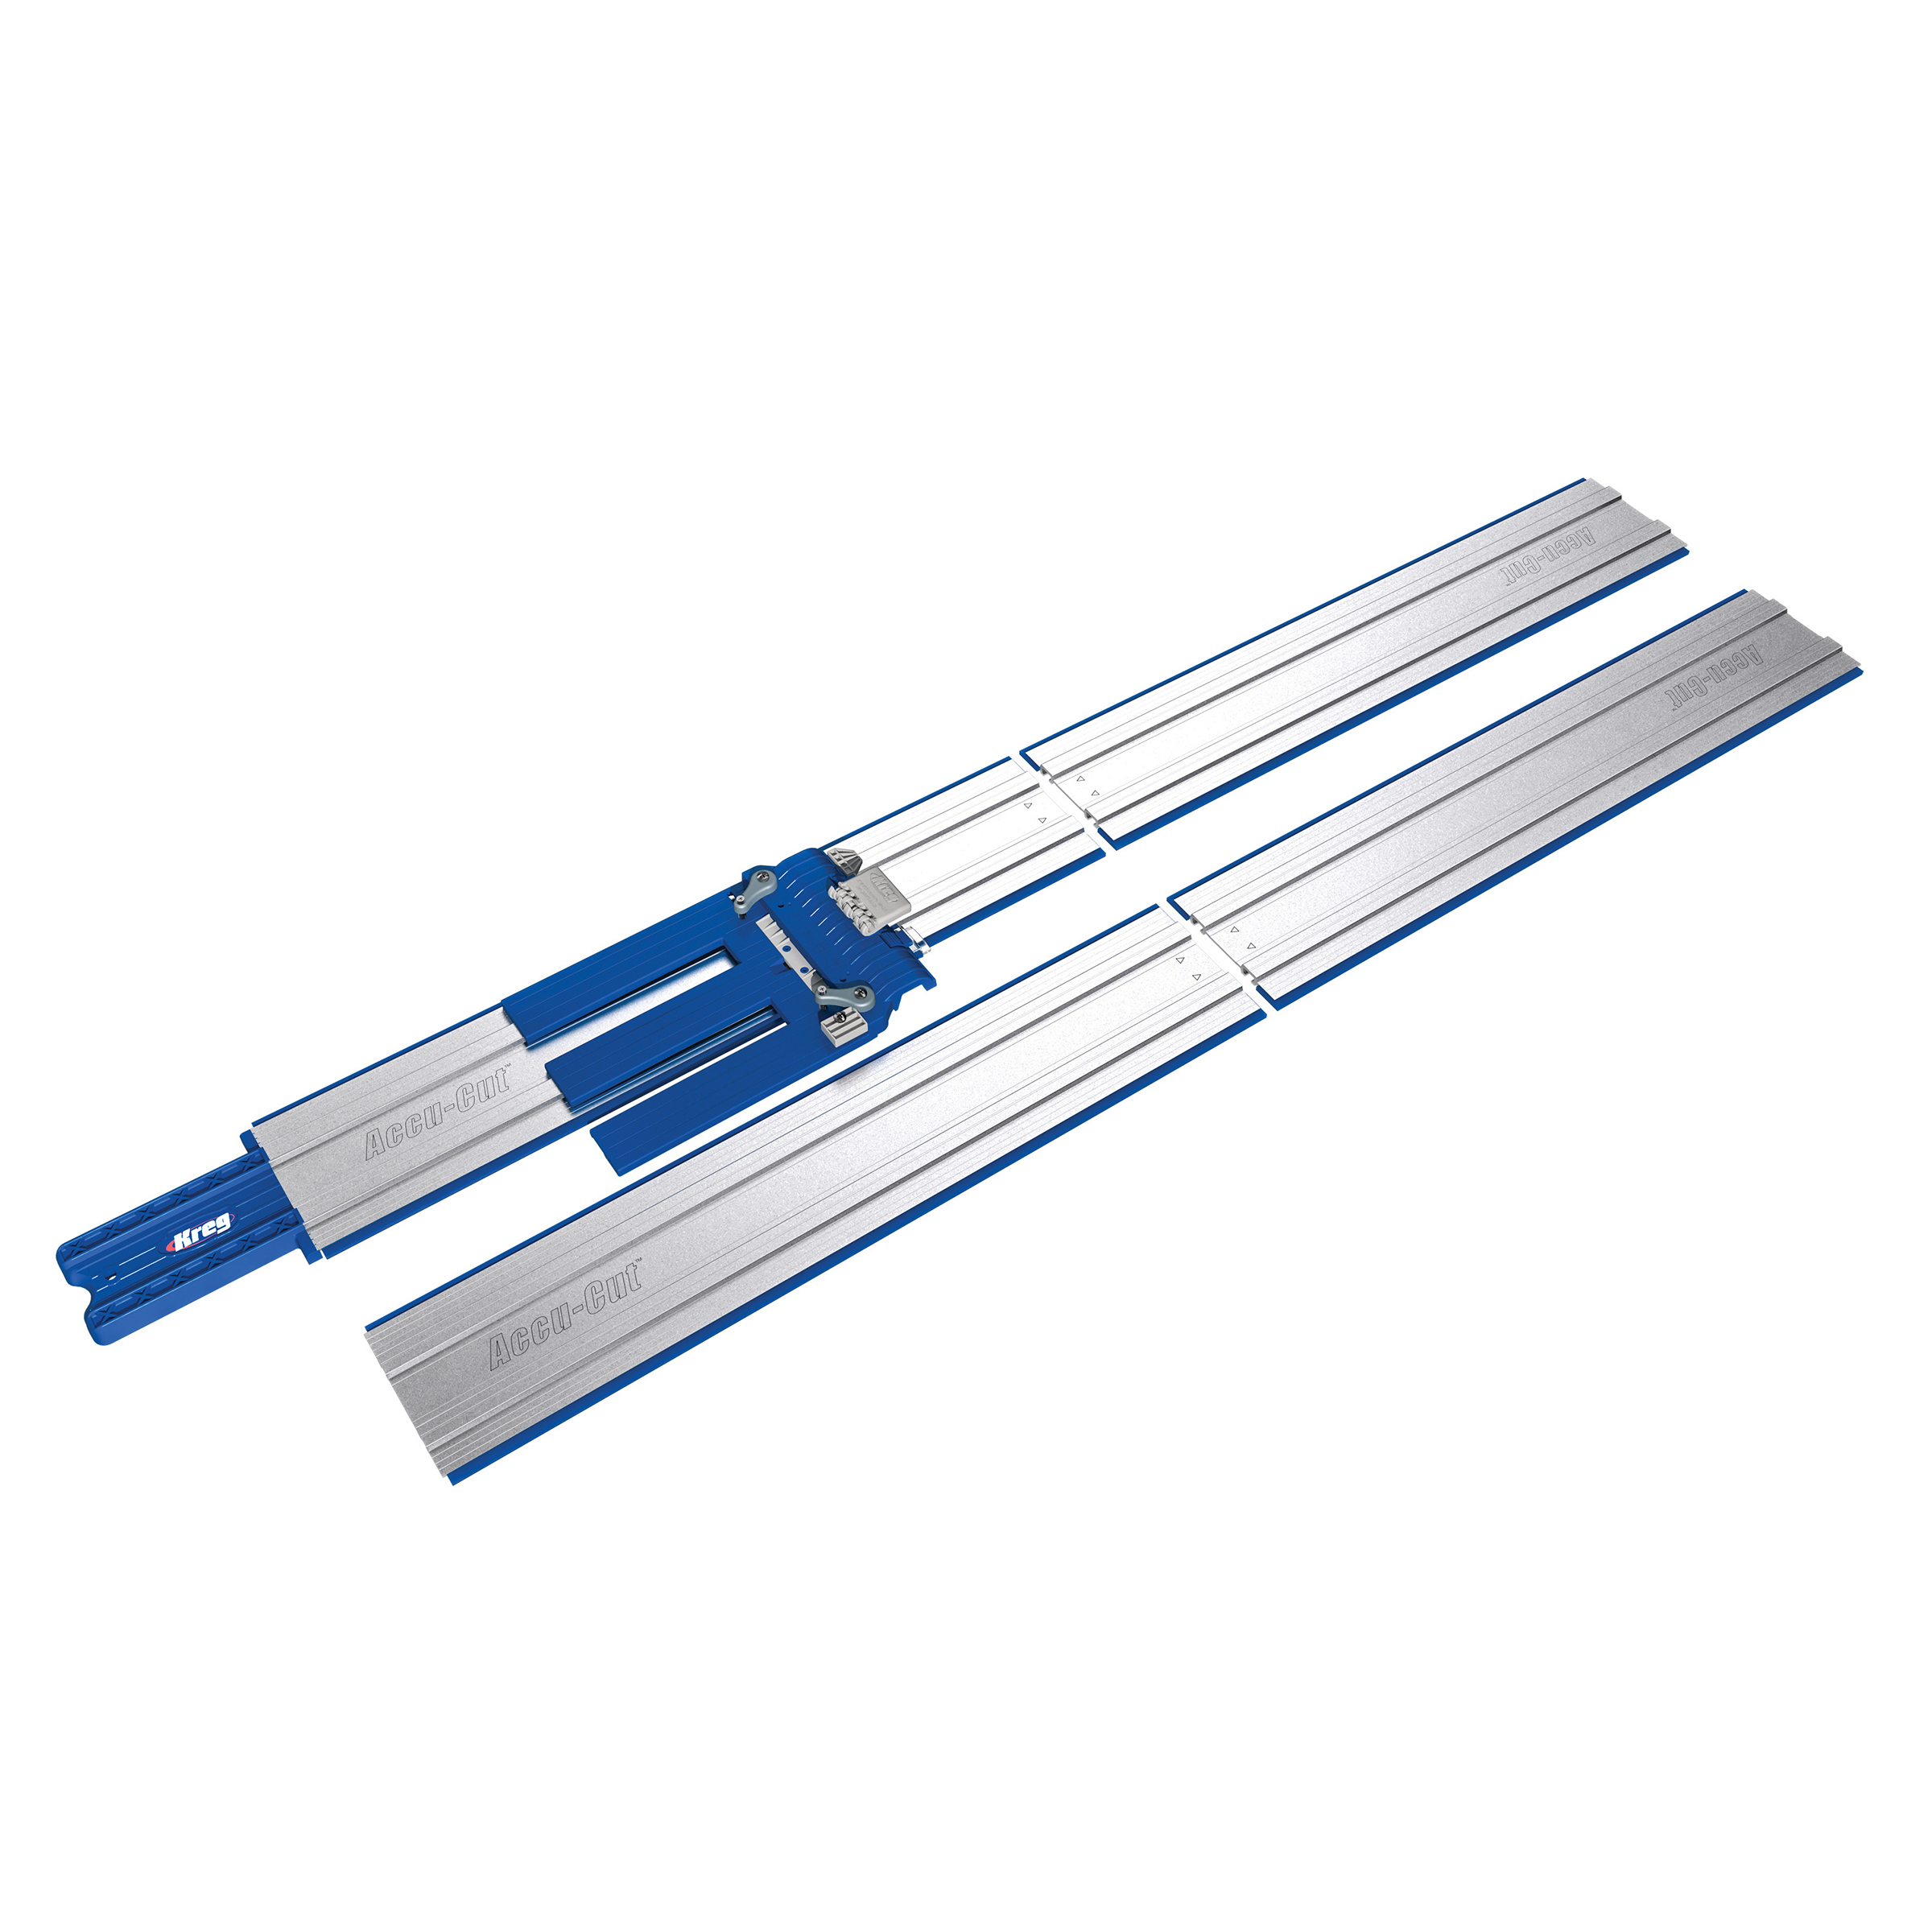
The solution is to use saw guides, such as the Kreg Accu-Cut™ and Rip-Cut™. They help you keep your saw moving straight and accurately. You can learn more about cutting plywood using saw guides in the related topics at the bottom of the page.
Bonus Tip: Chalk it up!
 When you’re cutting project parts, it can be all too easy to get them mixed up. And that can lead to drilling holes in the wrong places, assemblies that go together wrong, and extra trips and expense to get more materials.
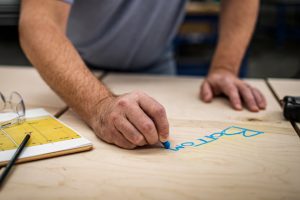
A great tip is to mark each part with its name. Many people reach for a pencil to do this, but pencil lines can be tough to see, can dig into the wood, and can be tough to get rid of later. Instead, reach for a piece of chalk. It’s bold, easy to see, and available in many colors. Plus, you can wipe chalk away with a damp rag and, if necessary, a little bit of sanding.
Do you cut plywood face up or down?
When using a circular saw or jigsaw, it’s generally recommended to cut plywood with the finished face down to minimize tear-out on the visible surface.
Maximize your cutting efficiency
Check out the short video below to see how easy it can be to cut plywood parts when you organize your parts, group your cuts, and then make those cuts using guides.
Preparing for Precise Plywood Cuts
Selecting the Appropriate Saw
Choosing the right saw for cutting plywood depends on the complexity of the cuts, the thickness of the plywood, and personal preference. Common cutting tools include circular saws, table saws, and jigsaws, each offering distinct advantages and capabilities.
Cutting Plywood with Power Tools
Power tools provide efficiency and precision when cutting plywood, making it easier to tackle a wide range of projects with ease.
Circular Saw Techniques
Circular saws are versatile tools ideal for making straight cuts in plywood. Techniques such as using a straightedge guide and making scoring cuts can help achieve clean and accurate results.
Table Saw Precision Cuts
Table saws excel at making precise rip cuts and crosscuts in plywood. By using a high-quality fence and a reliable miter gauge, woodworkers can achieve consistent and repeatable cuts with ease.
Jigsaw for Intricate Shapes
For cutting curved or irregular shapes in plywood, a jigsaw is the tool of choice. With the right blade and proper technique, woodworkers can achieve intricate and precise cuts for custom projects.
Is a jigsaw or circular saw better for plywood?
While both tools have their advantages, a circular saw is typically better suited for making straight cuts in plywood, while a jigsaw excels at cutting curves and intricate shapes.
What is the best tool to cut plywood with?
The best tool for cutting plywood depends on the type of cut needed; a circular saw is excellent for straight cuts, while a jigsaw is ideal for curved or irregular cuts.
Mastering Hand Tool Plywood Cutting
While power tools offer speed and efficiency, hand tools can provide greater control and finesse for certain cutting tasks.
Cutting Plywood with a Handsaw
Handsaws, such as a Japanese pull saw or a crosscut saw, are suitable for making fine cuts and trim work in plywood. With patience and practice, woodworkers can achieve smooth and accurate results by hand.
Making Plunge Cuts
Plunge cuts allow woodworkers to start a cut in the middle of a plywood sheet, rather than from the edge. By using a sharp utility knife or a plunge-cutting circular saw, precise openings and interior cuts can be made with ease.
Achieving Smooth Edges
Regardless of the cutting method used, achieving smooth edges on plywood is essential for a professional finish. Techniques such as sanding and edge banding can help smooth rough edges and enhance the appearance of the final project.
When using a circular saw in particular, cutting guides and tracks can greatly improve cut quality, in addition to the speed and accuracy gains. Consider adding a Rip-Cut™, Accu-Cut™, or Straight Edge Guide to a circular saw for better results.
How do you cut plywood by hand?
To cut plywood by hand, use a sharp handsaw or Japanese pull saw to follow a straightedge guide or layout lines, ensuring smooth and accurate cuts.
How do you cut plywood straight without a saw?
Without a saw, you can achieve straight cuts in plywood using a sharp utility knife to score along a straightedge guide, then snapping along the scored line for a clean break.
Choosing the Right Blade for the Job
The blade you choose for your circular saw or table saw can significantly impact the quality of your plywood cuts, so it’s essential to select the appropriate blade for the task at hand.
Identifying Blade Tooth Counts
Different tooth counts are suitable for various cutting applications. For plywood, blades with a high tooth count (e.g., 60 to 80 teeth) are ideal for clean and smooth cuts with minimal tear-out.
Selecting Blade Material and Coatings
Blades made from high-quality materials such as carbide-tipped or high-speed steel offer durability and longevity. Additionally, coatings such as Teflon or titanium can reduce friction and heat buildup, resulting in smoother cuts and extended blade life.
Maintaining Blade Sharpness
Keeping your blade sharp is essential for achieving clean and accurate cuts in plywood. Regularly sharpening or replacing dull blades will ensure optimal cutting performance and prevent tear-out and chip-out.
Adjusting Blade Height and Depth
Proper blade height and depth adjustment are crucial for achieving clean and accurate cuts in plywood. Adjusting the blade height to just below the thickness of the plywood and setting the depth of cut will help minimize tear-out and ensure smooth cuts.
Utilizing Zero Clearance Inserts
Zero clearance inserts provide support for the plywood fibers near the blade, reducing tear-out and chip-out during cutting. Installing a zero clearance insert on your table saw can significantly improve the quality of your cuts.
Which jigsaw blade should you use to cut plywood?
For cutting plywood with a jigsaw, choose a fine-toothed blade with at least 10 to 12 teeth per inch (TPI) to minimize splintering and achieve smooth cuts.
Protecting the Plywood Surface
To maintain the integrity of the plywood surface and minimize defects such as chip-out and tear-out, it’s essential to take precautions during the cutting process.
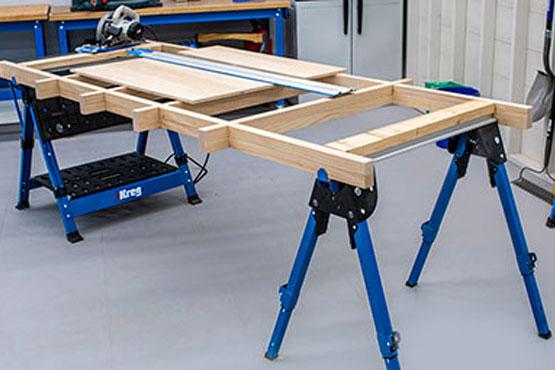
Elevating the Plywood for Support
Supporting the plywood sheet with sawhorses or a workbench can prevent sagging and ensure stability during cutting, resulting in cleaner and more accurate cuts.
Minimizing Chip-Out and Tear-Out
To minimize chip-out and tear-out, use masking tape or painter’s tape along the cut line to provide additional support and reduce splintering. Additionally, scoring the cut line with a utility knife before cutting can help prevent tear-out on the underside of the plywood.
Finishing Touches for a Clean Cut
After completing the cut, inspect the edges for any roughness or tear-out and use sandpaper or a block plane to smooth the surface if necessary. Applying edge banding or veneer tape can also conceal imperfections and provide a finished look to the edges of the plywood.