Farmhouse Nightstand
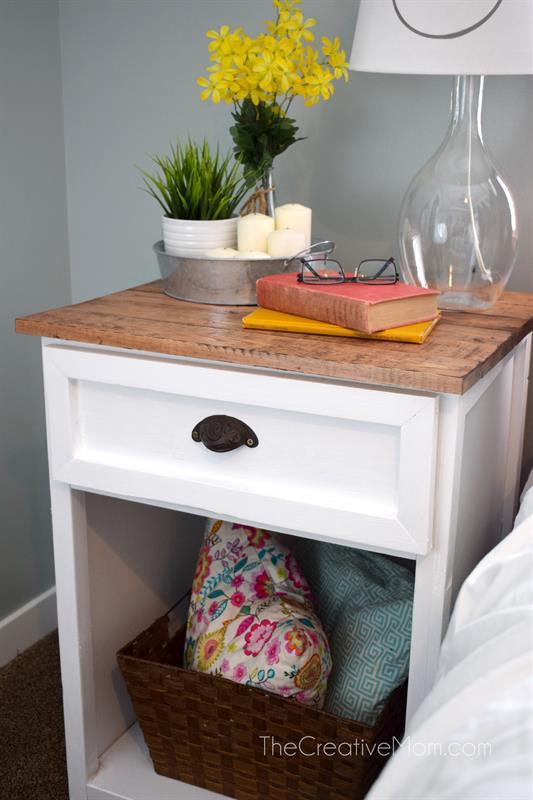
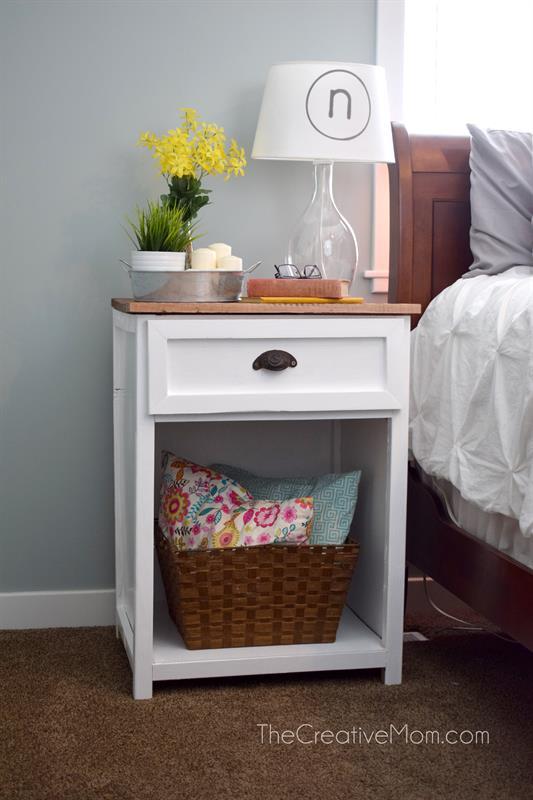
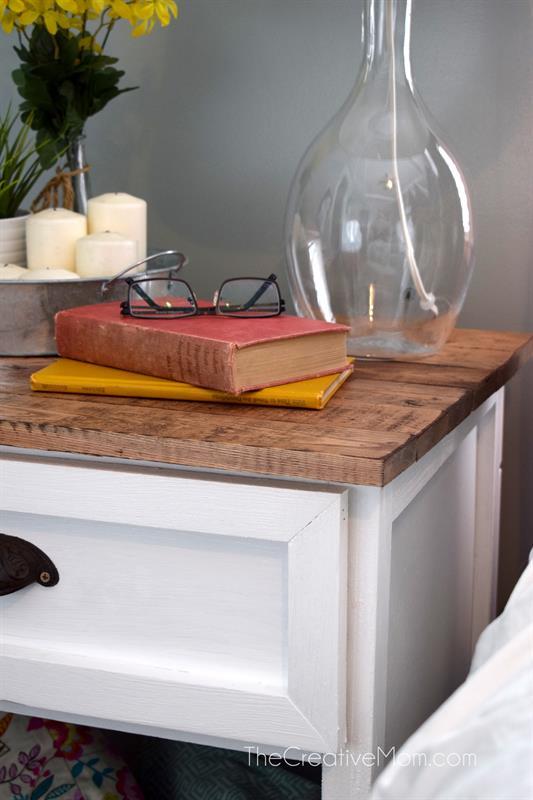
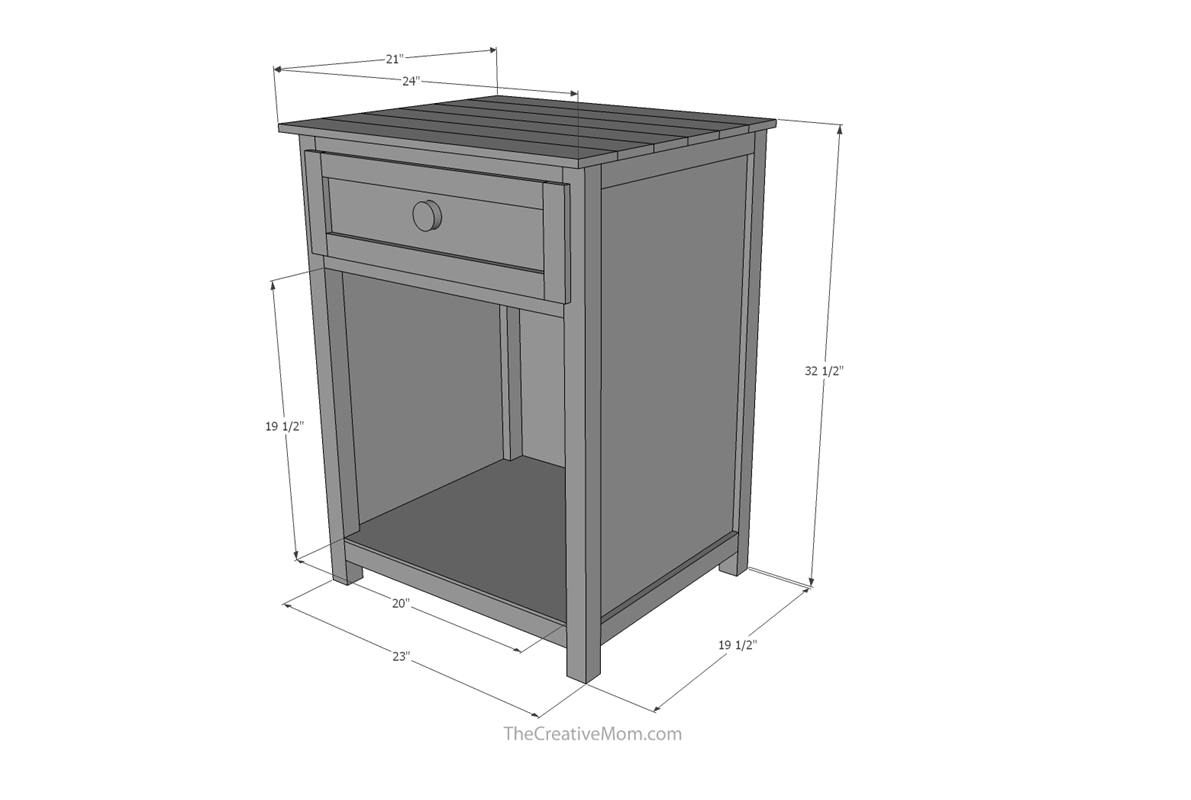
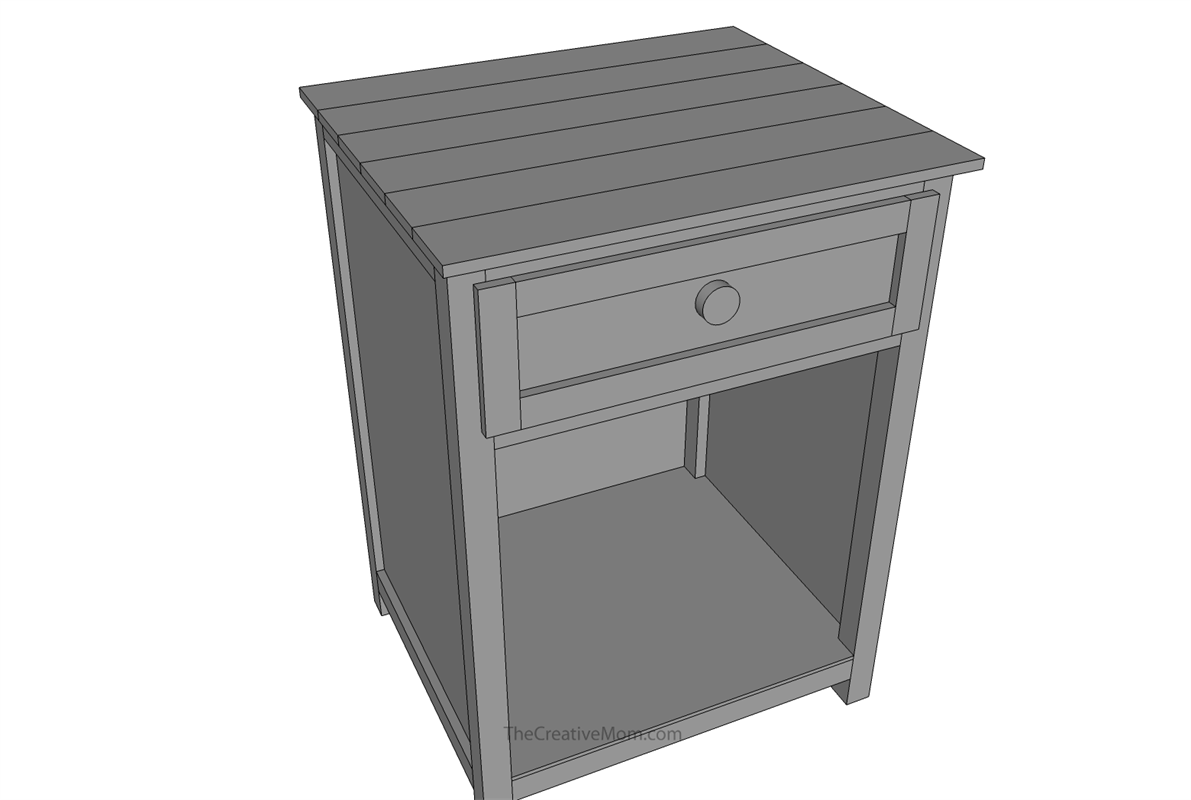
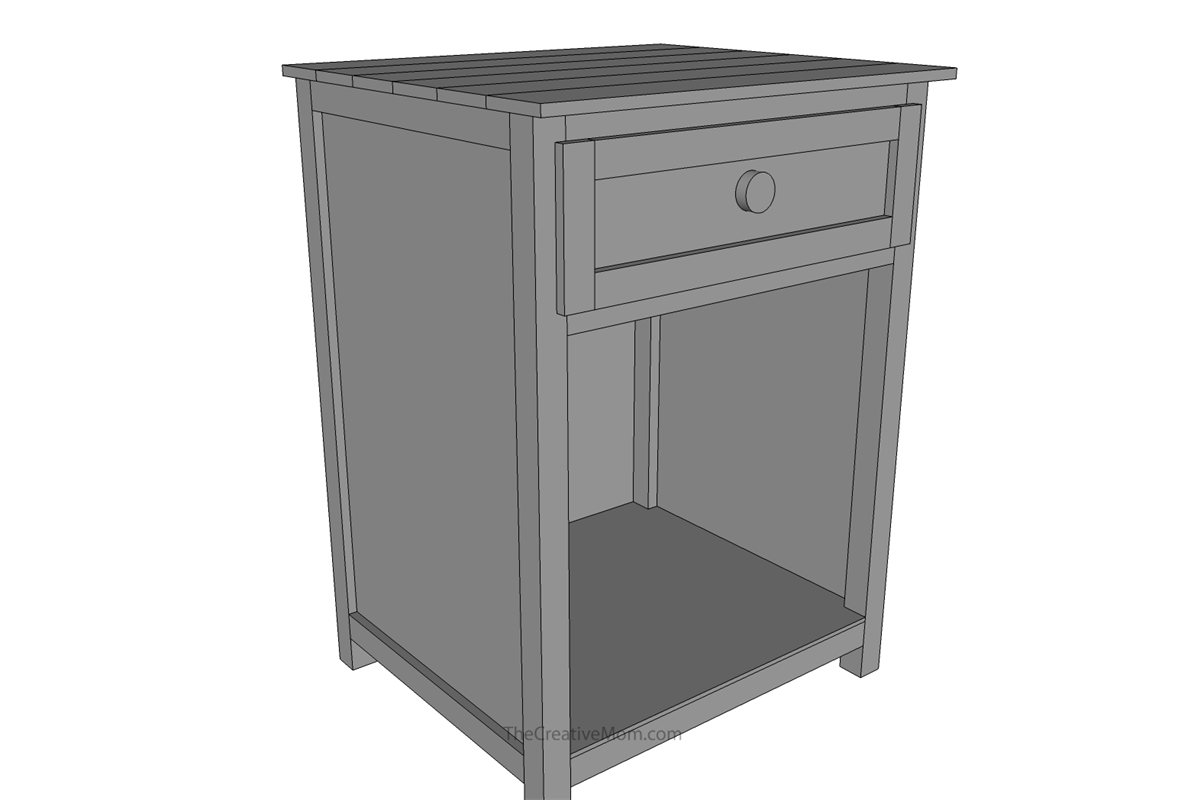
By The Creative MomA farmhouse style nightstand. Designed to pair with a taller bed. The nightstand has a planked wood top and craftsman style base. There is one drawer and a bottom shelf with space for a basket or other items. This is a intermediate build, with easy to follow instructions.
Directions
-
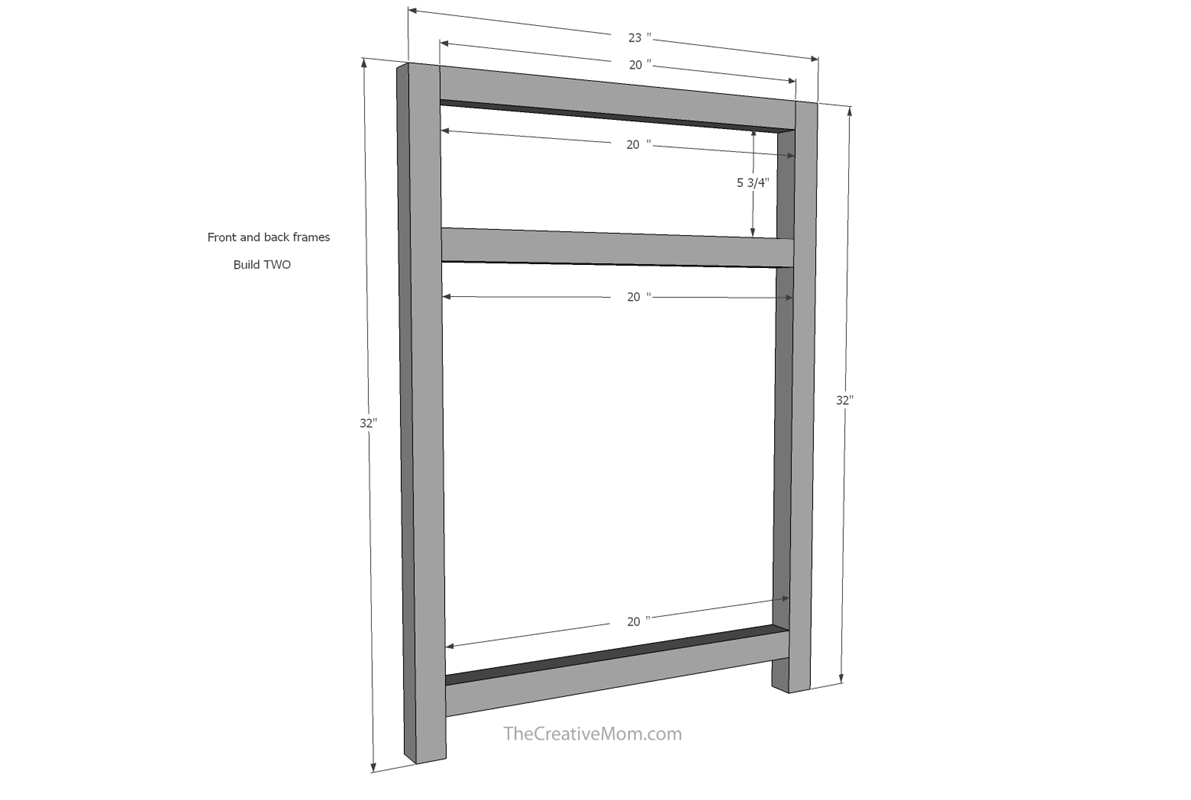
Build front & back frames
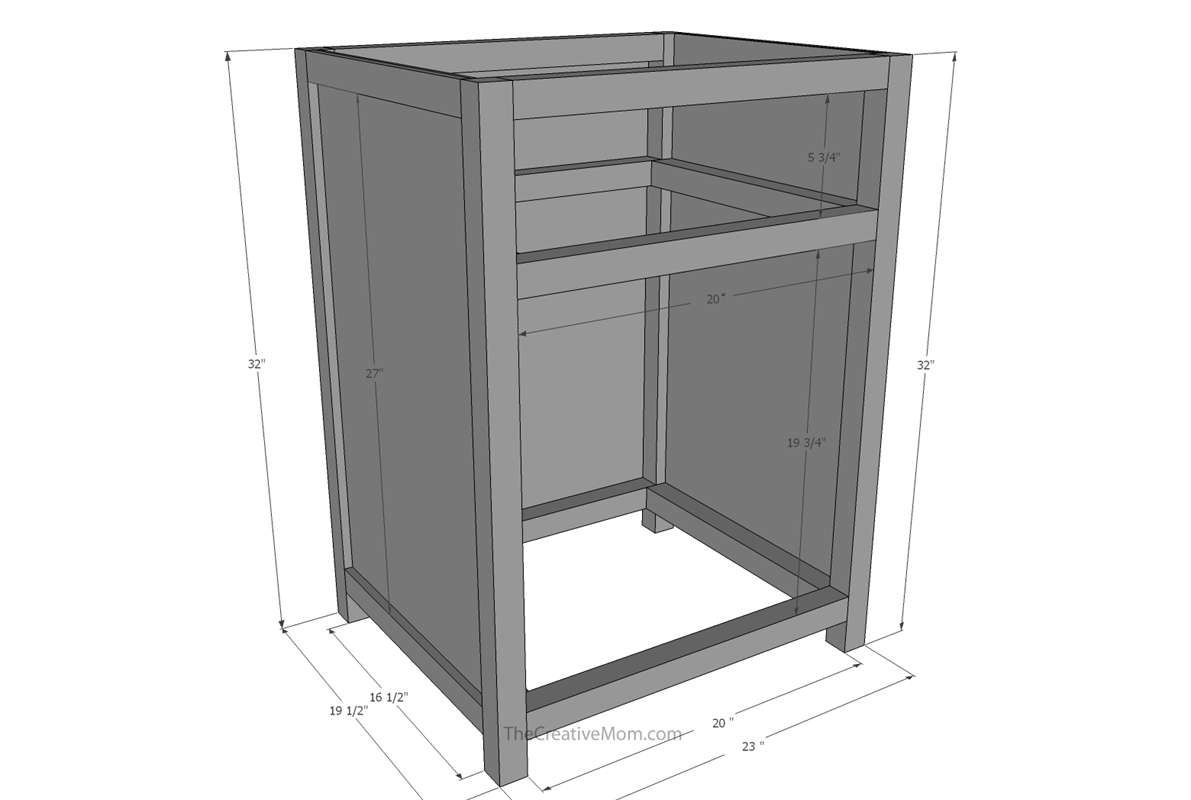
Cut 4- 32" 2x2's.
Cut 6- 20" 2x2's. Drill pocket holes in each end of all 20" 2x2's.
Use wood glue and 2 1/2" pocket hole screws to attach horizontal (20") 2x2's to vertical (32") 2x2 posts. You'll have one flush with the top of the corner post, one 5 3/4" below that, and one 2" from the bottom.
*Be sure to keep your project squared up as you build. -
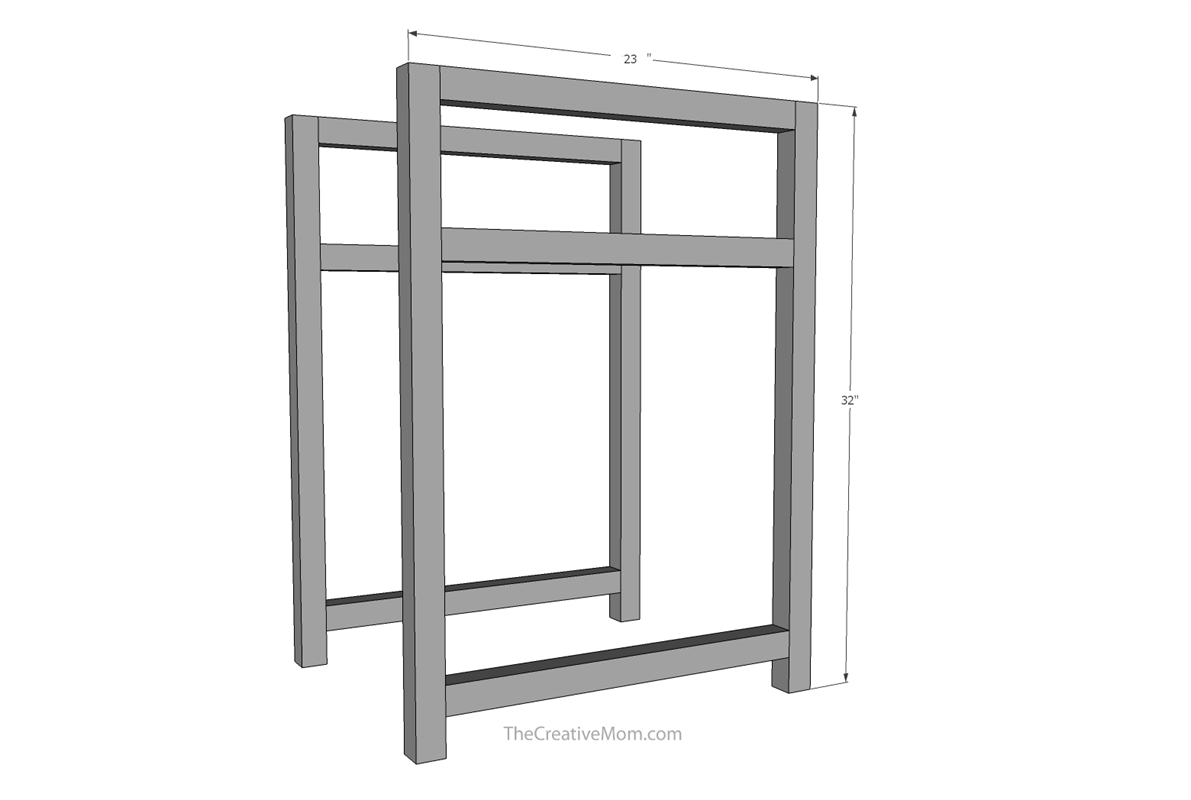
Front & Back Frames
Make sure you have 2 frames- one for the front of the nightstands and one for the back.
-
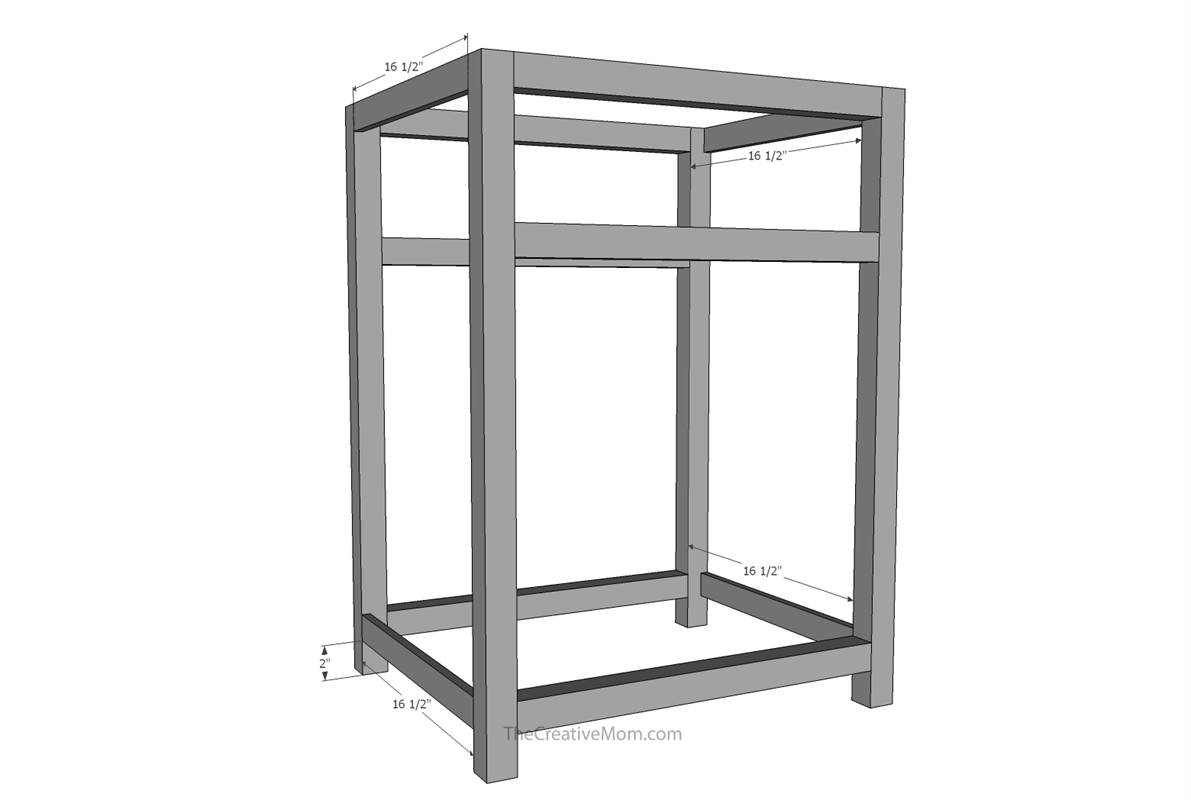
Add Side Supports
Cut 4- 16 1/2" 1x2's. Drill pocket holes in each end of all 4 boards.
Use wood glue and 1 1/4" pocket hole screws to attach horizontal 1x2's to vertical (32") 2x2 posts. You'll have one flush with the top of the corner post, one 5 3/4" below that, and one 2" from the bottom.
You'll do this on both sides of the frame to create a box.
**Be sure to keep your project squared up as you build. -
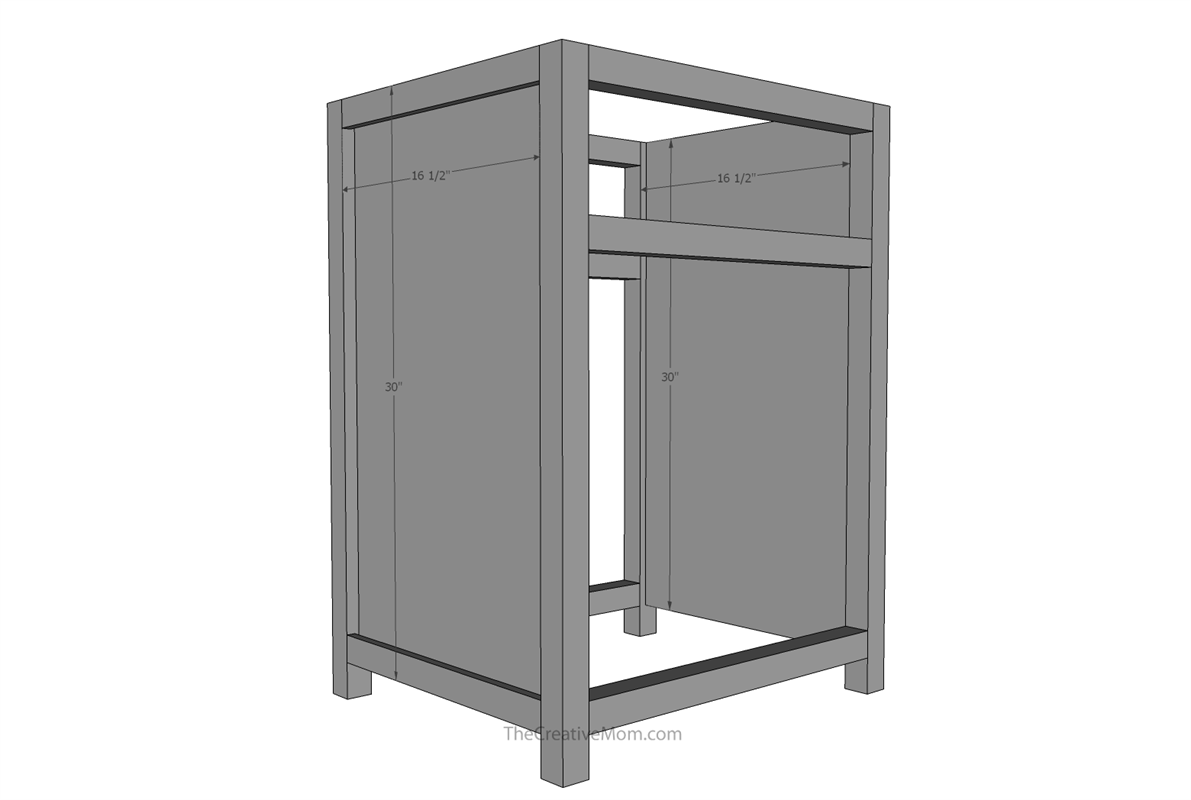
Add Plywood Sides
Cut 2- 16 1/2" x 30" pieces of plywood.
Using wood glue and brad nails, nail the plywood onto the horizontal 16 1/2" 1x2's from the INSIDE of the nightstand.
This will help sturdy up the frame. -
Add Drawer Slides and Shelf Support
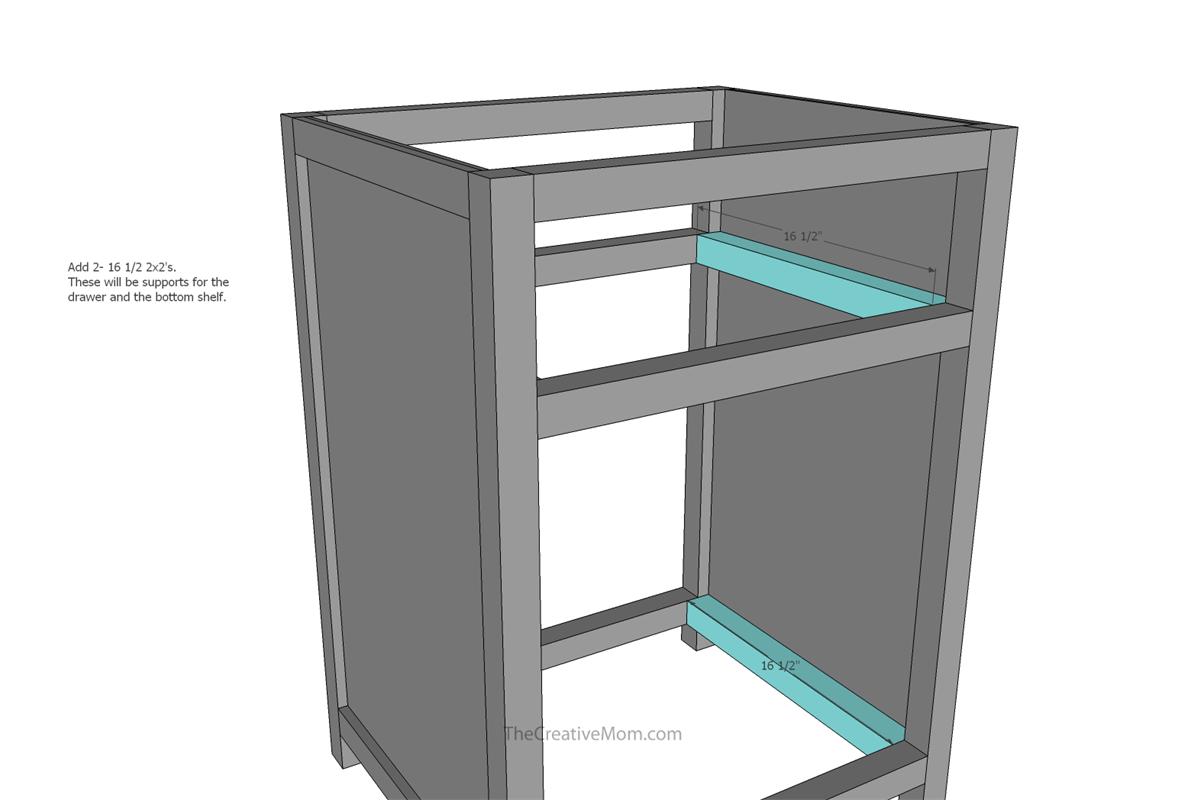
Cut 4- 16 1/2" 2x2's. Drill pocket holes in each end of all 4 boards.
Use wood glue and 2 1/2" pocket hole screws to attach horizontal boards to corner posts.
On each side of your nightstand, you'll attach one board flush with the middle 2x2 on the front frame, and one 2" from the bottom. These boards will be on the INSIDE of the side panels.
*Not only are these boards supports for the drawer and the shelf, but they also help stabilize the plywood on the sides of the nightstand. -
Attach Plywood Backing
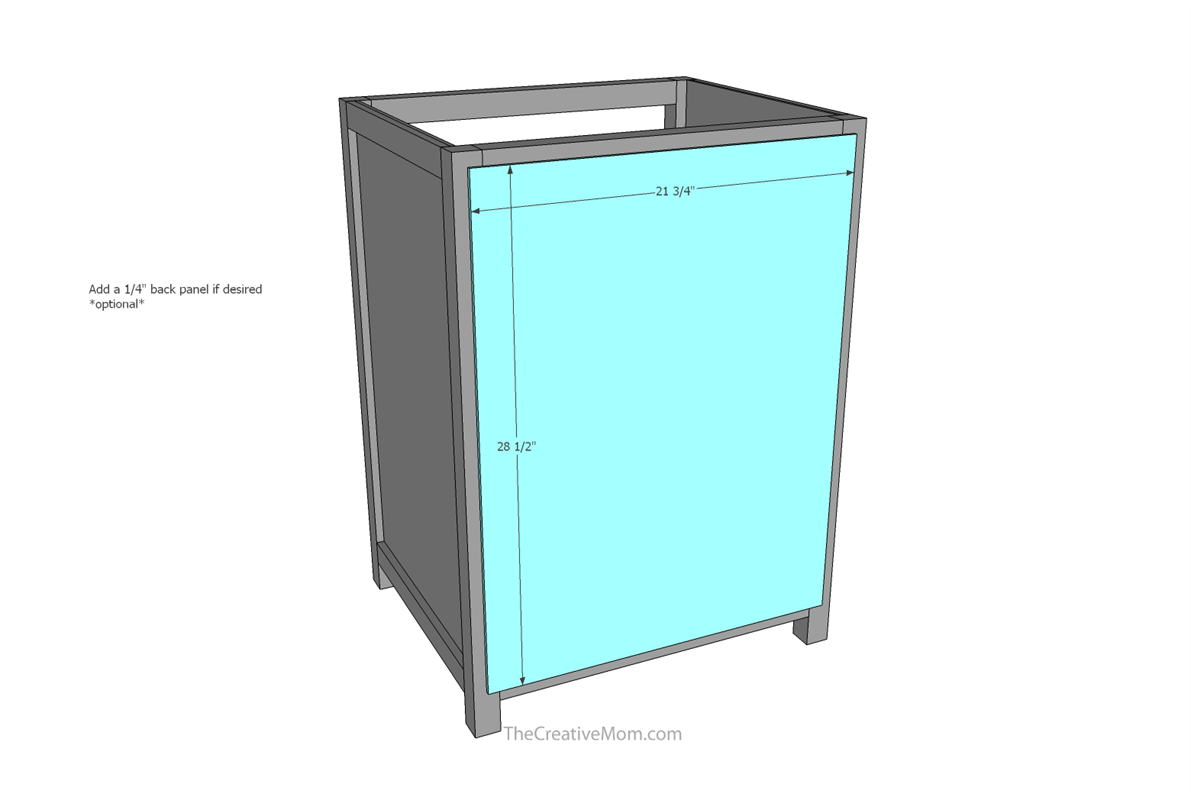
Cut 1- 21 3/4" x 28 1/2" piece of plywood.
Using wood glue and brad nails, attach to the back of the nightstand.
*This step is optional. It doesn't affect the integrity of the nightstand, it is for looks, and to keep the drawer from pushing too far back. The piece will function fine without it, though. -
Complete Nightstand Base
At this point, you should have a nice base for your nightstand. If you are planning to paint or stain the top a different color from the bottom, paint your base now. (Make sure to fill holes, sand, and prep before painting or staining.)
You can also add your bottom shelf in now (shown in the next step), before you paint or stain, if you want it all to be the same color.
You may also want to build the drawer box and paint it at the same time (shown in step 10). -
Add Bottom Shelf
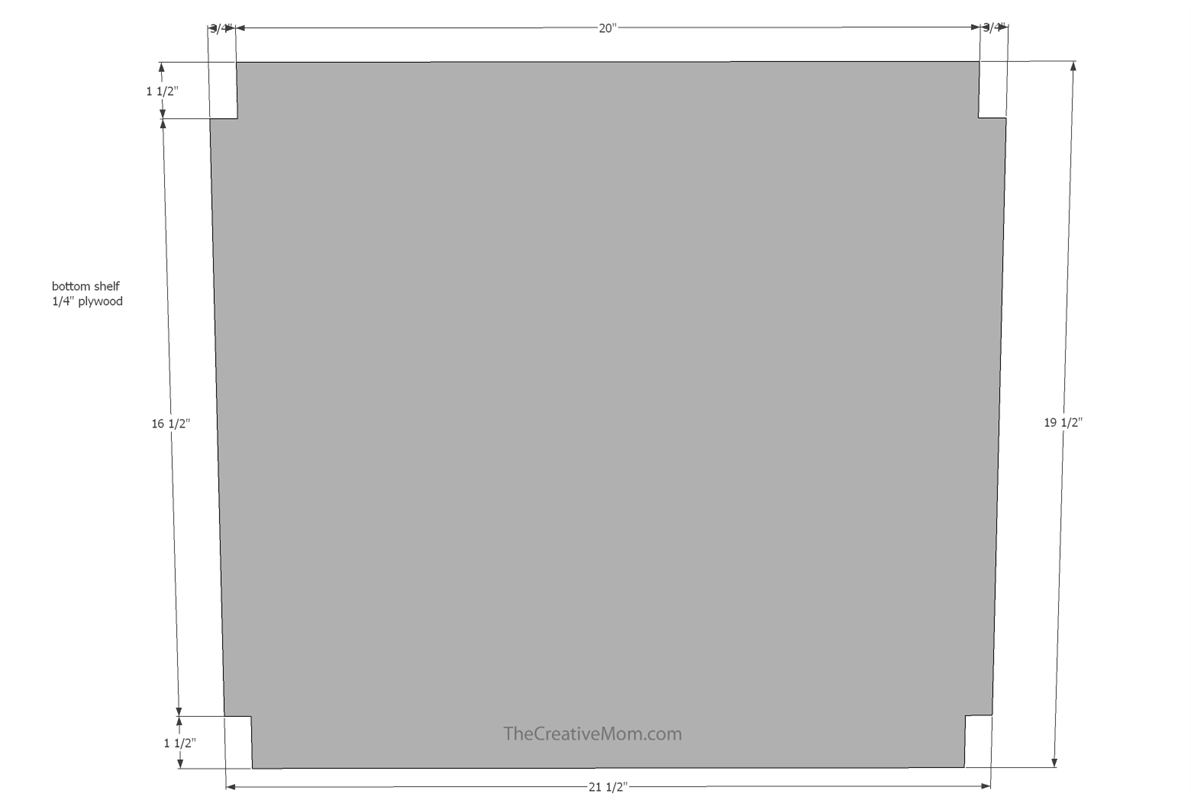
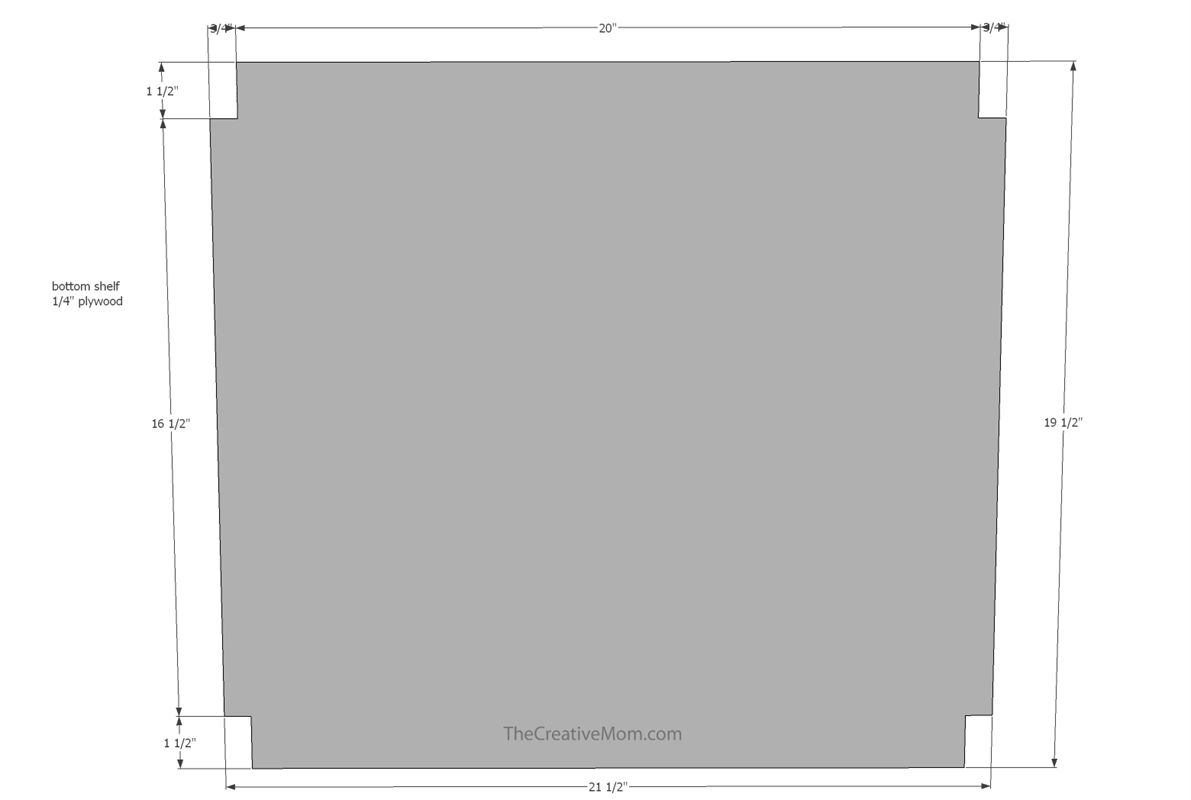
Cut a piece of plywood 21 1/2" x 19 1/2" (Make sure to check the measurements of your piece first).
Use a jigsaw to cut notches out of the corners. See plans for detailed cuts. -
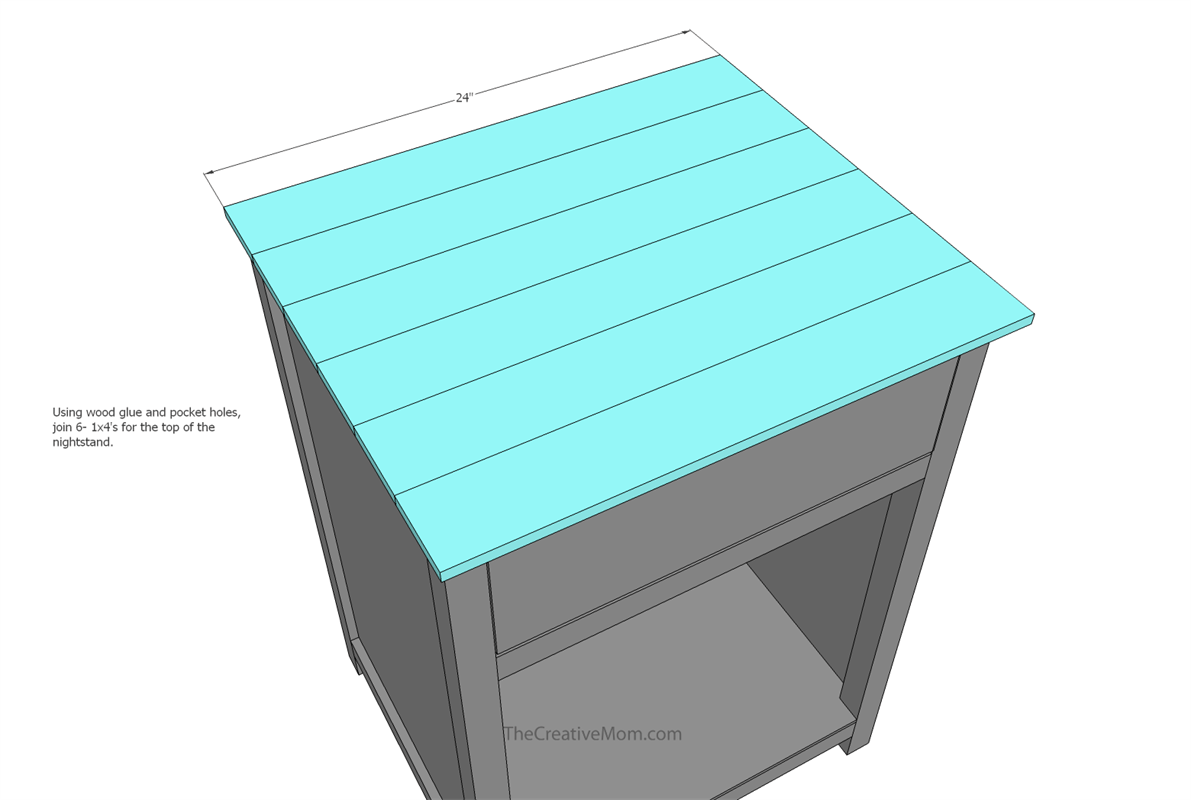
Build Table Top
Cut 6- 24" 1x4's. Drill 3 or 4 pocket holes down the length of the boards (on the underside only).
Sand boards, then paint or stain as desired.
Using 1 1/4" pocket hole screws, attach boards together to create a table top. Be sure to keep boards level and square.
Use L-shaped brackets to attach the table top to the nightstand base. -
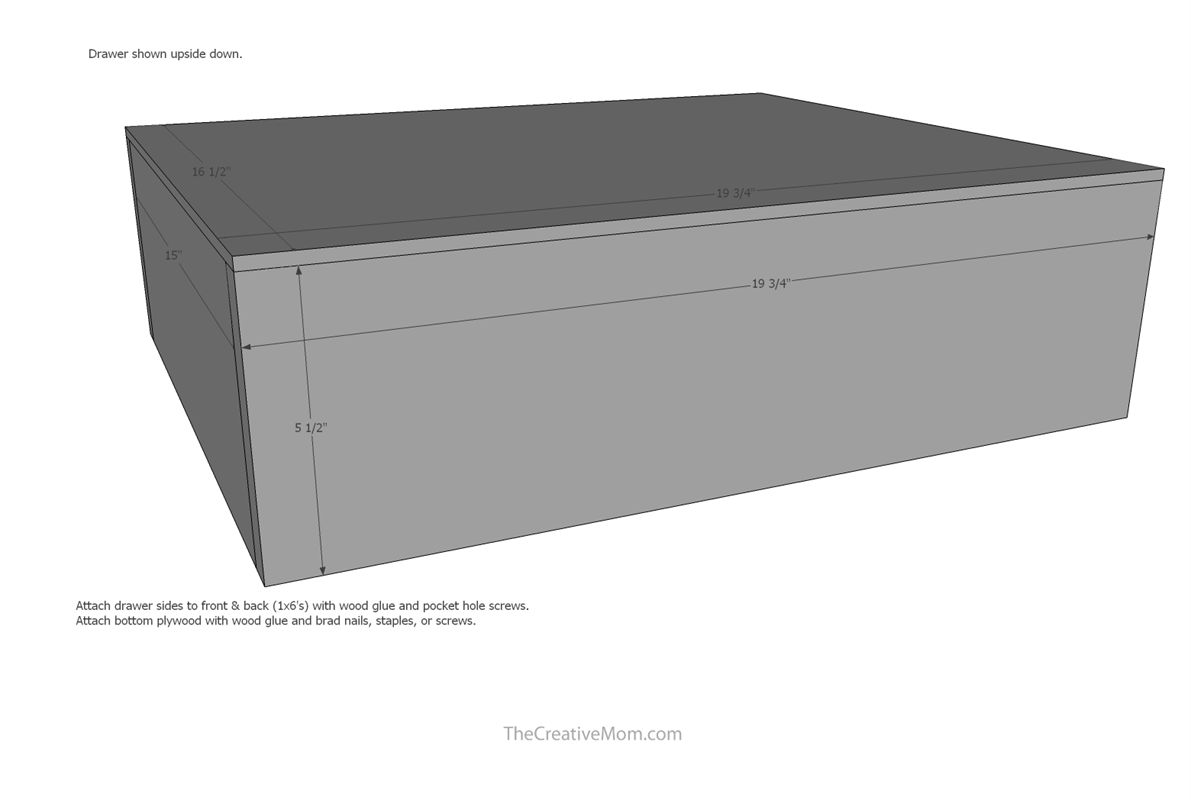
Build Drawer
Cut 2- 19 3/4" 1x6 boards.
Cut 2- 15" 1x6 boards. Drill pocket holes in the ends of the 15" boards.
Using wood glue and 1 1/4" pocket hole screws, attach boards to create a box.
Cut a piece of plywood 16 1/2 x 19 3/4". This will be the bottom of your drawer. Use wood glue and brad nails to attach to the bottom of the drawer box. -
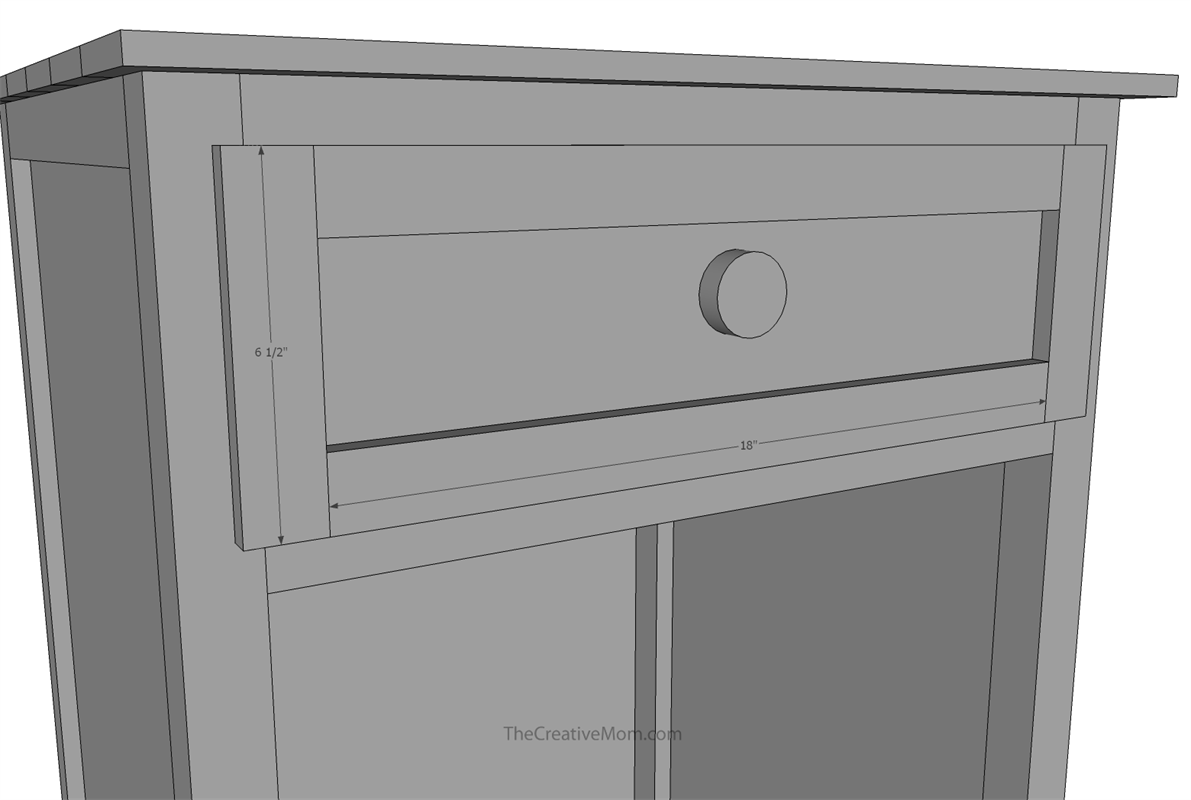
Trim Drawer Front
You should have a 1/8" gap around the drawer to allow for smooth sliding. You may leave the drawer as is. Or, add trim. This is totally optional.
Cut 2- 18" 1x2's
Cut 2- 6 1/2" 1x2's
Use wood glue and brad nails to attach trim to the front of your drawer. Make sure to keep trim square with your nightstand base. -
Finish
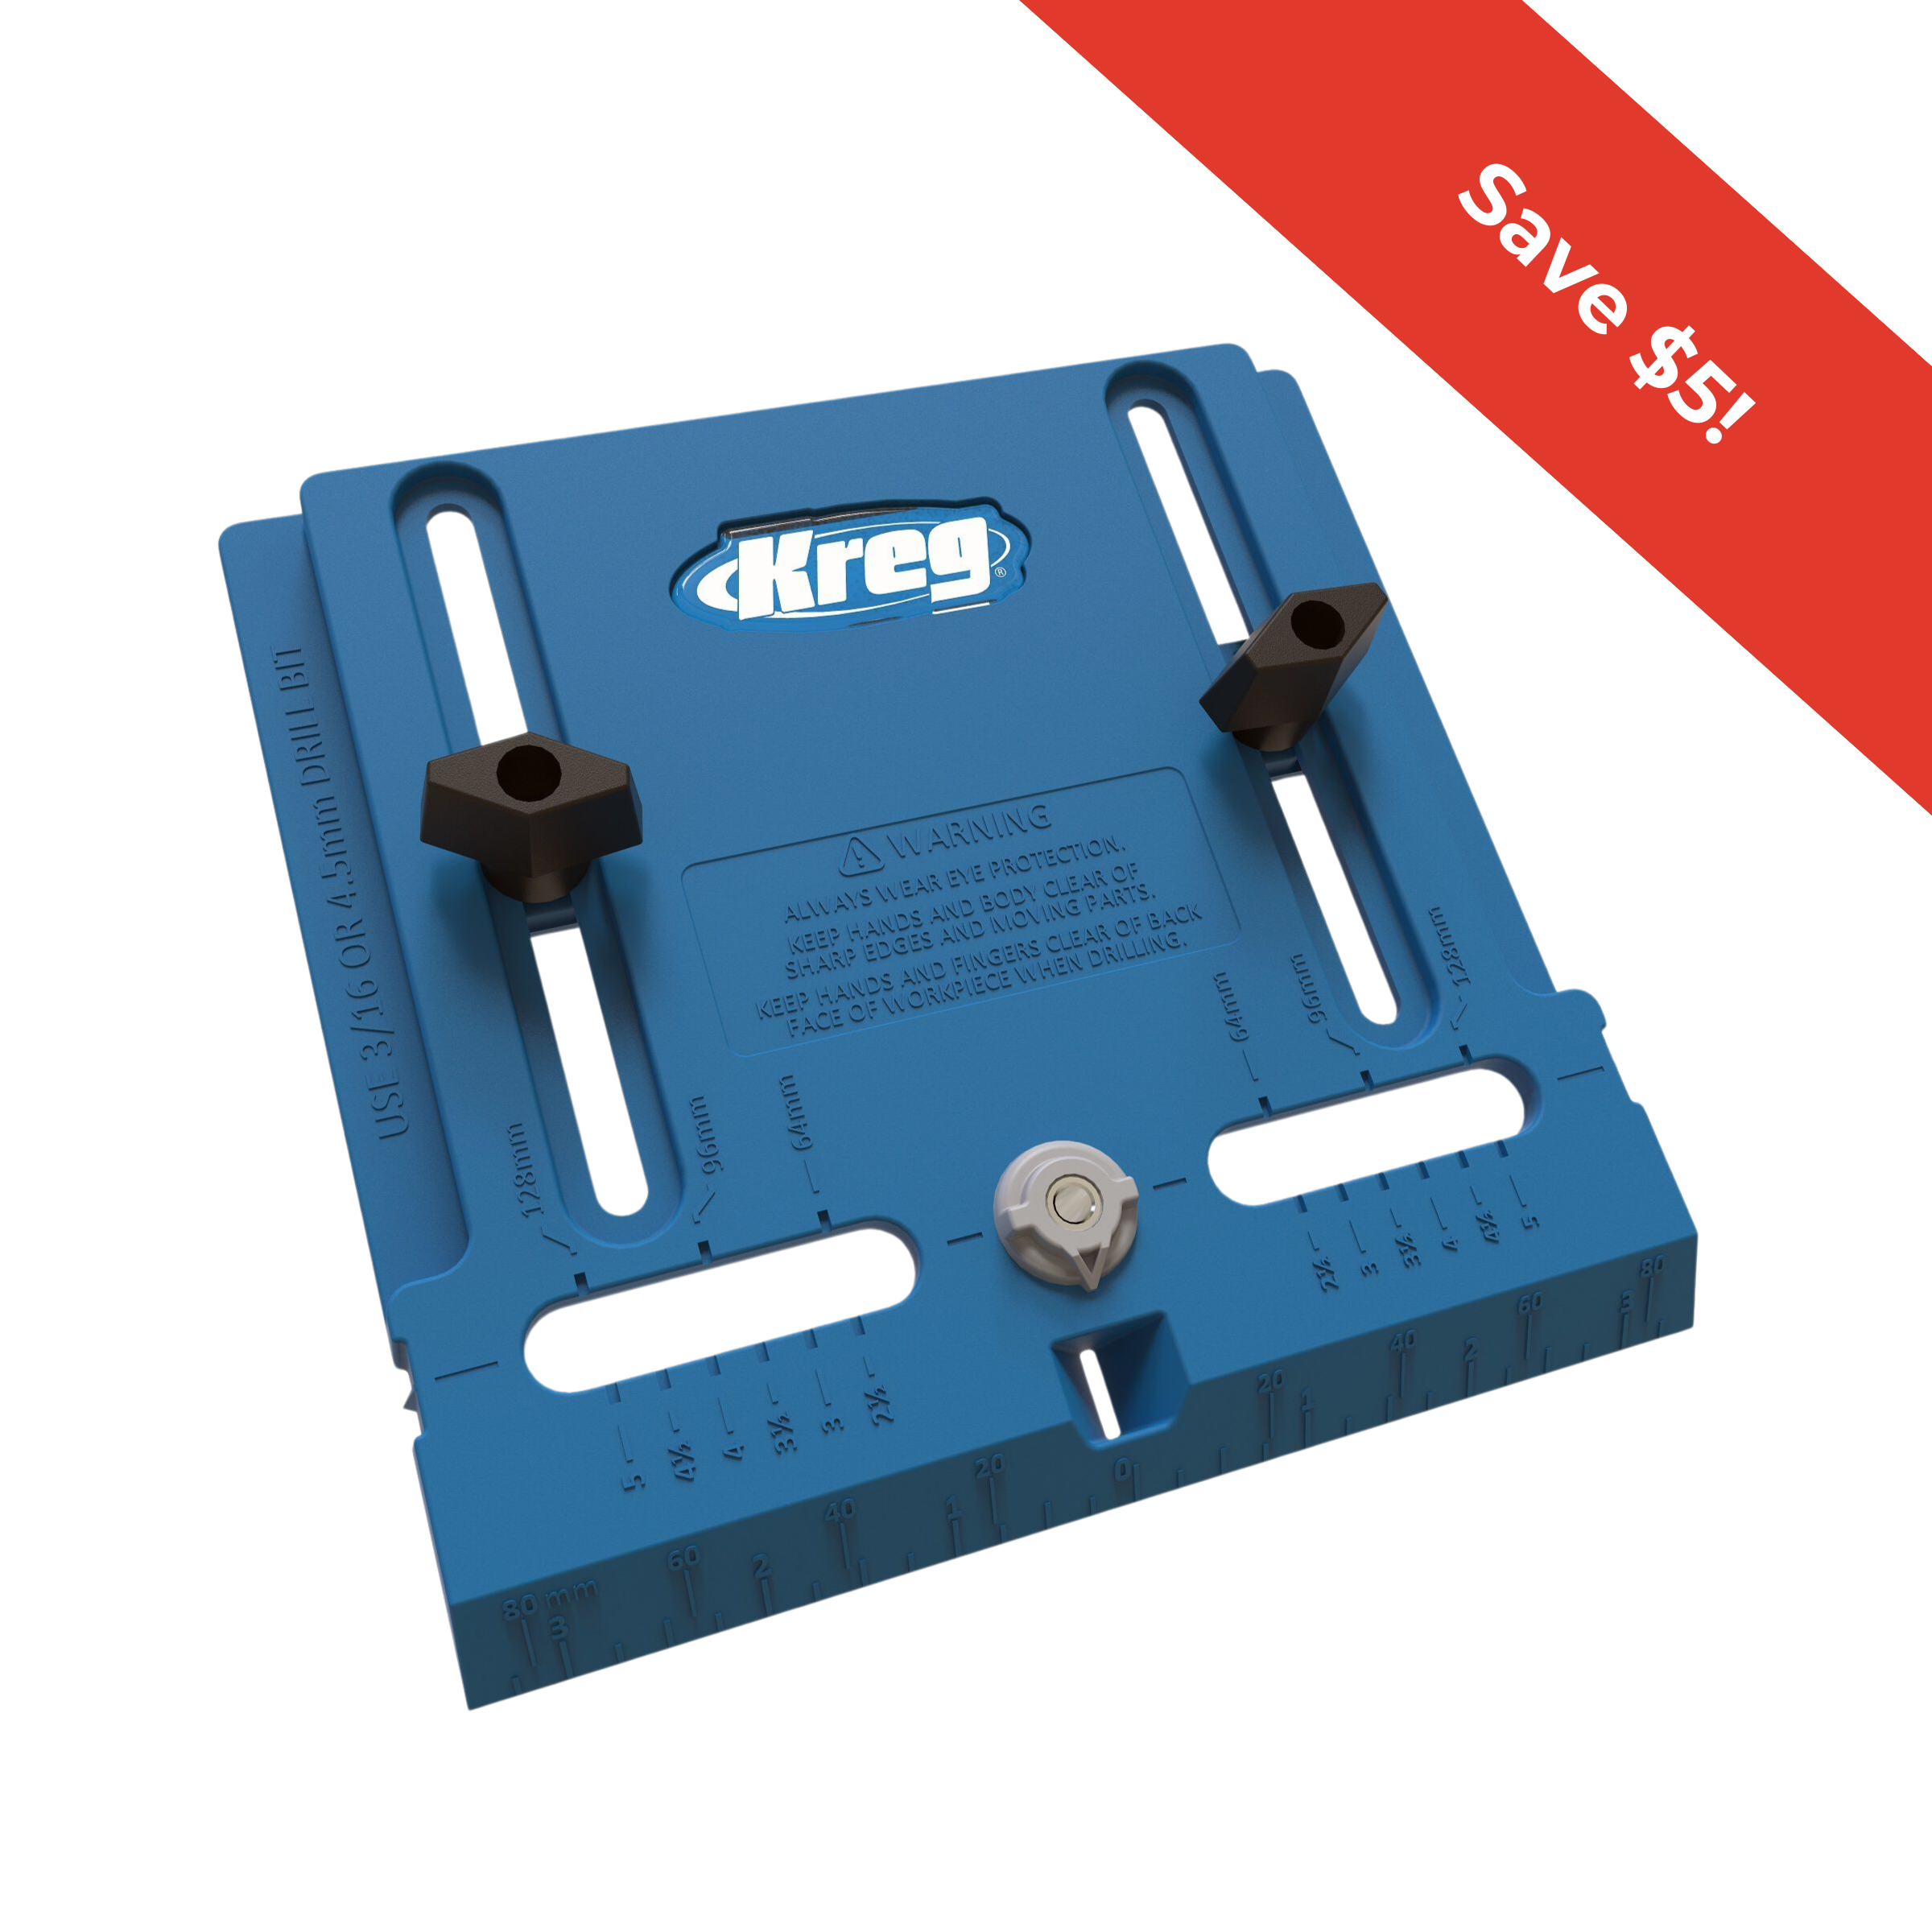
Fill any holes, sand, and paint or stain your piece. Add drawer pulls using Kreg's drawer pull jig.


