Antique Style Hutch
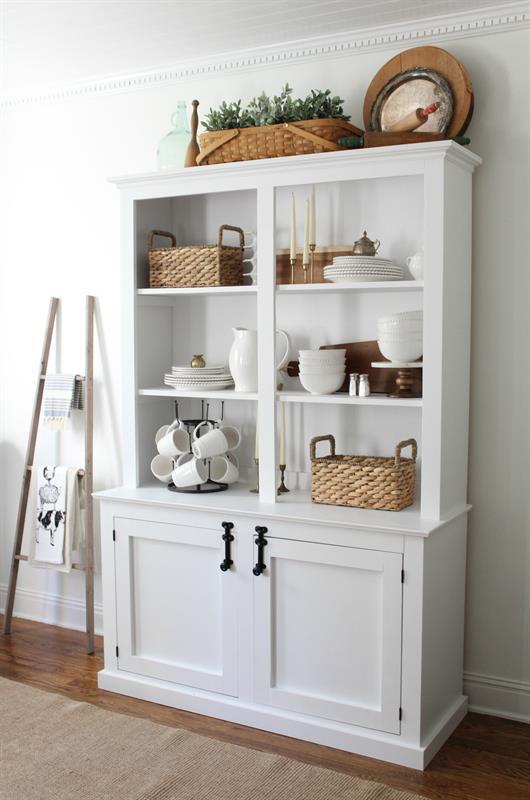
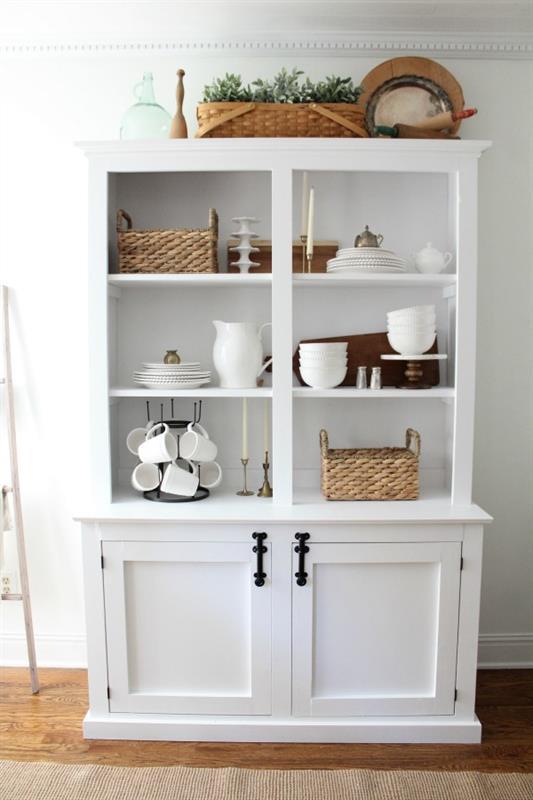
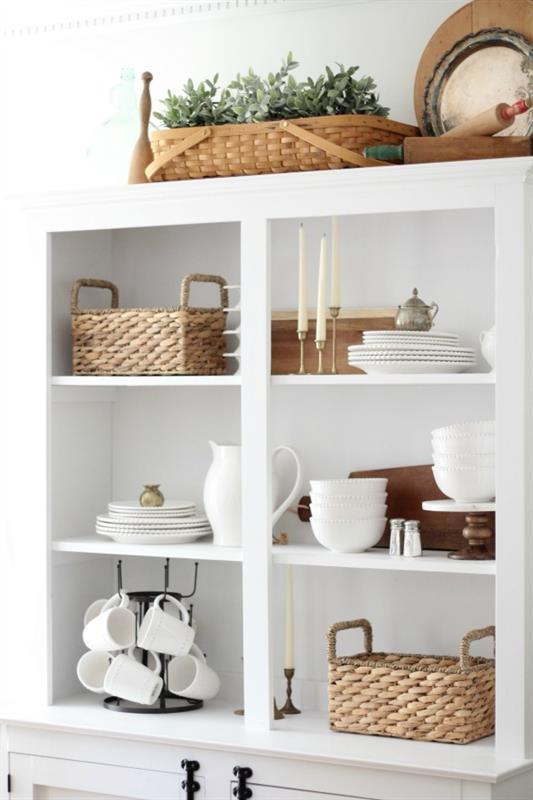
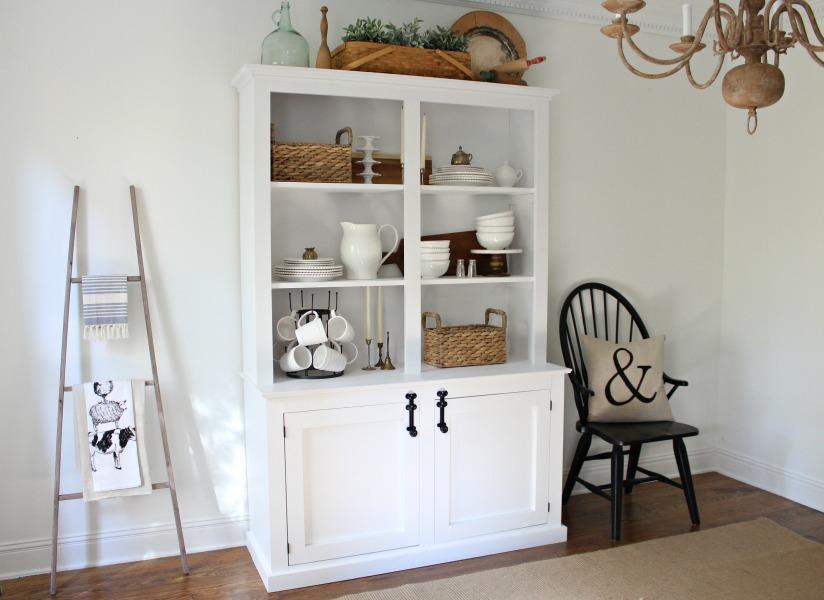
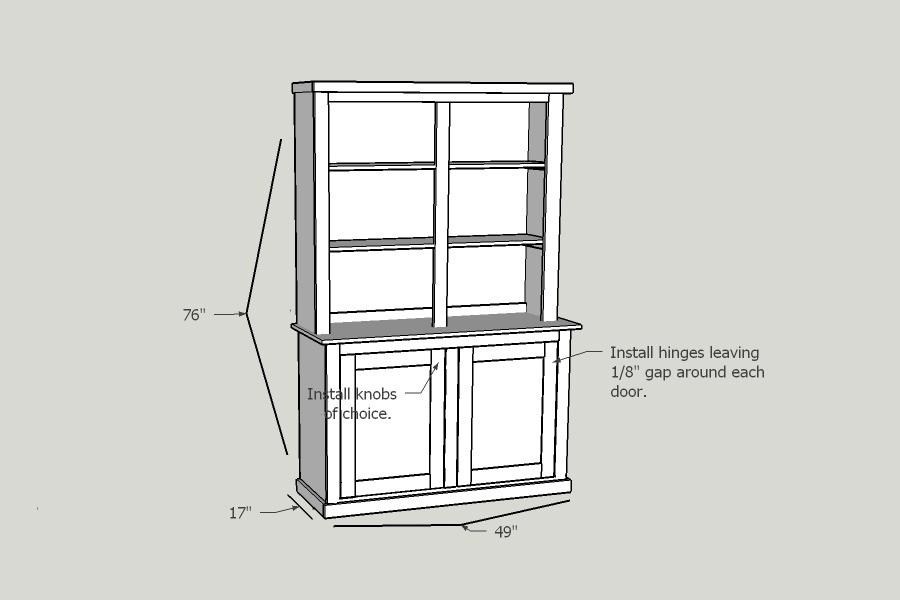
By Sincerely, Marie DesignsAntique, shaker style hutch & cabinet. Great for displaying all your dishes and dining utensils as well as plenty of storage below with an extra shelf.
Directions
-
Building Cabinet Base
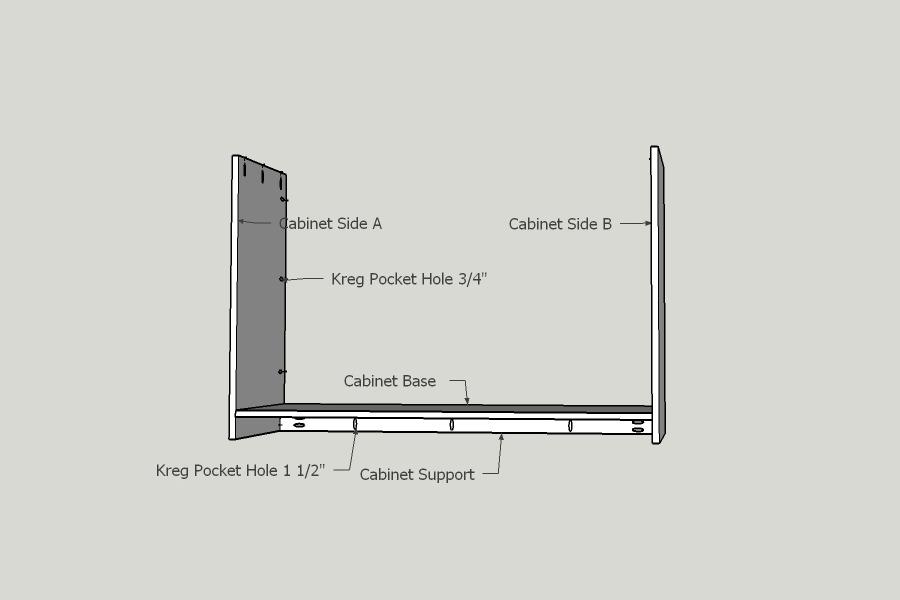
Make all pocket holes in the cabinet sides, cabinet support and bottom shelf. Attach cabinet sides to cabinet bottom support using 1 1/4" Kreg screws. Attach bottom shelf using 1 1/4" Kreg screws as well.
-
Adding Cabinet Face Frame
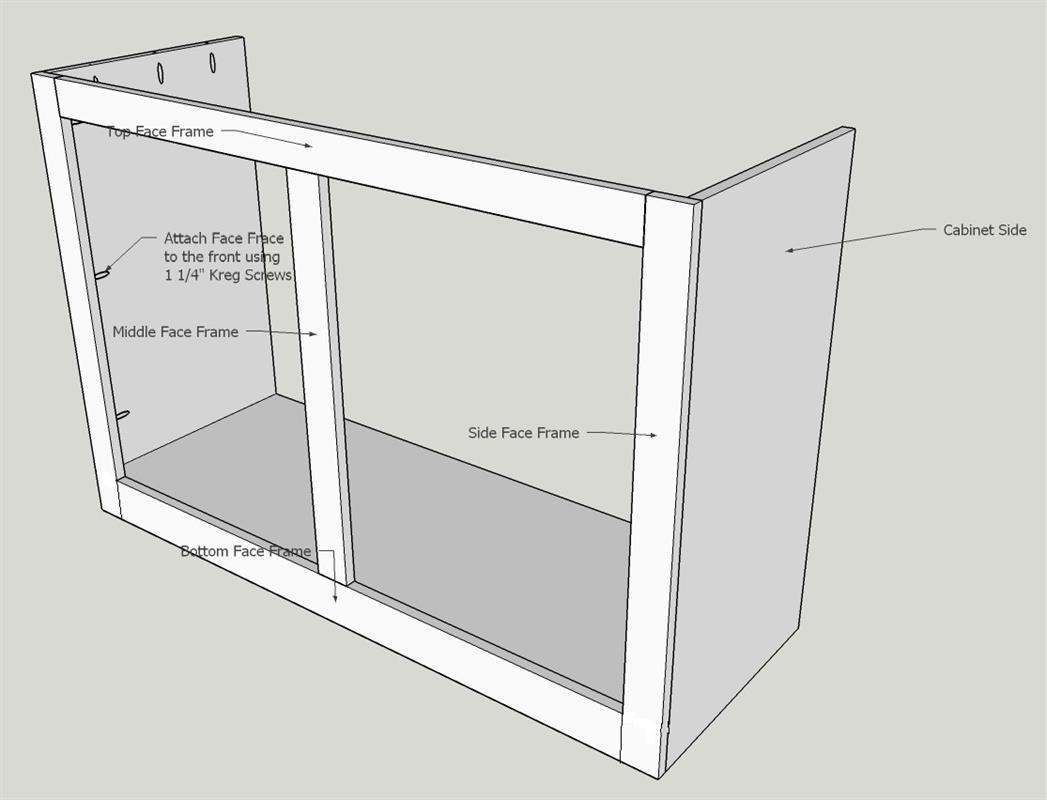
Attach top, bottom and side face frame using 1 1/4" Kreg screws and wood glue.
-
Adding Cabinet Shelf & Top
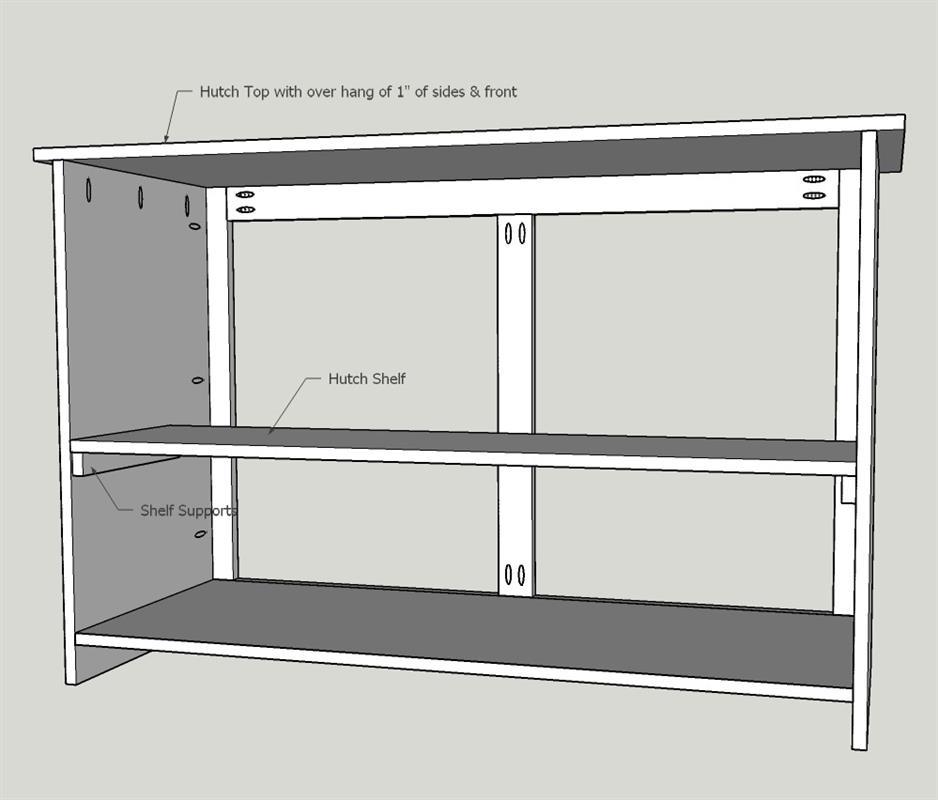
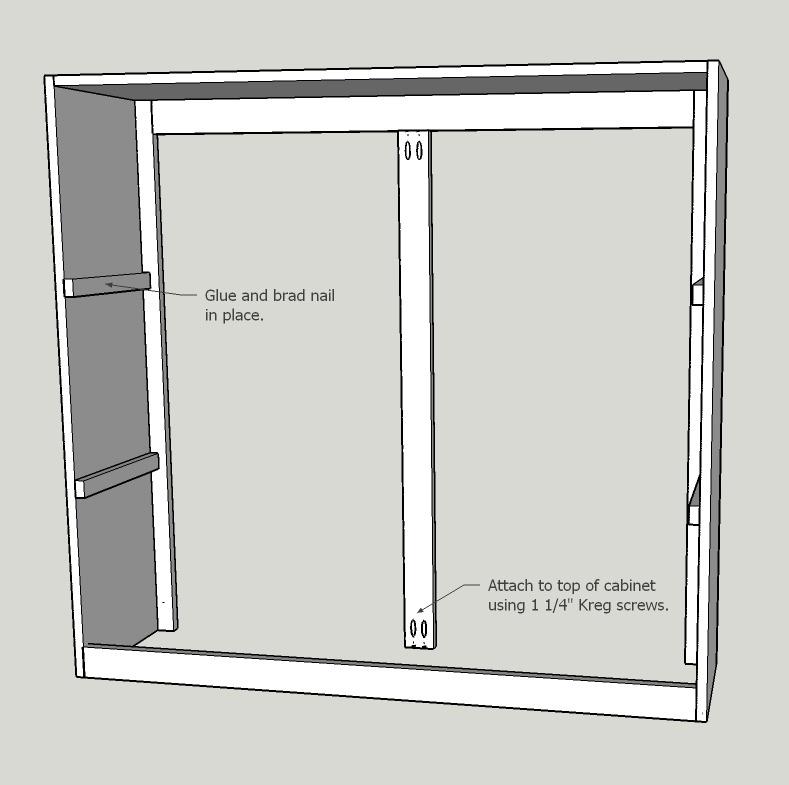
Using glue and brad nails attach the shelf supports making sure they're flush with the backs of the cabinet sides. Add the cabinet top using 1 1/4" Kreg screws.
-
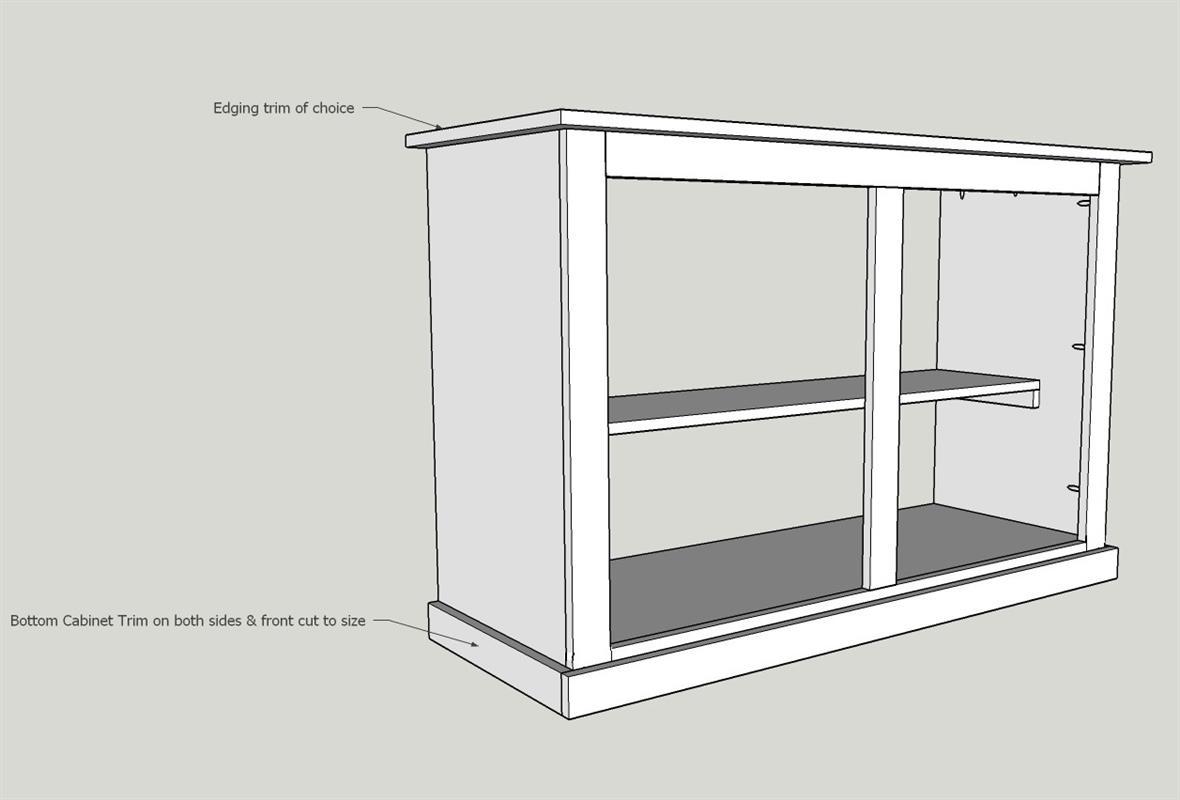
Adding Cabinet Trim
Cut to size and nail in desired trim around the base of the cabinet as well as around the cabinet top if you choose.
-
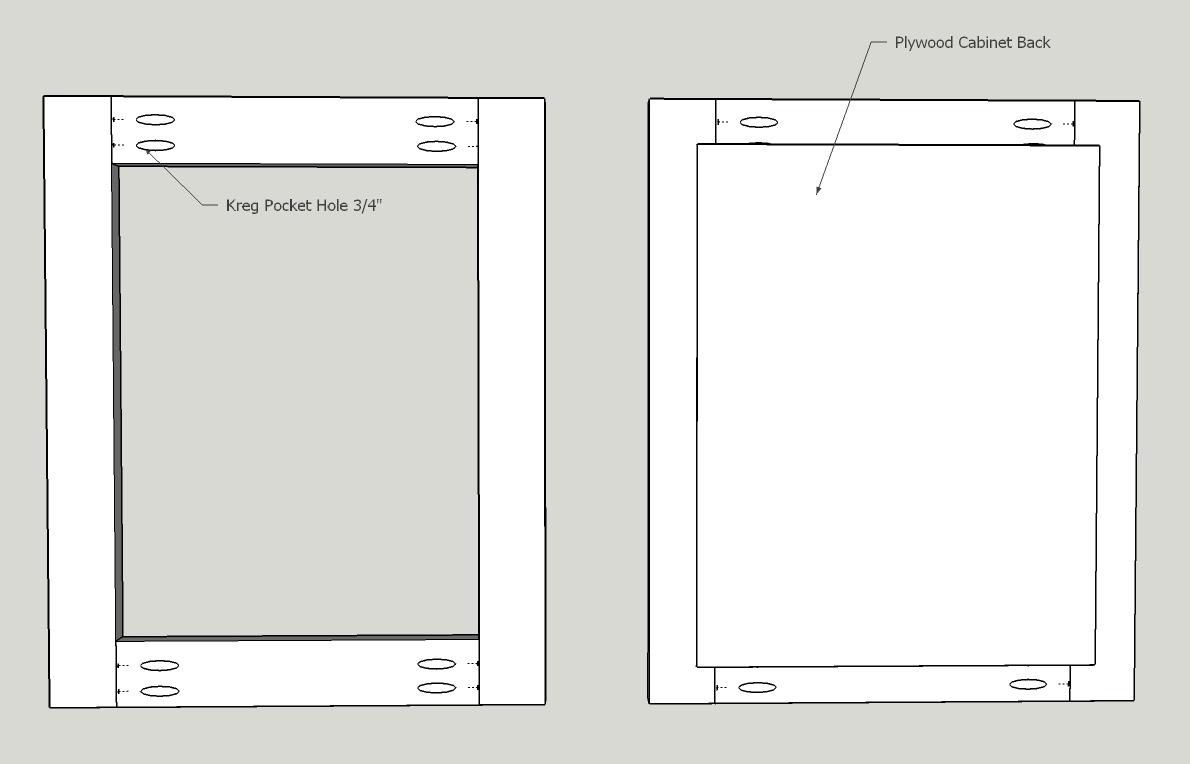
Make Cabinet Doors
Attach cabinet sides using wood glue and 1 1/4" Kreg Screws. Using a staple gun and wood glue, attach plywood backing to the backside of the doors.
-
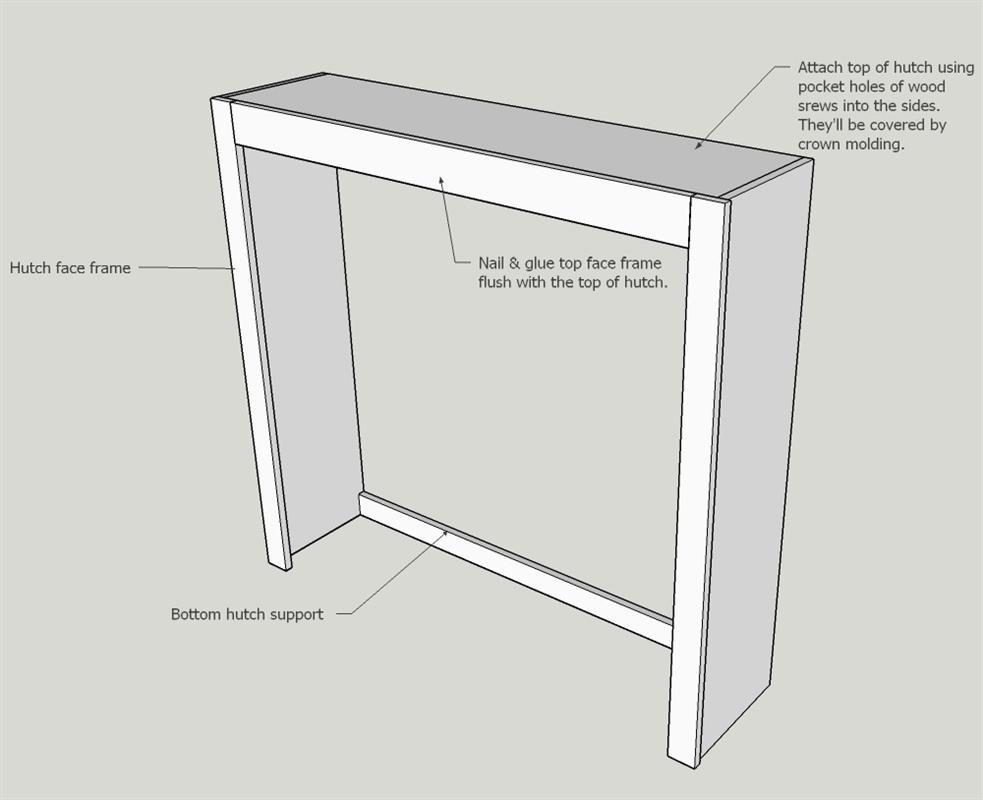
Assemble Hutch Frame
Attach hutch sides to bottom support with 3/4" pocket holes using 1 1/4" Kreg screws. Add hutch top by pocket holes and Kreg screws or use wood screws and drill in from the side. This will be covered later with crown molding.
Add hutch side face frames using wood glue and brad nails. Attach top face frame using 1 1/4" Kreg screws.
-
Add Hutch Shelves
Add middle face frame using 1 1/4" kreg screws. Find the center point and attach at top of the face frame and attach at the bottom by screwing into the top of the cabinet once in place.
Add your shelf supports with wood glue and brad nails. Make sure the supports are flush with the back of the cabinet.
-
Attach Hutch to Cabinet
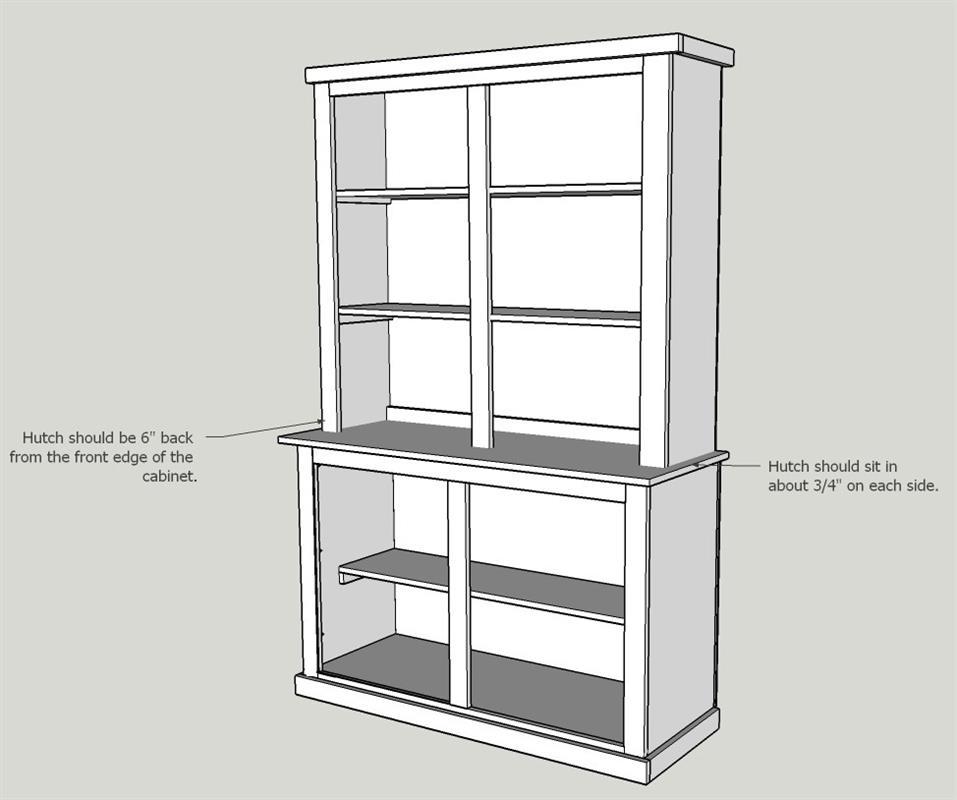
Attach the hutch to the cabinet by screwing middle hutch face frame onto the cabinet top and by adding mending plates to the back of the hutch sides and cabinet sides. There should be about 3/4" cabinet over hang on each side of the hutch.
-
Attaching The Cabinet Doors
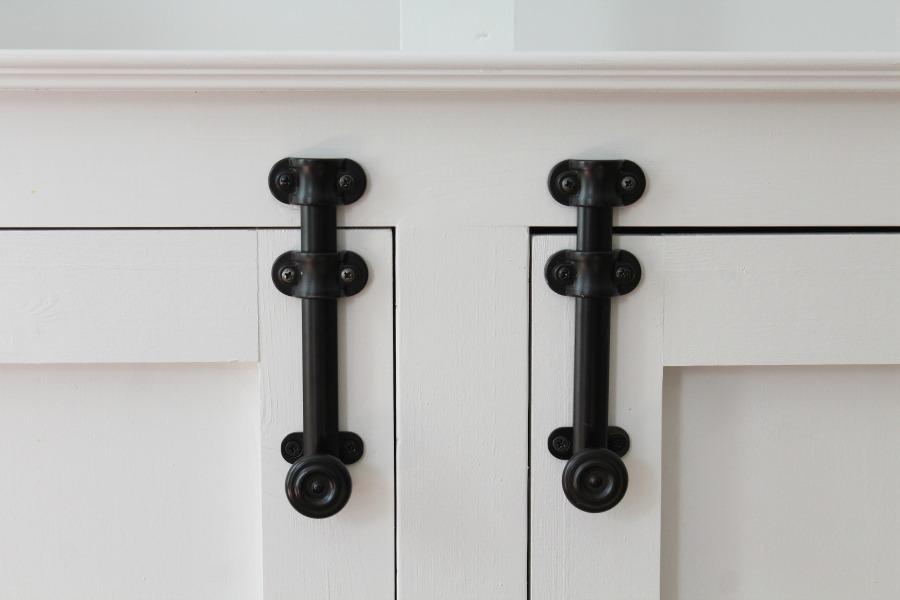
Hang doors with desired hinges, leaving an 1/8" gap around. Attach desired knobs or latches. The hardware shown here was all purchased at Home Depot.
-
Add Backer Board
Add 1/4" plywood cut to size to the back of the hutch and cabinet using a staple gun.
-
Finishing
Fill all holes and cracks with wood filler and sand with 120 grit sand paper and stain or paint with color of choice. Seal with a clear top coat and sand lightly with 400 grit sand paper for a super smooth finish.
-
Visit The Tale of an Ugly House
Visit me at TheTaleofanUglyHouse.com


