
Kreg pocket-hole jigs are versatile tools that simplify and speed up the process of joining wood, making great for both novice and experienced woodworkers. Whether you’re building furniture, cabinets, or simple DIY projects, this jig ensures strong, precise joints with minimal effort. In this guide, we’ll walk you through the steps to effectively use a Kreg pocket-hole jig, so you can more easily achieve professional-grade results in your woodworking projects.
Understanding Pocket Hole Joinery
What are pocket holes and how do they work?
Pocket holes are angled holes drilled into one piece of wood that allow you to join it to another piece using specialized screws. The concept is simple and ingenious: the screw passes through the pocket hole at an angle, entering the adjoining piece of wood and drawing the two pieces tightly together. This creates a strong joint that can be used in a variety of applications. Check out this article for a more in-depth look at how pocket hole joints work.
Why use pocket-hole joinery?
Benefits of Using Pocket Holes
The popularity of pocket hole joinery isn’t just a passing trend. There are several compelling reasons why woodworkers of all skill levels are embracing this technique:
- Speed: Compared to traditional joinery methods like mortise and tenon or dowel joints, pocket-hole joinery is significantly faster. You can create strong joints in minutes rather than hours.
- Strength: When executed properly, pocket-hole joints are remarkably strong, and comparable to other joinery methods. They can withstand considerable stress and are suitable for a wide range of furniture and cabinetry applications.
- Simplicity: One of the biggest advantages of pocket-hole joinery is its simplicity. Even beginners can create professional-looking joints with minimal practice, making it an excellent entry point into more advanced woodworking.
- Versatility: Pocket holes can be used in a wide variety of applications and wood types. From face frames to mitered corners, hardwoods to plywood, this technique is extremely adaptable.
- Invisible joints: With proper placement, pocket holes can be completely hidden from view, resulting in clean-looking projects.
- No specialized woodworking skills required: Unlike some traditional joinery methods that require years of practice to master, pocket-hole joinery can be learned quickly.
- Reversible: If you make a mistake or need to disassemble a project, pocket-hole joints can often be taken apart without damaging the wood.
Common applications for pocket hole joints
The versatility of pocket hole joinery makes it suitable for a wide range of woodworking projects. Here are some ideal applications:
- Cabinet construction: Pocket holes are perfect for building cabinet face frames and attaching them to cabinet boxes.
- Furniture building: Pocket holes can be used in almost any furniture project, like tables, chairs, bookcases, bed frames, and more.
- Face frames: Creating and attaching face frames for cabinets and built-ins is one of the most common uses for pocket-hole joinery.
- Joining mitered corners: Pocket holes provide extra strength to mitered corners in trim work or picture frames.
- Custom shelving units: Build strong, custom shelves for closets, pantries, or garages.
- Drawer construction: Assemble sturdy drawer boxes efficiently.
- Panel glue-ups: Use pocket holes to reinforce panel glue-ups for table tops or large surfaces. Pocket holes also remove the need to leave clamps in place while glue sets and cures.
- Outdoor projects: Many outdoor furniture and structures can benefit from the strength of pocket hole joints.
Check out this article on simple joints you can make with your pocket hole jig.
Introduction to Kreg pocket-hole jigs
What Is a Kreg Jig?
Kreg pocket-hole jigs are specially designed tools that help you create precise pocket holes quickly and consistently. The first jig was named after its inventor, Craig Sommerfeld (Craig’s Jig then became the Kreg Jig), who developed the first pocket-hole jig in the late 1980s. The jig works by guiding your drill at the perfect angle and depth, ensuring that your pocket holes are uniform, and your joints are strong.
Parts of a Kreg pocket-hole jig
To effectively use a pocket-hole jig, it’s important to understand its components.
Drill guide block
This is the heart of the jig. It features hardened steel drill guides that ensure accurate hole placement and angle. The number of drill guides varies depending on the model of Kreg Jig you’re using.
Stop collar
This adjustable collar attaches to your drill bit and controls the depth of your pocket holes. Setting it correctly is crucial for creating strong joints without breaking through the other side of your workpiece.
Dust collection port
Higher-end models often include a port for attaching a shop vacuum to keep your work area clean.
Step-by-step guide to using a Kreg pocket-hole jig
Now that we’ve covered the basics, let’s dive into a detailed, step-by-step process of using a Kreg pocket-hole jig.
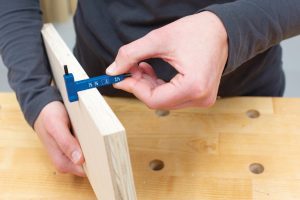
Step 1: Measure and set the board thickness
Use the Kreg Material Thickness Guide or a tape measure to measure the thickness of your workpiece.
Locate the material thickness setting on your Kreg pocket-hole jig and adjust it to match the board thickness.
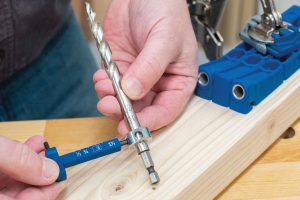
Step 2: Adjust the stop collar
Insert the specialized Kreg Easy-Set Drill Bit into your drill. This bit has a stepped design that creates both the pocket hole and the pilot hole for the screw. Slide the windowed stop collar onto the bit so the marking on the drill bit is visible.
Match the setting on the drill bit to the material thickness to set the correct drilling depth.
Tighten the stop collar securely using the included Allen wrench. It’s crucial that this doesn’t slip during use. Check the stop collar’s alignment from time to time to be sure your depth is correct.
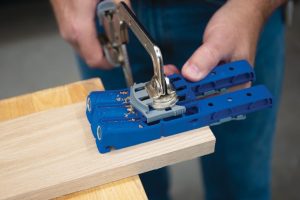
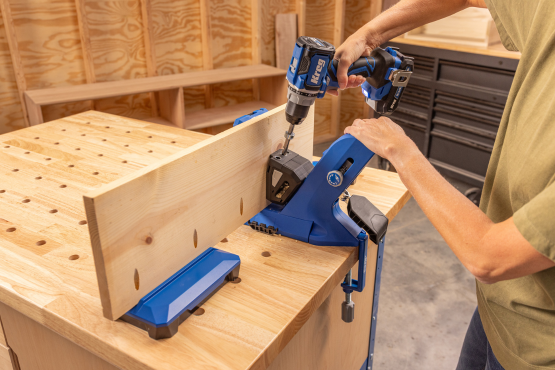
Step 3: Position and clamp your workpiece
Decide where you want your pocket holes. Mark these locations on your workpiece.
Position your workpiece in the jig (or the jig on the workpiece, depending on the jig), aligning it with the drill guides. Make sure the face of the board that will be visible in your finished project is facing away from the jig.
Best practices for pocket-hole placement
Keep holes at least 2″ from the edge of your workpiece to prevent splitting. For wide boards, consider using multiple rows of pocket holes for added strength.
For mitered corners, place the pocket holes as close to the inside corner of the miter as possible.
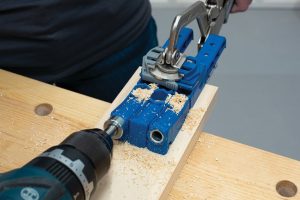
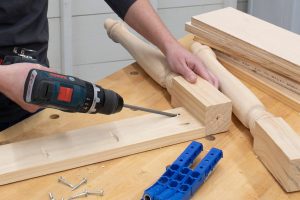
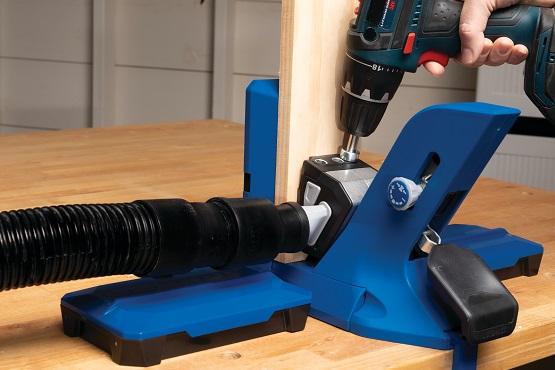
Step 4: Drill the pocket holes
Insert your drill bit into one of the drill guides. Make sure it’s fully seated. Start drilling slowly to prevent wandering, then increase speed as you go deeper.
Apply steady pressure and continue drilling until the stop collar touches the drill guide. You’ll feel a definite stop when you’ve reached the correct depth. Slowly withdraw the bit while it’s still spinning to clear chips from the hole.
Repeat for all marked pocket hole locations.
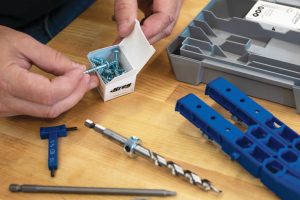
Step 5: Selecting the right screws
Choosing the correct pocket hole screws is crucial for creating strong joints. Fine-thread screws are best for hardwoods. They have less chance of splitting the wood and provide a stronger hold in dense materials.
Coarse-thread screws are ideal for softwoods and sheet goods like plywood and MDF. The wider threads provide better grip in these materials.
The length of the screw should be based on your material thickness. In general, keep the following in mind:
- 1/2″ and 5/8″ material: 1″ screw
- 3/4″ material: 1 1/4″ screw
- 7/8″ and 1″ material: 1 1/2″ screw
- 1 1/4″ and 1 3/8″ material: 2″ screw
- 1-1/2″ material: 2-1/2″ screw
Kreg screws come with a washer head, which helps prevent over-driving and provides a larger bearing surface for a stronger joint.
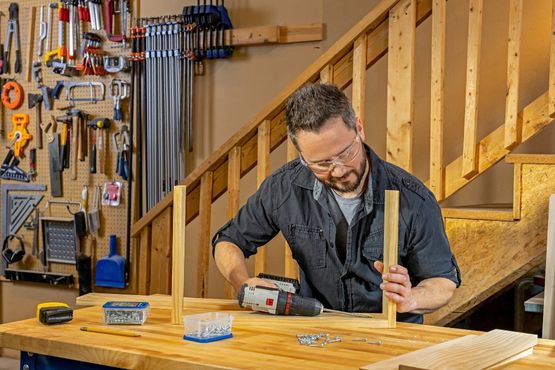
Step 6: Assembling and securing the joint
Aligning and clamping boards
Position your boards at a 90-degree angle (or the desired angle for your project). Use a Kreg Right Angle Clamp or bar clamps to hold the pieces in place. This ensures that your pieces stay aligned during assembly.
For panel glue-ups or edge joints, use pipe clamps or parallel clamps to keep the boards flush.
Driving the screws
Insert the appropriate Kreg screw into the pocket hole. Use a drill with a specialized pocket-hole driver bit. This bit has a square drive that fits Kreg screws perfectly.
Stop when the screw is fully seated and snug. Be careful not to over-tighten, as this can strip the screw or split the wood.
Repeat for all pocket holes in the joint.
Plugging pocket holes (optional):
If you want to hide the pocket holes for a cleaner look:
Purchase Kreg pocket-hole plugs that match your wood species. For a perfect match, you can make your own plugs from the same wood as your project using a specialized plug cutting bit.
Apply a small amount of wood glue to the plug. Insert the plug into the hole and tap it in place with a hammer.
Once the glue is dry (usually 24 hours), sand the plug flush with the surface using progressively finer grits of sandpaper.
Tips and Techniques
How to reinforce pocket hole joints
For extra strength, apply wood glue to the joint before driving screws. This creates a bond along the entire joint surface, not just at the screw locations.
Use additional pocket holes for larger or load-bearing joints. For example, a chair leg might benefit from three or four pocket holes instead of just two.
Troubleshooting common issues
For loose joints, ensure you’re using the correct screw length and jig settings. The screw should penetrate the second piece of wood by at least 1/2″.
If you’re getting tear-out when exiting the back of the board, try using a backer board or adjusting your drill speed.
For pocket holes that aren’t deep enough, double-check your depth collar setting and ensure you’re drilling until the collar contacts the jig.
Frequently asked questions (FAQs)
What types of wood work best with pocket holes?
Pocket holes work well with most types of wood, including hardwoods, softwoods, and sheet goods like plywood and MDF. However, very hard woods or those prone to splitting may require special care.
Can pocket holes be used in thin boards?
Yes, pocket holes can be used in boards as thin as 1/2″. For thinner materials, consider using the Kreg Micro Pocket Drill Guide or Pocket-Hole Jig Micro, which are designed specifically for thin stock.
How strong are pocket hole joints?
When done correctly, pocket-hole joints are incredibly strong. They’re suitable for most furniture and cabinetry applications. For high-stress joints, consider combining pocket holes with wood glue for added strength.
Associated Products

Kreg® Pocket-Hole Jig 520PRO


