

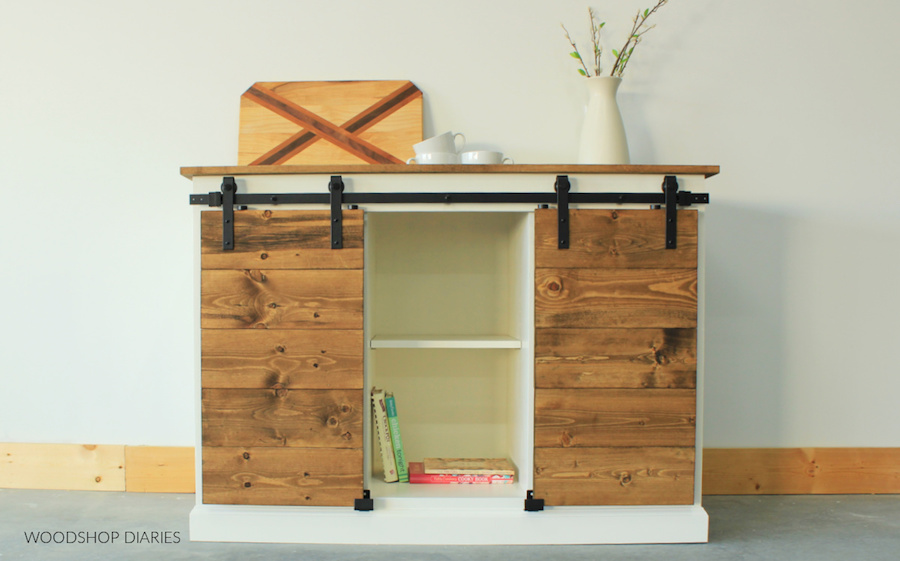
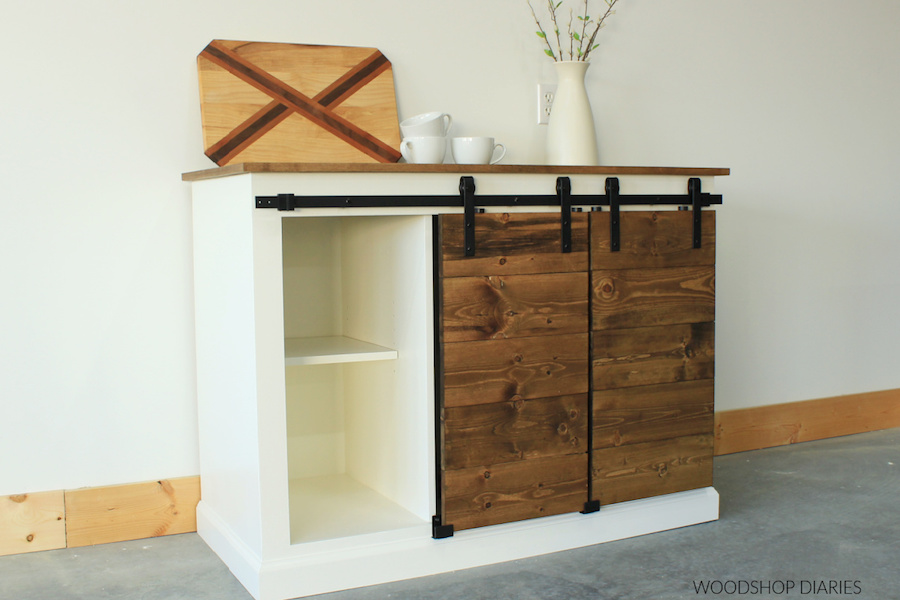
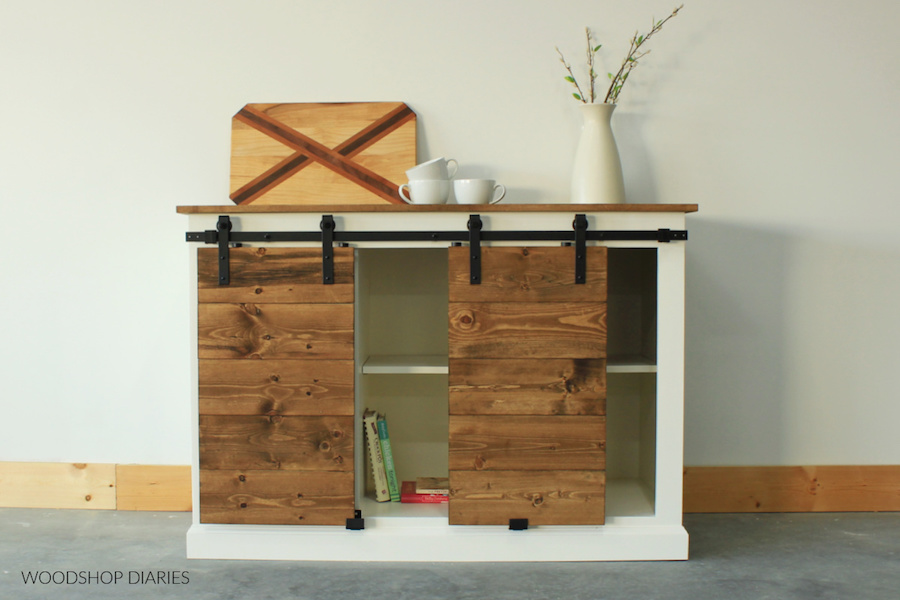
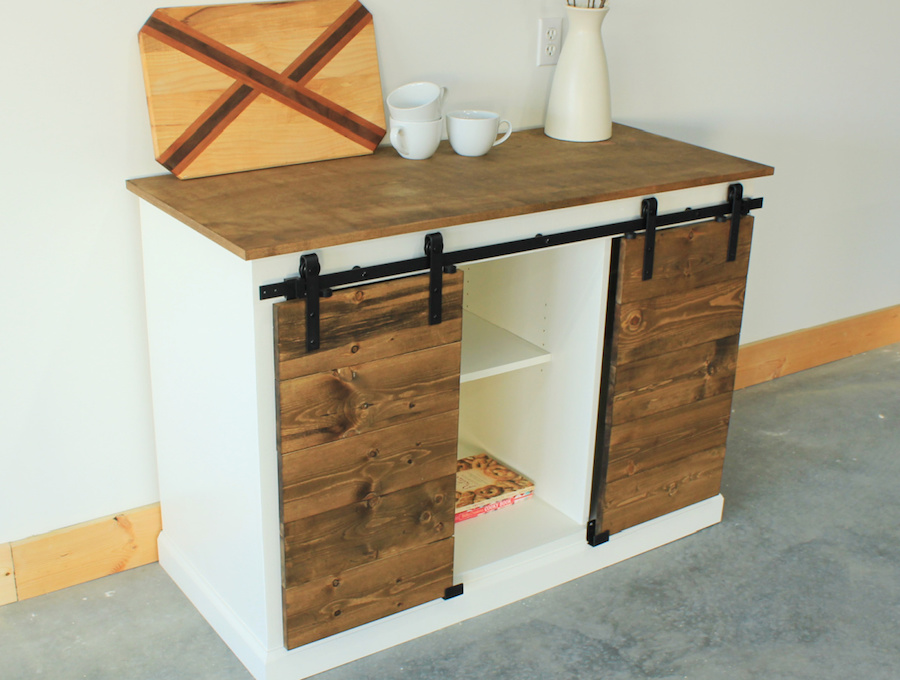


This sliding door console cabinet is perfect for adding extra storage in your pantry or for setting up a coffee station in your kitchen or dining room. It’s so versatile, you could even use it as a media cabinet in your living room!
Tools
Kreg Tools


Other Tools
-
Brad nailer

-
Miter saw
Materials
Wood Products
- 2 Plywood , 4x8x ¾”
- 1 Plywood , 4x4x ¼”
- 2 Boards , 1x6x8
- 2 Boards , 1x3x8
- 1 Boards , 1x4x8
- 1 Tall baseboard trim molding , 8’x 3 ¼”
Hardware & Supplies
- 1 Box of 1 ¼” pocket hole screws (see tools list)
- 1 Box of 1 ¼” brad nails
- 1 4 ft Sliding door hardware kit
- 1 Iron on edge banding (optional)
- 1 Box of shelf pins
- 1 Wood glue
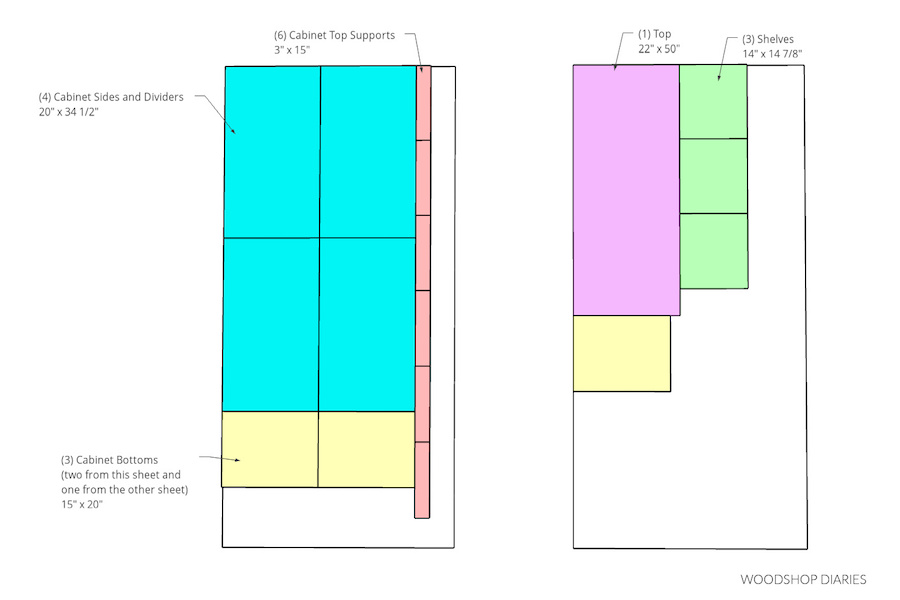
Cut List & Parts
- 4 Plywood- cabinet sides and dividers , 20” x 34 ½” x ¾”
- 3 Plywood- cabinet bottoms , 15" x 20" x ¾”
- 6 Plywood- top supports , 3” x 15” x ¾”
- 2 Top/bottom of face frame , 1x4 x 48”
- 2 Sides of face frame , 1x3x 26 ¾”
- 1 Plywood- Back panel , 31” x 47 ¼” x ¼”
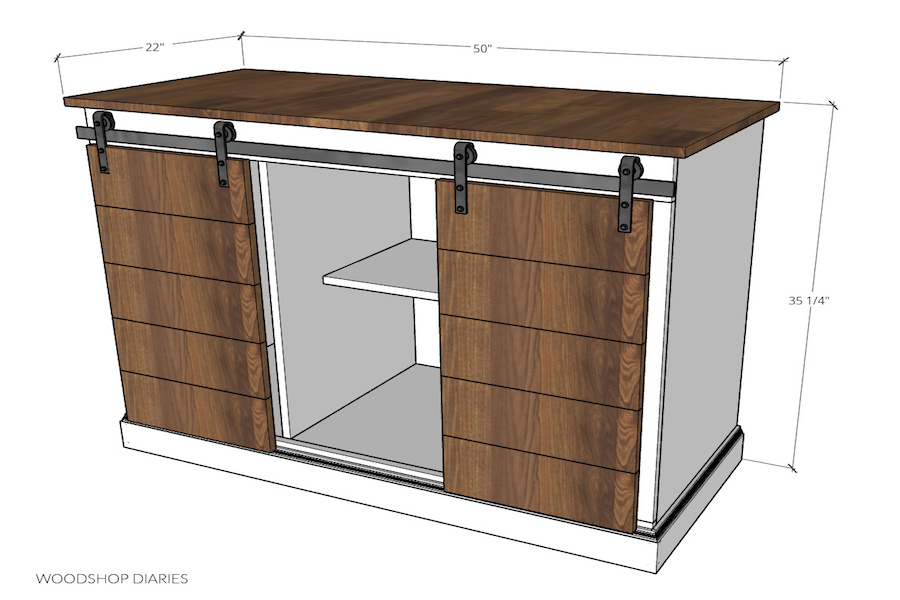
- 1 Plywood- Top panel , 22"x 50" x ¾”
- 3 Plywood- Shelves , 14" x 14 7/8” x ¾”
- 10 Horizontal door slats , 1x6x 15”
- 4 Vertical door slats , 1x3 x 24”
- 1 Base Board trim molding , Cut to fit
Directions
-
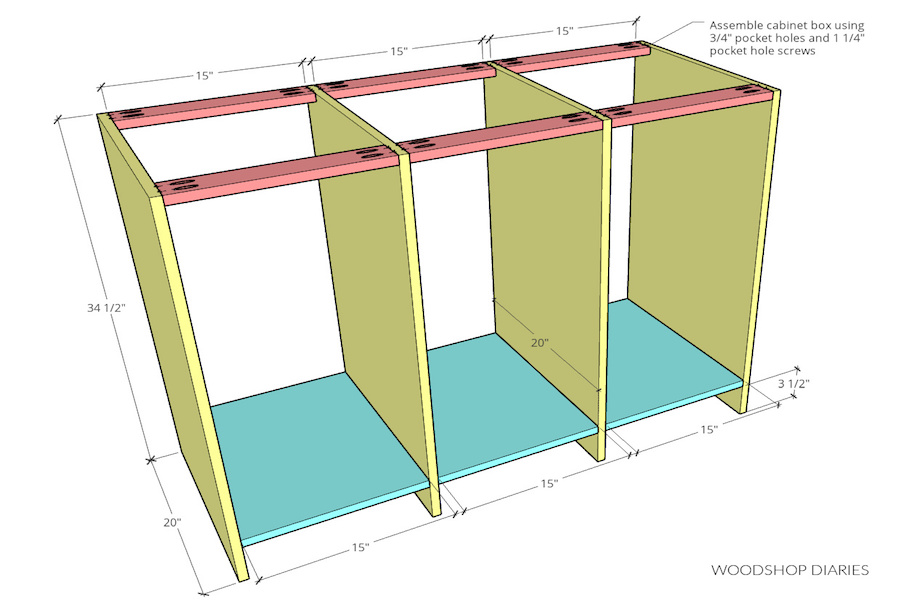
Assemble Cabinet Body
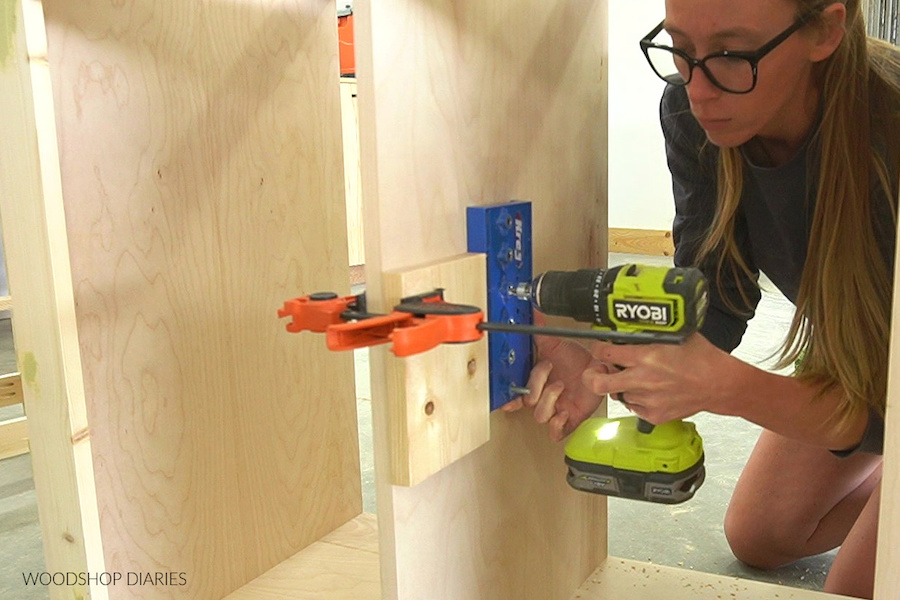
Cut cabinet sides and dividers, cabinet bottoms and cabinet top supports according to the cut list from ¾” plywood. Drill 3/4” pocket holes into the ends of each top support piece and along the 20” edges of the bottom panels.
Assemble the cabinet body using 1 ¼” pocket hole screws like shown in the diagram. Install the bottom panels between the sides/dividers leaving a 3 ½” space below. Note the pocket holes here are on the bottom so they are hidden.
Install the top supports so that the pocket holes face up and they are flush to the top edges—three at the back and three at the front.
If desired, apply iron on edge banding to the front edge of two middle divider panels. These edges will be exposed in the finished project.
-
Assemble Face Frame
Cut two (2) pieces of 1x4 to 48” long for the top and bottom of the face frame and two (2) 1x3s to 26 ¾” long for the sides. Drill ¾” pocket holes into the ends of the 1x3 pieces and assemble a face frame like shown using 1 ¼” pocket holes.

-
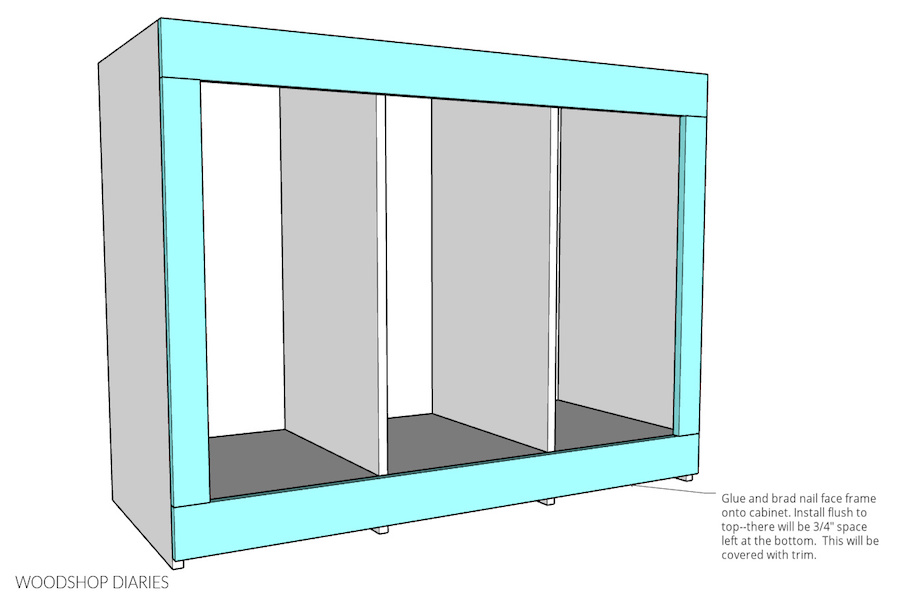
Attach Face Frame
Use wood glue and brad nails to attach the face frame to the cabinet box so that it’s flush along the top and sides (the top edge of the bottom piece should also be flush across the bottom panels). Note that the face frame will not go all the way to the bottom. That’s OKAY!
-
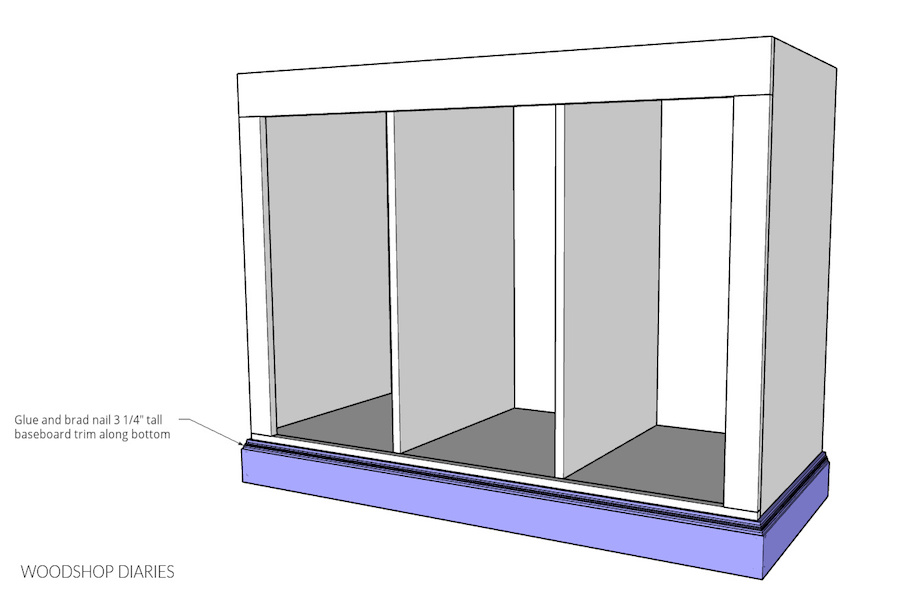
Add Baseboard Trim
Cut to fit 3 ¼” tall baseboard trim around the bottom of the cabinet. Miter the corners 45 degrees. This will hide the gap along the bottom from step 3.
-
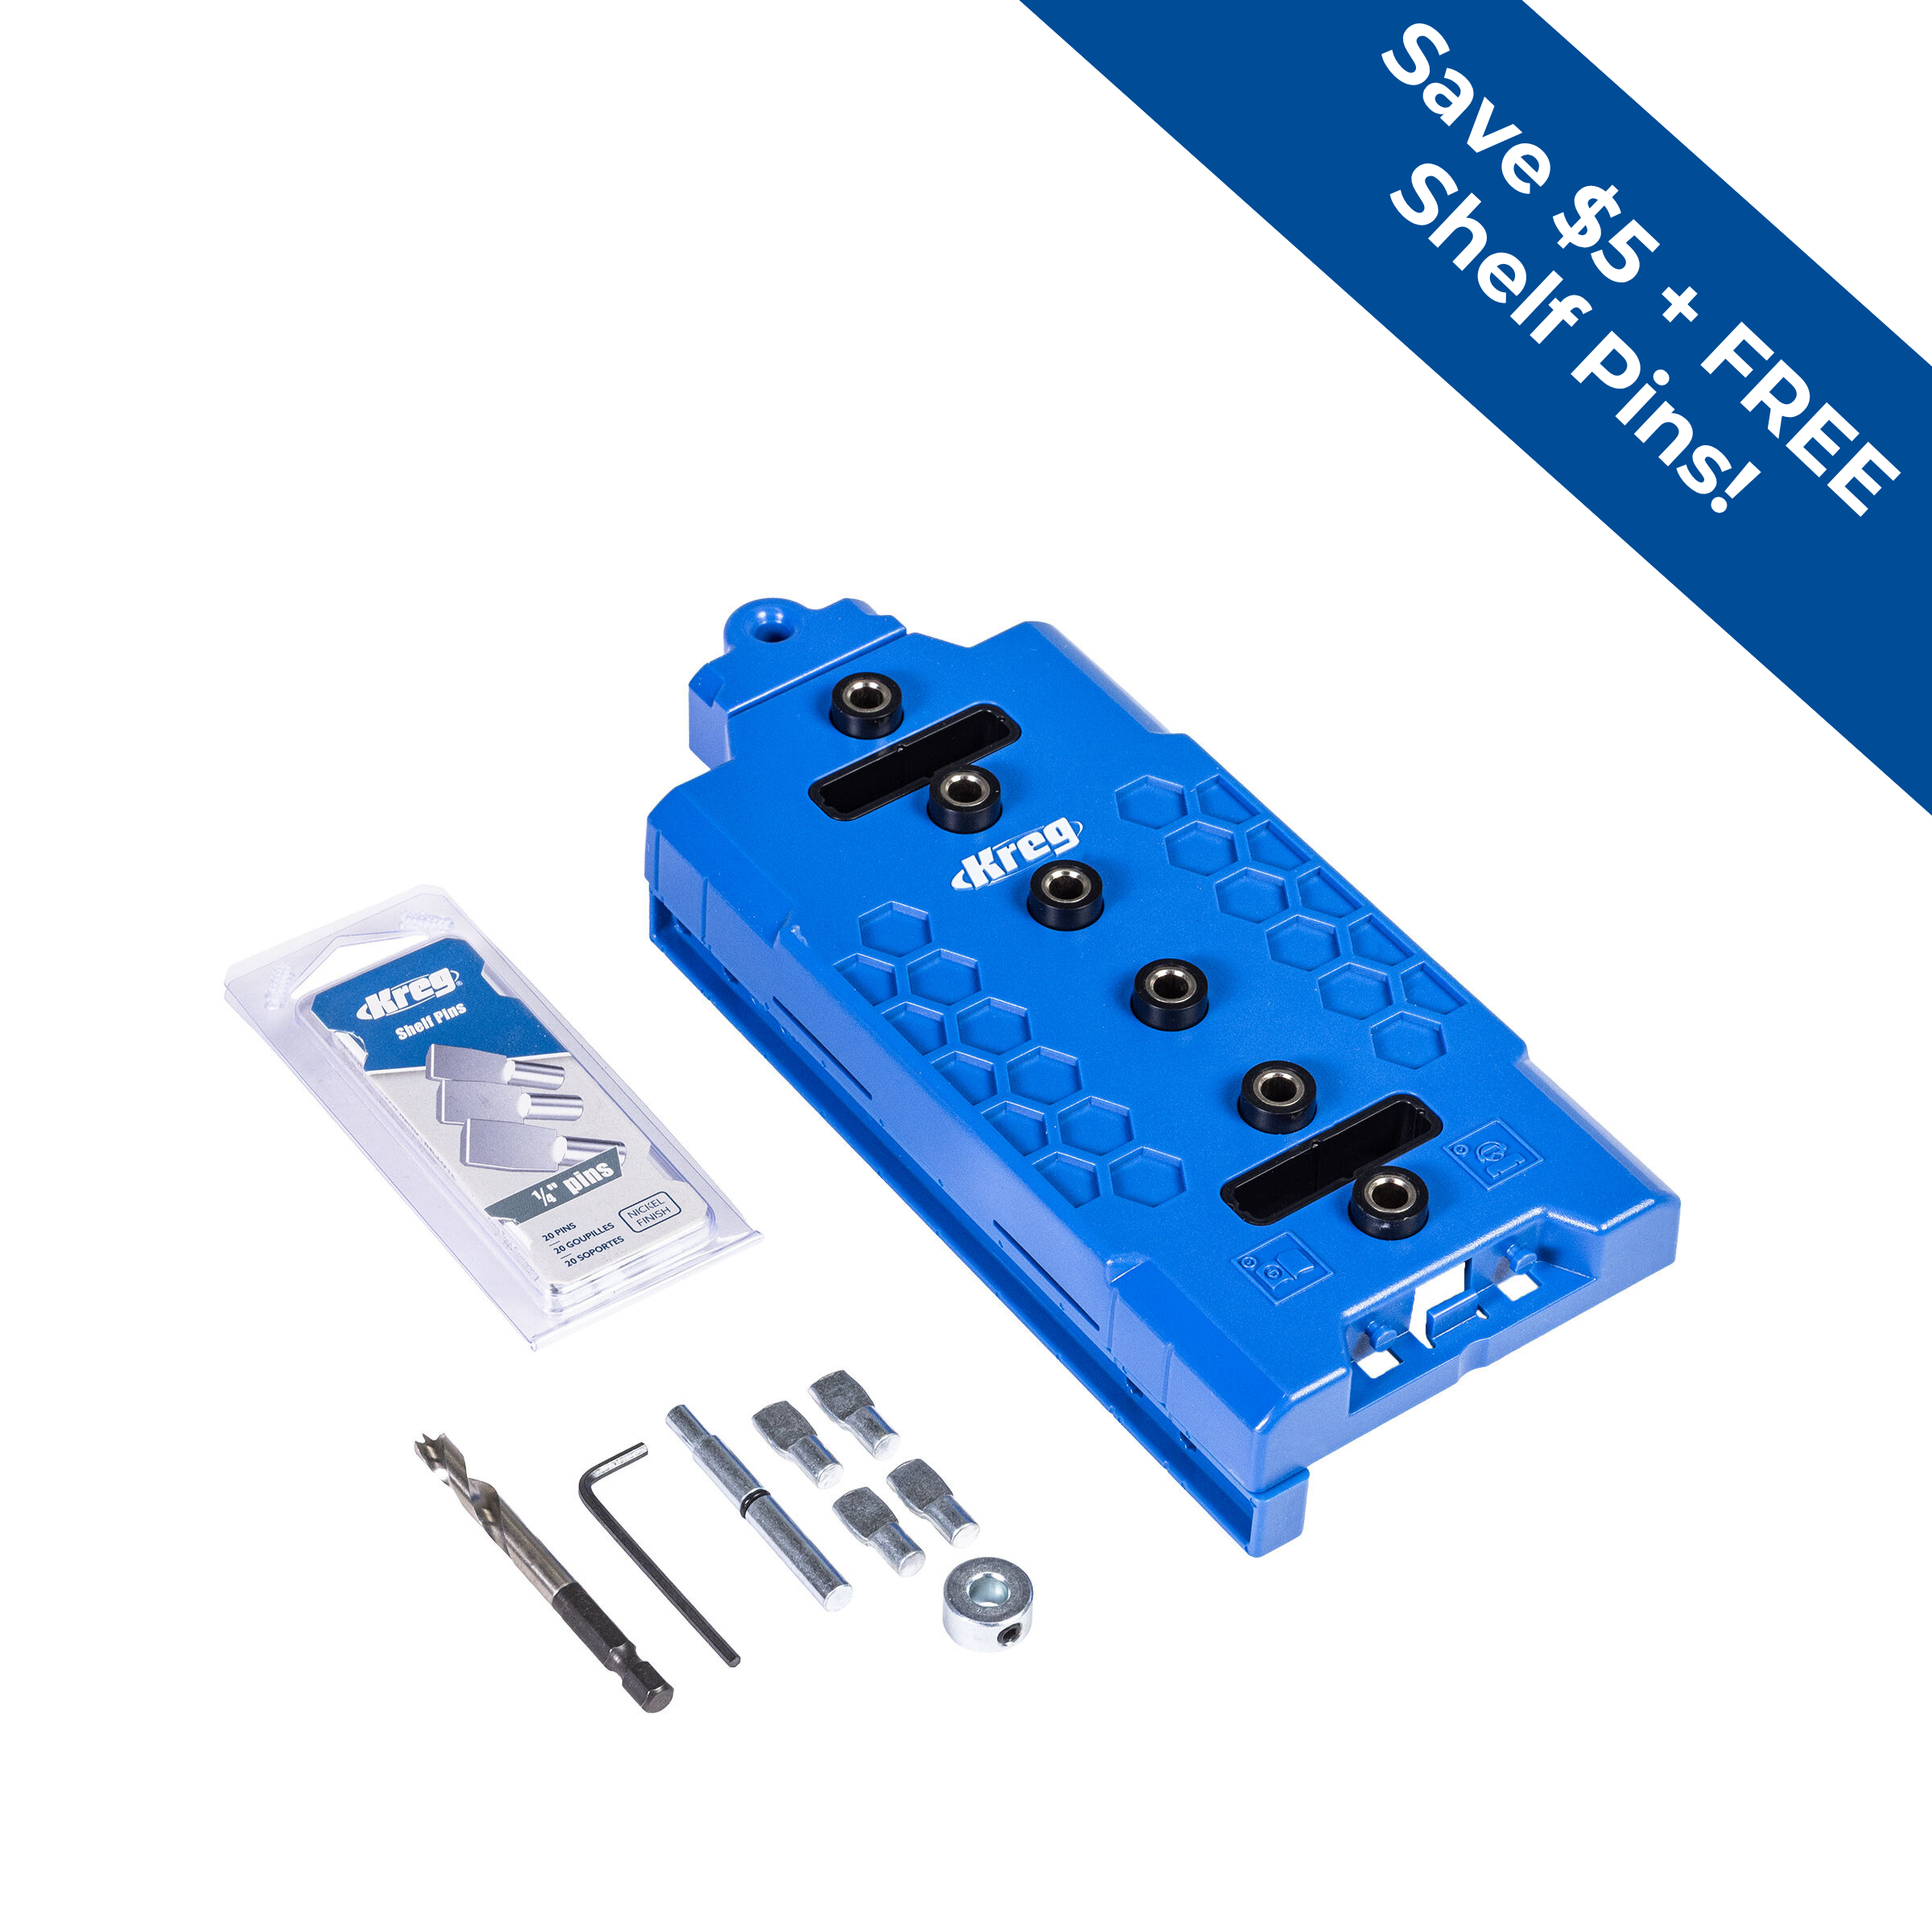
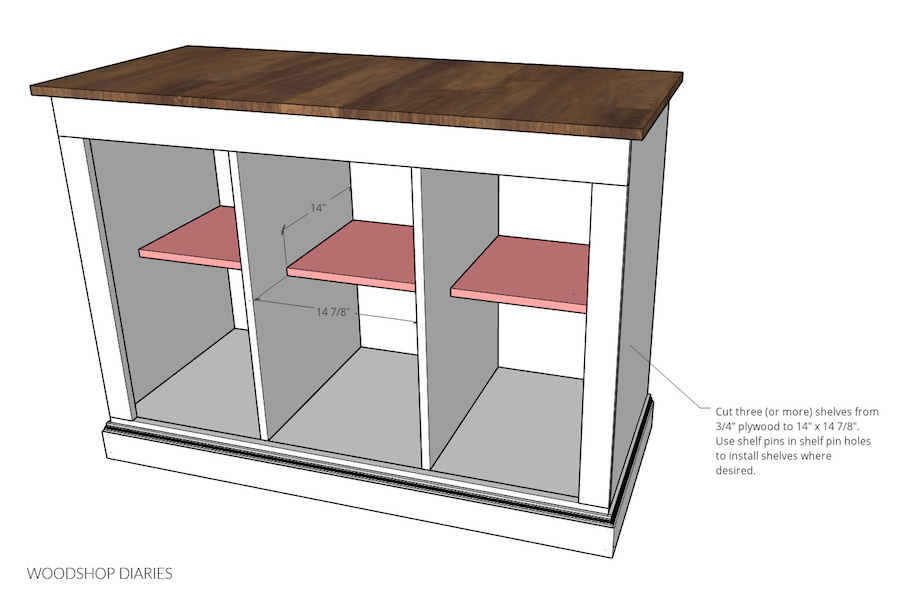
Drill Shelf Pin Holes & Cut Shelves
Use a Kreg Shelf Pin jig to drill shelf pin holes in each section of the cabinet. Make sure the holes toward the front are within 14” of the back edge of the cabinet. Cut ¾” plywood shelves according to the cut list and apply edge banding on the front edge if desired. Set these to the side for now.
Tip:
NOTE: I made my shelves 14” deep. You can make yours deeper if you’d like.
-
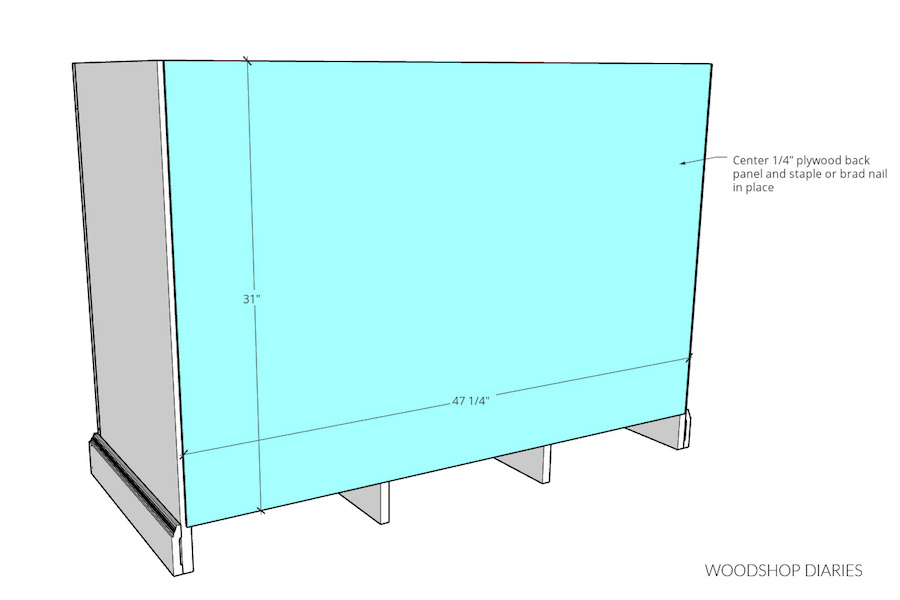
Cut and Attach Back Panel
Cut ¼” plywood panel to 31” x 47 ¼”. Center panel on back side of cabinet and flush along the top. Staple or brad nail panel in place.
-
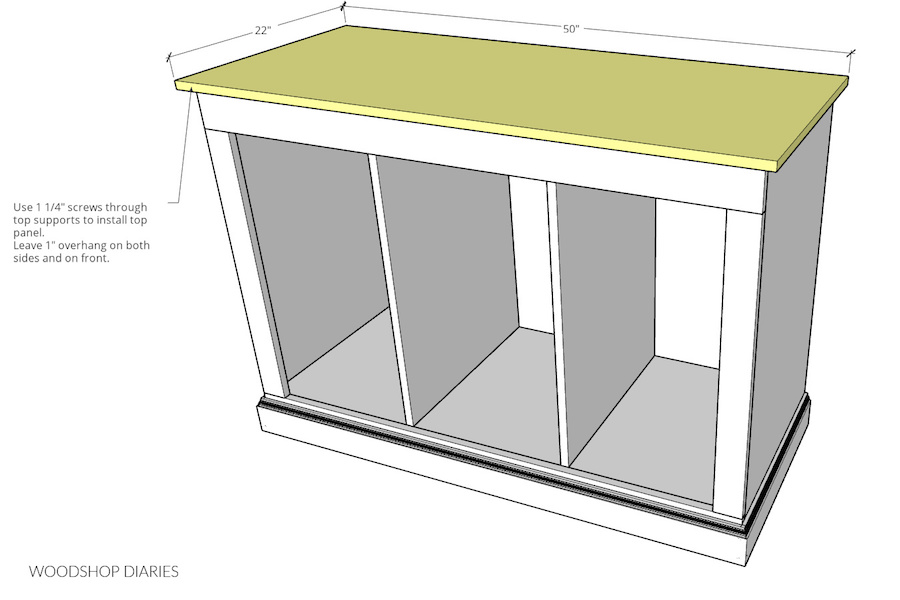
Add Top
Cut ¾” plywood panel 22” x 50” for the top. Apply iron on edge banding on front and side edges if desired. Place onto cabinet leaving 1” overhang on both sides and the front.
Use 1 ¼” screws through the top supports of the cabinet to secure the top panel in place.
-
Install Shelves
Use shelf pins in the shelf pin holes from step 5 and places shelves where desired.
-
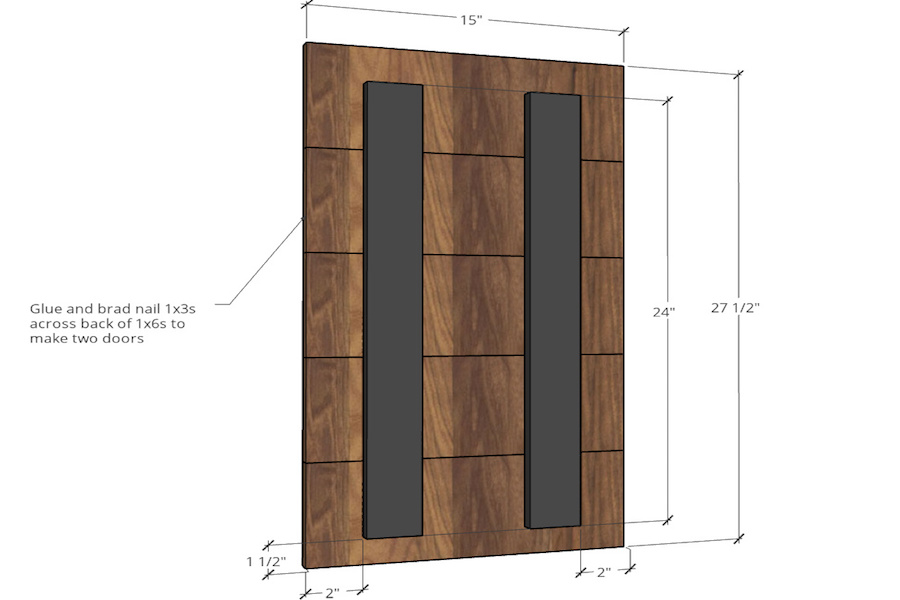
Assemble Doors
Cut ten (10) pieces of 1x6 to 15” long—five for each door. Cut four (4) pieces of 1x3 to 24” long—two for each door. Assemble two identical doors like shown in the diagram using wood glue and brad nails to secure the 1x3s vertically across the back side of the 1x6s. Note that the 1x3s should be 1 ½” up from the bottom edge and 2” in from the sides.
-
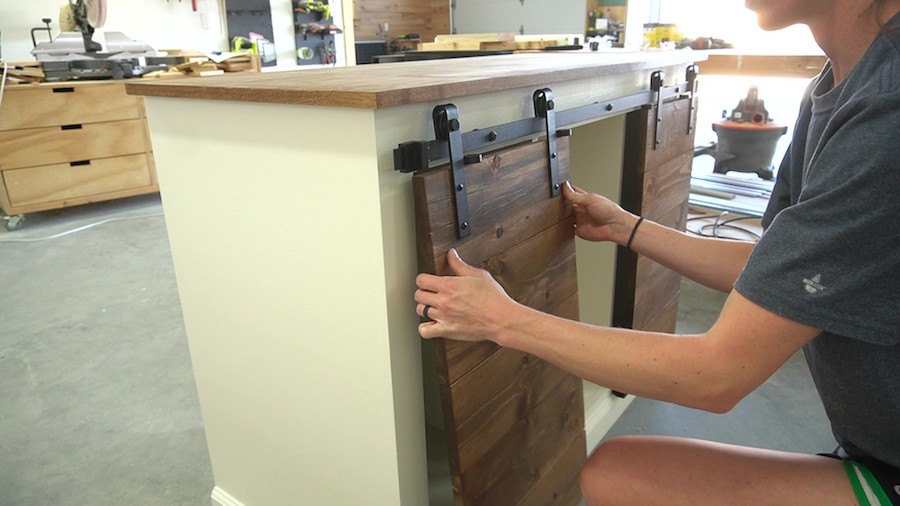
Install Doors
Follow the instructions included with the sliding door hardware kit to install the doors onto the cabinet. Check out the YouTube video for more details and tips.
-
Finish
Finish cabinet as desired using paint or stain. Stain used here is Minwax Provincial and paint color is SW Cotton White.