

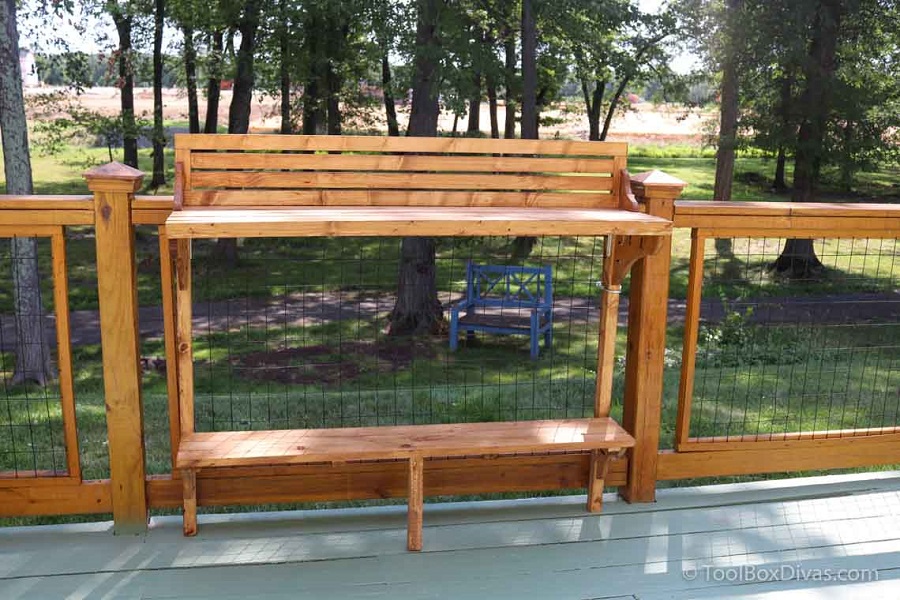
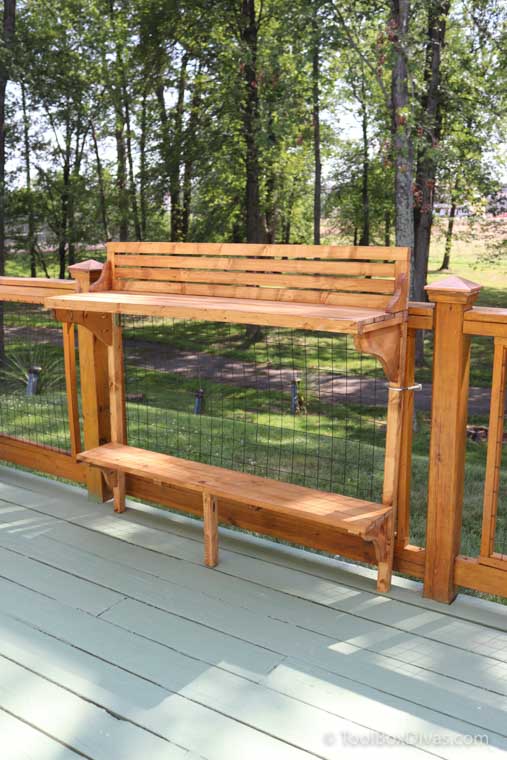
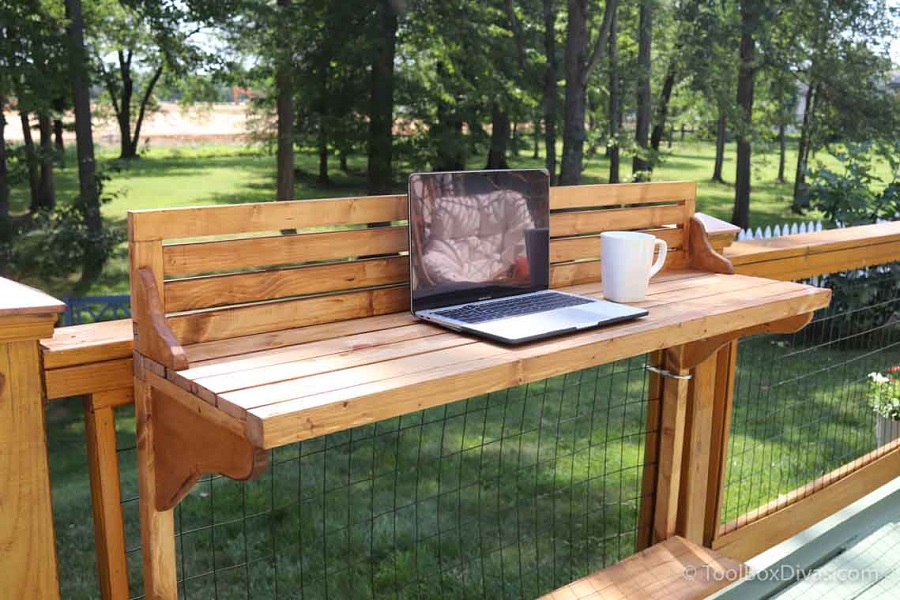


A bar table that can be used as a bar to have a drink or meal on a deck or balcony, or it can be used as standing desk on deck or balcony.
Tools
Kreg Tools


Other Tools
-
Clamps

-
Miter saw
-
Tape measure
Materials
Wood Products
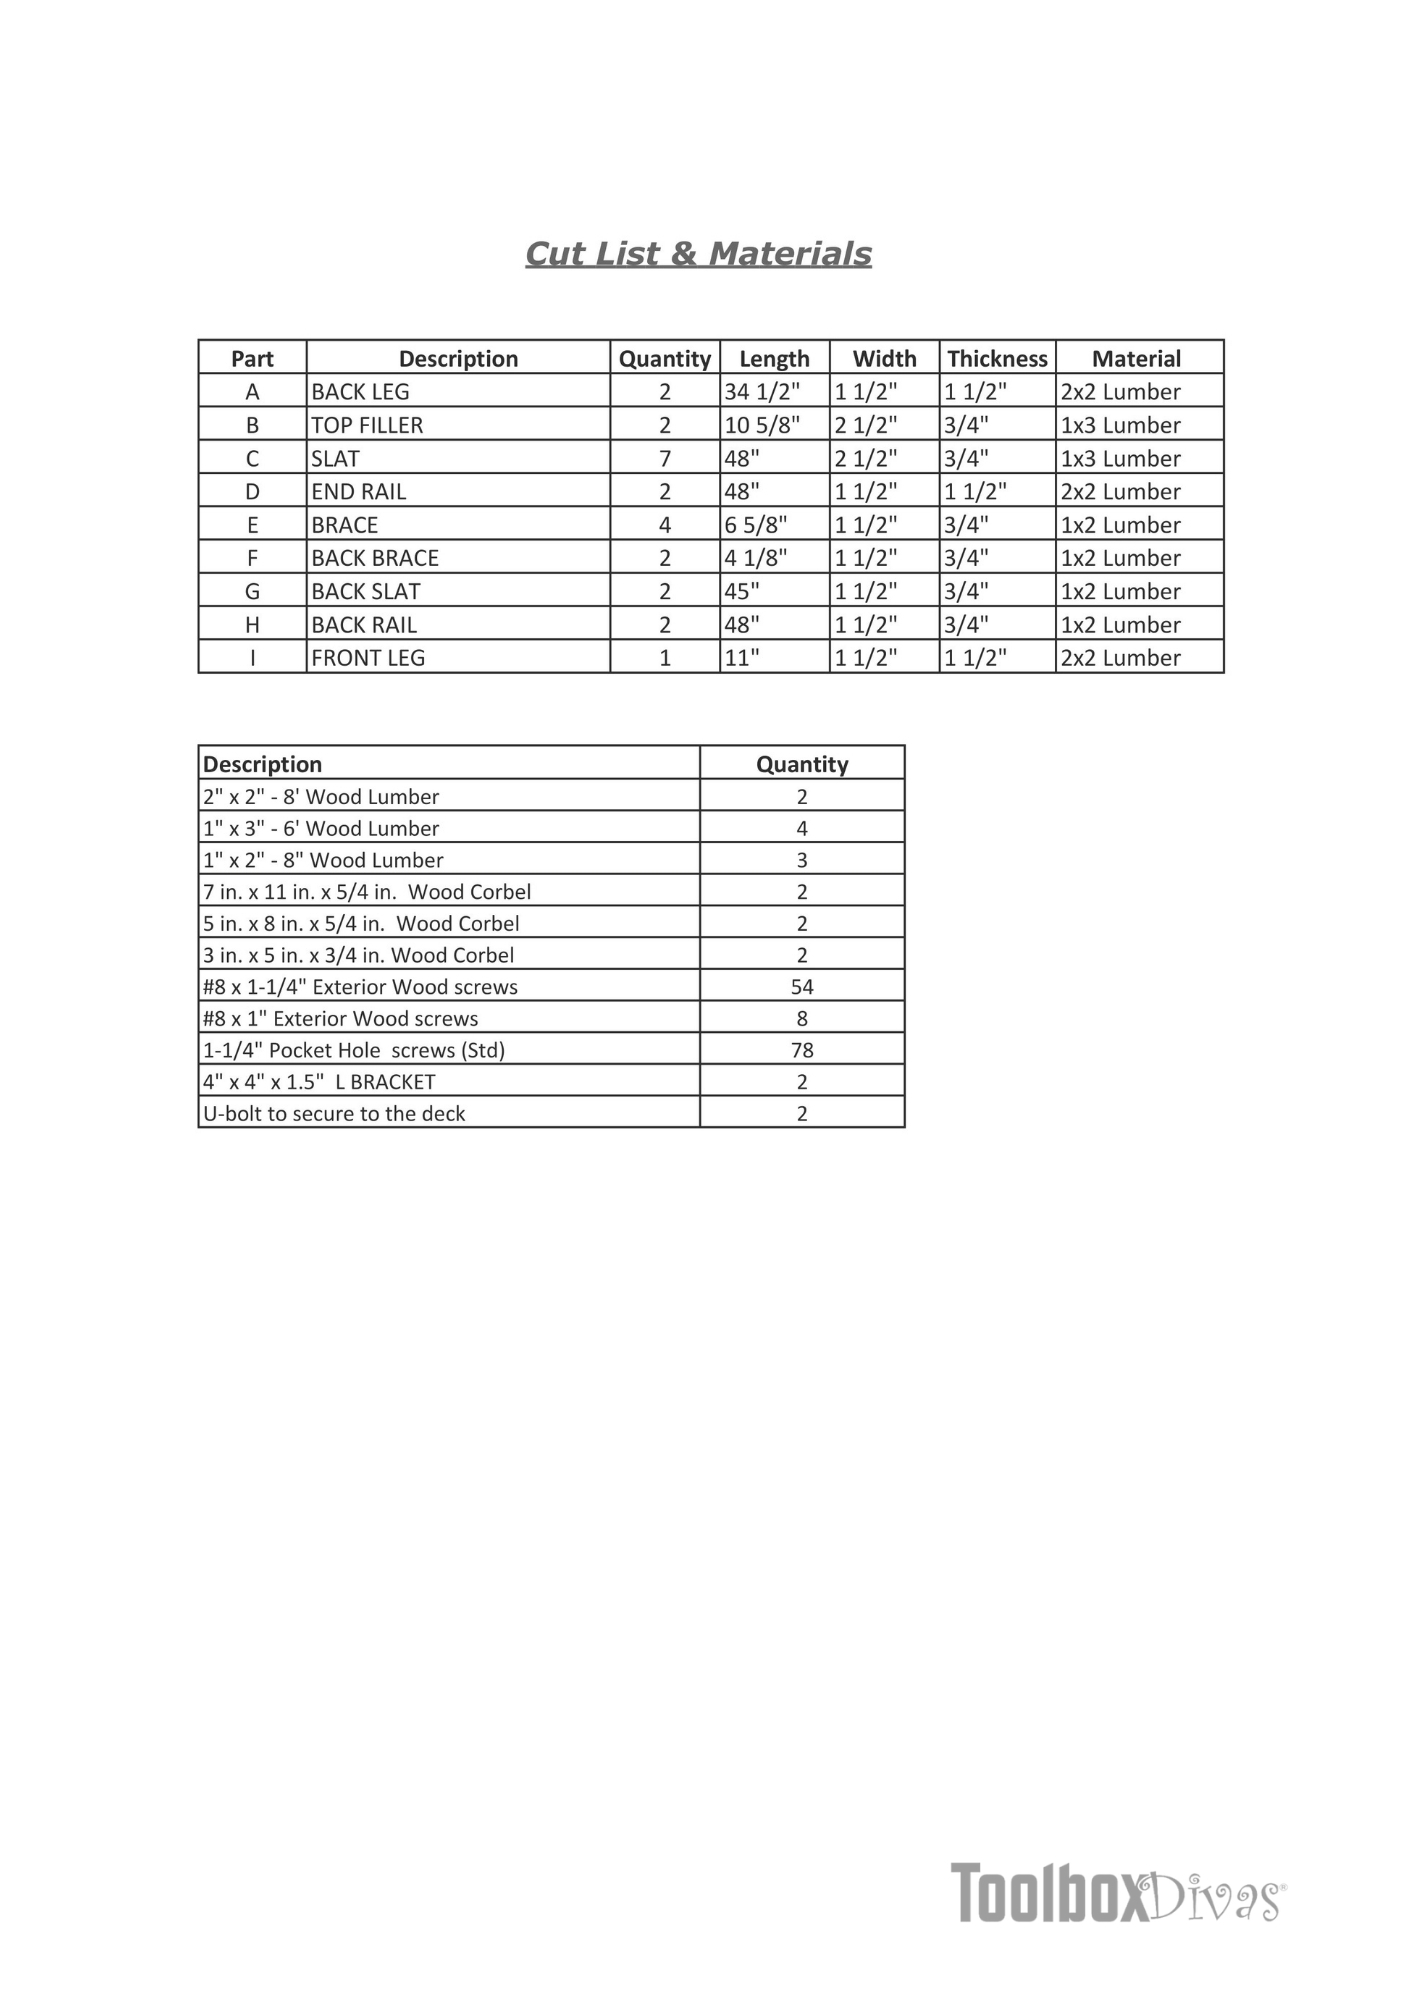
- 2 Wood lumber , 2" x 2" - 8'
- 4 Wood lumber , 1" x 3" - 6'
- 3 Wood lumber , 1" x 2" - 8'
- 2 Wood corbel , 7 in. x 11 in. x 5/4 in.
- 2 Wood corbel , 5 in. x 8 in. x 5/4 in.
- 2 Wood corbel , 3 in. x 5 in. x 3/4 in.
Hardware & Supplies
- 54 #8 x 1-1/4" exterior wood screws
- 8 #8 x 1" Exterior wood screws
- 78 1 1/4" pocket hole screws (std)
- 2 4" x 4" x 1.5" L bracket
- 2 U-bolt to secure to the deck
Cut List & Parts
- 2 Back leg , 34 1/2" x 1 1/2" x 1 1/2" - 2x2 lumber
- 2 Top filler , 10 5/8" x 2 1/2" x 3/4" 1x3 lumber
- 7 Slat , 48" x 2 1/2" x 3/4" - 1x3 lumber
- 2 End rail , 48" x 1 1/2" x 1 1/2" - 2x2 lumber
- 4 Brace , 6 5/8" x 1 1/2" x 3/4" - 1x2 lumber
- 2 Back brace , 4 1/8" x 1 1/2" x 3/4" - 1x2 lumber
- 2 Back slat , 45" x 1 1/2" x 3/4" - 1x2 lumber
- 2 Back rail , 48" x 1 1/2" x 3/4" - 1x2 lumber
- 1 Front leg , 11" x 1 1/2" x 1 1/2" - 2x2 lumber
Directions
-
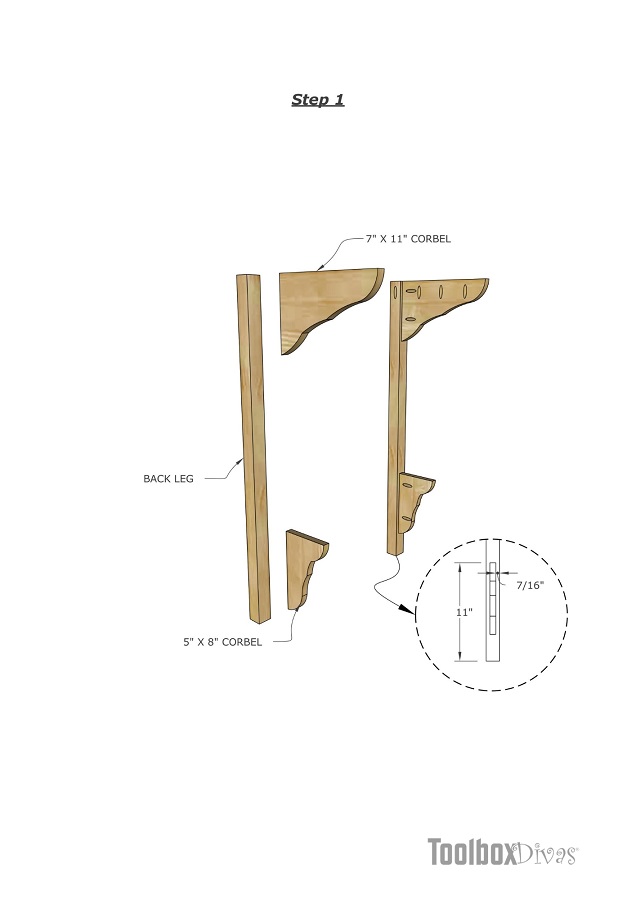
Create the frame of the bar
Take the 2 back legs and attach the corresponding corbels using exterior pocket screws. The 7"x11" corbel should be flush with the top, while the 5"x8" corbel should be placed 11" from the bottom of the back legs. When attaching the corbels place in the center of the 2x2 back legs.
-
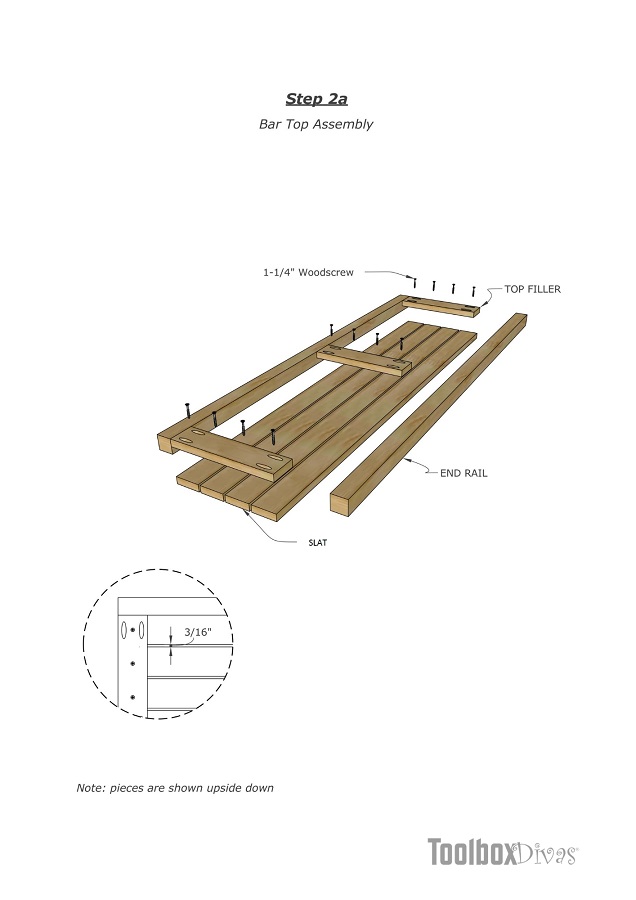
Bar top assembly
Assemble the bar top by creating the frame of the top by connecting the 2x2 end rails with the 1x3 top fillers. Next line up and screw the 1x3 slats in place. Ensure the slats are even before screwing in place and spaced out 3/16".
-
Foot rest assembly
Assemble the foot rest by butting the 1x3 slats up against one another and linking together with 4 - 1x2 braces.
Keep in mind the two end braces should be 1 1/16" from the edges.

-
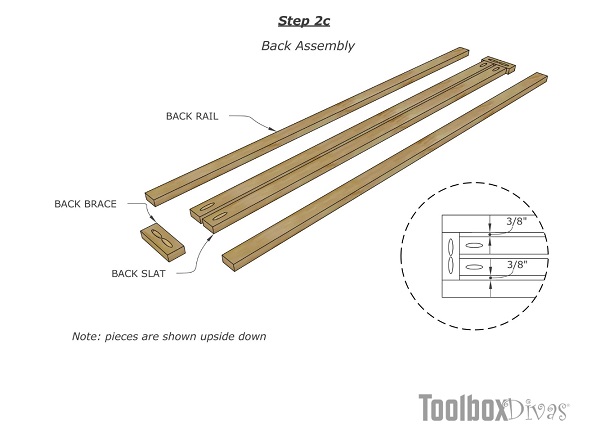
Back assembly
Assemble the back of the bar top by starting with the 2 1x2 back slats. Attach using pocket screws to the 2 back braces. Then cap the ends with the back rails. Space the rails by 3/8".
-
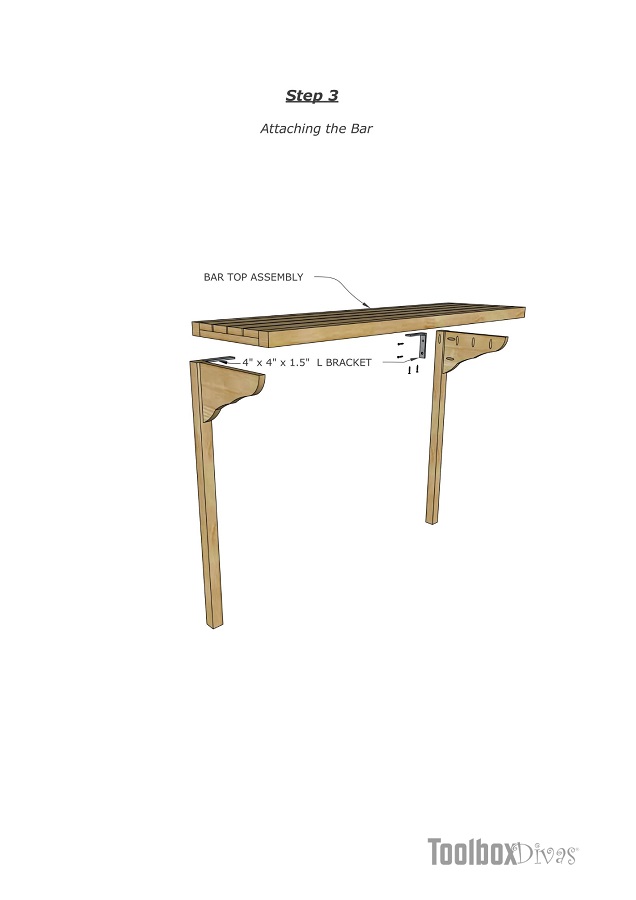
Attaching the bar
Now assemble the balcony bar from the top down, starting by screwing the bar top in place. It should be flush with the two legs. Add metal corner braces under the bar top for additional support given the length of the bar.
-
Attaching the foot rest
Attach the foot rest to the bottom corbels and center the front leg under the foot rest.

-
Attaching the back
Attach the back of the bar top using wood glue and screws. And you are done. Use the appropriate sized U-Bolts for your deck or balcony and secure the bar to your balcony or deck railing.
