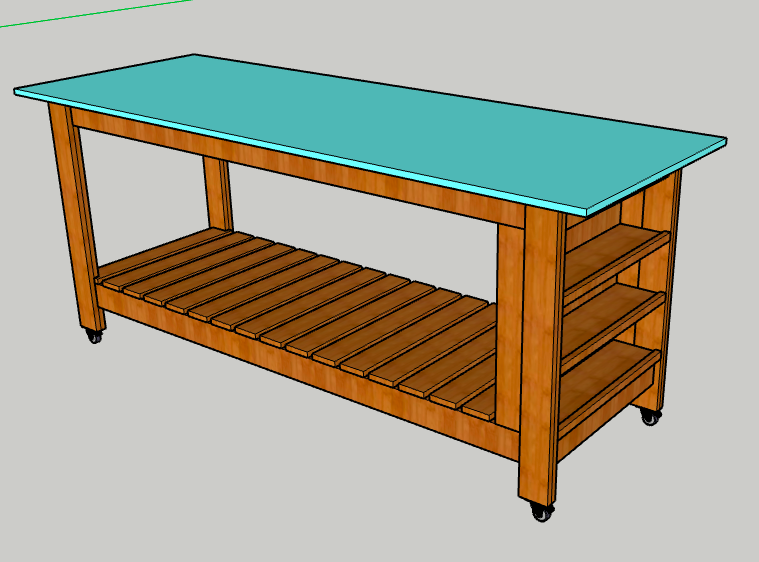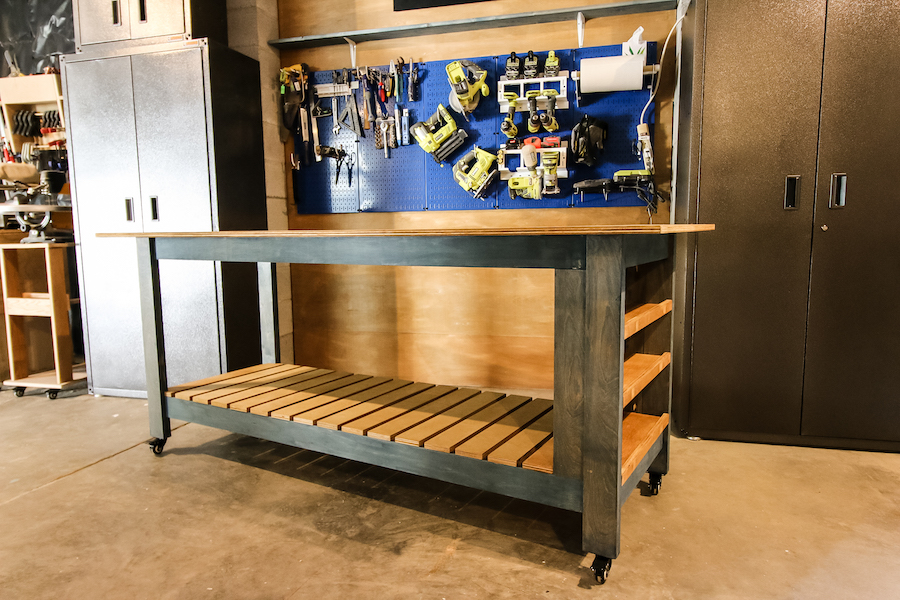
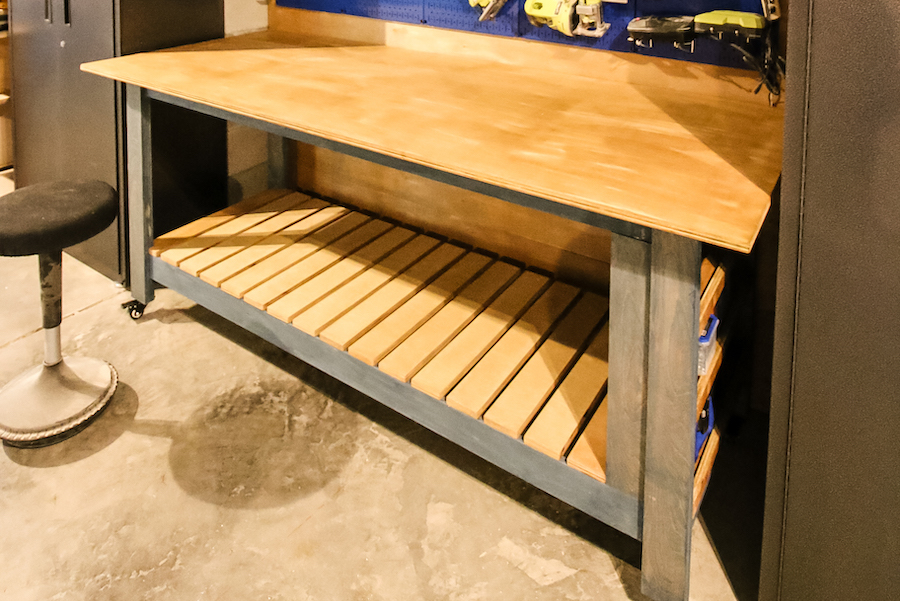
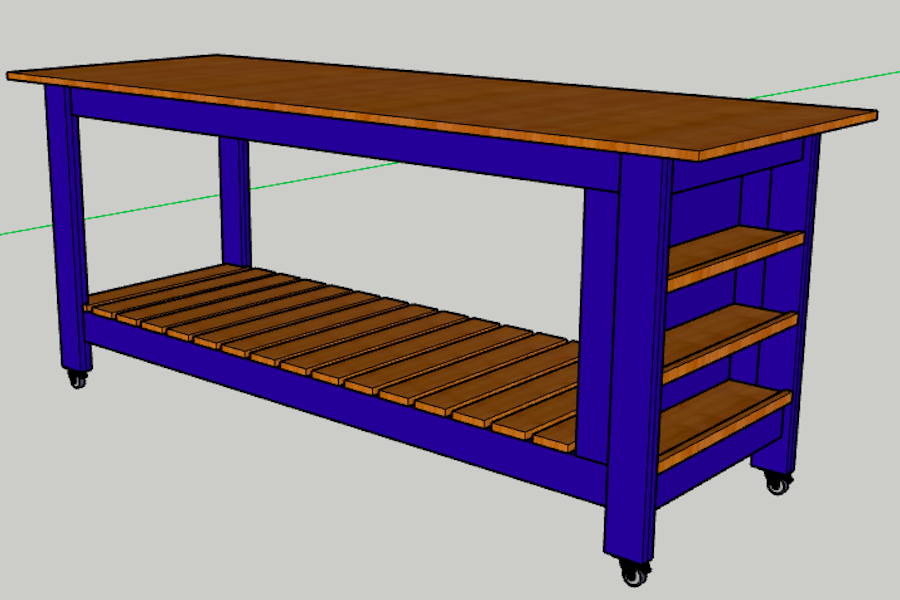
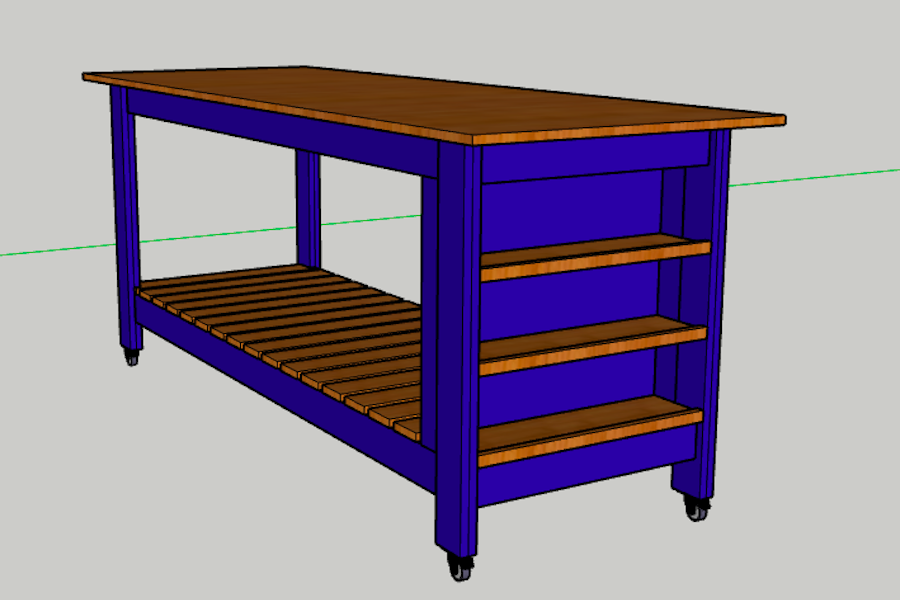


This mobile workbench is huge and perfect for building projects with Kreg pocket hole joinery! This workbench is made entirely of plywood, making it a great project to build with the Kreg Adaptive Cutting System. It also includes storage on the side to keep all of your essentials within reach!
Tools
Kreg Tools


Other Tools
-
Brad nailer

-
Clamps
Materials
Wood Products
- 2 Plywood sheets , 4’x8’x3/4”
Hardware & Supplies
- 4 2" locking rubber casters
- 1 Wood glue
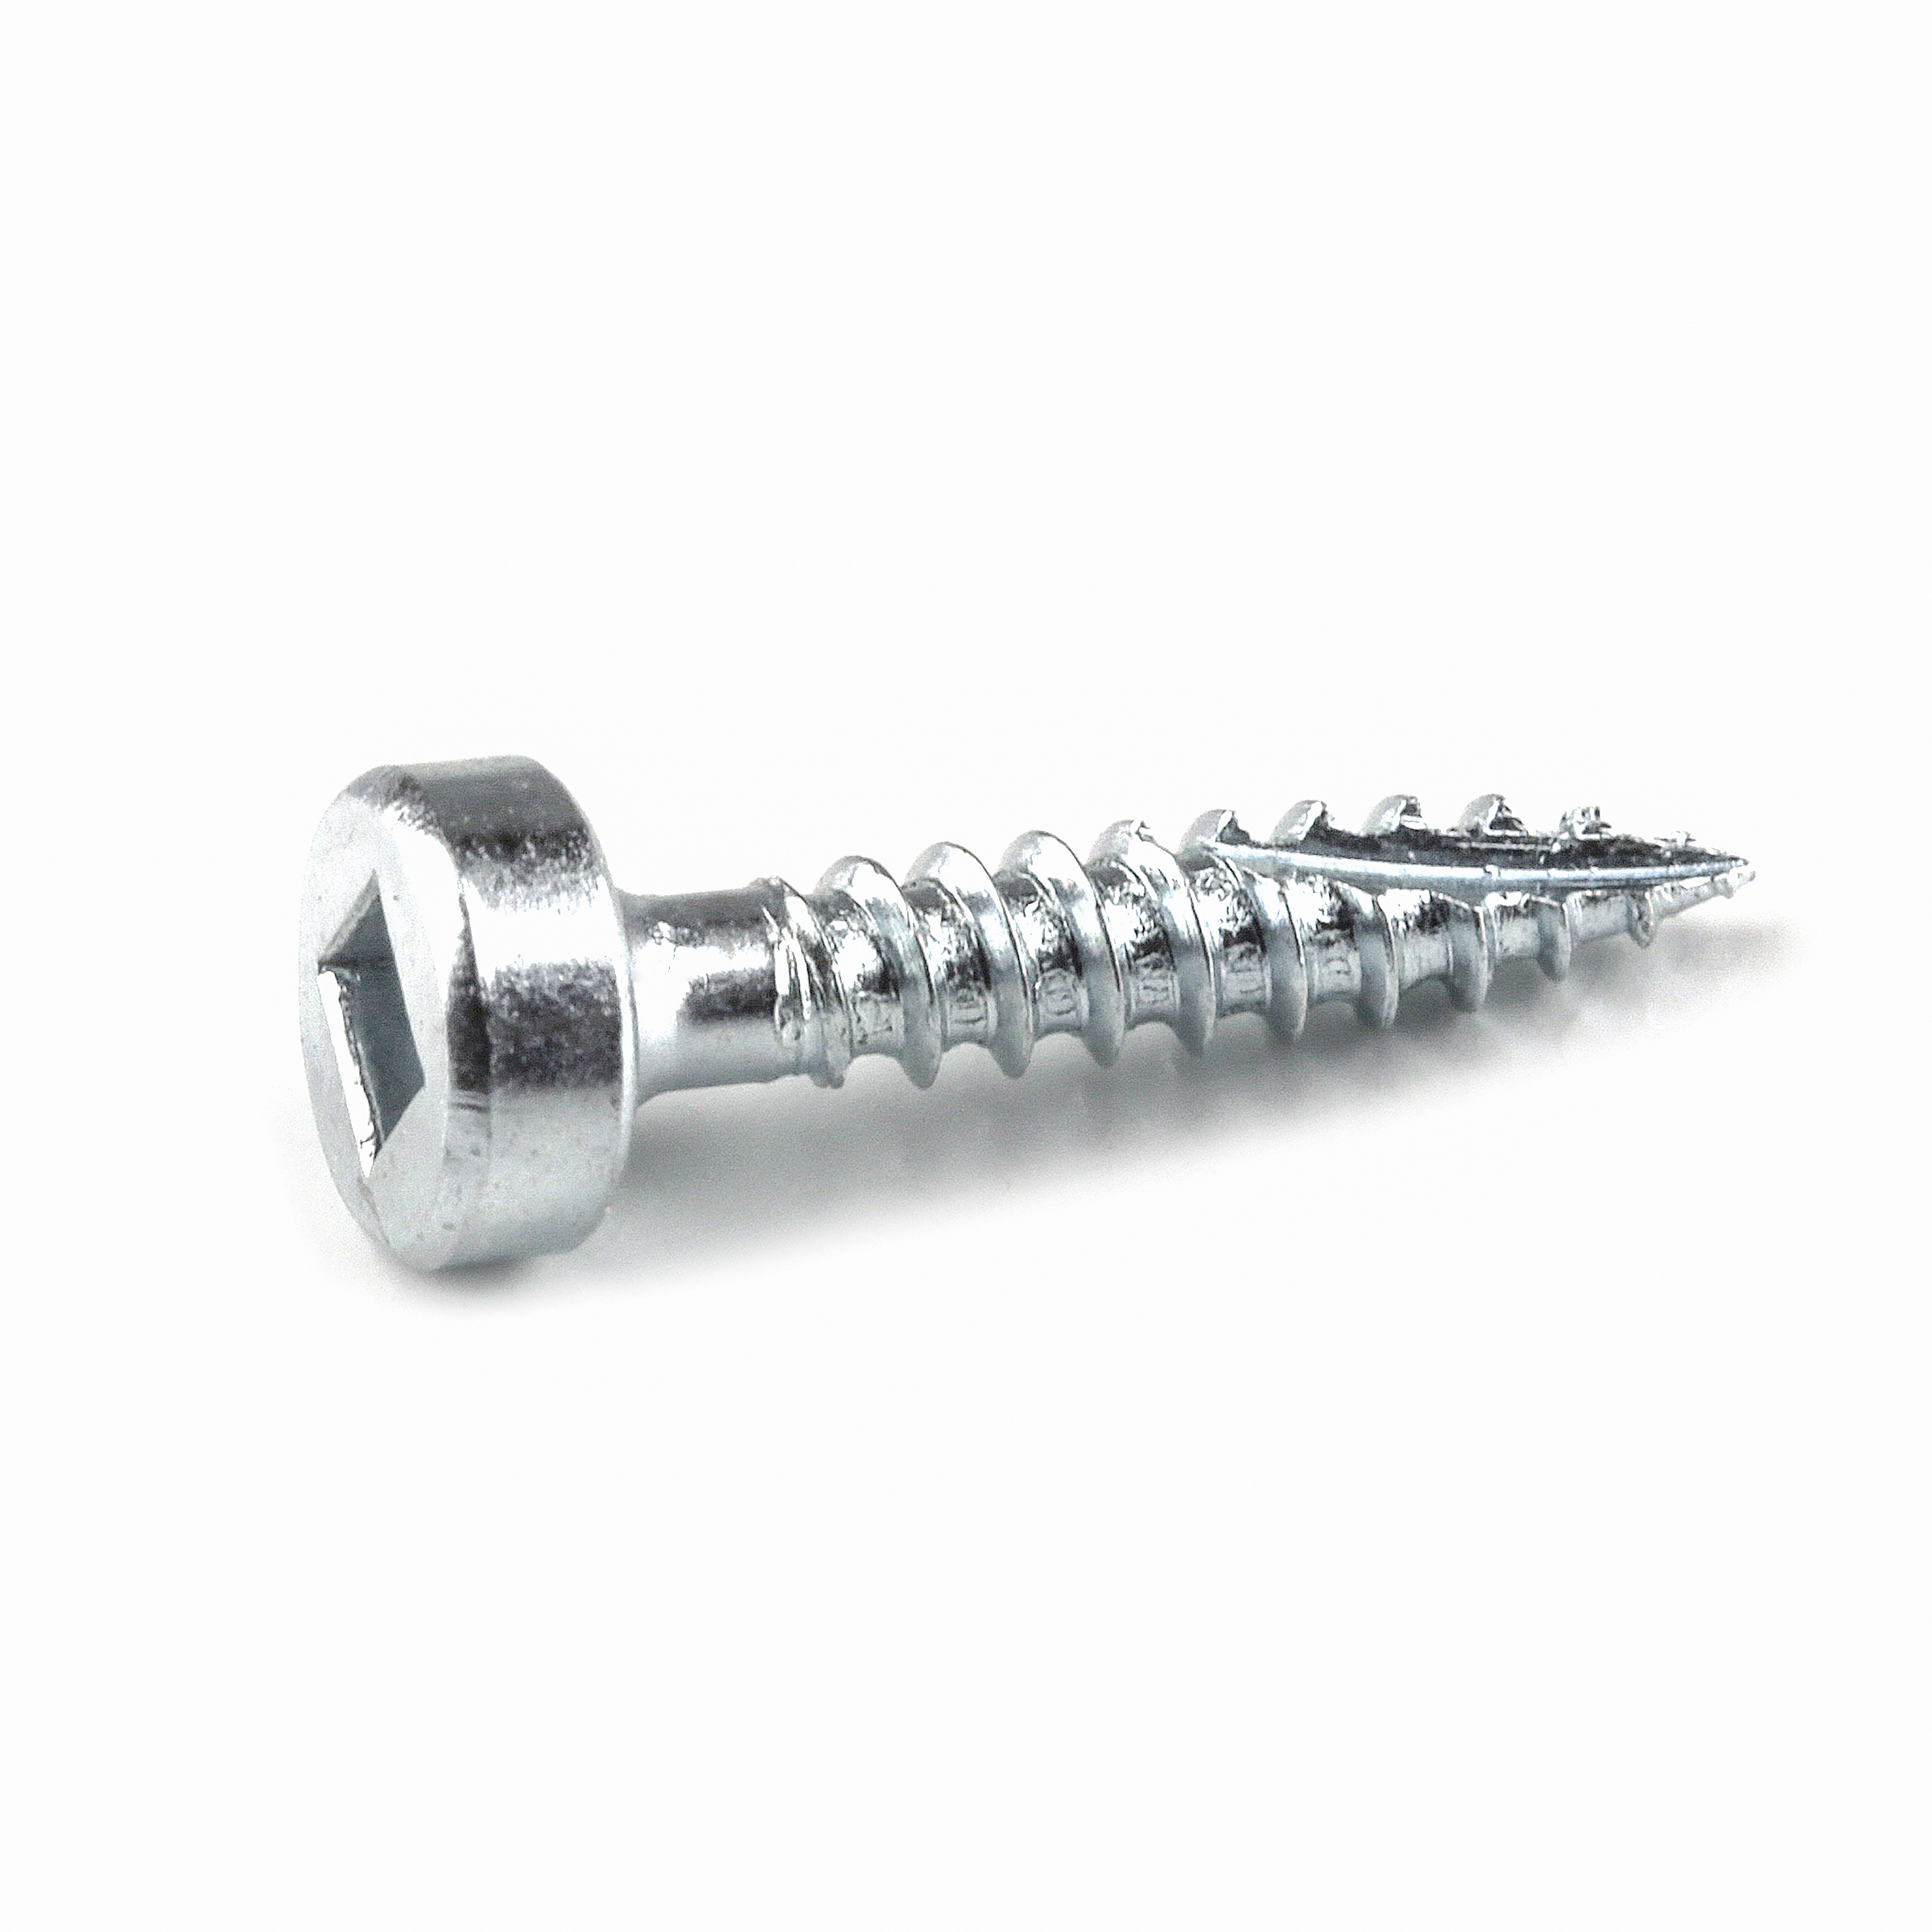
- 1 1 ¼” pocket hole screws
- 1 1" brad nails
- 1 Stain and sealant
Directions
-
Glue Legs
- Using wood glue, attach two Legs together on one face. Use clamps to hold together.
- Repeat to make three more sets of Legs.
- When dry, drill two pocket holes in one end of each Leg set.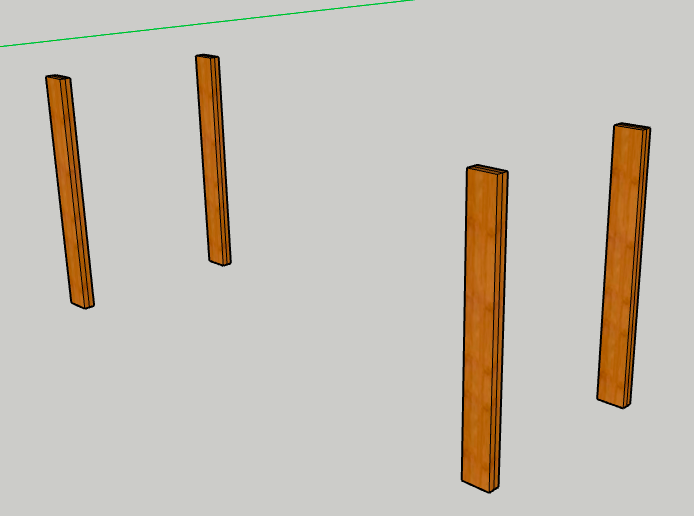
-
Build Front and Back Frame
- Drill two pocket holes in each end of the four Long Stretchers.
- Build the front frame of the workbench by attaching a Long Stretcher at the top of two Legs.
- Attach flush at the top and on the inner half of the Legs.
- Do the same thing with another Long Stretcher 3 1/2" up from the bottom of the Legs.
- Repeat to build the back frame.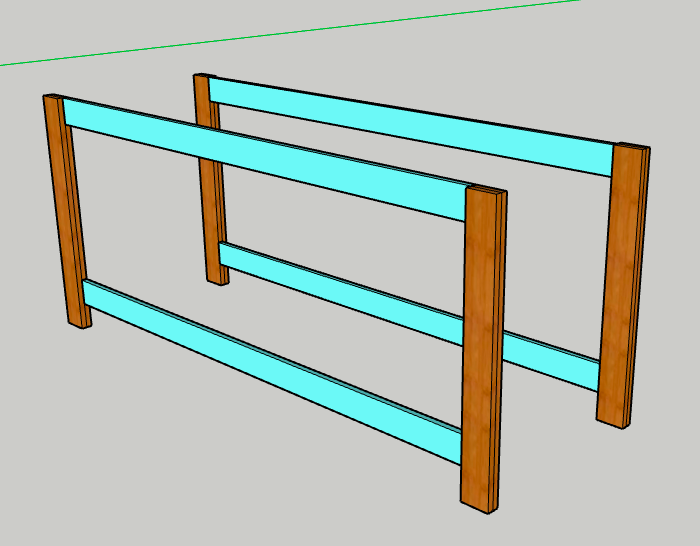
-
Connect Frames
- Connect the front and back frames using the Short Stretchers.
- Drill two pocket holes in each end of the Short Stretchers.
- Attach the Short Stretchers to the front frame in the same locations on the Legs as the Long Stretchers. Attach 3/4" in from the outside edge of the Legs.
- Flip the back frame on top of the Short Stretchers and attach using pocket screws in the same locations.
- Drill two pocket holes in each end of the two Center Supports.
- Attach the Center Supports between the center of the front and back frames using pocket screws.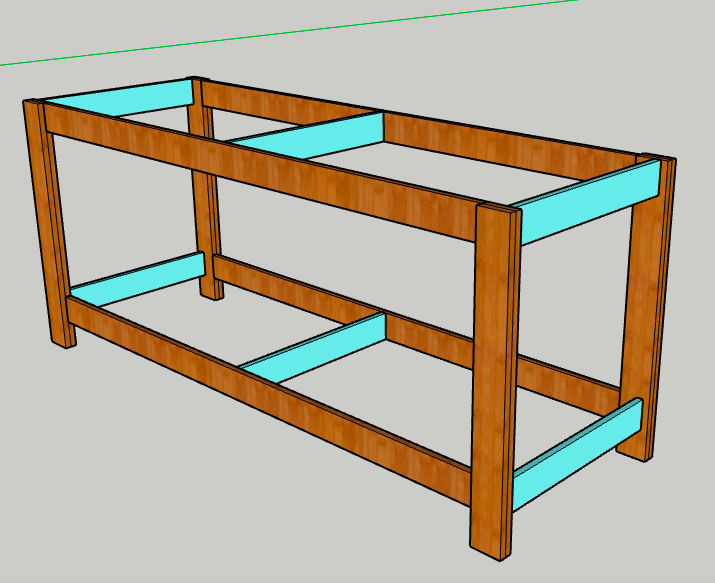
-
Attach Shelf Sides and Back
- Drill two pocket holes in each end of the Shelf Sides.
- Drill three evenly spaced pocket holes along each of the 25 1/4" long sides of the Shelf Back and two pocket holes along one of the 23" long sides.
- Attach the Shelf Sides flush against the Legs in between the Long Stretchers on one side of the workbench using pocket screws.
- Attach the Shelf Back between the Shelf Sides flush along the back inside edge, using pocket screws.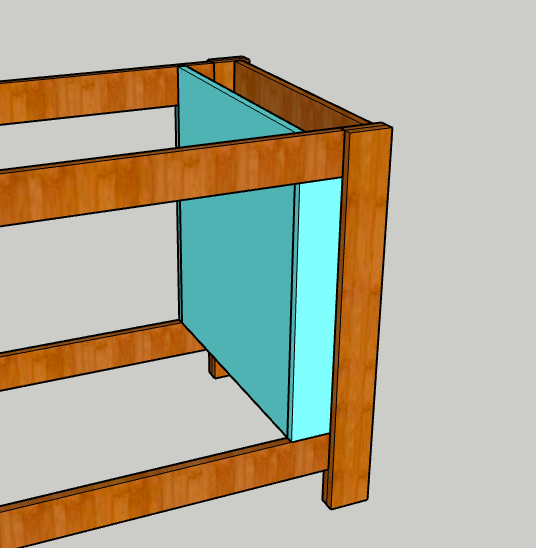
-
Attach Shelves
- Drill two pocket holes in each end of the Shelves and two along one long edge..
- Attach the first Shelf to the Shelf Back and the Legs and Shelf Sides where the pocket holes align. Attach this Shelf flush on top of the bottom Side Stretcher.
- Attach the next two Shelves the same way, with 6" of space between them.
- Nail the Shelf Fronts to the front edge of each Shelf.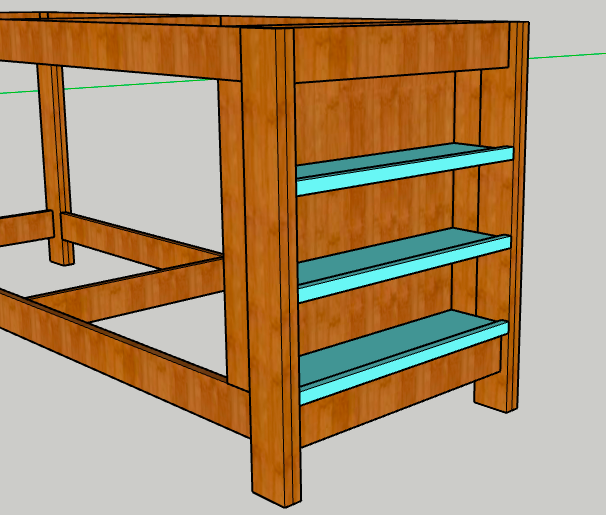
-
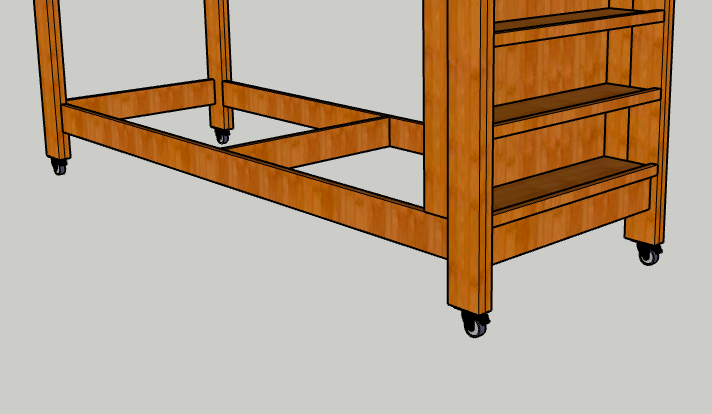
Attach Casters
- Flip the workbench frame over and attach casters to the bottom of the Legs.
-
Attach Slats
- Attach the Slats to the Long Stretchers on the bottom of the workbench.
- Starting with a Slat 3/4" from the Shelf Back, nail the Slat into the Long Stretcher on both sides.
- Using a 3/4" spacer between each Slat, work your way down until you reach the last Slat.
- Use a jigsaw or scroll saw to cut out 2 3/4" x 3/4" on each side of the last Slat.
- Attach this Slat so it fits around the Legs.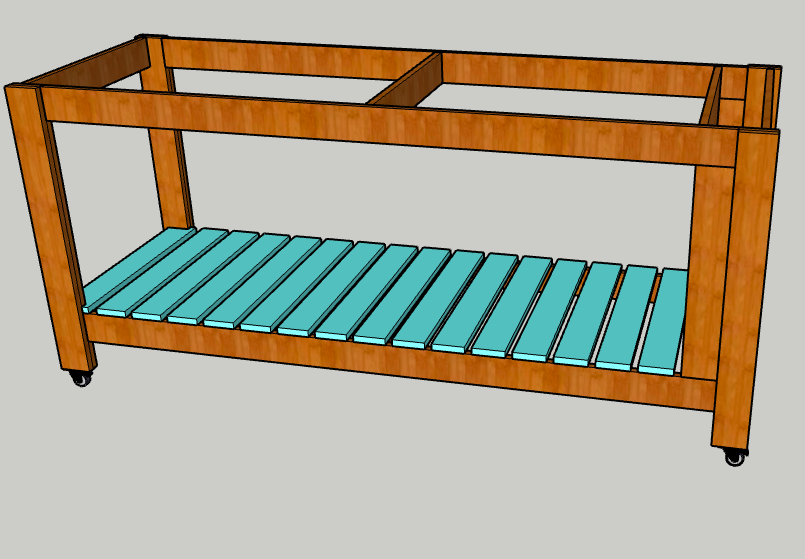
-
Attach Top
- Using the pocket holes in the Legs and the Shelf Back, attach the Top to the workbench base.
- The Top should hang off the Legs 4" on the sides and 2" on the front and back. -
Enjoy!
- Enjoy your handiwork and tag @CharlestonCrafted on Instagram with a picture!