Ready to create your own wooden cutting board? Below is a step-by-step guide to walk you through the process, plus a curated list of the best DIY cutting board plans to inspire your project!
How to Make a Cutting Board: Step-by-Step Guide
Making your own cutting board is a rewarding project that combines practicality with creativity. With just a few tools and the right materials, you can craft a durable and personalized addition to your kitchen or a thoughtful handmade gift.
Choosing the right materials
When it comes to creating a cutting board that will become a cherished kitchen companion, material selection is everything. The woods you choose will determine not just the board’s appearance, but its durability, food safety, and long-term performance. Let’s dive deep into the art of selecting the perfect materials for your handmade cutting board.
Types of wood
Hardwoods reign supreme in cutting board construction, offering the ideal combination of durability, beauty, and food safety. Let’s explore the top contenders.
Maple
Hard maple stands as the quintessential cutting board wood. Its tight grain structure and exceptional hardness make it a favorite among professional chefs and home cooks alike. Maple’s light, creamy color provides a clean, classic look that complements a variety of decors. More importantly, its dense cellular structure resists bacteria and stands up to years of chopping and slicing.
Walnut
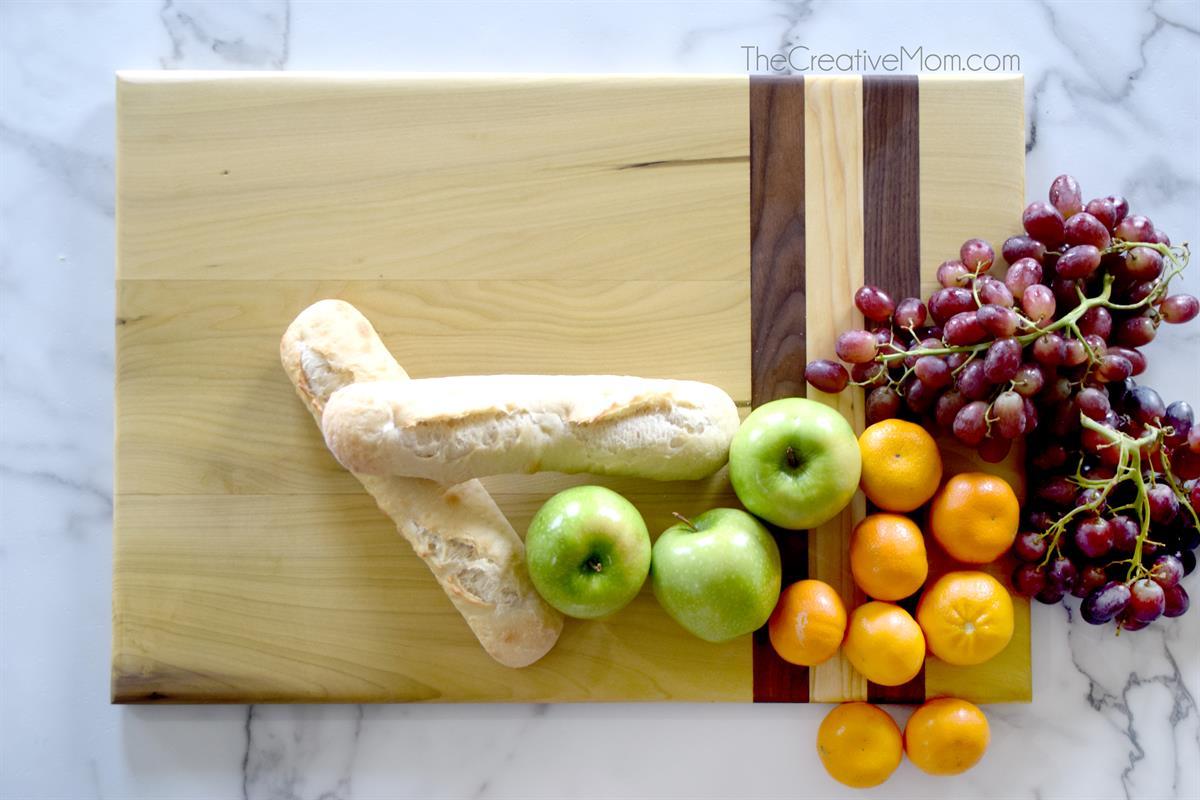
For those seeking a deeper, more dramatic appearance, walnut is a luxurious option. Its rich, dark brown tones bring elegance to any kitchen, while maintaining the hardness necessary for a top-quality cutting board. Walnut is slightly softer than maple but still provides excellent durability and a stunning visual appeal.
Cherry
Cherry wood brings a warm, reddish-brown hue that deepens beautifully with age. It strikes an excellent balance between hardness and workability, making it a popular choice for woodworkers. Cherry’s natural antibacterial properties and beautiful grain pattern also make it well-suited for cutting board material.
Avoiding toxic woods
Not all woods are created equal when it comes to food preparation. Some wood varieties can be downright dangerous when used in kitchen tools. Avoid these woods completely when considering your choice for cutting board material:
- Treated lumber (contains harmful chemicals)
- Softwoods like pine (too soft and potentially resinous)
- Exotic woods with known toxicity (some can cause allergic reactions)
- Woods treated with pesticides or chemical stains
Woods with potential toxicity concerns include:
- Cedar
- Rosewood
- Oleander
- Yew
When in doubt, stick to well-known, food-safe hardwoods from reputable sources. Always research and verify the safety of any wood you’re considering for a food prep surface.
Selecting grain type
The way wood is oriented can dramatically impact a cutting board’s performance and durability. Three primary grain types dominate cutting board design.
Face grain boards
The most basic and visually appealing option, face grain boards showcase the wood’s natural beauty. Created by cutting wood along its width, these boards display the broadest, most decorative surface. However, they’re the least durable option, more susceptible to knife marks and wear.
Edge grain boards
A step up in durability, edge grain boards are constructed by standing wood strips on their narrow edge and gluing them together. This method creates a stronger surface that’s more resistant to wear than face grain. Edge grain boards offer a good balance between aesthetics and functionality, making them a popular choice for home woodworkers.
End grain boards
The ultimate in cutting board construction, end grain boards represent the pinnacle of durability. Created by arranging wood pieces so the end grain faces upward, these boards are constructed by cutting wood perpendicular to its growth rings. The result is a surface that’s incredibly forgiving to knife edges, with remarkable self-healing properties. Knife marks tend to close up, making end grain boards both beautiful and long-lasting.
Pro tip: For the most professional results, consider creating a cutting board that combines multiple wood types. A cutting board featuring maple, walnut, and cherry can create a stunning visual masterpiece that’s as functional as it is beautiful.
Tools and supplies needed
Creating a beautiful, functional cutting board requires more than just skill and creativity. You’ll need the right tools and supplies to transform raw wood into a kitchen masterpiece. Let’s walk you through everything you’ll need to bring your cutting board project to life.
Saws
Table saw
A standard for making precise, straight cuts, a table saw allows you to create uniform wood strips with perfect edges for gluing.
Track saw
Track saws are extremely versatile and combine the accuracy and stability of a table saw with the portability and ease of use of a circular saw.
Miter saw
Excellent for making clean, accurate crosscuts and managing smaller pieces with ease.
Band saw
Ideal for cutting more intricate shapes and handling curved or unique design elements.
Clamps
Bar clamps
Essential for applying even pressure across the entire board during glue-up.
Pipe clamps
Affordable and extendable, these are perfect for larger projects.
Spring clamps
Helpful for holding smaller pieces or providing additional support during the gluing process.
Planer and sander
Thickness planer
Ensures your wood pieces are perfectly uniform in thickness.
Random orbital sander
Critical for achieving a smooth, professional finish.
Sandpaper (various grits)
Start with 80-grit for initial smoothing, progress to 120, then 220, and finish with 320-grit for a smooth, even surface.
Measuring and marking tools
- Tape measure
- Combination square
- Marking gauge
- Pencils
Adhesives and finishes
Waterproof wood glue
Choose a food-safe option like Titebond III Ultimate.
Mineral oil
The gold standard for cutting board finishing and protection.
Optional board cream or wax
Provides additional protection and conditioning.
Safety gear
Safety goggles
Protect your eyes from wood chips, dust, and potential glue splashes.
Dust mask or respirator
Critical for preventing inhalation of wood dust.
Work gloves
Protect your hands from splinters, sharp edges, and potential tool-related injuries.
Additional safety considerations
- Ear protection
- Anti-slip work mats
- First aid kit
- Proper ventilation in your workspace
Gluing and clamping the board
Creating a rock-solid cutting board isn’t just about selecting the right wood, it’s more about mastering the art of gluing and clamping. This crucial stage can make the difference between a professional-looking cutting board and a disappointing project that falls apart.
Step 1: Applying glue
Glue application is a precision process that requires patience and technique. The goal is to create an even, complete bond with zero gaps or weak points.
Choosing the right glue
Not all wood glues are created equal. For cutting boards, you’ll want a food-safe, waterproof wood glue. Titebond III Ultimate Wood Glue stands out as the top choice for woodworkers. It’s waterproof, FDA-approved for indirect food contact, and provides exceptional strength.
Before applying glue
- Ensure wood surfaces are clean and dust-free
- Check that wood pieces are perfectly flat and aligned
- Dry-fit your pieces first to confirm perfect alignment
Glue application techniques
- Use a dedicated glue brush or roller for even distribution
- Apply a thin, consistent layer of glue to both surfaces
- Aim for complete coverage without excessive glue
- Wipe away excess glue immediately with a damp cloth
Pro tip: The “Goldilocks” rule of glue
Too little glue creates weak joints. Too much glue creates messy squeeze-out and potential weak spots. You want just the right amount; a thin, even layer that covers the entire surface.
Step 2: Clamping
Proper clamping is an art form that requires both technique and the right equipment.
Clamping best practices
- Use multiple clamps to distribute pressure evenly
- Place cauls (support boards) across the clamps to prevent indentations
- Alternate clamp direction to ensure uniform pressure
- Check for square alignment during clamping
Clamping sequence
1. Begin with center clamps
2. Gradually add clamps from the center outward
3. Tighten clamps incrementally, not all at once
4. Use just enough pressure to squeeze out a small amount of glue
Step 3: Allowing to cure
Proper curing is critical for maximum strength and durability.
Recommended curing times
- Minimum clamp time: 24 hours
- Full cure time: 72 hours
- Ideal curing conditions: Room temperature (70 F), low humidity
Curing environment
- Choose a flat, stable surface
- Maintain consistent room temperature
- Avoid direct sunlight or extreme temperature changes
- Keep the area dust-free
After removing clamps
- Check for any glue squeeze-out
- Remove dried glue carefully with a sharp chisel or scraper
- Look for any gaps or weak spots
- Sand any rough areas before proceeding to final finishing
Expert tips for flawless glue-ups
- Work in a clean, well-lit area
- Prepare all materials before starting
- Have your supplies organized and within reach
- Work efficiently but without rushing
- Practice on scrap wood to perfect your technique
Troubleshooting common gluing issues
Gaps in joints
Usually caused by uneven wood surfaces or improper glue application.
Excessive glue squeeze-out
Indicates too much glue or improper clamping.
Weak joints
Often result from dirty surfaces or inadequate clamping pressure.
Shaping and refining the cutting board
The transformation of a cutting board from a raw glued-up panel to a polished, professional kitchen tool is where true craftsmanship shines. This critical stage requires patience, precision, and a keen eye for detail.
Trimming
Achieving the right dimensions is an art form that begins with careful measurement and strategic cutting:
- Use a large, reliable square to ensure perfectly straight edges
- Mark cutting lines with a sharp pencil and combination square
- Double-check measurements before making any cuts
- Account for about ¼” of extra material to allow for final trimming
Cutting techniques
- Table saws or track saws are the most precise method for straight, clean cuts.
- Using a circular saw with a guide can be a great alternative.
- Miter saws are excellent for creating perfectly square corners, but lack versatility when working with wide workpieces.
Pro tip: Always cut slightly larger than your final desired size. It’s easier to remove material than to add it back. Leave yourself about 1/8″ or ¼” of extra material for final refinement.
Adding features
Elevate your cutting board from functional to extraordinary with carefully crafted features:
Juice grooves
Use a router with a decorative groove bit
Typical groove depth: 1/8″ or ¼”
Create a channel around the board’s perimeter or design a unique pattern
Consider the board’s primary use when designing groove placement
Handle slots
Use a router or drill press with a straight bit
Position handles for balanced lifting
Typical handle slot dimensions: ¾” wide, ½” deep
Round the edges of handle slots for comfort and safety
Optional design elements
Decorative chamfer edges
Rounded corners
Inlaid wood accents
Personalized engraving or branding
Sanding
Sanding is where good cutting boards become great. The process requires methodical approach and progressive refinement:
Sanding progression
1. Rough sanding (80-grit)
Remove major imperfections
Level any slight variations from glue-up
Correct minor alignment issues
2. Medium sanding (120-grit)
Smooth out rough areas left by initial sanding
Begin to reveal the wood’s natural beauty
Prepare surface for fine sanding
3. Fine sanding (220-grit)
Eliminate all remaining scratches
Create a smooth, uniform surface
Prepare for final finish
4. Ultra-fine sanding (320-grit)
Achieve a glass-like smoothness
Prepare surface for oil or other finishes
Sanding techniques
- Always sand with the grain
- Use light, consistent pressure
- Keep sanding surface clean
- Use a random orbital sander for most efficient results
- Hand-sand edges and corners for precise control
Common sanding mistakes to avoid
- Skipping grit levels
- Applying too much pressure
- Sanding across the grain
- Failing to clean surface between grits
Final inspection after sanding (before finishing)
- Wipe board with a tack cloth
- Check for any remaining scratches
- Inspect in good lighting
- Feel the surface with your hand to detect imperfections
Finishing the board
The final stage of cutting board creation is perhaps the most crucial. A proper finish not only protects your woodworking masterpiece but ensures its longevity and food-safe performance. Let’s explore the art of finishing a cutting board that will become a cherished kitchen companion.
Sealing
Choosing the right finish is critical for both protection and food safety. Unlike furniture or decorative pieces, cutting boards require special, food-safe finishes that nourish the wood and protect against moisture and bacteria.
Mineral oil
- 100% food-safe
- Deeply penetrates wood fibers
- Prevents moisture absorption
- Doesn’t go rancid like cooking oils
- Enhances wood’s natural grain and color
Application technique
1. Ensure board is completely clean and dry
2. Apply a generous coat of food-grade mineral oil
3. Use a clean, lint-free cloth
4. Rub oil into wood using circular motions
5. Allow oil to soak for 15-20 minutes
6. Wipe away excess oil
7. Repeat 3-4 times for maximum protection
Beeswax blend
Create a cutting board cream by combining:
4 parts food-grade mineral oil
1 part pure beeswax
Optional: Blend in coconut oil for additional conditioning
- Benefits of beeswax blend
- Creates a water-resistant barrier
- Provides longer-lasting protection
- Adds slight sheen to the wood
- Natural antimicrobial properties
Optional customization
Engraving
- Laser engraving for precision designs
- Woodburning for rustic, handcrafted feel
- Hand-carved initials or family name
- Commemorative dates
- Favorite recipe or meaningful quote
Decorative edge techniques
- Rounded over edges for smooth feel
- Chamfered edges for modern look
- Decorative router patterns
- Contrasting wood inlays
- Unique shape cutouts
Maintenance tips
Proper maintenance ensures your cutting board remains beautiful and functional for years.
Cleaning
- Wash with warm, soapy water immediately after use
- Never submerge in water
- Avoid dishwasher
- Use mild, unscented dish soap
- Dry immediately with clean towel
Conditioning schedule
- Initial seasoning: 3-4 coats of mineral oil
- Maintenance: Reapply oil every 2-4 weeks
- Heavy use boards: Consider monthly conditioning
- Signs it needs oil: Dry, dull appearance
- Always oil after thorough washing
What to avoid
- Harsh chemical cleaners
- Bleach
- Prolonged moisture exposure
- Direct sunlight
- Extreme temperature changes


