X Arbor with Bench
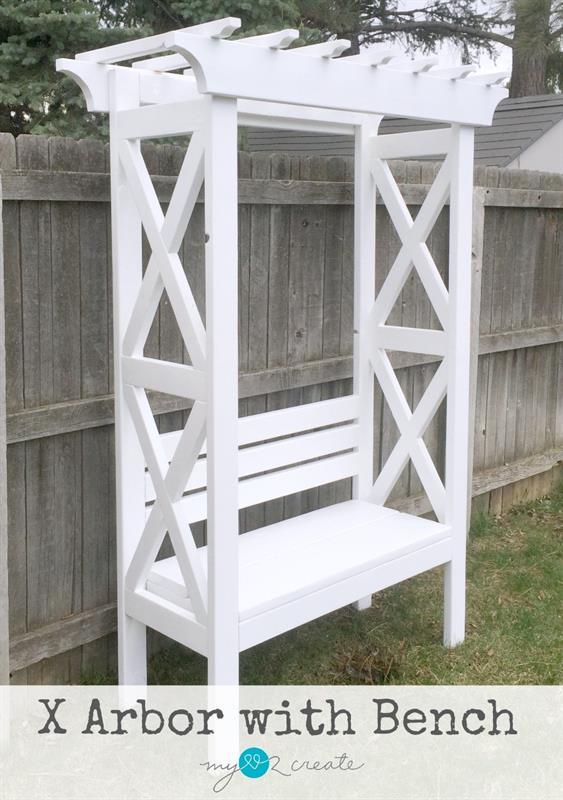
By My Love 2 CreateThis X Arbor with Bench is the perfect accent to you garden or back yard escape. Not only is it beautiful and sturdy it is the perfect spot to sit and relax. It can be stained or painted to fit your preference and would be great with potted plants on the side.
Directions
-
Build Sides
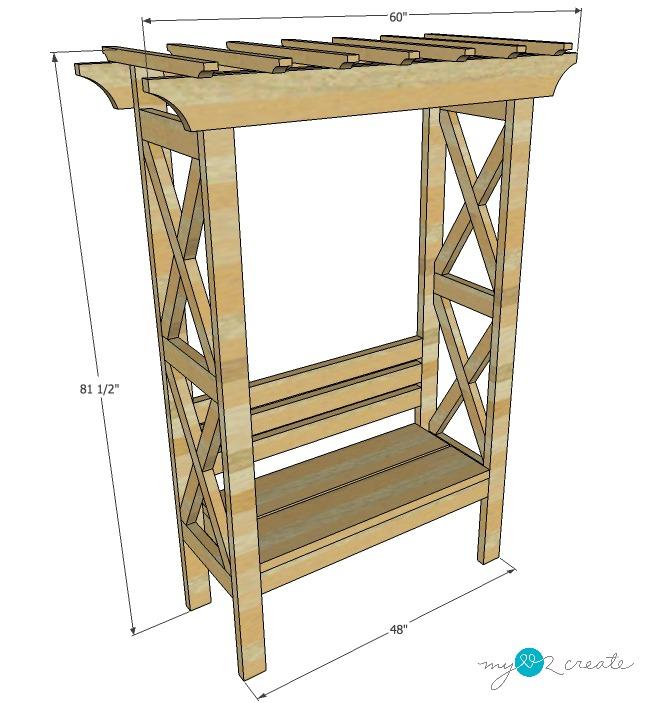
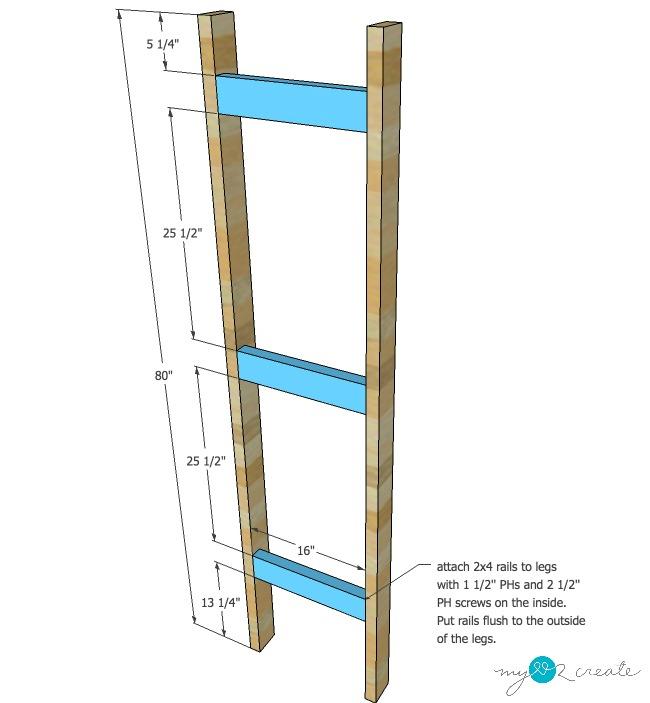
Take the two 80'' 2x4 legs and attach them together with the three 16'' 2x4 rails as shown, using 1 1/2'' pocket holes and 2 1/2'' pocket hole screws.
-
Attach long x boards
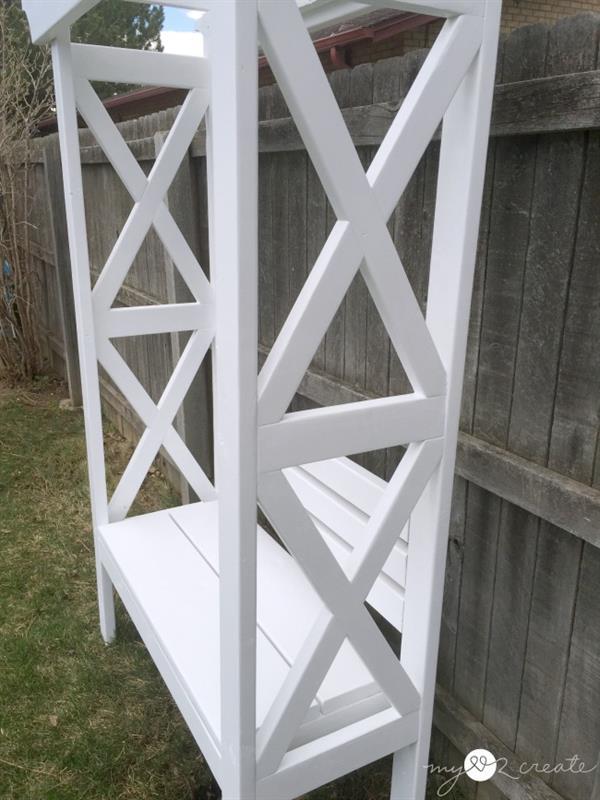
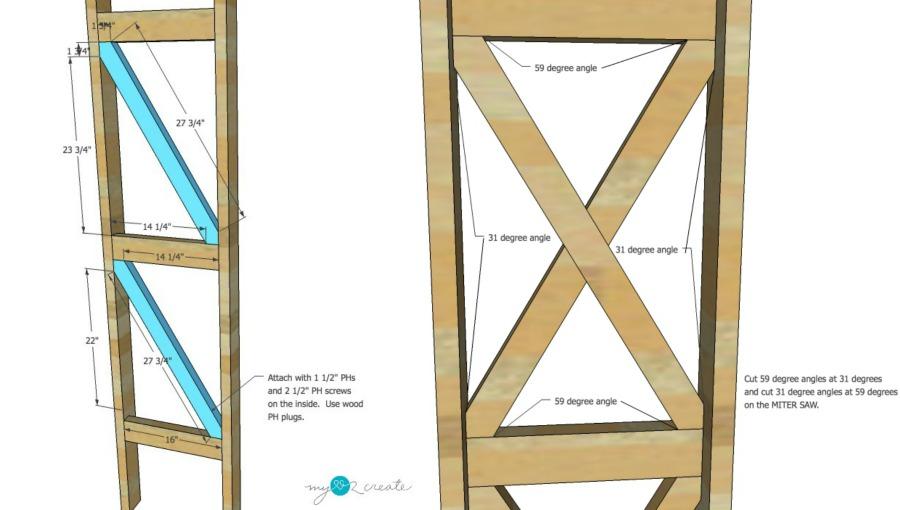
Attach the two long 2x3 X pieces as shown in-between the rails on each side. An easy way to do this is to lay your 2x3 piece under the opening and trace where to cut the ends onto the board. I have provided the angles in the image for cutting on your miter saw. Drill 1 1/2'' pocket holes and attach with 2 1/2'' pocket hole screws on each angled cut and attach them to the legs and rails.
-
Attach small x boards
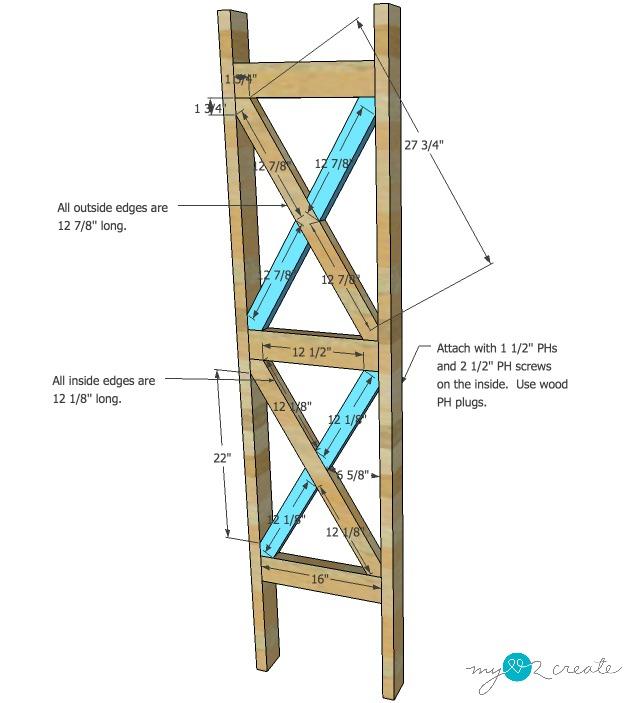
Attach small 2x3 x boards to complete the x pattern using the images shown. Drill 1 1/2'' pocket holes and attach with 2 1/2'' pocket hole screws.
-
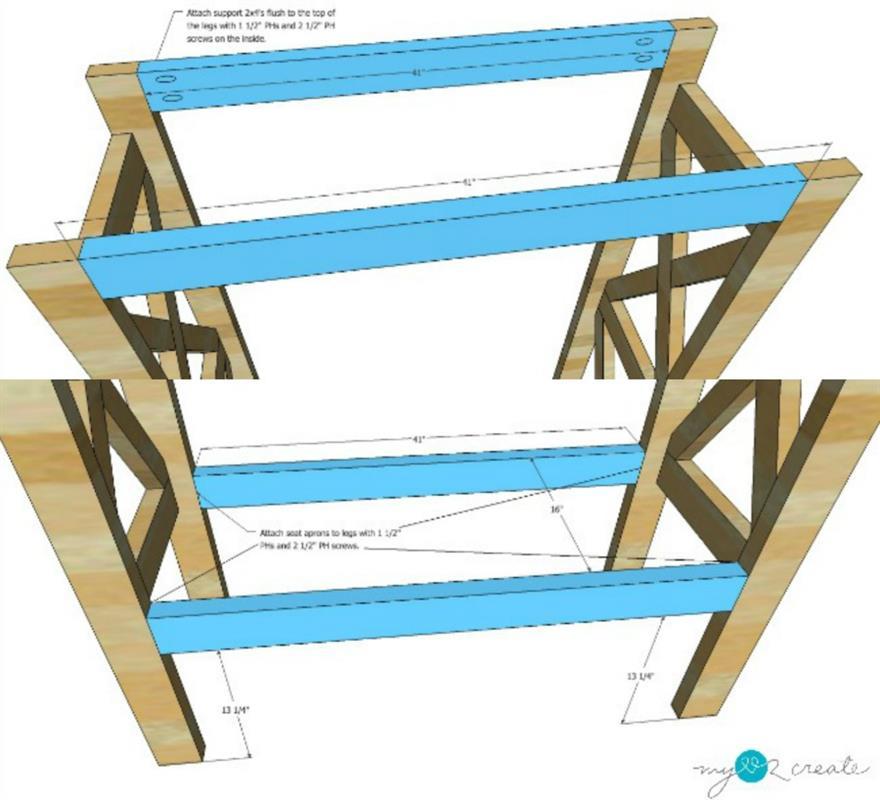
Attach top supports and seat aprons
Connect the two sides together with the 41'' 2x4 top support and seat apron boards with 1 1/2'' pocket holes and 2 1/2'' pocket hole screws.
-
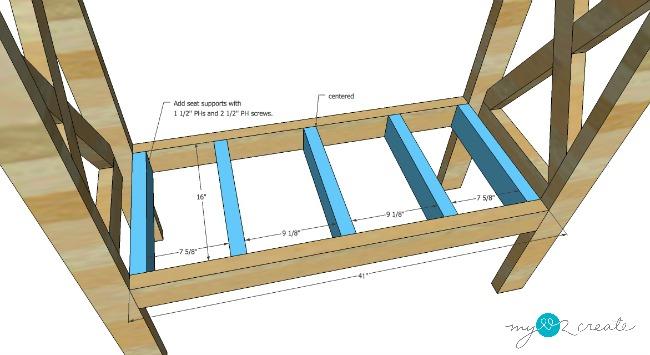
Add seat supports
Add the 16'' 2x4 seat supports as shown with 1 1/2'' pocket holes and with 2 1/2'' pocket hole screws.
-
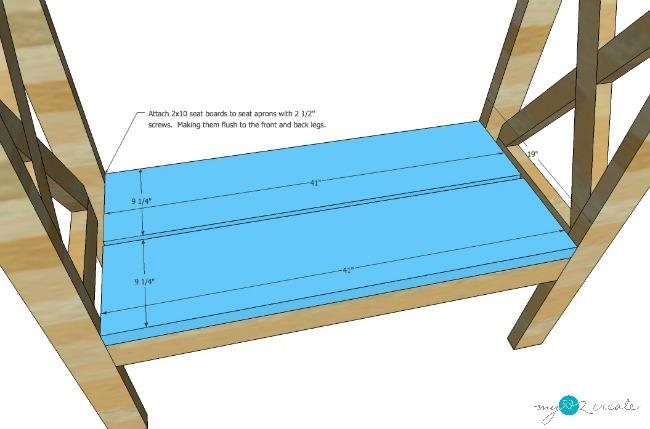
Add Seat
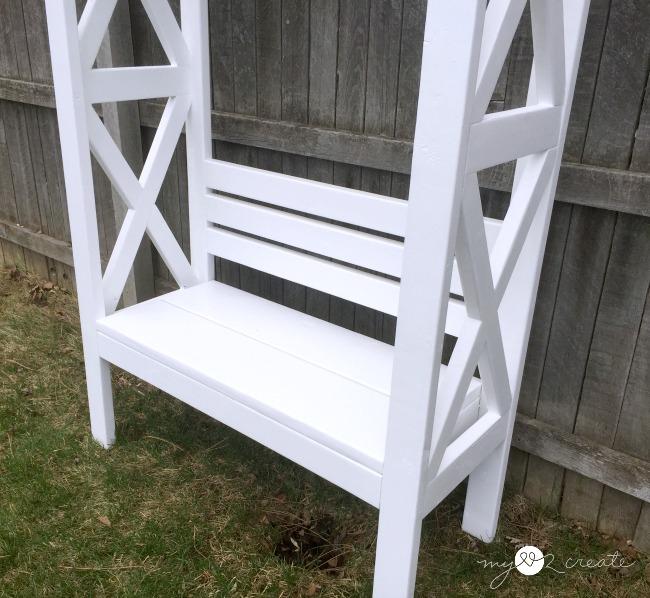
Add 41'' 2x10 seat boards to seat support with 2 1/2 screws.
-
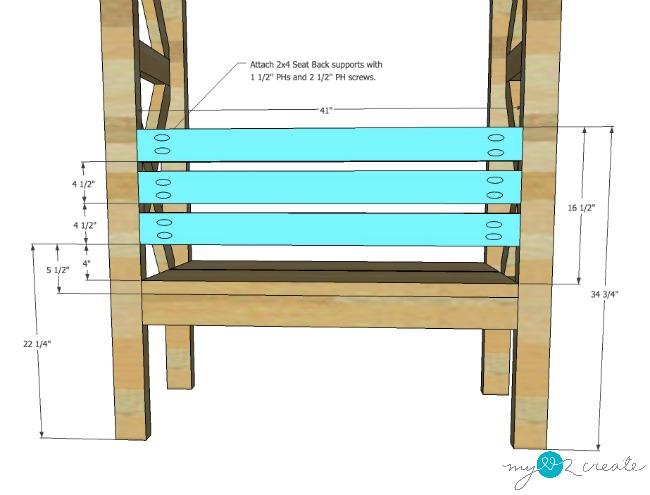
Add Seat back boards
Add the 41'' 2x4 seat back boards as shown with 1 1/2'' pocket holes and with 2 1/2'' pocket hole screws.
-
Attach 2x6 Rafters
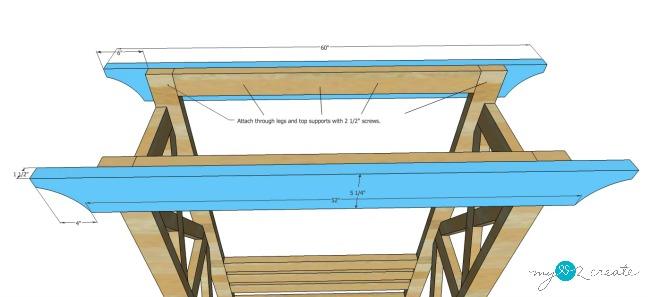
Attach bottom 60'' 2x6 rafters to legs and top support boards with 2 1/2'' screws.
-
Add top rafters
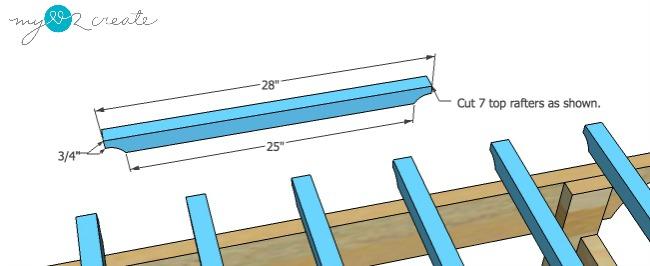
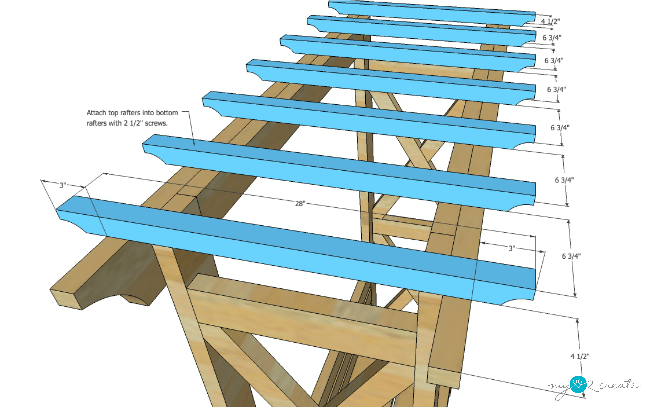
Attach top 28'' 2x2 top rafters as shown. Fill pocket holes and screw holes and finish as desired.


