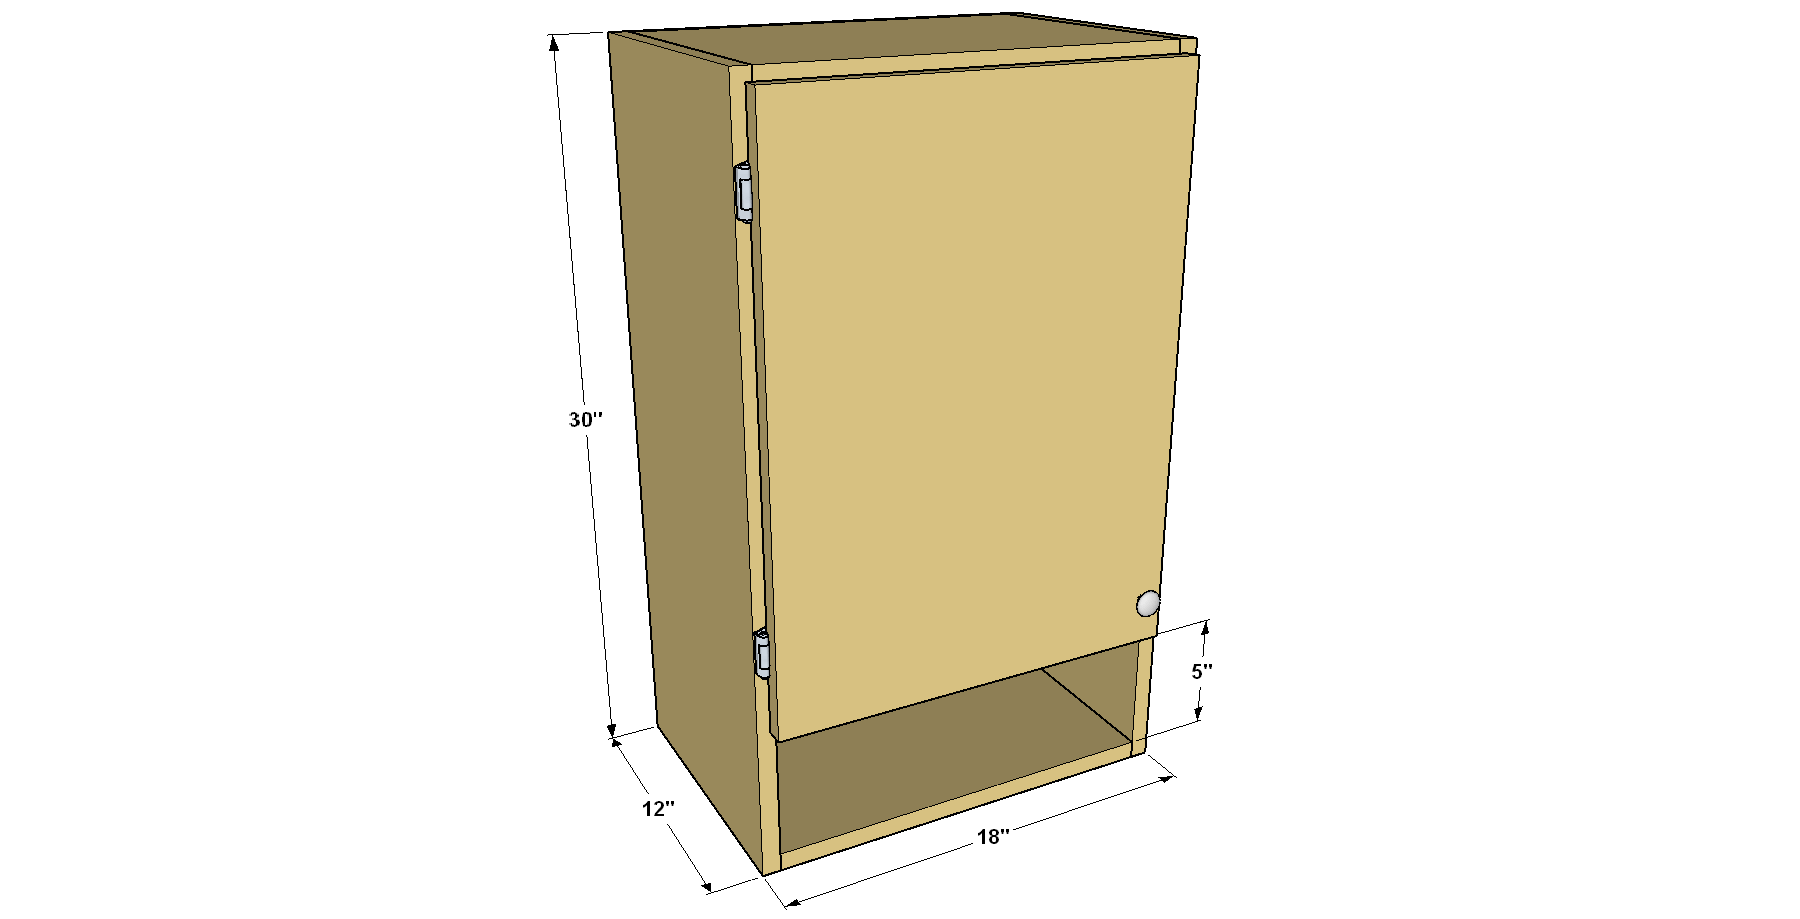


Add storage space in your shop or garage with this easy-to-build wall cabinet. It offers enclosed storage with an adjustable shelf, as well as an open storage area. You can make a cabinet from just a half sheet of plywood, a piece of hardboard, and a short 1x4. Pocket hole screws hold it together.
Tools
Kreg Tools


Other Tools
-
tape measure

Materials
Wood Products
- 1 Plywood , 3/4" x 48"x 48"
- 1 Hardboard , 1/4" x 24"x 48"
- 1 Board , 1x4 x 48"
Hardware & Supplies
- 30 1 1/4" coarse-thread Kreg Pocket-Hole Screws
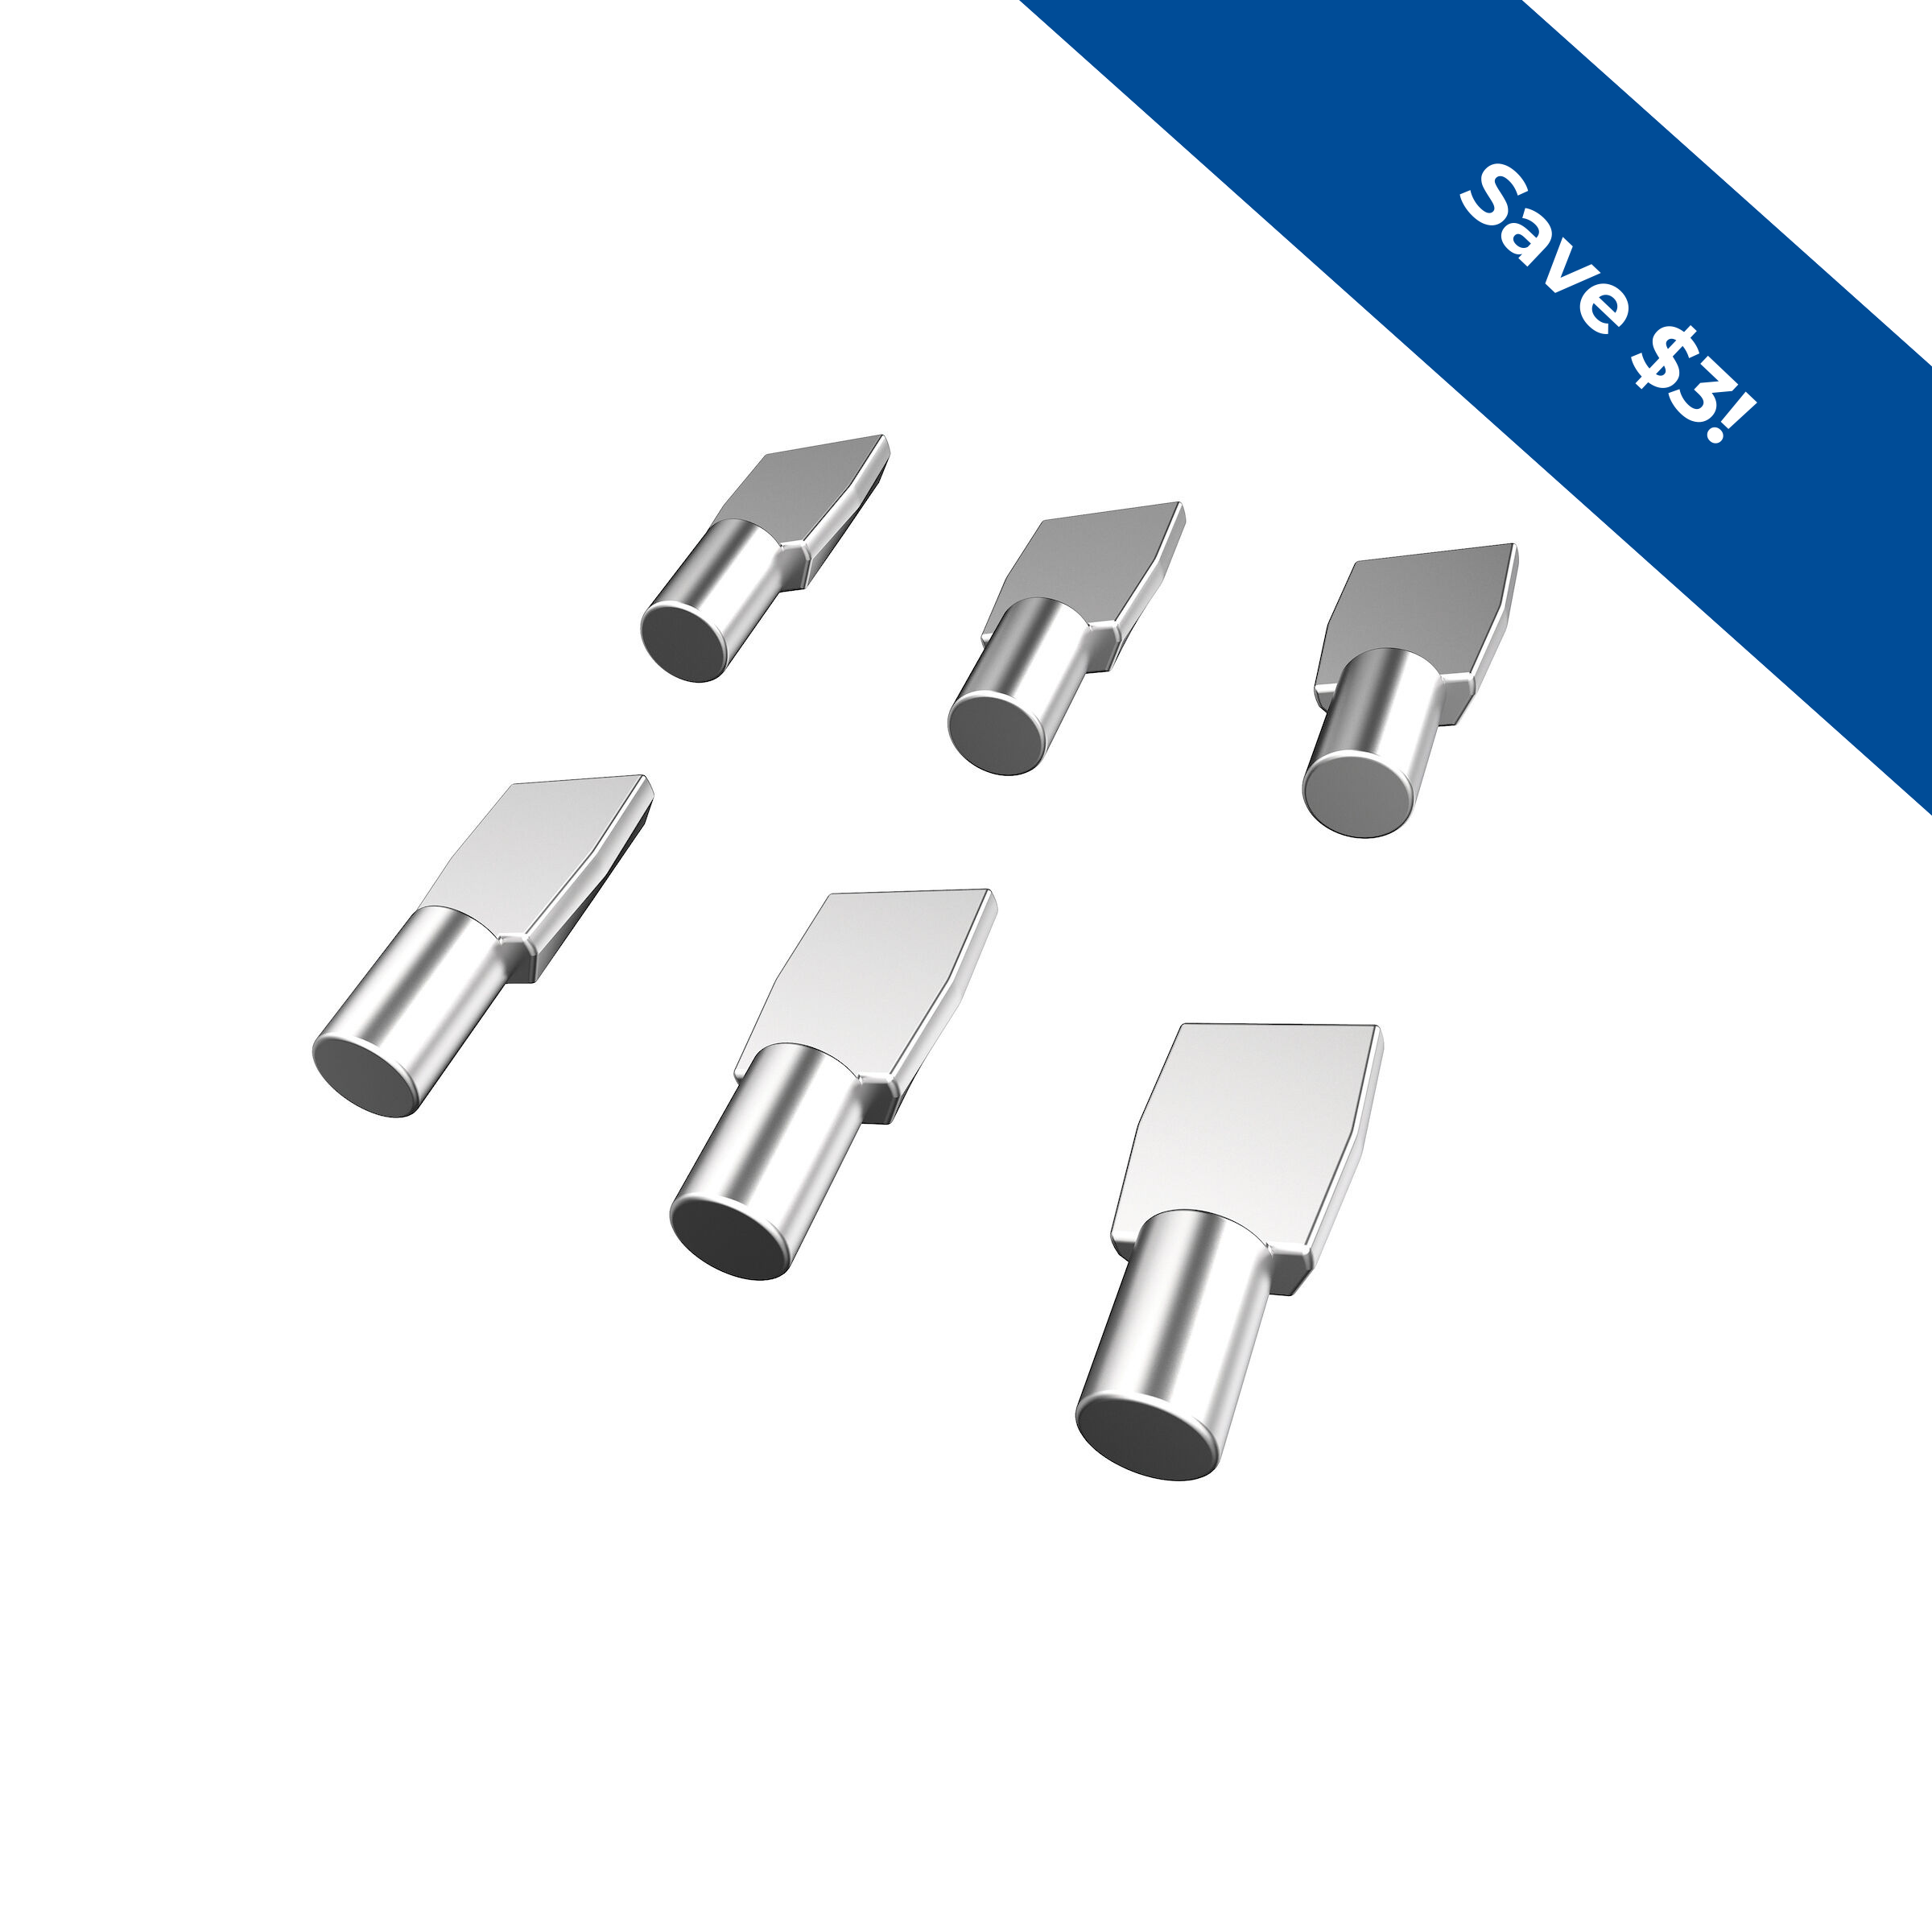
- 4 1/4" shelf pins
- 1 Pair 1/4" overlay cabinet door hinges
- 1 1"-diameter door pull
- 12 3/4" brad nails
- 4 3" wood screws
Cut List & Parts
- 2 Side , 3/4" x 12" x 30"
- 1 Top , 3/4" x 11 3/4" x 16 1/2"
- 1 Bottom , 3/4" x 11 3/4" x 16 1/2"
- 1 Divider , 3/4" x 11 3/4" x 16 1/2"
- 2 Cleat , 3/4" x 3 1/2" x 16 1/2"
- 1 Back , 1/4" x 16 1/2" x 30"
- 1 Adjustable Shelf , 3/4" x 11" x 16 1/2"
- 1 Door , 3/4" x 17" x 23 1/4"

Directions
-
Make the Cabinet Sides
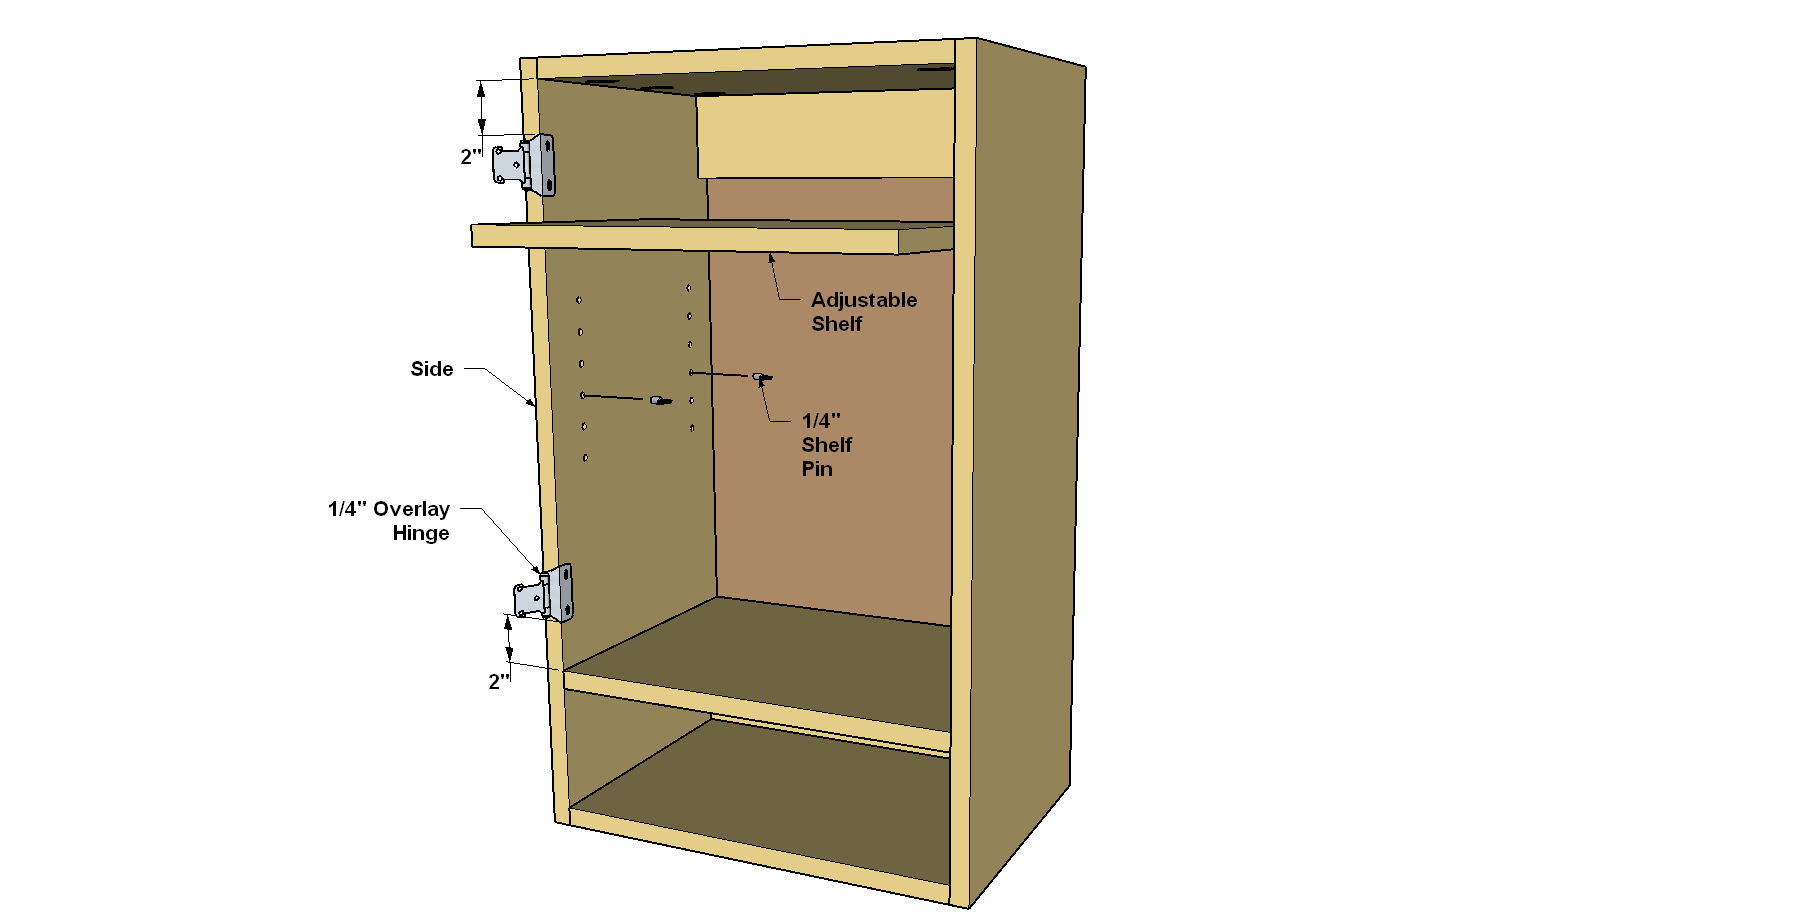
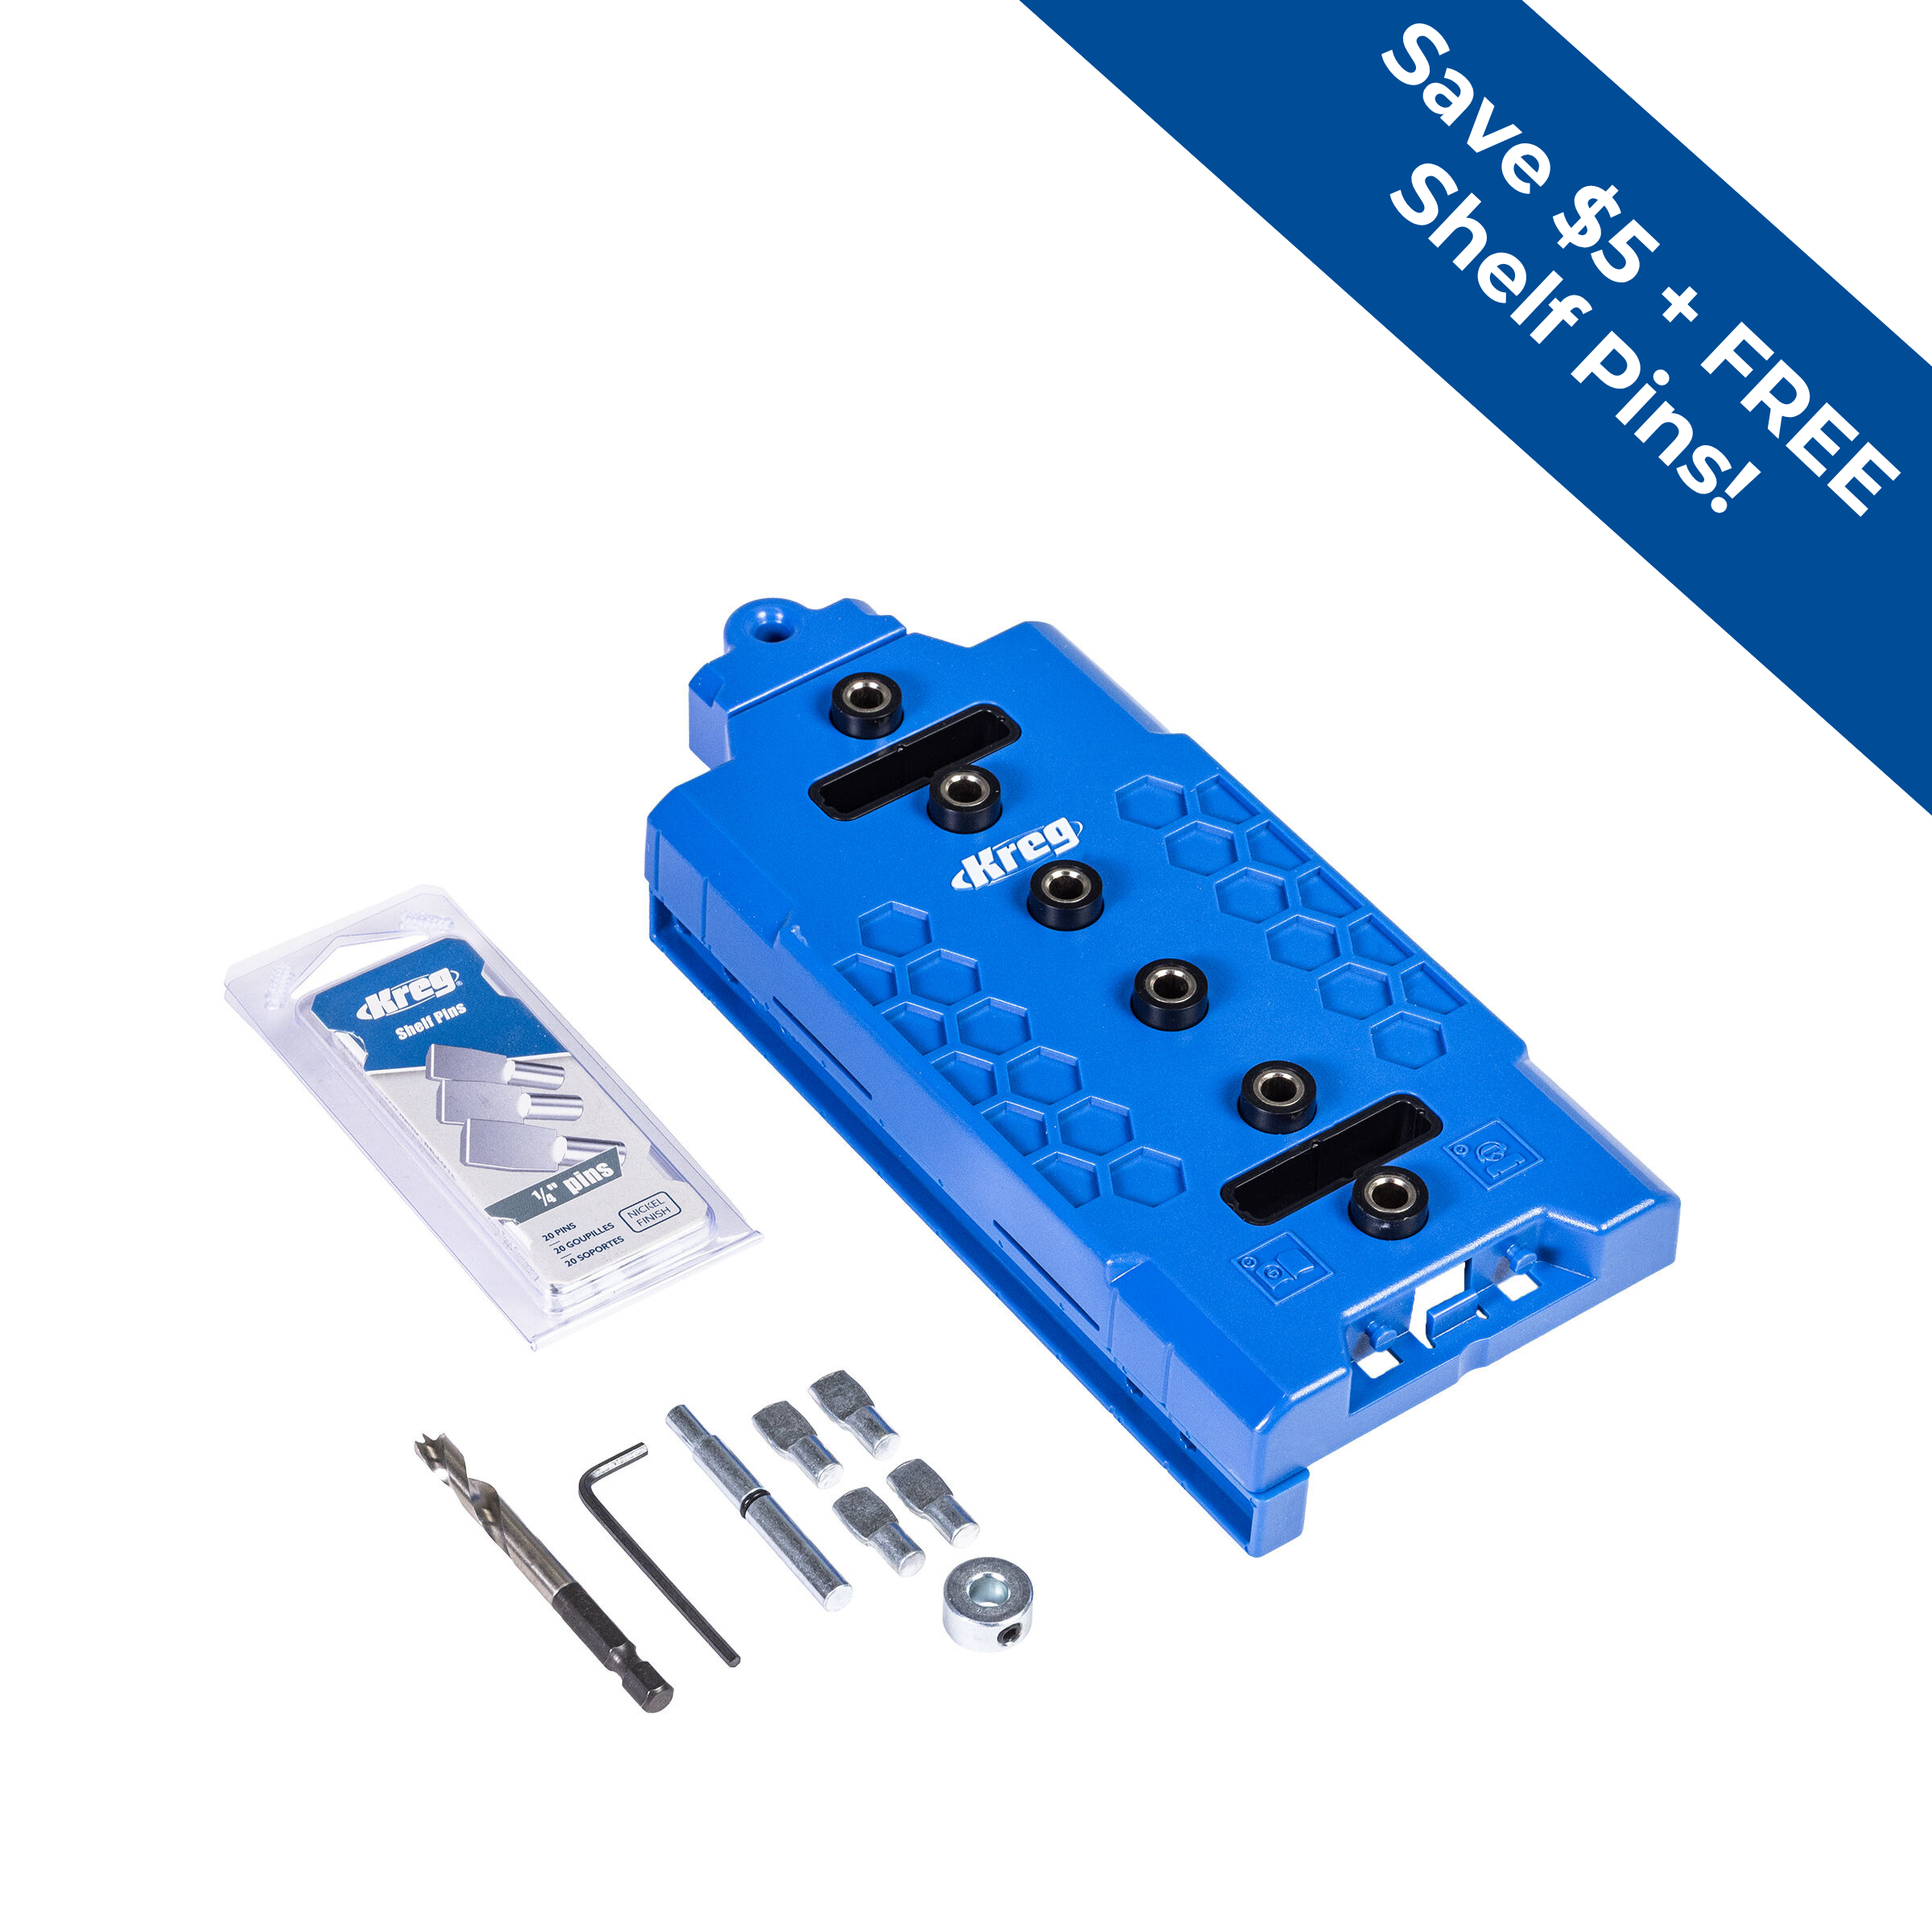
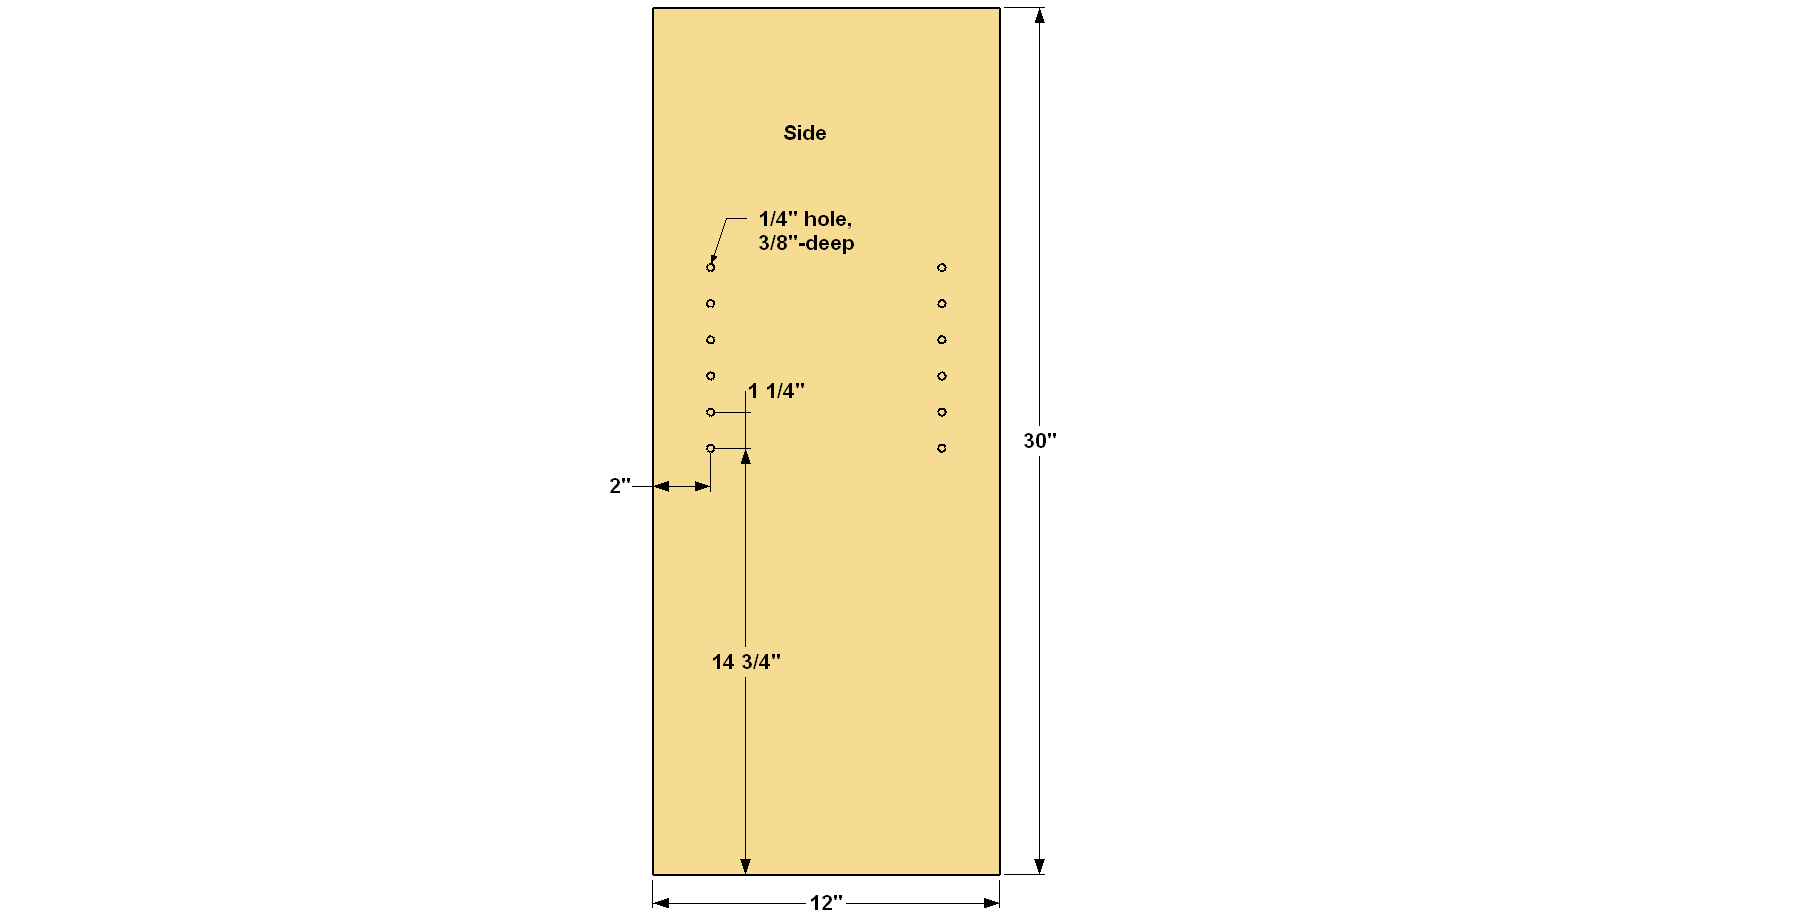
Cut two Sides to size from 3/4" plywood, as shown in the cutting diagram. Then drill holes for adjustable shelf pins where shown. The easiest way to do this is with a Kreg® Shelf Pin Jig. The jig makes it easy to keep the holes consistently spaced and aligned.
NOTE: The setback spacing (distance from the edge to the shelf-pin holes) shown matches the first-generation Kreg Shelf Pin Jig. The second generation model, released in March 2022, has different setback spacing. The vertical distance between the pin holes, though, matches the dimensions shown here—1 1/4". You can create the shelf-pin holes accurately using either the first- or second-generation jig.
-
Make a Top, Bottom and Divider
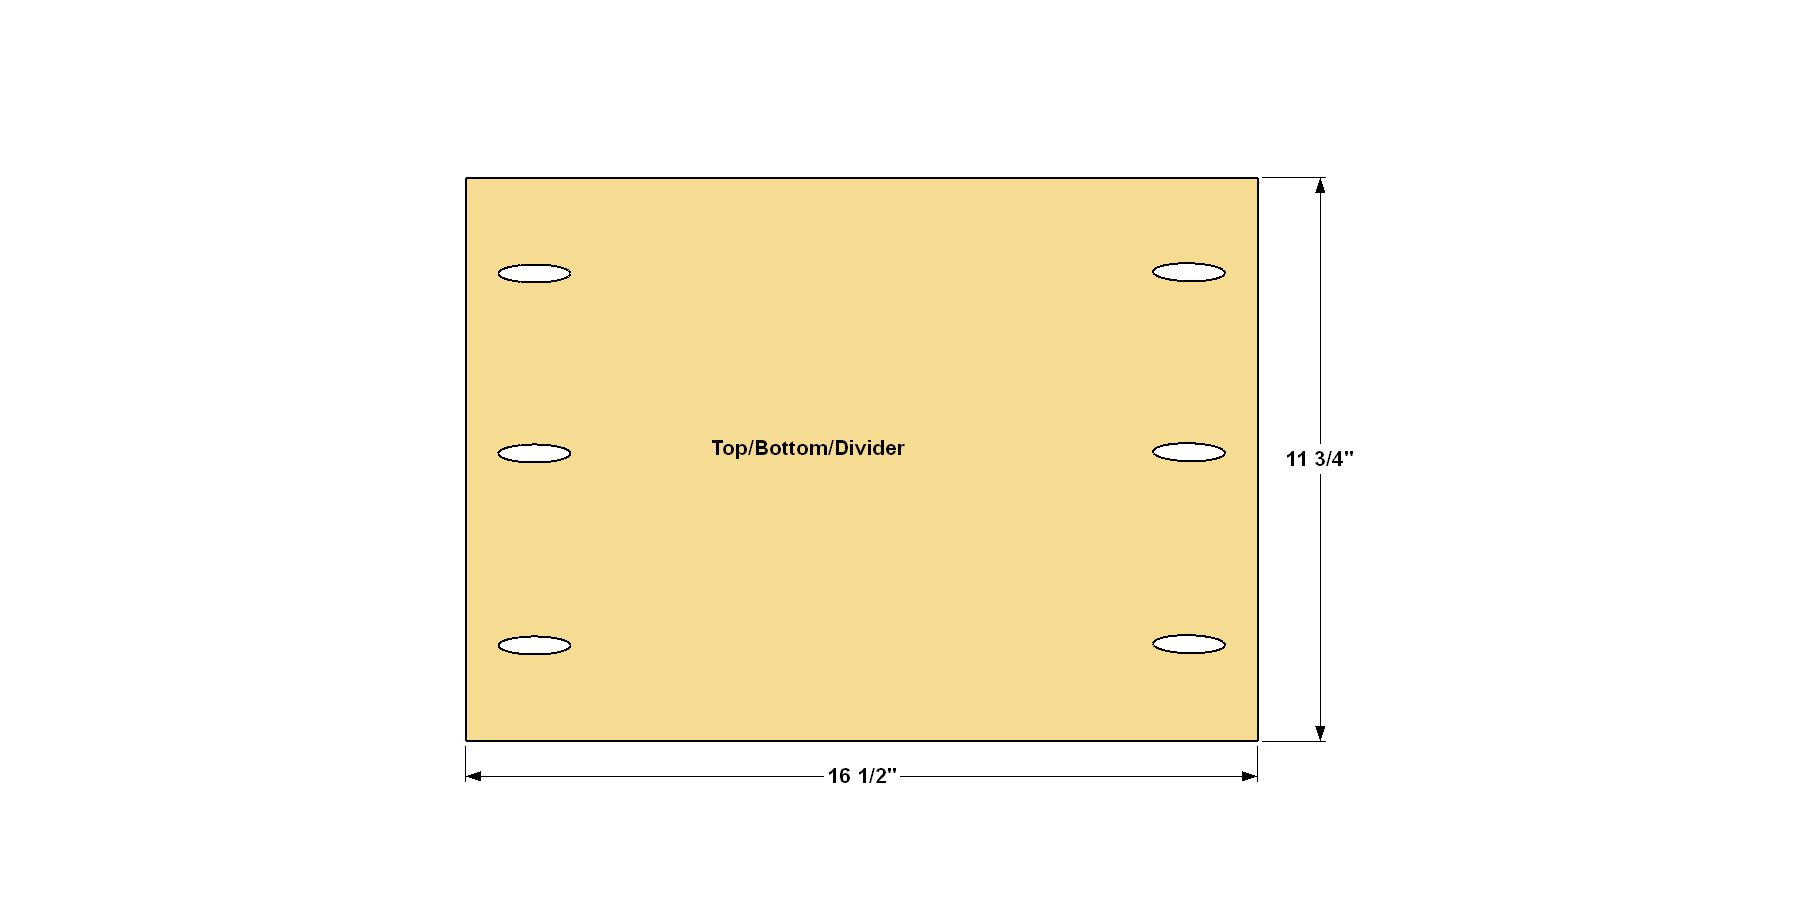
Cut one Top, one Bottom, and one Divider to size from 3/4" plywood, as shown in the cutting diagram. Then, with your Kreg Pocket-Hole Jig set up for 3/4"-thick material, drill pocket holes in these three pieces where shown.
-
Cut a Shelf and Door
Cut one Adjustable Shelf to size from 3/4" plywood, as shown in the cutting diagram. Note that the Shelf is slightly shorter and narrower than the Top, Bottom and Divider. That makes it easy to fit the Shelf into the cabinet, and to adjust it as needed. You can also cut the Door to size now. It’s actually larger than the opening in the cabinet. That way, the door overlaps the Top, Divider, and Sides by 1/4" when closed. Once they’re cut, you can set the Adjustable Shelf and Door aside for now.
-
Make the Cleats
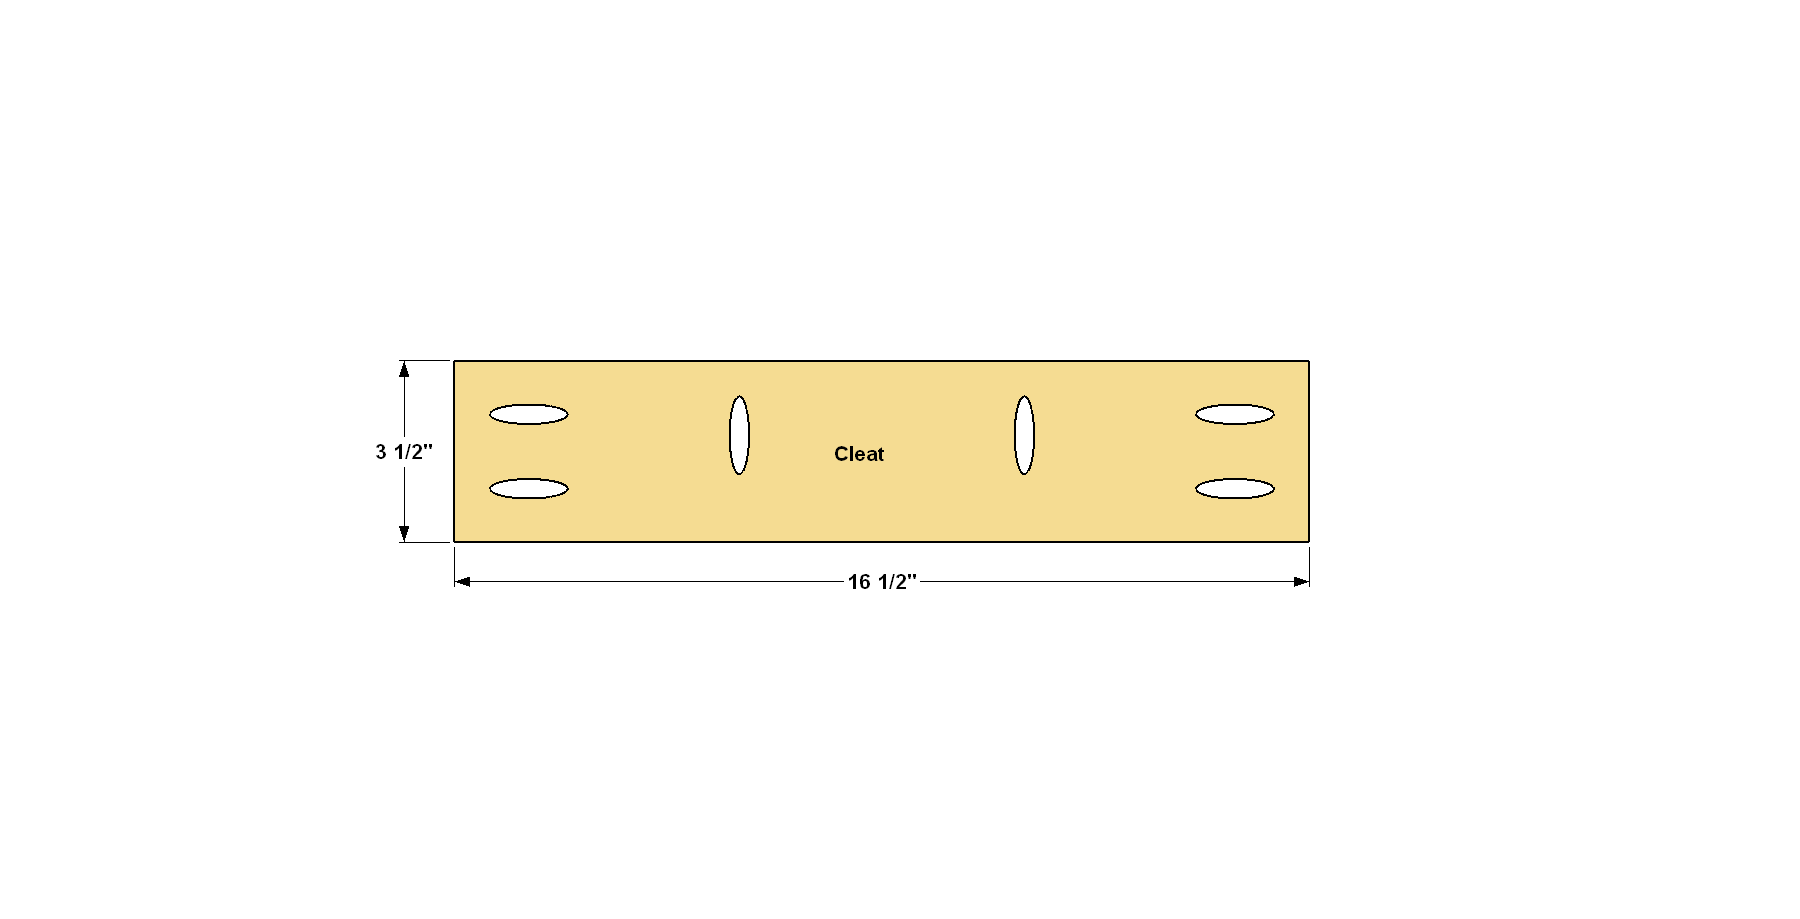
Next, cut two Cleats to length from a 1x4 board, as shown in the cutting diagram. Drill pocket holes in the Cleats where shown.
-
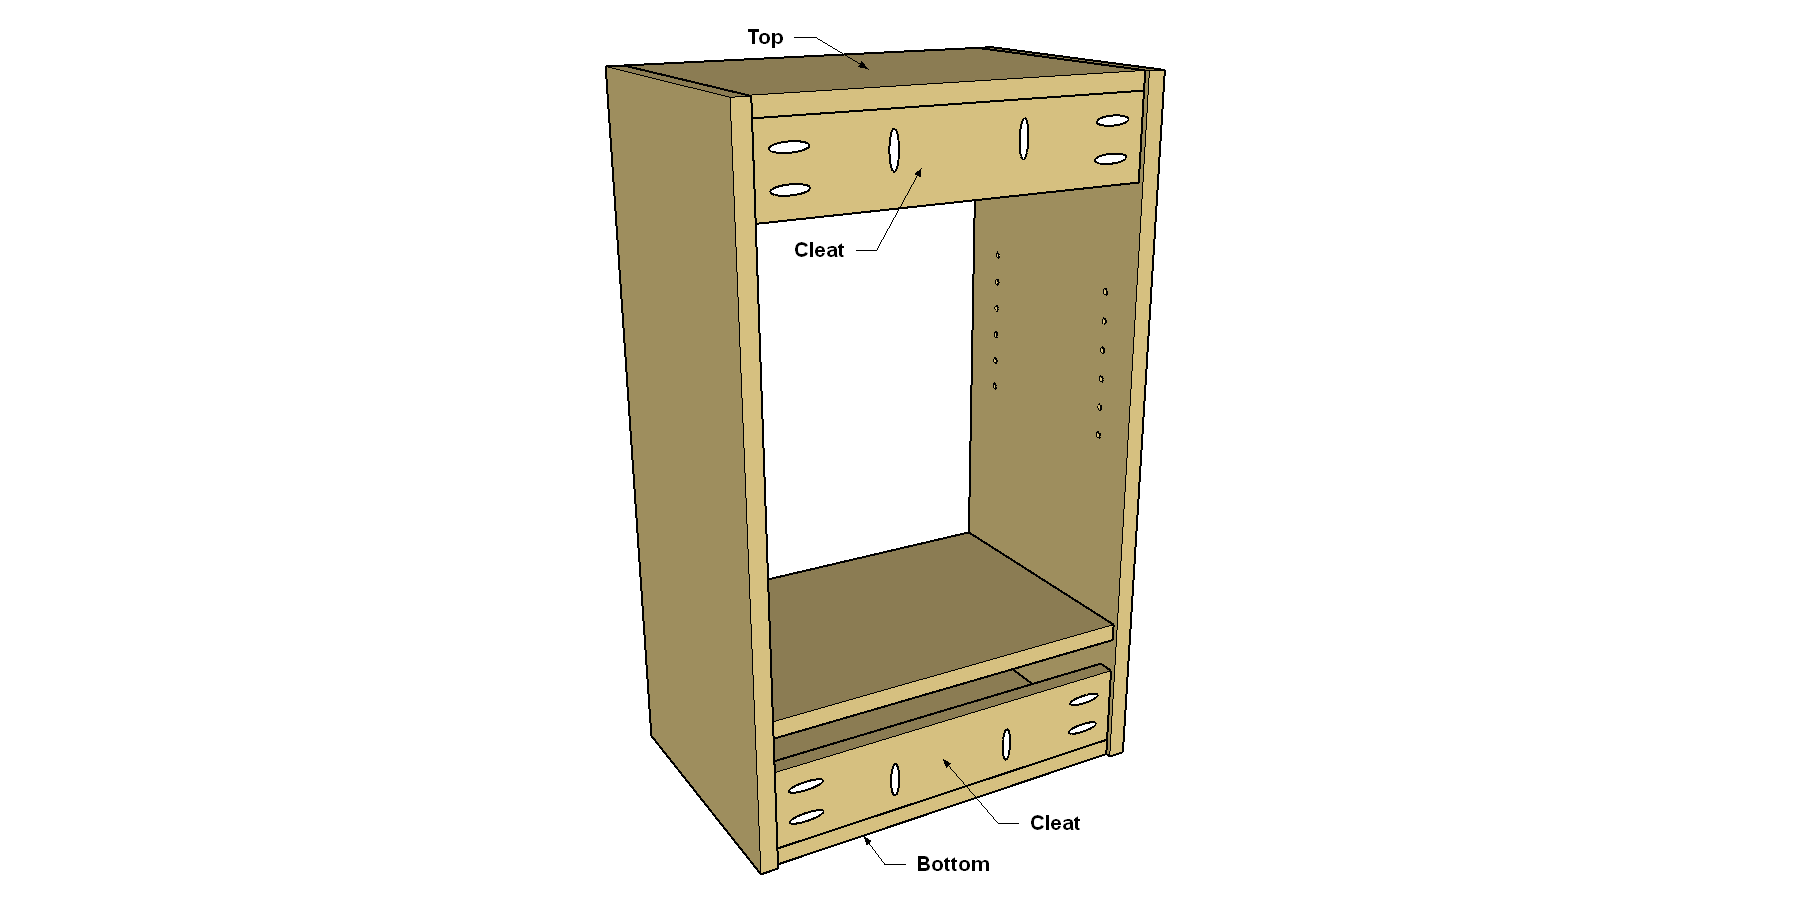
Start Cabinet Assembly
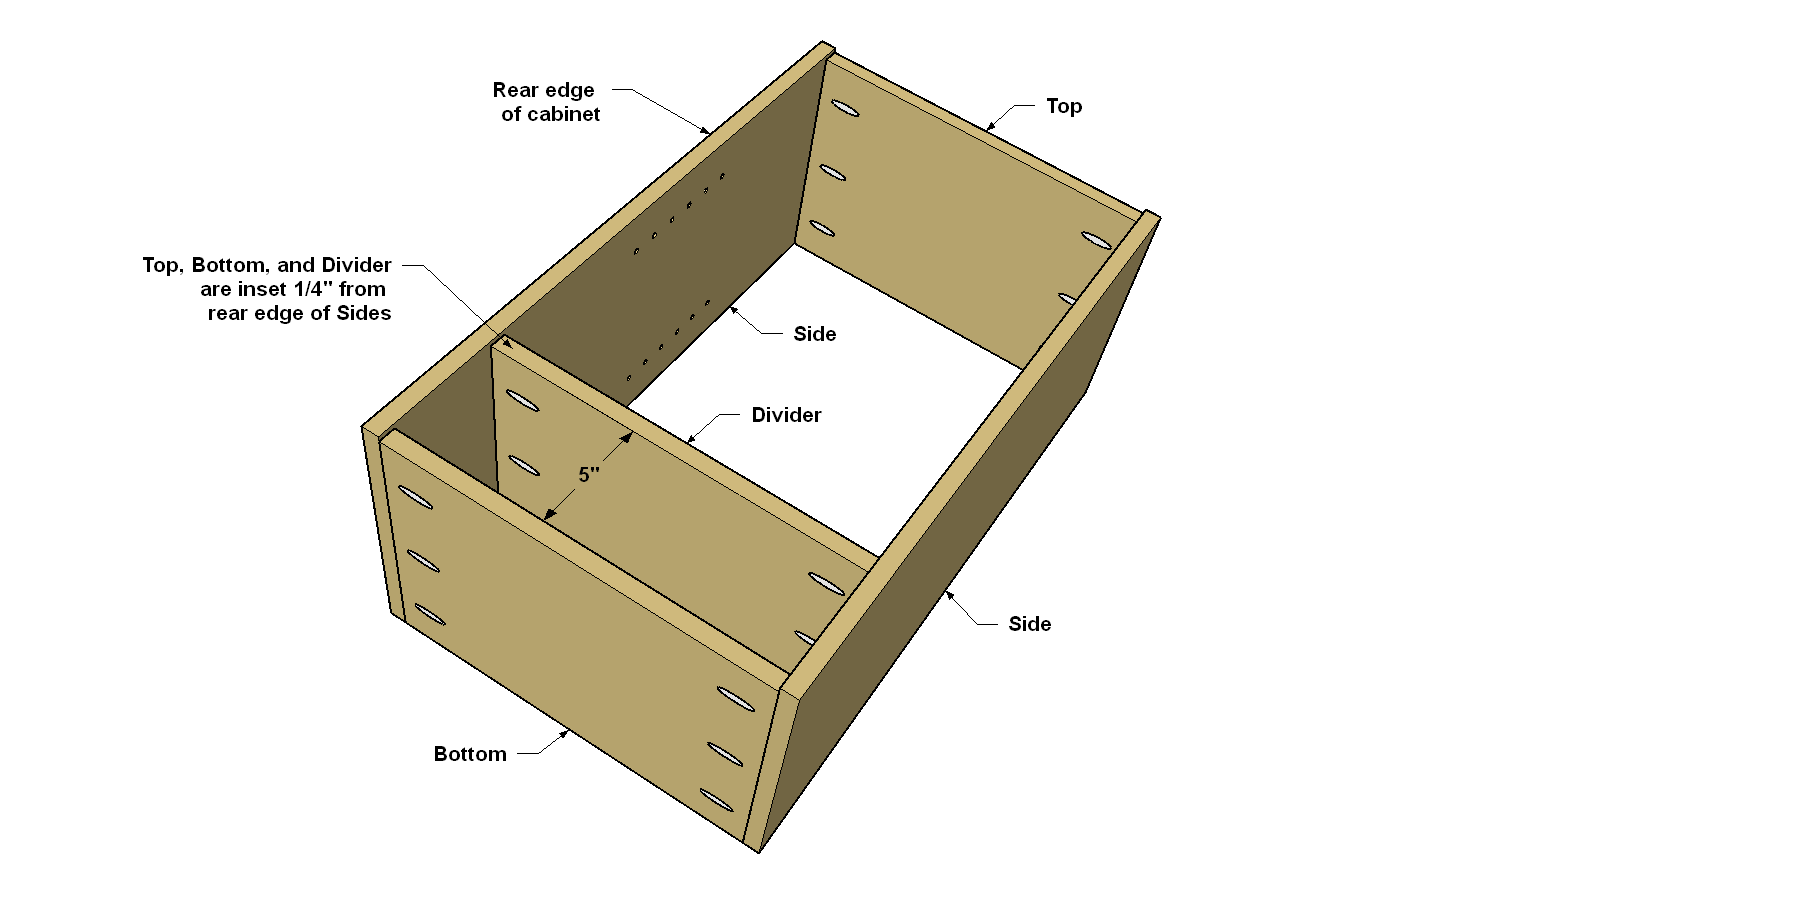
After sanding your cabinet parts, you can begin assembling the cabinet. To do that, you’ll attach the Top, Bottom, and Divider to the Sides using 1 1/4" coarse-thread Kreg Pocket-Hole Screws. As you were cutting these parts, you probably noticed that the Top, Bottom, and Divider are 1/4" narrower than the sides. When you attach them, make sure that the front edge of the Top, Bottom, and Divider all sit flush with the front edge of the Sides, as shown. That way, you’ll have a 1/4" recess at the rear of the cabinet to accept the Back, which you’ll add later.
-
Install the Cleats
Now you can attach the Cleats to the Top, Sides, and Bottom using 1 1/4" coarse-thread Kreg Pocket-Hole Screws. Make sure that the rear face of each Cleat sits flush with the rear edge of the Top and Bottom, respectively.
-
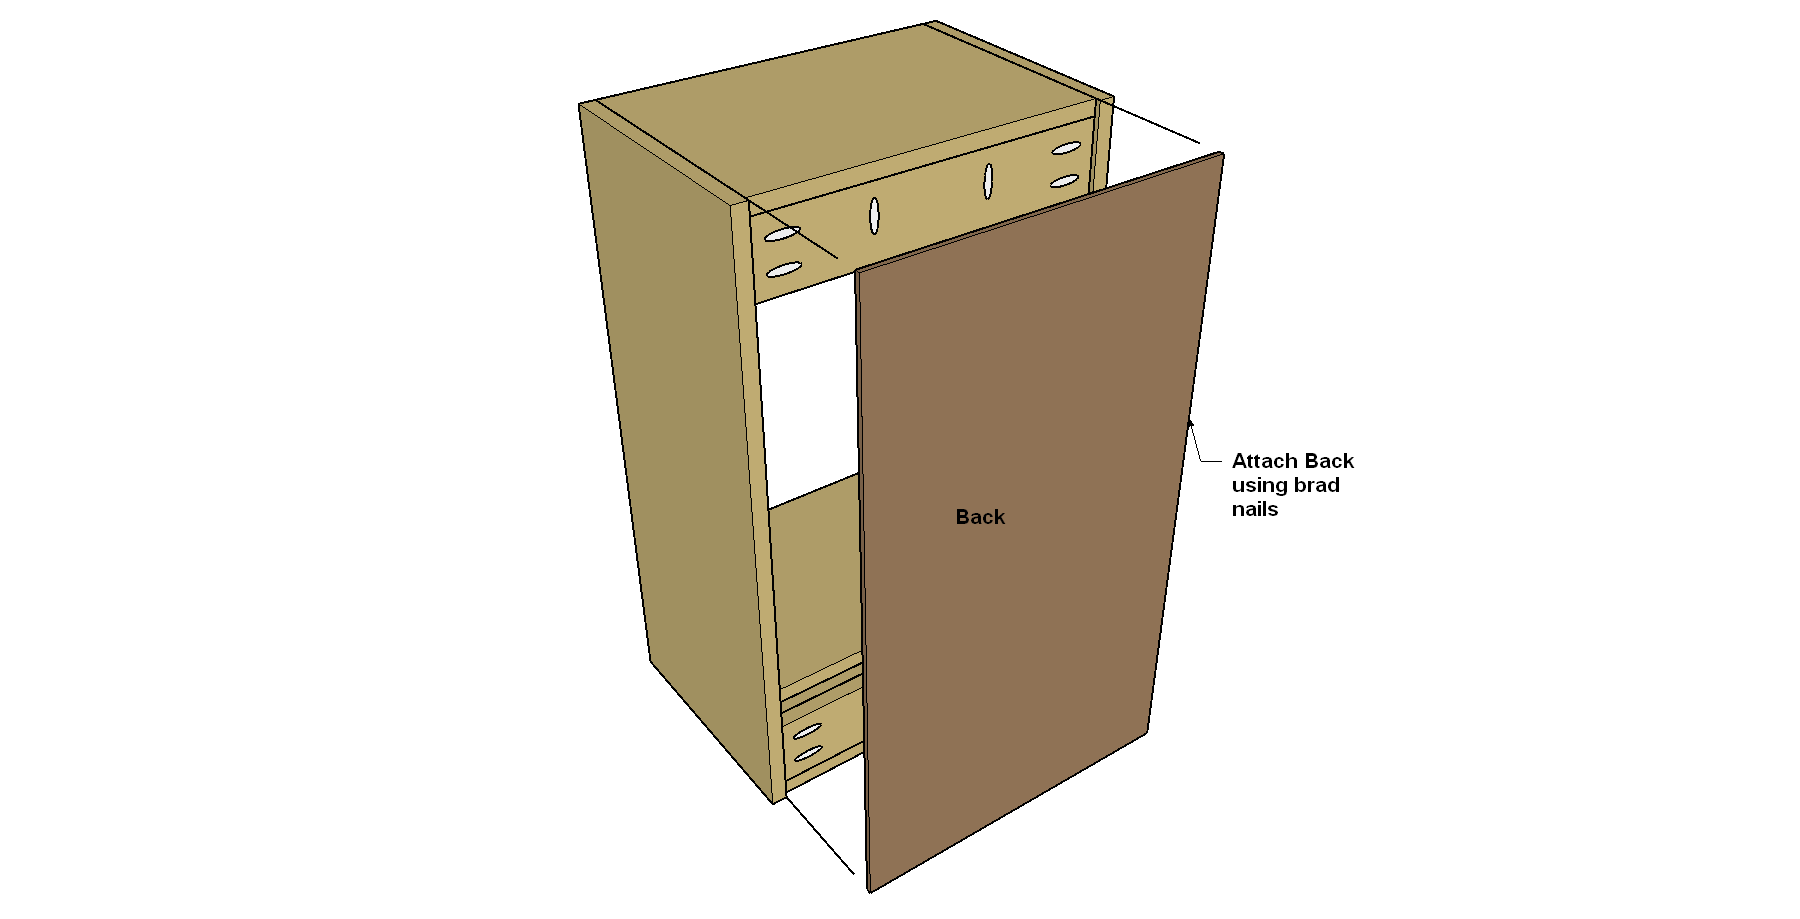
Add a Back
Cut a Back to size from 1/4" hardboard or plywood, as shown in the cutting diagram. Then attach it to the cabinet assembly using 3/4" brad nails. Place a few into each Cleat, and a few into the rear edge of the Divider.
-
Prep and Paint the Cabinet
With all of the parts made and most of the assembly complete, you can prepare the cabinet for paint. If you don’t want to see the plywood edges, fill them before you prime and paint.
-
Install the Door and Hang the Cabinet
After the paint dries, install the door hinges and add a knob or pull to the door .You can place the hinges on the left side, as shown, or put them on the right if that works better for you. Then mount the cabinet to the wall by driving couple of 3" screws through each cleat and into a wall stud.