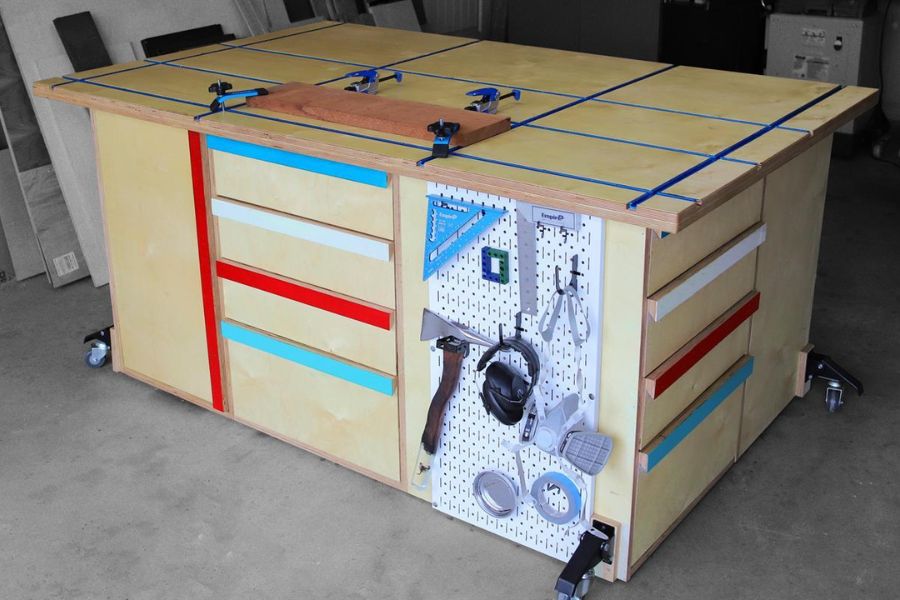


This workbench is an assembly/outfeed table with t-track, & loads of storage. I needed a workbench to help me get more organized in the shop, but w/ key features that make it the ideal workbench for anyone. Watch the full video on Jonny Builds YouTube: https://youtu.be/mxTMeh_5FjI
Tools
Kreg Tools


Other Tools
-
Miter Saw

-
Square
-
Table Saw
-
Tape Measure
-
Air Compressor
Materials
Wood Products
- 6 Plywood , 3/4" Thick , Full Sheet
- 1 Plywood , 1/2" Thick , Full Sheet
- 1 Plywood , 1/4" Thick , Full Sheet
Hardware & Supplies
- 100 1 1/4" pocket screws
- 50 1" pocket screws
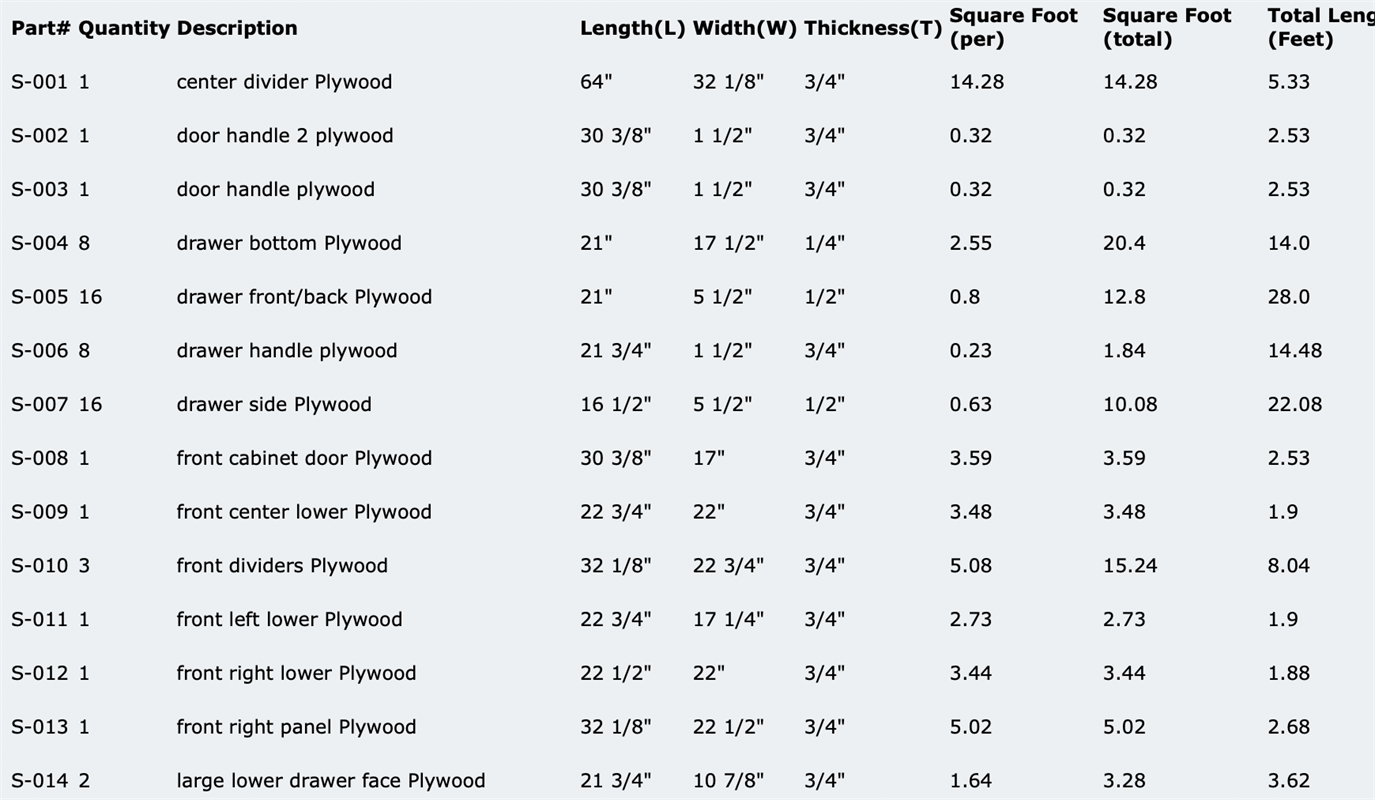
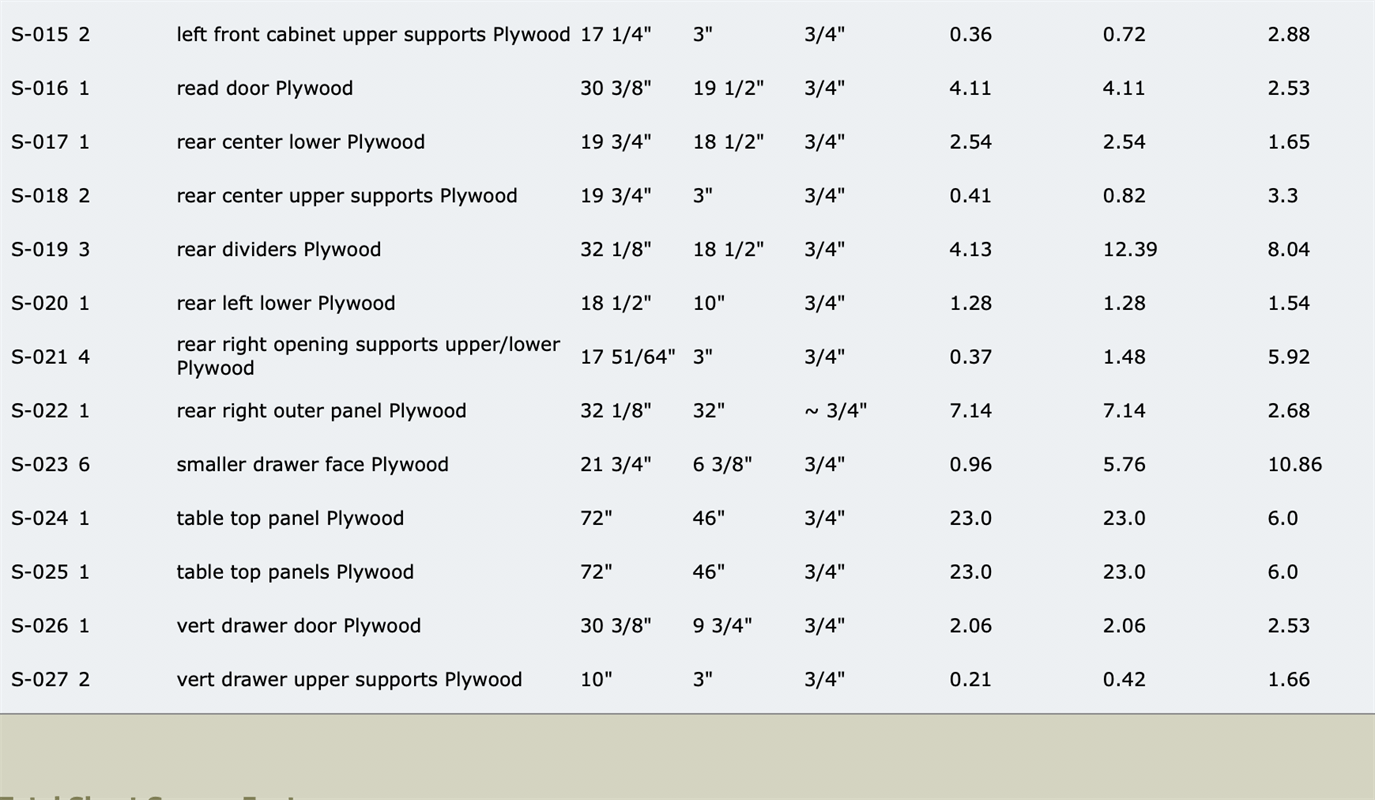
Cut List & Parts
- 6 3/4" Baltic Birch Plywood , 4x8 sheet
- 1 1/2" Baltic Birch Plywood , 4x8 sheet
- 1 1/4" Baltic Birch Plywood , 5x5 sheet
Directions
-
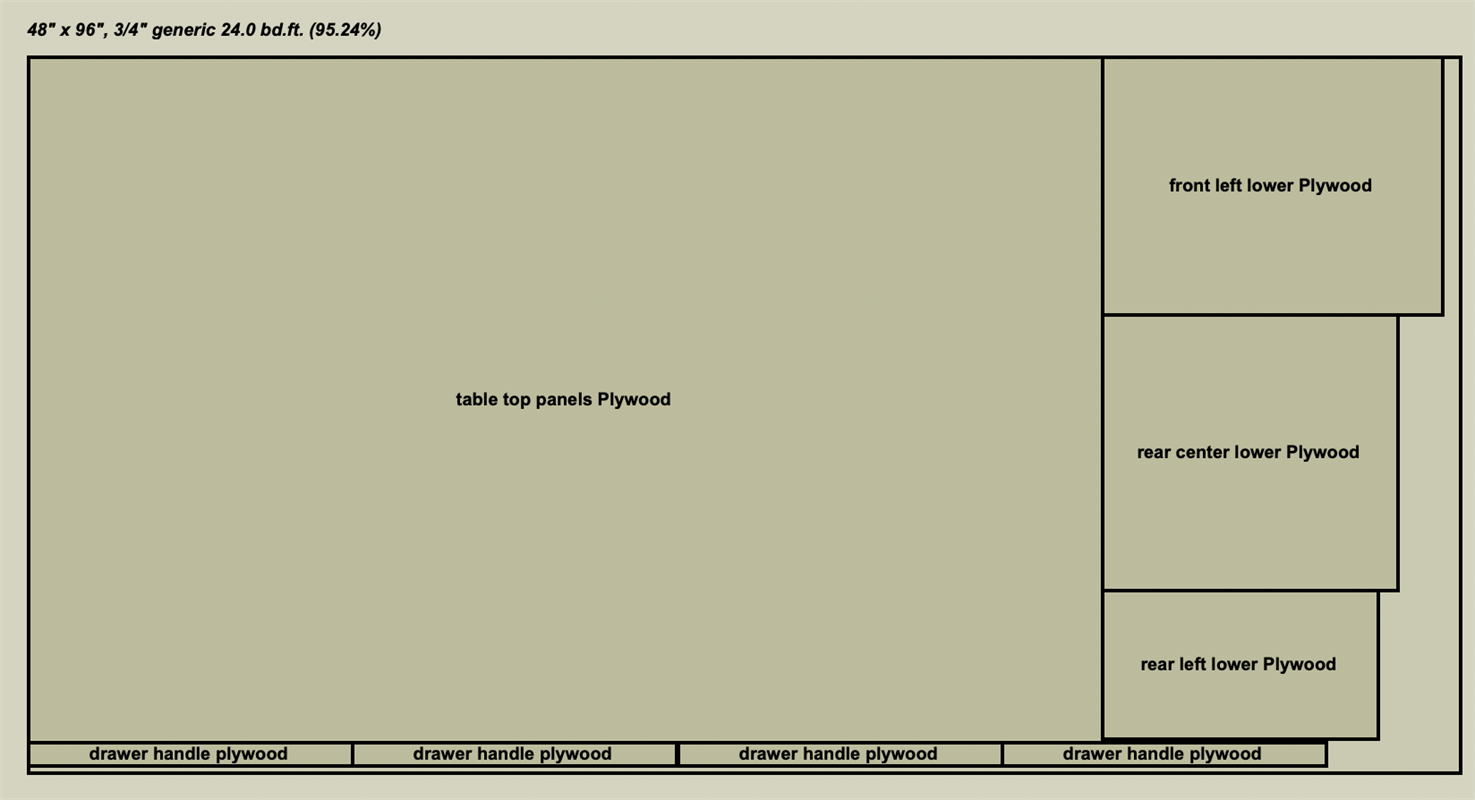
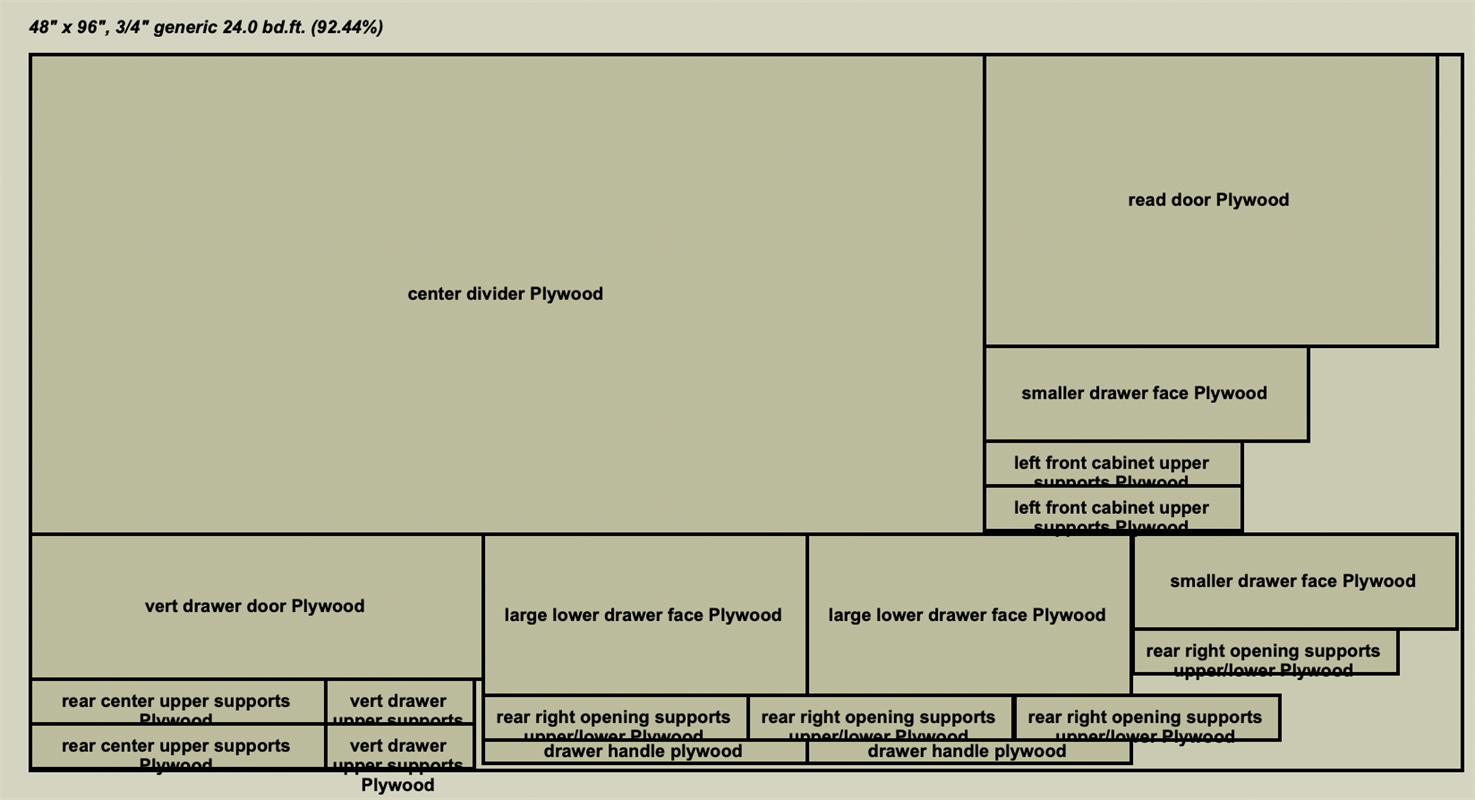
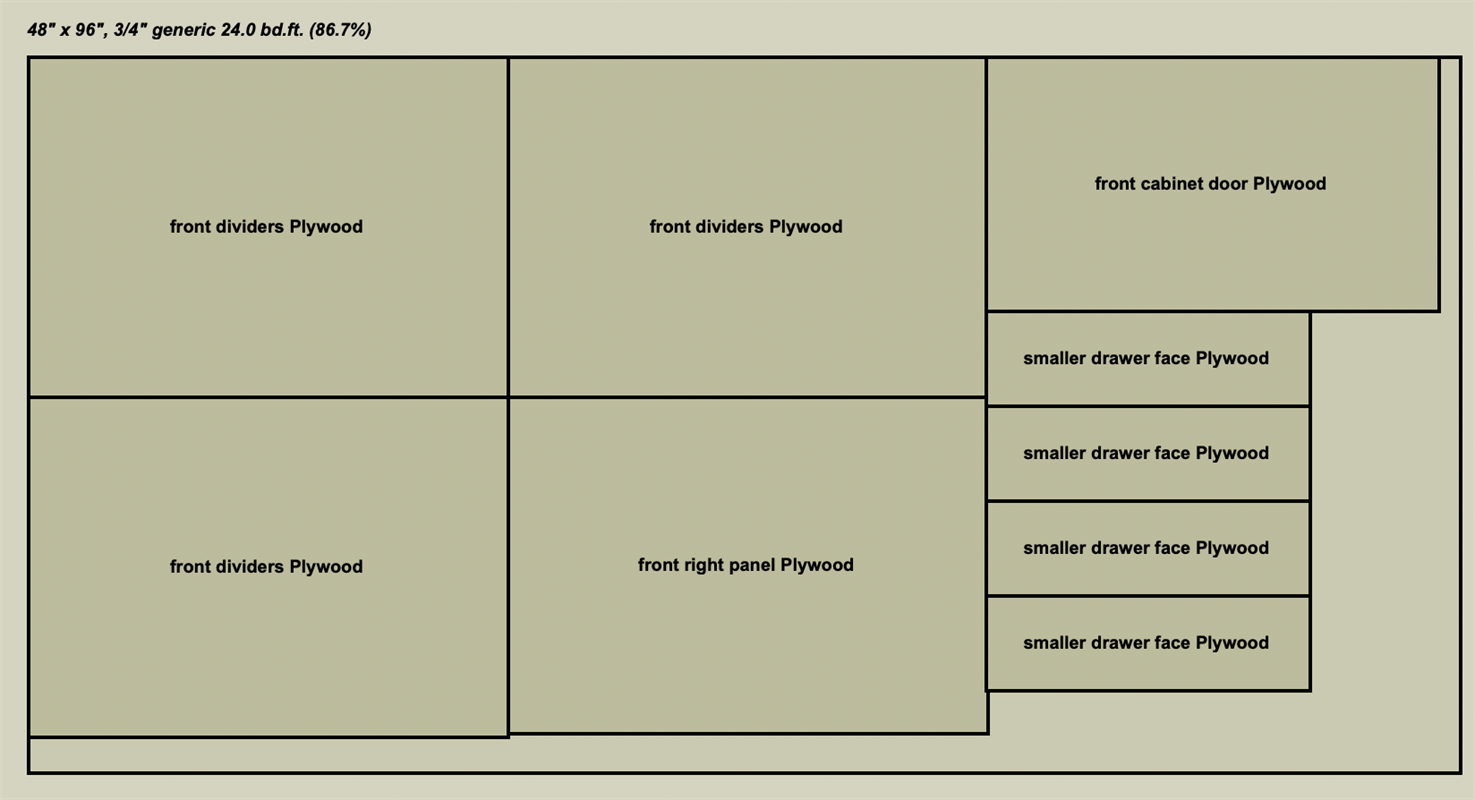
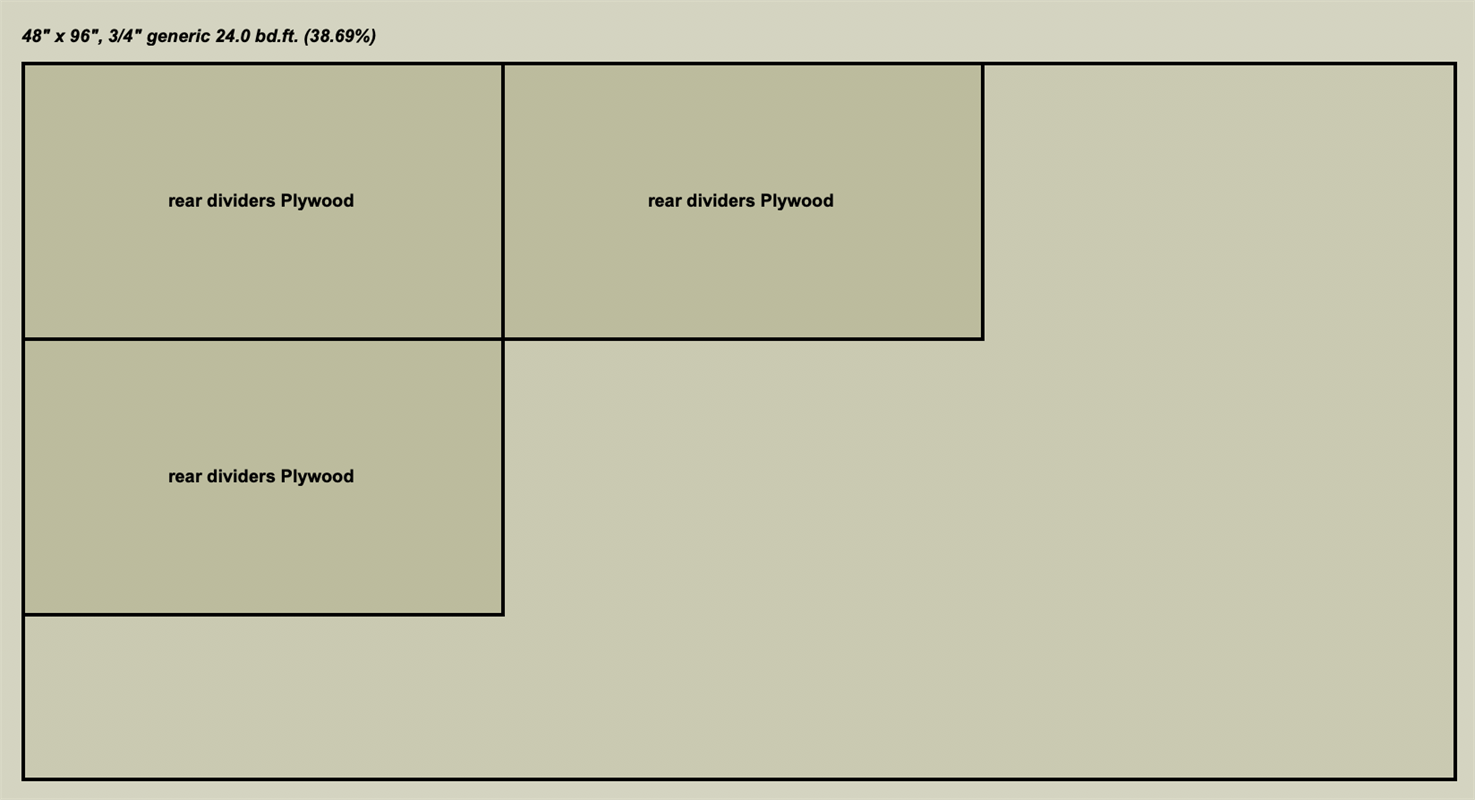
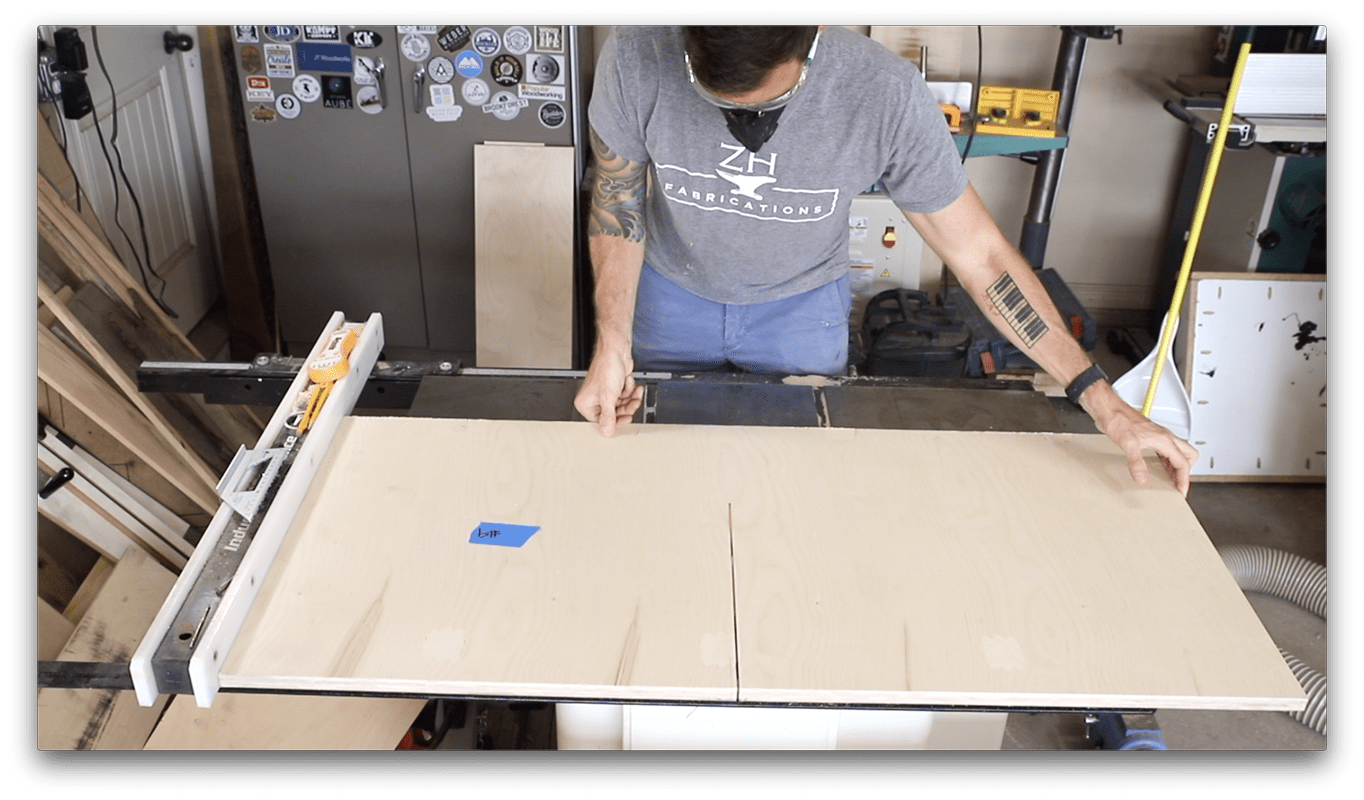
Cut Panels to Size
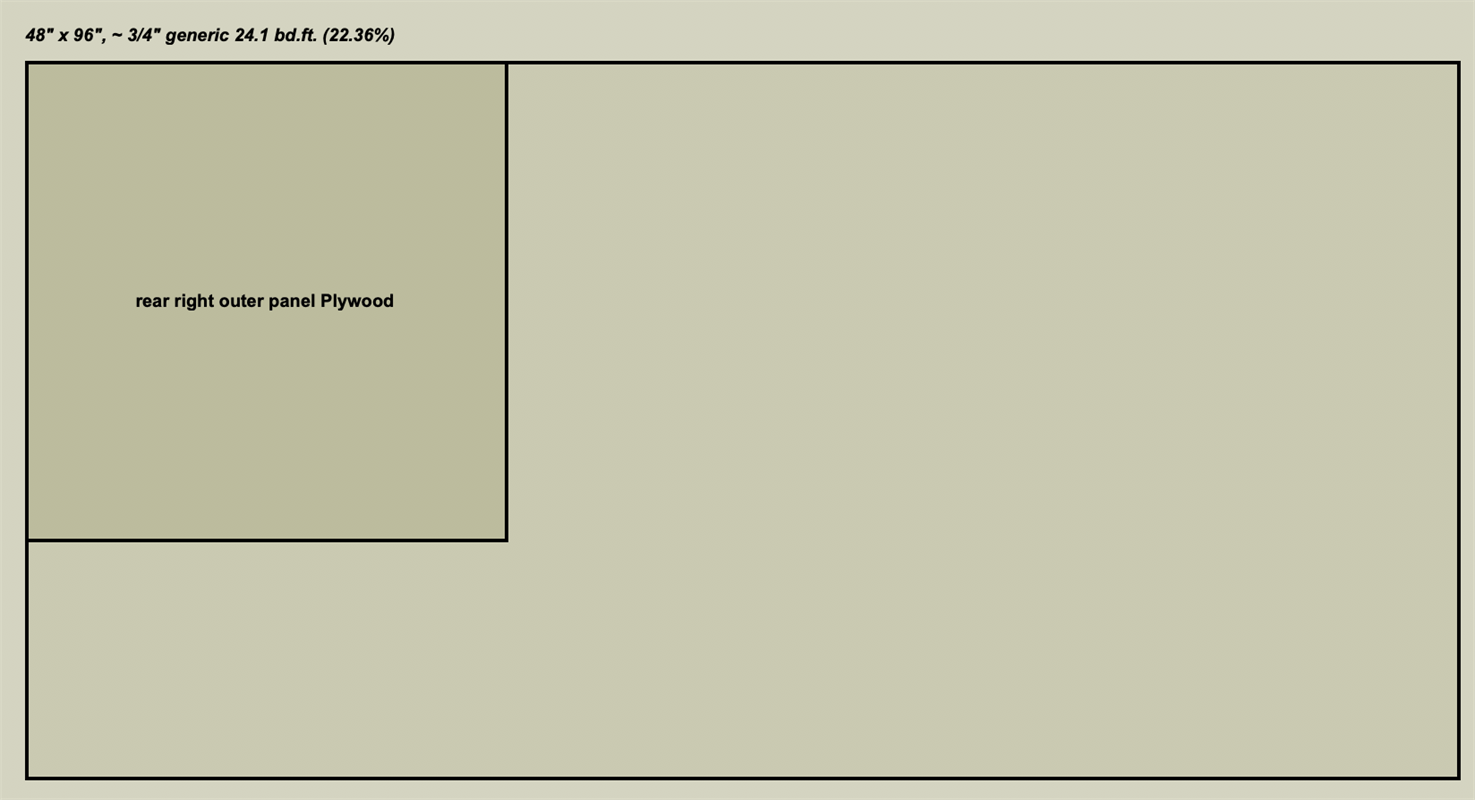
Begin by cutting down all the panels for the lower workbench cabinet to size making sure to label the parts as you go. Refer to the cut list for detailed dimensions.
-
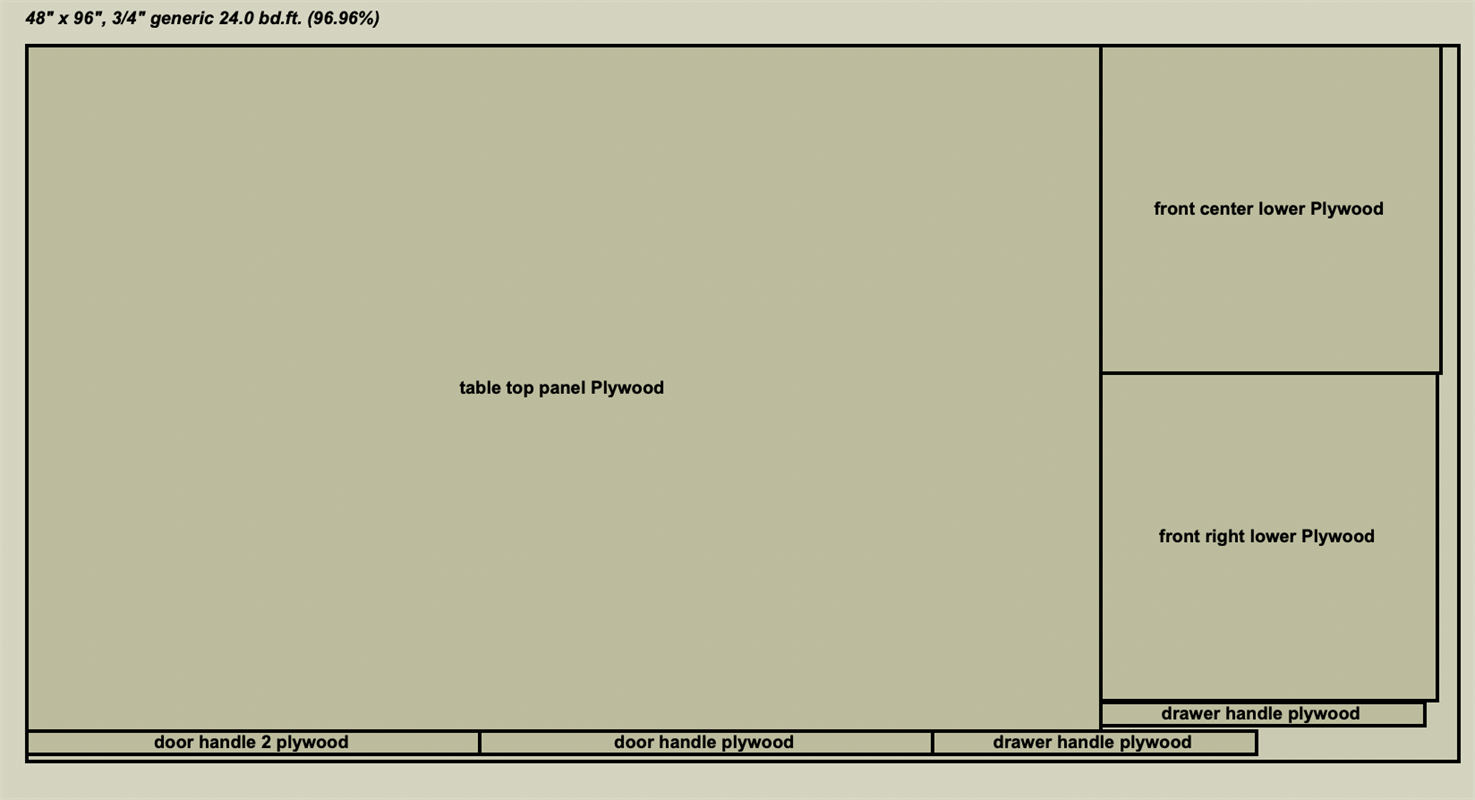
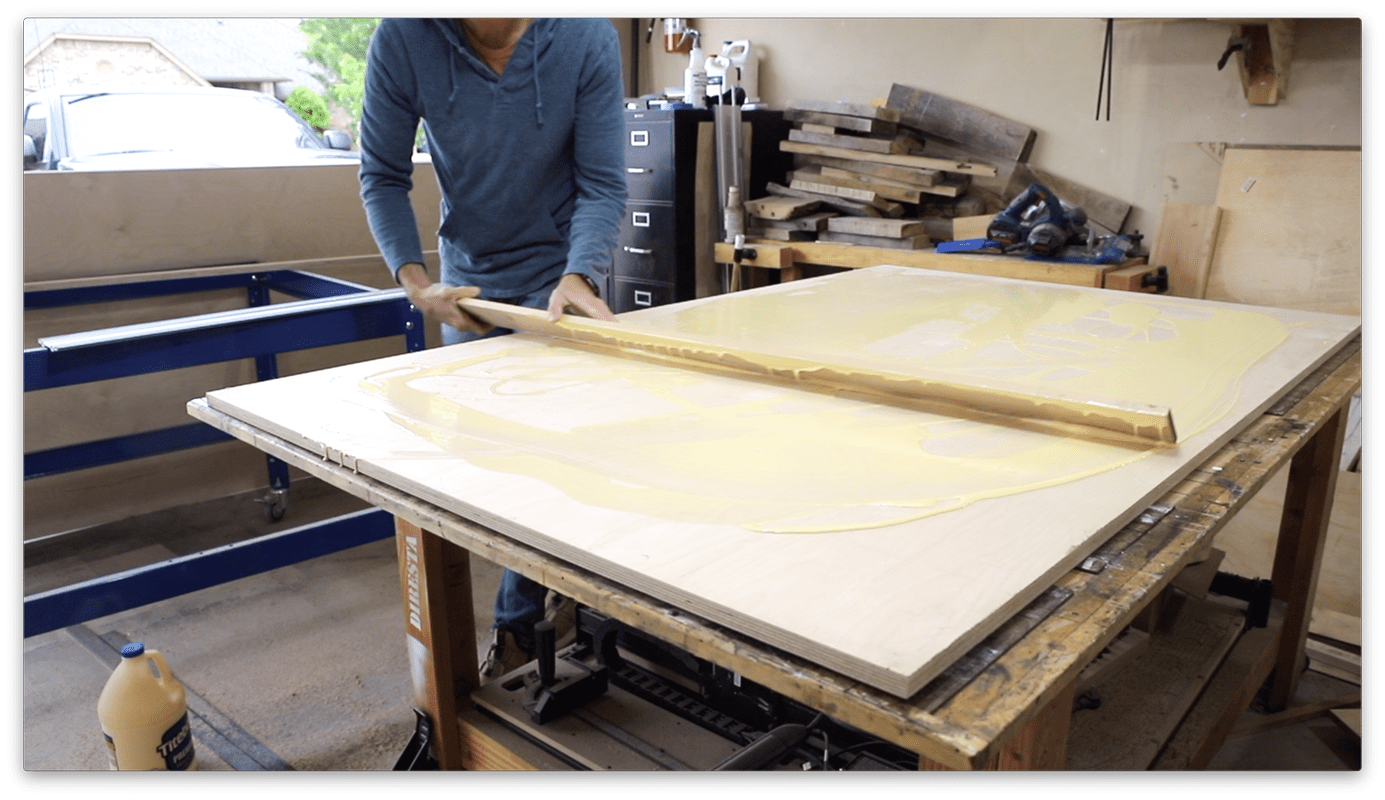
Assemble Table Top
Cut a sheet of plywood to 72"x46". Cut the second sheet to 1/4" larger in length and width than the first. Apply liberal amounts of wood glue to the smaller panel, and spread evenly making sure you get all the way to the edges. Place the larger panel on top of the first so that it overhangs about 1/8" in all directions. Apply weight to the top and clamps to the edges to ensure there are no gaps. Flush trim the overhanging panel to the shorter panel with a router and flush trim bit. This ensures perfectly even panels.
-
Add Pocket Holes to Cabinet Panels
Starting with the front sections of the cabinet lay out the partitions and bottom floor panels as they will be arranged on the long center panel. Mark out locations for pocket holes on the underside of the bottom panels and the sides of the partitions where they connect to the center panel. Drill out these pocket holes.
-
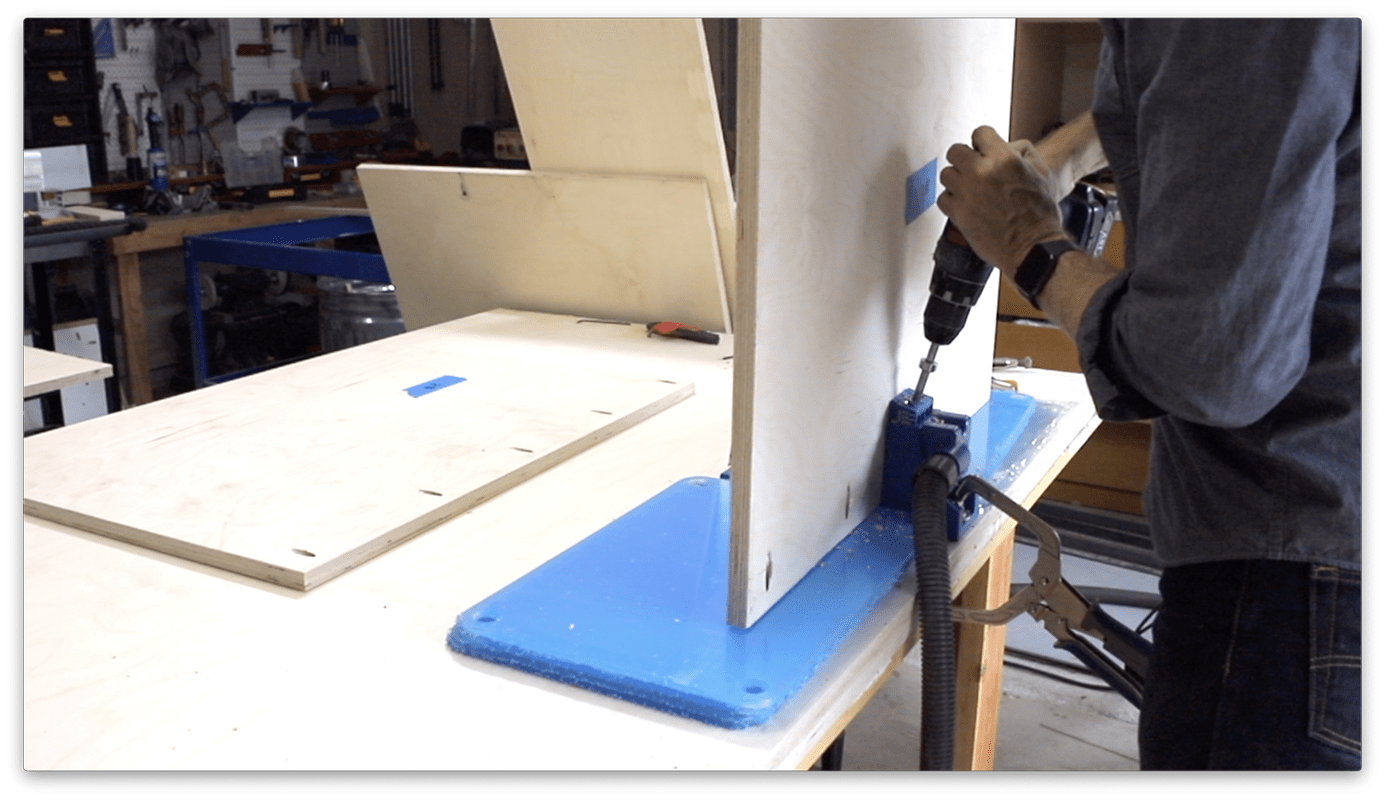
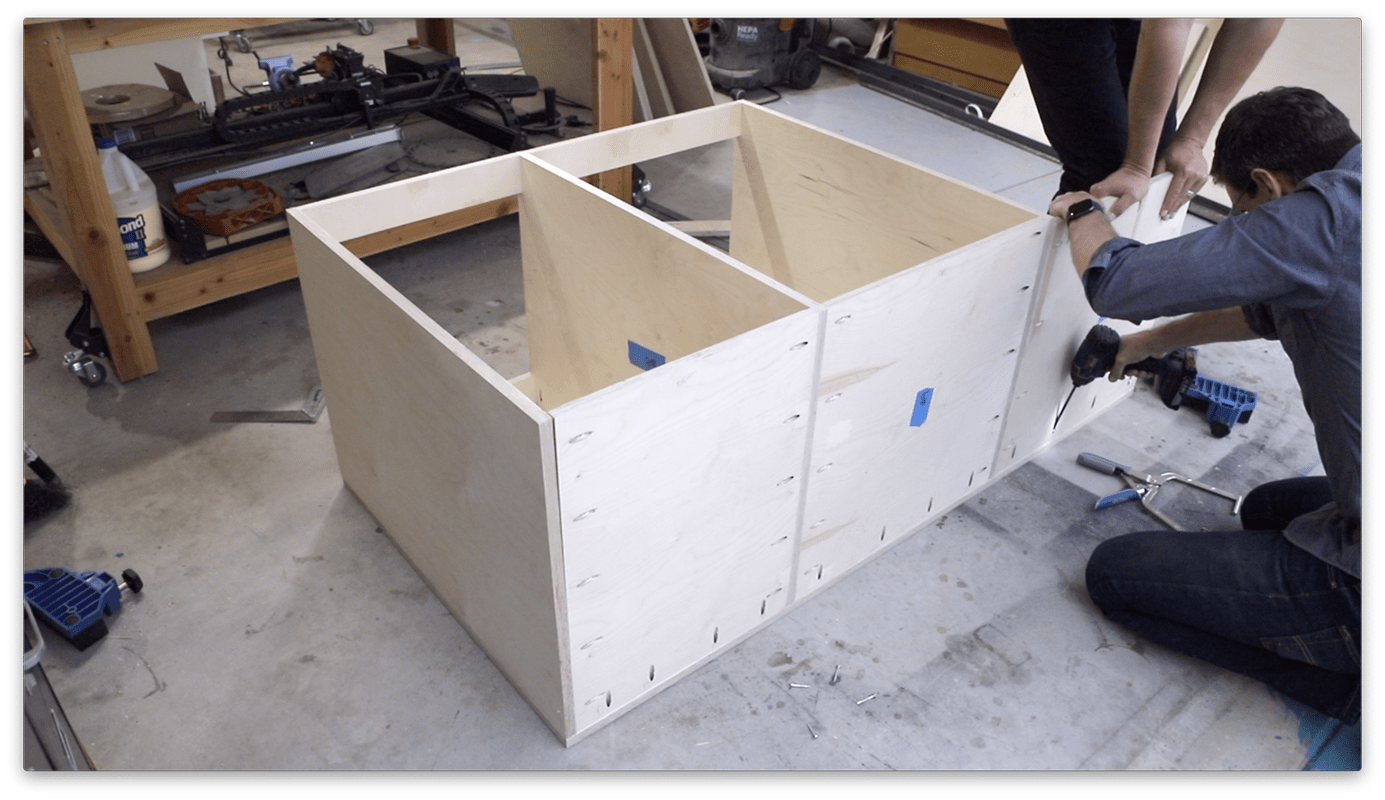
Cabinet Carcass Assembly
Making sure to check for square often begin assembling the cabinet by driving in pocket screws to attach the front side of the cabinet to the center panel working from the left side to the right. I found assembling the cabinet on its side to be the easiest and most accurate. Once you complete the front side flip the cabinet over and attach all the panels for the back side of the workbench.
-
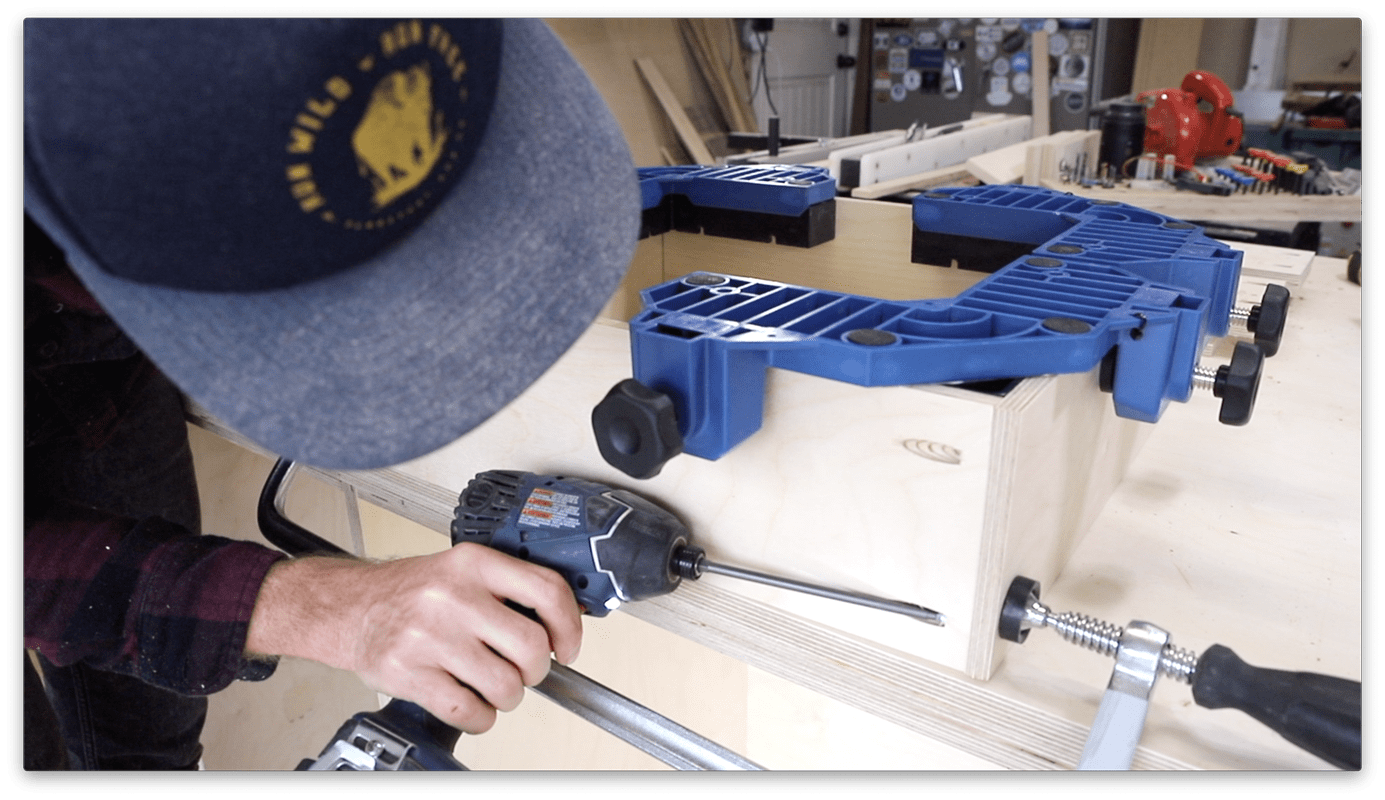
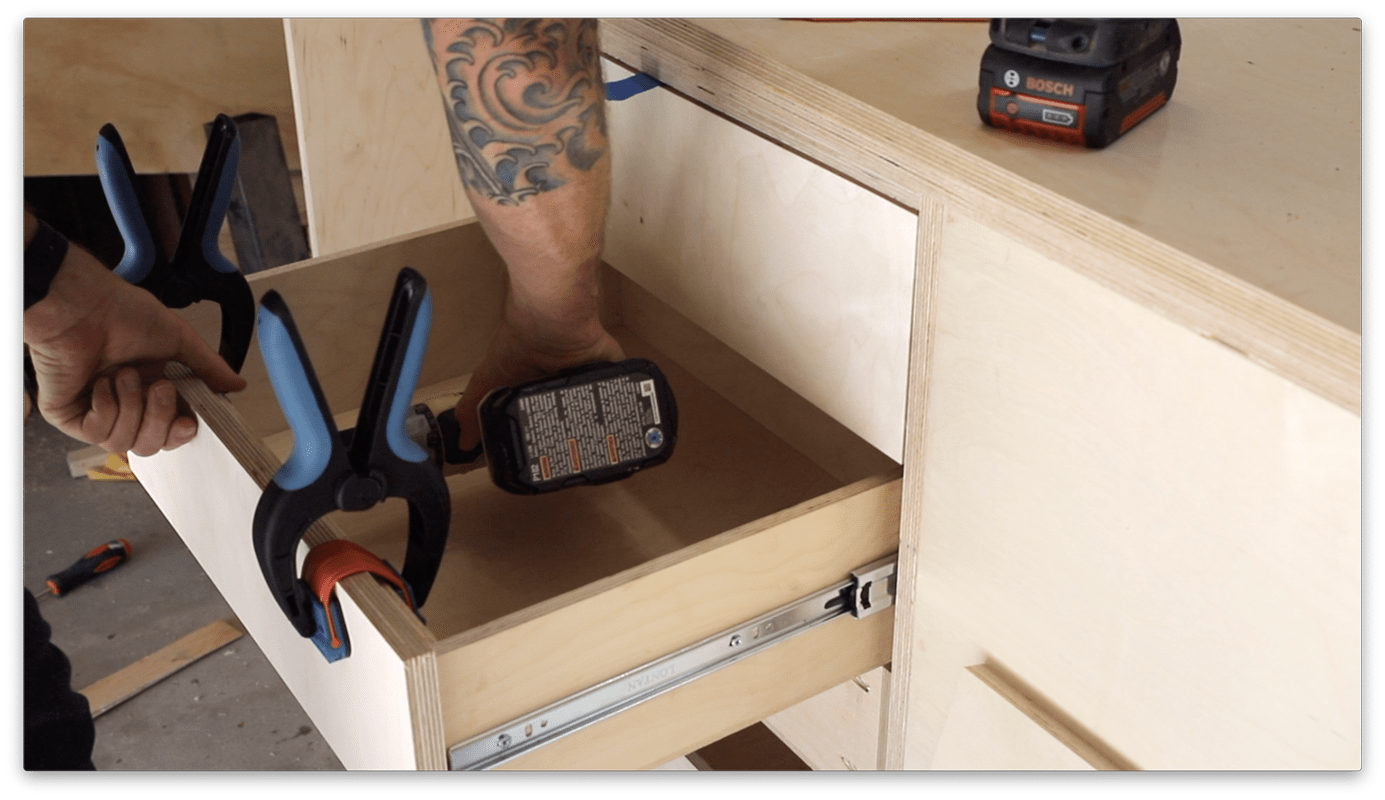
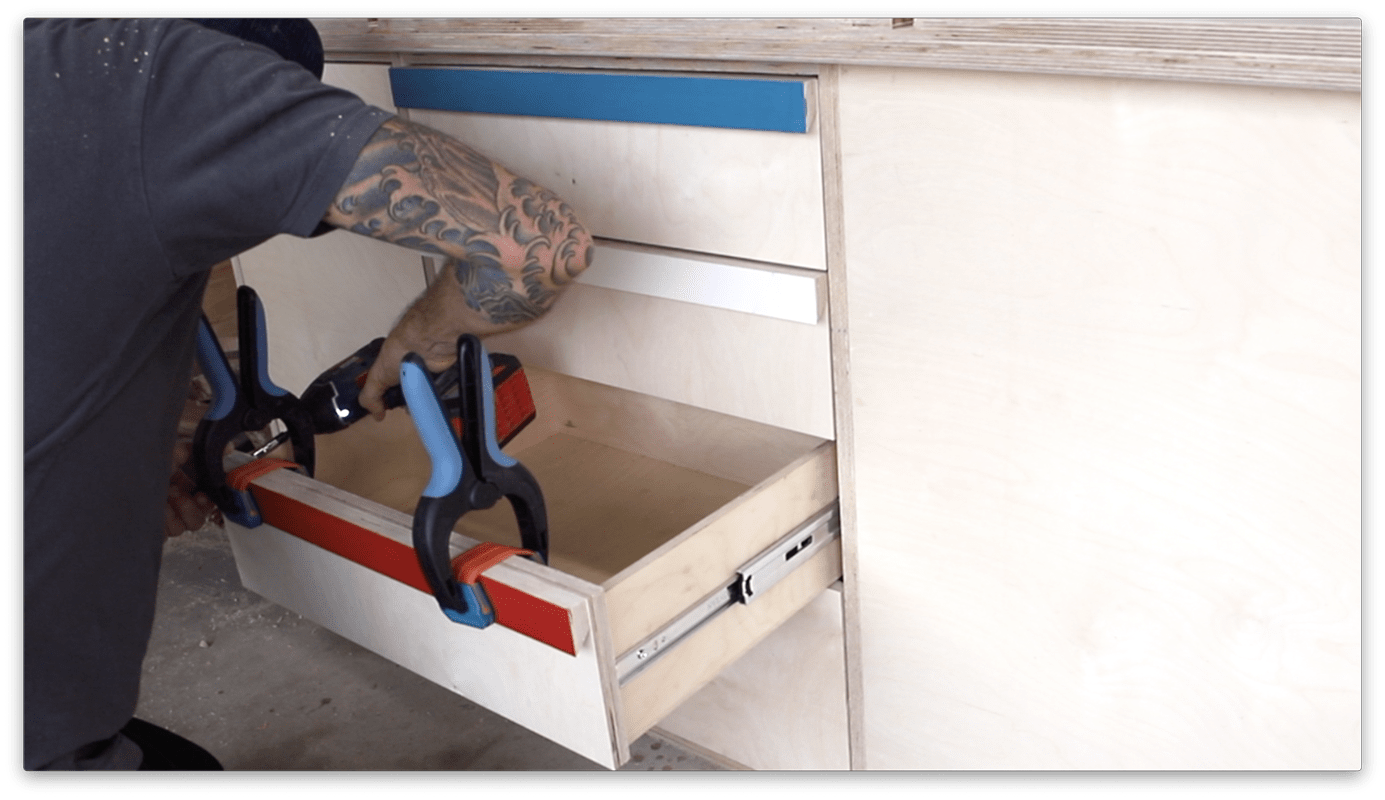
Build Drawers
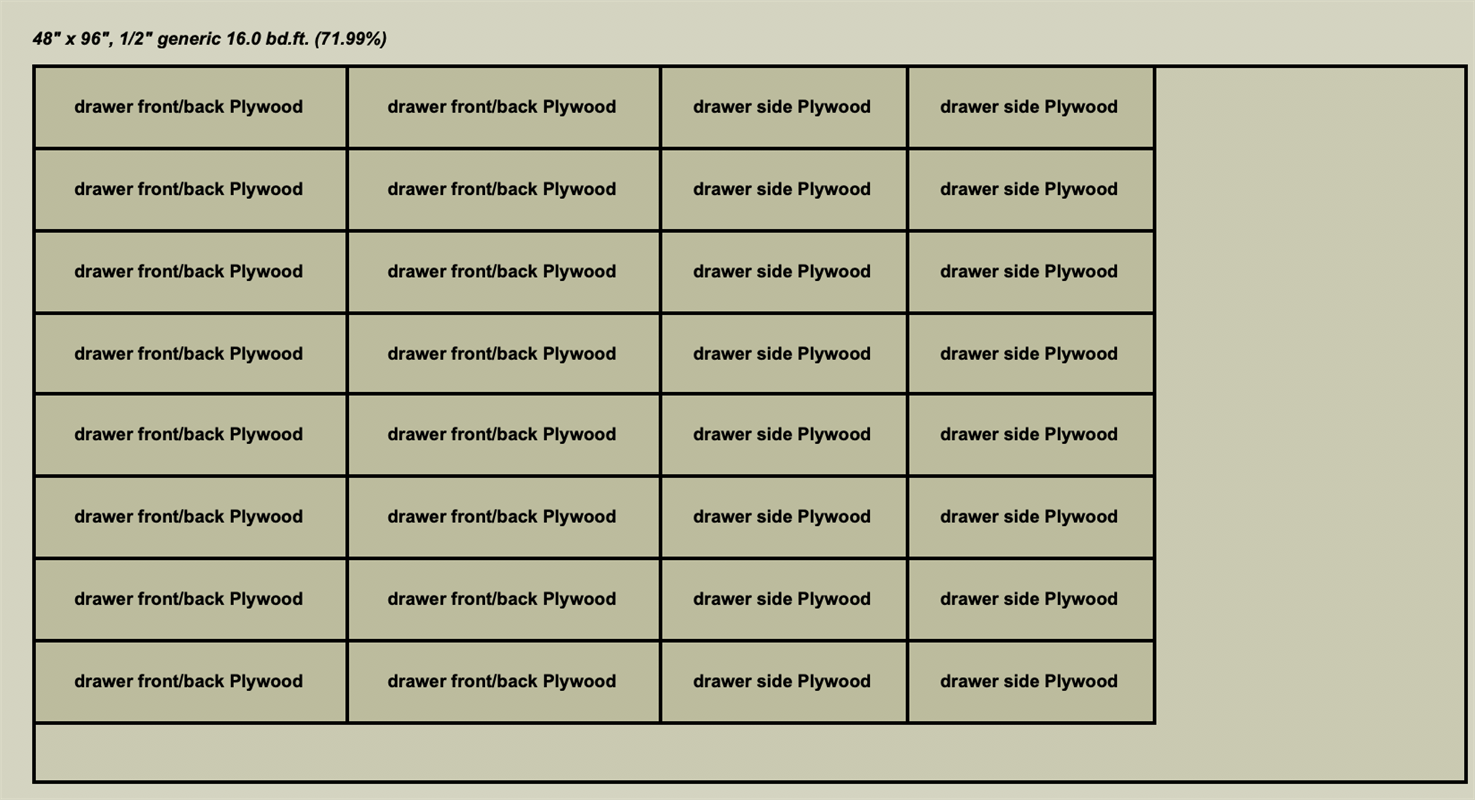
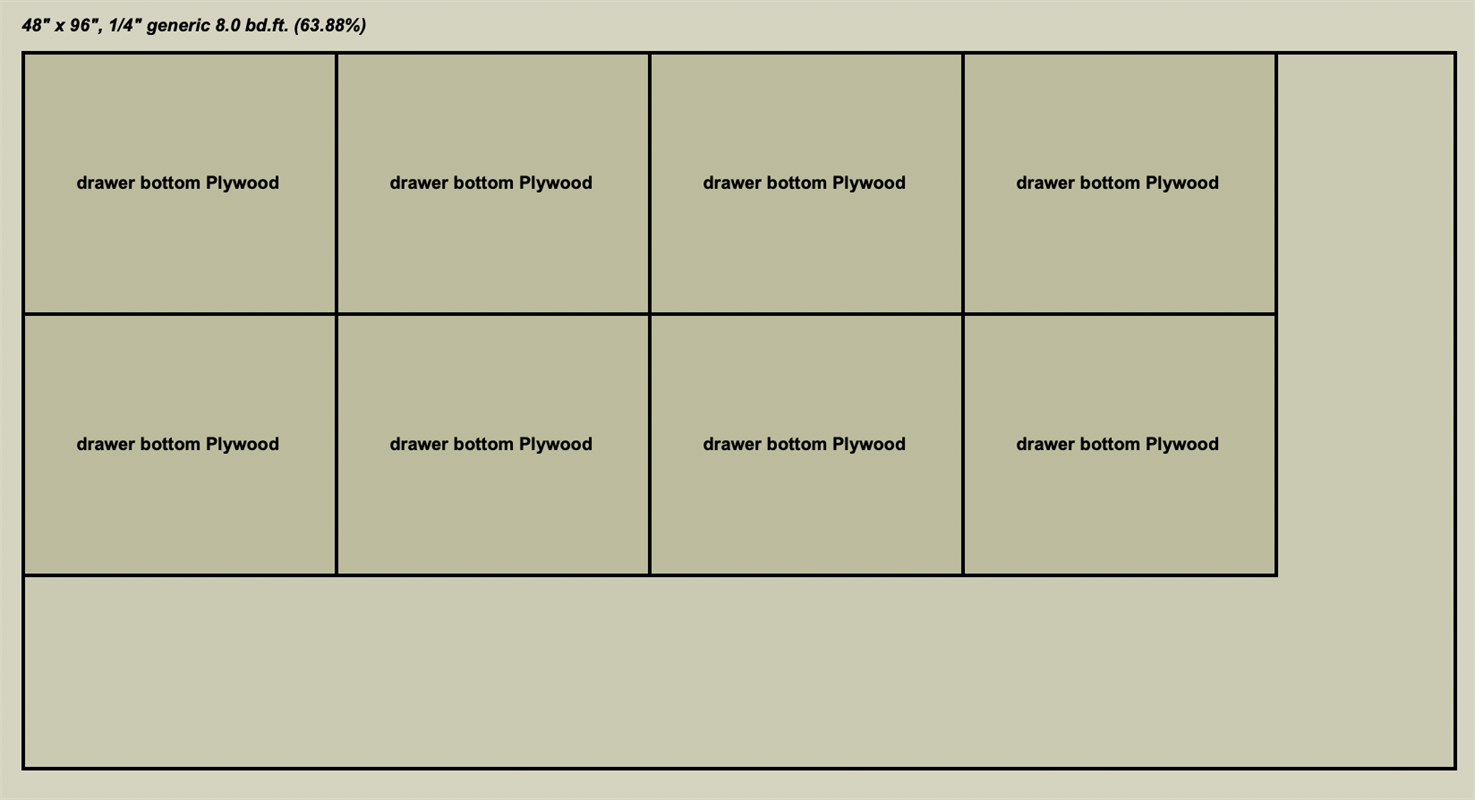
There are two identical drawer cabinets on this workbench. One in the front, and one on the side. Each contains 4 drawers, and each drawer is 5 3/4" tall. The lower drawer is spaced farther apart to allow larger items. Rip 1/2" plywood into 5 1/2" strips. Next you need 16 pieces cut to 18 inches, and 16 pieces cut to 17 inches long. Add two pocket holes to each end of the 18 inch long boards. Assemble the drawers with 1 inch pocket screws. Cut 1/4" plywood to fit as the drawer bottoms, and attach with screws making sure to predrill and countersink these holes. Right angle clamps are great for keeping everything square as you assemble.
-
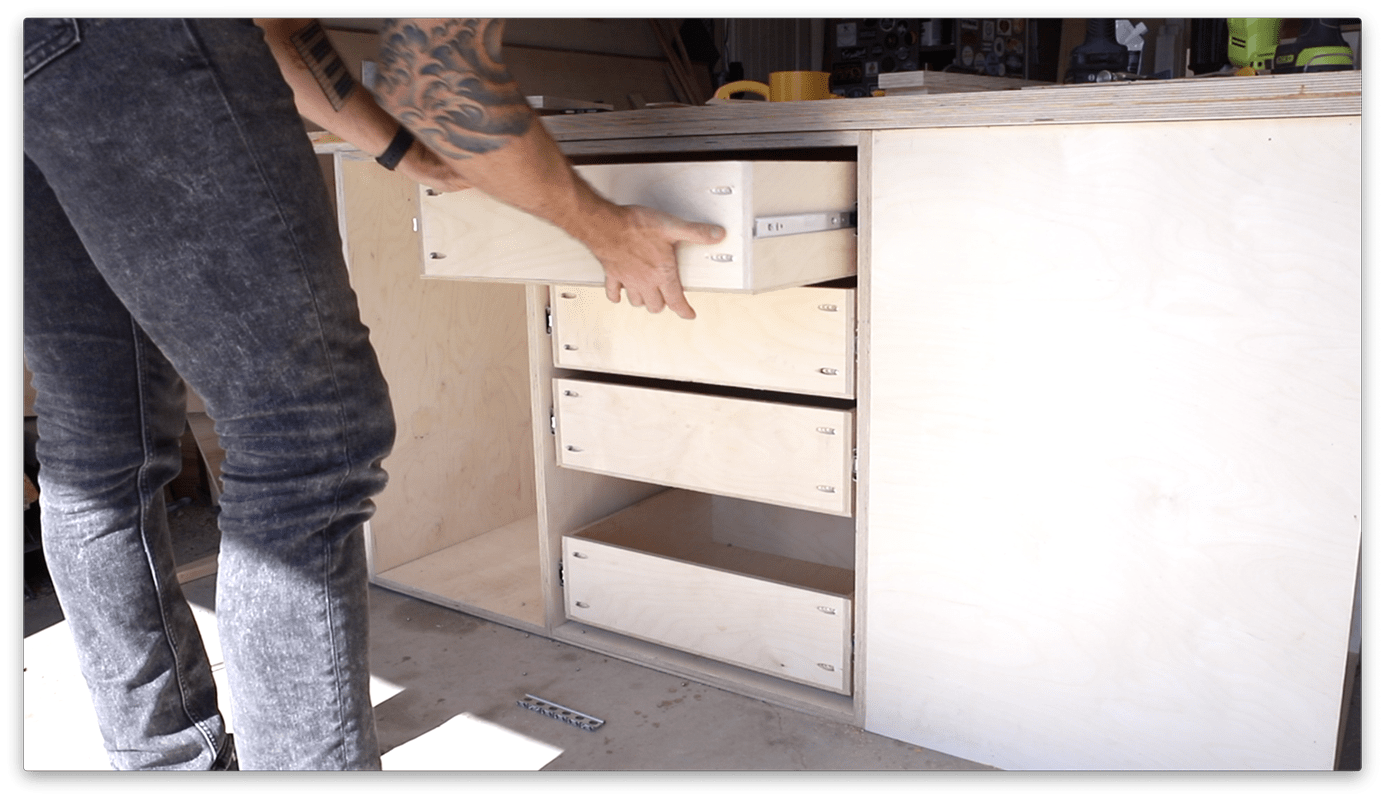
Install Drawers
I used 18 inch drawer slides. These were 17.5 inches, so they were a 1/2" longer than my drawers which worked out great. When installing the drawers note these drawers are recessed 3/4" into the cabinet to allow room for the drawer face that sits flush. Starting from the top measure down 3/4 inch plus half the thickness of the drawers; 2 7/8" This is the centerline of the drawer slide. Install the drawer slides but cutting a scrap piece of plywood to size and resting the slide on top. Attach with screws, and repeat for the other side. Now cut 6 1/2" off of the plywood you used to space the drawer slide and continue to the last drawer which you space 3/4 inch off the bottom. Install the slides onto the centerline of the drawer sides.
-
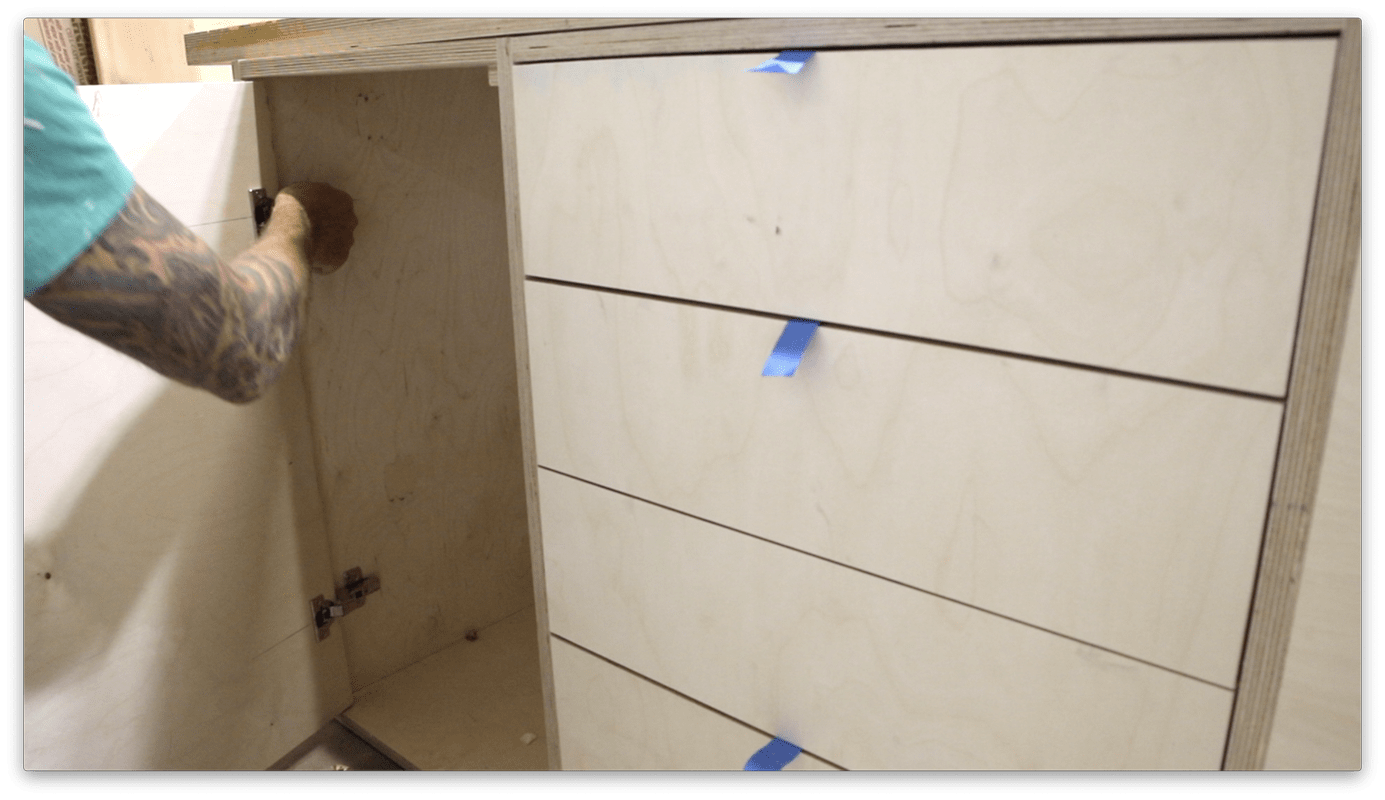
Cut & Attach Drawer Faces
Cut a panel that would fit into the drawer box opening, and then working from the top down cut each drawer face so it sits level with the bottom of the drawer and has a 1/8" gap on the sides and top. Attach drawer faces with two screws from the inside. cut and attach the remaining drawer faces paying attention to the grain of the plywood panel you originally cut. Repeat for each set of drawers.
-
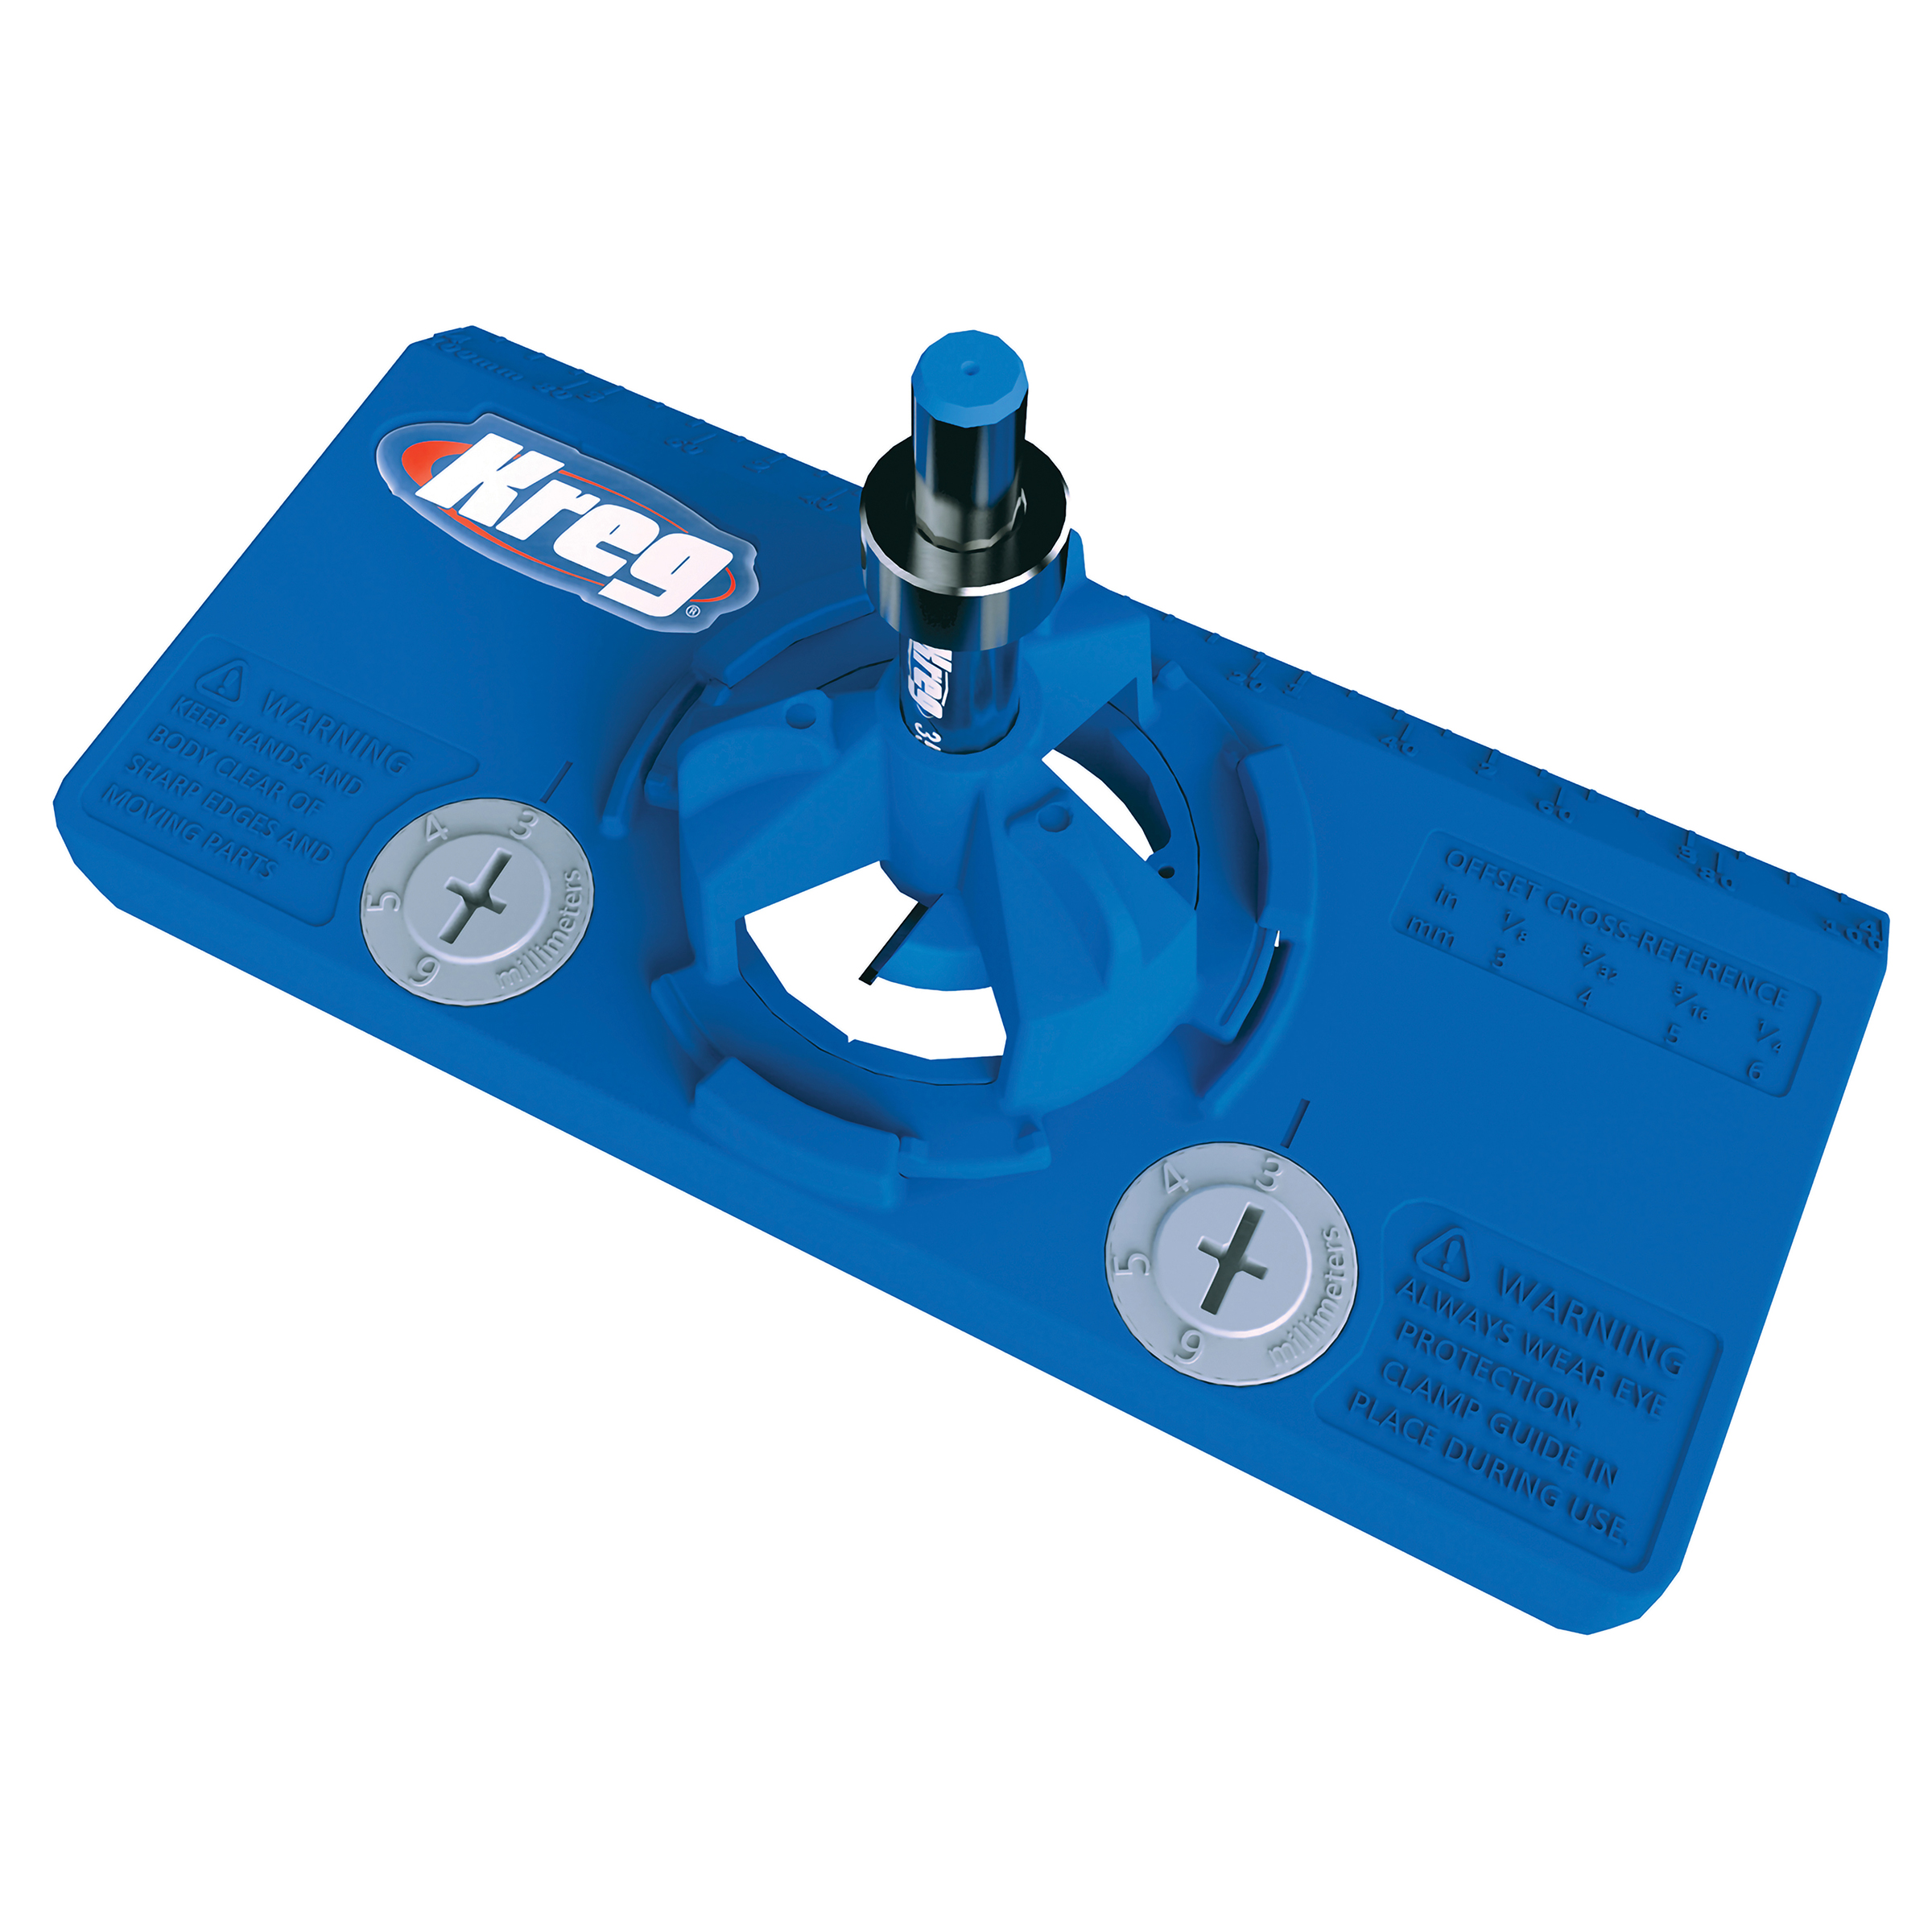
Cabinet Door Installation
There is a cabinet of the front left and rear center of the workbench that has an inset door with inset euro style soft close hinges. Cut your door to fit with a 1/8" reveal around all sides. Set your hinge spacing. I spaced mine 19 inches apart, and then marked a line on the door, and inside of the cabinet. Using the Kreg Hinge Jig drill holes for the hinges on the door along the lines you marked. Attach the other part of the hinge inside the cabinet with proper spacing for your hinge, and centered on the lines you marked. Now snap the door in place and use the adjustment screws on the hinges to tune the fit. I used a scrap block screwed inside the cabinet as a door stop. Add a shelf with the Kreg Shelf Pin Jig. Repeat for other side.
-
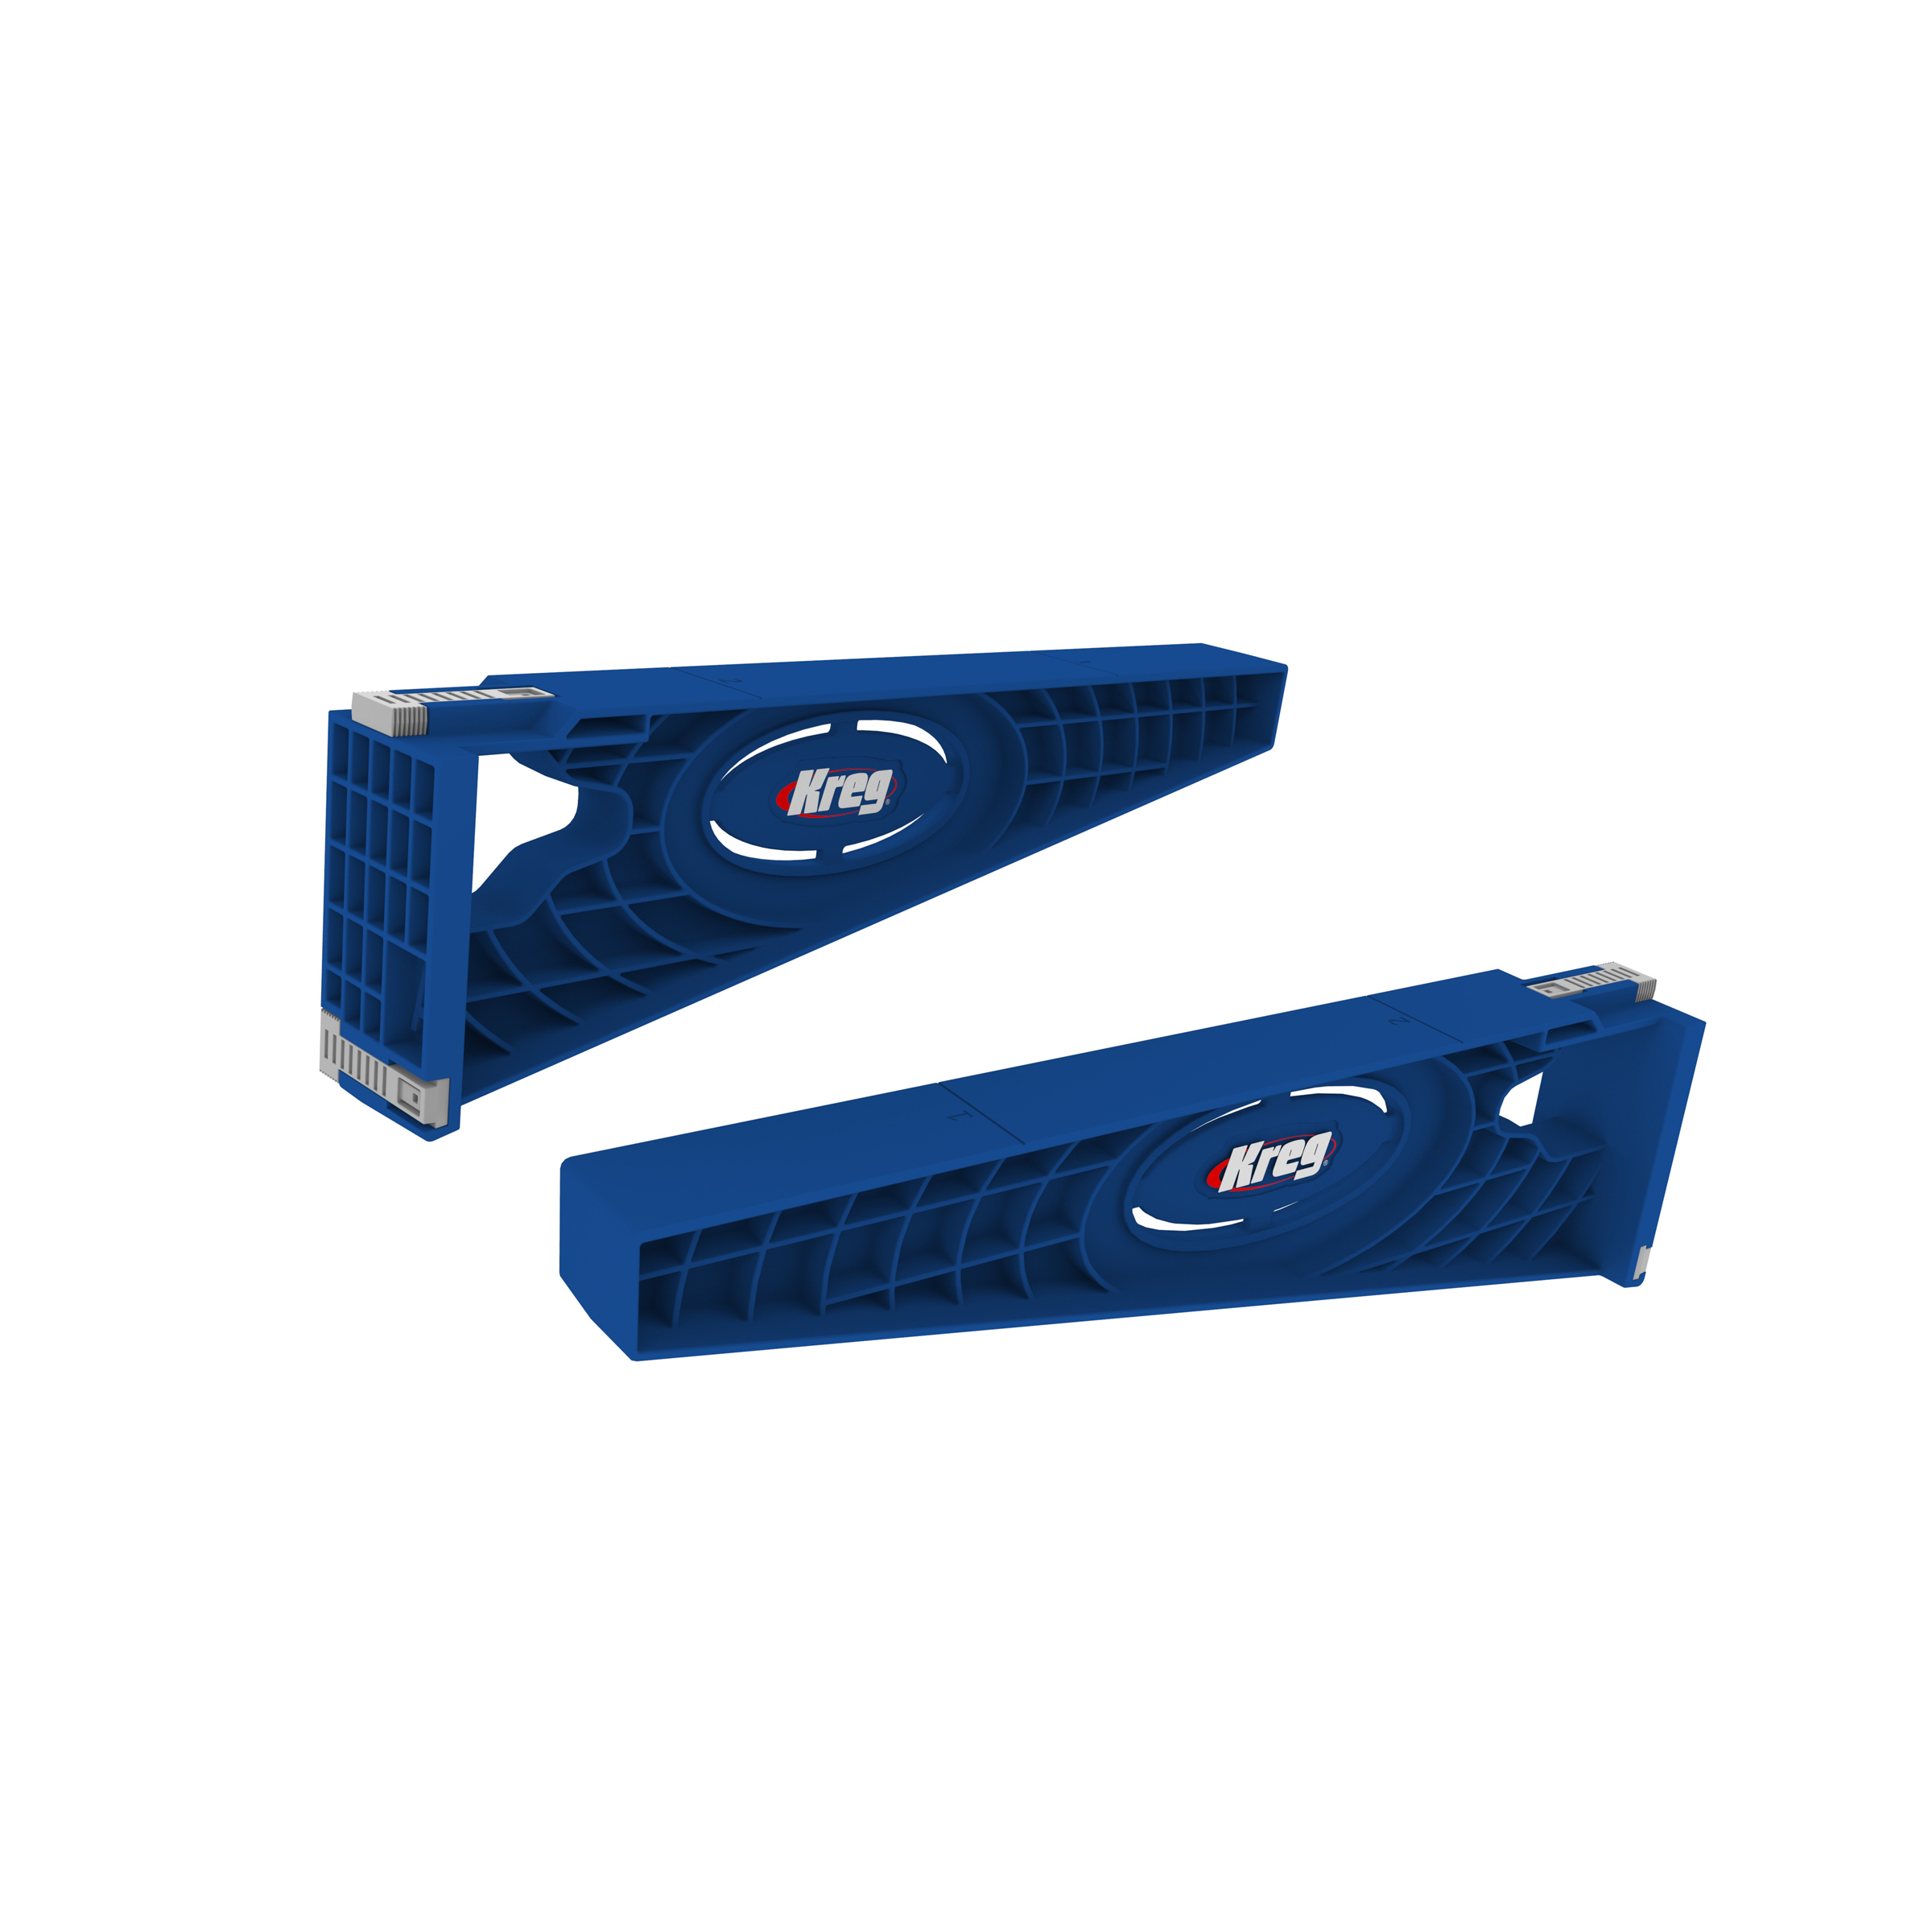
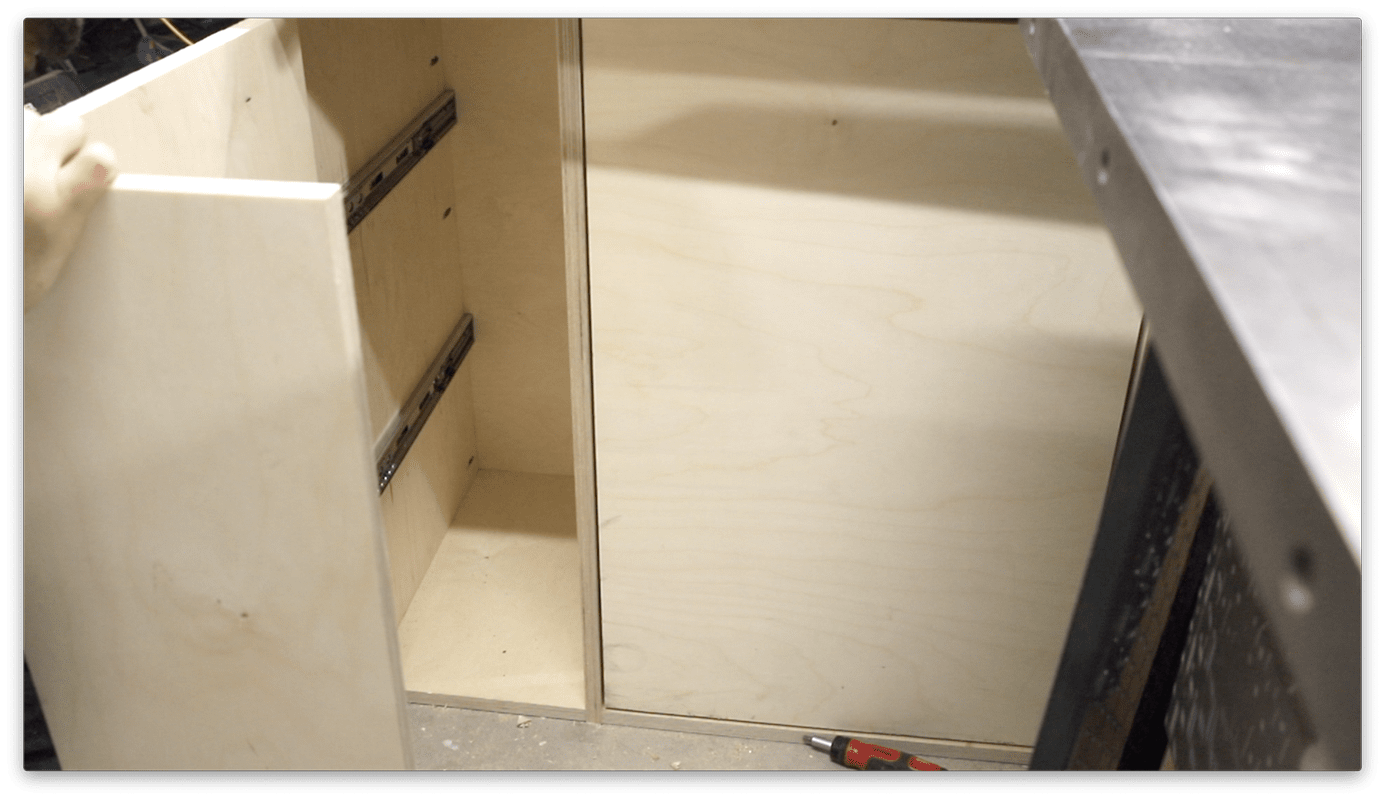
Vertical Drawer
Using a Kreg Drawer Slide Jig attach two drawer slides to the left side vertical cabinet on the back left. Space these slides about 14 inches apart and cut a vertical drawer panel to fit inside this cabinet. I made mine about 2 inches shorter than the cabinet which gave me plenty of wiggle room. Mark out the location to attach the drawer slides to the vertical drawer at the same distance you installed the main portion of the slides. 14 inches on mine. Now cut a door that gives a 1/8" reveal on all sides to fit in this portion of the cabinet. Drill pocket holes onto the vertical drawer and attach to the drawer face. Slide vertical drawer into the cabinet. I added storage for hanging saw blades and saw accessories.
-
Drawer Pulls/Door Handles
To make drawer pulls rip some scrap 3/4" plywood to 1 1/2 inch strips. Next cut a 45 degree bevel along one edge. Cut these to fit along the top of each drawer and door, and attach with screws from the back. I painted my door handles to add some color to this project.
-
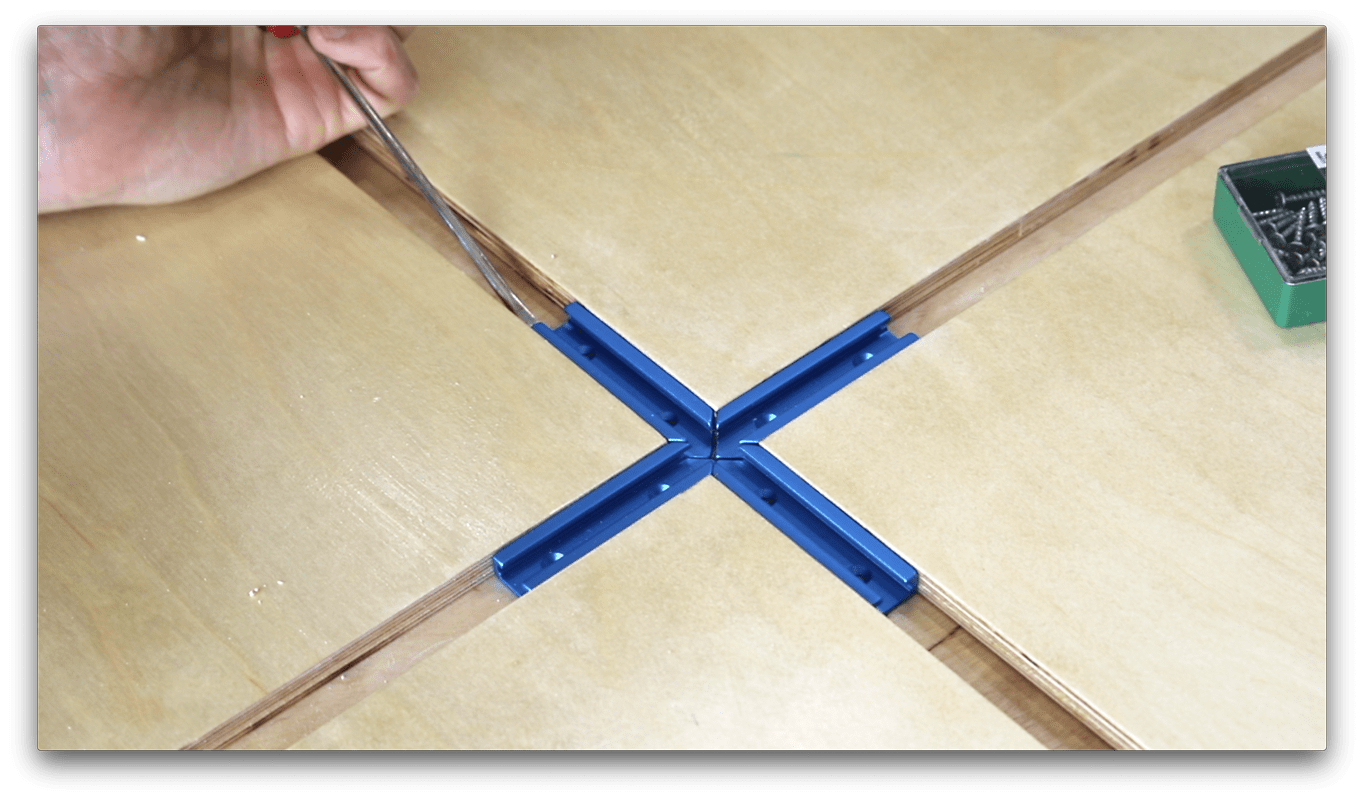
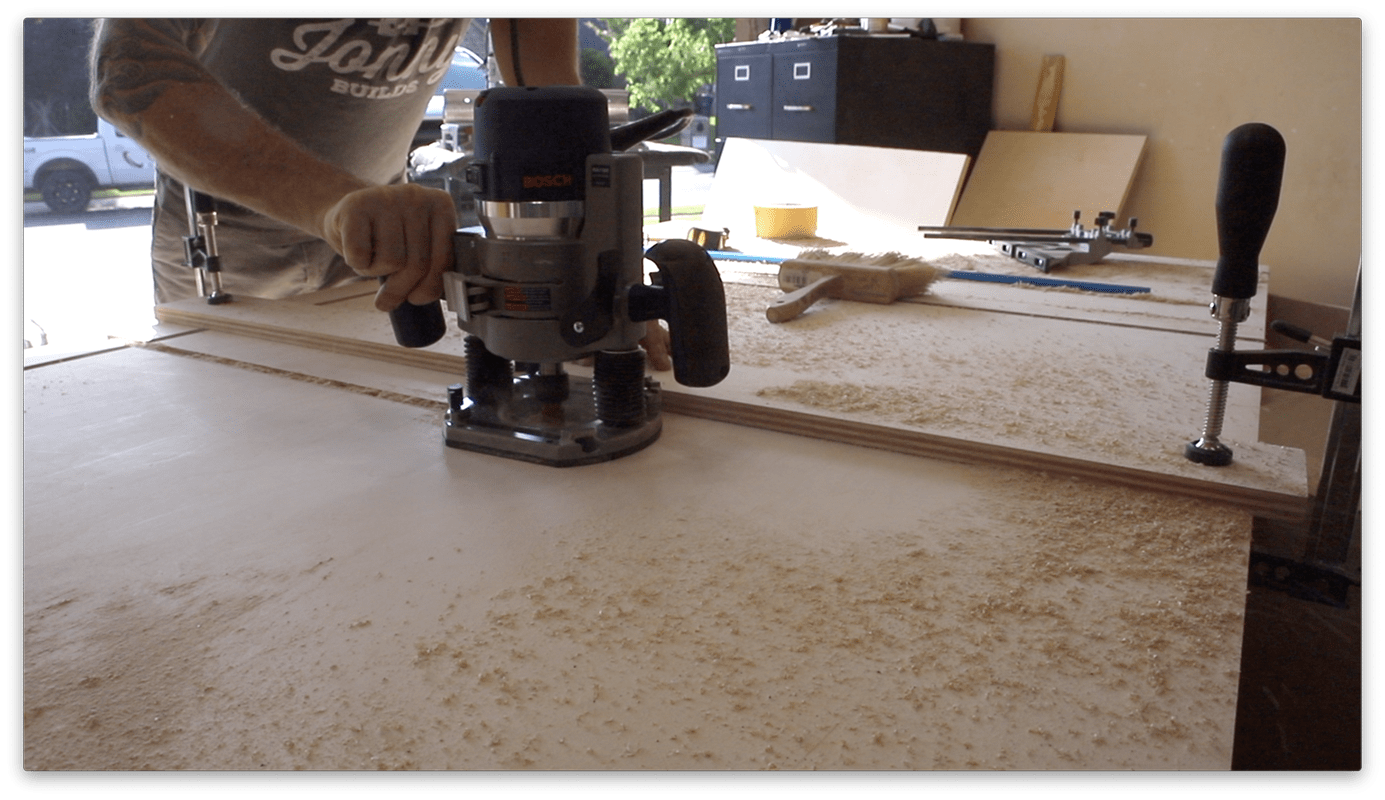
Cut Grooves for T-Track
Cut 3 grooves along the width starting at 3 inches from the front and spacing them every 11 inches apart going towards the back. Use a router with a 3/4 inch straight bit and cut the 1/2" deep grooves in 2 to 3 passes. Next cut in 4 groves that run across the width. The outside grooves are cut in 3 inches from the edges, and the middle grooves are spaced 21 inches in from there.
-
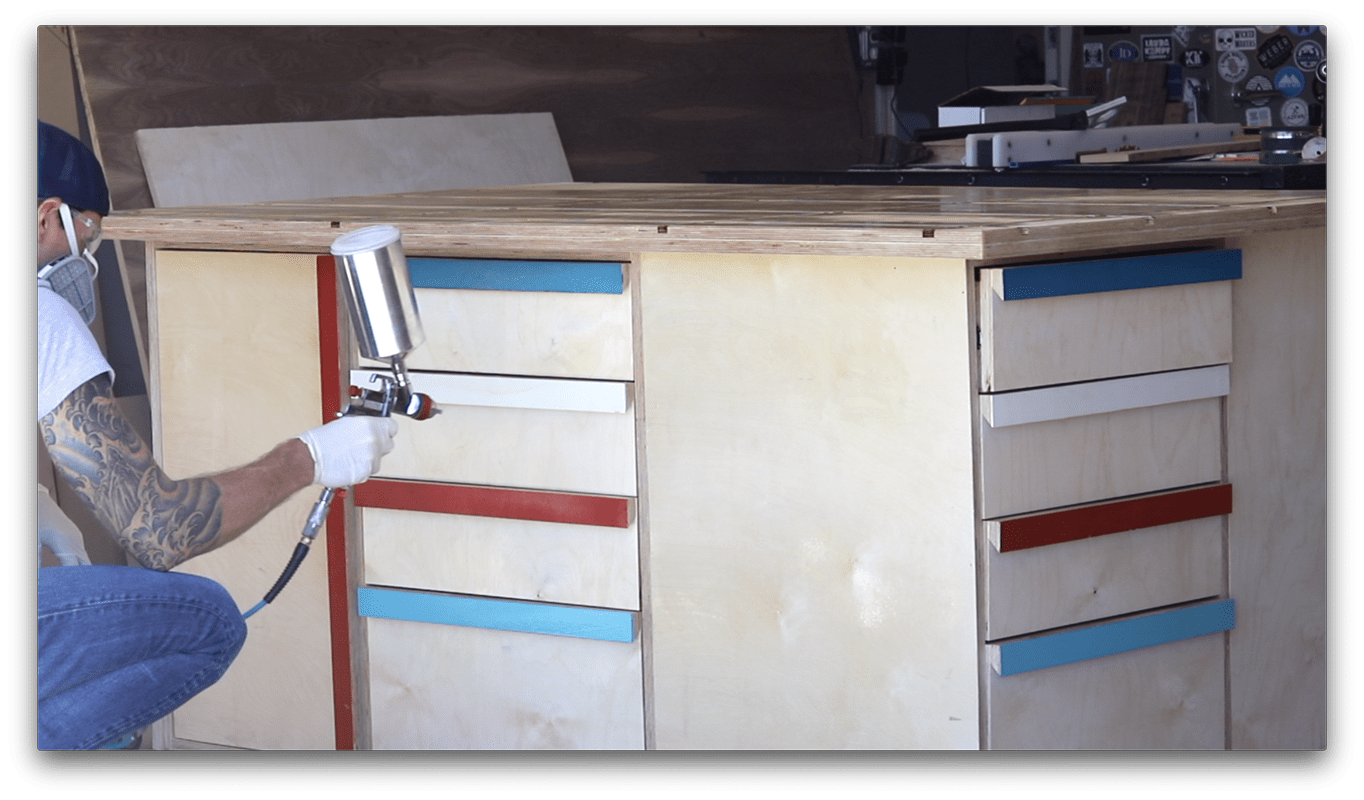
Apply Finish
Apply the finish of your choice. I used a marine grade spar urethane made by Total Boat because I wanted an extra durable finish. I applied 4 coats.
-
Install T-Track & Casters
Install T-Track into the grooves you cut. Attach 4 workbench casters. I used the kind that can raise the workbench when needed, but otherwise sit flat on the ground.