Wooden Gift Box
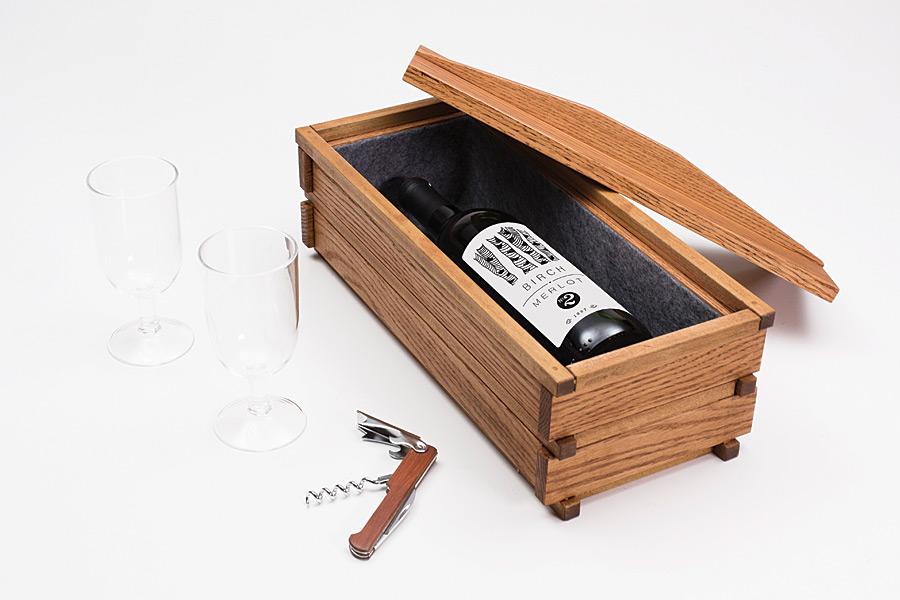
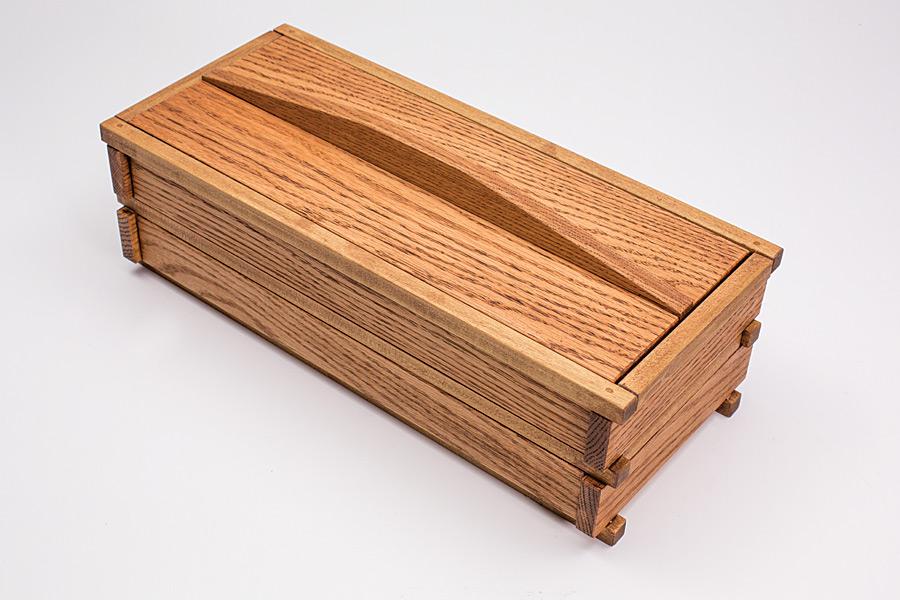
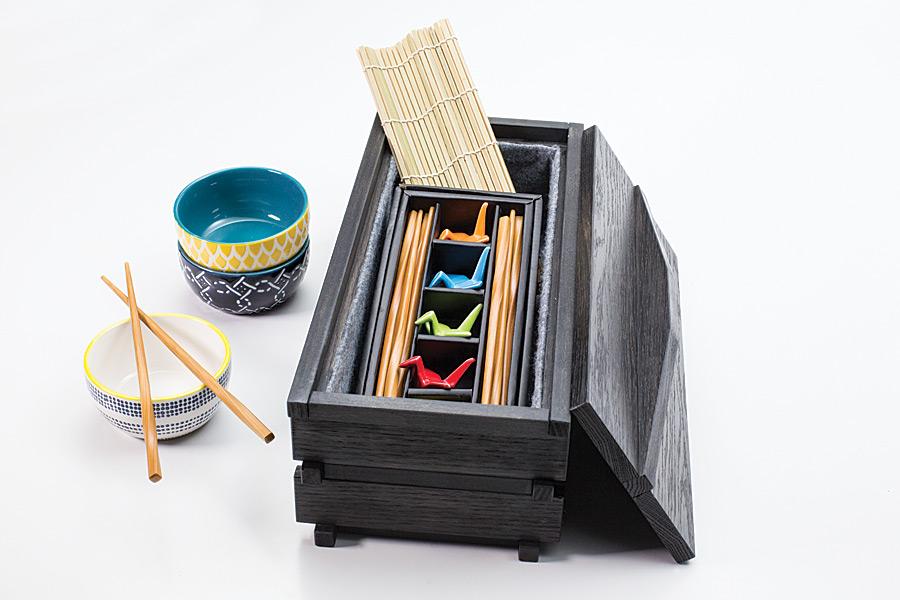
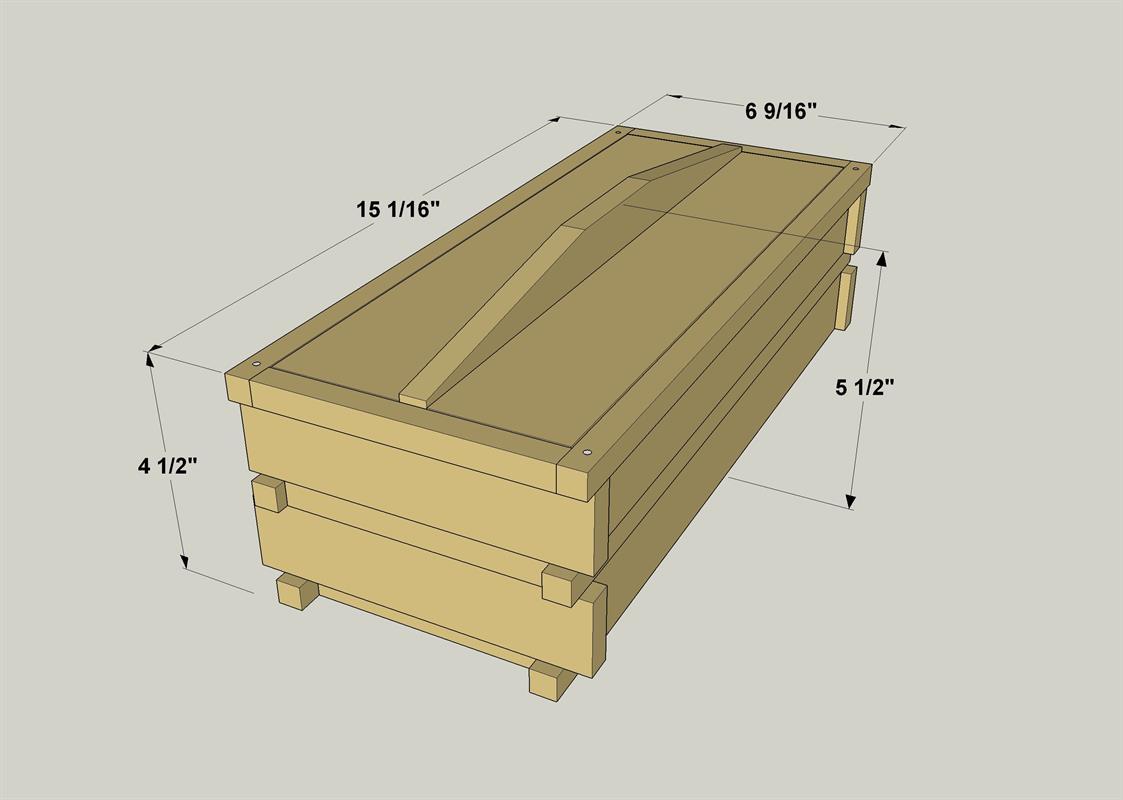
By Kreg ToolMake the gifts you give even more special by presenting them in this one-of-a-kind gift box. In fact, the box may be valued more than whatever it contains. The box is sized to hold a bottle of wine or any number of other items, and it’s glued up from boards you can buy in any home center.
Directions
-
Cut Side and End Parts to Length
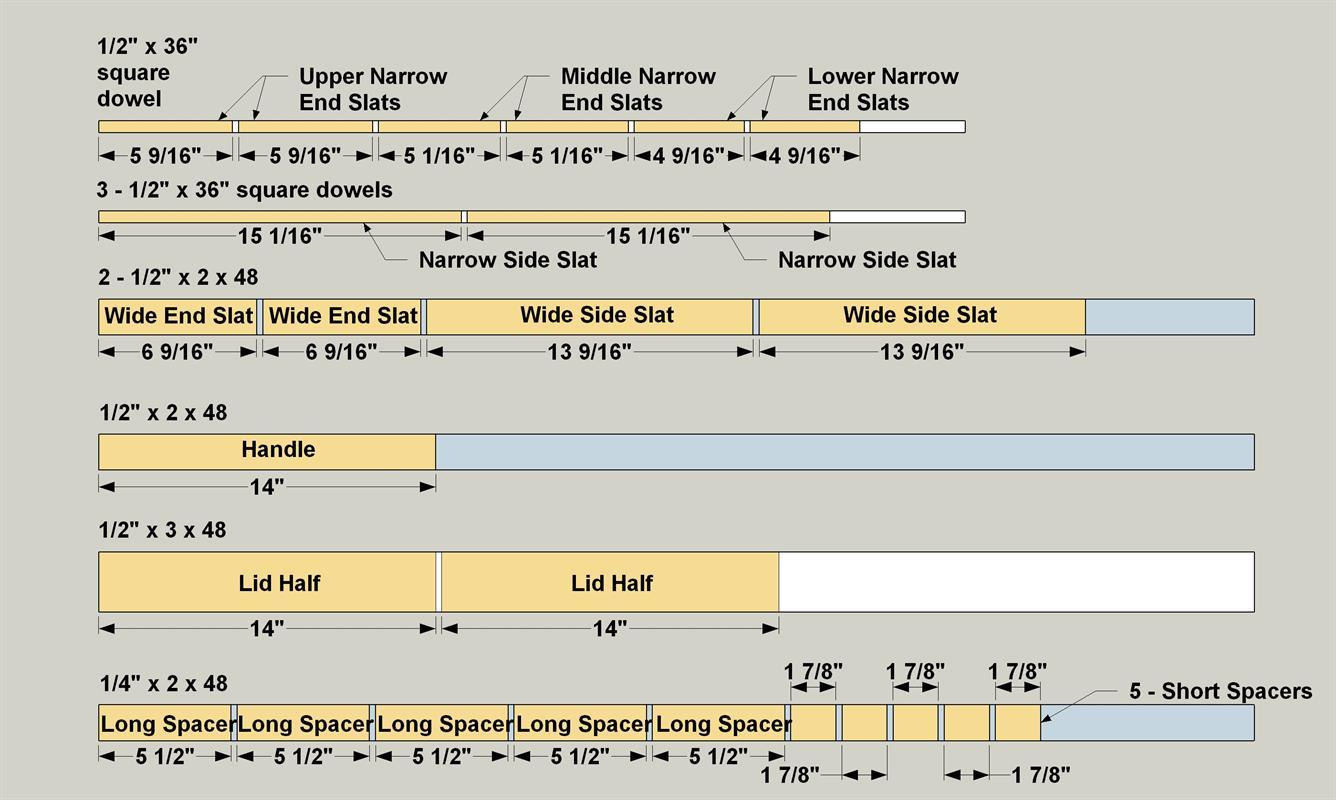
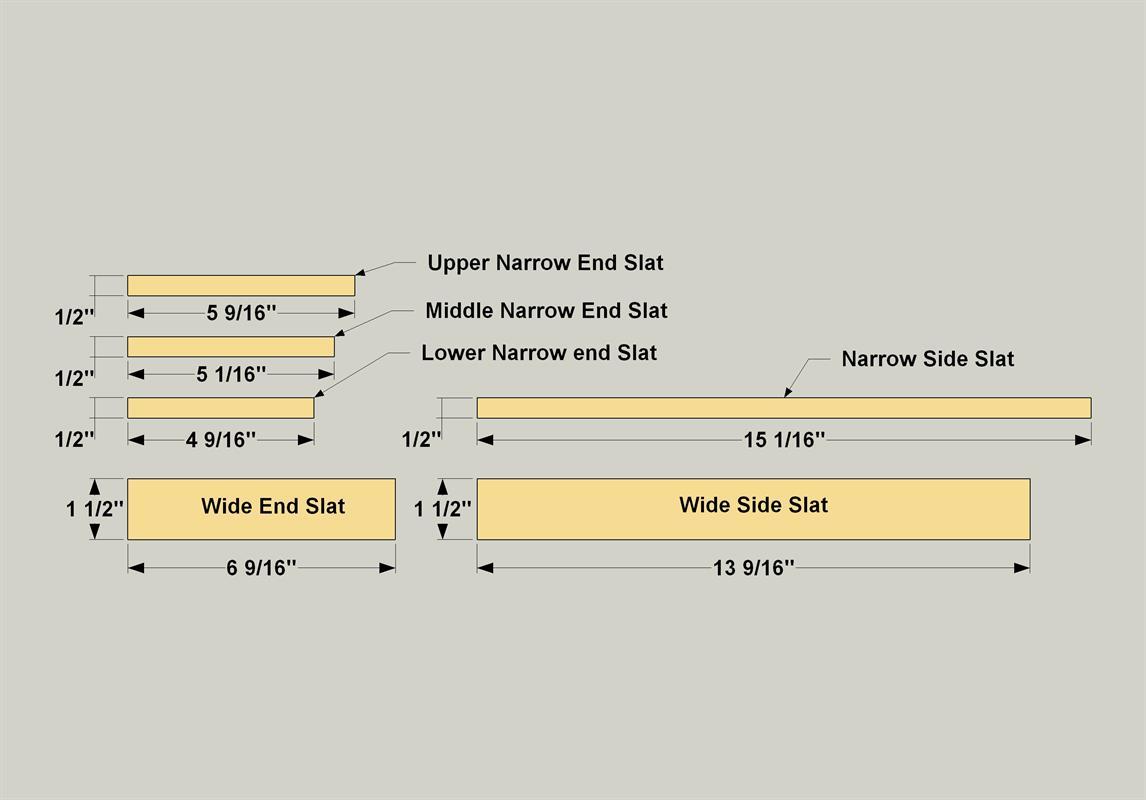
Cut all the Narrow End Slats and Narrow Side Slats to length from 1/2" x 1/2" square dowels. Cut all the Wide End Slats and Wide Side Slats to length from 1/2" x 2 red oak boards. To make sure all like parts are exactly the same length, measure and mark carefully and use a stop block on your miter saw. Sand slight chamfers on all edges using 150-grit sandpaper wrapped around a scrap-wood block.
-
Cut the Assembly Jig Parts
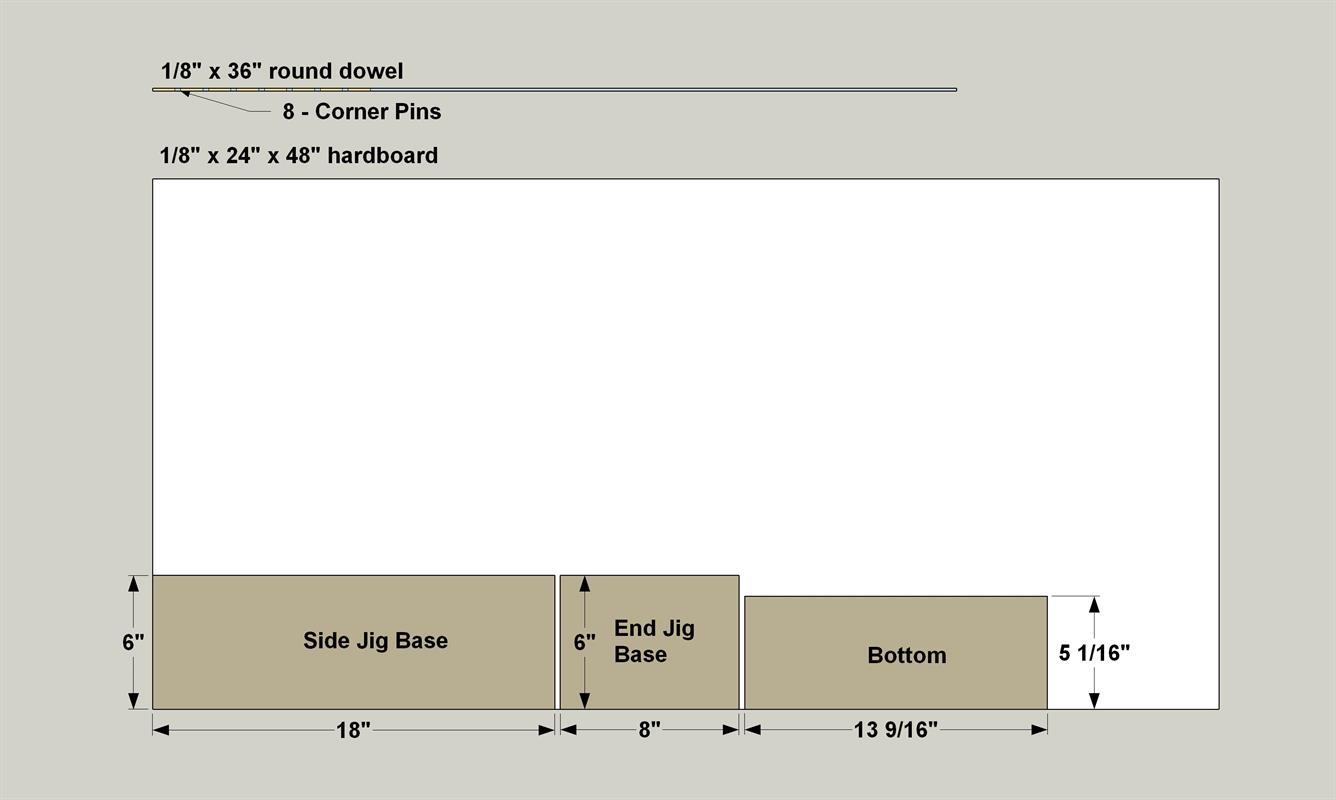
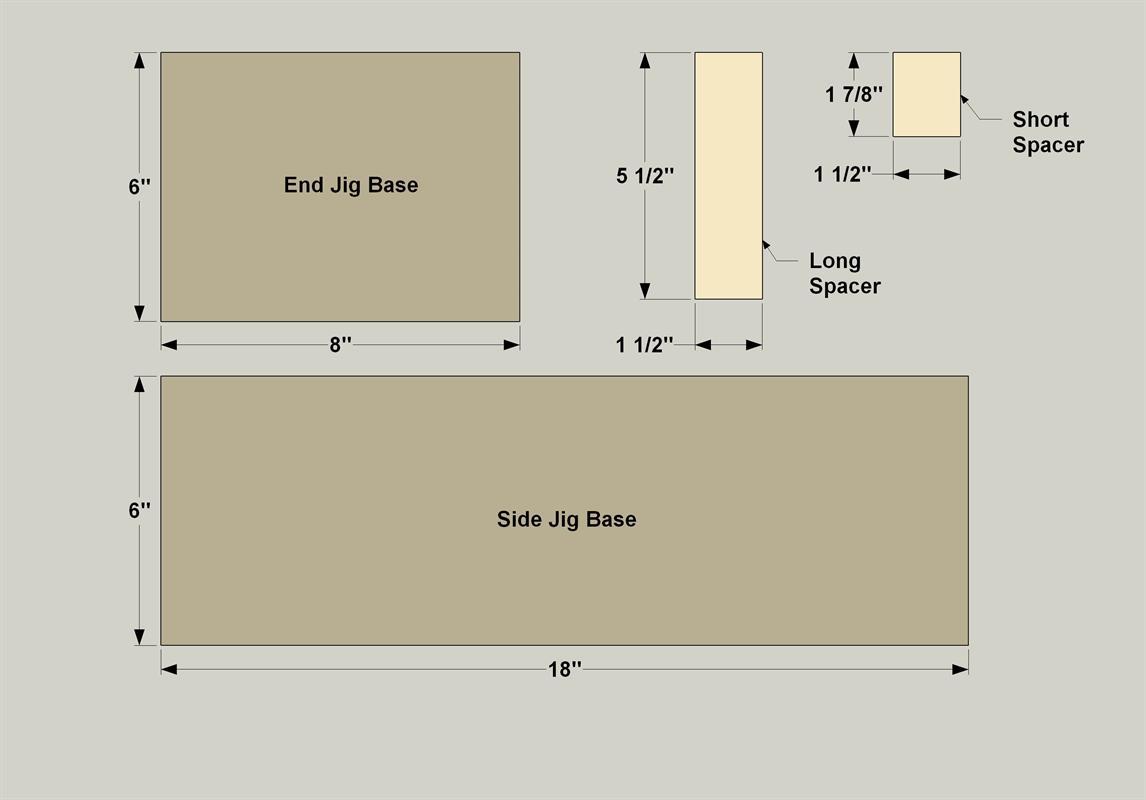
To assemble this project, you’ll want to build a couple of jigs. These assembly jigs ensure accurate alignment of the Slats in the end and side assemblies. Plus, if you look at the box you’ll see that the Narrow Slats at the top are offset 1/4" outward. This provides a place to hold the lid. At the bottom, the Narrow Slats are set 1/4" inward to support the Bottom Panel. The jigs help you align all of the ends, and they jigs set these two offsets. To make the jigs, start by cutting the End Jig Base and Side Jig Base to size from 1/8" hardboard, as shown in the cutting diagram. Then cut the Long Spacers and Short Spacers to length from a 1/4" x 2 poplar board.
-
Make the End Assembly Jig
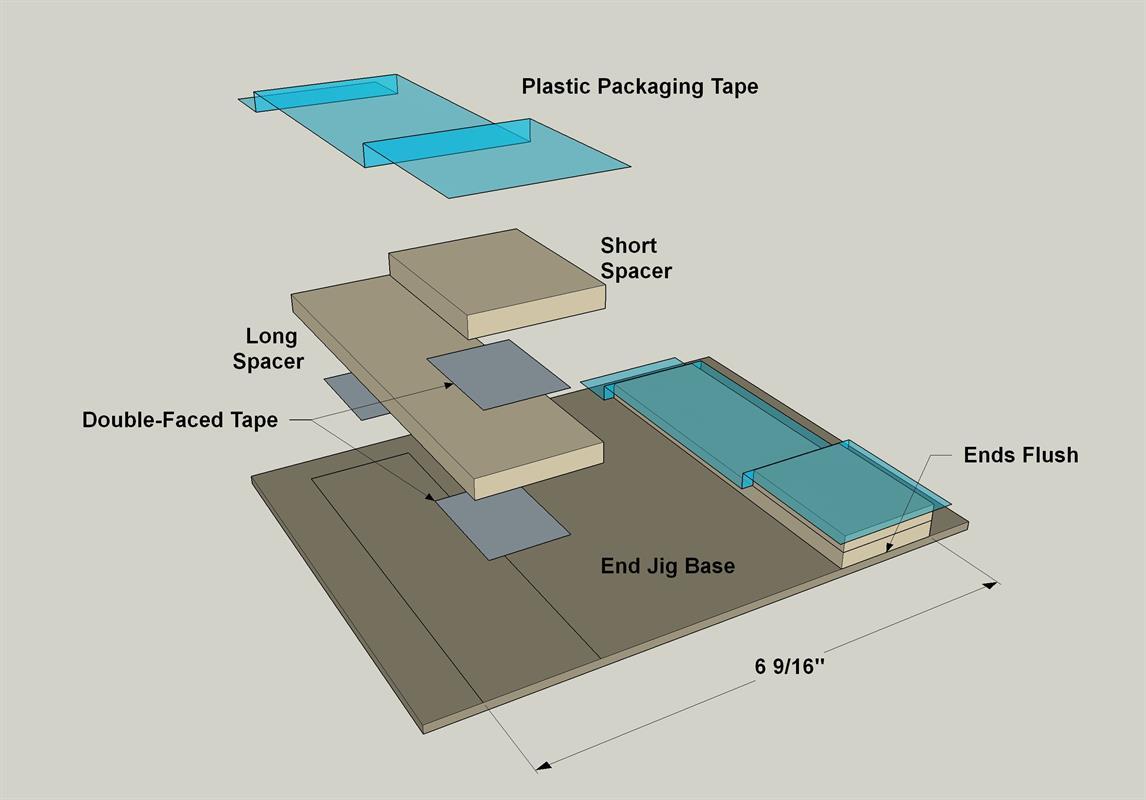
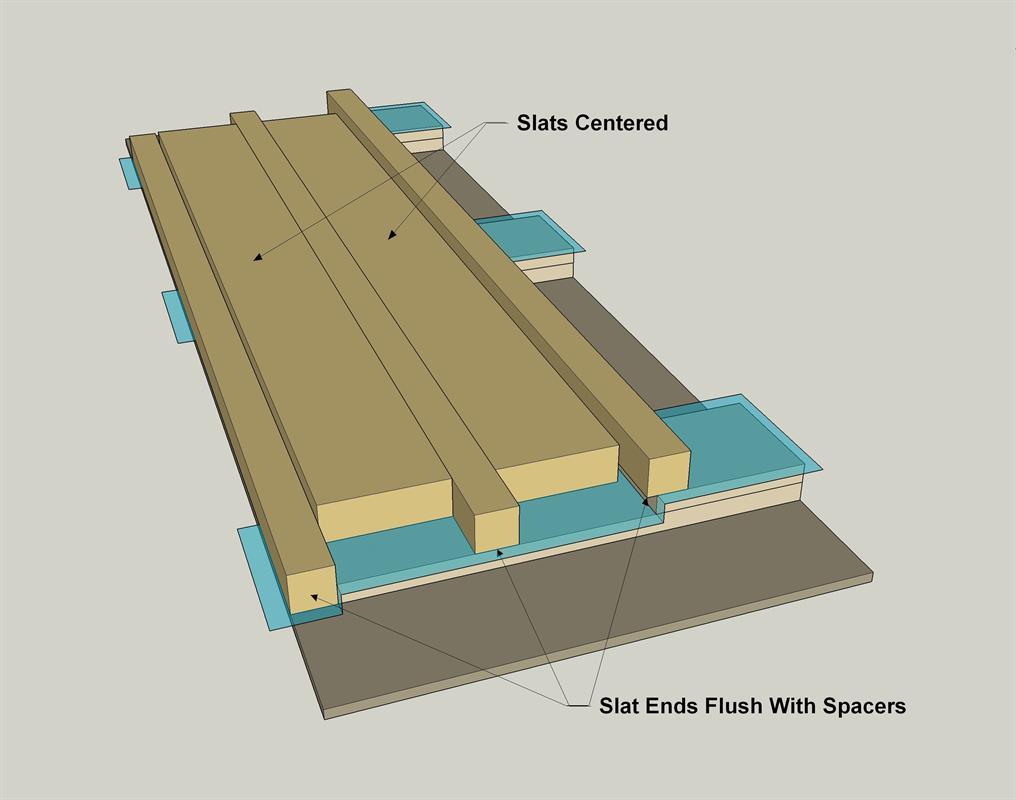
Using double-faced tape (commonly called carpet tape), adhere two Long Spacers to the End Jig Base. Make sure the Spacers are aligned properly and sitting square to the Base. Then attach the Short Spacers to the Long Spacers where shown. Then cover the spacers with plastic packaging tape. This will prevent glue from sticking to the spacers as you glue up the parts of your gift box.
Square Up the Jigs
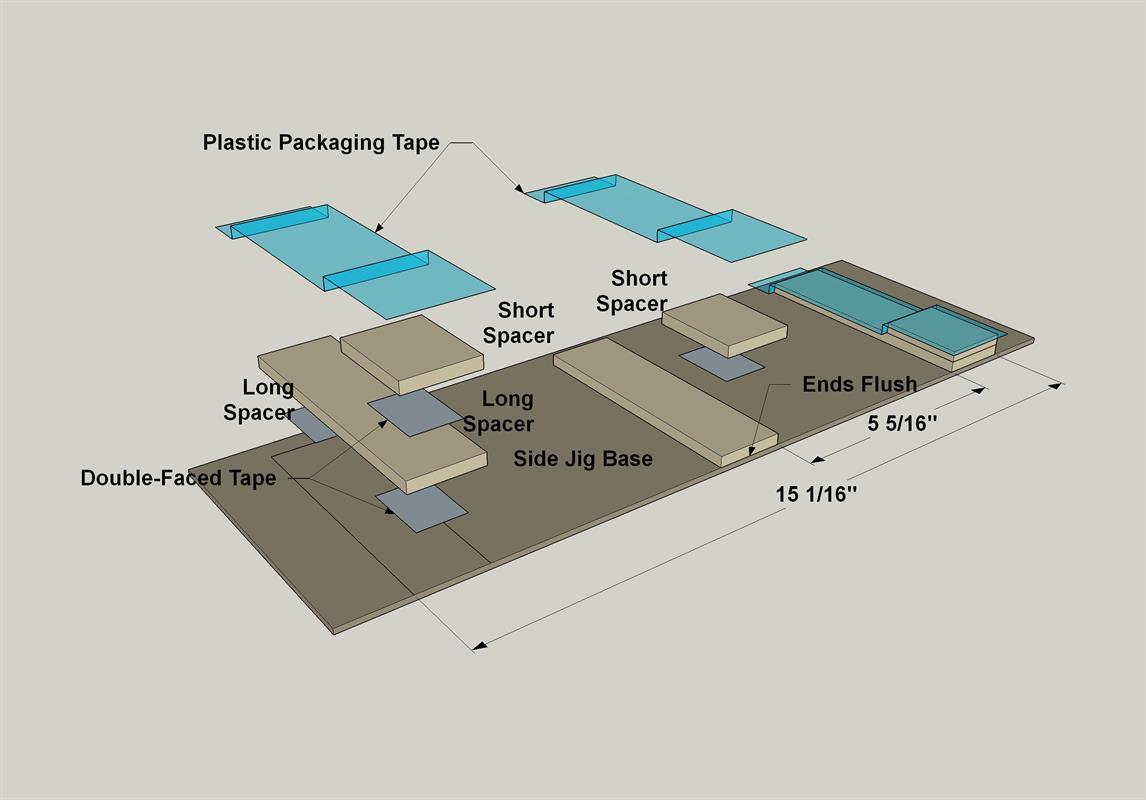
To make assembly of the ends and sides easier, the outside edges of the assembly-jig spacers align with the ends of the Wide End Slats (End Jig) and the Narrow side Slats (Side Jig). To ensure accurate Long Spacer placement, use a square when marking the outside edge locations on the Jig Bases.
-
Make the Side Assembly Jig
Now assemble the side assembly jig in the same way. Adhere three Long Spacers to the Side Jig Base and three Short Spacers to the Long Spacers. Cover the spacers with plastic packaging tape.
-
Assemble the Ends
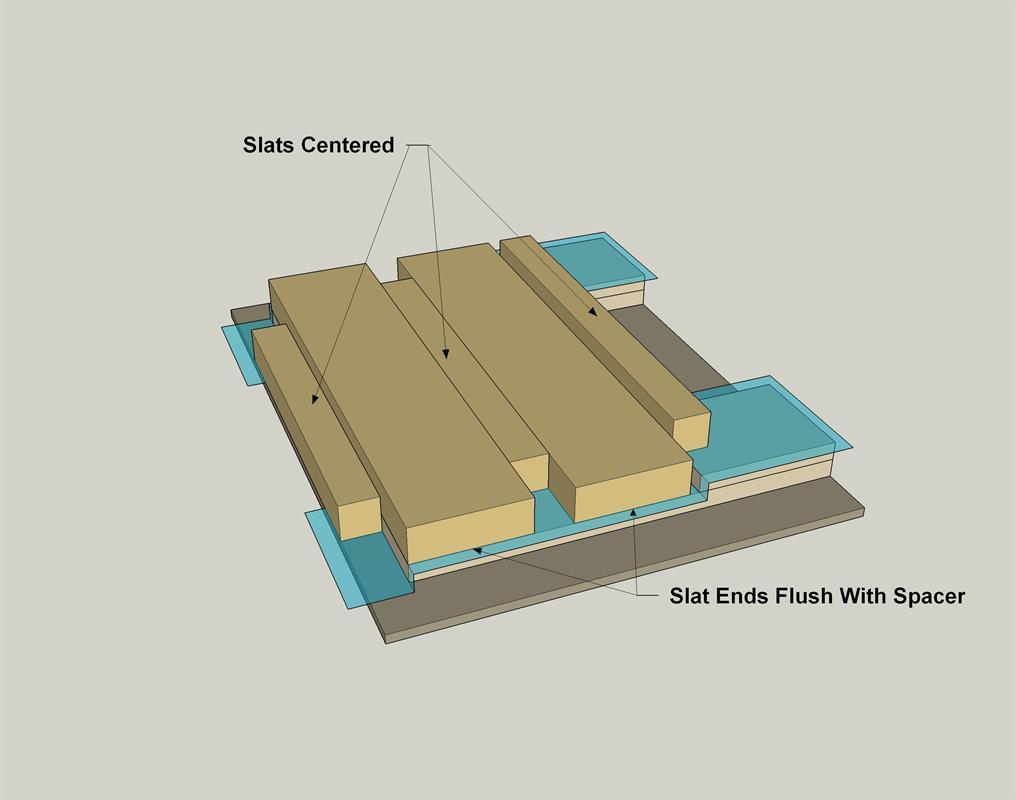
Dry-fit one set of End Slats on the End Assembly Jig, aligning the ends of the Wide Slats with the edges of the Spacers. Then carefully center the Narrow Slats. Trace the locations of the ends of the Narrow Slats onto the jig with a fine-point felt-tip marker. Remove the slats from the jig. Apply a fine line of glue (don’t over-do it) to the mating Slat edges, position the parts on the jig, and lightly clamp. Remove any excess glue with a damp cloth. When the glue dries, repeat with the second end assembly.
-
Assemble the Sides
Dry-fit one set of Side Slats on the Side Assembly Jig, aligning the ends of the Narrow Slats with the edges of the Spacers. Then carefully center the Wide Slats. Trace the locations of the ends of the Wide Slats onto the jig with a fine-point felt-tip marker. Remove the slats from the jig. Apply a fine line of glue to the mating Slat edges, position the parts on the jig, and lightly clamp. When the glue dries, repeat with the second side assembly.
-
Assemble the Box
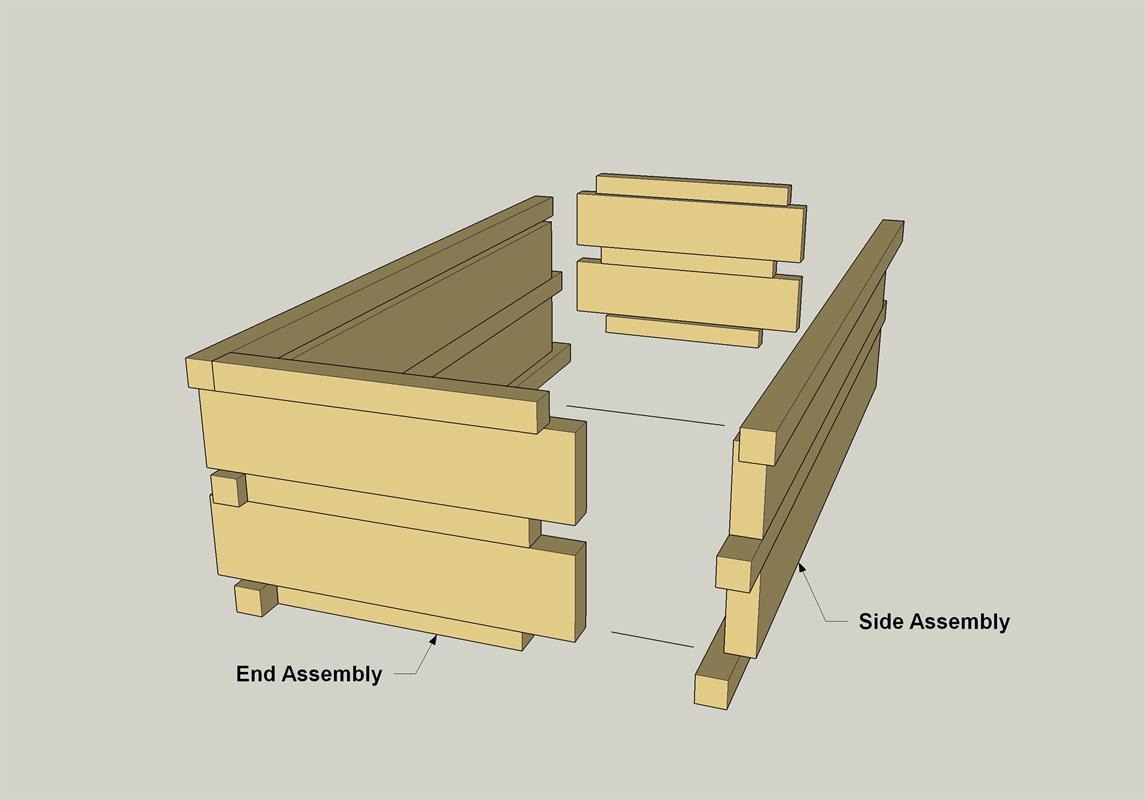
Lightly sand the inside and outside faces of the box end assemblies and box side assemblies with 150-grit sandpaper. Press the ends and sides together, interlocking the “fingers” and “notches” of the mating parts. Clamp the assembly and check it for square. (Measure diagonally from corner to corner. Squeeze the box diagonally as necessary. When the diagonal measurements are equal, the box is square.)
-
Pin the Corners
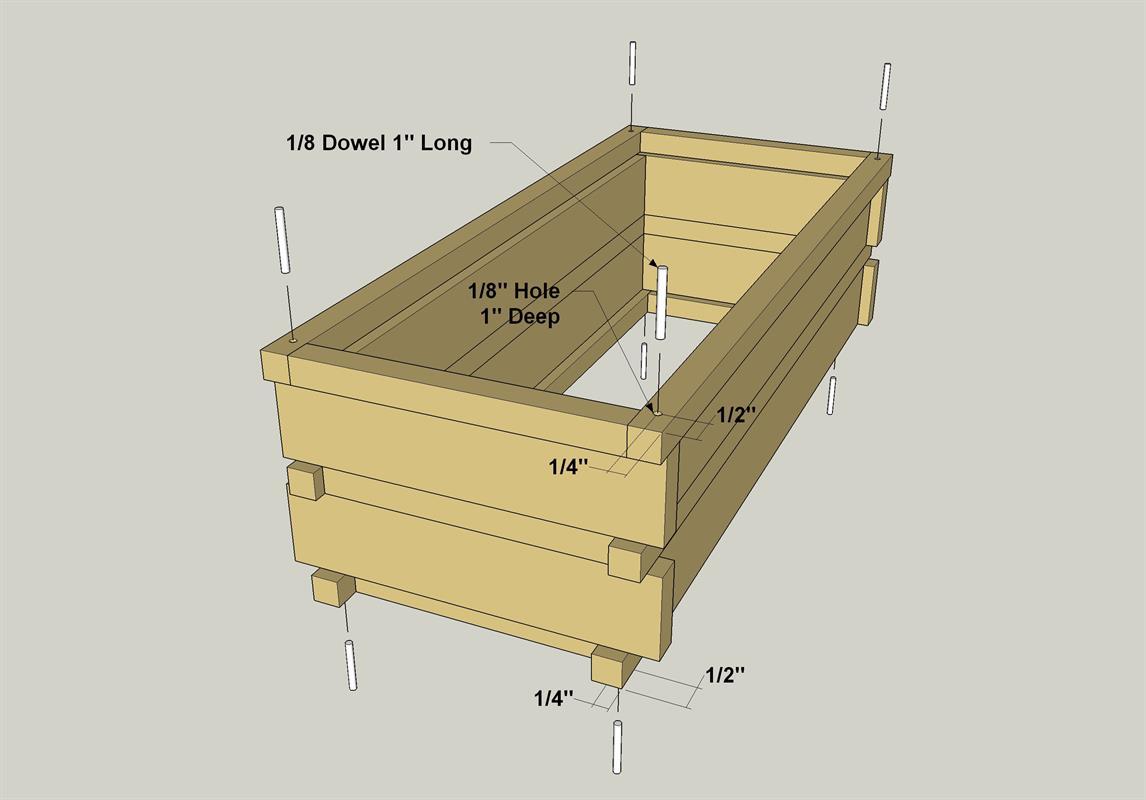
Cut the Corner Pins to length from 1/8" round dowel using a utility knife. Mark center-point locations for the Pins on the top of the box and drill 1"-deep holes. Squeeze a little glue into the holes and tap in the Pins. Turn the box upside down and repeat at the bottom corners.
-
Insert the Bottom
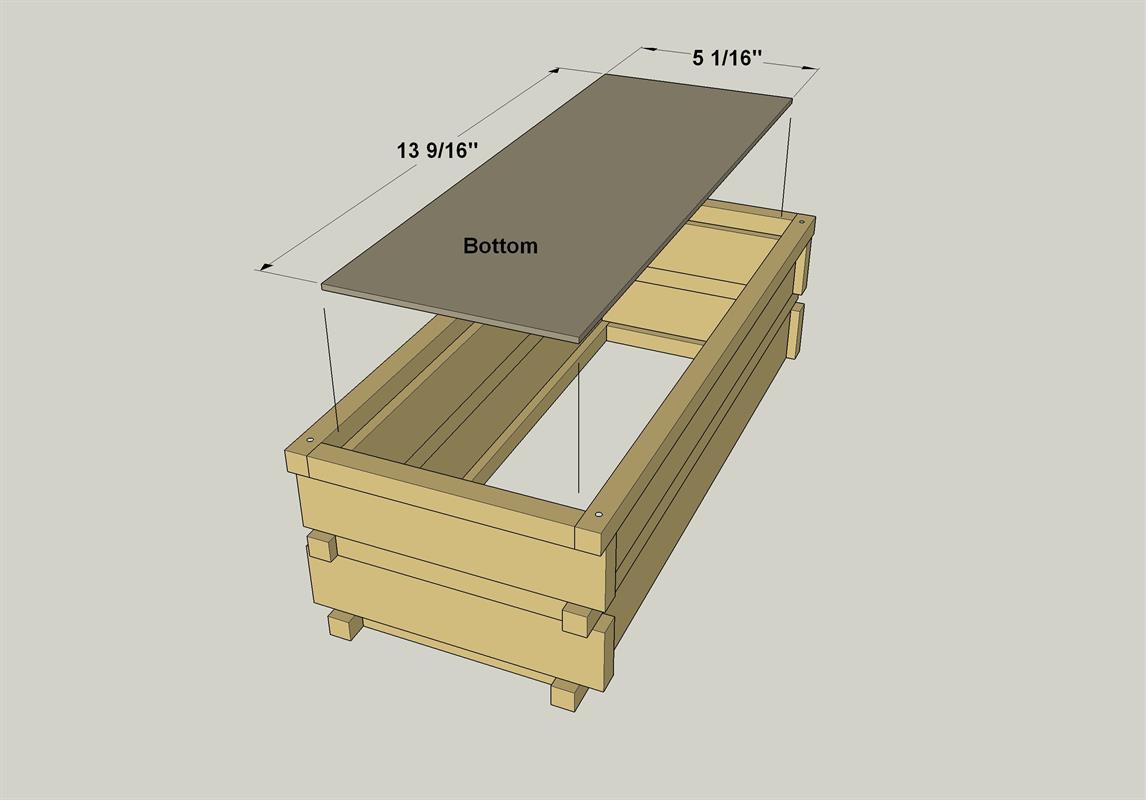
Cut the Bottom to size from 1/8" hardboard. Apply glue to the ledge created by the lower end and side Slats and insert the Bottom. Apply weight, such as a quart can of paint, to the bottom until the glue dries.
-
Form the Handle
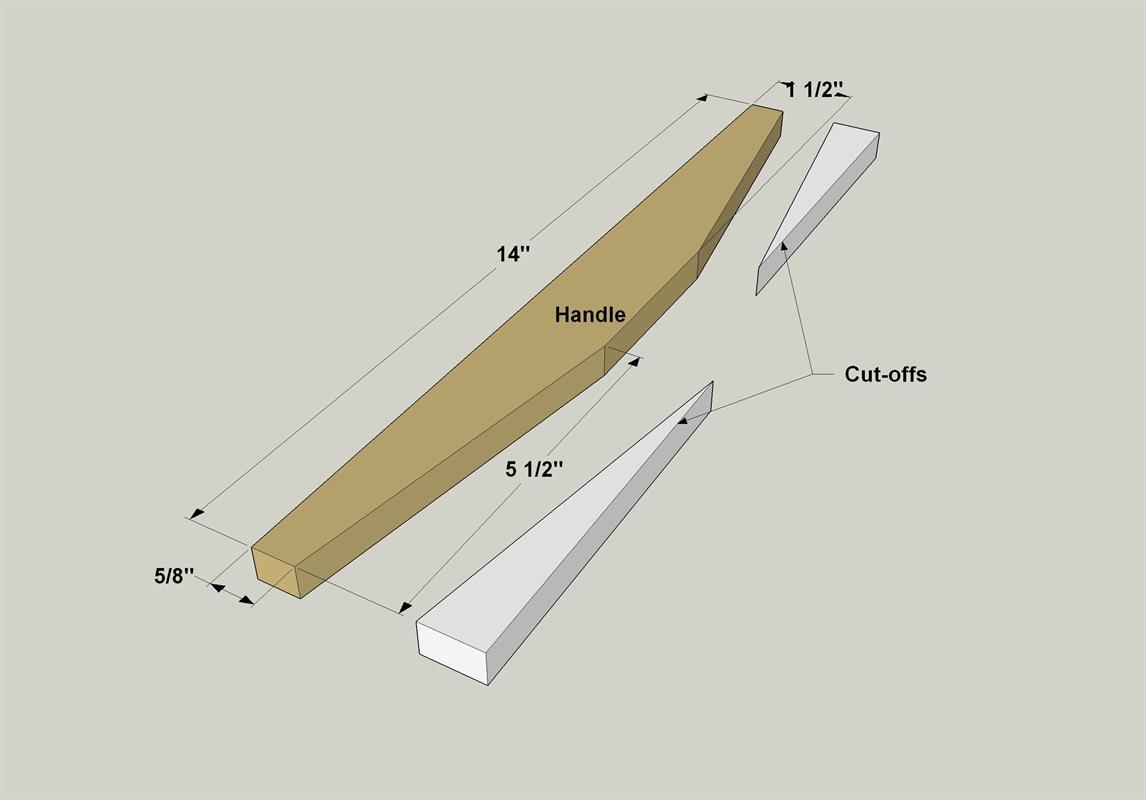
Cut the Handle to length from a 1/2" x 2 red oak board. Draw the tapers on the handle and cut along the lines with a jigsaw. Sand the cut edges smooth. Sand slight chamfers on the top edges.
-
Make the Lid
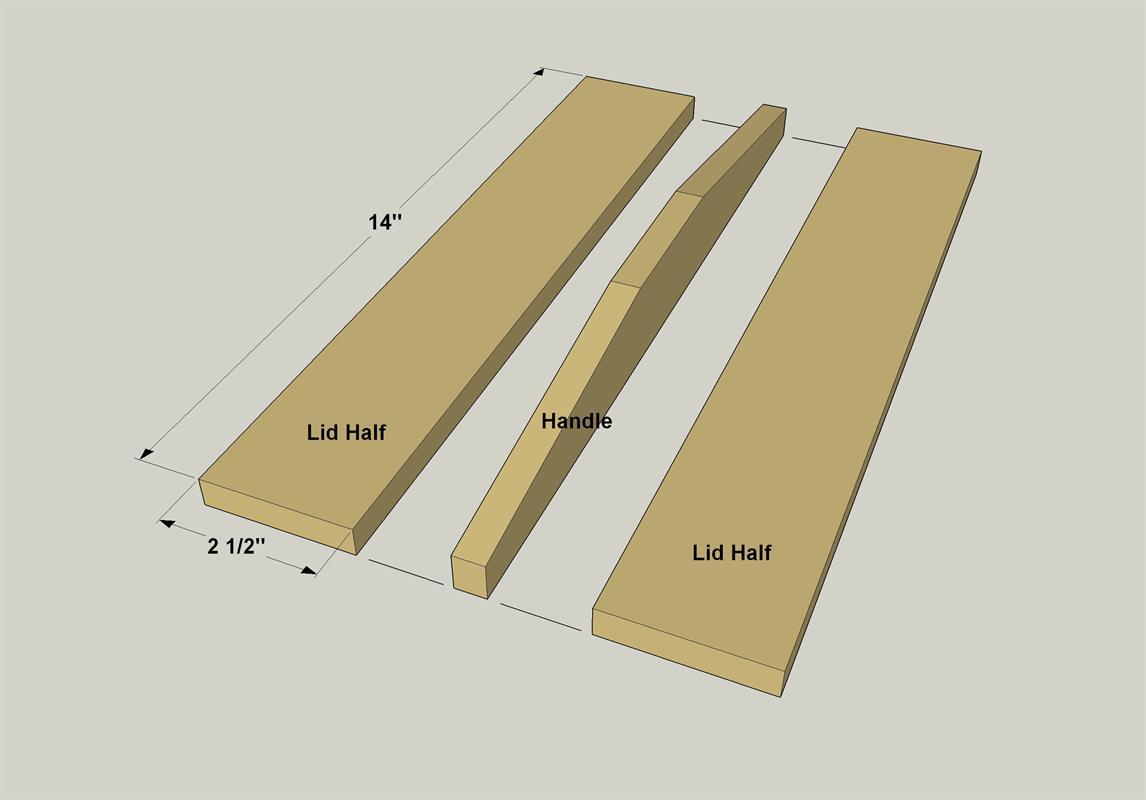
Cut the Lid Halves to length from a 1/2" x 3 red oak board. Sand slight chamfers on the ends and one edge of each Lid Half. Glue and clamp the Handle between the Lid Halves, with the chamfers on the Lid Halves on the perimeter and the bottom surfaces flush. With the glue dry, place the Lid on the ledge created by the offset upper end and side Narrow Slats. Sand the edges as necessary for a good fit. Lightly sand the top and bottom surfaces of the lid with 150-grit sandpaper.
-
Apply the Finish and Felt
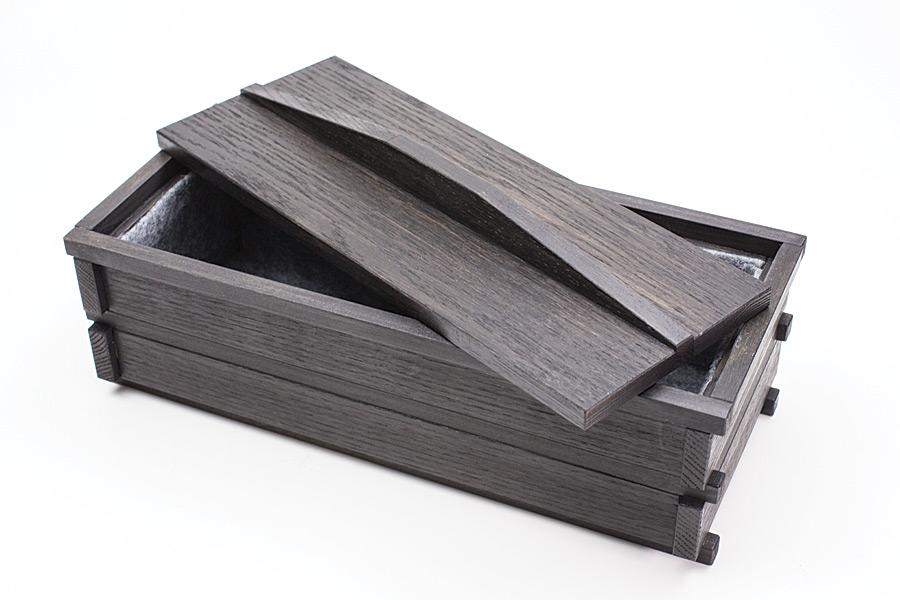
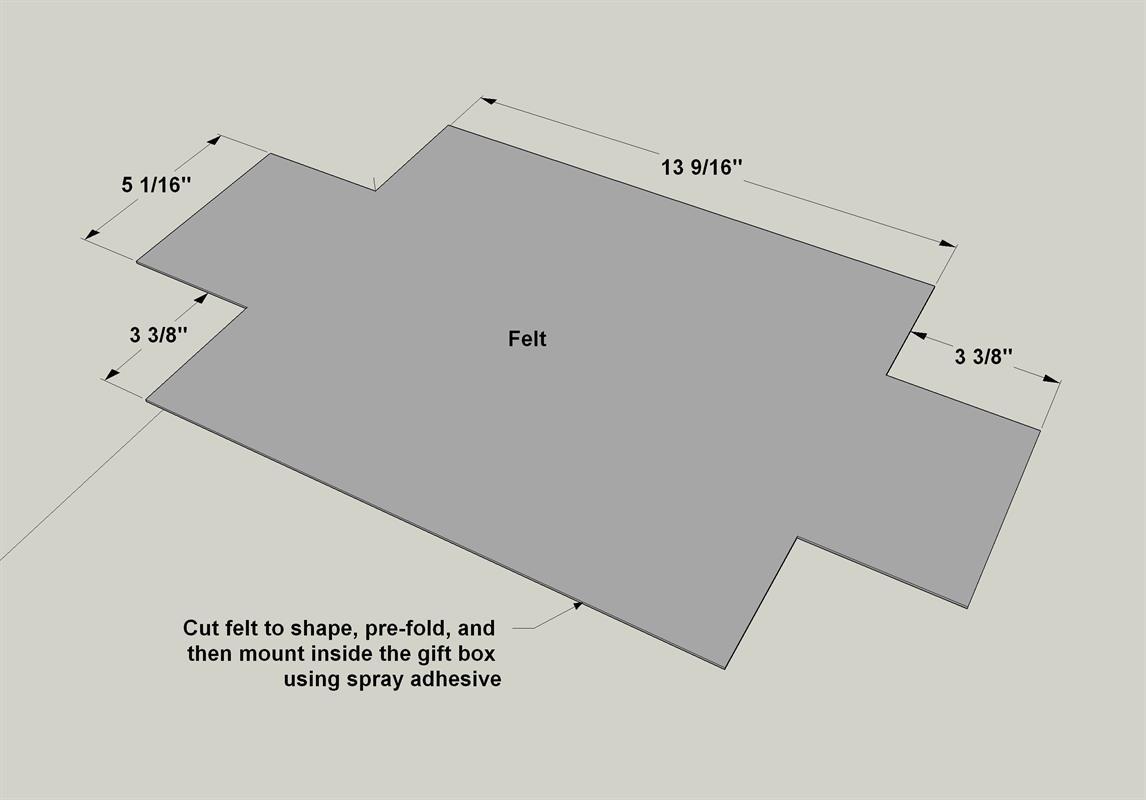
Once your box is assembled, you can stain it to suit your taste. To set it off even more, we finished the inside of our box with felt that we picked up at a fabric store. Cut the felt to shape and test fit it, then install it with a light coat of spray-mount adhesive. Just spray the back side of the felt, and carefully position it in the box.


