Wine Cabinet
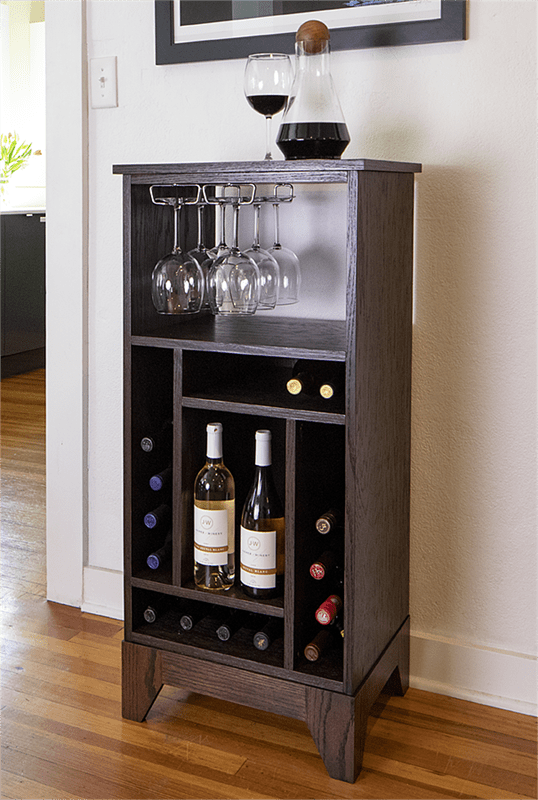
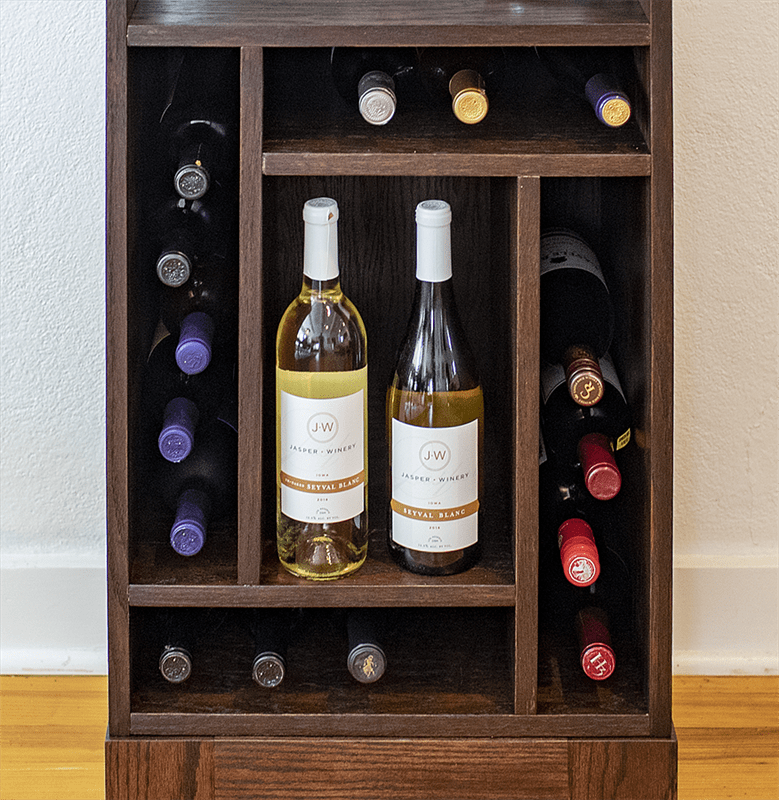
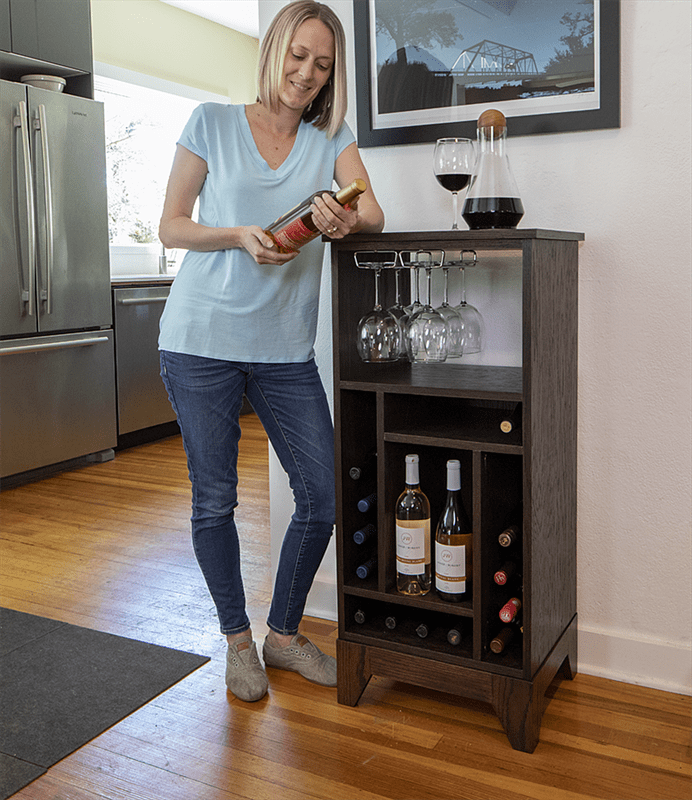
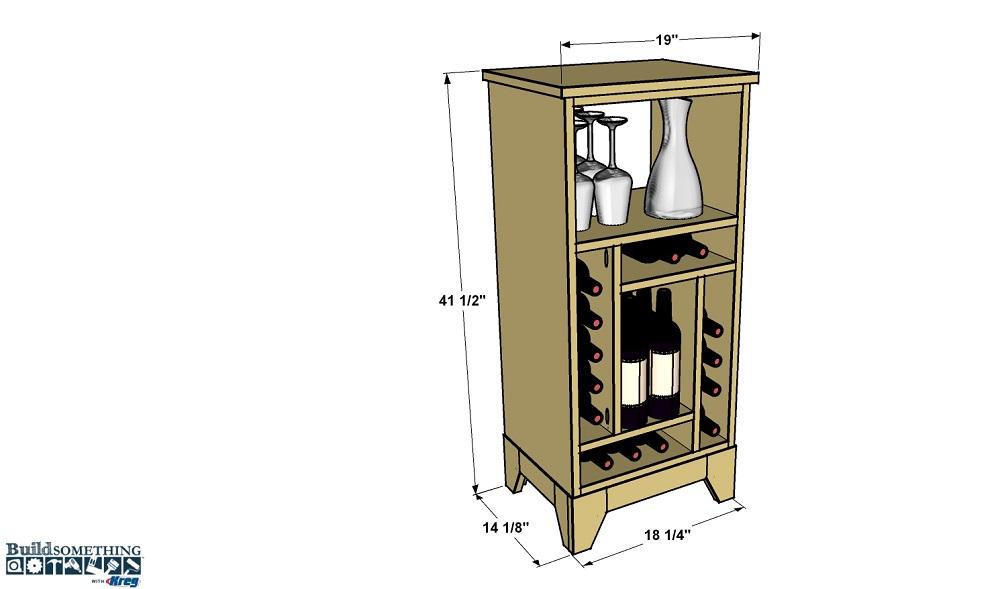
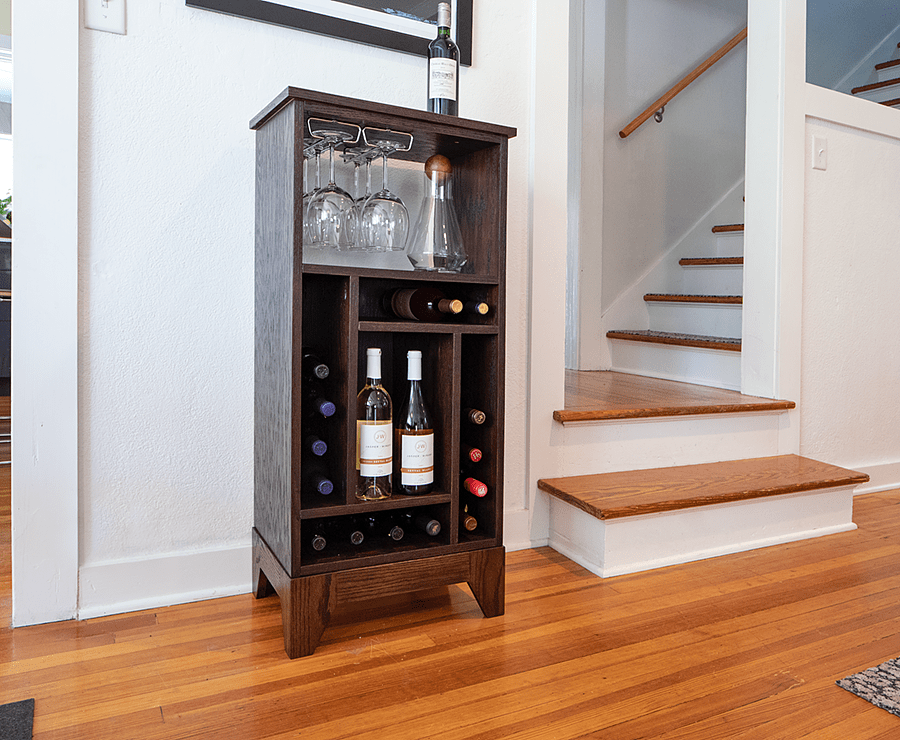
By Kreg ToolStore your wine in style! This wine cabinet holds multiple bottles and wine glasses in a compact space, and looks great doing it. Plus, it’s easy to build from plywood and a few boards, and it goes together with strong pocket-hole joints. You can build one yourself and stain it to match any decor.
Directions
-
Cut All the Cabinet Parts
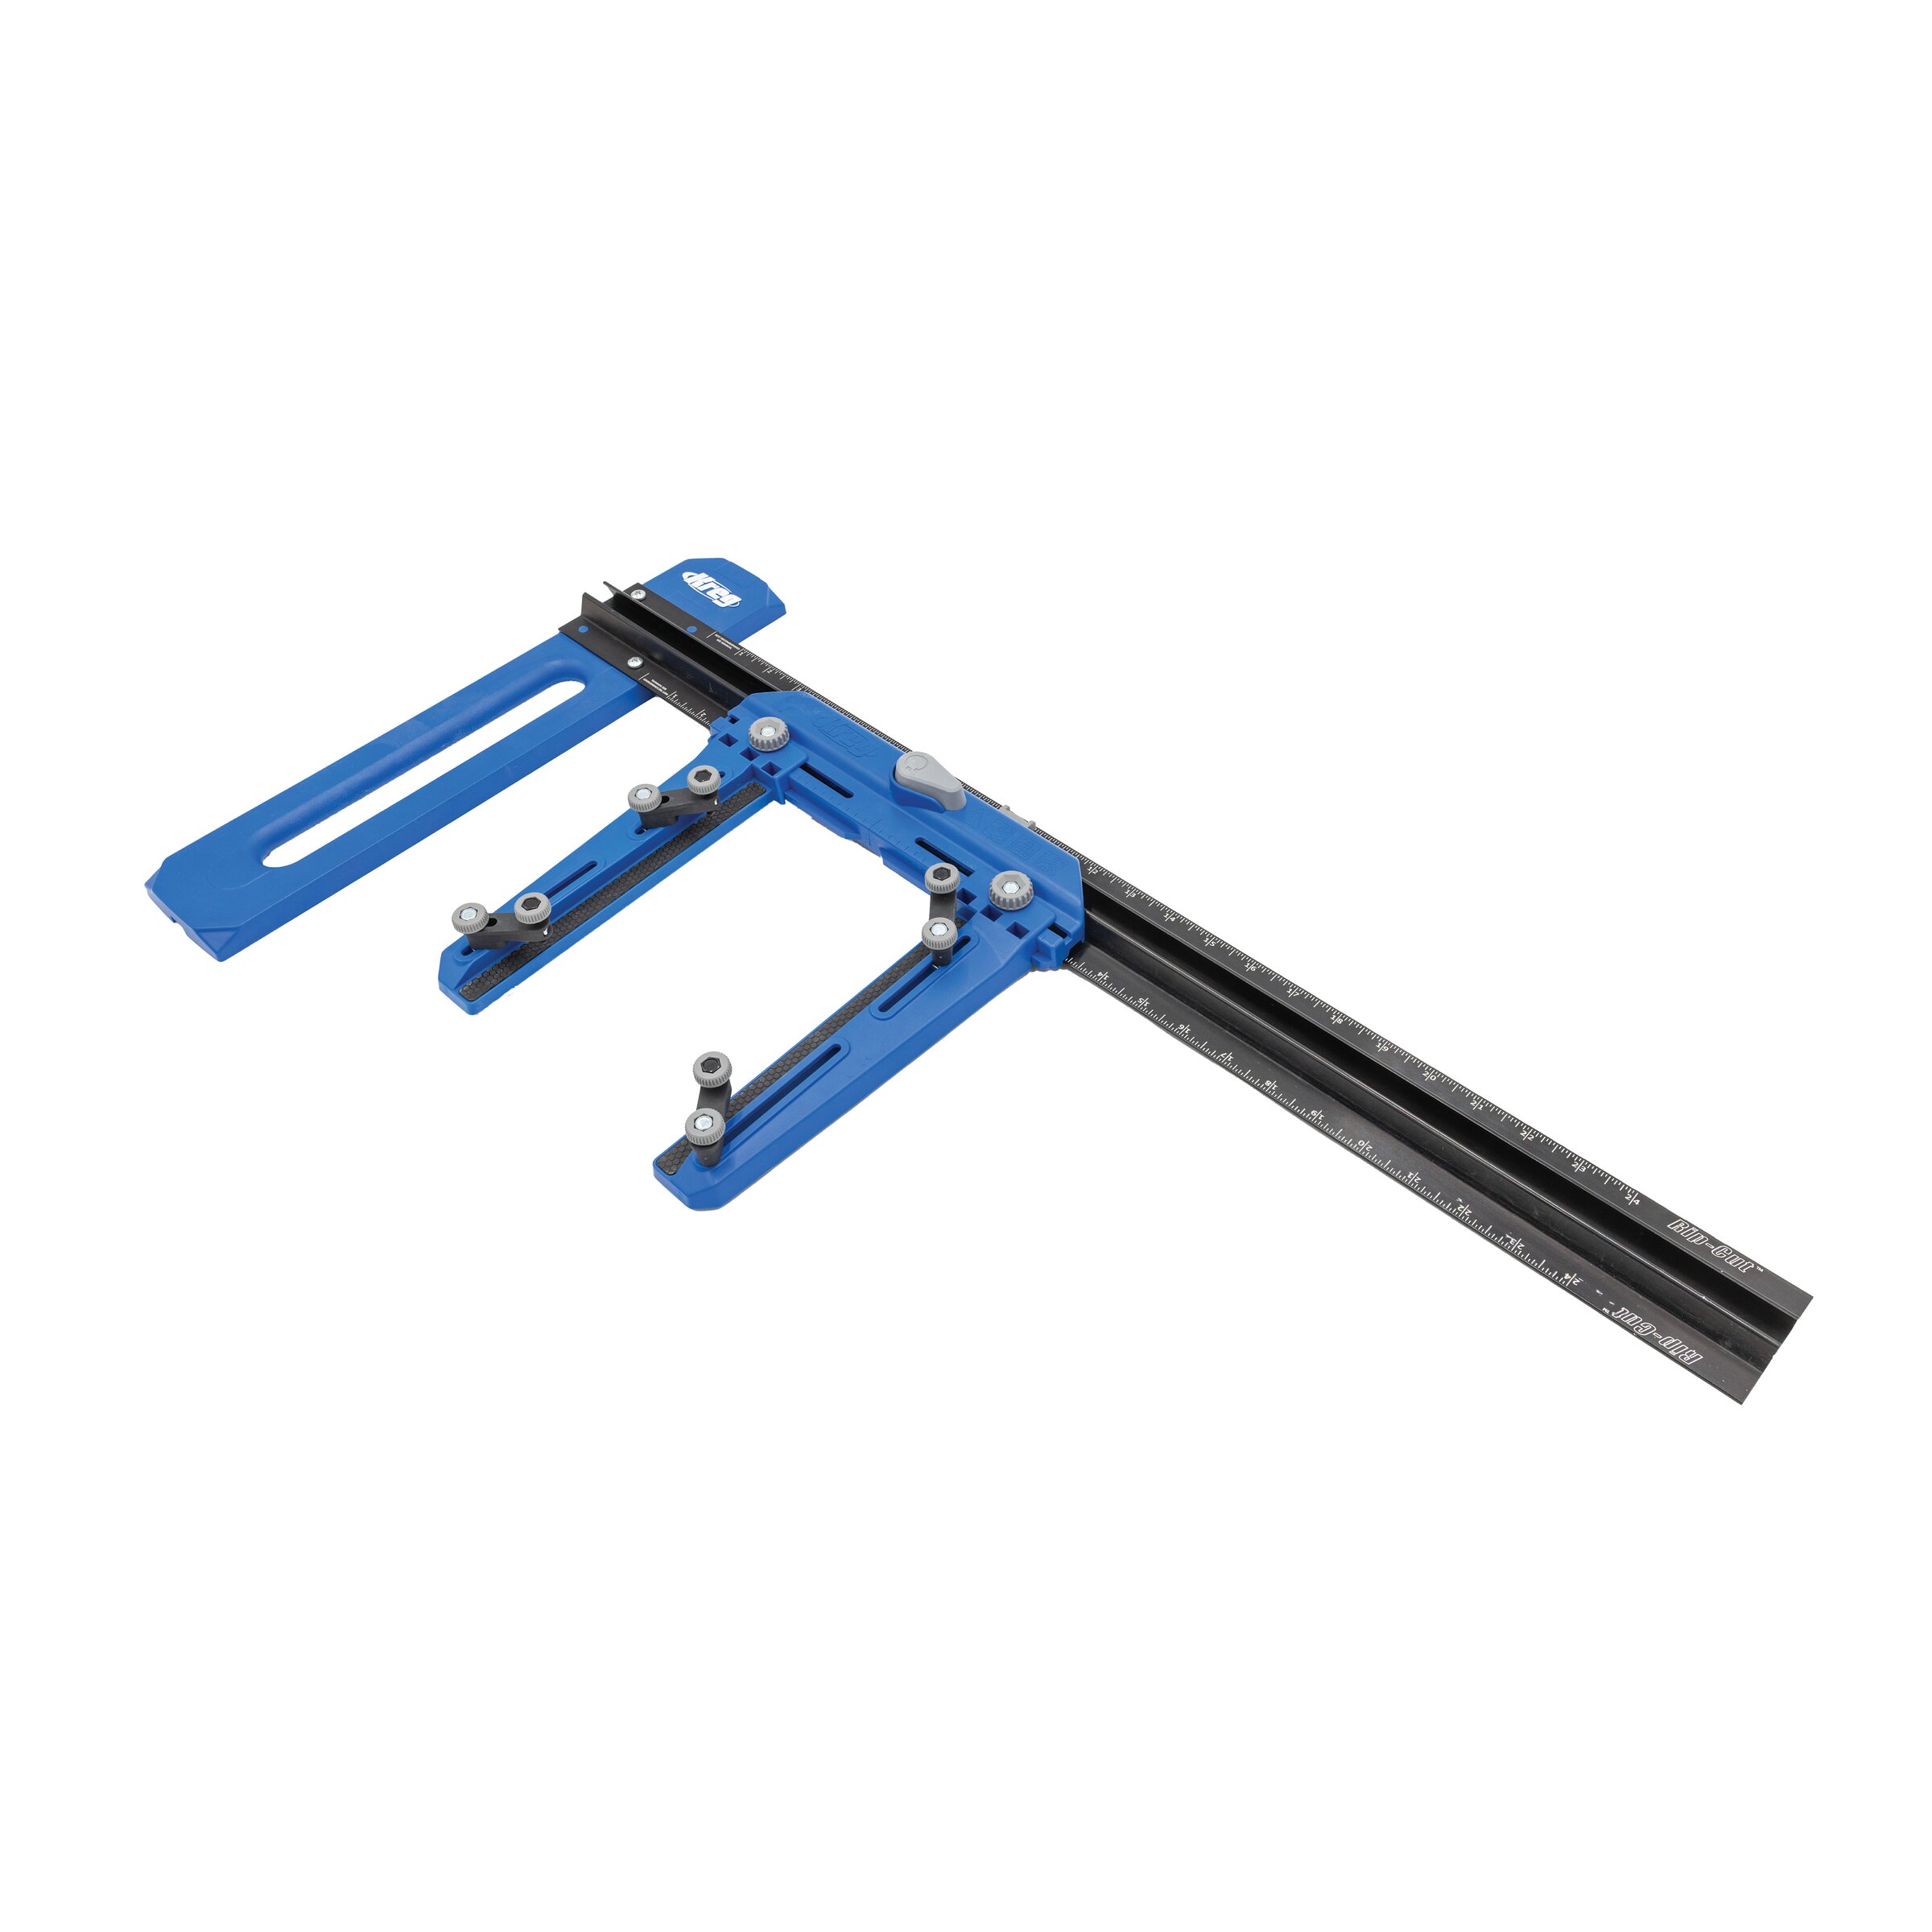
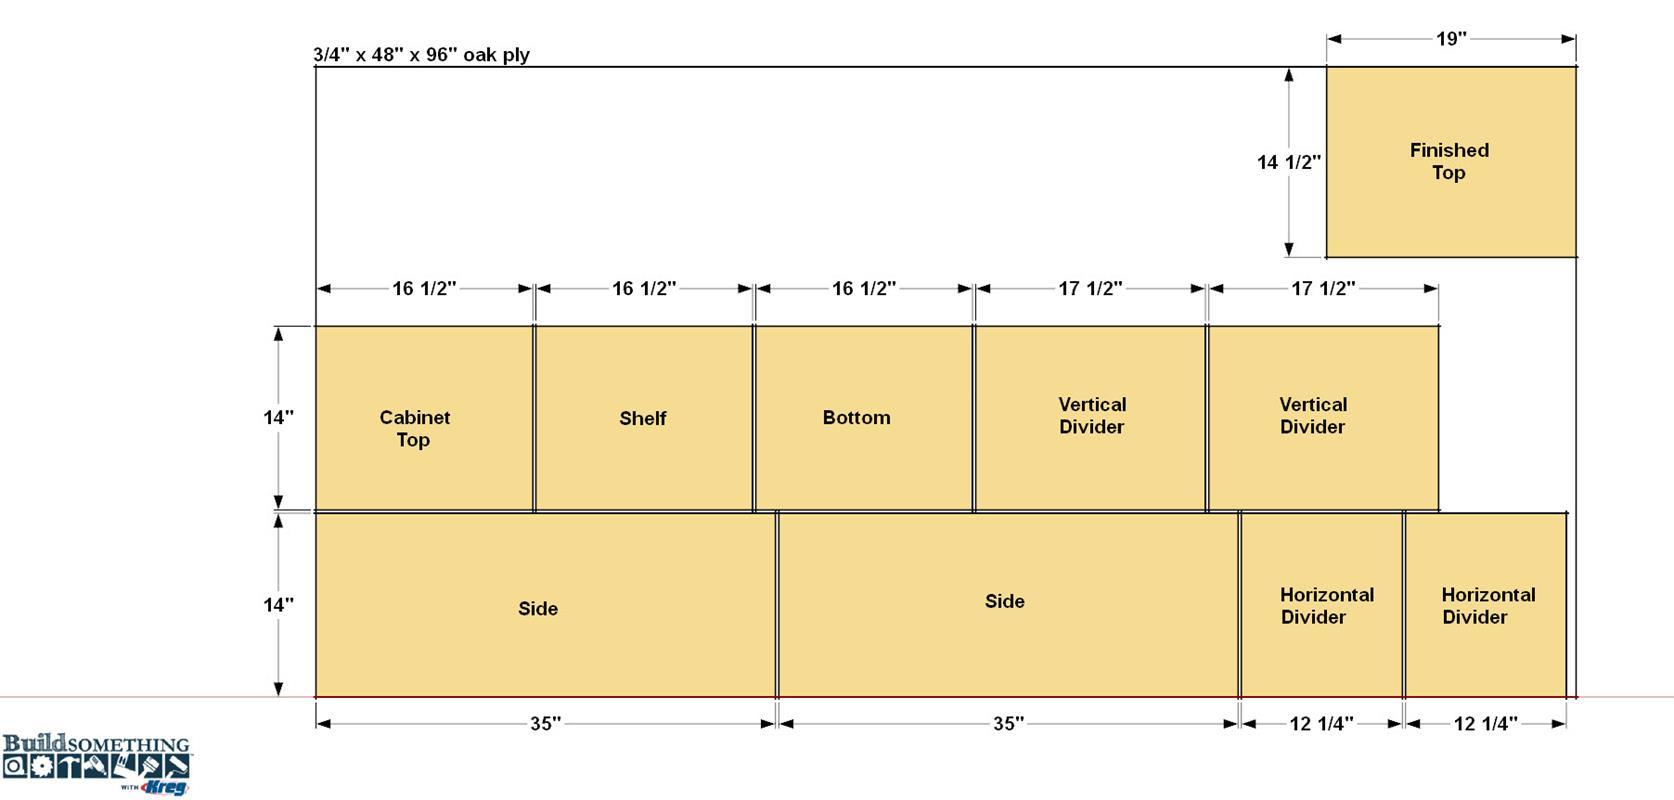
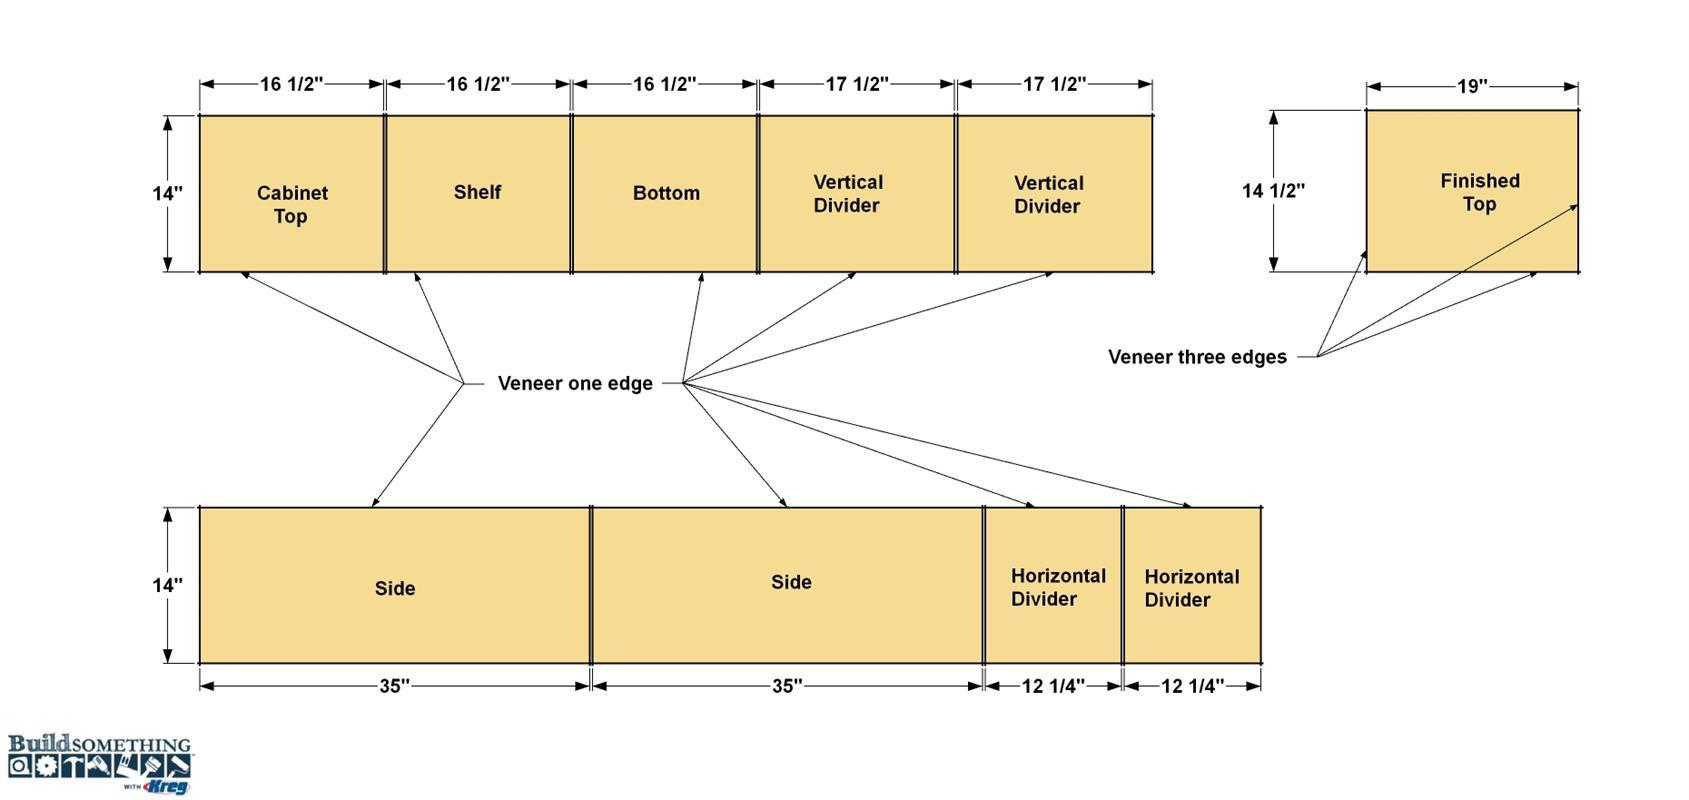
Start by ripping all of the cabinet parts to finished size from a sheet of 3/4" oak plywood, as shown in the cutting diagram. For this project, it’s more efficient to cut everything now so that you can move on to applying veneer to the edges in Step 2. Be sure, though, that you double check all your measurements, so that you know the parts are sized correctly. The how-to video below will show you how to get straight, smooth cuts in plywood by using a saw guide.
-
Add Iron-On Veneer Edging
To make the plywood parts look like solid wood you can apply iron-on veneer banding to the exposed edges. The video below will show you how. You’ll only need to apply veneer to one edge of most pieces, as shown, except for the Finished Top, which gets covered on three edges. After you glue on the edging, you can trim it to final length with a utility knife, trim it to width using a banding trimmer, and then sand the edges smooth with 220-grit sandpaper. Be careful not to sand through the thin veneer on the plywood. After that, it’s a good idea to mark the name of each part so you can keep them sorted in upcoming steps. You can use pencil, apply masking tape, or note the name on one of the edges that won’t show.
-
Cabinet Top, Shelf, and Bottom
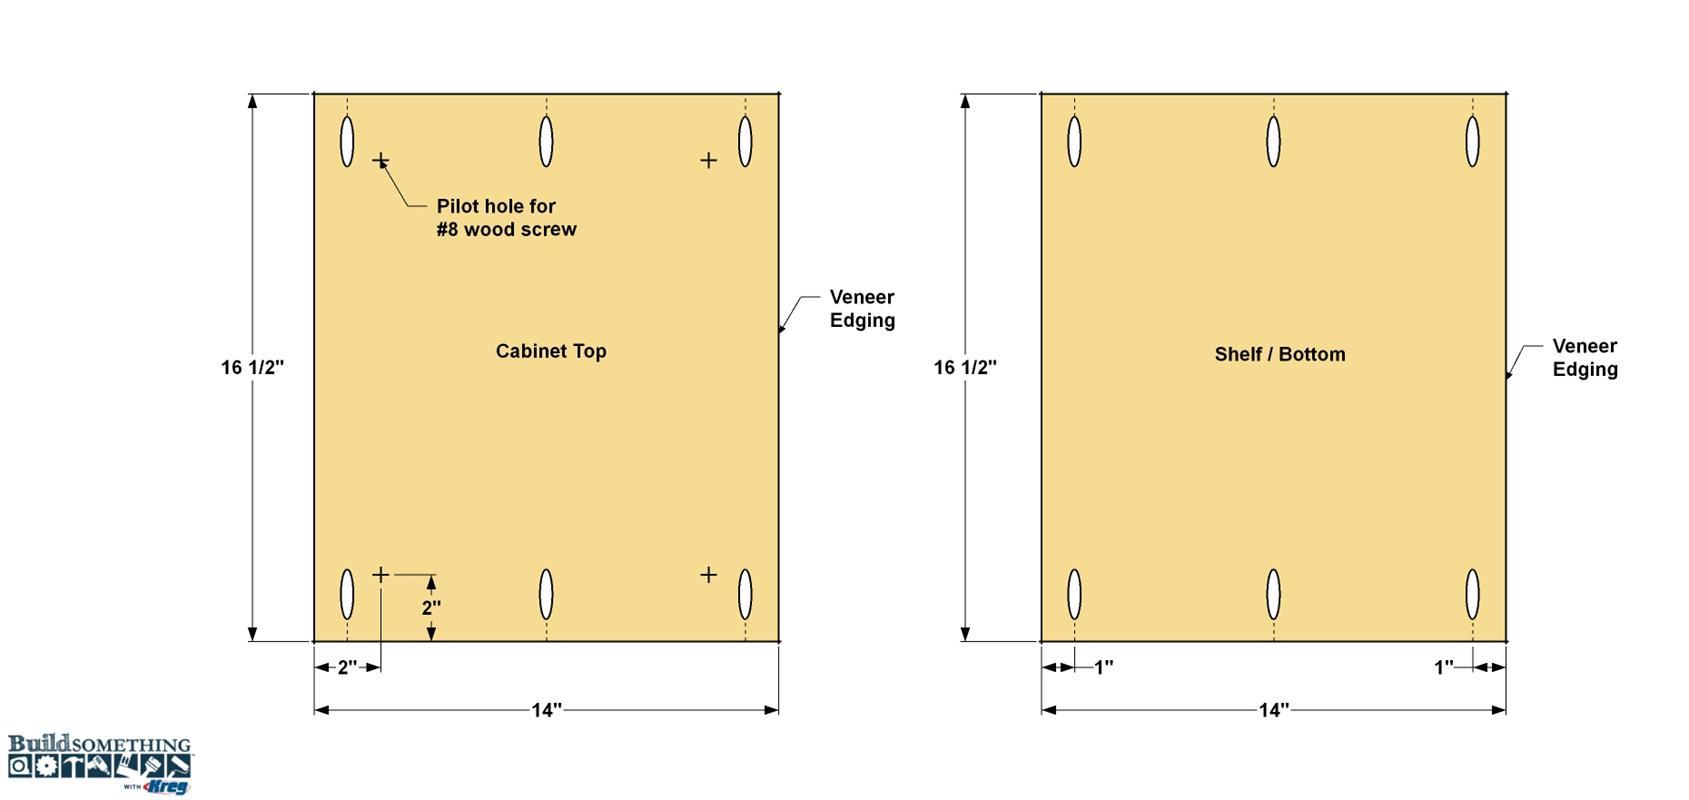
With all the parts edged, it’s time to drill pocket holes. Let’s begin with the Cabinet Top, Bottom and Shelf. Set your Kreg Pocket-Hole Jig for 3/4"-thick material, and then drill pocket holes in each of the parts at the locations shown. On the Cabinet Top, drill four countersunk pilot holes where shown, as well. These are for attaching the Finished Top to the cabinet in one of the final assembly steps.
Set the Shelf and Bottom aside for later steps. -
Attach the Top and Shelf to Sides
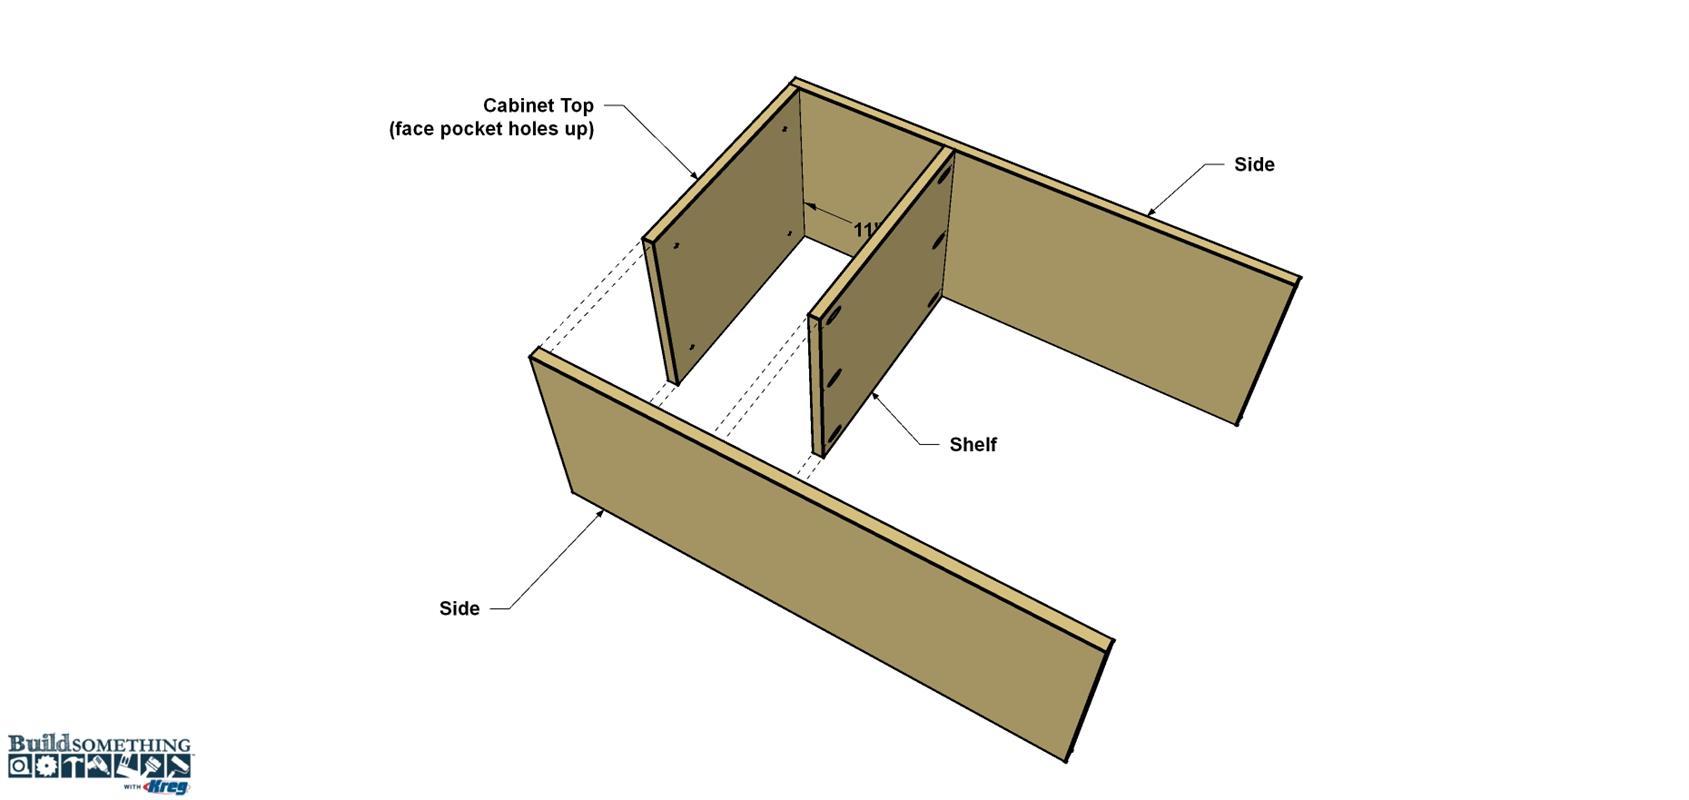
Assemble the cabinet parts as a “dry-fit” (which means you won’t be using any glue). This way, you can get all the parts aligned and make sure everything goes together correctly. Later, you’ll take the cabinet apart again. It requires a bit more work, but it lets you stain and finish all the parts lying flat, which makes it much easier to get a great finish. For now, just position the Position the Top between the Sides making sure the edges are flush. Note that the pocket holes are on the outer surface. They’ll get covered later.. Secure the Top with clamps and attach the parts using 1 1/4" coarse-thread Kreg Screws. Repeat the process for the Shelf.
-
Make the Dividers
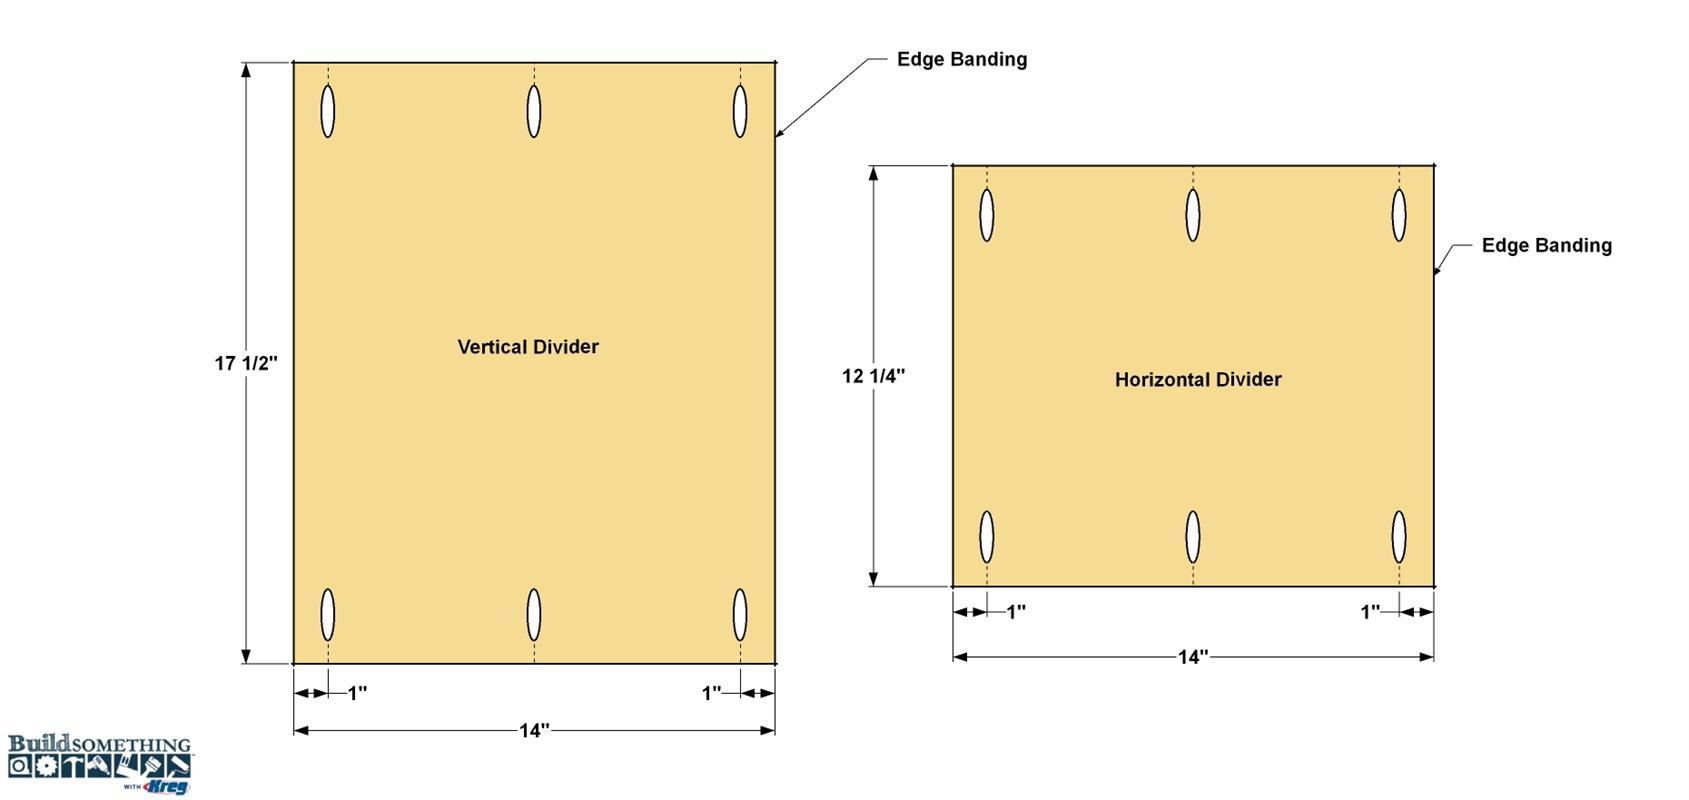
Drill Pocket holes in the two Vertical dividers and the two Horizontal Dividers where shown. Set one Vertical and two Horizontal Dividers aside for a later step.
-
Add the First Horizontal Divider
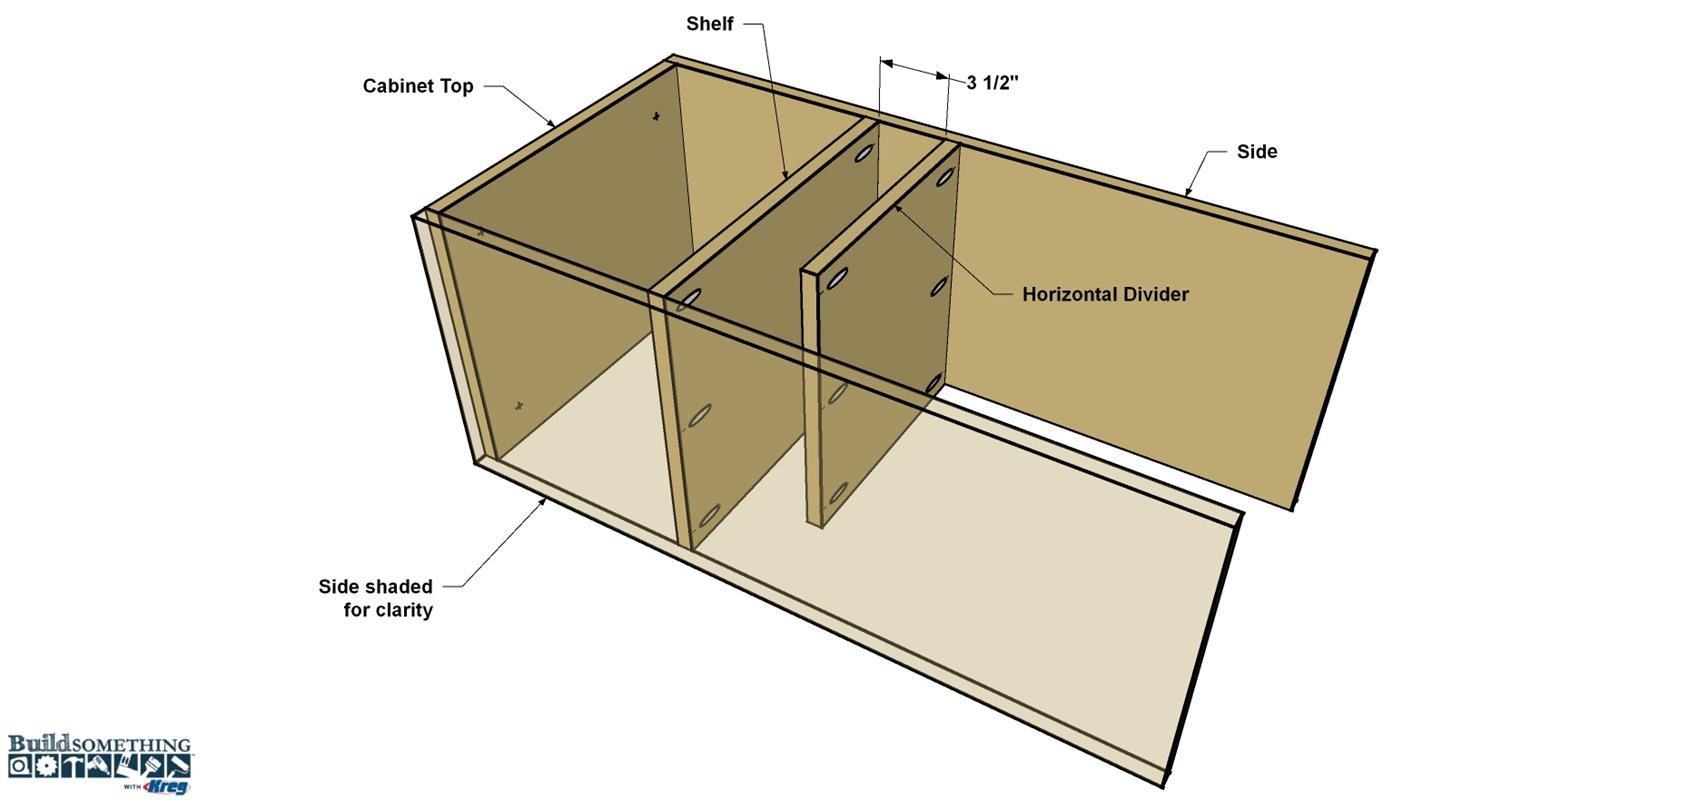
Mark the location where the Horizontal Divider will attach to the right-hand Side and draw a light pencil line across the panel using a square. You can also use a 1x4 board as a spacer to position the Horizontal Divider. Clamp the Horizontal Divider in place, and then attach it to the Side using 1 1/4" coarse-thread Kreg Screws.
-
Add the First Vertical Divider
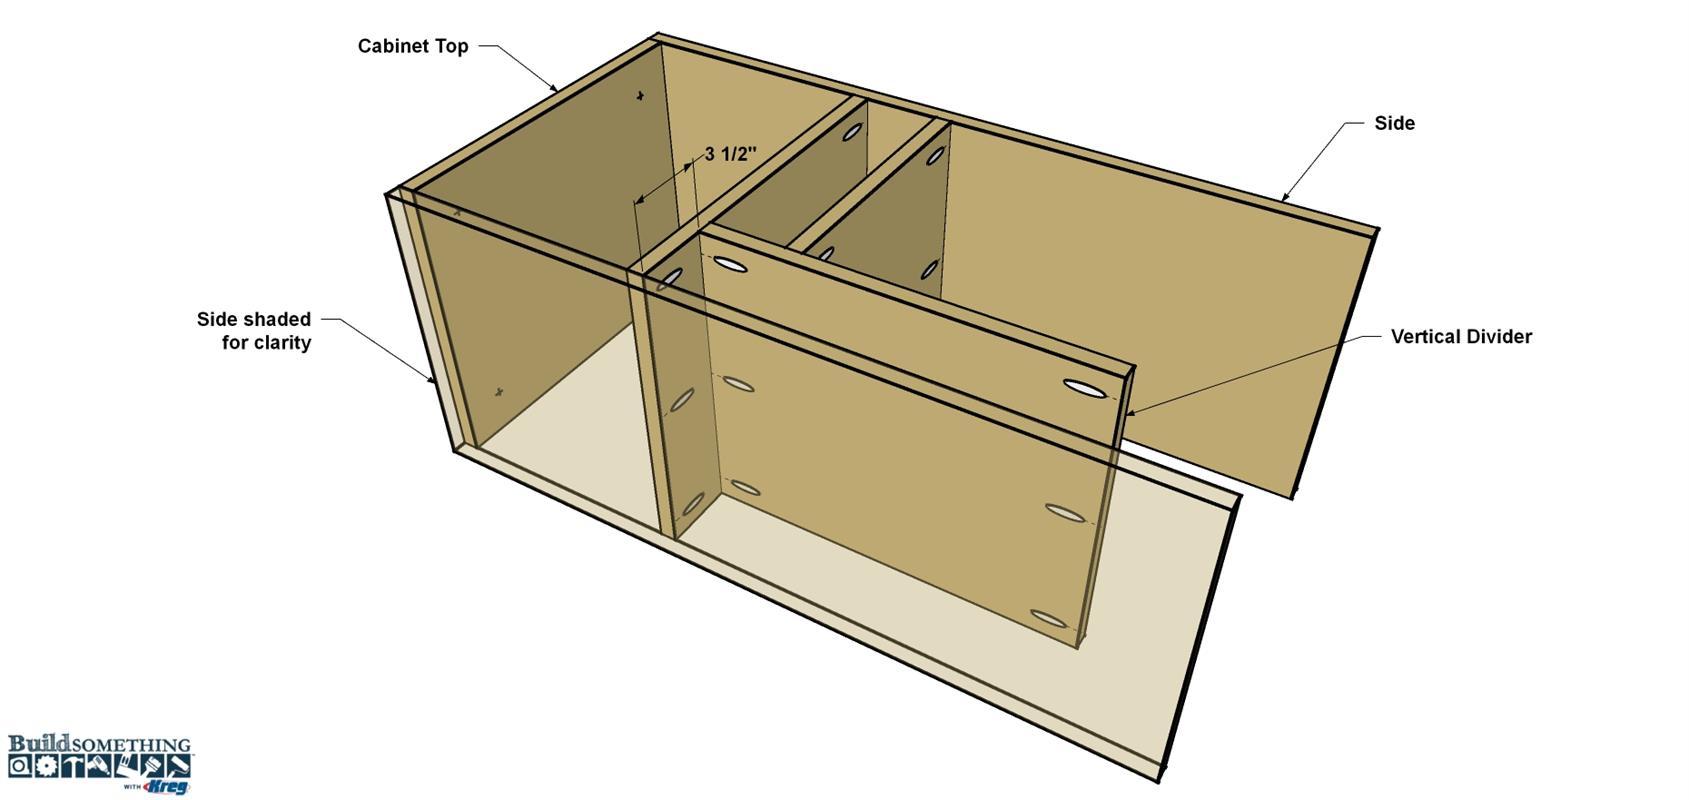
Next, you can add the first Vertical Divider, which attaches to the Shelf and Horizontal Divider, as shown. There’s not a lot of space inside the cabinet for driving the pocket-hole screws, but you can still do it easily by using a right-angle drill attachment. The video below shows how one works. Position the Vertical Divider against the Shelf and the Horizontal Divider and clamp it in place. Attach the parts using 1 1/4" coarse-thread Kreg Screws.
-
Add the Second Horizontal Divider
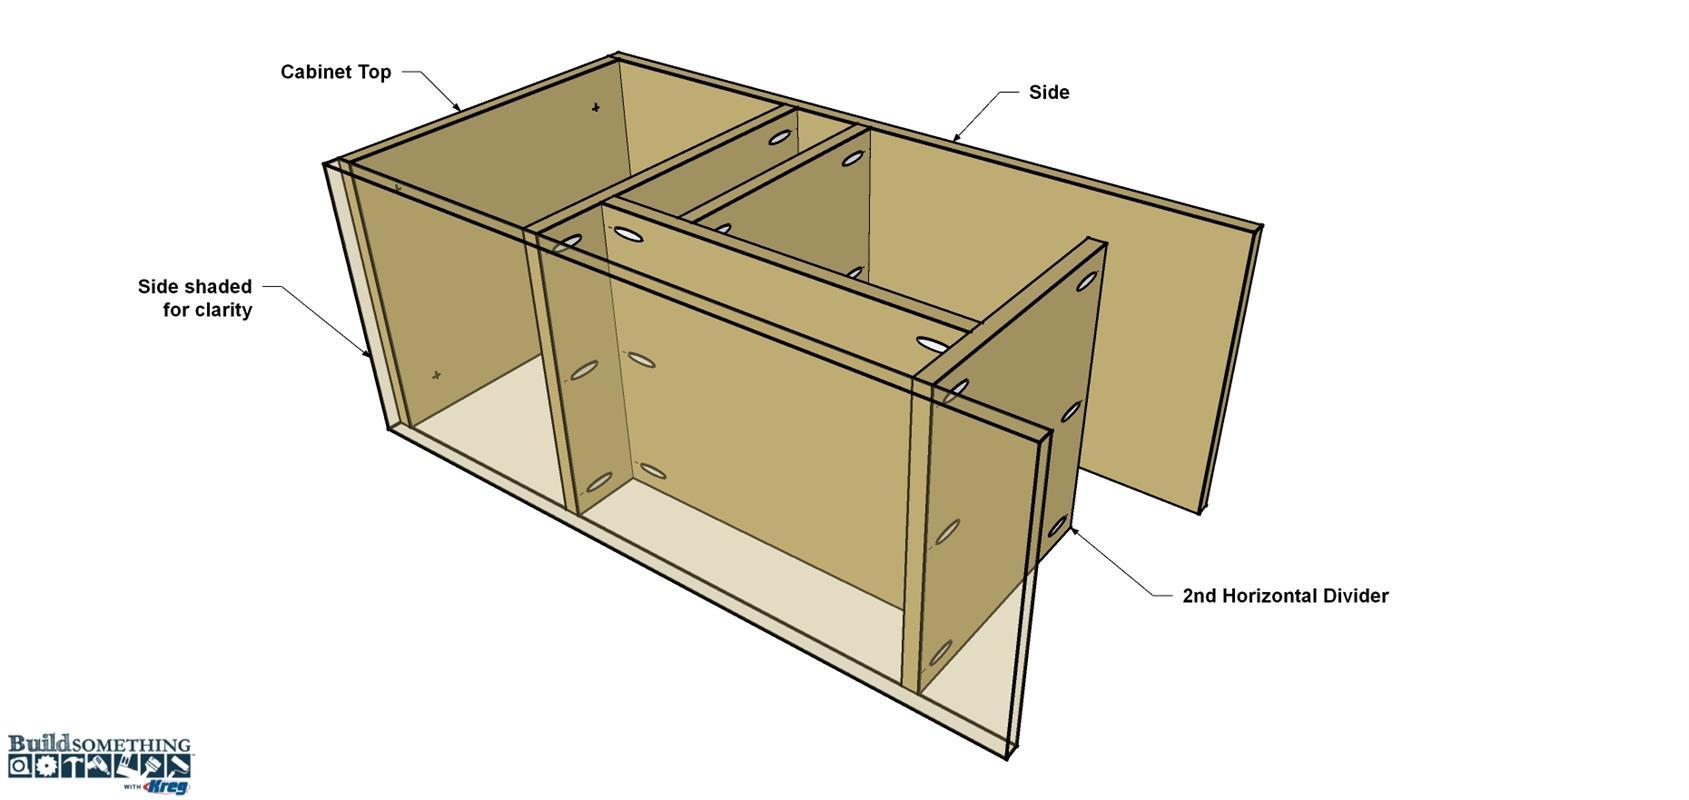
Position the Second Horizontal Divider against the Vertical Divider, clamp it in position as shown, and then secure it to the Vertical Divider and to the Side using 1 1/4" coarse-thread Kreg Screws.
-
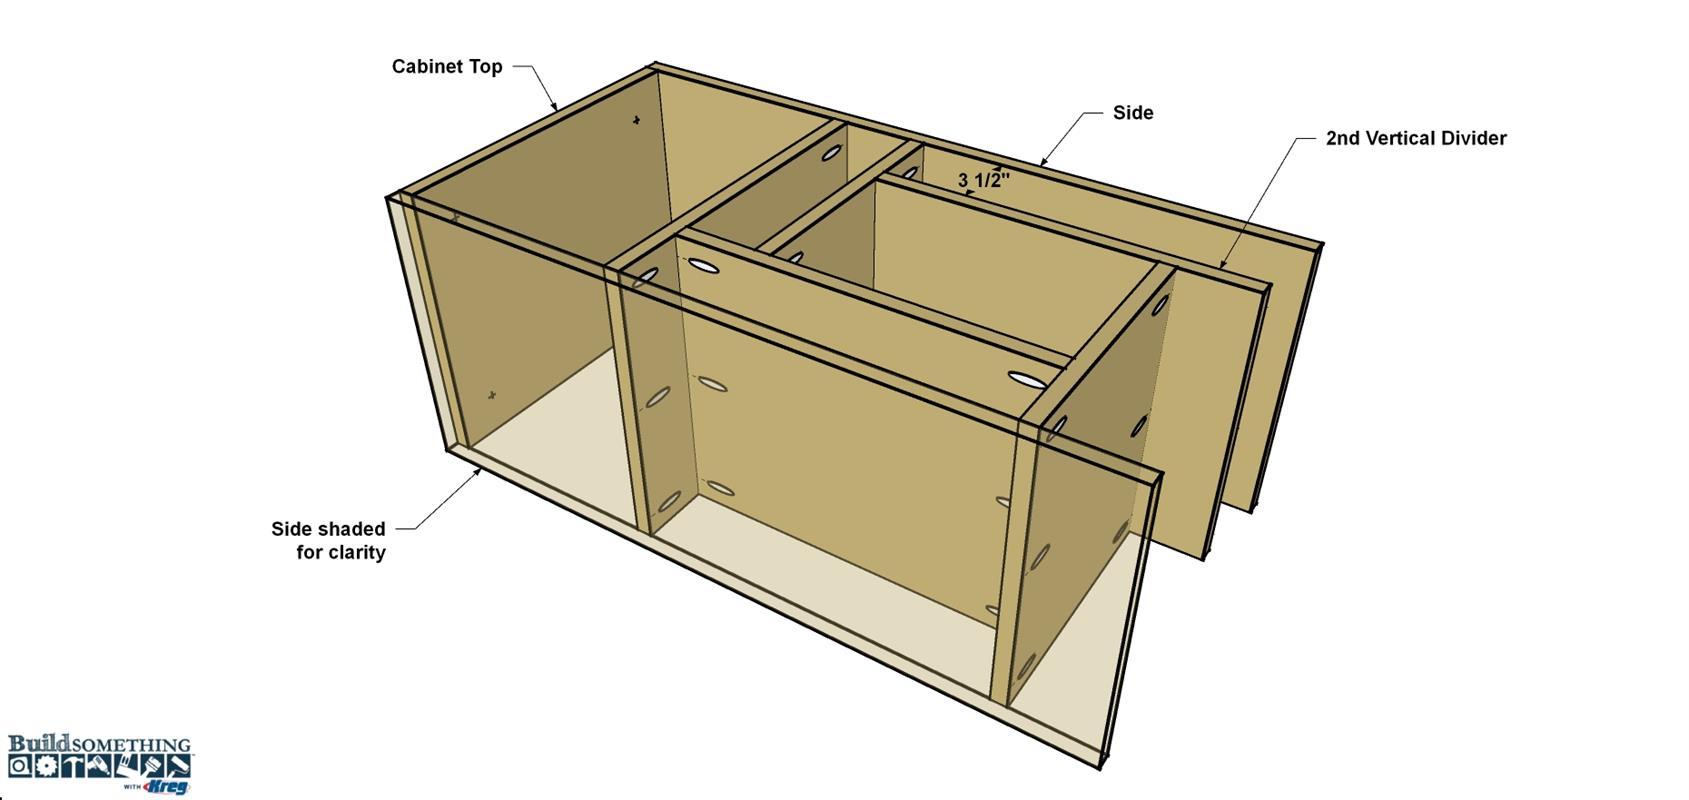
Add Second Vertical Divider
Position the Second Vertical Divider against the Horizontal divider, clamp it in position and secure it using 1 1/4" coarse-thread Kreg screws, as shown.
-
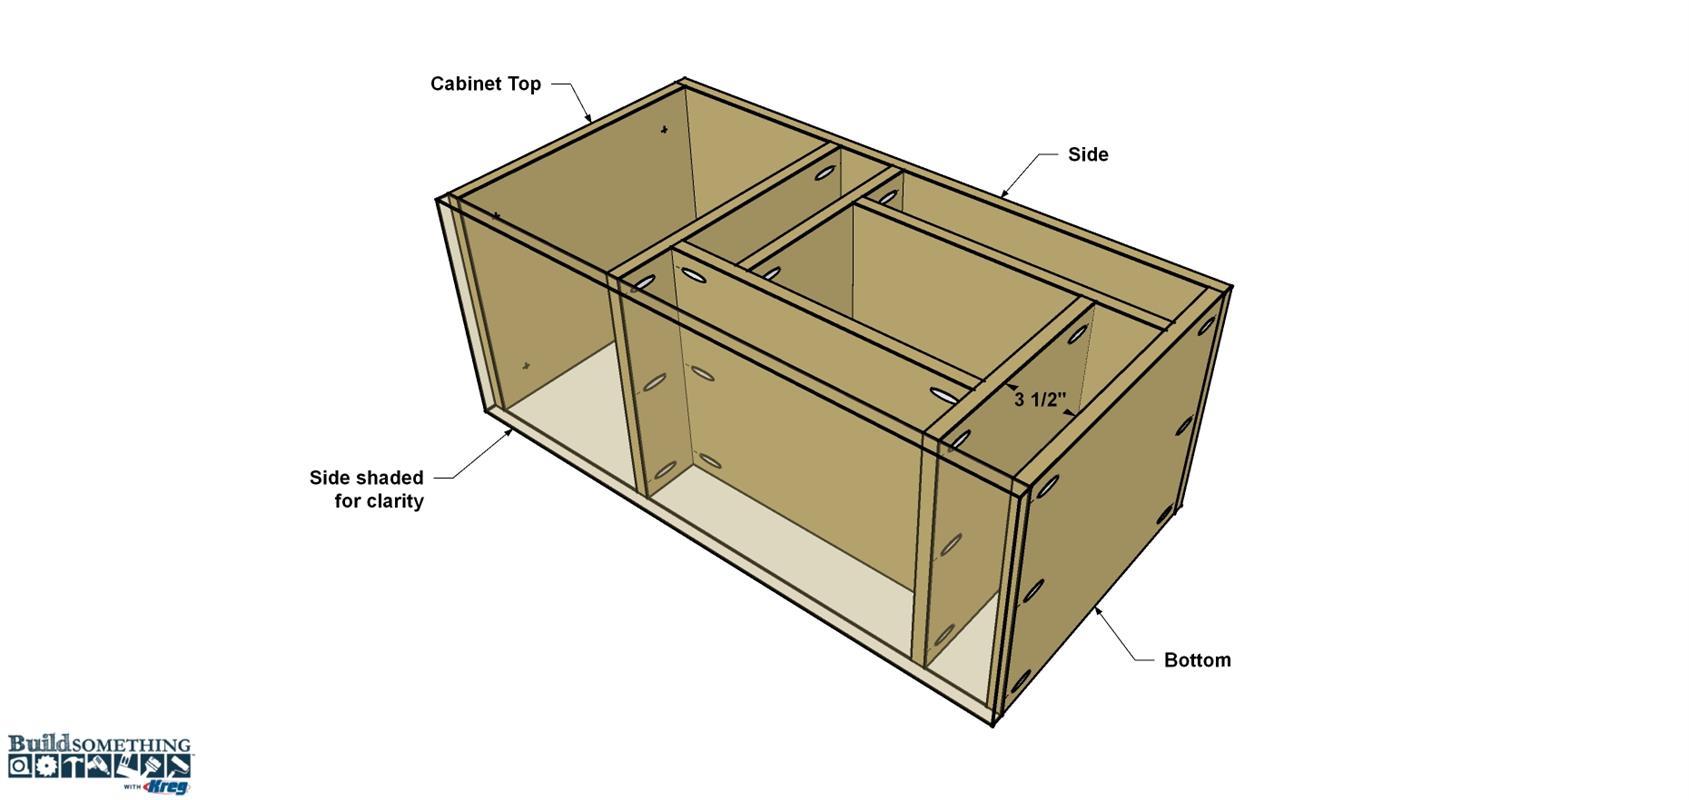
Add the Bottom
Finally, add the Bottom to the cabinet, as shown, with the pocket holes facing outward. Secure the Bottom to the Sides and to the Vertical Divider using 1 1/4" coarse-thread Kreg screws.
-
Attach the Finished Top
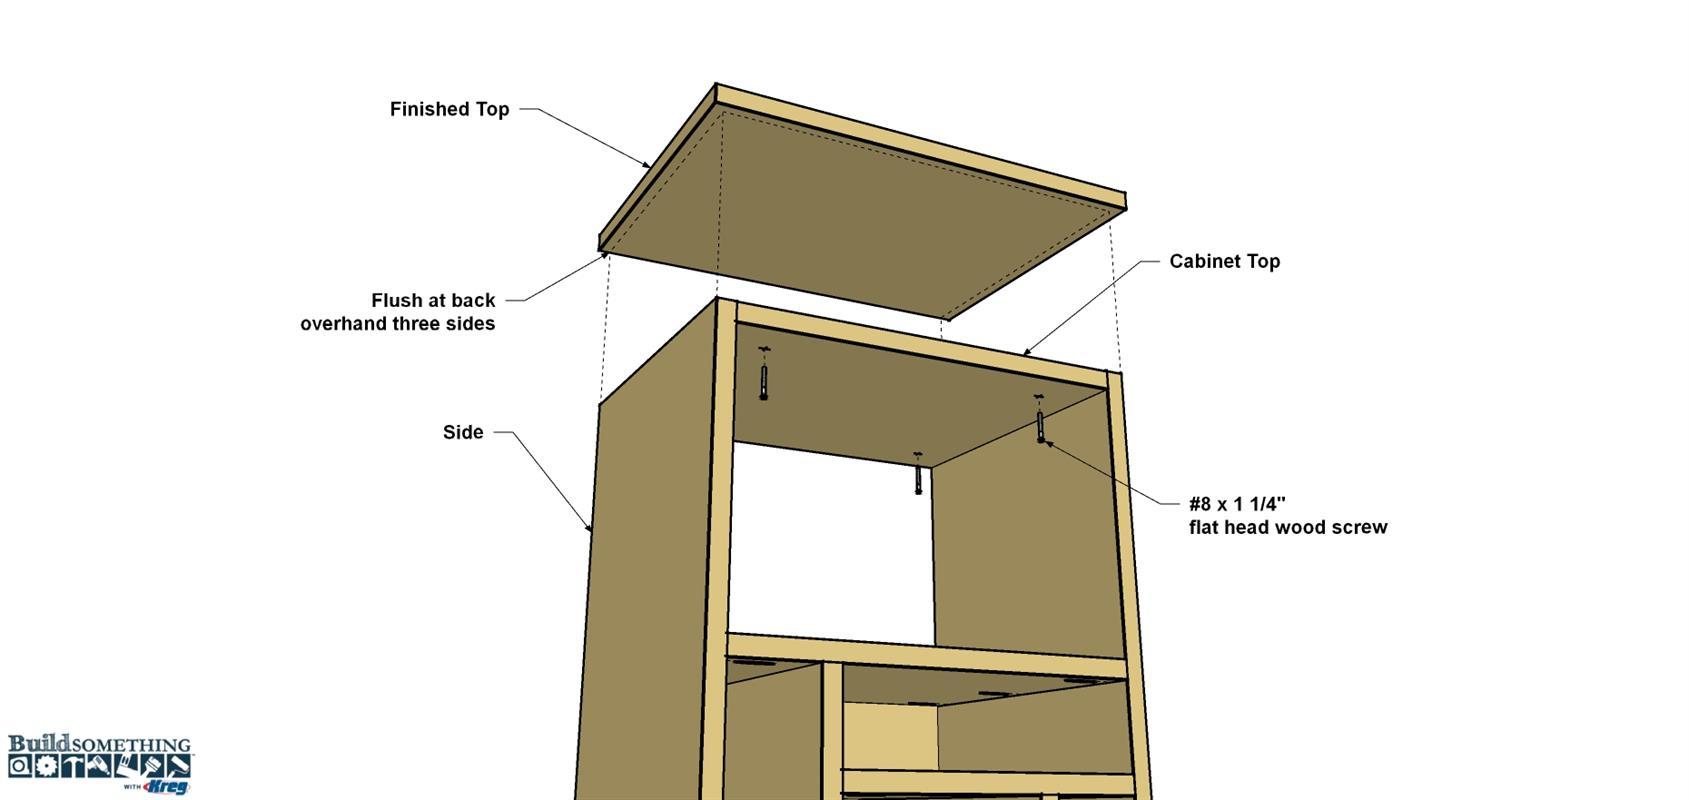
Place the Finished Top in position so the back is flush to the back of the Cabinet Top and the other three side overhang equally.
To secure the Finished Top to the cabinet, drive four 1 1/4" flat-head wood screws up through the Cabinet Top into the Finished Top. -
Make the Back
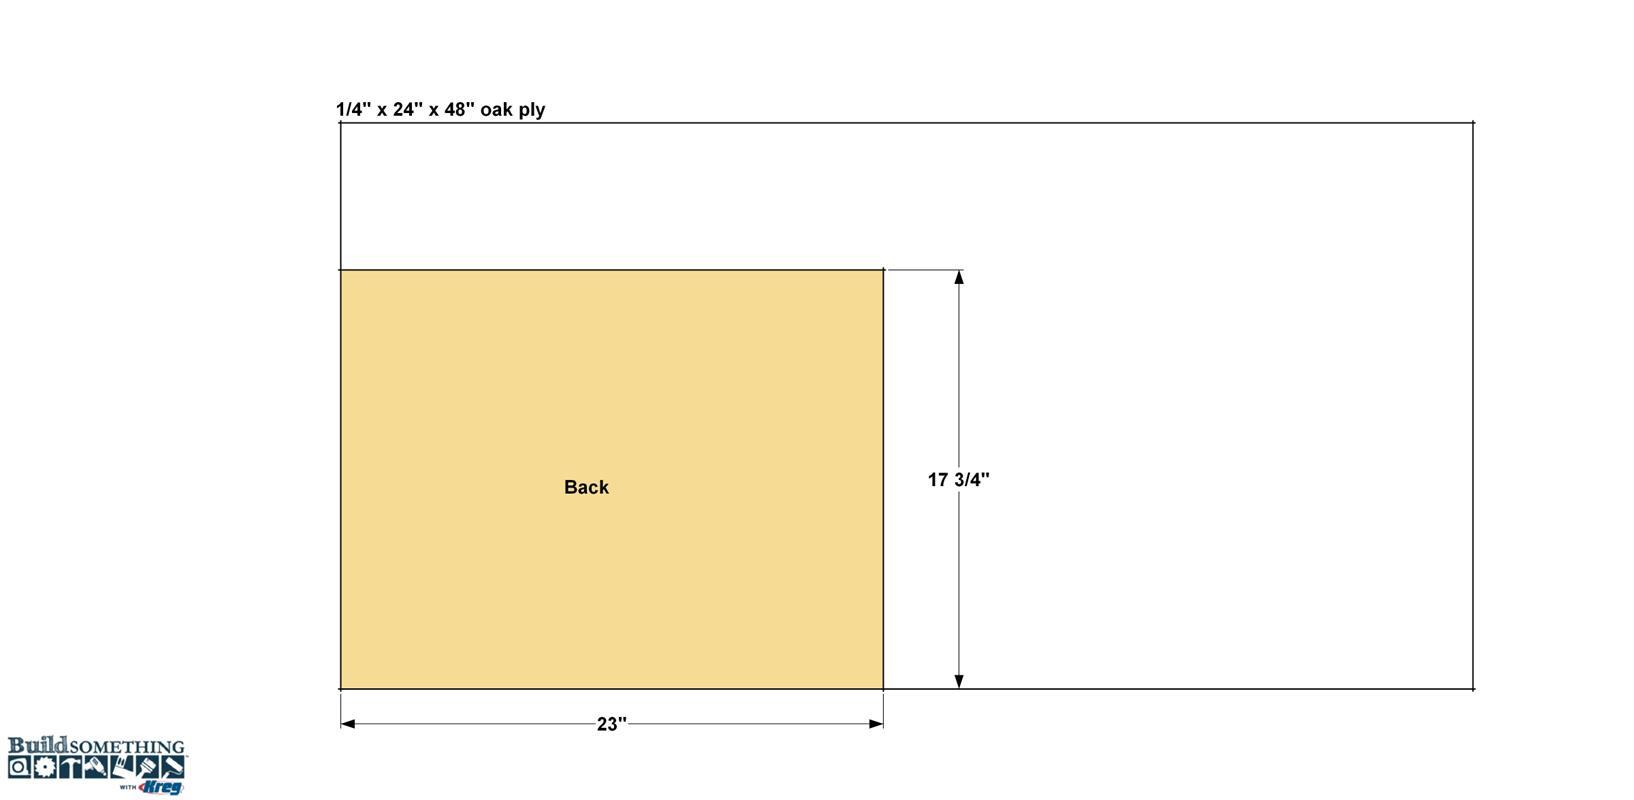
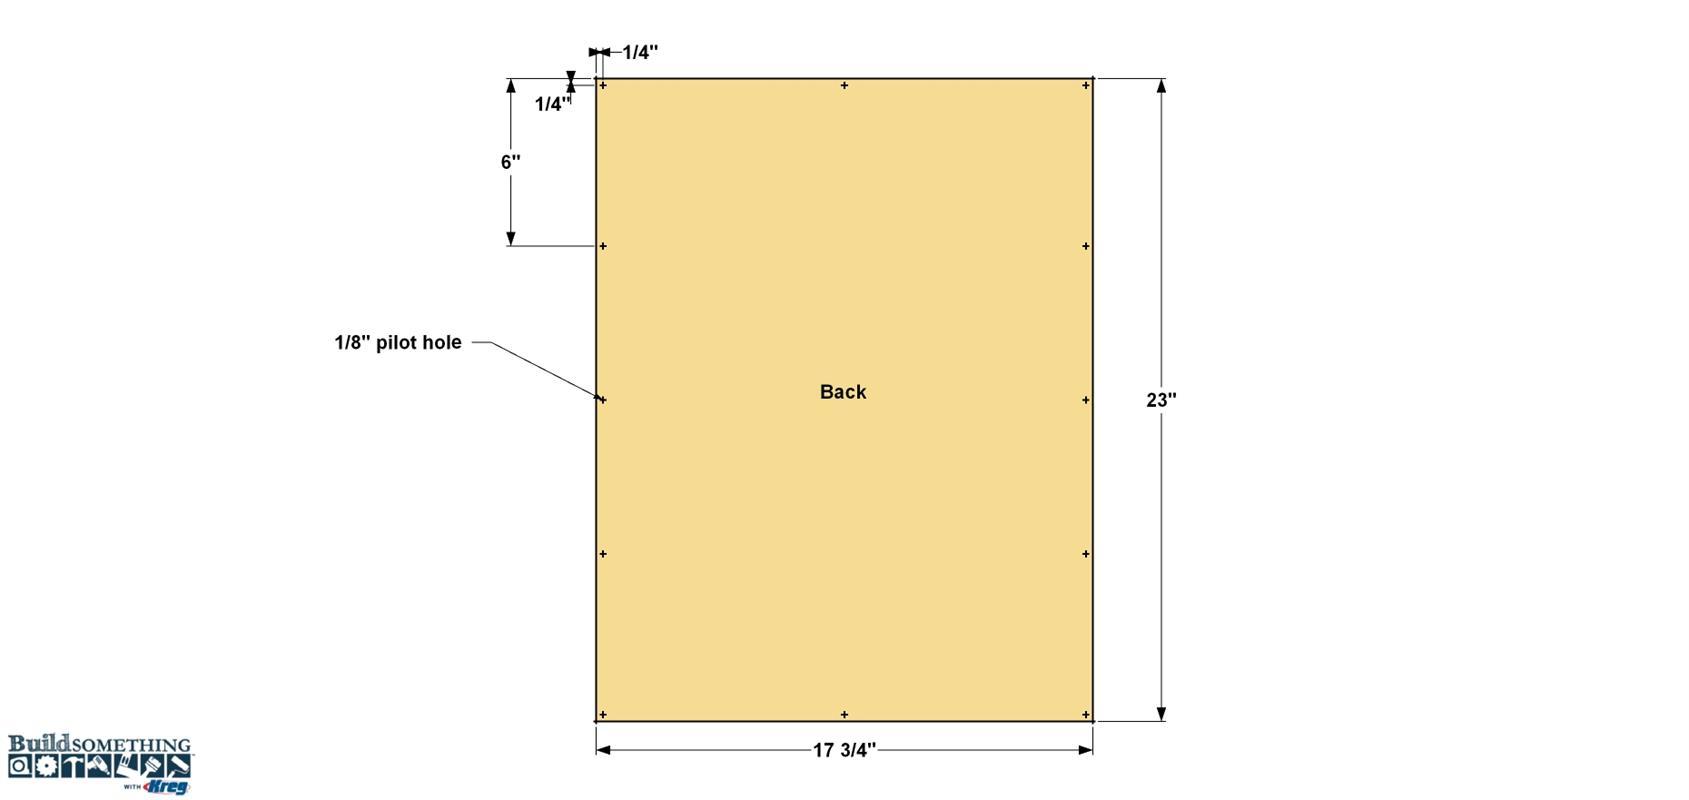
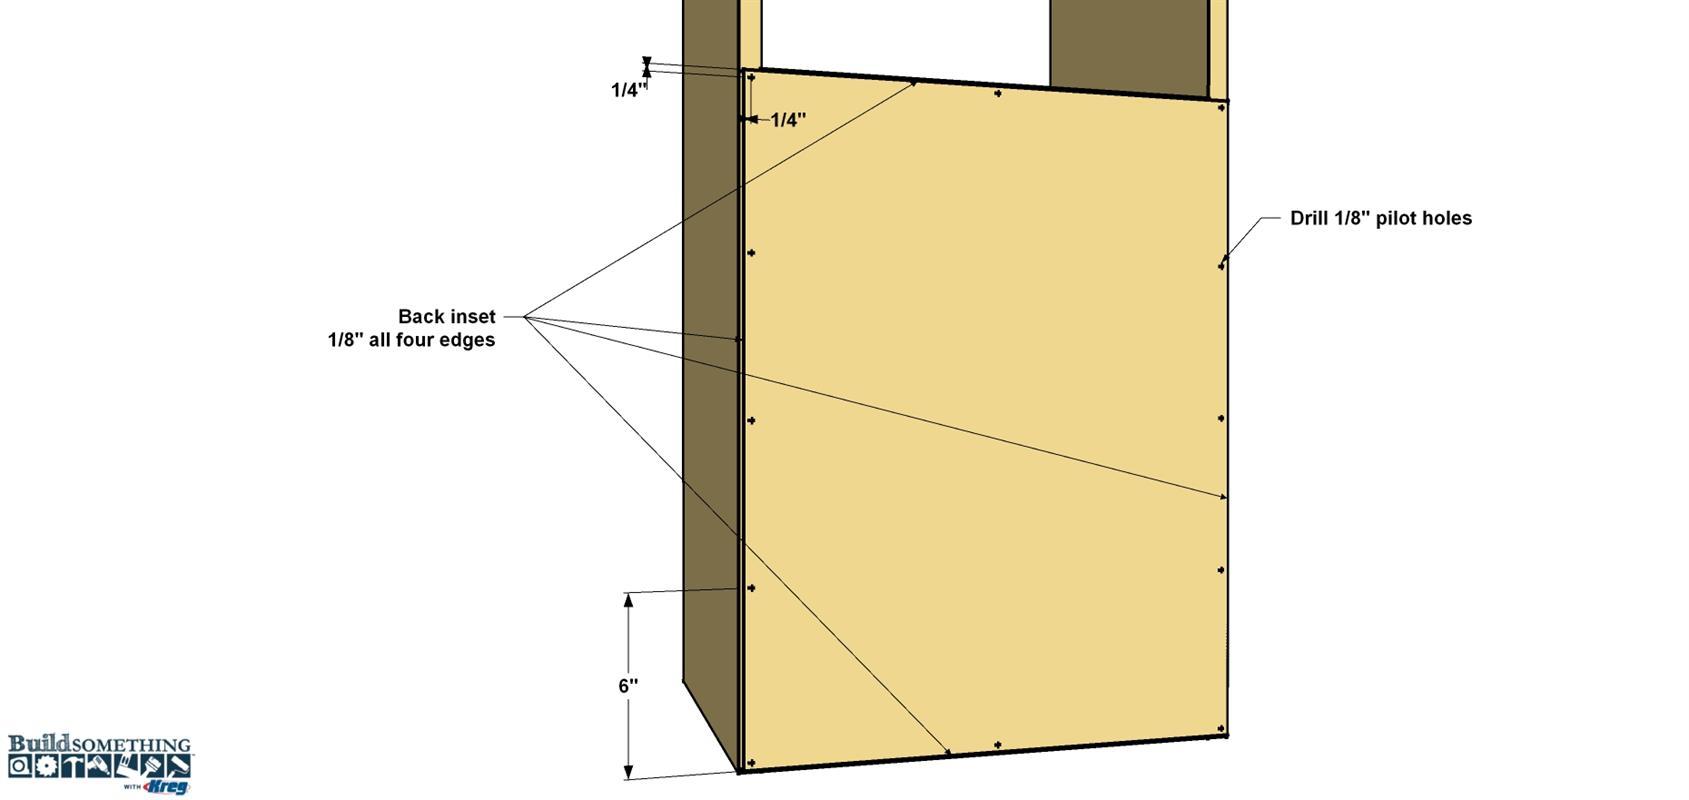
Cut the Back to size from 1/4" plywood, as shown in the cutting diagram. Then drill 1/8" pilot holes around the perimeter at the locations shown. You’ll use these to attach the Back to the Cabinet with short screws in the next step.
-
Install the Back
Now you can position the Back on the cabinet. As the illustration shows, the Back is slightly undersize, so it sits 1/8" in from the edge of all the panels. Align the back, and then attach it using #6 x 5/8" pan-head wood screws.
-
Make the Legs
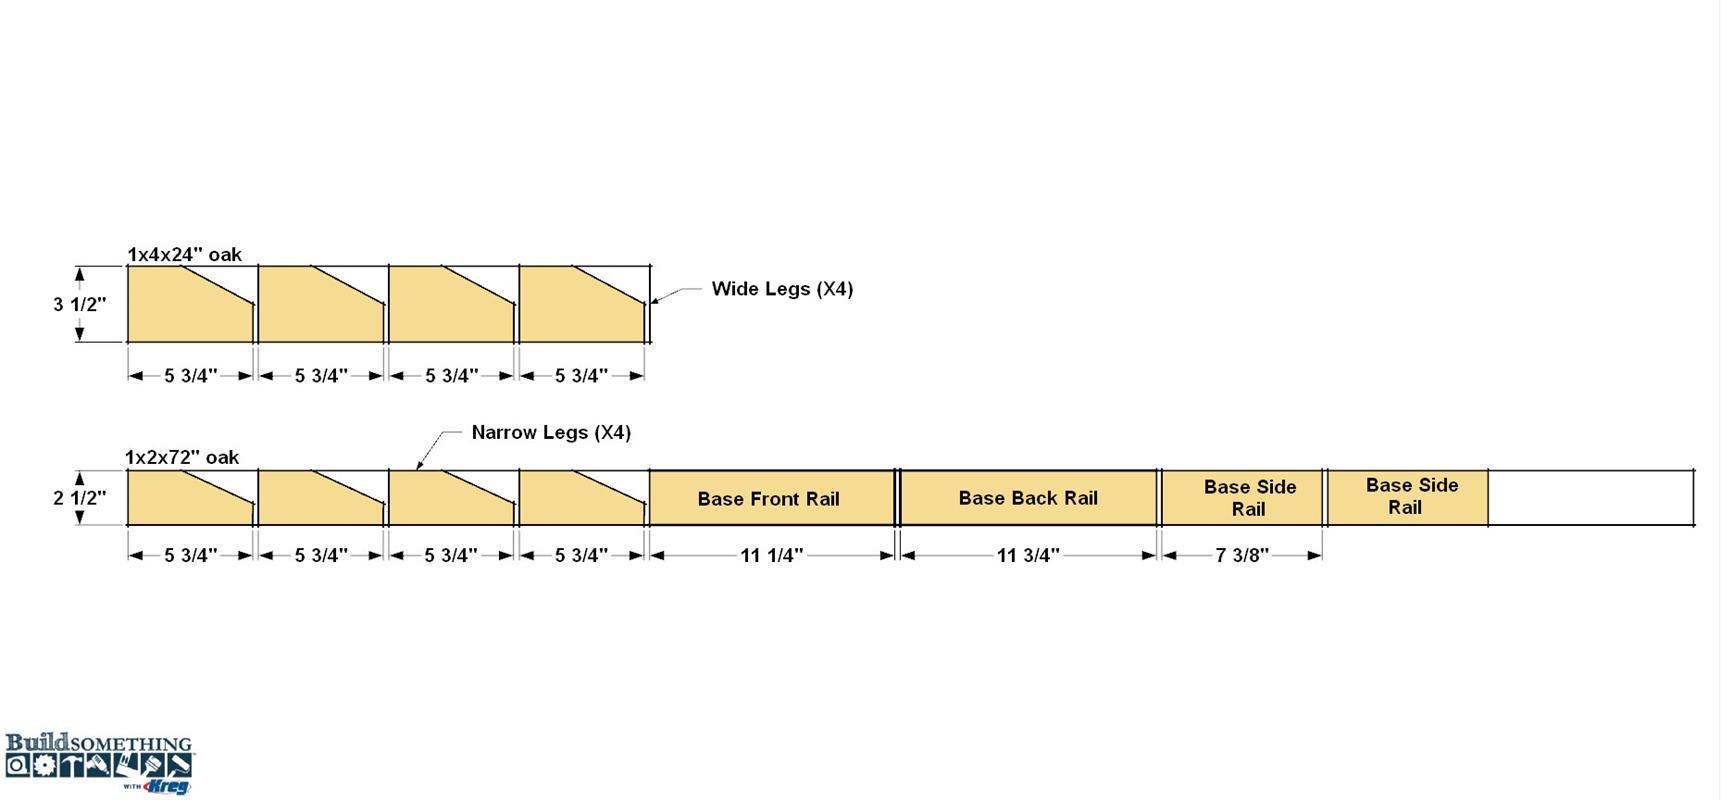
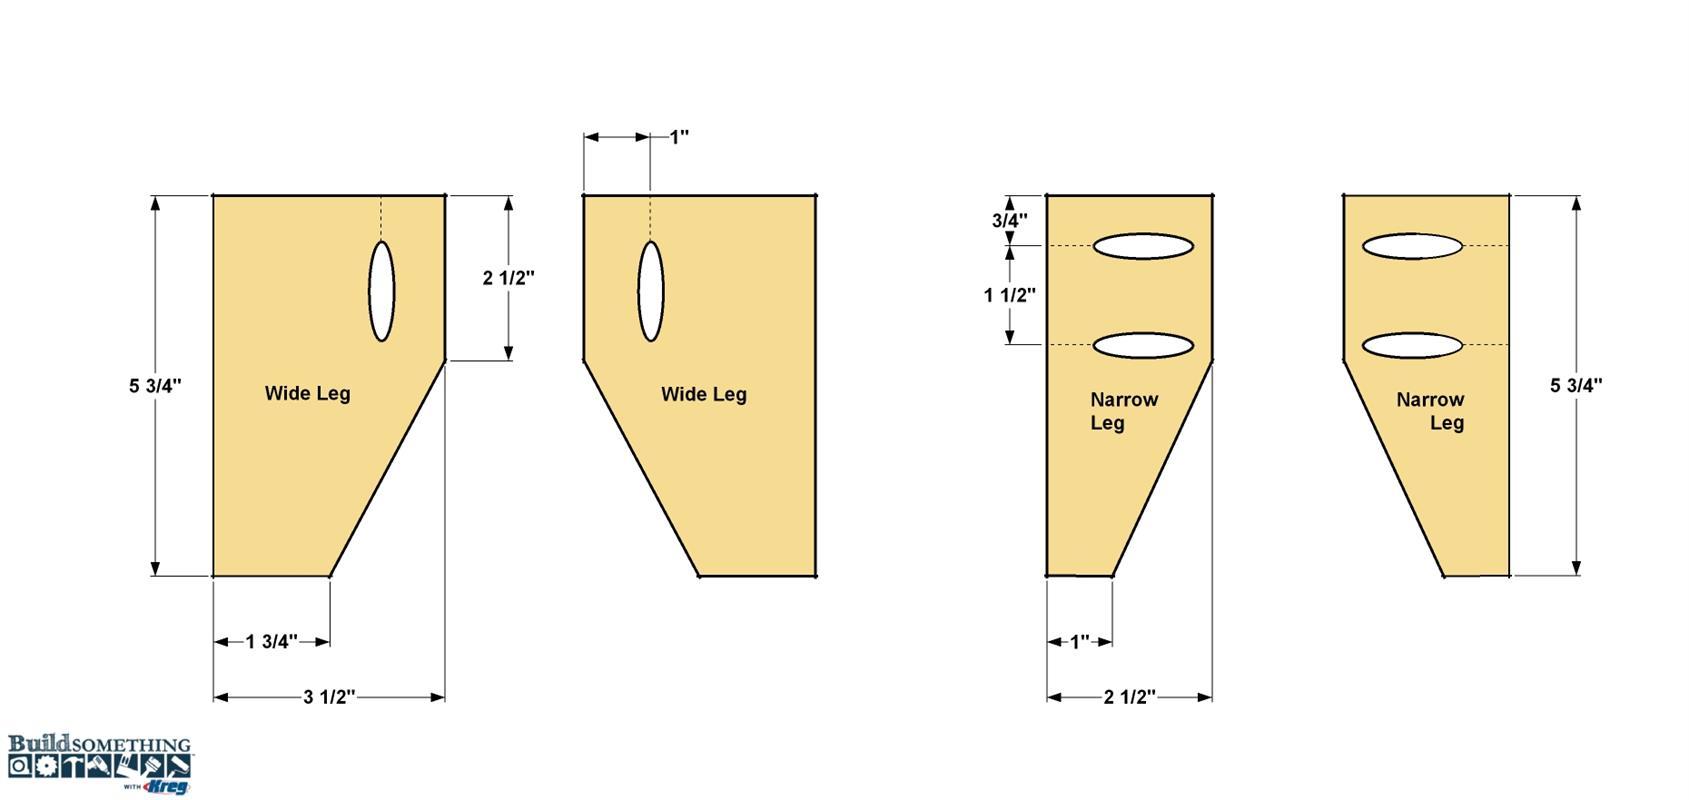
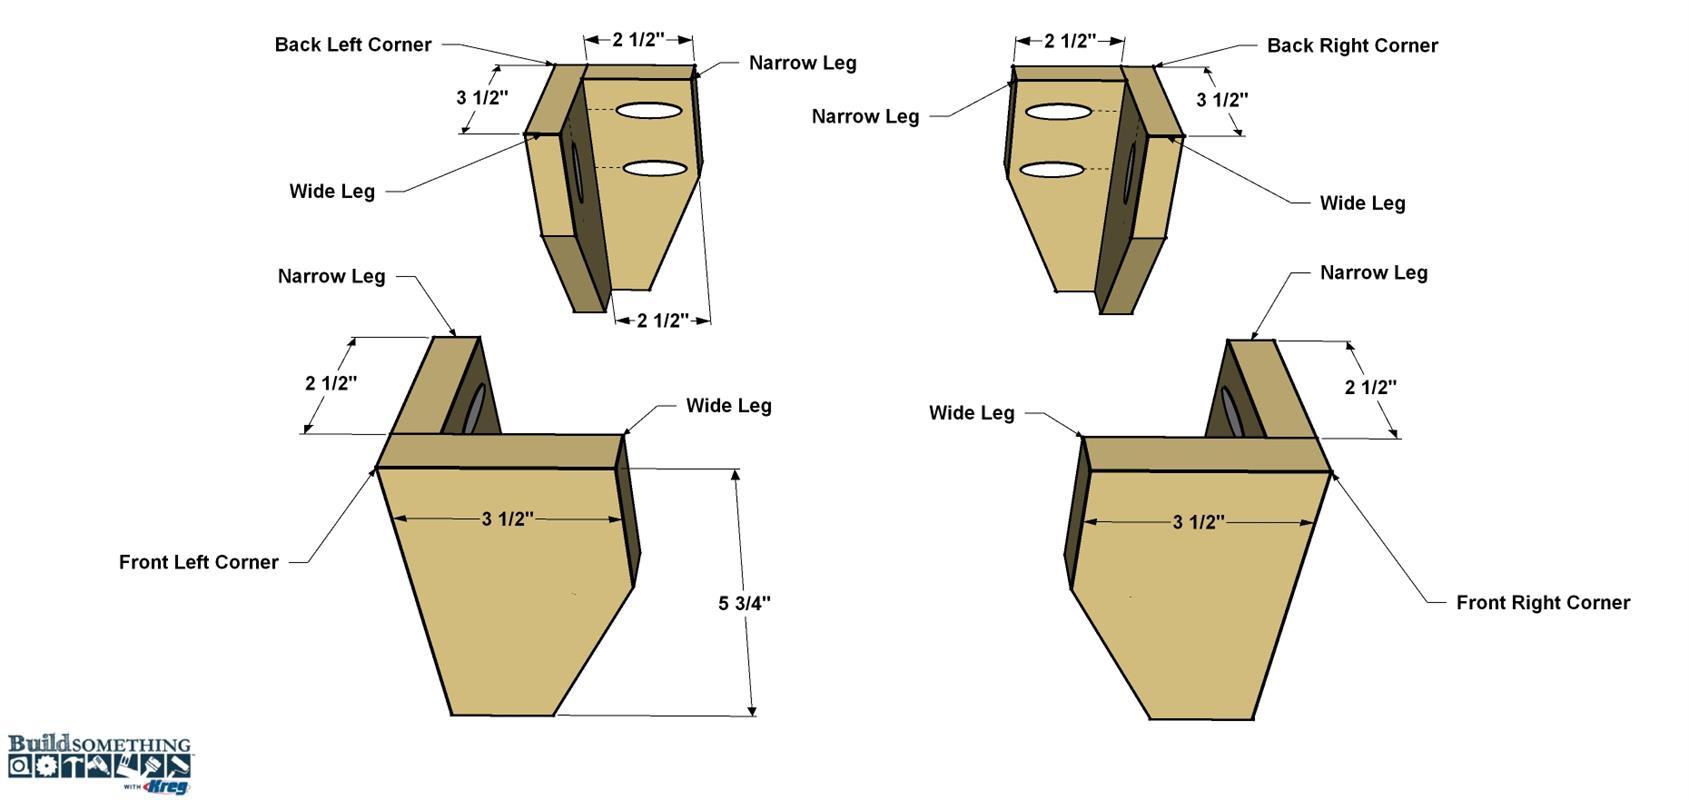
To make the cabinet base, start by cutting four Wide Legs from a 1x4 board and four Narrow Legs from a 1x3 board, as shown in the cut diagram. Lay out the tapers on all the Legs, secure the first to a work surface, and cut the taper with a jigsaw. Sand the cut smooth and repeat the process for each of the other Legs. Before you drill pocket holes on any of the Legs, notice the pocket hole orientation on both the Wide Narrow Legs. There will be a right side and a left side after you drill the holes. With your Kreg jig still set for 3/4"-thick material, drill pocket holes in each of the Legs, as shown.
-
Assemble the Legs
Begin with one left Wide Leg and one left Narrow Leg, apply glue along the mating edge and clamp them together. Since the base is made of hardwood, you’ll want to use 1 1/4" fine-thread Kreg Screws to assemble these joints. The video below will help you understand which Kreg Screws to choose for different woods and applications. Repeat the assembly process for the other left side leg assembly, then do the same for the right-side legs.
-
Make the Rails
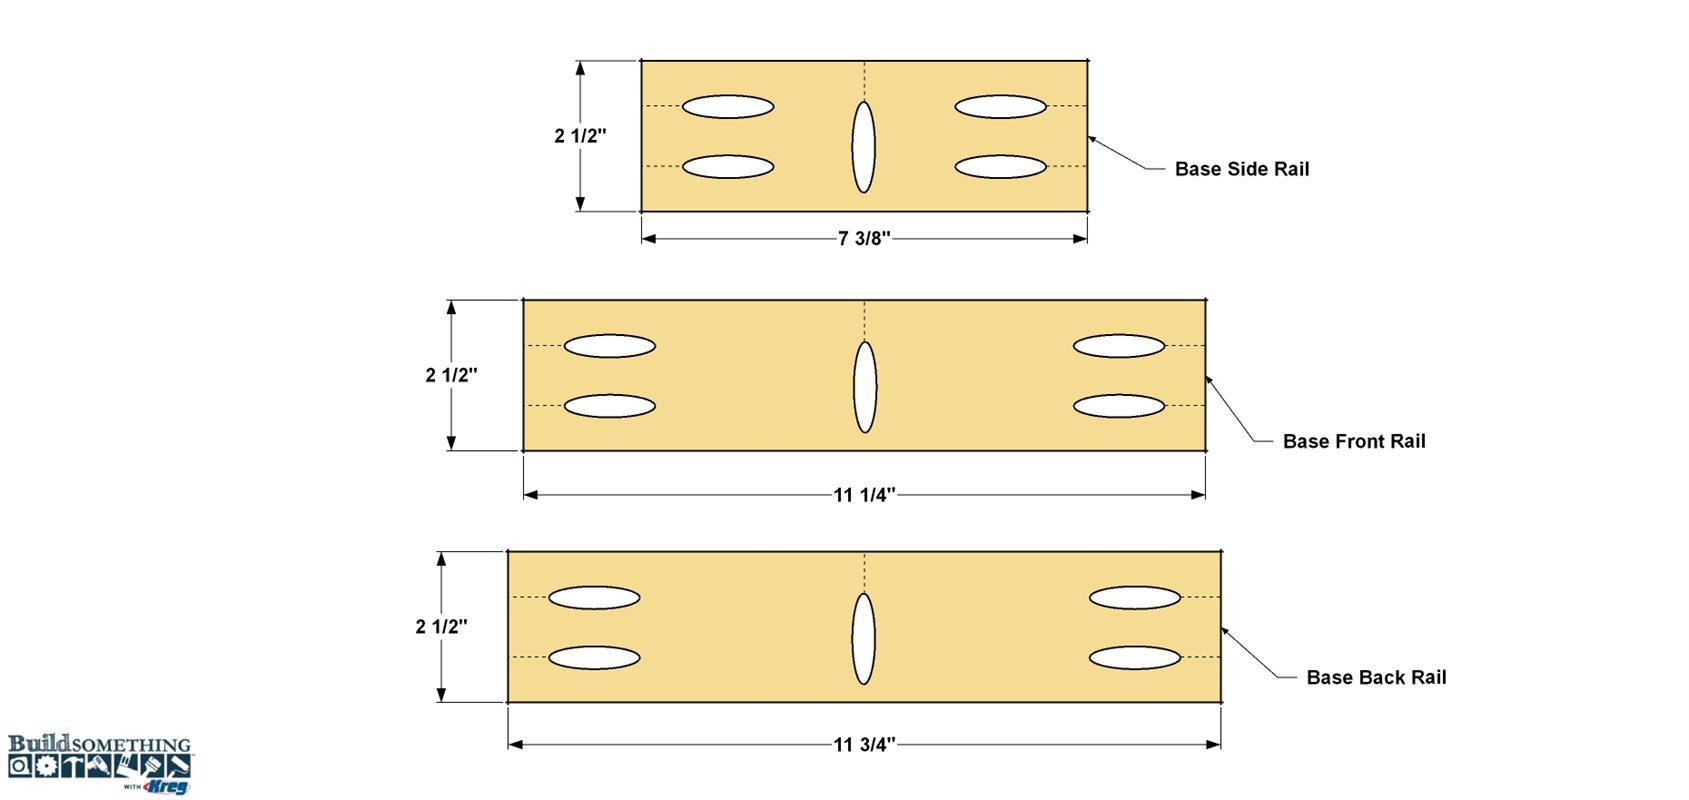
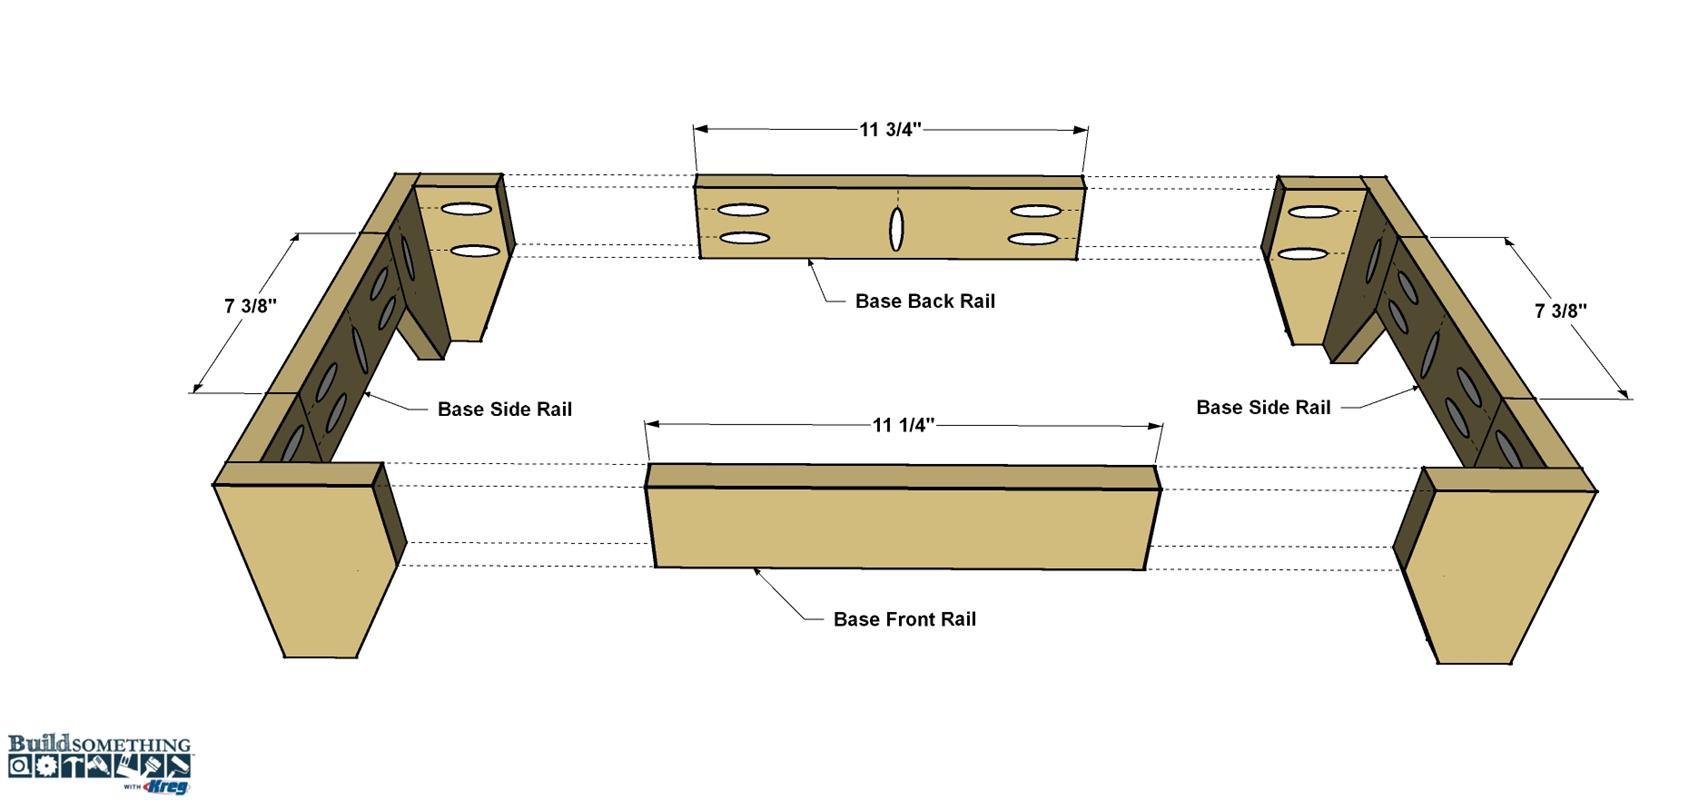
Using the rest of the 1x3 board, cut one Base Front Rail, one Base Back Rail, and two Base Side Rails to length, as shown in the cutting diagram. Drill pocket holes in each board at the locations shown.
-
Assemble the Base
Align one Left Leg with a Side Rail, apply glue the joint and secure the parts with 1 1/4" fine-thread Kreg screws. Now add the second Leg the Same way. Repeat this process for the right side. Finally, add the Base Front Rail and the Base Back Rail to complete the base. Sand the upper edges and outer faces of the base assembly smooth.
-
Disassemble Sand, and Stain
Before you disassemble the cabinet to stain it, make sure you have each part labeled, as mentioned in Step 2. This makes it much easier to reassemble the cabinet when its finished. Disassemble the cabinet (but not the base) by removing the screws. Now you can sand all he cabinet parts smooth, and then wipe away all dust to prepare for staining. The easiest way is to lay all the parts out on a clean surface, and then stain one face and the edges. We used a Java-colored gel stain. When this stain is dry, flip the panels over and stain the other faces. Allow the stain to properly dry, and then repeat the process to apply the clear finish. We applied two coats of wipe-on polyurethane. You can stain and finish the Base without taking it apart.
-
Reassemble the Cabinet
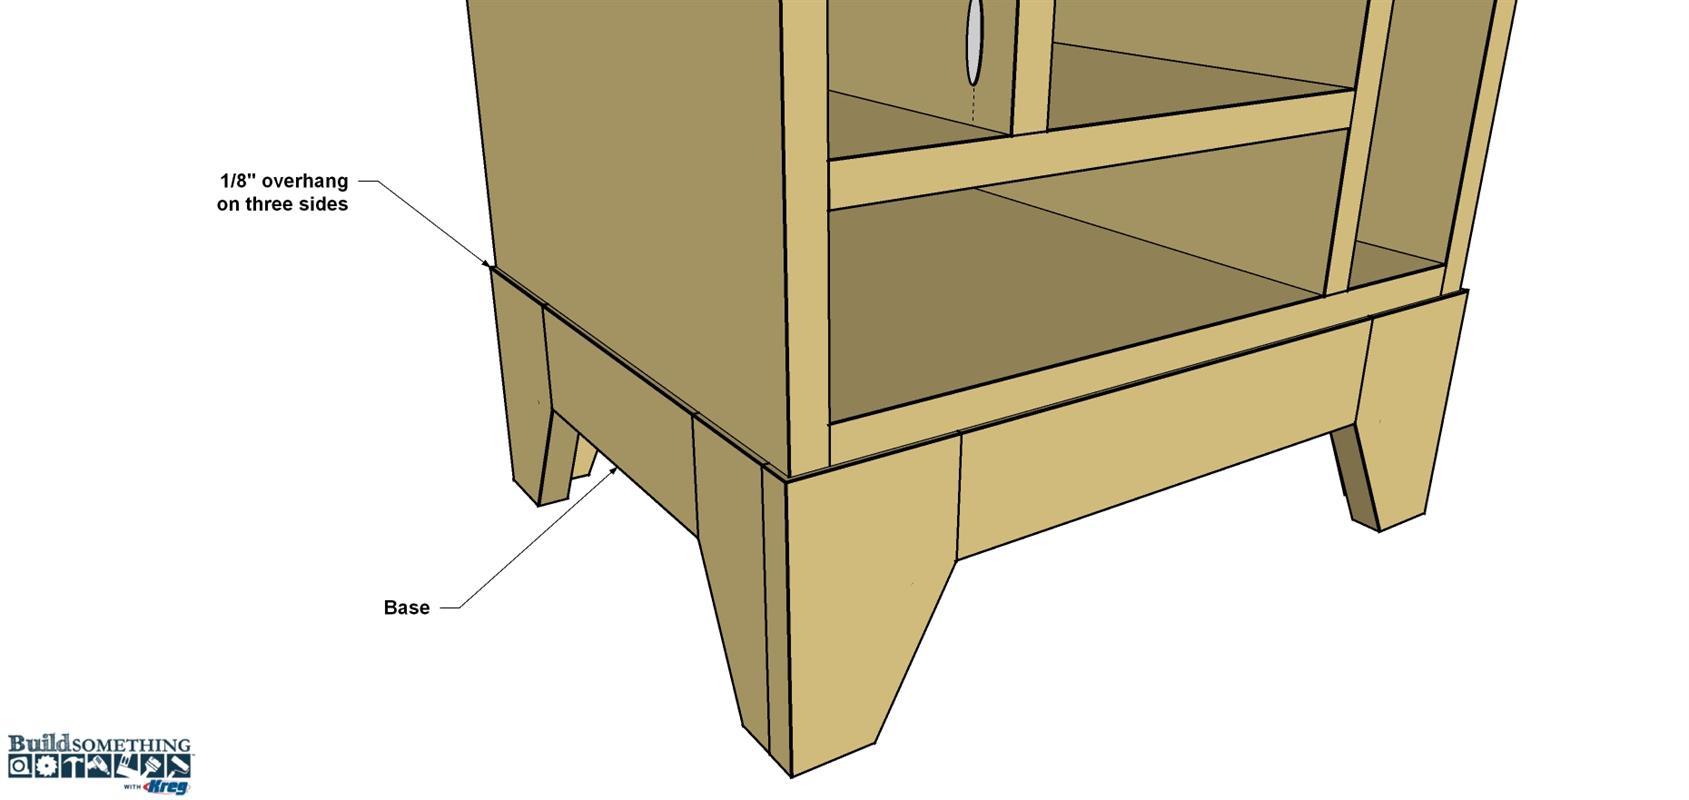
When the stain and finish has dried according to the manufacturer’s directions, you can reassemble the cabinet aligning the parts and repeating those steps. This time use glue along all mating edges to add extra strength. Just use a narrow bead of glue to prevent having it squeeze out of the joints. If any does squeeze out, wipe it away with a damp rag. Finally, install the competed base using 1 1/4" coarse-thread pocket-hole screws.
-
Load and Enjoy
With your wine cabinet complete, you can install some wine glass holders, load the cabinet with wine, and sip a glass to reward your hard work!


