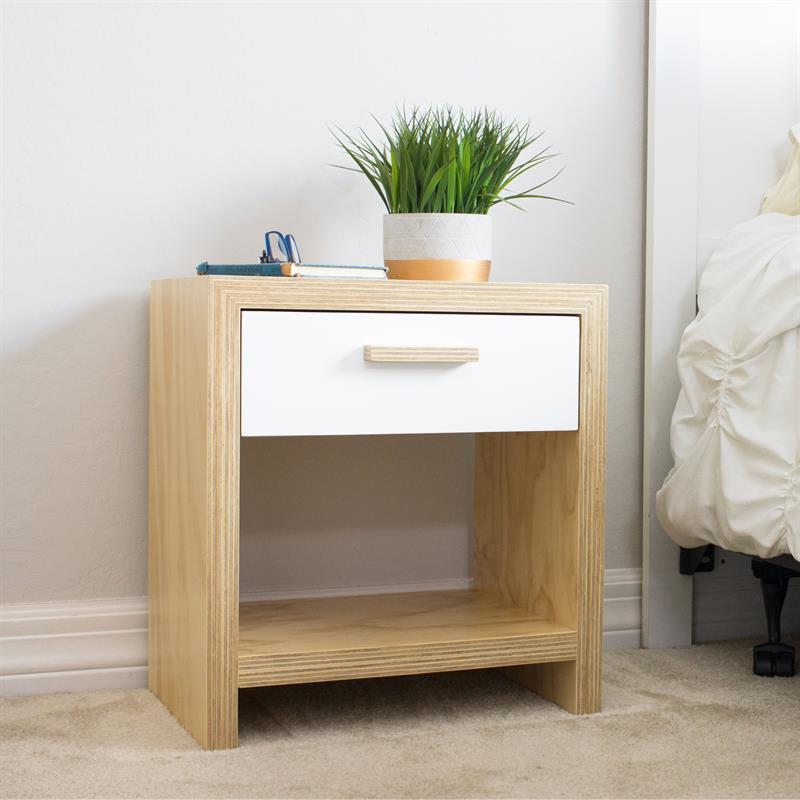
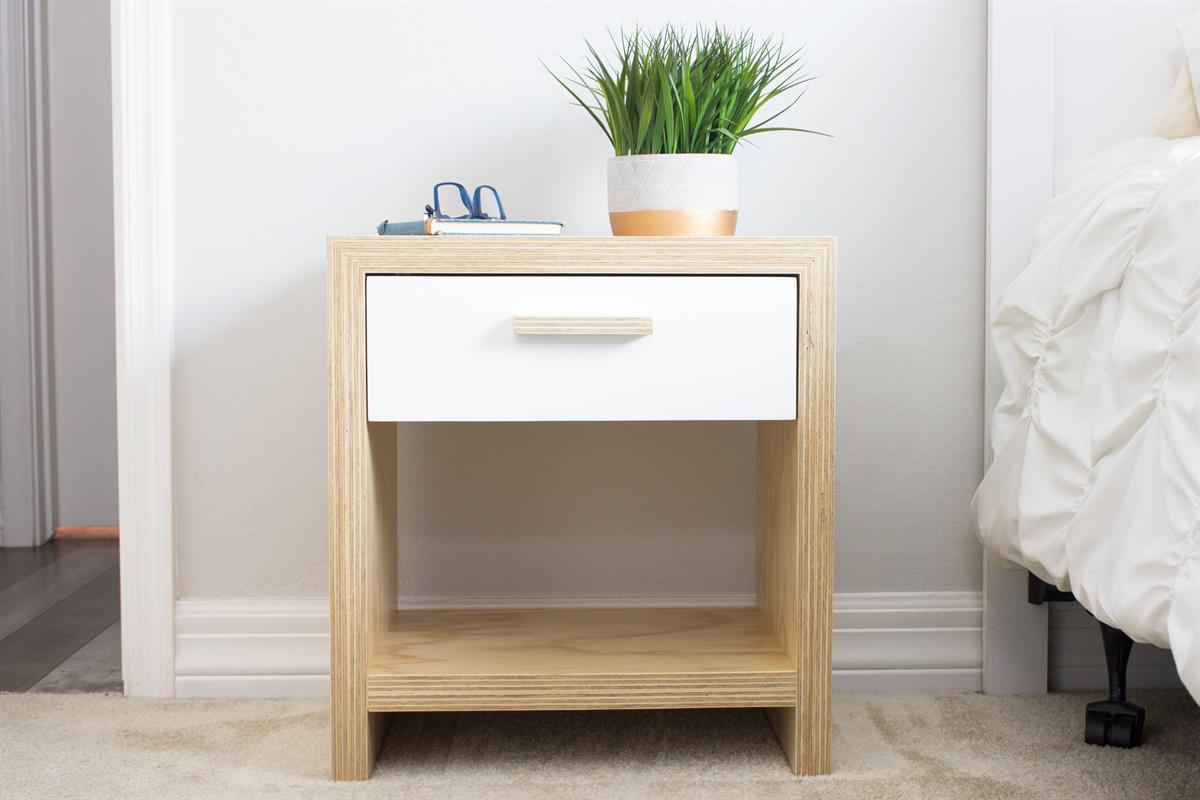
Waterfall Edge Modern Nightstand
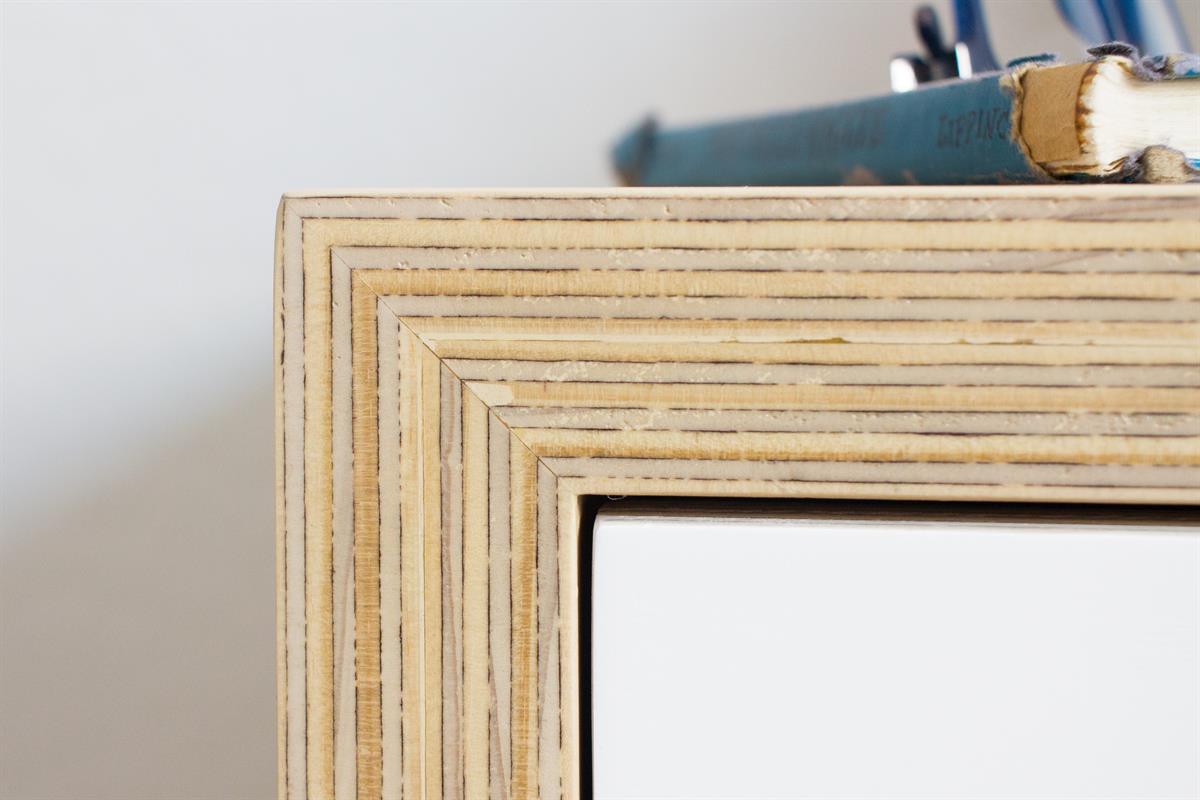
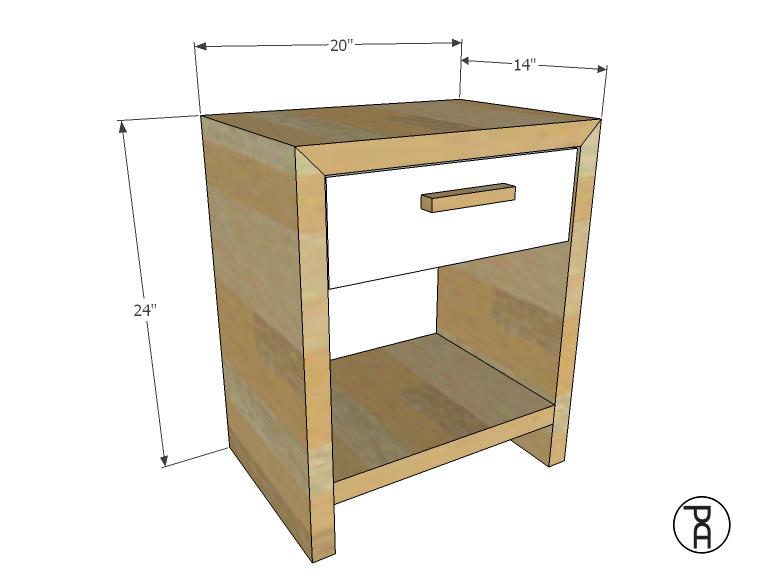
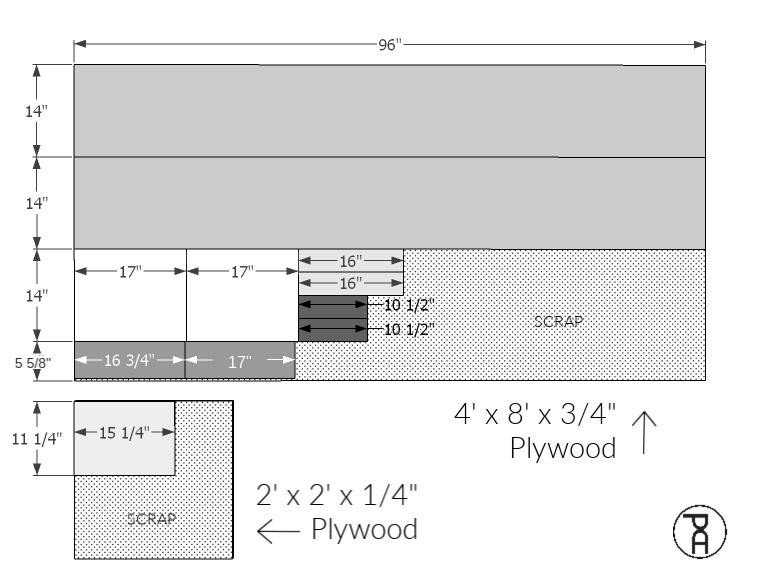
By Pneumatic AddictWhether you're using an exotic live edge board or inexpensive plywood, this simple one drawer nightstand shows off the beautiful natural grain of the material. The clean mitered corners add to the sleek and modern lines of the piece. Build a pair with just two sheets of 3/4" plywood!
Directions
-
Laminate Panels
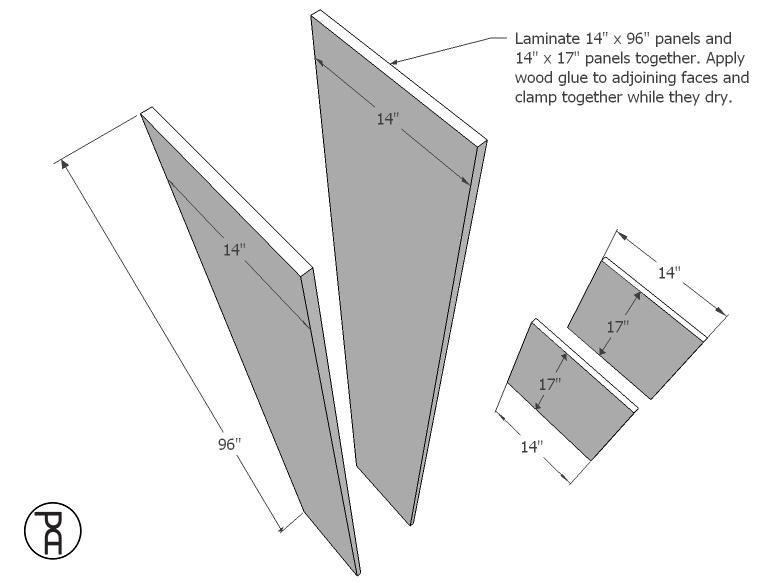
Laminate 14" x 96" plywood pieces and 14" x 17" plywood pieces together to create 1-1/2" thick panels. Apply wood glue to adjoining faces and clamp together while they dry.
-
Miter Panels
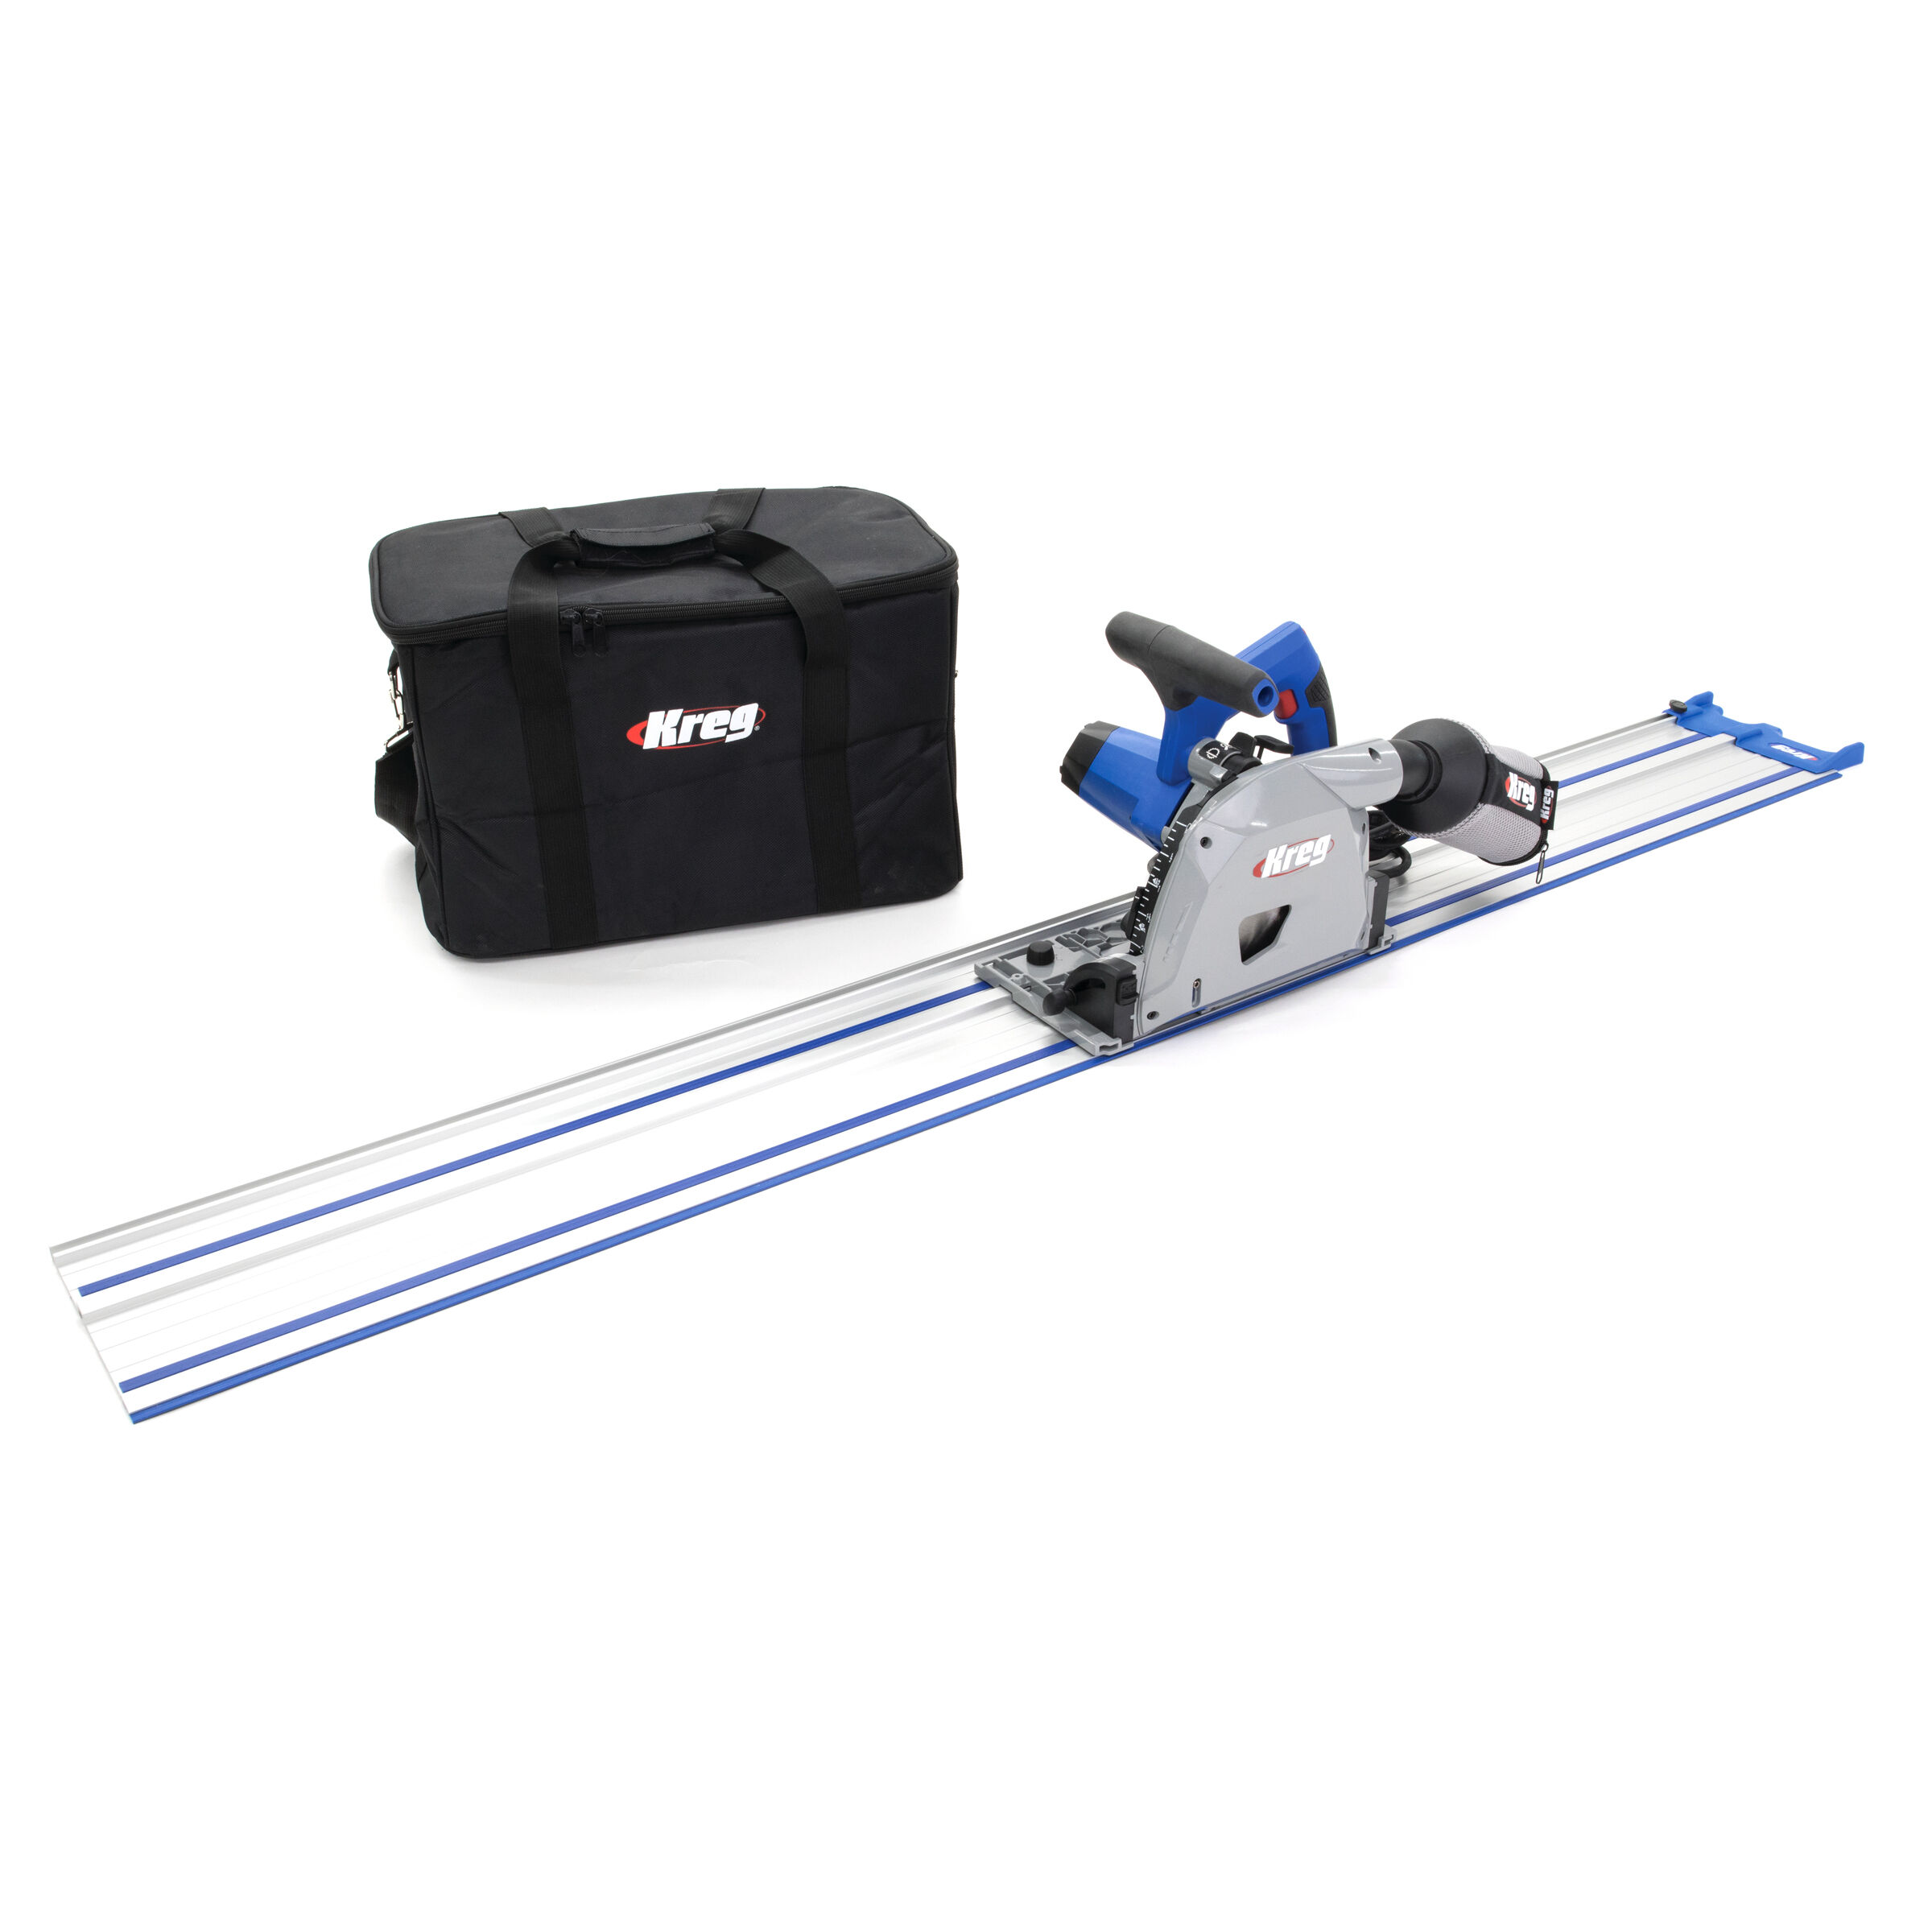
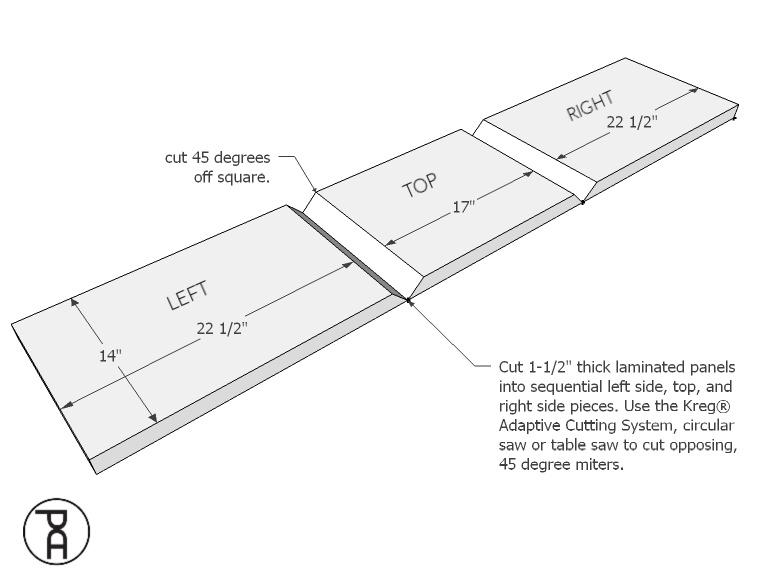
Cut 1-1/2" thick laminated panels into sequential left side, top, and right side pieces. Use the Kreg® Adaptive Cutting System, circular saw or table saw to cross-cut opposing, 45 degree miters. Cut the ends of the leg panels square at 90 degrees.
-
Attach Sides to Top
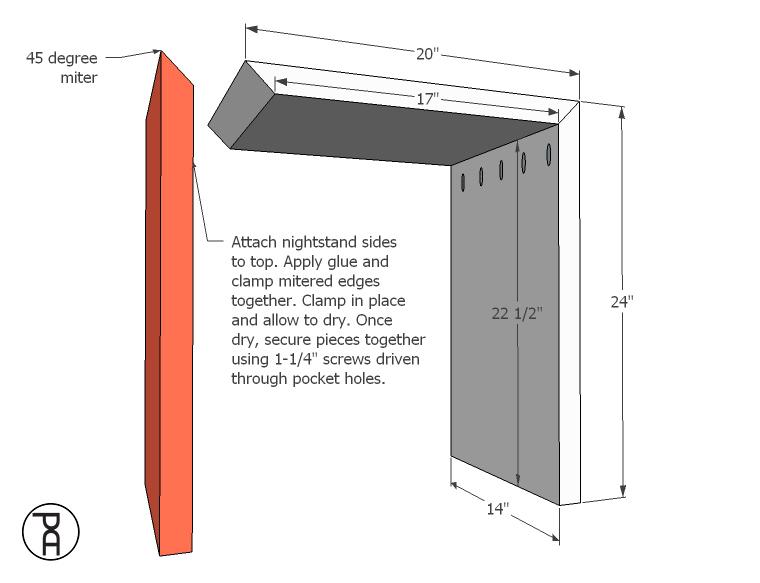
Attach mitered, 1-1/2" thick sides to top. Apply glue and clamp mitered edges together. Clamp in place and allow to dry. Once dry, secure pieces together using 1-1/4" screws driven through pocket holes.
-
Attach Shelf
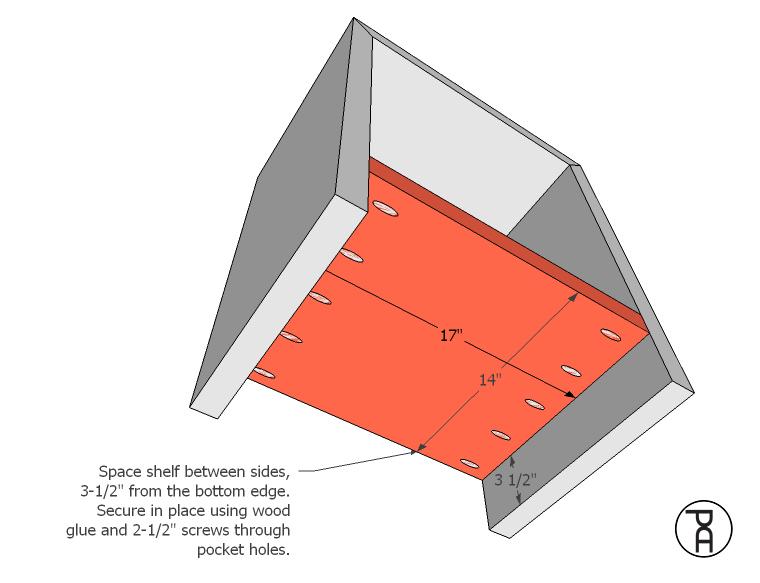
Space lower shelf between sides, 3-1/2" from the bottom edge. Secure in place using wood glue and 2-1/2" screws through pocket holes.
-
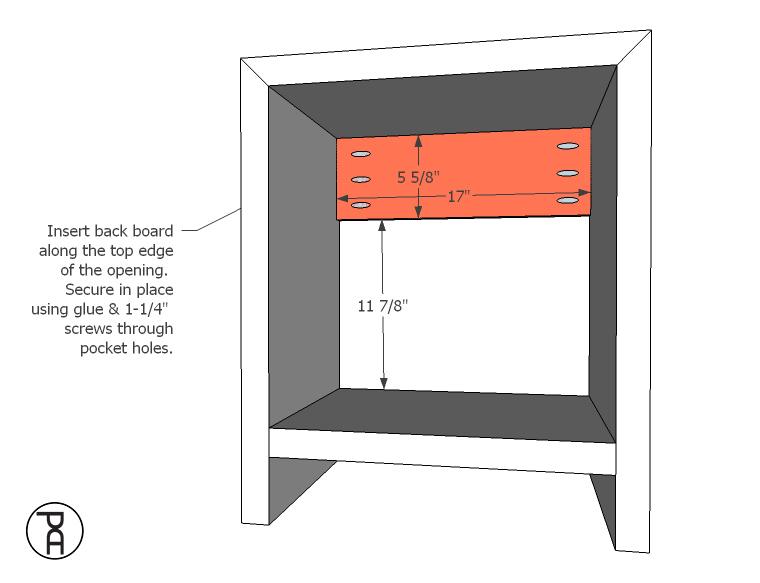
Back Board
Insert back board along the top edge of the opening. Secure in place using glue & 1-1/4" screws through pocket holes.
-
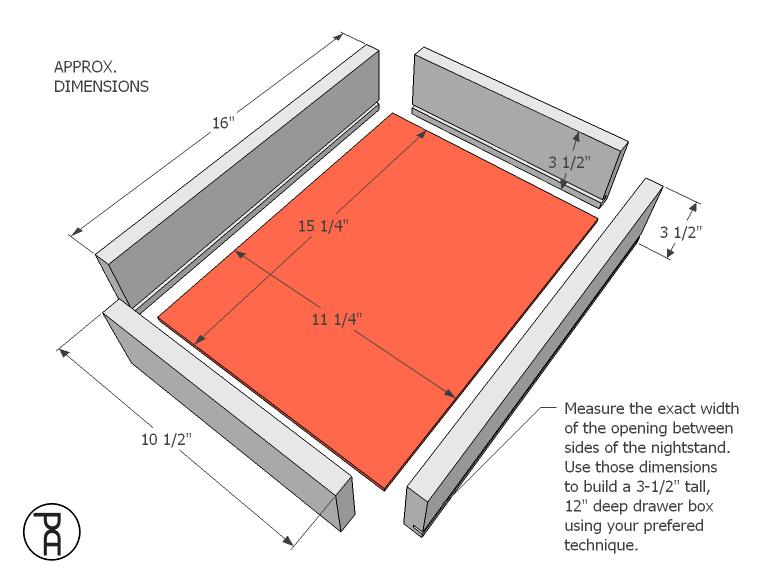
Build Drawer Boxes
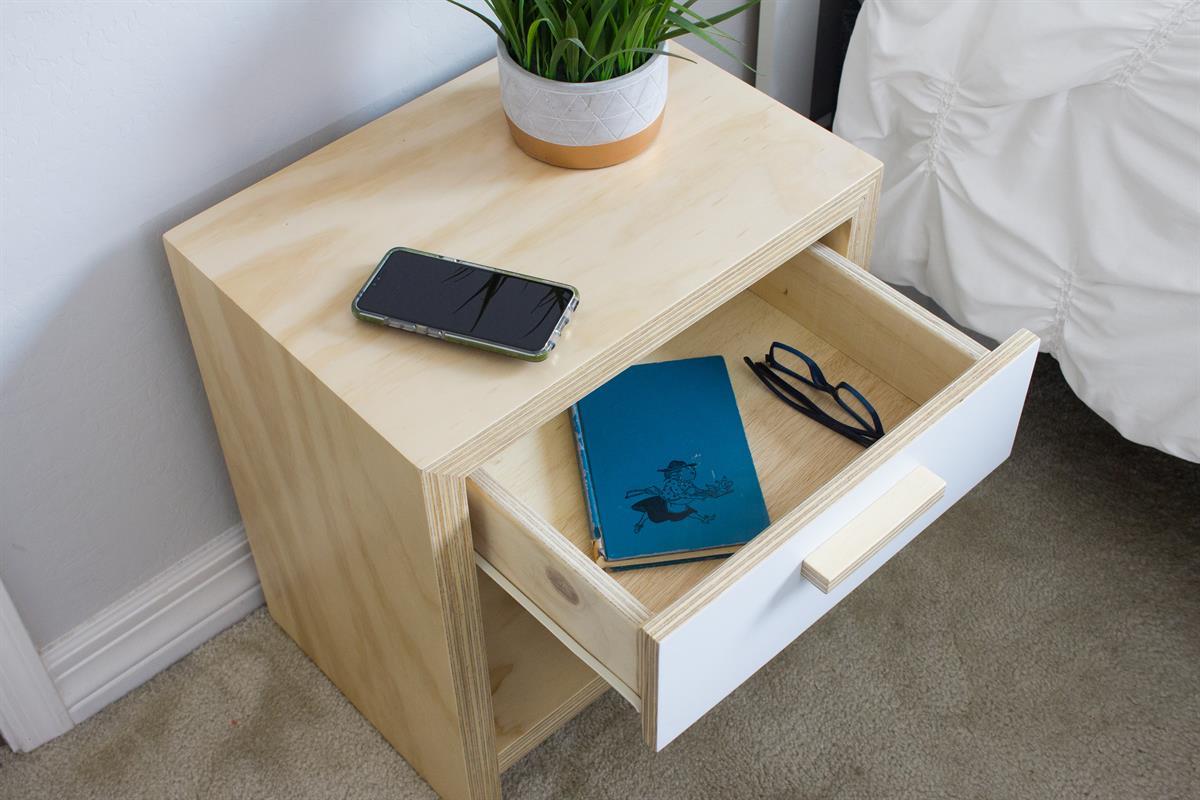
Measure the exact width of the opening between sides of the nightstand. Use those dimensions to build a 3-1/2" tall, 12" deep drawer box using your preferred technique.
-
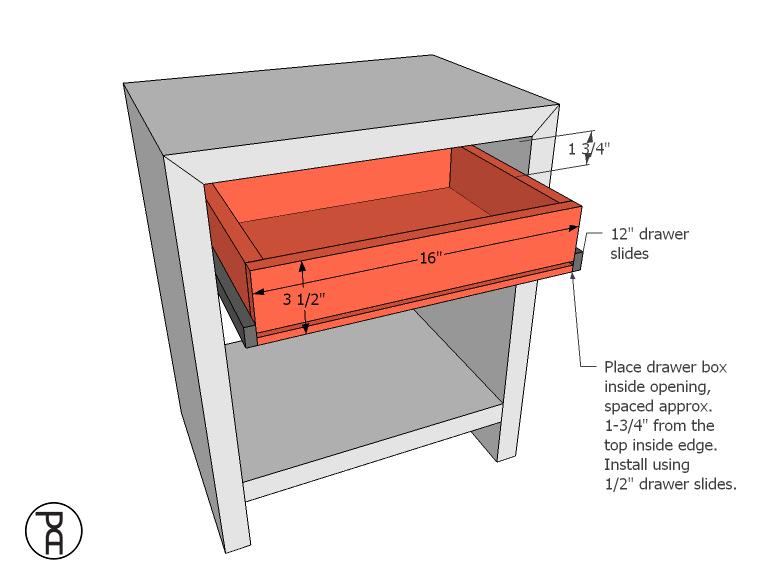
Install Drawers
Place drawer box inside opening, spaced approximately 1-3/4" from the top inside edge. Install using 1/2" drawer slides.
-
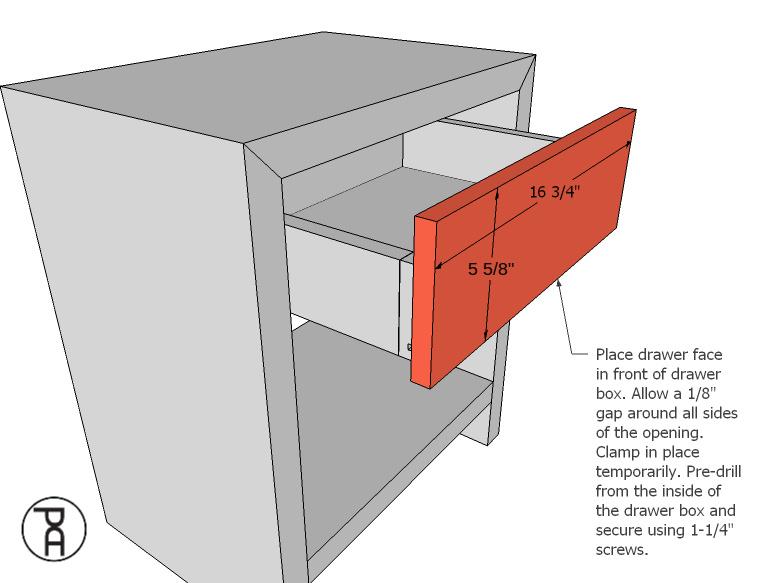
Add Drawer Face
Place drawer face in front of drawer box. Allow a 1/8" gap around all sides of the opening. Clamp in place temporarily. Pre-drill from the inside of the drawer box and secure using 1-1/4" screws.
-
Attach Drawer Handle
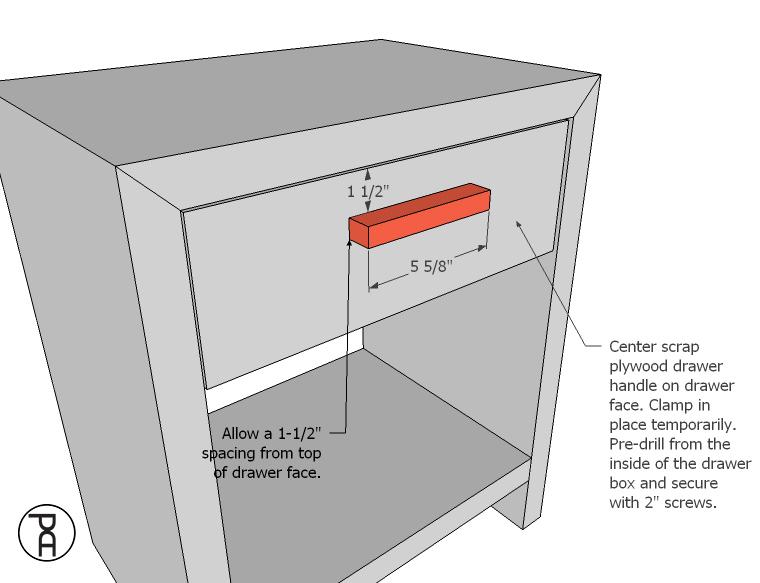
Center scrap plywood drawer handle on drawer face. Clamp in place temporarily. Pre-drill from the inside of the drawer box and secure with 2" screws.
-
Watch Build Video
Head to http://www.pneumaticaddict.com or https://youtube.com/pneumaticaddict to watch the build video and pick up some tips and tricks I learned as I completed this project.


