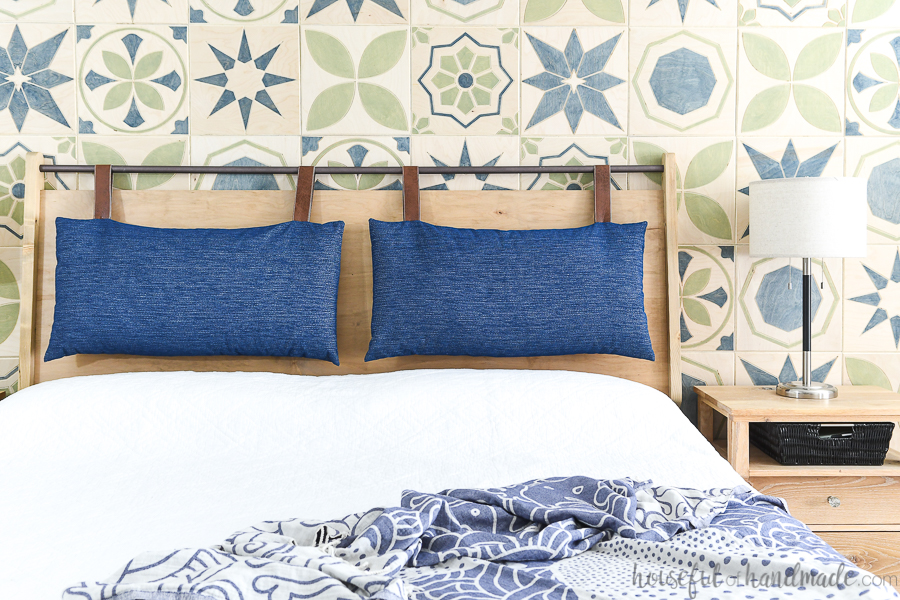
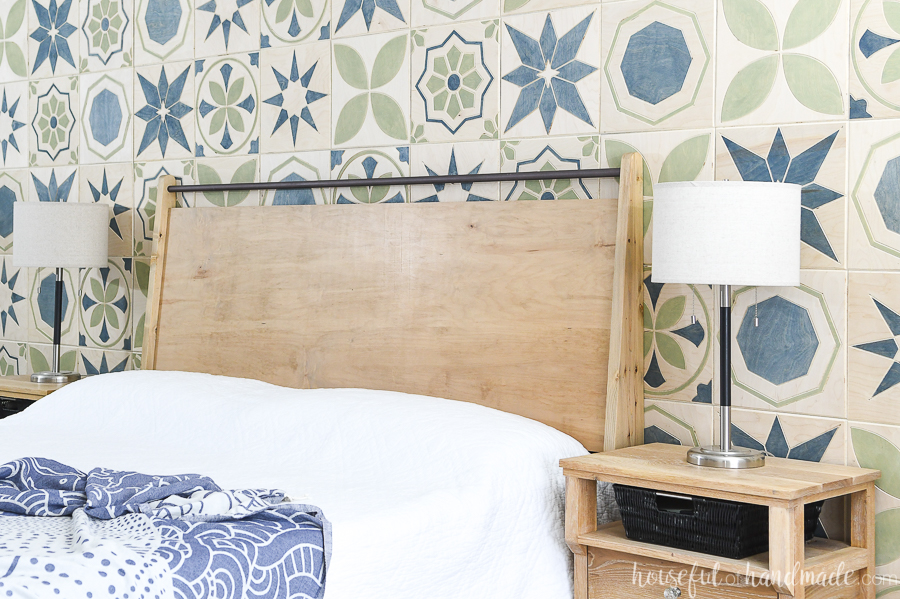


This modern headboard has a slightly angled back to make lounging in bed more comfortable. The metal rod adds style and can hold a headboard cushion for a unique look. The headboard is mounted to the wall with an integrated DIY french cleat for a sturdy headboard.
Tools
Kreg Tools


Other Tools
-
Miter Saw

-
Level
Materials
Wood Products
- 1 Board , 2"x6"x8'
- 1 Board , 2"x4"x6'
- 1 Board , 1"x4"x8'
- 1 Sheet of plywood , 3/4"x4'x8'
Hardware & Supplies
- 24 1 ¼” pocket hole screws (see tools list)
- 8 2 ½” pocket hole screws (see tools list)
- 1 Wood glue
- 1 78” long ¾” electrical conduit or dowel
- 1 Plywood edge banding
Directions
-
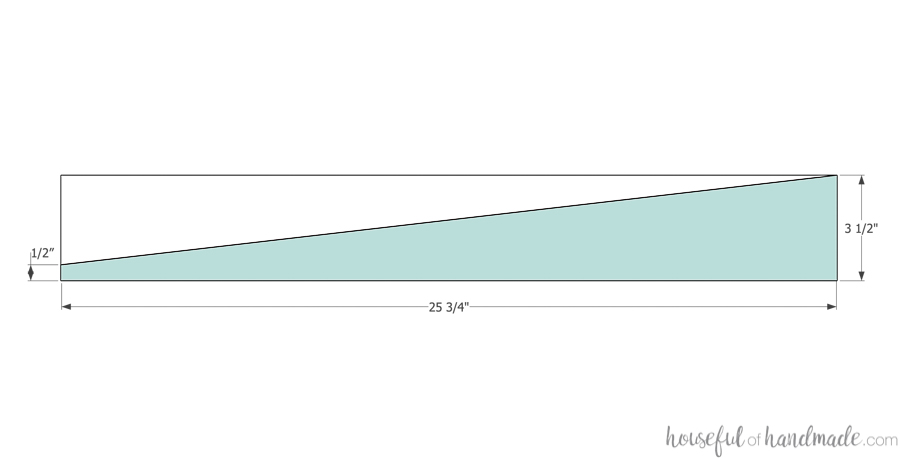
Shape side pieces
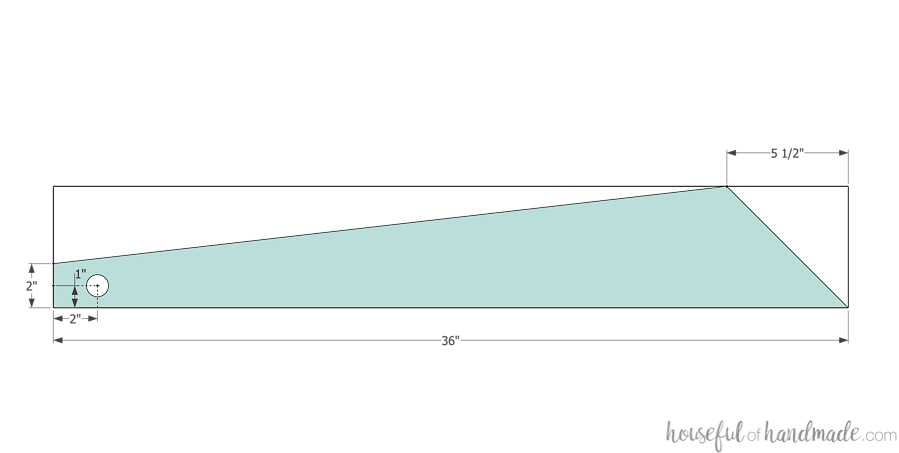
Mark out the angled cuts on the side pieces according to the diagram. Cut out the boards with a circular saw. Use the AccuCut to line up the edge of your circular saw with the angled lines and cut. The other side piece can be used to balance the end of the AccuCut as you cut. Sand the corners/points so they are rounded. Measure the exterior measurement of your dowel or electrical conduit. Drill a ¾” deep hole that size using the center point noted on the diagram. Make sure to mirror the boards when drilling the hole.
-
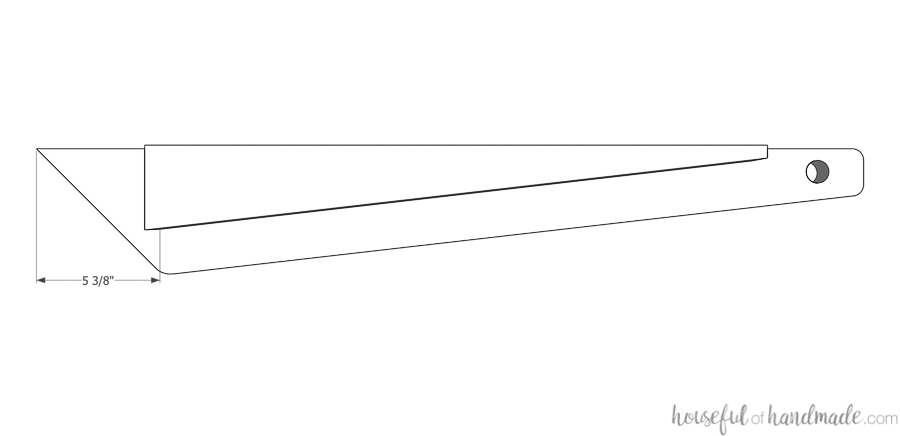
Cut back supports
Mark out the angled cut on the back supports according to the diagram. Cut the boards with a circular saw and the AccuCut the same way you did the side pieces.
-
Layout plywood placement
Lay the back support pieces on the side pieces so the back is flush and the bottom is 5 ⅜” up from the bottom point of the sides. Draw a line along the front angle of the back support piece and mark the bottom corner. This is where you will attach the plywood later.
-
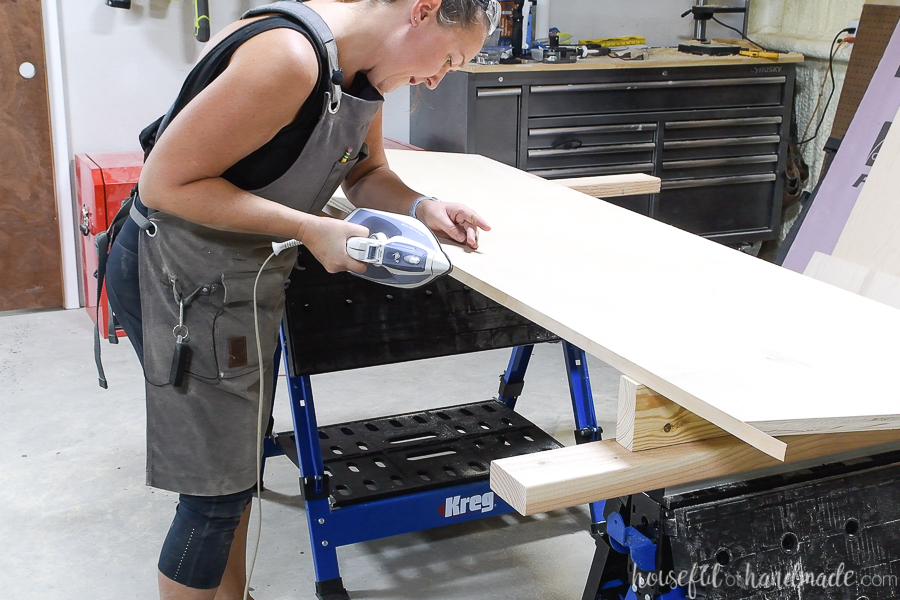
Prep the plywood back
Cut your plywood piece for the back. Use the Straight Edge Guide or AccuCut to get a nice straight cut. Apply edge banding to the top and bottom (long sides) if desired. Set your pocket hole jig for ¾” thick material. Drill 5 pocket holes in the back of the plywood on each edge.
-
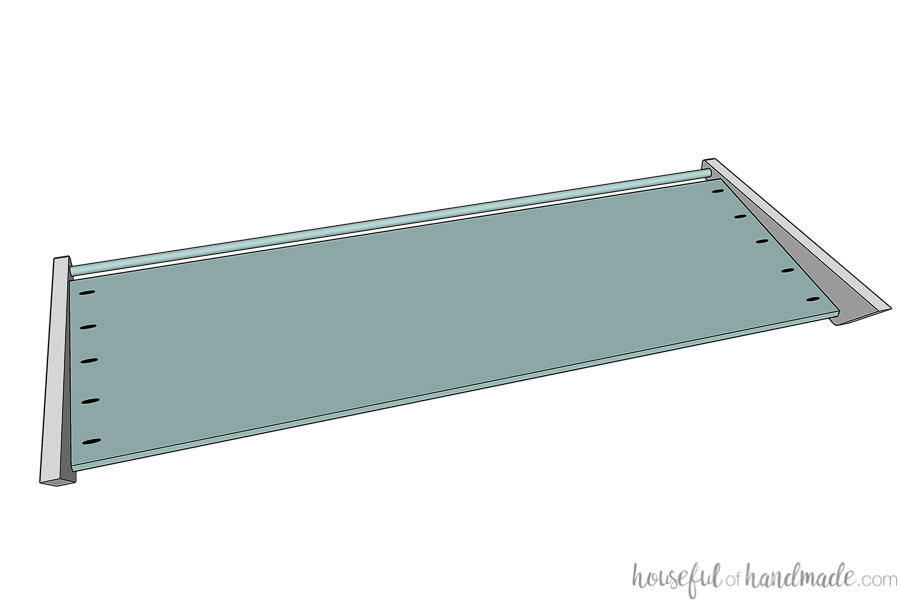
Attach the back
Line one side piece up against the plywood so the back and bottom corner are flush with the placement line previously marked. Attach with wood glue and 1 ¼” pocket hole screws. Insert the rod into the hole (if you want it painted, do it before assembly) and then line up the second side piece. Attach the same way, enclosing the conduit as you secure the back.
-
Attach back supports
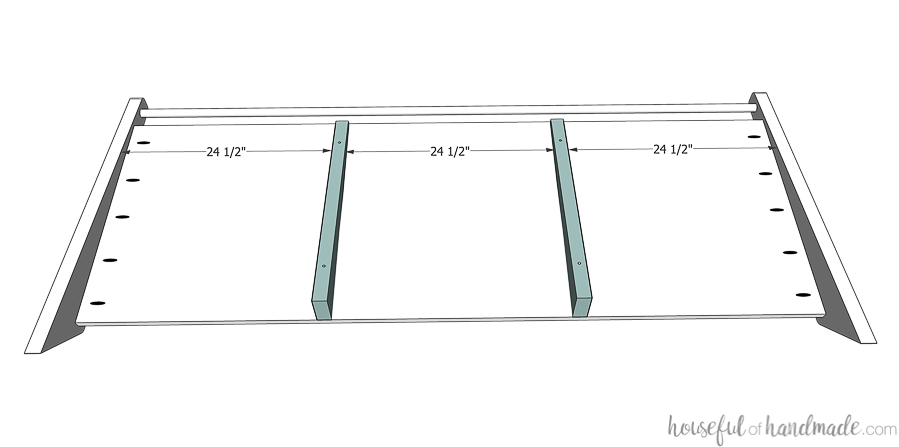
Find the 1” thick section of the back support piece towards the top. Predrill a ¼” deep hole to countersink your screw head at that point. Then from the bottom, find the 3” thick section of the board and predrill a 1” deep hole there. Line the back supports up on the back panel so they are centered (24 ½” between them and the sides). Attach the back support to the plywood with wood glue and a 1 ¼” screw through the top hole and a 2 ½” screw through the bottom hole.
-
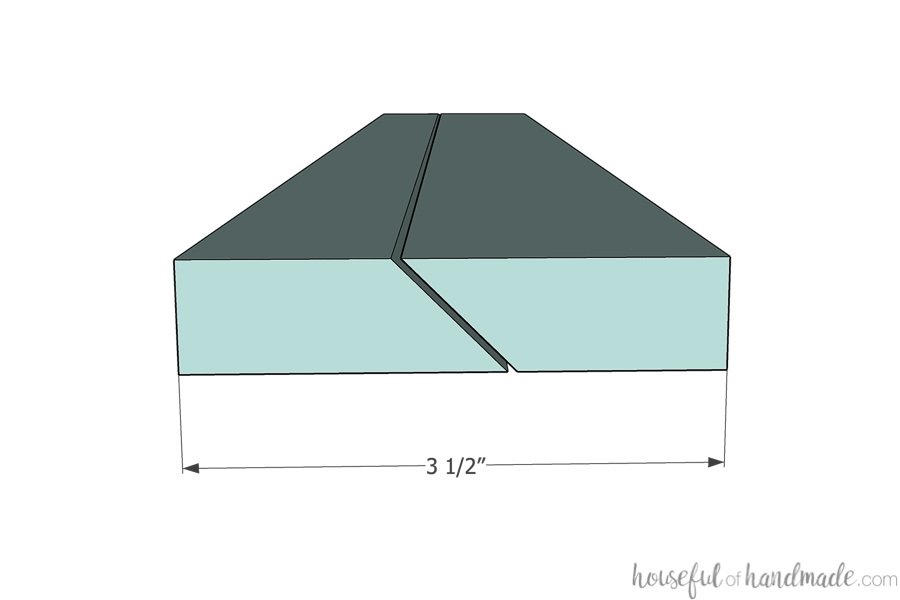
Cut a french cleat
Rip the 1x4 cleat boards in half lengthwise at a 45 degree angle. Don’t worry if the cut is not perfectly centered, just get it close. Now you have 3 cleats with 2 parts. Trim 1” off 1 part of each cleat. This will be the piece attached to the wall. Cutting them 1” short gives you a ½” clearance on either side when attaching the headboard to the wall.
-
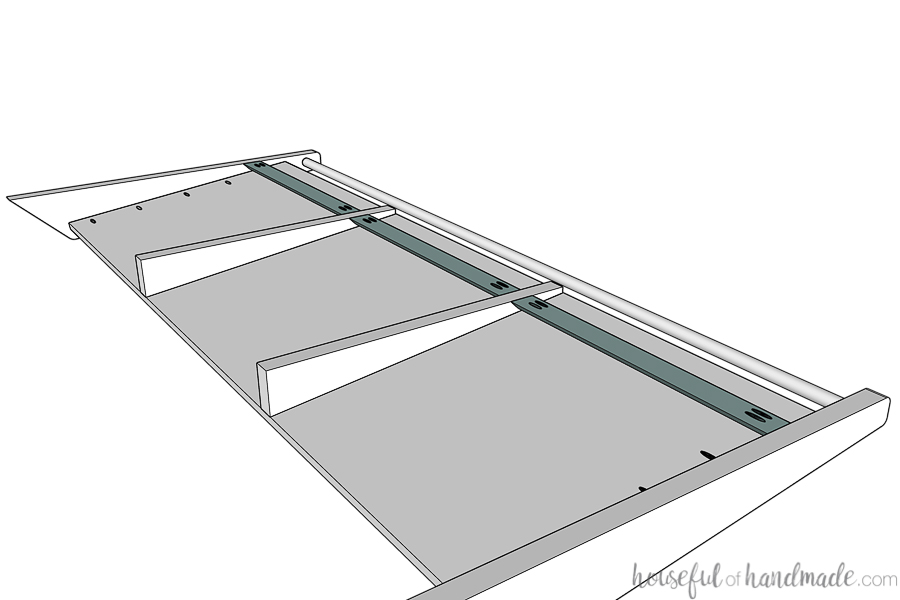
Attach the cleat
Drill 2 pocket holes set for ¾” thick material in the edges of the non-trimmed cleat pieces. Drill these holes in the wider side. Attach these between the sides/back support boards so they are flush with the back and the same distance from the top (mine were about 5” from the top of the plywood). Attach with 1 ¼” pocket hole screws.
-
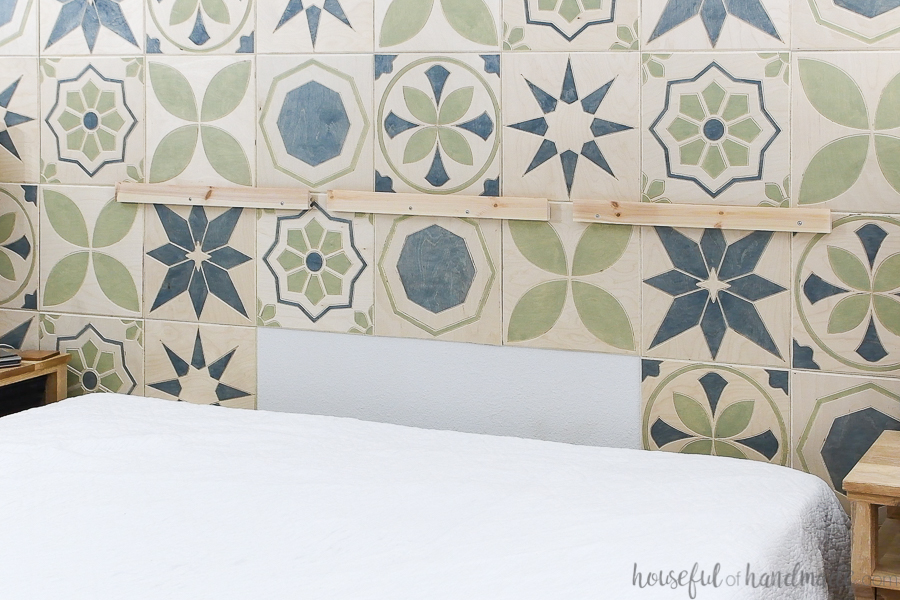
Attach headboard to wall
Determine where you will attach your headboard to the wall. Attach the trimmed cleats so the wider side is away from the wall creating a channel up against the wall for the cleat on the back of the headboard to seat into. Use a level to make sure all the cleat pieces are straight and secure the cleats to the wall into studs with 2 ½” screws. Make sure the head is countersunk so the front of the cleat is flat. Lift the headboard onto the wall and seat the two cleat pieces together snugly.
-
Enjoy!
The metal bar on the top of the headboard is more than just decoration. It is designed to hold a headboard cushion, perfect for lounging. See how I sewed these easy pillows and find more things to build at Housefulofhandmade.com!
https://housefulofhandmade.com
https://housefulofhandmade.com/modern-diy-headboard-with-cushion/
Video for this plan
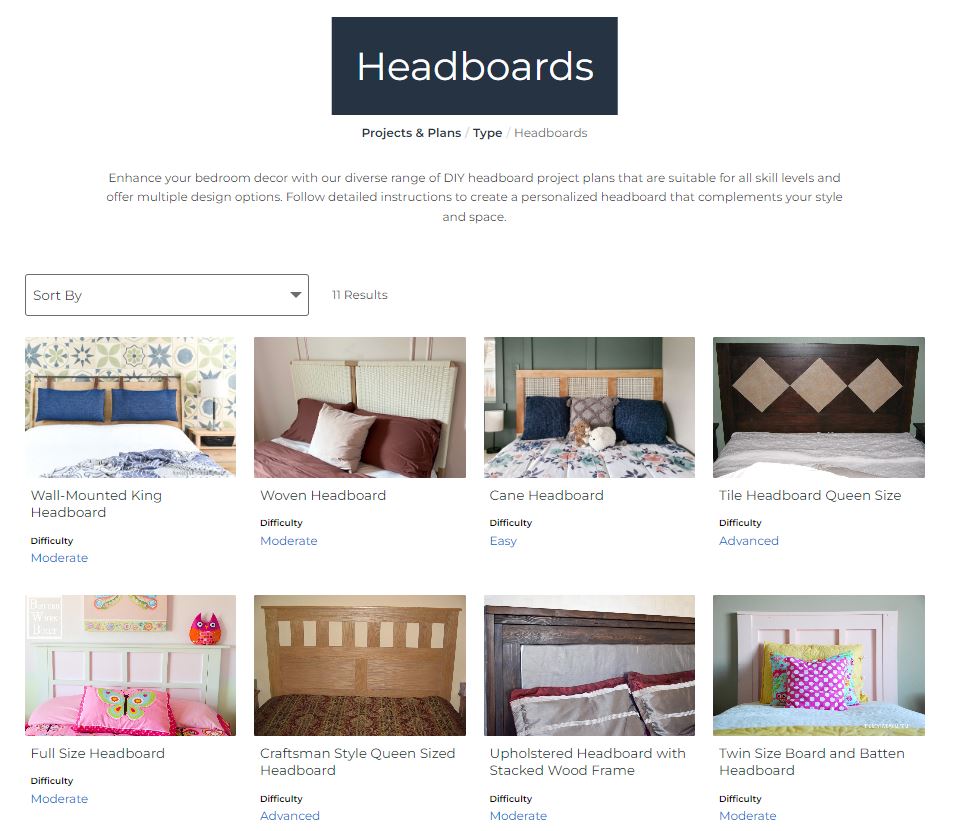
Be sure to check out all our top project plans for diy headboards: