

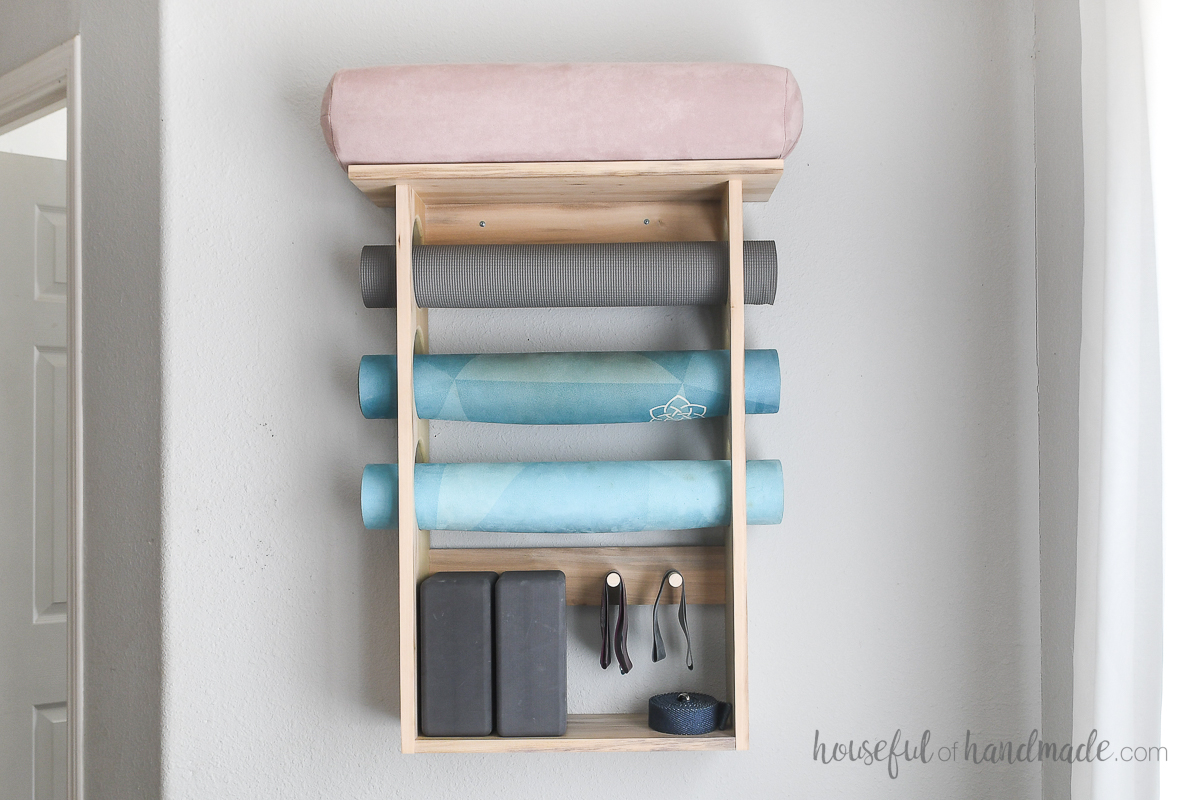
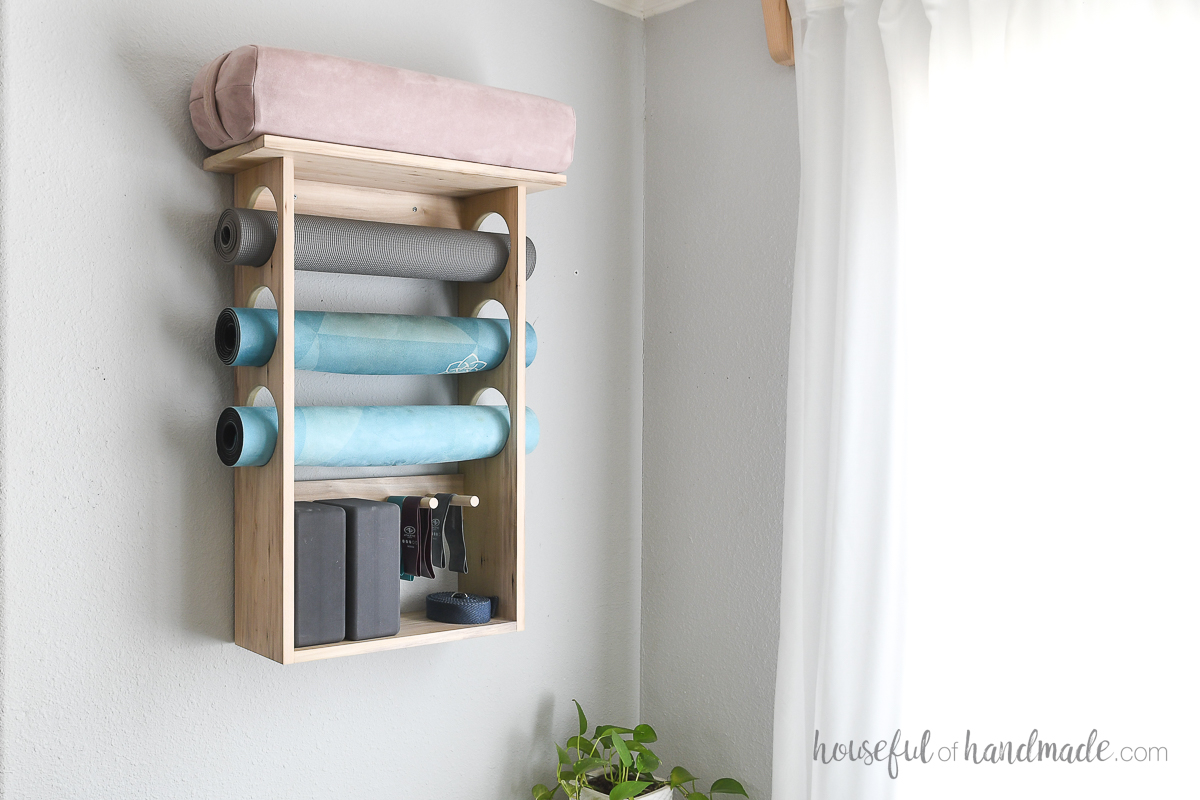
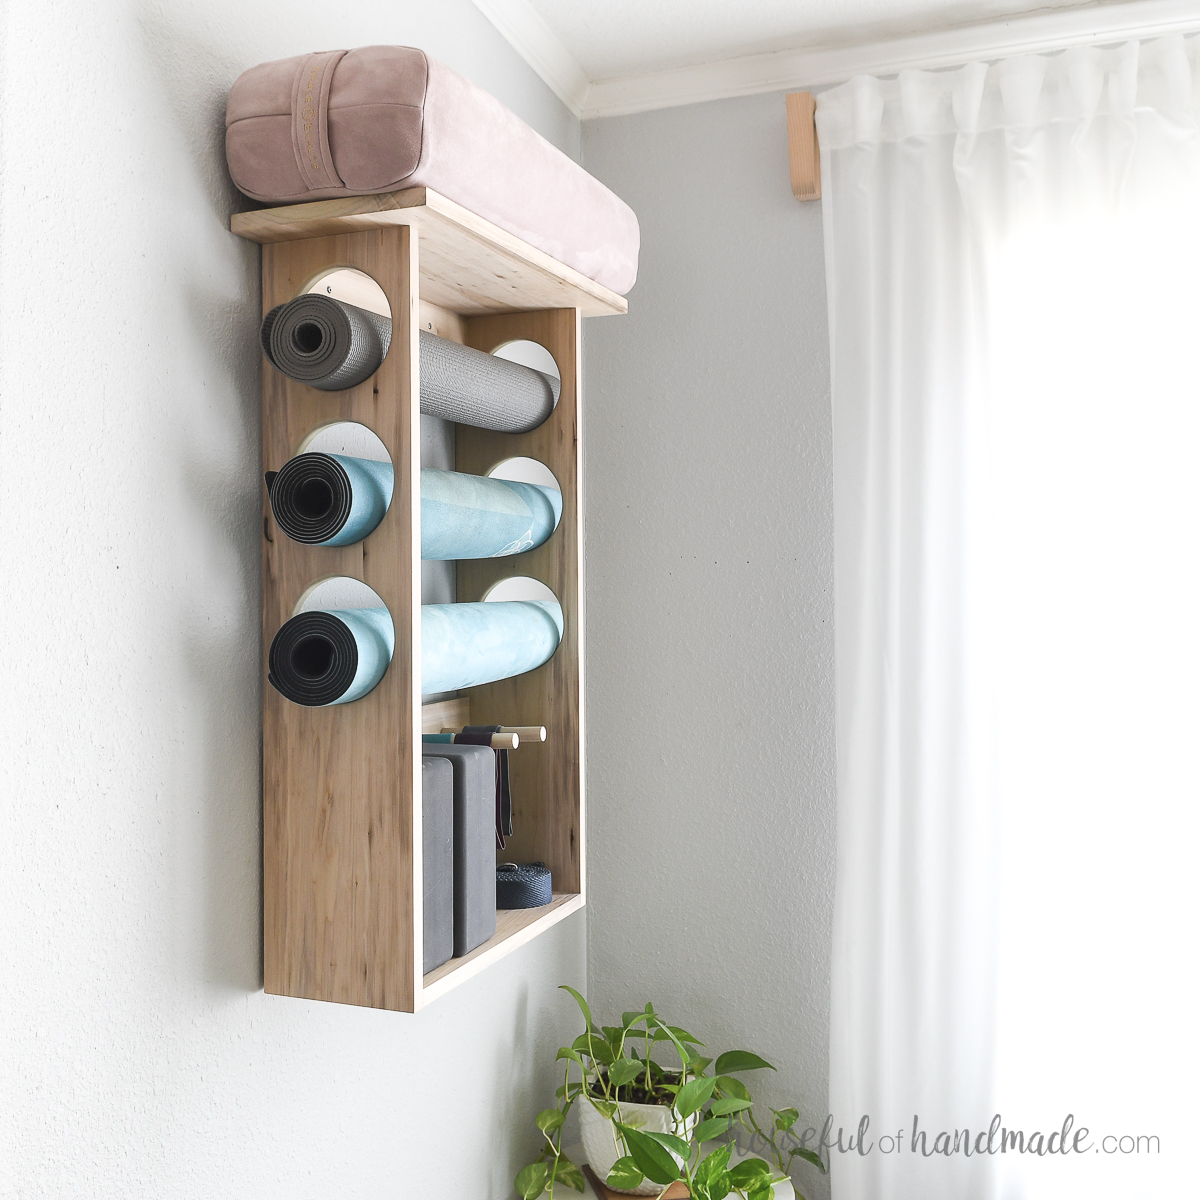


Store away and organize your exercise mat and gear with this beautiful wall mounted shelf. This shelf is easy to build from dimensional lumber and holds 3 yoga mats, plus blocks and bands.
Tools
Kreg Tools


Other Tools
-
Miter saw

-
Brad nailer
Materials
Wood Products
- 1 Board , 1x8 , 8'
- 1 Board , 1x4 , 3'
- 1 Board , 1x10 , 2'
- 1 Dowel , 3/4" , 14"
Hardware & Supplies
- 14 1 1/4" pocket hole screws
- 10 1 1/4" brad nails
- 1 Wood glue
- 2 2 1/2" wood screws
Directions
-
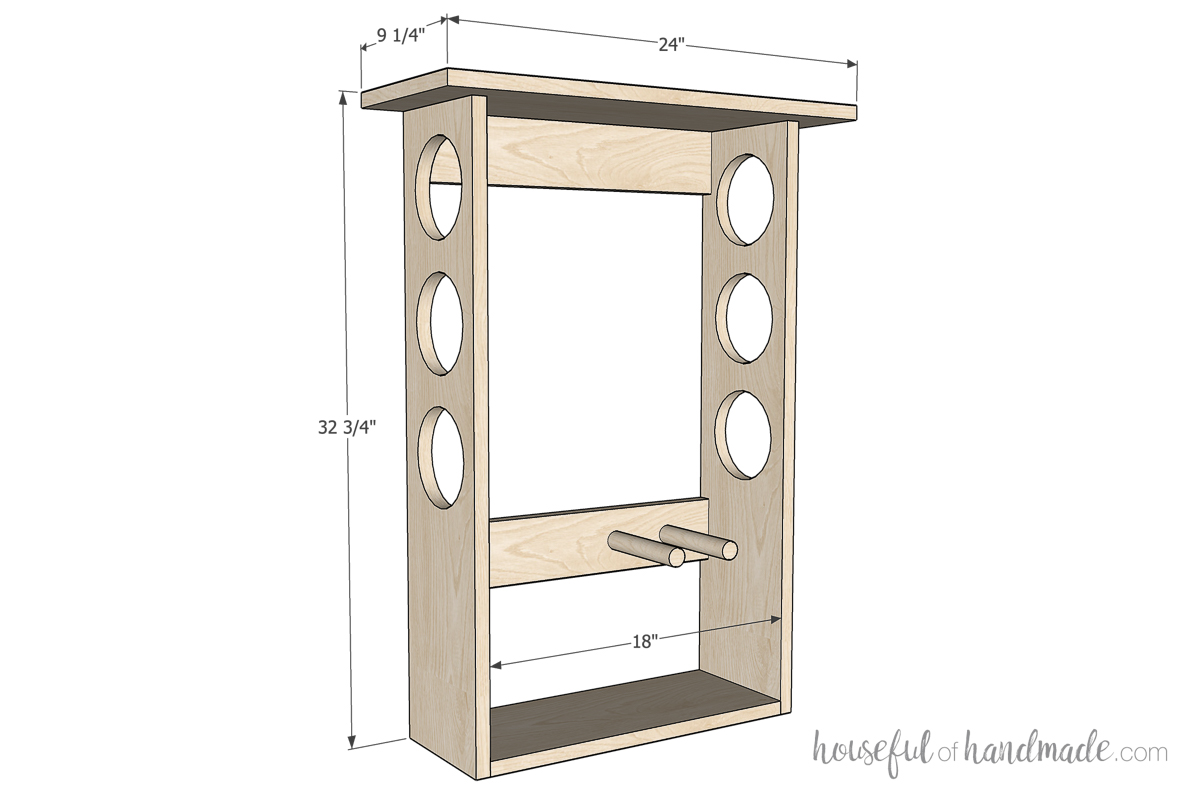
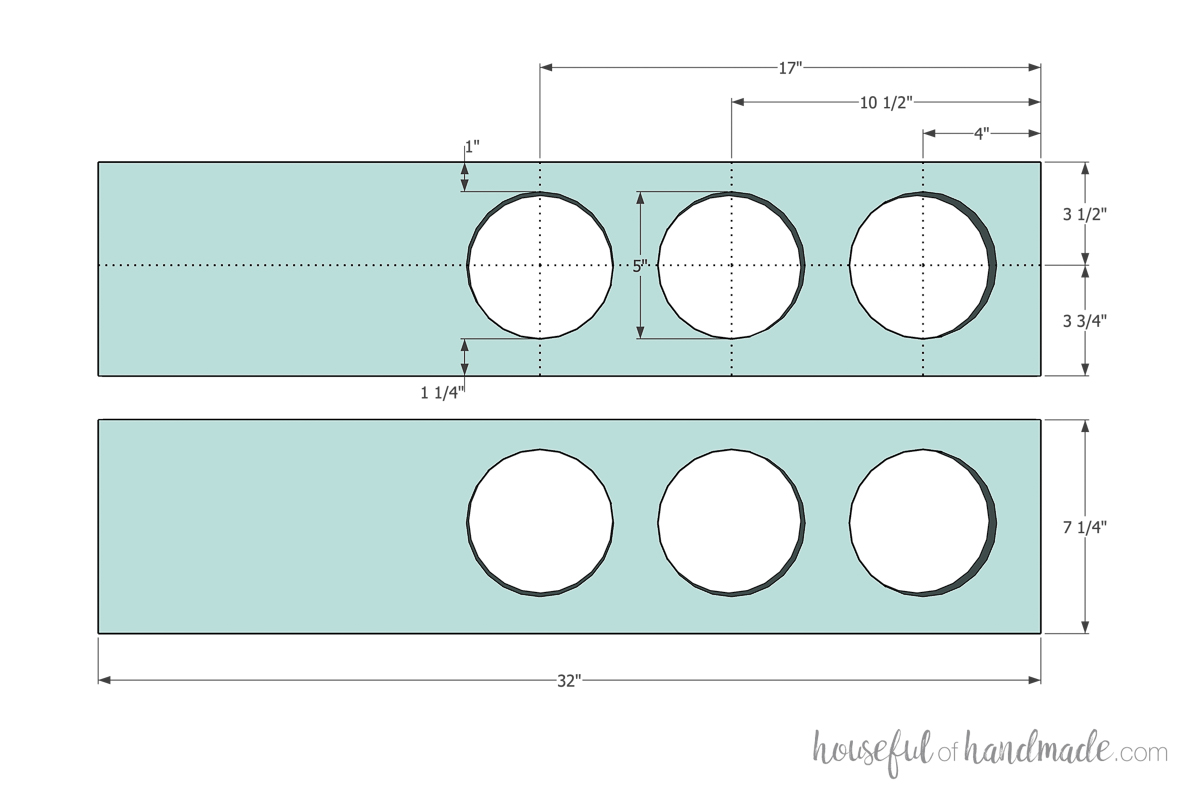
Cut holes in sides
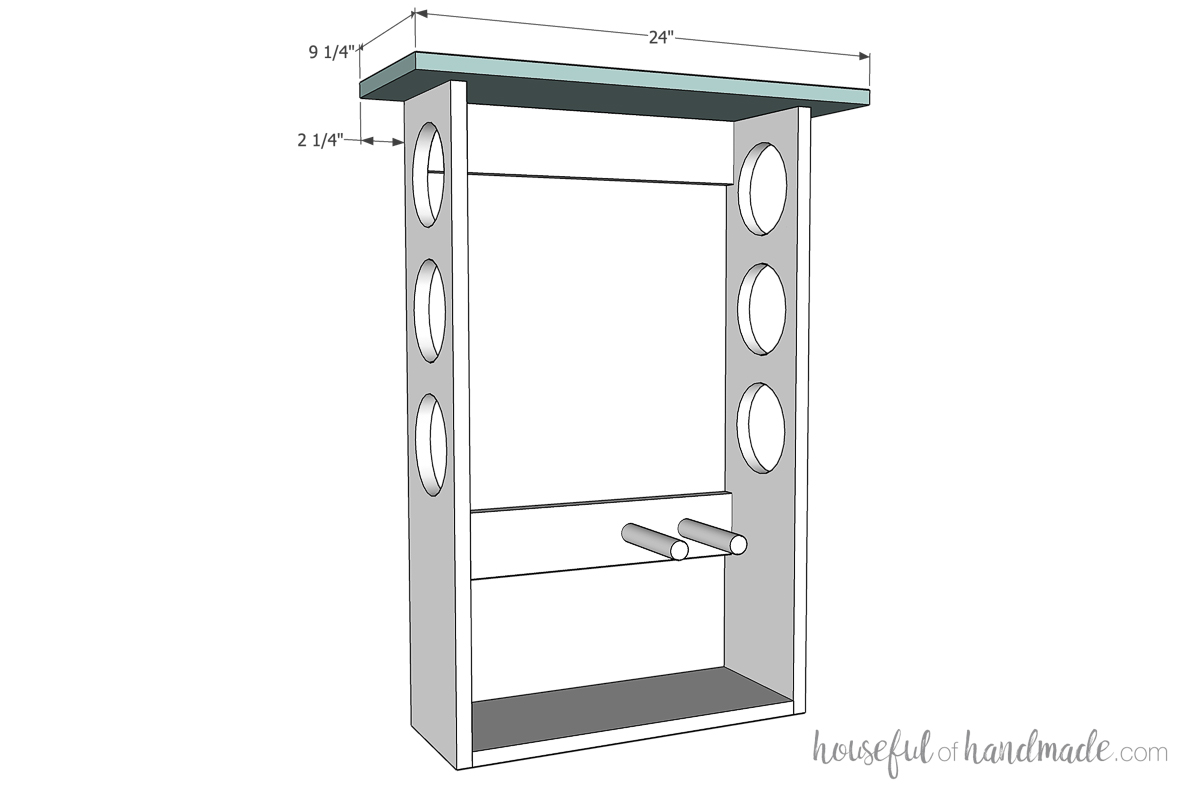
Measure 3 1/2" from the front of the side board and draw a vertical line. Then mark along the line at 4", 10 1/2" and 17". Draw 5" circles using these marks as the center. Repeat for the other side board.
Drill a hole in the circle area, insert the jig saw and cut it out. Then use a round over bit in the trim router to round over the inside and outside of the holes.
Easy Circles
Use a compass or tie a string around your pencil with a nail in the center to draw the circles.
-
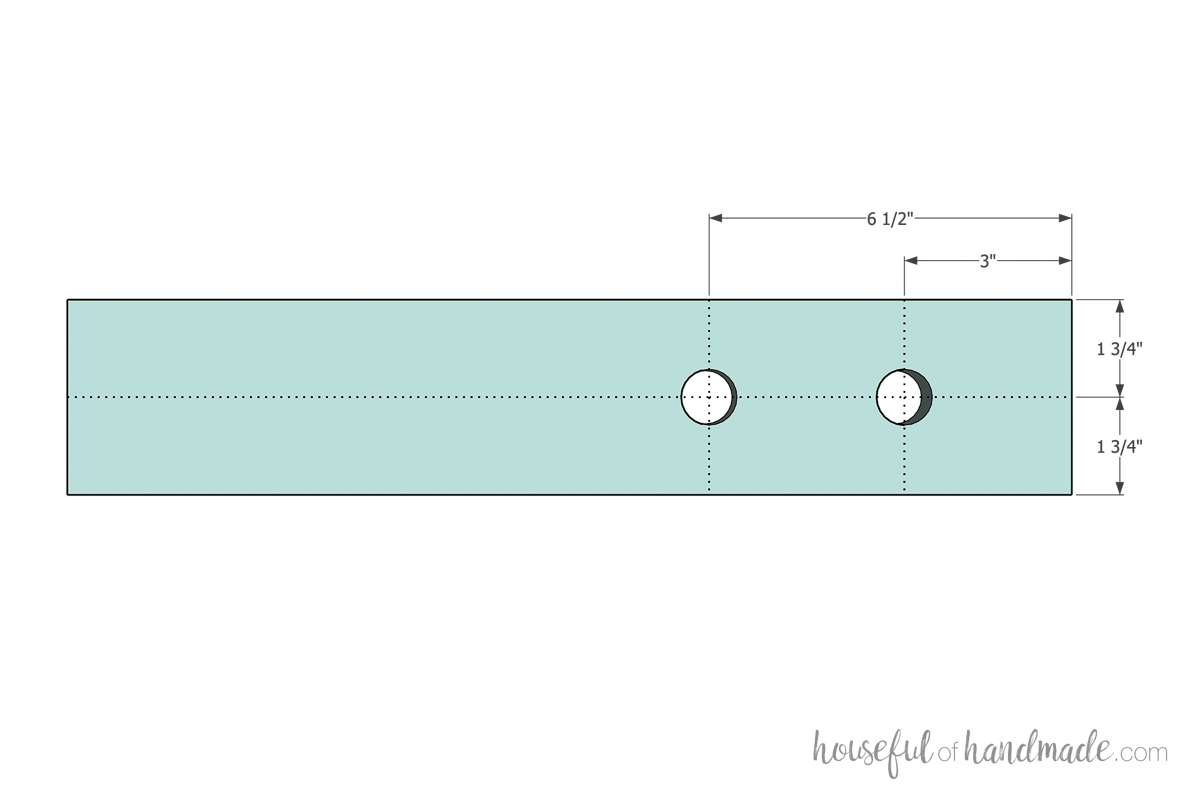
Drill holes for pegs
Draw a line down the center of one of the back support boards. Then measure over 3" and 6 1/2" from one side and mark along the line. Drill 3/4" holes all the way through the board with the center at these marks.
Adjust as needed
The pegs on the side leave room for 2 yoga blocks on the other side. You can adjust the placement, eliminate them, or even add more to work for your own exercise equipment.
-
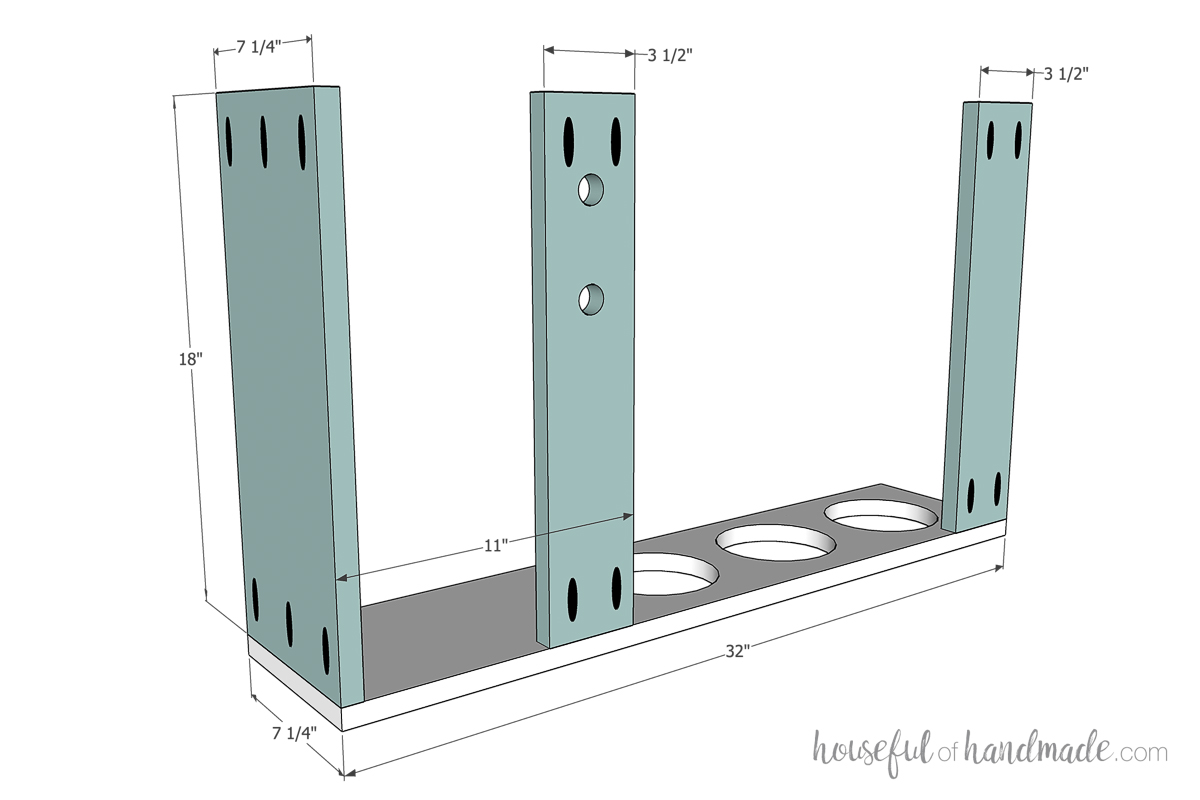
Attach boards to one side
Set your Kreg pocket hole jig to drill holes in 3/4" thick material. Drill holes in both ends of the back support and bottom boards.
Attach the bottom board to the bottom of one side board so it is flush along the bottom. Attach the back supports so one is flush with the top of the side board and the other is 11" up from the bottom (see diagram). Secure with wood glue and 1 1/4" pocket hole screws.
-
Attach second side
Place the second side piece on top of the boards and secure with wood glue and 1 1/4" pocket hole screws. Make sure to line them up the same as they were on the other side board.

-
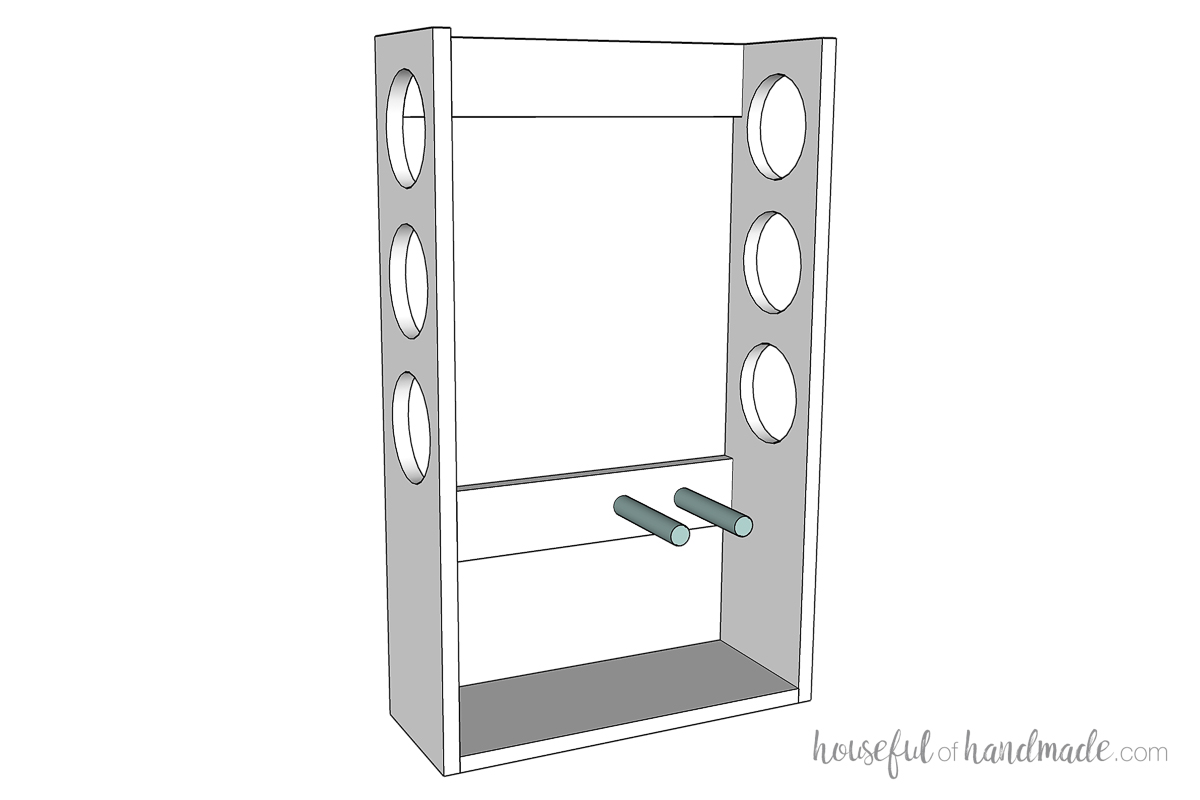
Glue in dowels
Glue the dowels into the holes on the back support board. They should be flush with the back of the board.
-
Attach the top
Place the top shelf on the assembled piece so it is centered side-to-side and flush with the back. Secure with wood glue and brad nails through the the top into the sides and back support.
-
Sand and finish
Sand and finish your exercise mat holder. I used poplar boards for my shelf and finished it with a wood wax to give it a matte, unfinished look.
-
Hang and enjoy!
To hang your mat holder, attach it to your wall into studs with 2 1/2" wood screws through the top back support board. Then slide your rolled exercise mats into the holes and place other accessories on the top and lower shelf.
Learn how to use the Kreg 720 pocket hole jig here: https://housefulofhandmade.com/how-to-use-kreg-pocket-hole-jig-720/
Find more build plans on https://housefulofhandmade.com