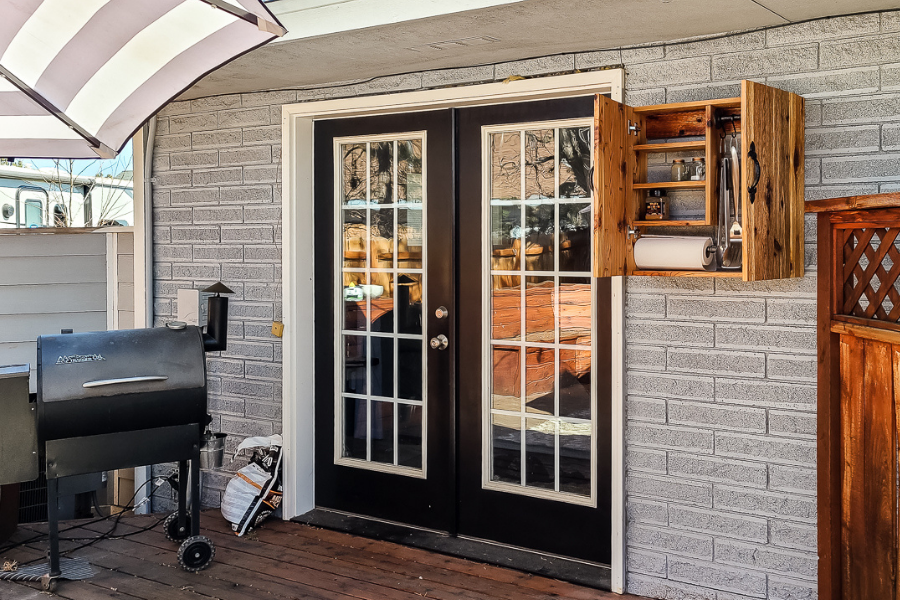


Looking for a place to store your BBQ utensils? This wall-mounted barbecue tool holder is the perfect solution! Follow along with the beginner-friendly plans to make this for your backyard!
Tools
Kreg Tools


Other Tools
-
Miter saw

-
Tape measure
-
Crescent wrench
-
Level
-
Finish nail gun
-
Dremel or Hack saw
Materials
Wood Products
- 5 Cedar , ¾” x 6” x 8’
Hardware & Supplies
- 1 Box of 1 ¼” Kreg pocket hole screws (See tools list)
- 1 150 grit sandpaper
- 1 12” long ½” black iron pipe
- 1 Cap for ½” black iron pipe
- 2 5” long ½” black iron pipe
- 1 ½” black iron pipe coupling
- 3 ½” black iron pipe flange
- 3 1” drywall screws (to attach flanges)
- 4 M10 machine screws 35mm long
- 4 M10 washers
- 4 M10 lock nuts
- 1 Boiled Linseed Oil
- 1 Paintbrush
- 4 Frameless Cabinet Hinges
- 2 Door Handles
- 4 Anchors
- 4 2 ½” deck screw
- 1 Box of 1 ½” finish nails
Directions
-
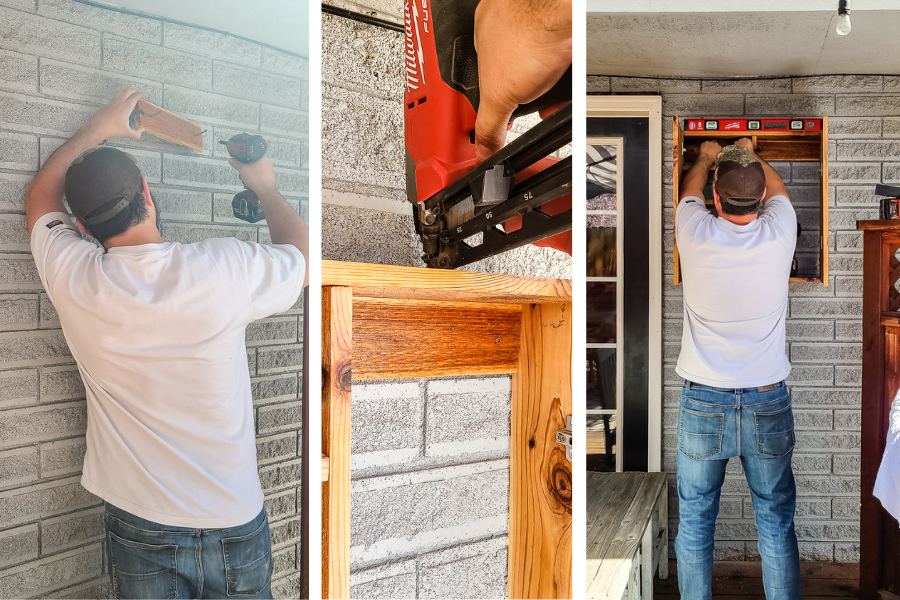
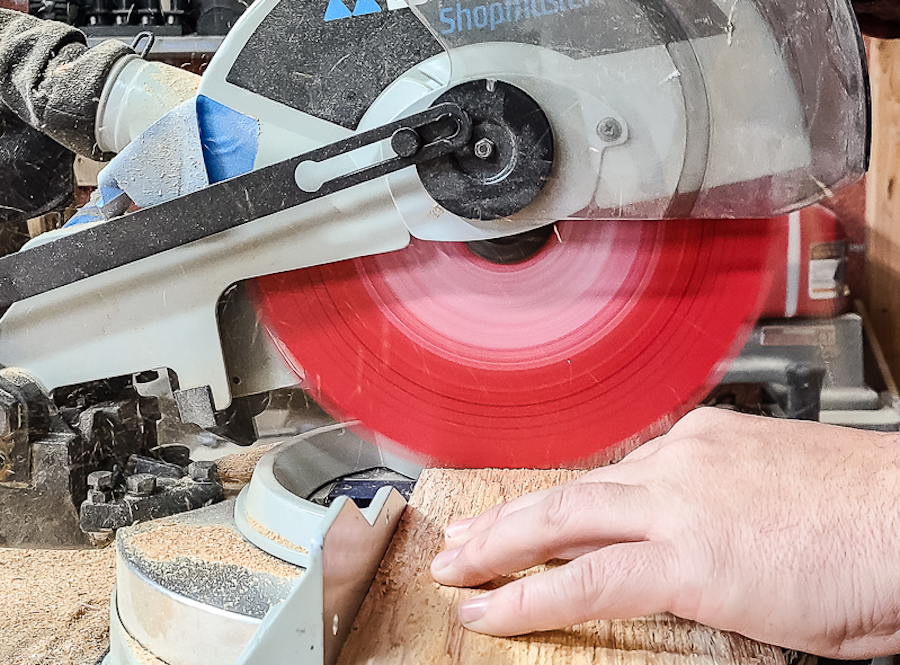
Cut wood.
Cut wood according to the visual cut list in the woodworking plans with a miter saw for the lengths. You will also need to use a table saw or circular saw to cut the widths of the pieces on the cut list.
-
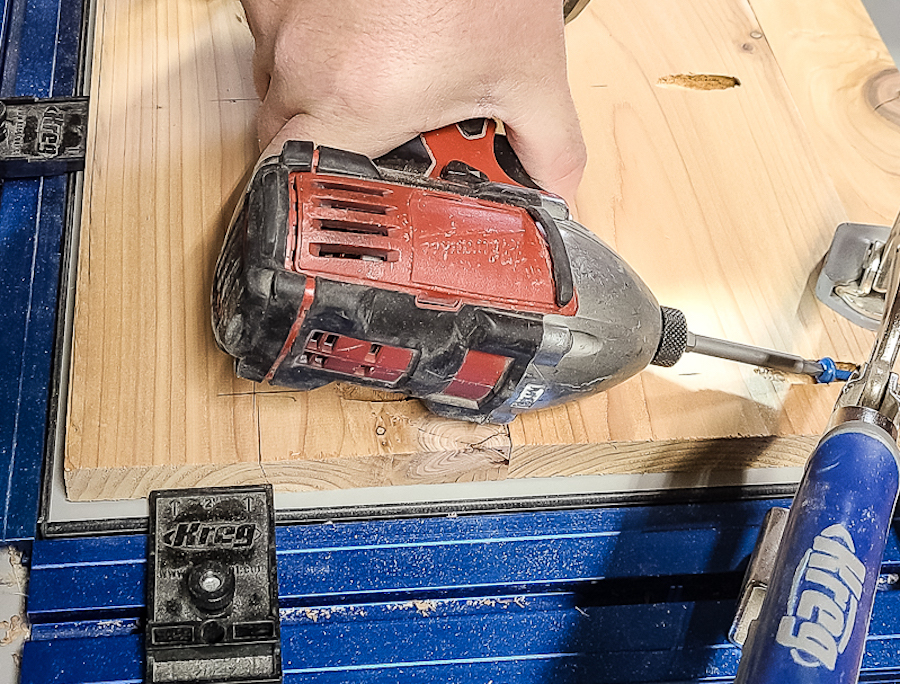
Drill pocket holes.
Drill pocket holes as shown in the woodworking plans. We used the Kreg 720 Pro. Because the wood is cedar, be sure the “rough” side is facing out by drilling pocket holes on the smooth side of each piece.
-
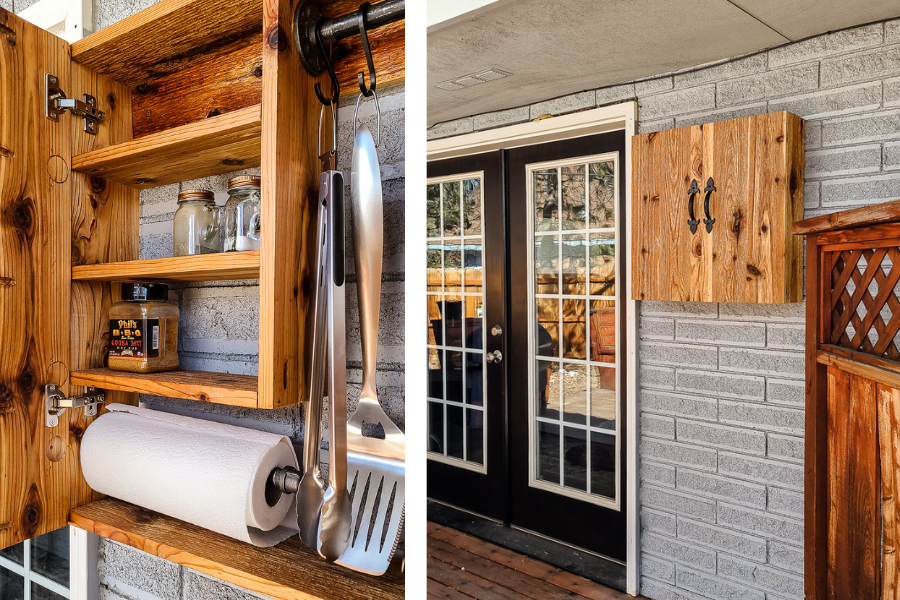
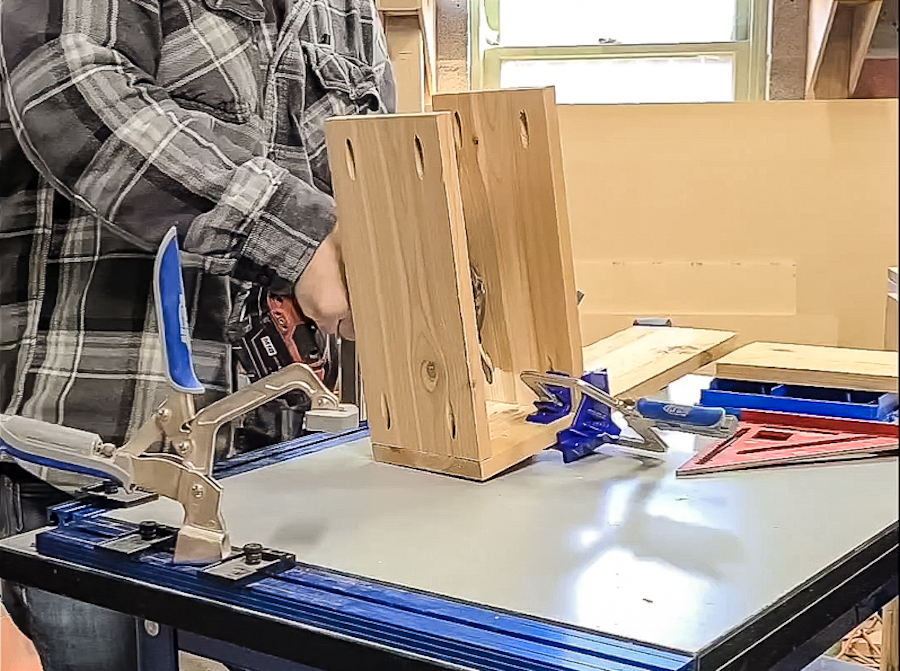
Assemble the shelves.
Using clamps, start putting the interior shelves together by attaching each shelf to the inside panel with the pocket holes. The Kreg 90-degree corner clamps work great for keeping everything square while you assemble. Be sure to measure where the shelves will be mounted (per the woodworking plans, they are spaced out 5”). Attach them all to the inside panel. Make sure that the pocket hole on the inside panel is facing out so you can attach it to the box in the next step.
-
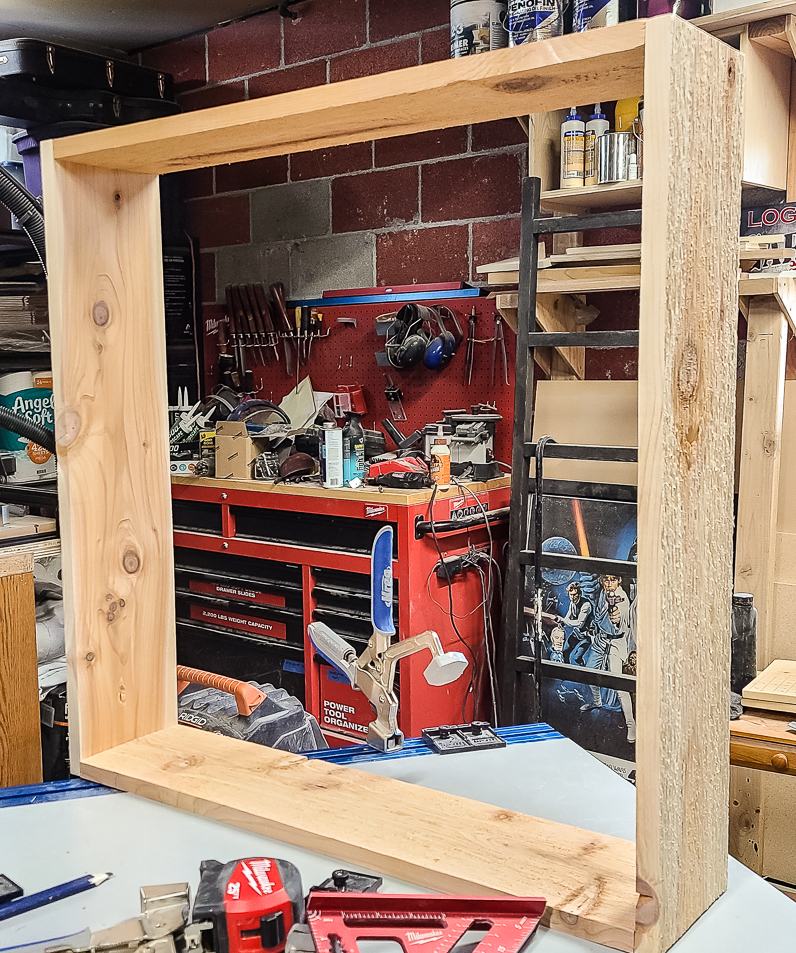
Assemble the box.
The box is pretty straightforward. Just attach the top and bottom to the side panels using the pocket holes drilled in each corner To keep the inside of the tool holder looking nice and clean, position your pocket holes on the outside of the box. You’ll barely be able to see them once it is mounted on the wall. The Kreg 90-degree corner clamps come in handy again for this step.
-
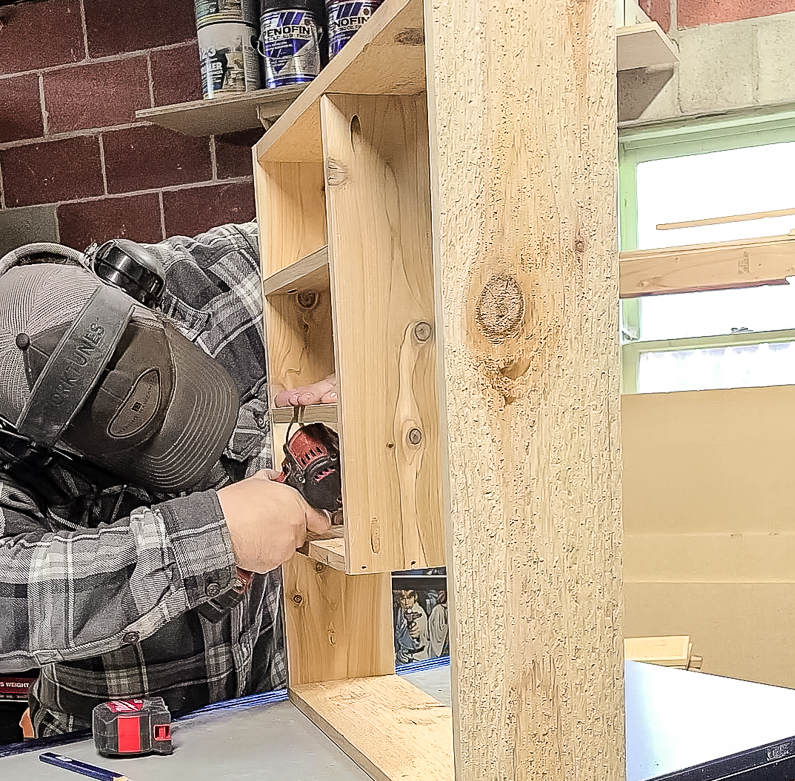
Attach shelves to the box.
Make sure your shelves are level when assembling these two pieces. The easiest way to do this is to take your tape measure and make a mark where each shelf should be on the side panel. Start with the bottom shelf and attach the middle panel to the top of the box using the already drilled pocket holes. Do the other shelves after.
-
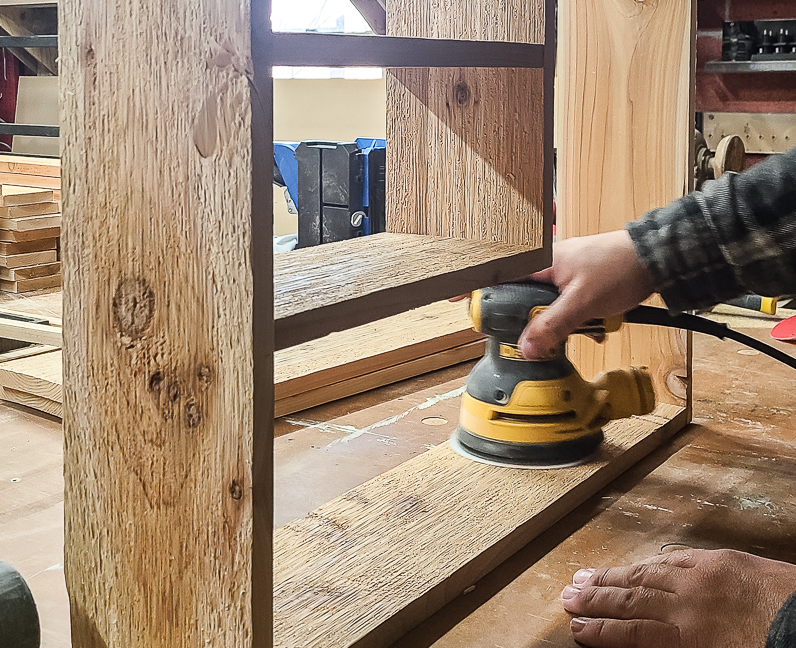
Lightly sand.
Lightly sand the entire structure and the door slats (not yet assembled) with an orbital sander and 150 grit sandpaper.
-
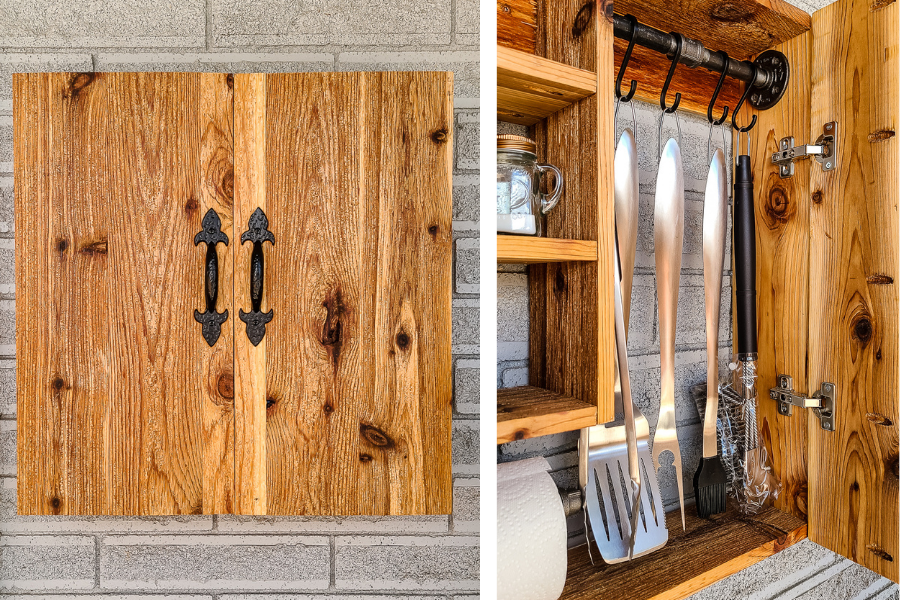
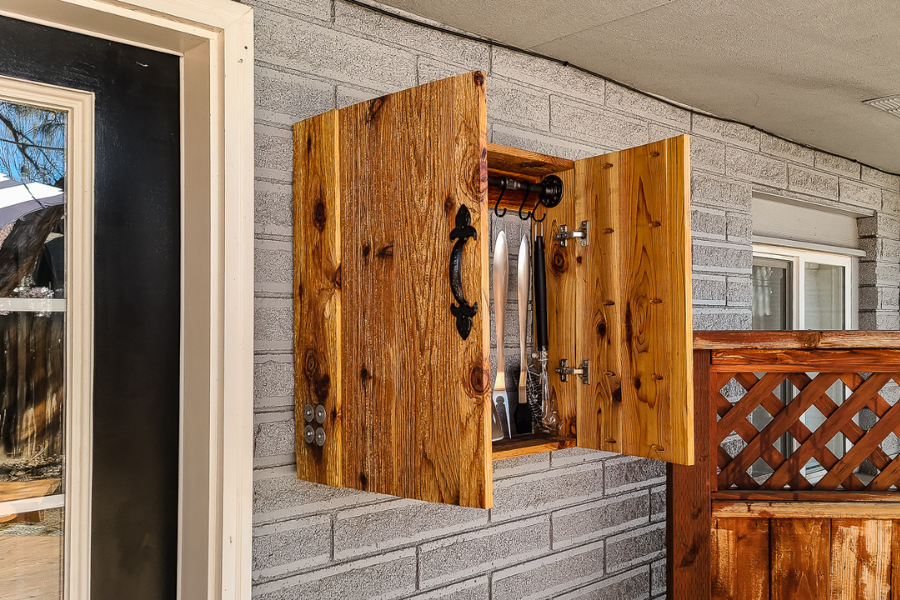
Assemble the doors.
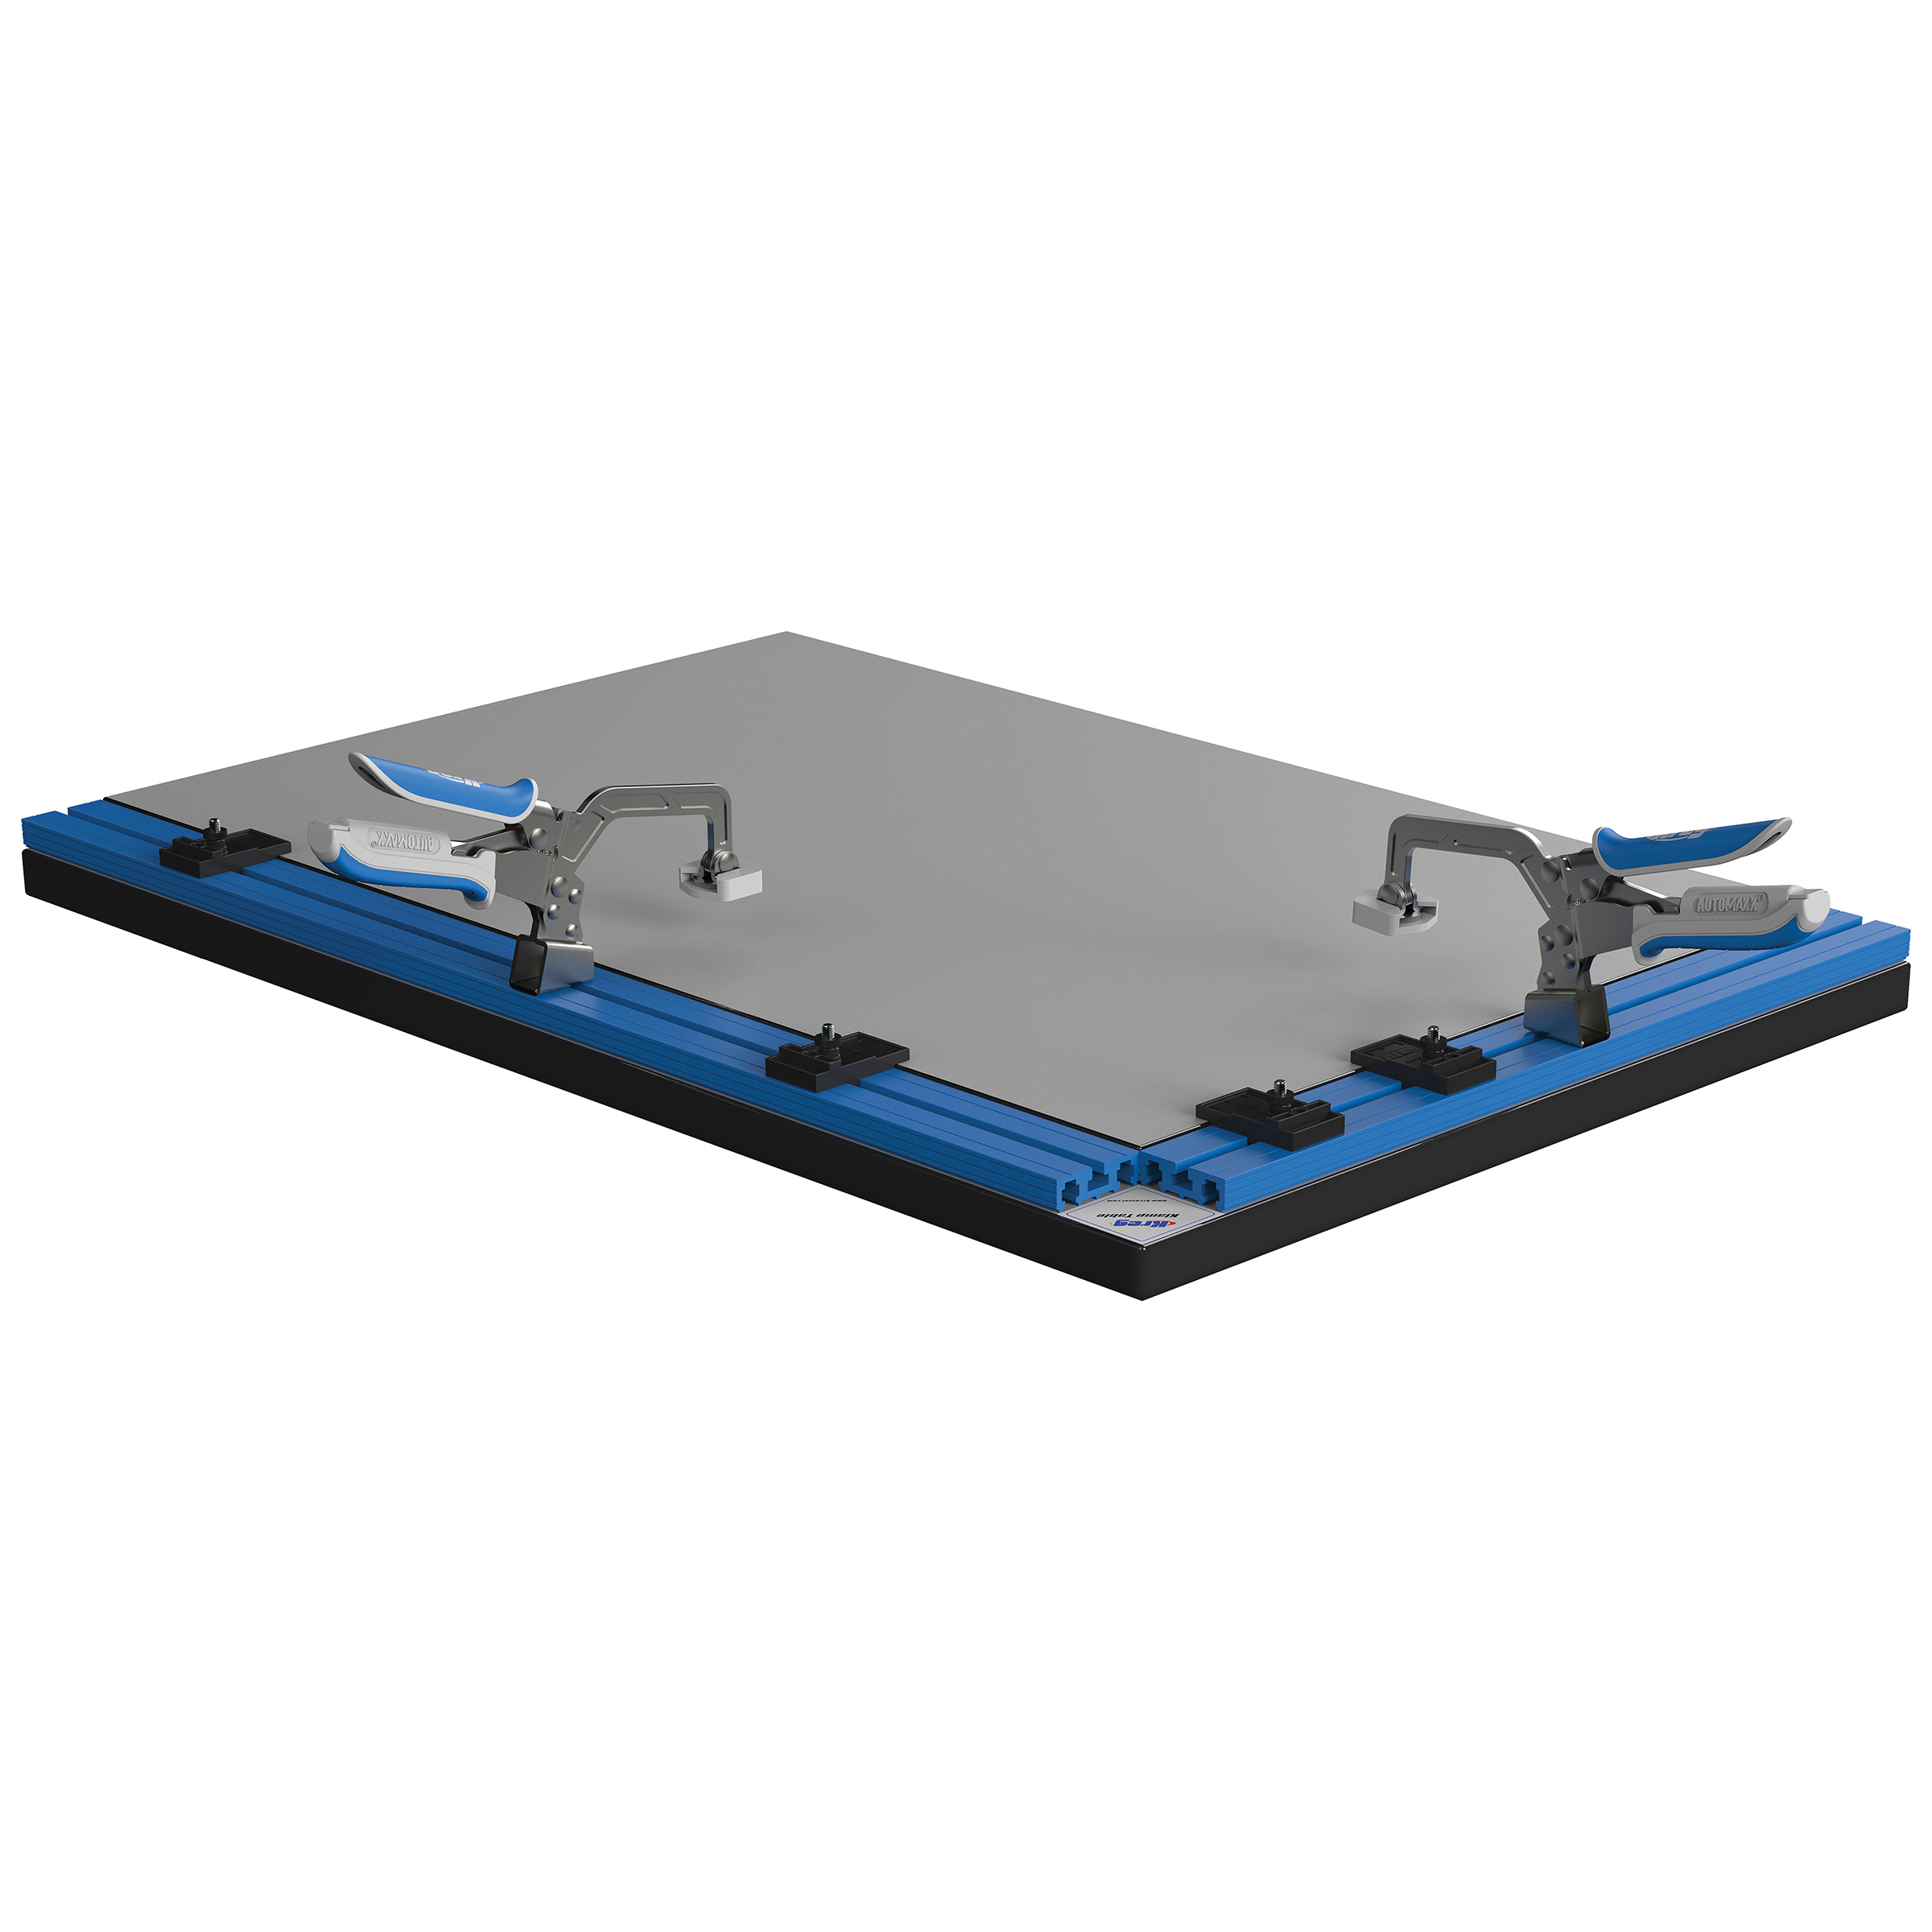
Lay the door panels on a flat surface and connect two door slats together for each door and then add one slimmer door end slat to each door to get to the correct width. Try to keep the panels as flat as possible when connecting the door panels together. Using the Kreg clamp table works great for this step. You can make small adjustments to the sides by sanding them down so they lay more flat together.
-
Drill holes for hinges on the door.
Take your template for cabinet hinges, or follow your hinge instructions, and make a mark where to drill. We used standard cabinet hinges for this build.
-
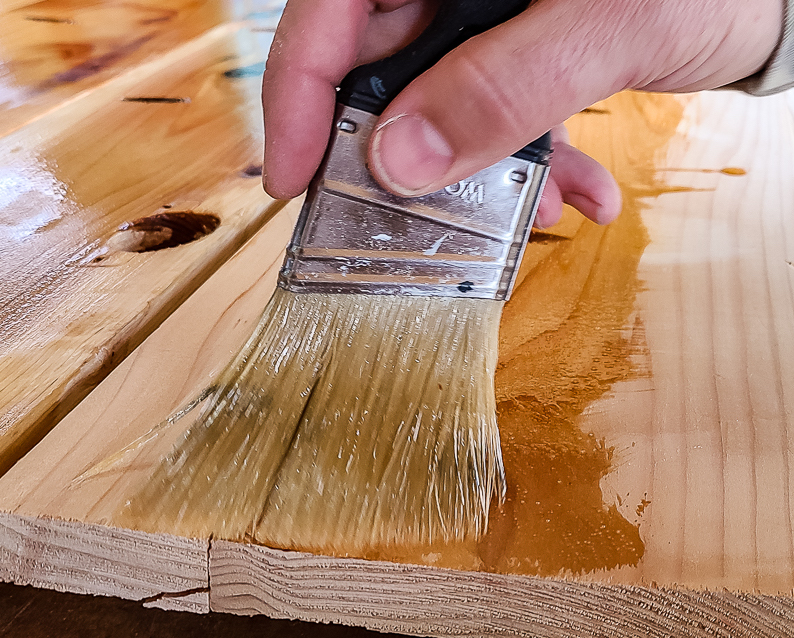
Seal your wood.
Because this is cedar and it is going outdoors we opted to just use boiled linseed oil. This really makes the wood pop and also protects it from the elements to retain the color longer. Cedar is also fine just by itself if you like the look as is. It will age naturally in the outdoors.
-
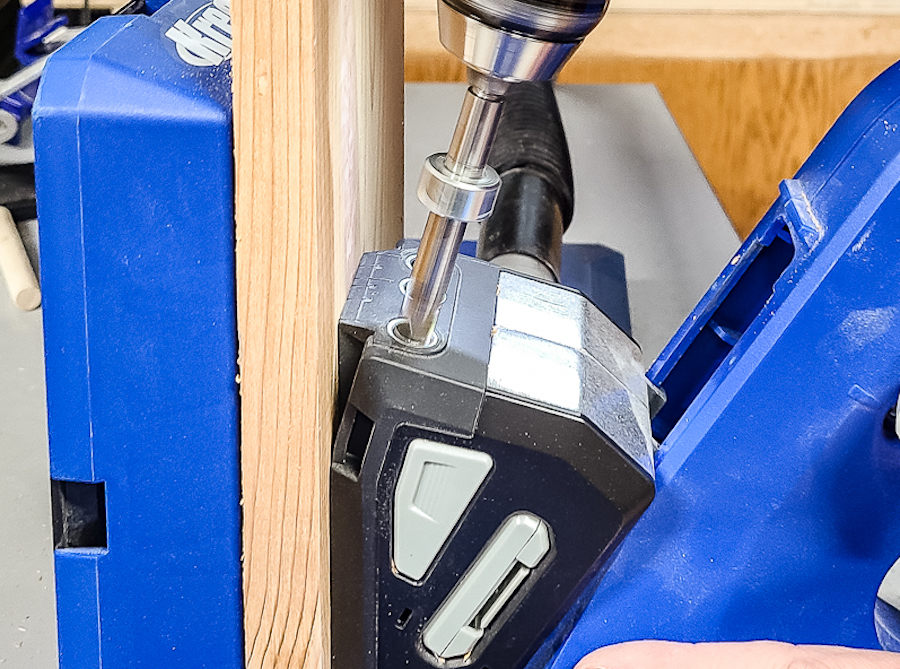
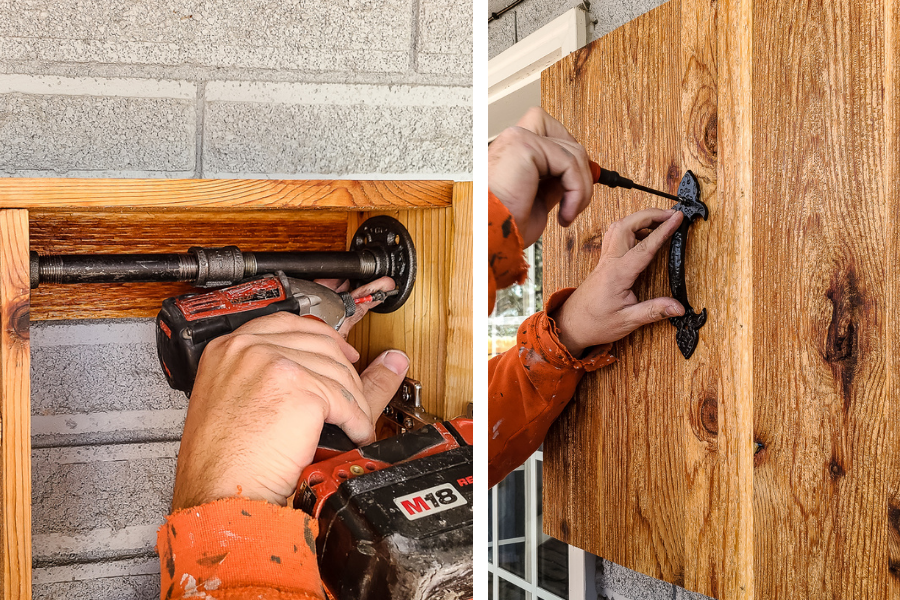
Attach your hardware:
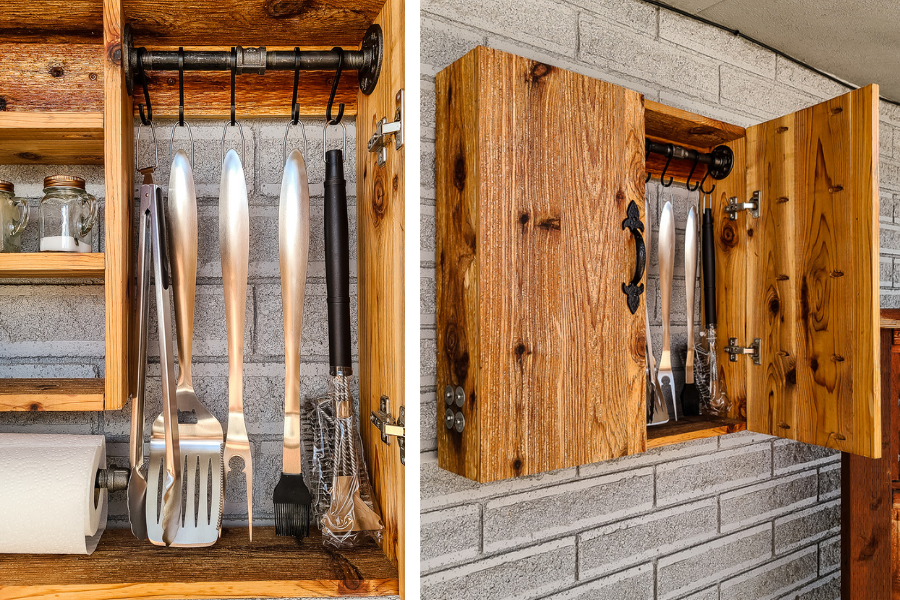
Connect the hinges in the holes you previously drilled. Attach your handles, paper towel holder, and rack for hanging your BBQ utensils. For the paper towel holder, we used 12” long ½” black iron pipe with a cap at the end. It is connected to the inside of the box with a ½” flange and M10 machines screws with a M10 washer and M10 lock nut for stability. Cut off excess screw with a Dremel or Hack saw. For the rack to hang the hooks for the BBQ tools, we used two 5” long ½” black iron pipe with a coupling in the middle and two ½” flanges with 1” drywall screws on either side to connect to the inside of the BBQ tool holder. We purchased a new set of BBQ tools and they came with the hooks that we added to hang the tools up. *Note: we mounted the box first and then attached our hardware. You can do these steps in any order.
-
Mount on exterior wall.
Finally, mount your BBQ Utensil Holder in your desired location. We were drilling into our brick exterior, so we used block anchors and 2 ½” decking screws attached through two small mounting pieces made out of leftover cedar wood to the exterior. Once the mounting pieces were attached to the exterior with the screws, we placed the BBQ Utensil Holder in place and then nailed it to the mounting pieces from the topside with a nail gun.