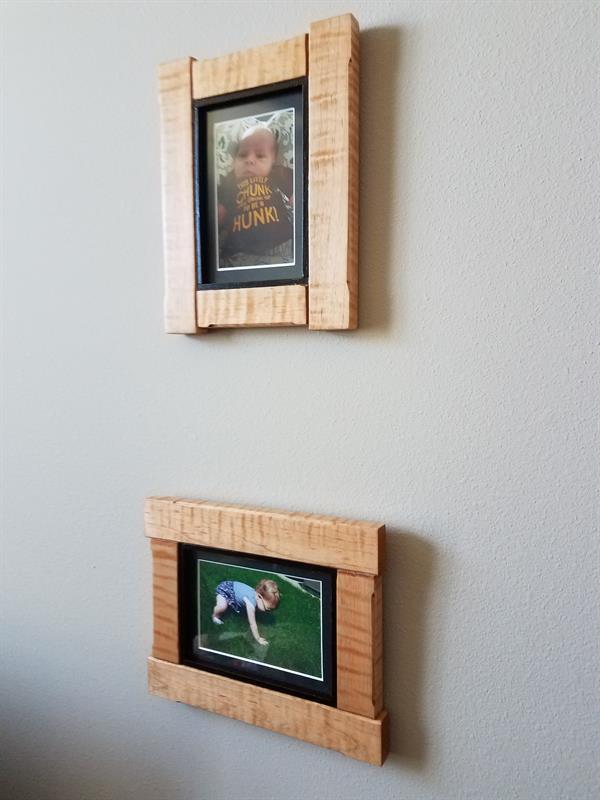
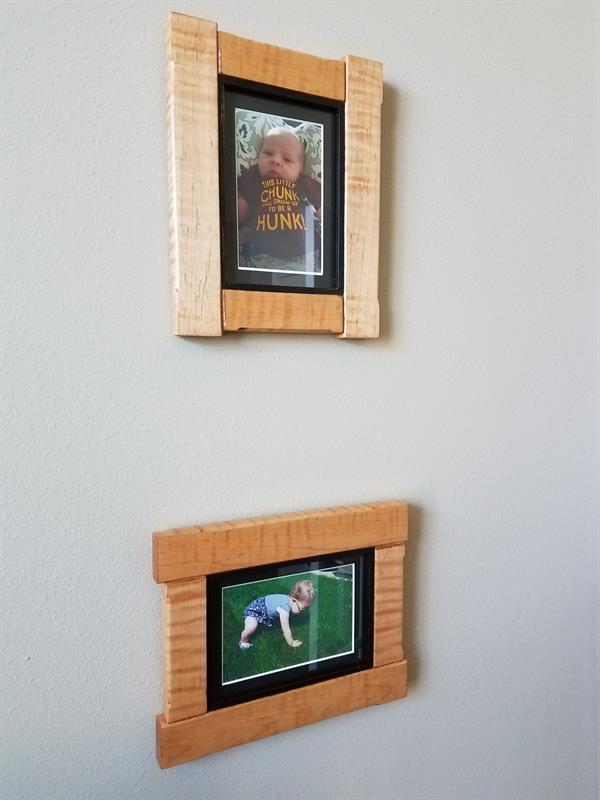
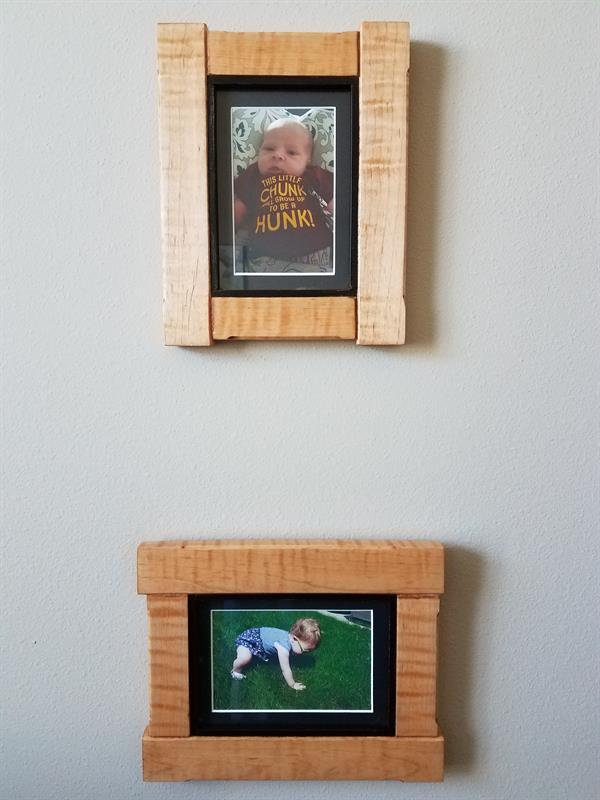


Frame inspired by Kreg's Simply Stunning Photo Frame build completed by Daniel Campbell....Liked the curly maple he used.
Constructed 4 frames as Christmas gifts,
Frames use standard 5x7 mat for a 4x6 photo, or can be used without a mat with a 5x7 photo.
Can be hung in portrait or landscape format
Tools
Kreg Tools


Other Tools
-
Miter Saw

-
Table Saw
-
Tape Measure
-
Clamps
-
Shop Vacuum
-
Workbench
Materials
Wood Products
- 1 Board , 3/4" Thick , 5" x 48"
- 4 Balsa Wood , 1/4" Thick , 36"
- 1 Basswood , 1/4" Thick , Full Sheet
Hardware & Supplies
- 2 Saw tooth picture hangers for each photo frame
- 4 Picture frame turn buttons for each photo frame
Cut List & Parts
- 8 Rails , 3/4" x 1 1/2" x 5 1/8"
- 8 Stiles , 3/4" x 1 5/8" x 10 5/8"
- 8 Vertical stops , 1/4" x 1/4" x 6 5/8"
- 8 Horizontal stops , 1/4" x 1/4" x 5 1/8"
- 4 Backers , 1/4" x 5" x 7"


Directions
-
CUT THE STILES AND RAILS
This build is for 4 frames
Used a 3/4" x 5" x 48" curly maple board from a national woodworking and hardware supplier
Cut (8) 3/4" x 1 1/2" x 10 5/8" stiles
Cut (8) 3/4" x 1 5/8" rails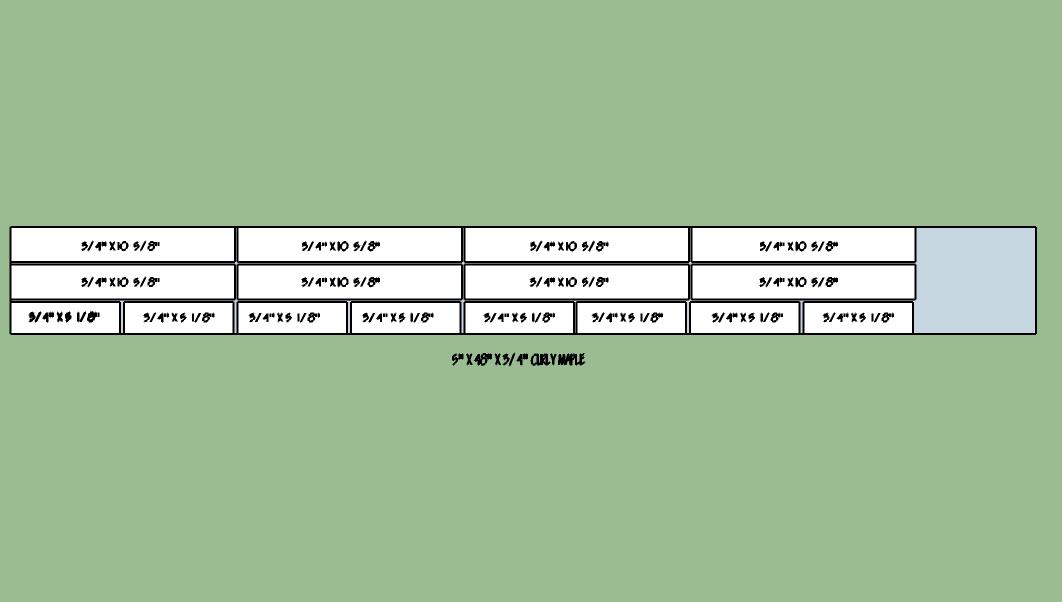
-
ADD CHAMFERS TO STILES AND RAILS
Using a 45 degree router bit add a 1/16" chamfer to the short ends of the
5 1/8" rails and to the inward side of the 10 5/8" stiles
Also using a 45 degree router bit a 1/8" chamfer to the styles and rails as shown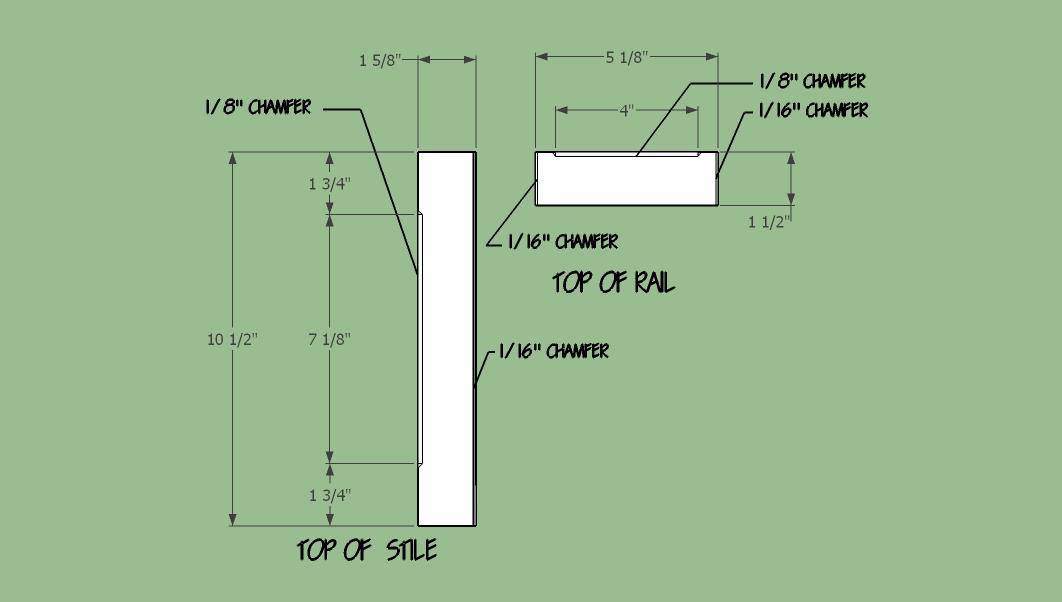
-
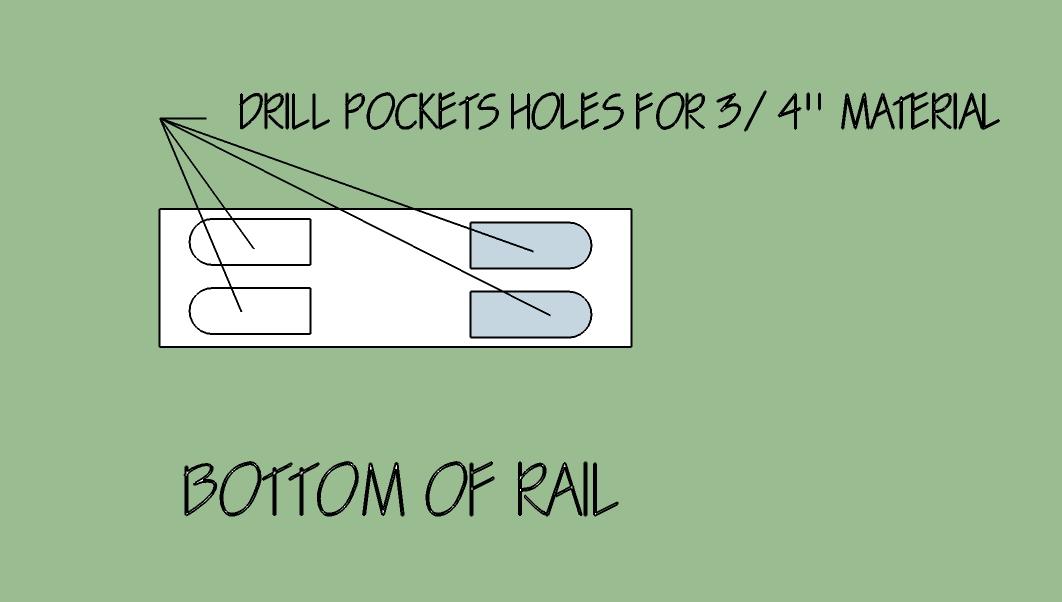
DRILL THE RAILS
Using your Kreg pocket hole jig set up for 3/4" material, drill pocket holes at the ends of each rail as shown
-
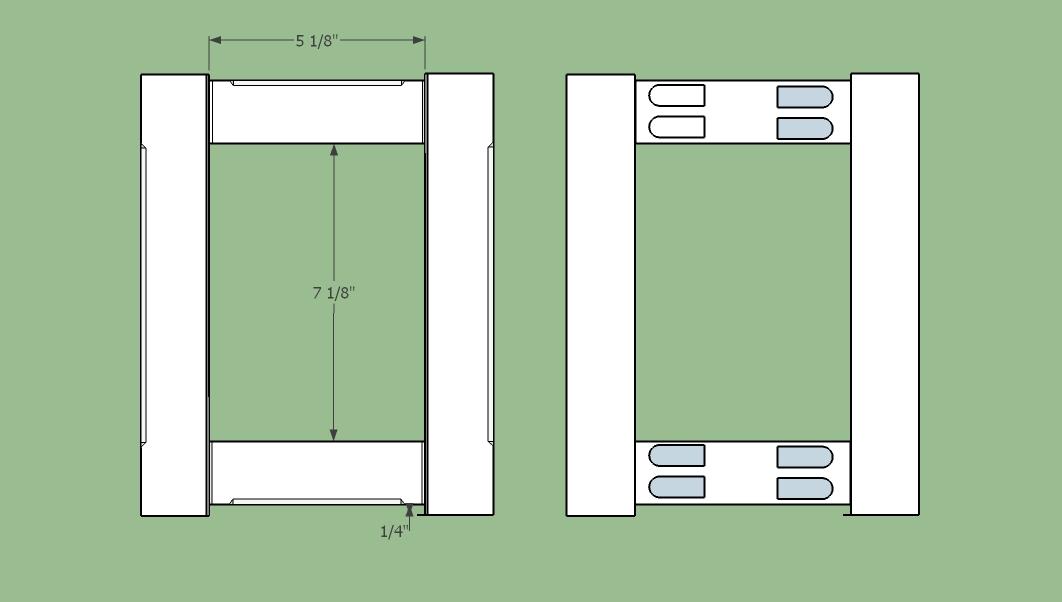
ASSEMBLE THE RAILS AND STILES
Now you can position the rails against the stiles as shown—inset 1/4" from the ends, and then attach the rails using 1 1/4" fine-thread pocket hole screws.
-
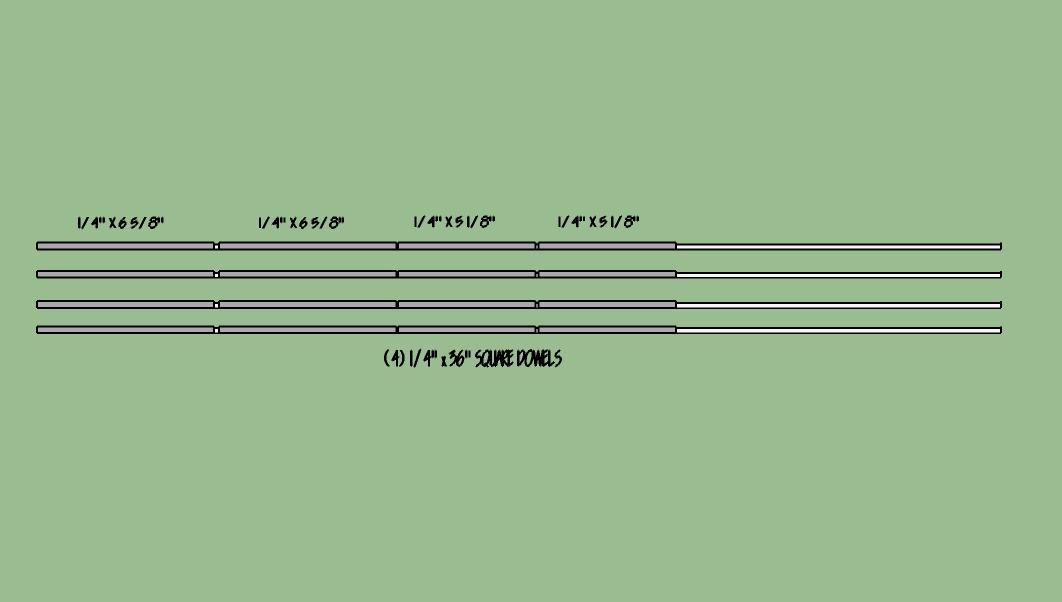
CUT THE STOPS
Cut two horizontal stops and two vertical stops for each frame to length from 1/4" square dowels, as shown in the cutting diagram. Measure your frame opening carefully at cut the dowels so they have a snug fit. Start with the horizontal stops, fitting them between the stiles. Then proceed to the vertical stops, fitting them between the horizontal stops.

-
FINISH THE STOPS BEFORE ASSEMBLY
Color the stops with a black spray paint and then let the stops dry thoroughly. It’s much easier to do this before you attach them to the frame.
-
INSTALL THE STOPS
Use a 5" x 7" x 1/8" hardboard spacer. This will be used to help position the stops.
Place the spacer frame face-down on a flat surface.
Apply a very thin bead of glue to the horizontal stops and glue them in place first. Try to avoid having glue squeeze out and make sure the stops are resting against the spacer.
Then glue in the vertical stops the same way. Use masking tape or small clamps to hold the stops in place while the glue dries. Scrape away any squeezed-out glue just after it begins to harden, but before it dries completely.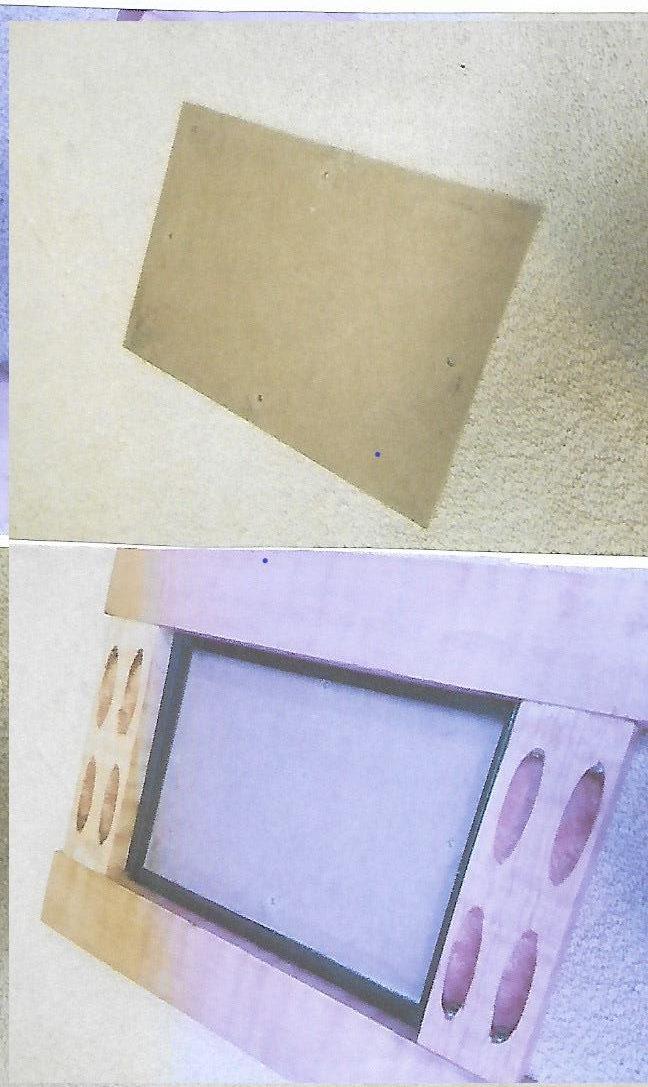
-
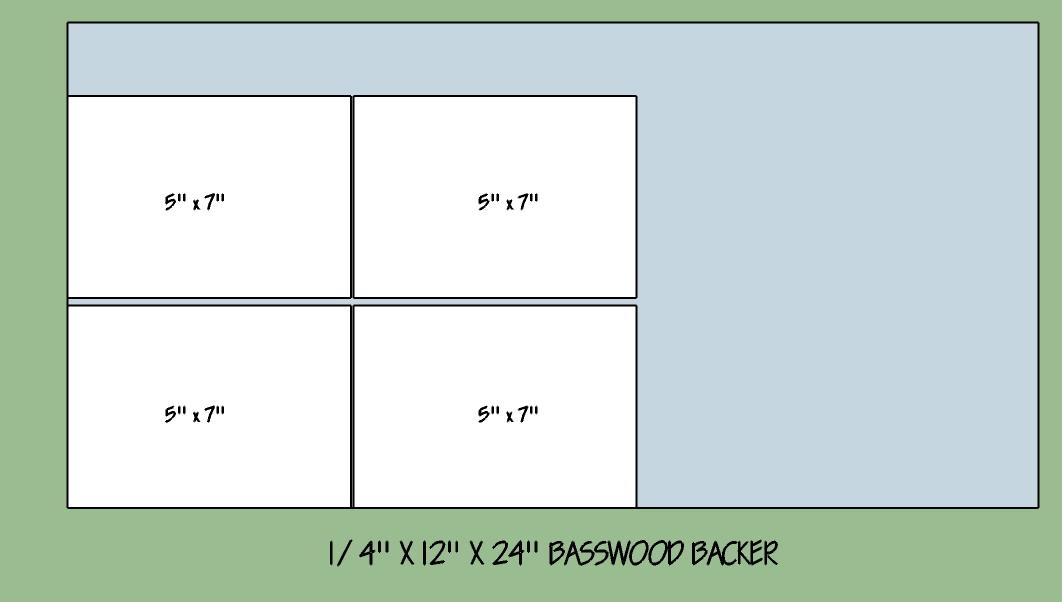
CUT THE BACKER
Cut the backer to size from 1/4" basswood. Sand the edges smooth.
-
FINISH THE FRAME AND BACKER
I used (3) coats of Danish Oil, and (3) coats of a wipe on poly finish. I also apply a spray coat of sealer after the poly finish. I followed the steps shown in the video in the 'extra' section for applying the Danish Oil

-
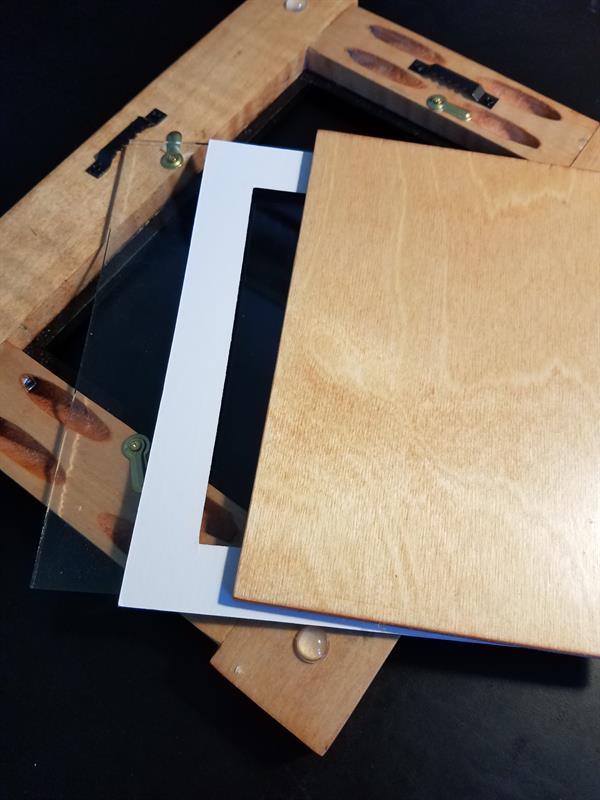
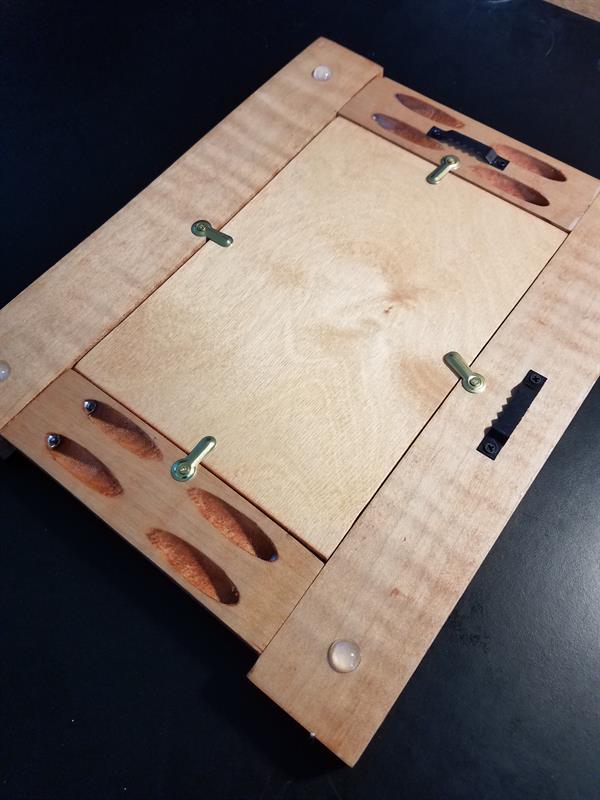
ADD HARDWARE - GLASS MAT AND BACKER
install the saw tooth picture hangers and turn buttons. See 'extra' section for availability of hangers and turn buttons.
Install a 1/8" x 5" x 7" thick single-strength glass cut to fit the frame. Note that the glass dimensions are just slightly smaller than the opening in the frame.
Install a mat if using a 4" x 6" photo. I used a 5" x 7" mat.
Or just install a 5" x 7" photo in the frame.
I also added (4) rubber bumpers at the corners to protect the wall.